A Swap Block for Donation Quilts

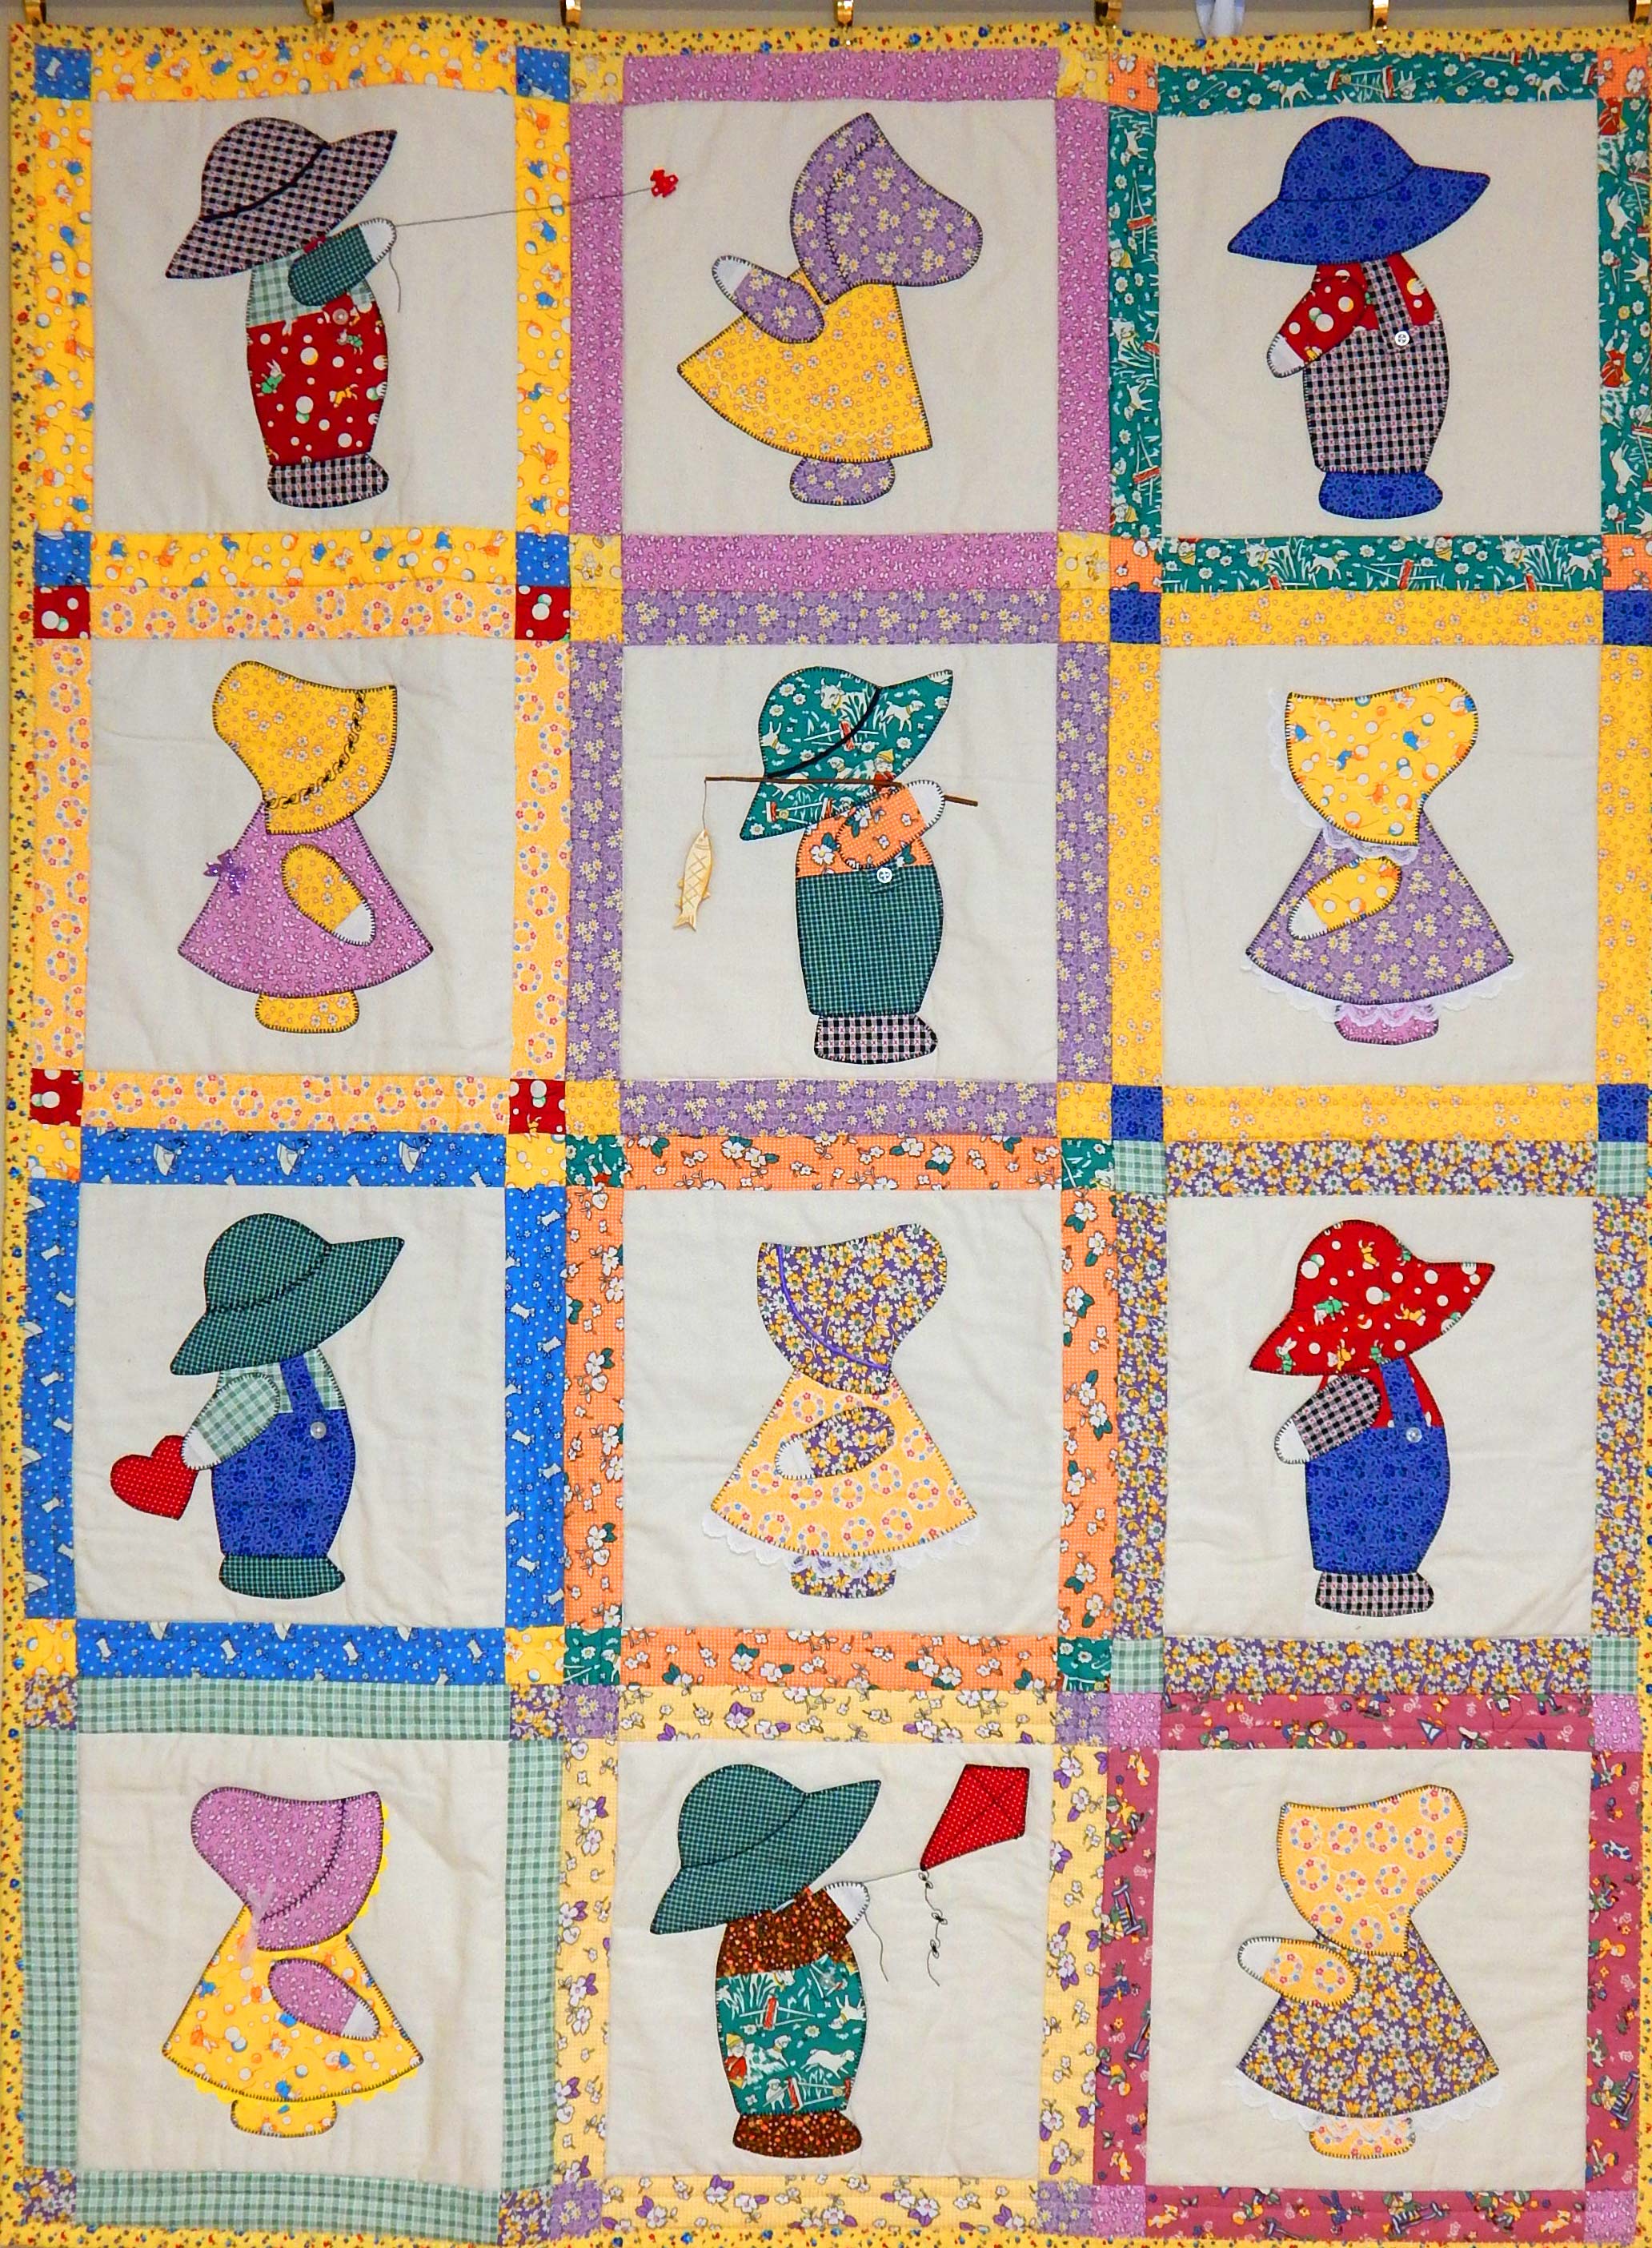
One of my quilt groups makes donation quilts about 40″ square for various organizations. The size is easy to construct and quilt at home, and is appropriate for the children who receive the quilts.  Here are the recent group donations:

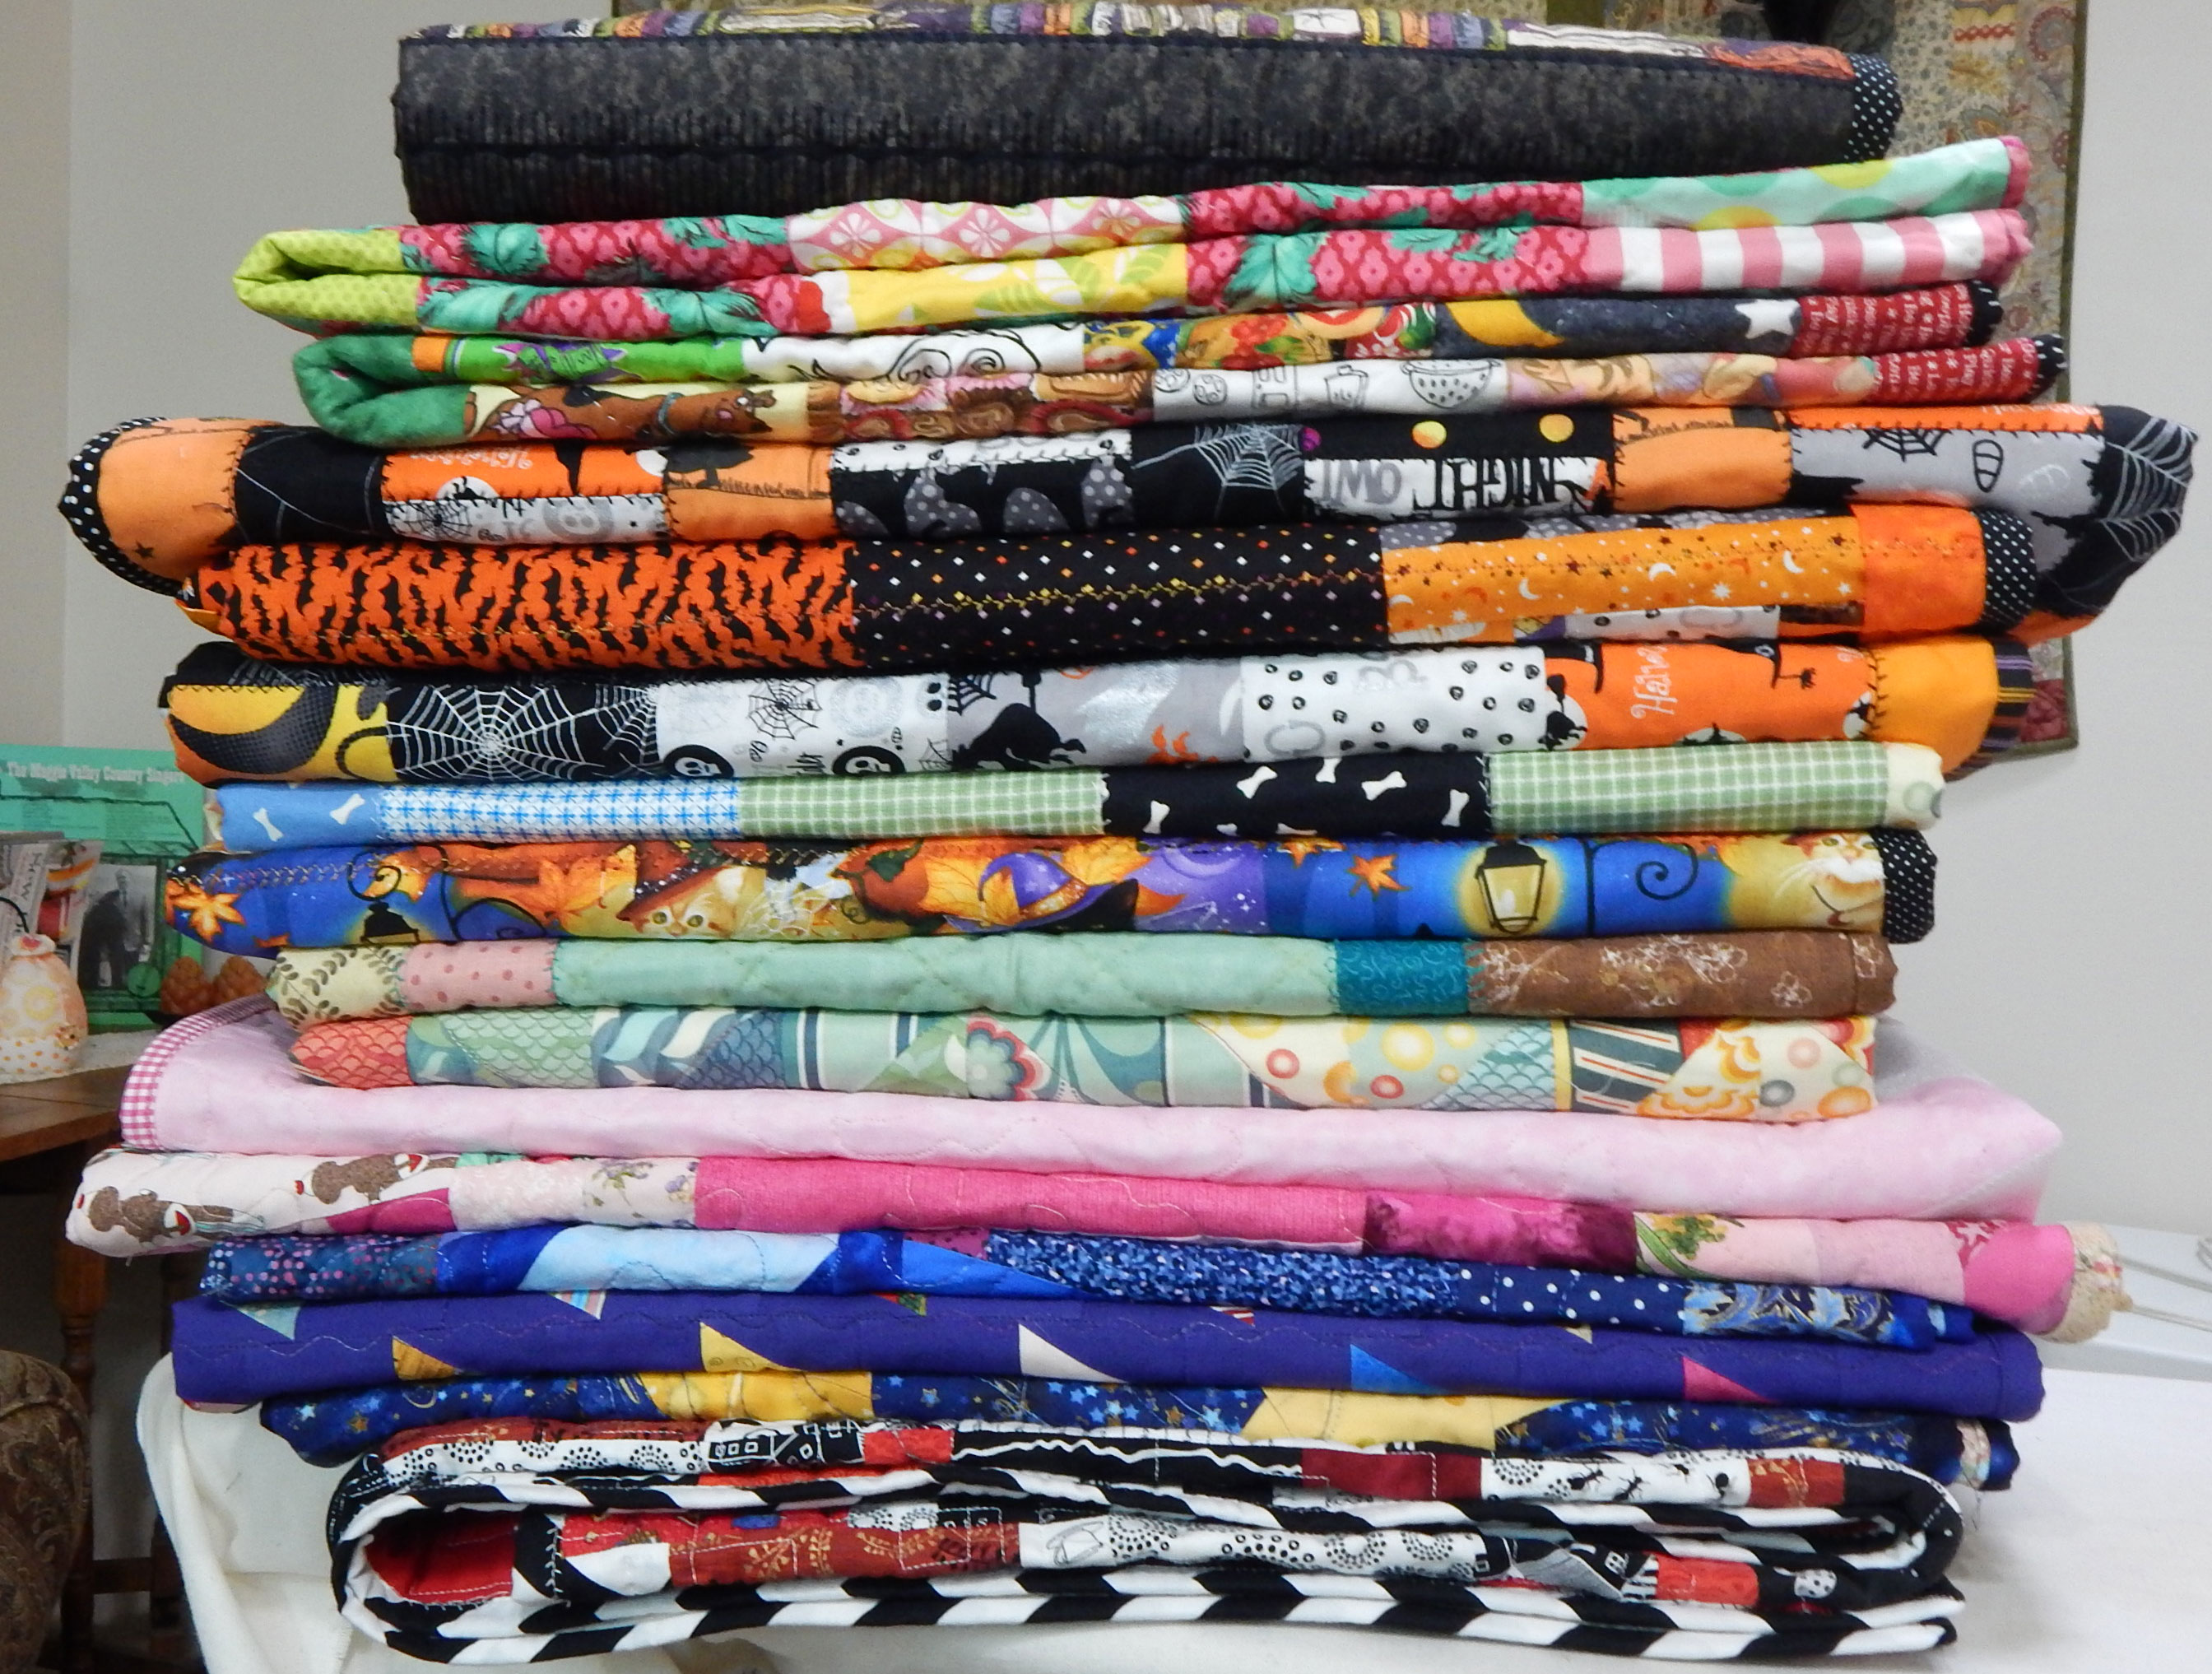
We often use swap blocks for our quilts and recently decided on a new swap and I want to tell you about it. One of your quilt groups may enjoy it, too!  Here’s how:

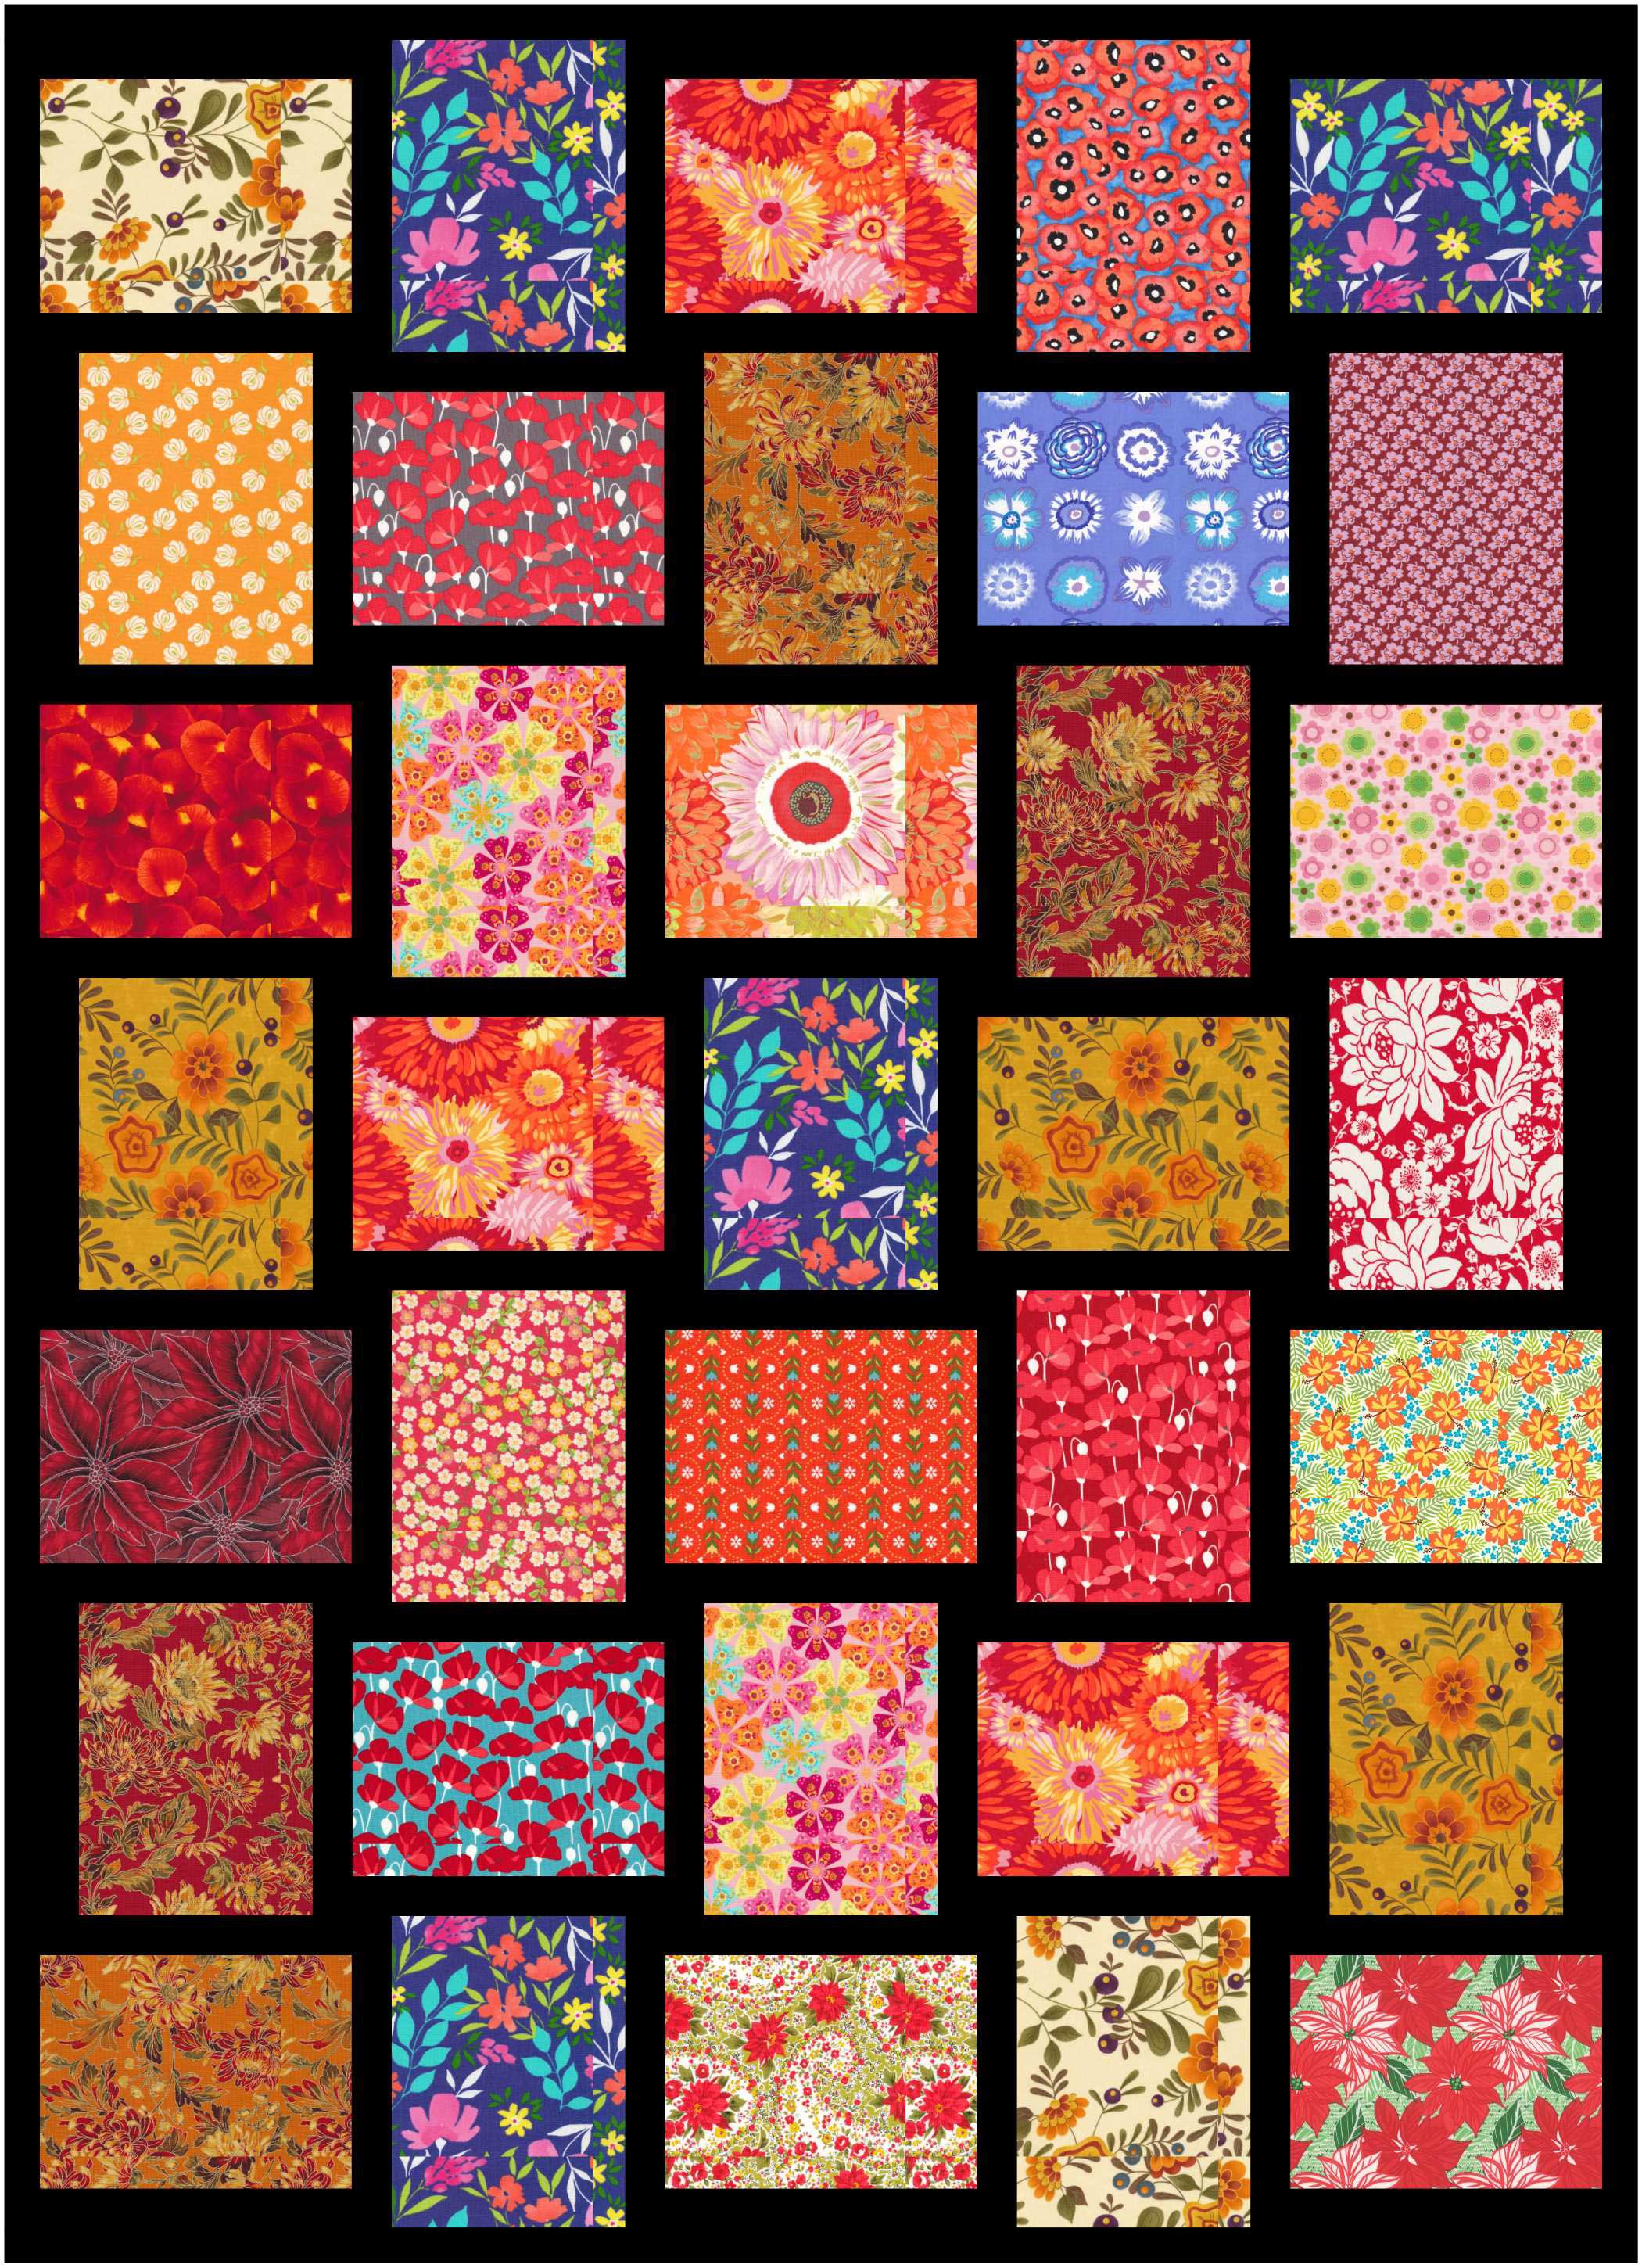
First make a big wonky log cabin block. Our blocks started with a 5″ square, which was modified to make a wonky center.  It was then surrounded by strips from my scrap bins, and occasional strips were trimmed so they were wonky, too.

These big blocks are 21″ square (unfinished).

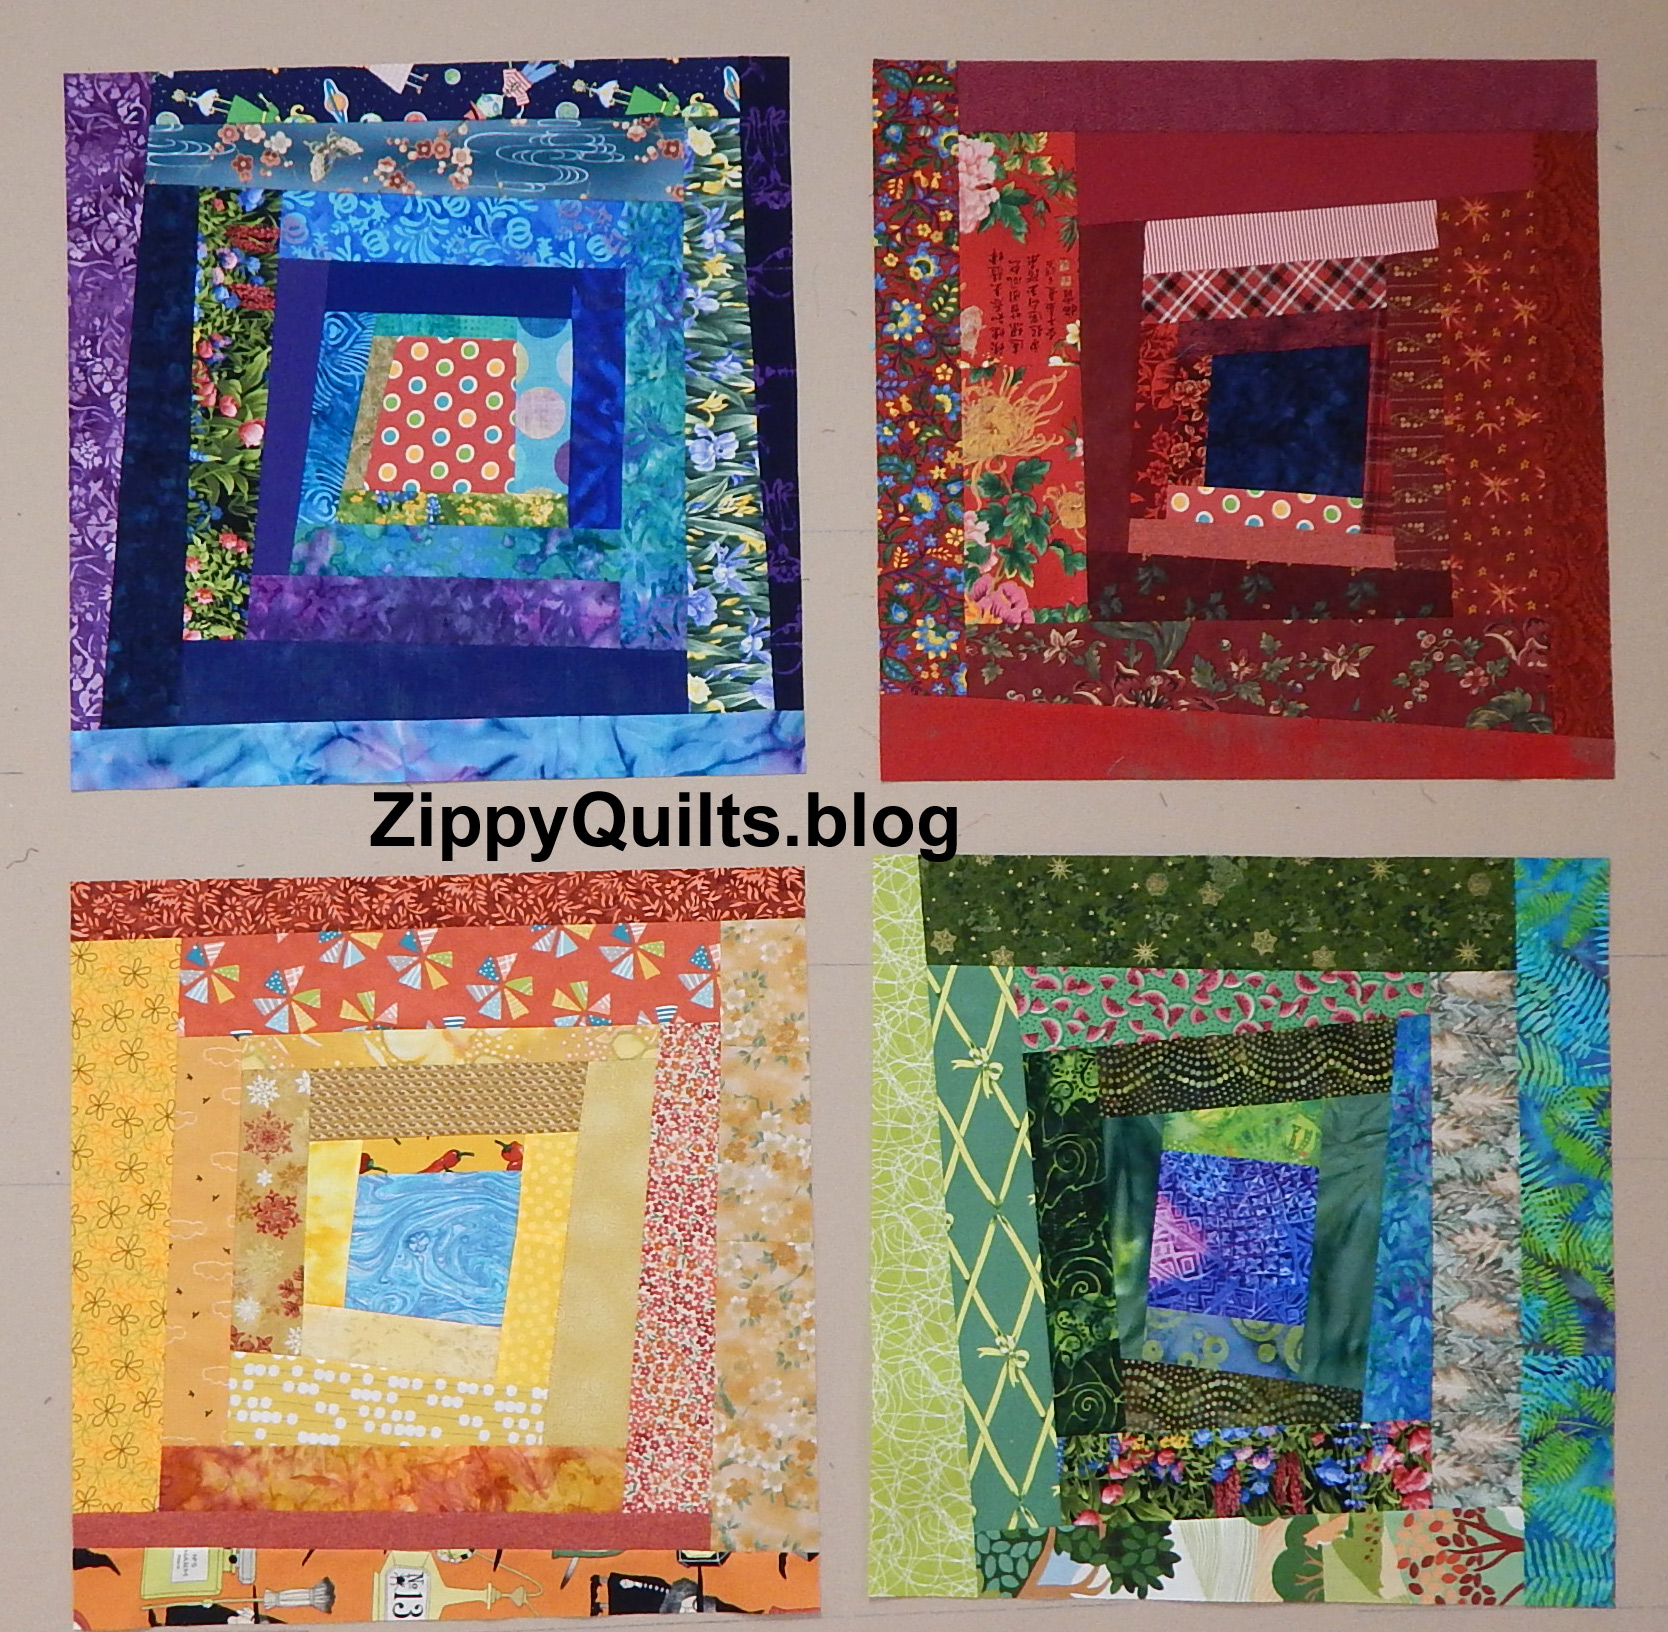
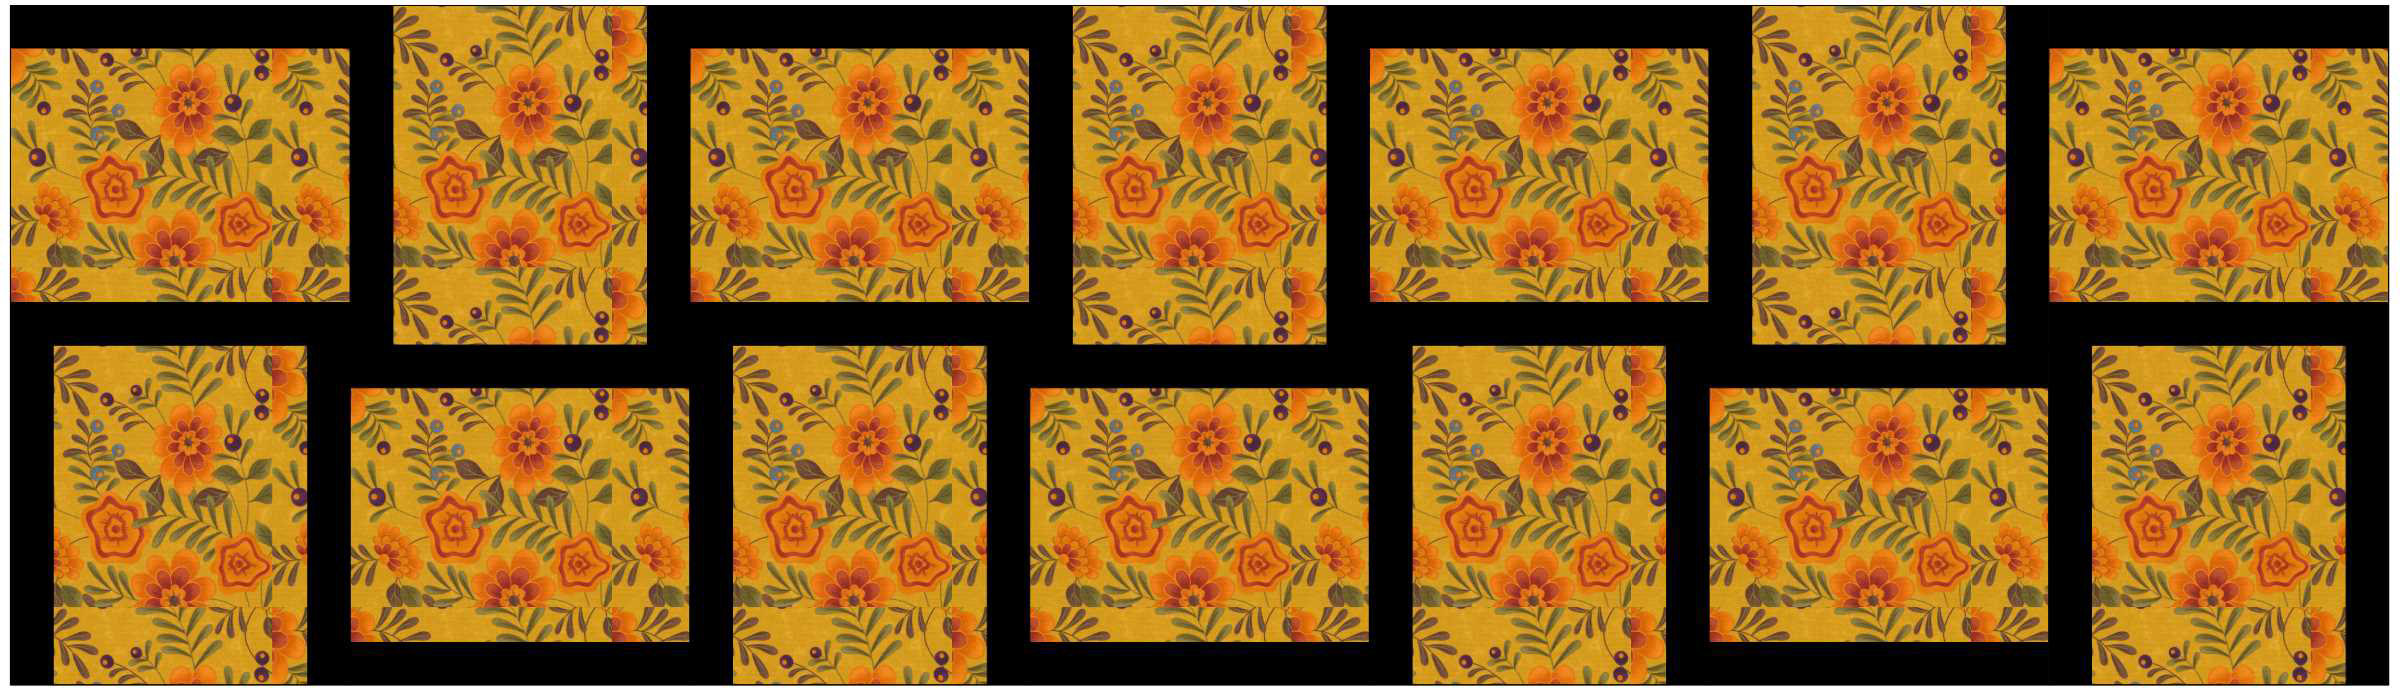
We cut each block in quarters, so each quarter is 10.5″ unfinished, and started arranging them to make a quilt top that would finish at 40″ square.

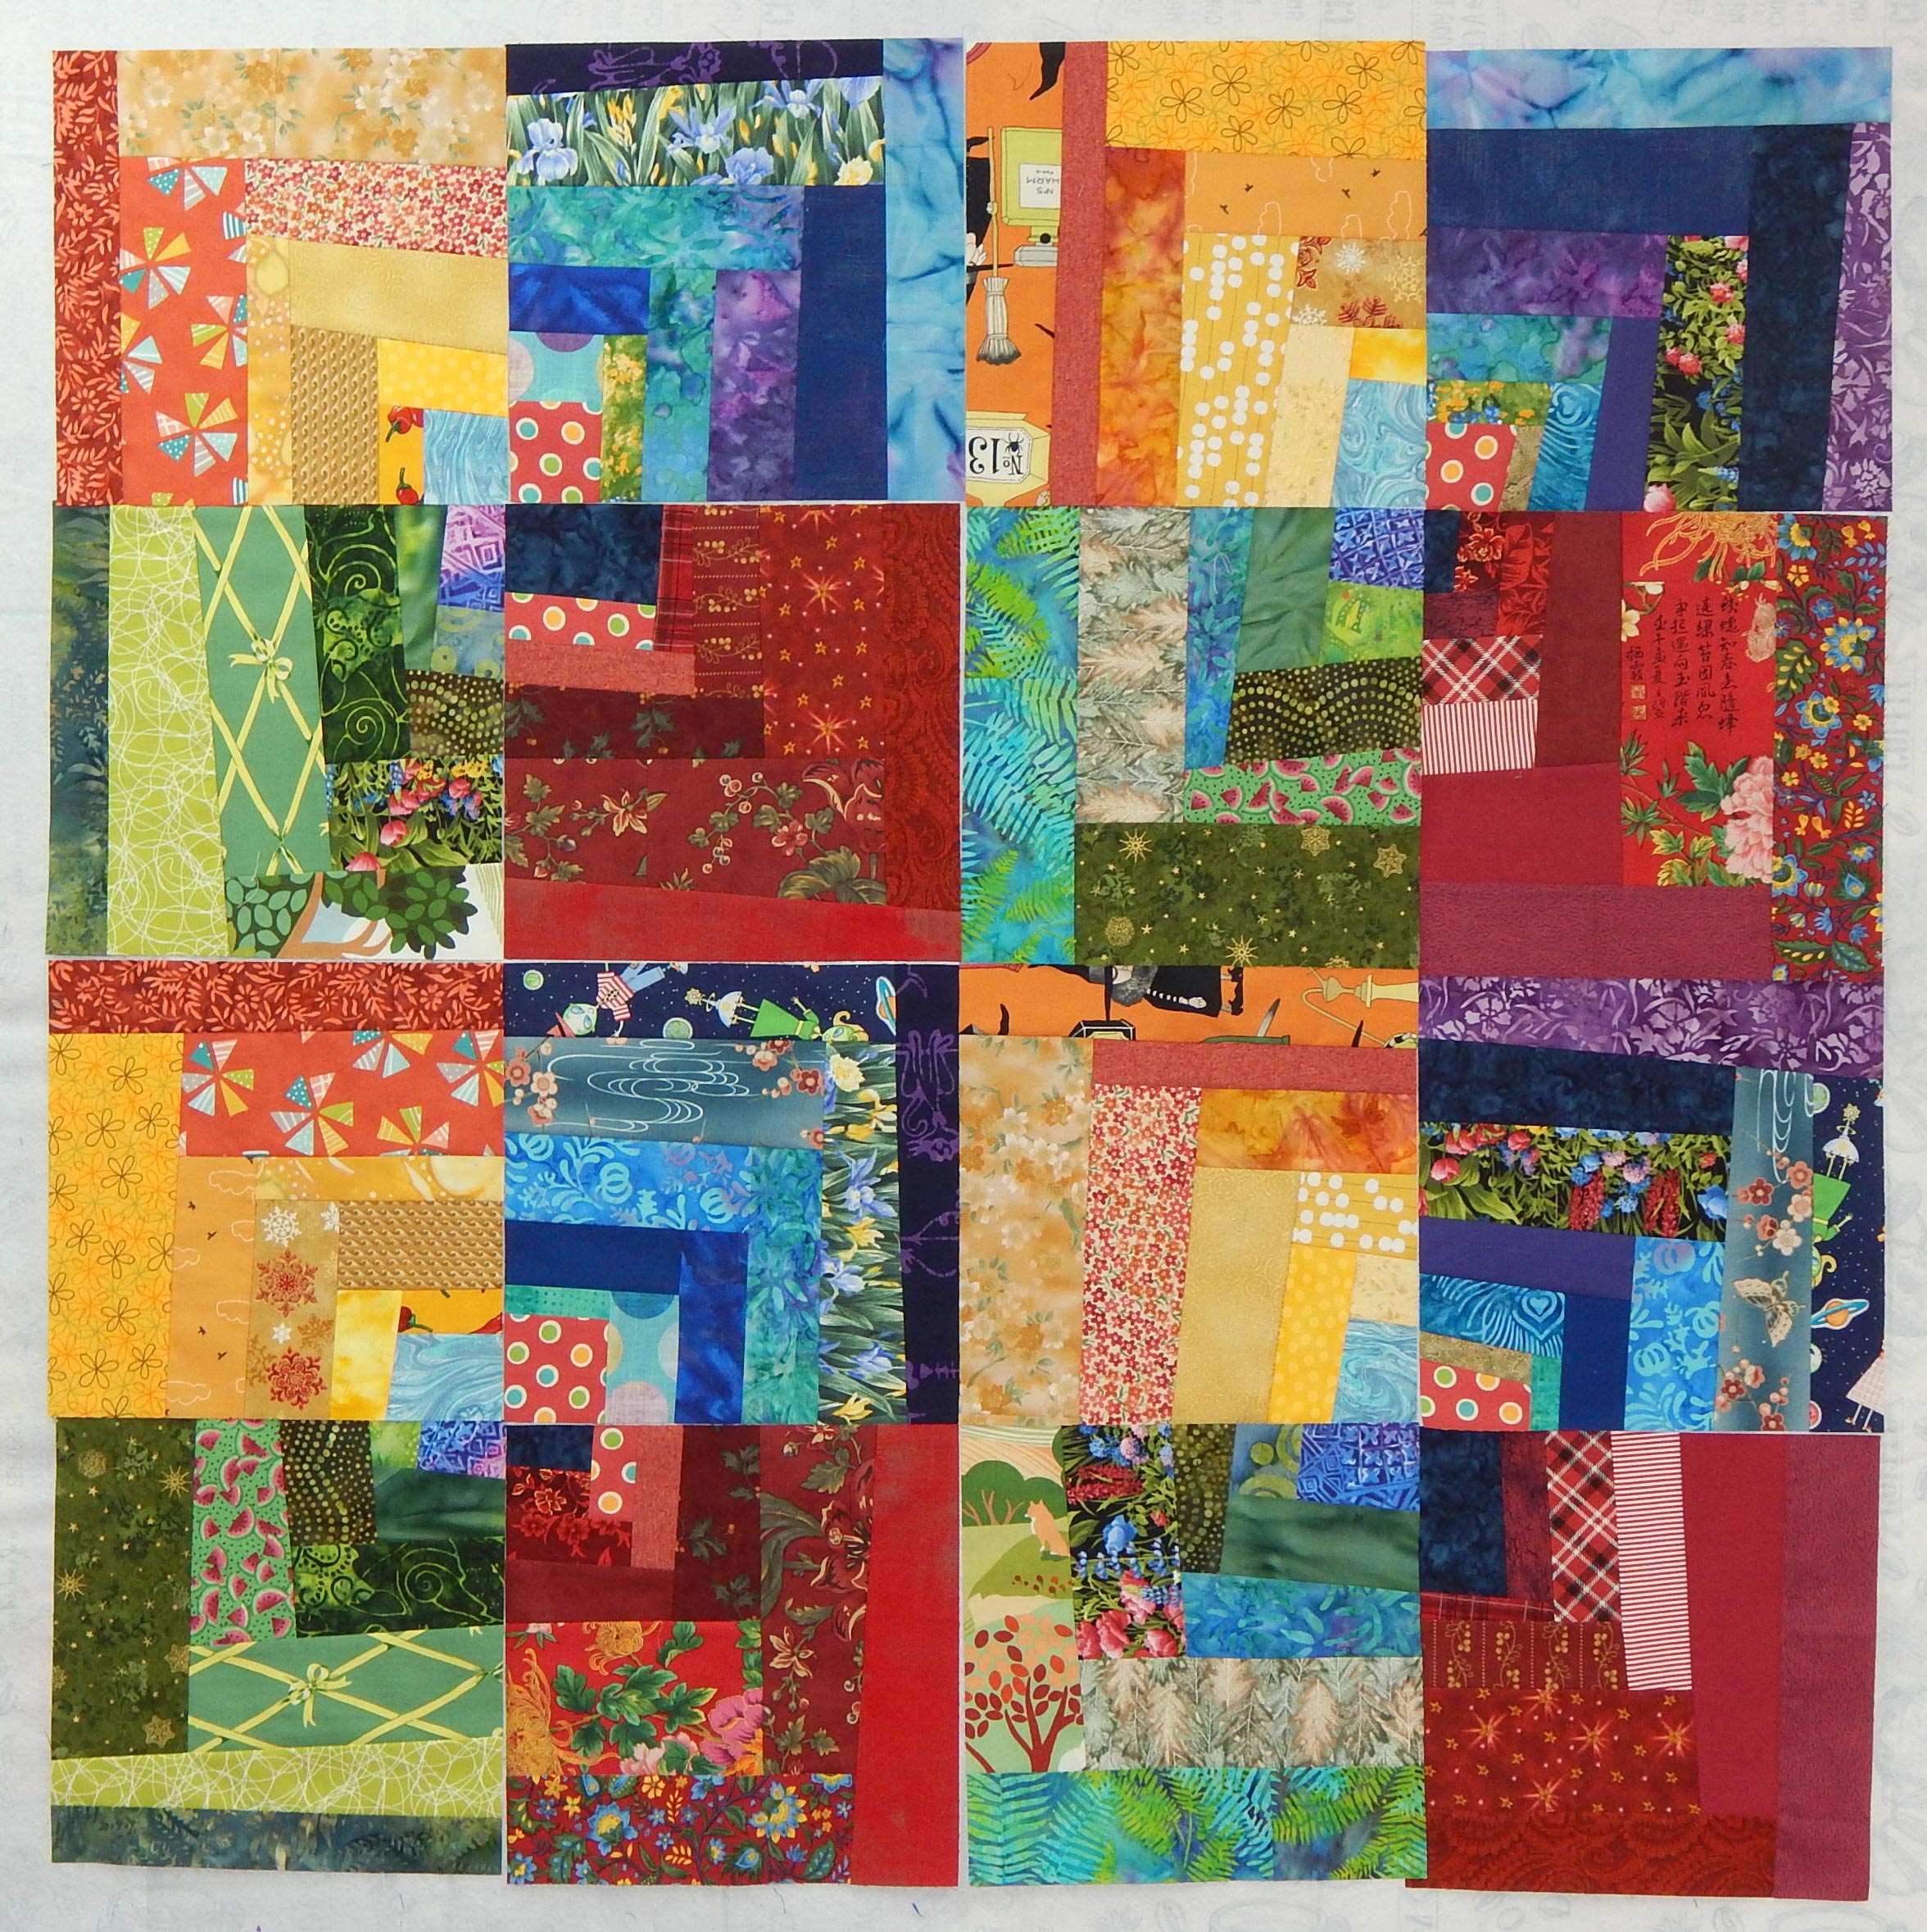
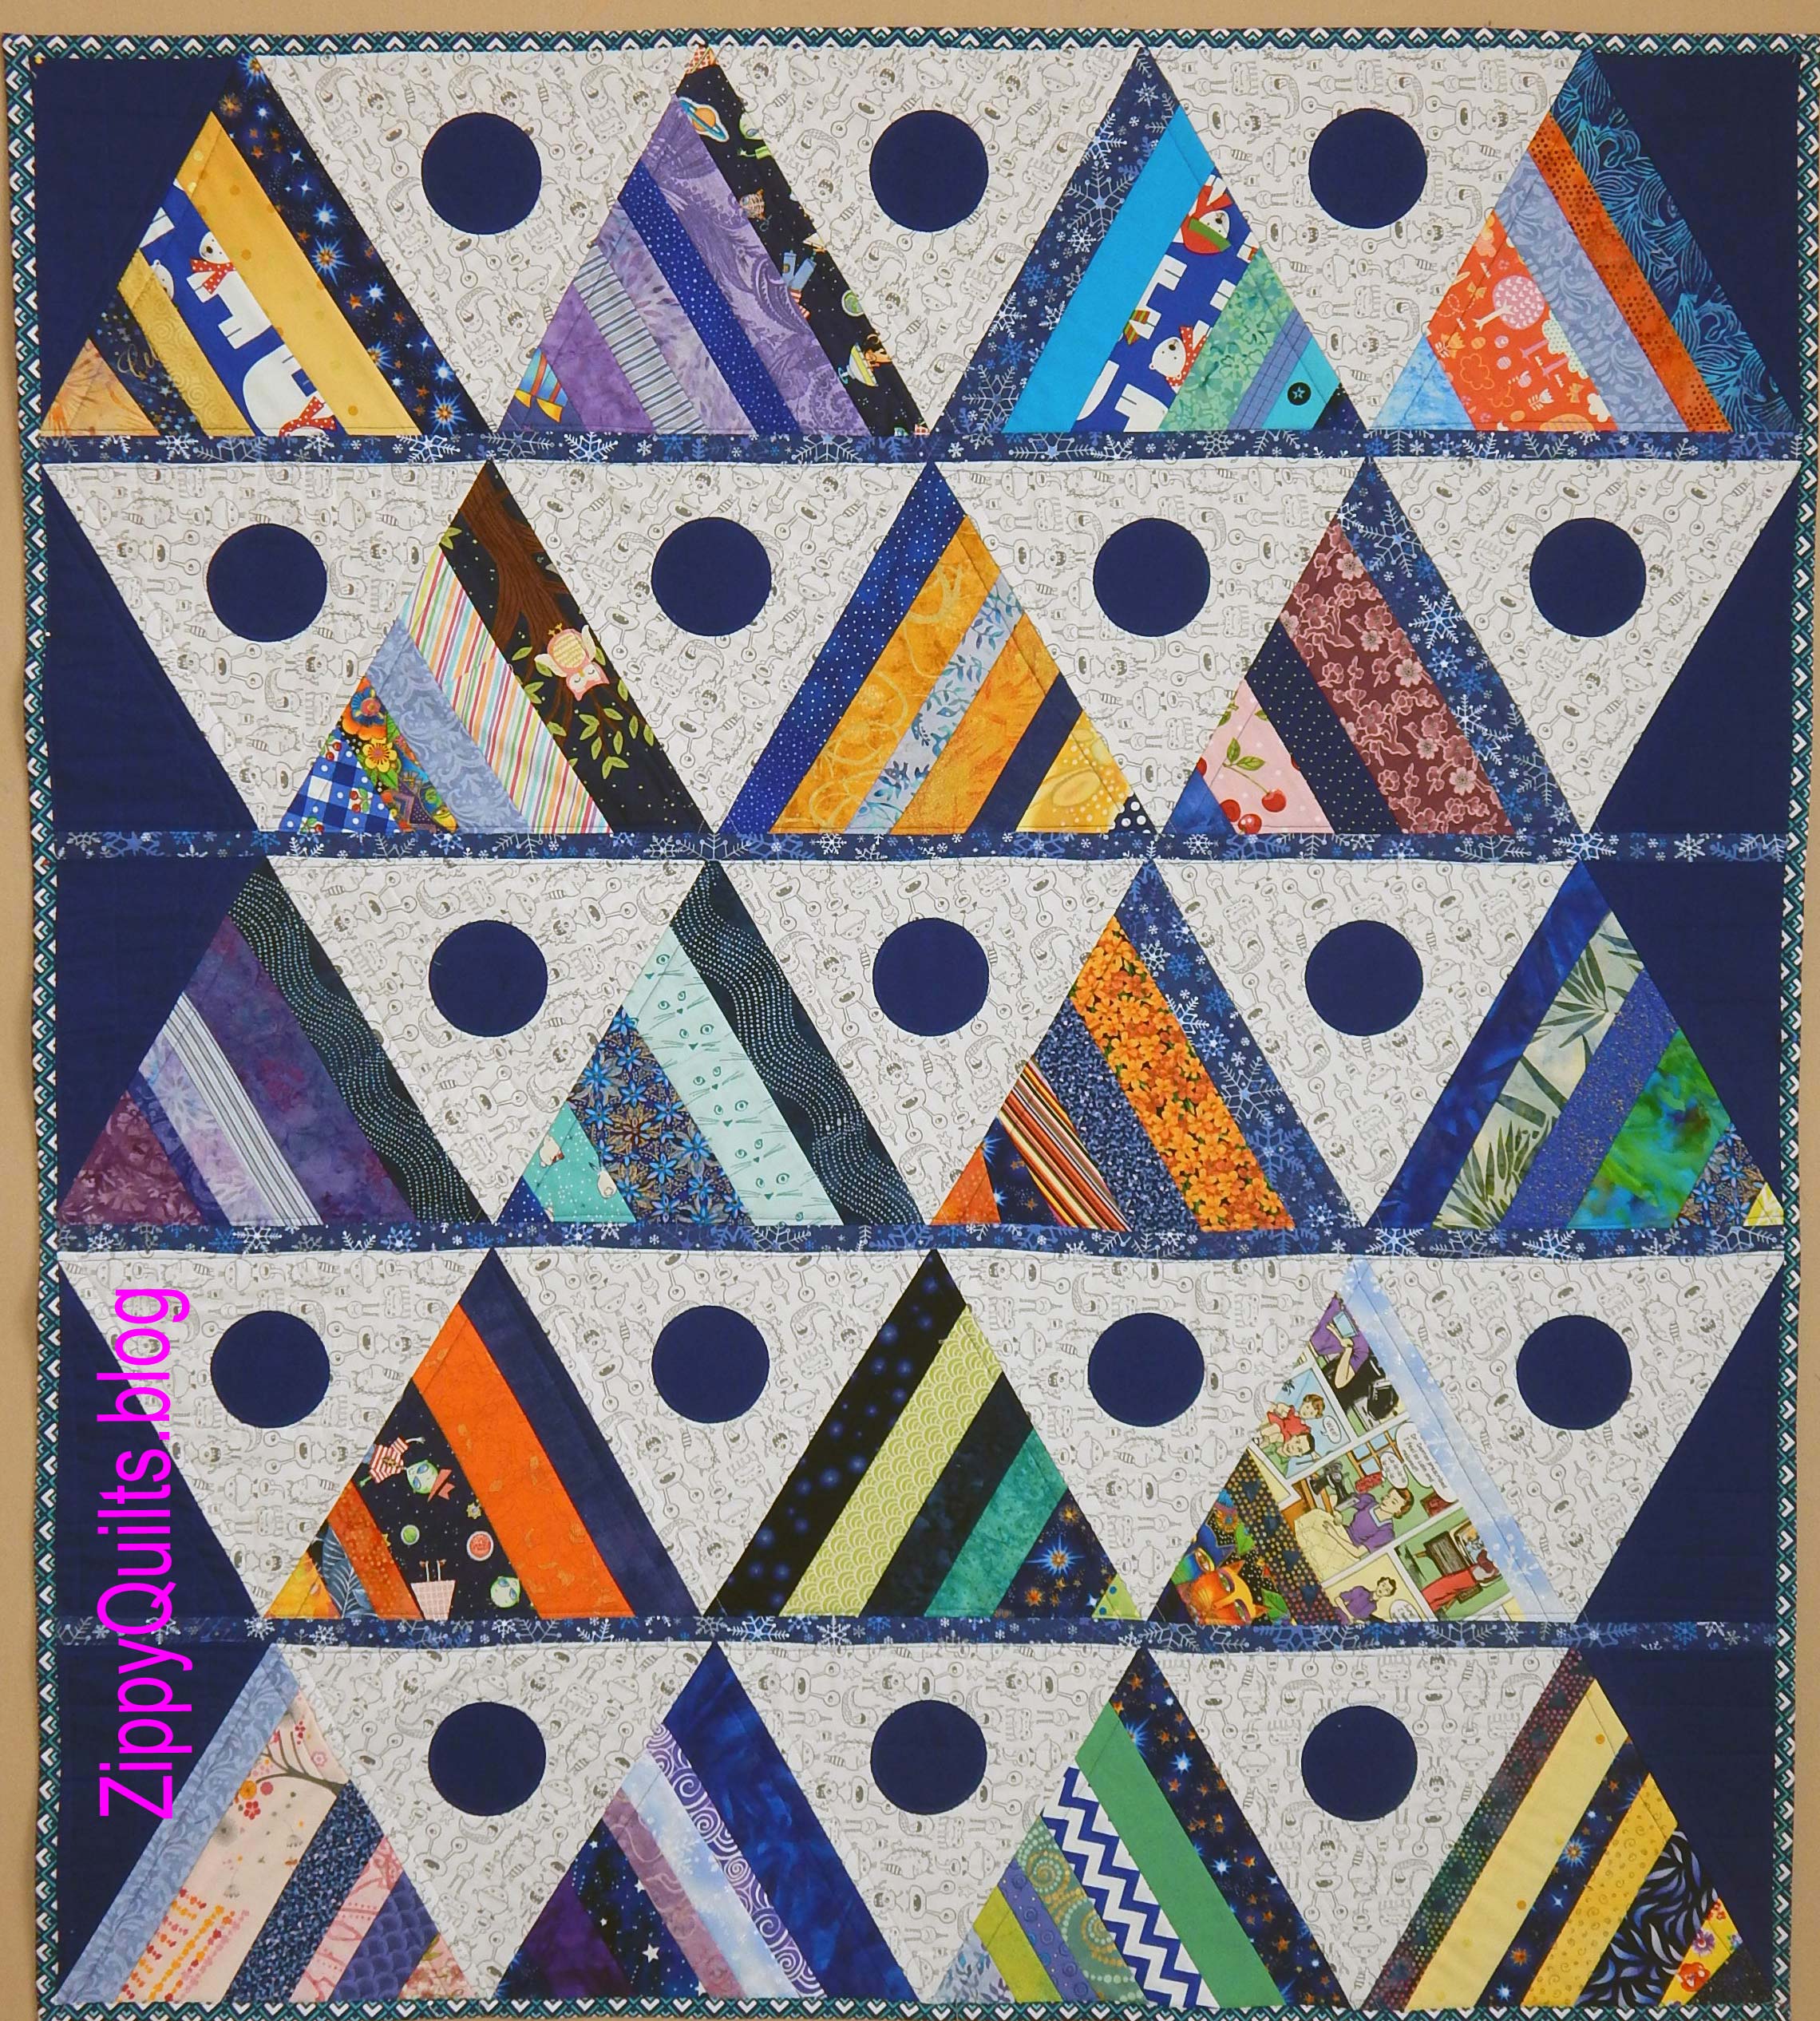
This was how we eventually decided to arrange them in the finished top:

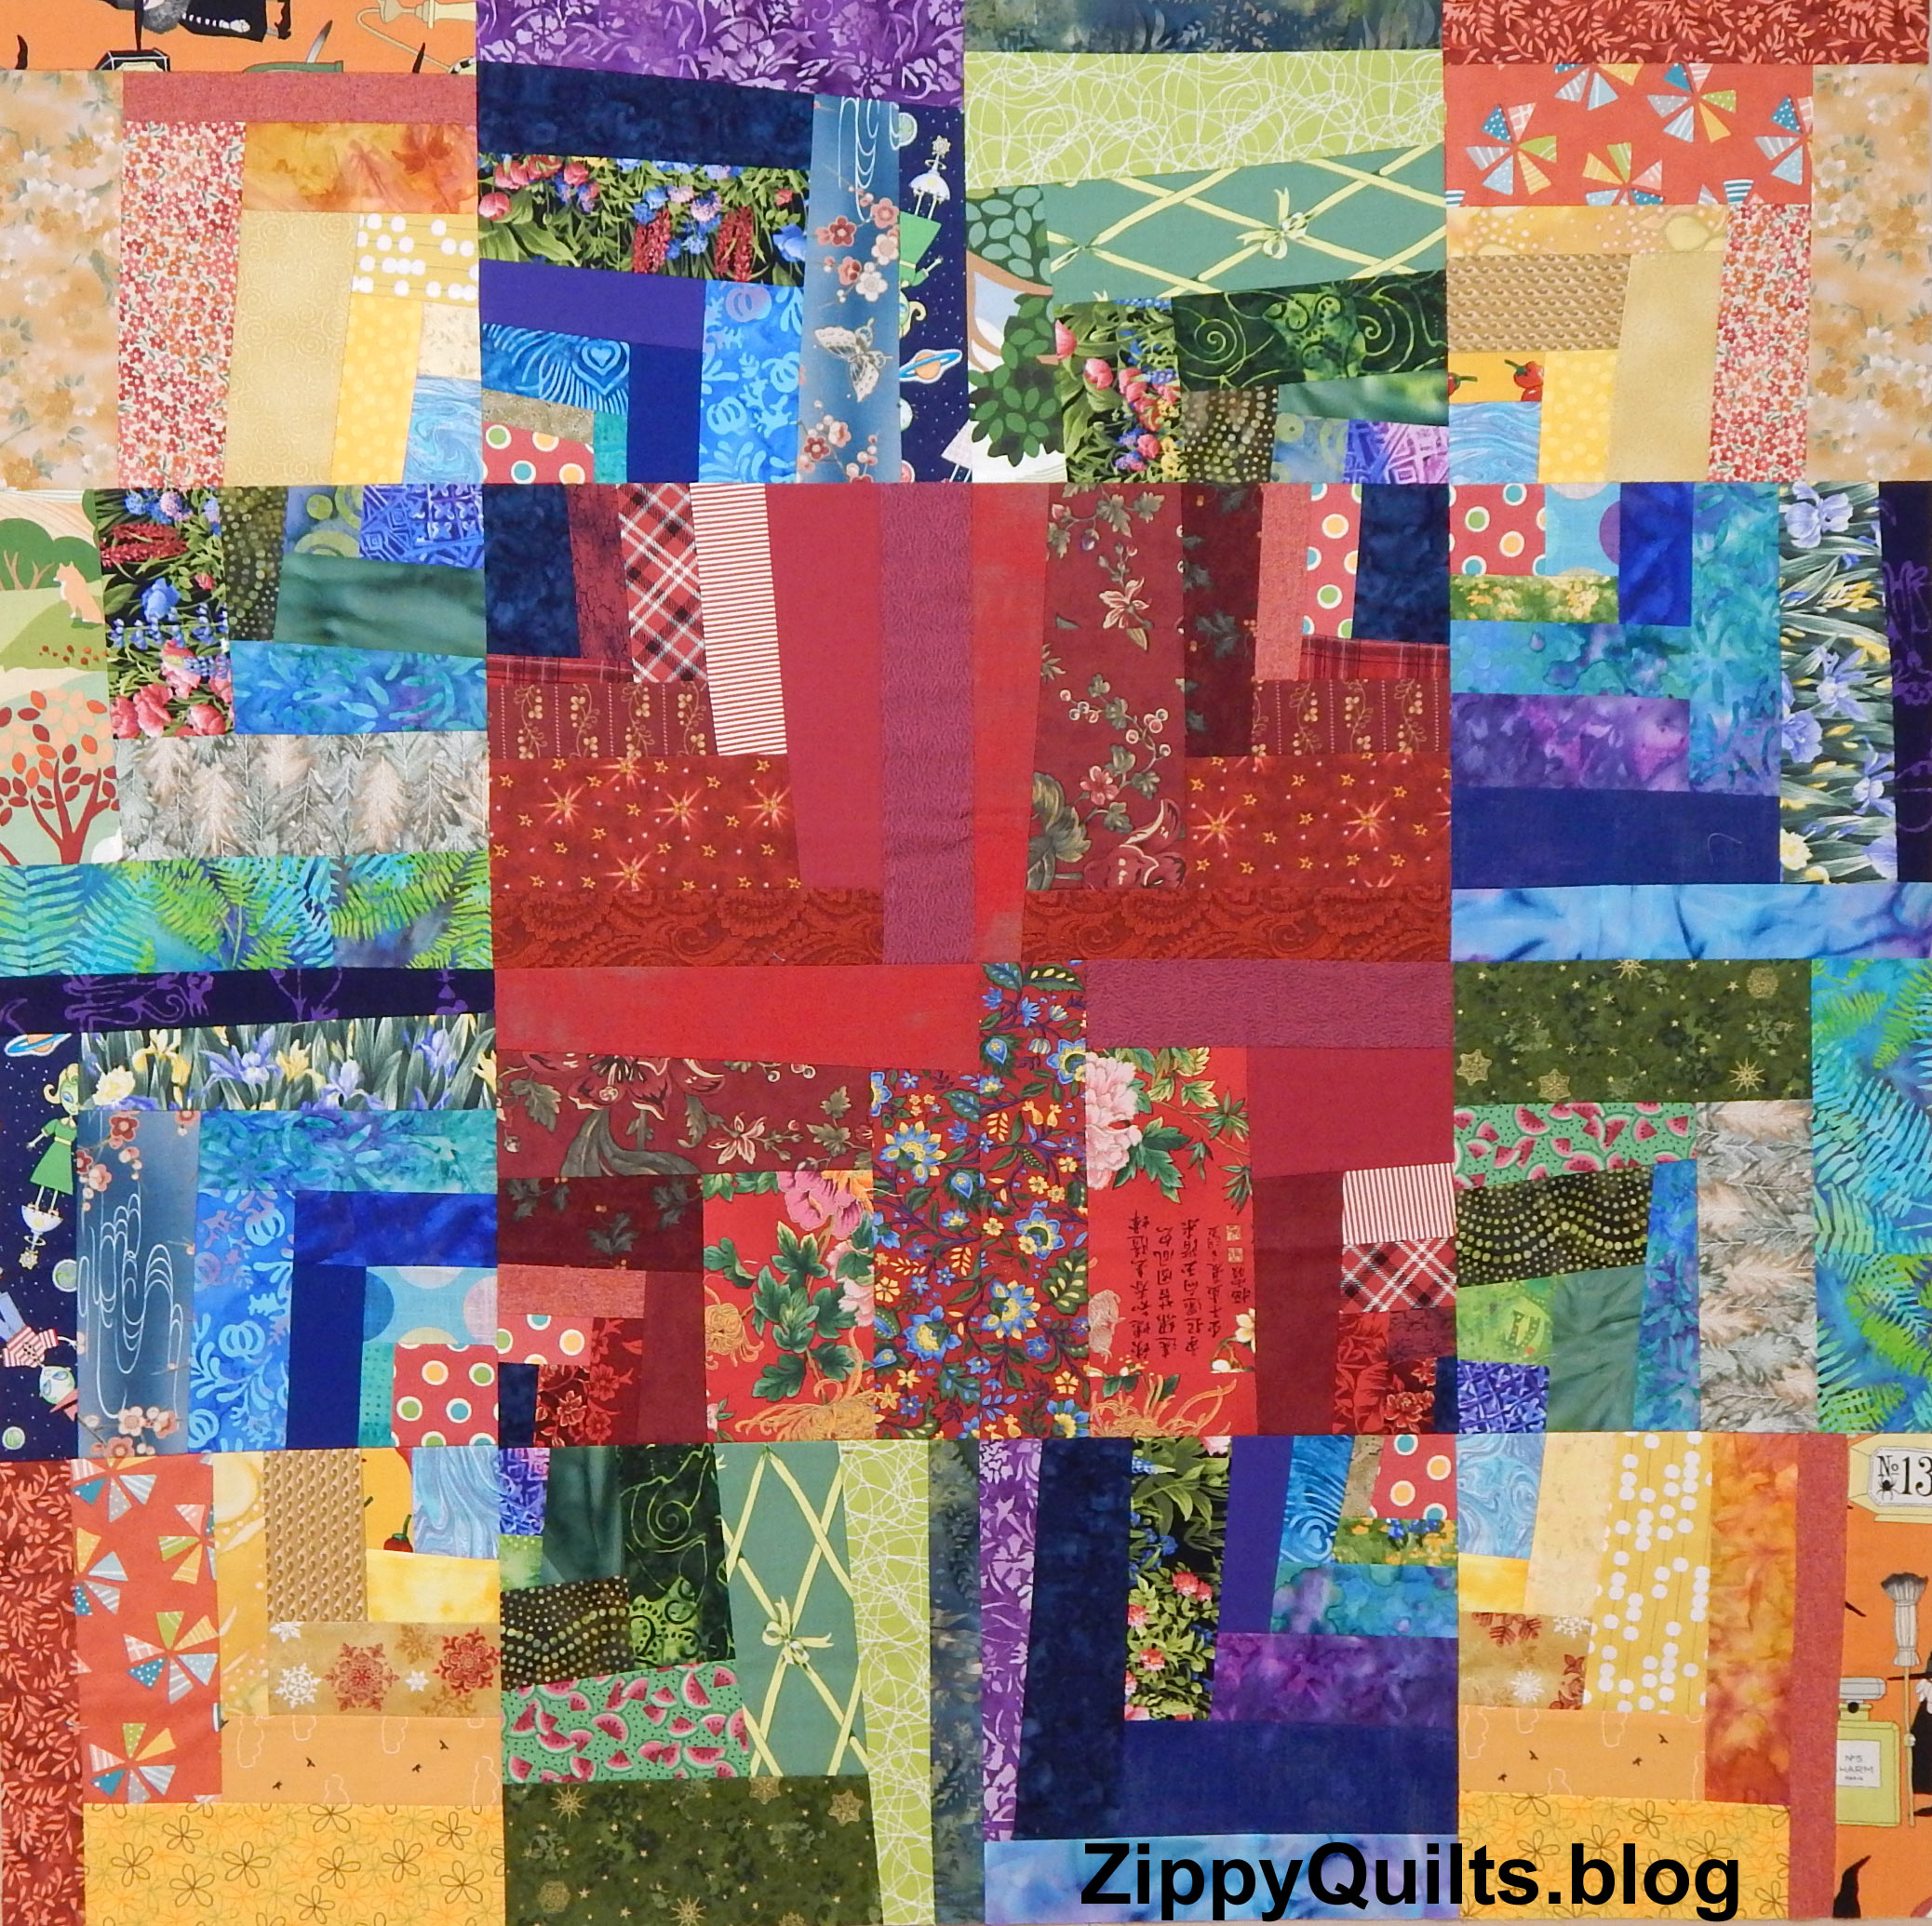
And then, of course, we made 4 more:

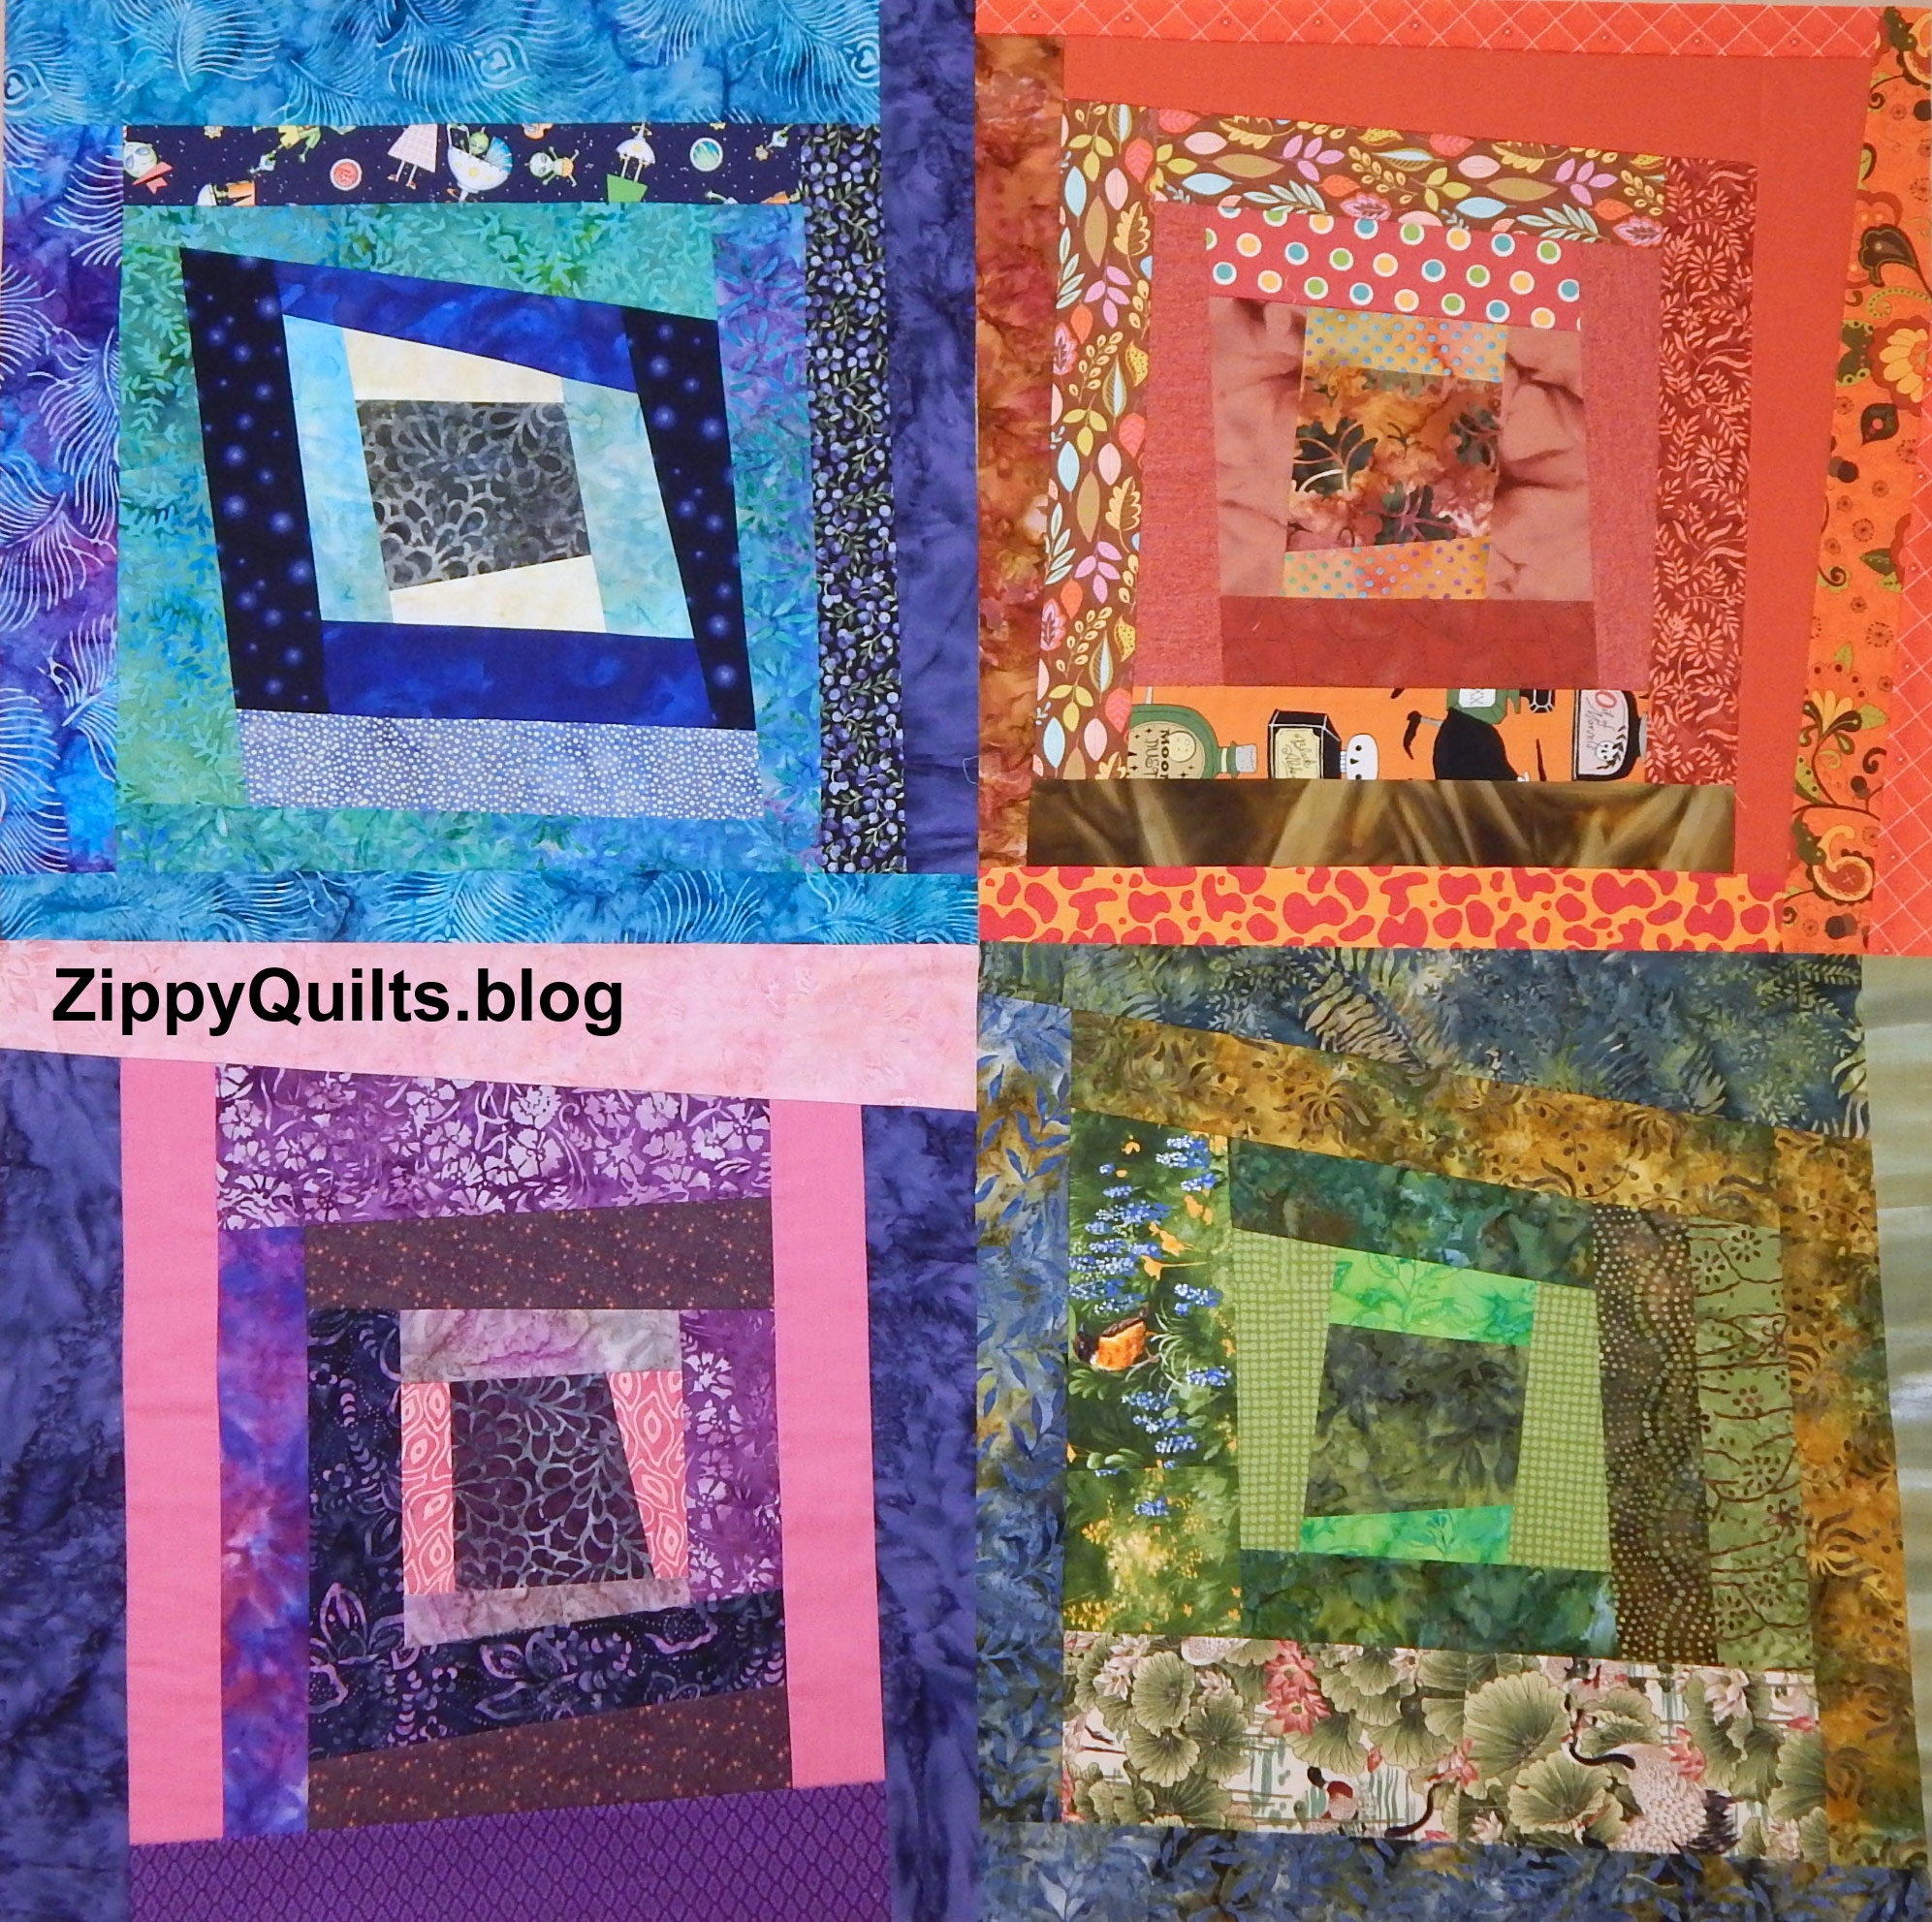
If you decide to do this, there are only 2 things to watch out for:

  1. As you add strips, keep measuring to be sure the center block remains centered enough so that there will be a piece of it in each quarter when you cut the block up.
  2. It’s easiest if the final round of strips is considerably wider than needed so the block can be trimmed to (unfinished) size easily without running into seams.

This is a really fun way to use scraps!  If you make one, or use this for a group swap, send me a picture!

Lattice Quilt

This design has been around forever and I’ve seen many versions of it, some even published as patterns.Anyway, I decided to teach it as a design-your-own quilt class, since I think the size of the center squares really should depend on the size of the prints you are using.  I made a handout to help each person design his/her own blocks, so I’m sharing the details with you.  All these drawings were made using Electric Quilt 8, which allows for easy export of the picture.

Here is the basic block:

The only trick is to make the block square.  The center is a rectangle, and the size of the side strips has to make the block square.  So, for example, if you cut a center rectangle 3.5″ x 5.5″ (to finish 3″ x 5″), your side strips need to be cut 5.5″ x 1.5″ each so the block (unfinished) will measure 5.5″ x 5.5″ and the finished block will be 5″ square.  Whew!

Actually, it’s easy.  We all drew our blocks (finished size) out on graph paper and remembered to add 0.5″ seam allowance in each direction before cutting each piece!

When the blocks are made, lay them out in a row, alternating directions. This forms the lattice. Two rows look like this:

And when a border is added, all the blocks are “closed” and you have a complete lattice.

And yes, the outer edge will vary in width after the addition of the border.  That’s all part of the fun. The blocks appear to float as they alternate directions.

You can vary the look of the quilt considerably by changing the proportions of the lattice and the central rectangles:

I think this design works especially well with a collection of related fabrics, and one woman brought Christmas fabrics to class:

Another brought fabrics with a camping theme:

This is an easy quilt.  It can be chain pieced easily and the blocks can be trimmed before joining if necessary.

Now, go make one and send me a picture of it!

Kraft-Tex Appliqué ! Woo!

Appliqué and I have a love-hate relationship.  I love the look of appliqué sometimes, and I’ve tried several methods, from needle turn to fusible and most things in between.  No method is perfect.

And just to show that I really have tried, here are some samples:

Machine appliqué of these circles was done after the quilting, so the backing and batting acted as stabilizer

The petals were fused on with Heat’n’Bond, and then I buttonhole stitched around them after doing the rest of the quilting, again eliminating the need for stabilizer

The snowmen and noses were a combination of fusible appliqué and Eleanor Burns’s appliqué with fusible interfacing.  I have washed this and it held up fine.

Sunbonnet Sue

Sunbonnet Sue Visits Quilt in a Day was done with Eleanor Burns’s method using fusible interfacing to produce turned edges

So, when I wanted a space alien to go on a quilt recently, I gave the appliqué process some serious thought.  This fabric is part of the background for a wonky star quilt I’m making, and I wanted one block to be a space alien to go with the theme.

Unfortunately, I have not saved the selvage from this fabric, so I don’t know who made it

Then I had an idea (drum roll, please).  The folks at C&T recently asked me to be an ambassador for Kraft-Tex, and since I was already a Kraft-Tex user and had blogged about it 3 times, I agreed.  They sent me some free Kraft-Tex!

I chose Marsala, Denim (hand dyed and prewashed), and natural prewashed for my free Kraft-Tex

Actually, I had already bought this black Kraft-Tex for another project, but I just want you to know that, for the first time ever, I have accepted a donated product for use in my blog.

I’ll have a tutorial on this whole quilt when it’s finished, but here’s an overview of how I used Kraft-Tex to avoid traditional appliqué .  I cut out the alien’s head using one of my circle cutters and attached it to the block with washable glue stick. Then I cut the outline from black Kraft-Tex and put it over the raw edge, with the raw edge kind of centered underneath.

Here is the alien on my design wall

The eye stalks and eyes were cut from Kraft-Tex and all the Kraft-Tex was glued down with the same washable glue.  That all worked well.  I then machine-stitched near the edges of the Kraft-Tex using a size 70 needle and matching thread.  Voila!  I didn’t have to fool with fusibles, bias strips, or much of anything at all.

Kraft-Tex is washable, and I’ll be interested to see how it does in this quilt.  It is stiffer than fabric, but I think that will be OK given the small amount I used on this twin-size quilt.

I can especially see using Kraft-Tex this way in art quilts very soon!

I’ll let you know how this all turns out!

Meet Cheryl Brickey of Meadow Mist Designs

You already know that I took an excellent class with Cheryl Brickey at the North Carolina Quilt Symposium recently.  She kindly agreed to an interview, as well.

Cheryl and me with the partially completed quilt I designed and made in class

Cheryl has written a book and numerous patterns; all are available on her website.    She is an engineer and works 3 days a week writing patent applications for high-tech textiles used in things like tires and military applications.  On top of all that, she has two children and a very busy life, so I asked for her top time management tip.  Her answer: “Don’t have any [time].”  She explained that, because her time is so limited, she knows exactly what she needs to do when she enters her studio and gets right to it.

Cheryl’s book, which she wrote with her friend Paige Alexander

Cheryl started quilting when her children were small.  She had always been involved in crafts, but started making quilts because it was something that “stayed done”, unlike the dishes, the laundry, etc.  I think we can all understand that!  She says she read somewhere that a woman should do something every day that can’t be undone.  Both she and I have searched extensively for that quotation without finding it, so I think we’ll just attribute it to Cheryl!  Anyway, quilting meets that need for her.

Cheryl identifies “modern traditional” as her style of quilting, and you can see what she means from the pictures below of some of her designs.

Samples for Cheryl’s class on minimalism in design

She blogs at Meadow Mist Designs, where she has just announced her next free mystery quilt.

Click here to be taken to Cheryl’s blog, where you can read about her mystery quilt

This mystery quilt will start in July of this year and run through April of 2020.  She will post a new set of directions the first Thursday of each month.

Cheryl says there is a non-mystery option, and about 25% of those who sign up for the mystery quilt elect to get a picture of the finished product from the outset!  (This meets her “engineer need”, she says.)  The only caveat is that those who elect to see the design from the beginning have to keep the secret so as not to ruin it for others.

Cheryl was a delight to meet and interview.  Her workshop and lecture were very well organized and presented.

Here are two of my favorite patterns from Cheryl, because who can resist pretty pictures?

You can check her out here.

North Carolina Quilt Symposium

I recently spent 2 weeks mostly doing quilty things rather than cooking, doing laundry, hanging on the internet, etc. The time ended with the North Carolina Quilt Symposium at Lake Junaluska, NC.

View from the hotel at Lake Junaluska

This was one of the best events I have ever attended in terms of the quality of instruction. The friends who went with me agree, so it wasn’t just me in my little bubble 🙂

I took a class with Cheryl Brickey (see her website here), who was a wonderful instructor and showed us her personal method of designing modern-traditional quilts using EQ8 (Electric Quilt).  I have used EQ for ages (OK, since EQ5, and they are now up to EQ8) but she showed me some cool new tools I had never discovered.

Cheryl and me with the partially completed quilt I designed and made in class

My second class was with Lyric Kinard.  (Her website is here.)  I learned a lot about creating portraits in fabric.  Here is one that was done for practice at the beginning of the class.  It’s supposed to be the woman who was sitting across from me, but I did not take a photo of her for comparison 😀

This was just a quick practice piece; I promise the woman didn’t really have blue skin!

Lyric went on to teach a much more elaborate and realistic way to do a portrait in fabric, but mine isn’t even far enough along to show.  The whole class was useful and Lyric is an encouraging instructor.

The details of next year’s NC Quilt Symposium are not finalized, but if you want to know more about the symposium and what was available this year, visit the website at NCQSI.org.  I hope to see you there next year, especially, because I have agreed to help recruit teachers!  Come join the fun!

I was able to interview 3 of the teachers at NCQS, so look for posts about them coming up in the next few weeks.

Travel Inspires

As my friend Melanie recently pointed out, travel can inspire creativity. We just got back from a loooong drive across the country to New Mexico and back, and I took a few pictures of things that inspired me.First, we saw literally thousands of these wind generators across the flat, windy, high plains of West Texas and Oklahoma. The complex shape of the blades is quite an engineering feat by itself, even before the rest of the contraption is considered. It was great to see renewable energy in action, and these are attractive additions to the landscape in my opinion. (No, we never saw any dead birds near them, despite looking.  Research in Europe suggests this is mostly an urban myth.)

In New Mexico, I looked for the details that said “Southwest”.  These design elements are a kind of shorthand for “you are here” and I thought that idea would be useful in designing quilts (or anything else).  Here are a couple.

Stucco walls, turquoise trim, tile roof

Courtyard enclosed by a stucco wall with a wooden gate; tile accent along roof edge; flat roof

Now, I’m off to learn to organize my photos in Photoshop so I can find the rest of the pictures from the Southwest 😀

Another Fun Guild Program

This is part of my occasional series on guild programs, with the hope that it will help others who need to come up with program ideas.

Our modern guild has no money to hire speakers, so we are taking turns sharing our talents. One of our members recently volunteered to teach us block printing on fabric, and she furnished all the materials herself!

block printing quilt fabric

Suzanne brought a beautiful print she had made as an example

A few of us had done block printing in the past, but these blocks were much easier to carve. Apparently the block medium is now made of soft rubber rather than linoleum–a big improvement for the hands and wrists.

block printing

Some people carved abstract designs, using the whole block

Everyone got a square of rubber to carve. Some people carved a design on the square using the entire thing. Some carved an object and then cut out around the object so that it could be glued to a board backing for easier handling.

It was fun to see what everyone did.


Then we were given ink and encouraged to mix the colors, either to produce a variegated print or to produce a secondary color.

The prints were amazing and fun.

I didn’t get a picture of the block used for these fish, but they were very successful.

block printing fabricOur challenge for next month is to use the printed fabric in a project.  Can’t wait to see what everyone does!

Find Your Inner Designer – Part 1

Some of my readers have asked about how I design quilts, so I’ve decided to do a monthly series of posts to lead you to design your own original quilts. I know there are several courses and lectures out there on “principles” of modern quilt design, but this series is about a practical approach.  So here is Part 1: Start by tweaking a design you already like.

Start with a traditional-style pattern you want to make.  By traditional-style, I mean one with multiple similar blocks, probably arranged in a grid.  Here’s my example, which really is more of a modern design because the blocks are improvisationally cut, but it has the blocks in a grid

modern pieced quilt

I saw this quilt at the house where we have retreats

Now experiment, tweaking this pattern (or a similar one) 3 different ways:

1. Change the size of the blocks. A quilt made up of 20 blocks each 10″x 10″ will look quite different from a quilt of the same size made up of 80 blocks 5″ x 5″.

You can go up or down in size, but change the size of the blocks. If the math gives you trouble, either get help from a friend who LOVED algebra in high school, or use a computer program like Electric Quilt to re-draw the blocks in the size you want and give you instructions for cutting them. If you want to make the blocks very small, consider paper piecing: Just draw your paper base and you don’t need any math because the pieces you use to construct the block on the paper base aren’t cut exactly to size.

.
2. Change the size of just one (or a few) block(s):

modern quilt design

Substitute one large block for 4 of the small ones!

Either replace one block with 4 little blocks 1/4 the size of the usual, or replace 4 regular blocks with one big one. Either tweak makes the overall quilt design more interesting.

Pieced quilt

Substitute 4 little blocks for one large one–or for several large ones!

3. Add (or subtract) a little: Instead of making the usual grid of blocks, add a strip or a row of blocks to each row to make some of the grid offset. I like to put the insert at a different place in each row.

modern quilt design

Insets make the blocks move out of line in some places, adding interest

Another option is to remove the sashing and/or border(s) from a quilt, or to insert an extra border.

You don’t have to sew any of your designs unless you want to; just draw them out on graph paper (or your computer program), and color them if you like. The drawing counts as a design! And don’t worry that modifying somebody else’s design isn’t “original”. You have to start somewhere, just like the designer of your pattern did!

Now, go try some of this! I like to make baby quilts to try out new designs or techniques—not too much commitment in time and materials, but I learn a lot. And watch for the next post in this series; I’m going to do a design post the first Sunday of each month for a while.