Trying A New Binding Technique

I’m always on the lookout for ways to improve my binding (as well as my other quilting skills). Recently I ran across a video (YouTube, of course) showing how to use the Bernina #71 foot for binding. Here’s the link: https://www.youtube.com/watch?v=tpl-7L4SEzM

I have no idea who this woman is, but she’s using 2″ binding, which is my usual. I also use Quilter’s Dream Request Loft batting (the thinnest loft), which is part of why the narrower binding works.

After watching the video several times, I tried it out.

As you can see, the binding looks pretty good, and it’s still all done by machine. I achieved a more consistent width using this foot than with my usual method with the walking foot.

I did have some trouble with the corners, but I thought my binding was pretty good for a first try. (And no, I didn’t take a picture of a messy corner!)

Here’s the finished quilt, which is one of the samples for the beginning quilting class I’ll be teaching later this year. 
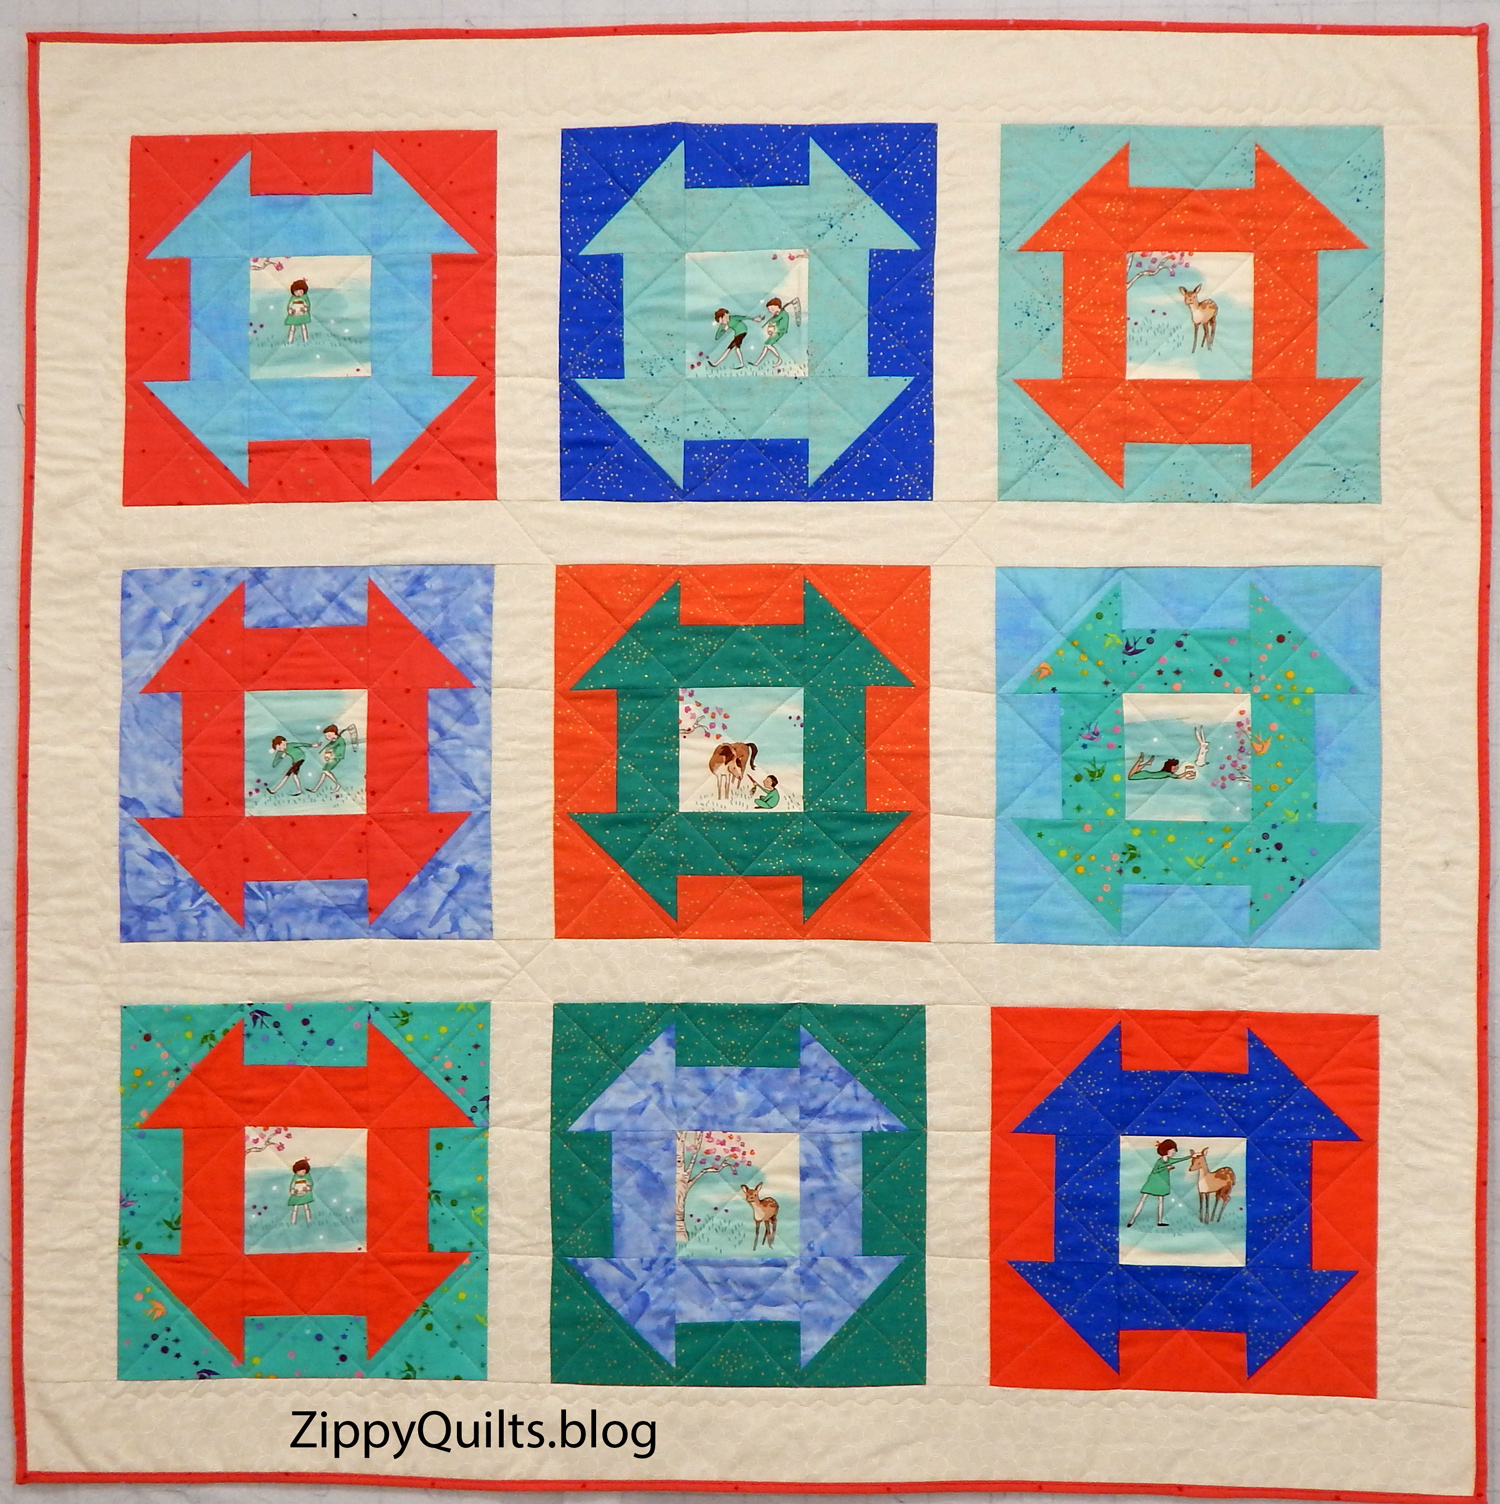
This is a pattern I modified from the book Jump Into Patchwork and Quilting. Specifically, I re-drafted it so the monkey wrenches are made with the flip-and-sew method rather than with half square triangles. This floats the wrenches so beginners will be less likely to cut off a point.

Photo courtesy of C&T

I’ll be using the book as a text for the class so students will have a written reference at home. The book is bright and modern and I think it will appeal.

It also has some easy projects students will be able to do on their own. This book costs only a bit more than a pattern, so it’s a good value. (The book is available from Studio Stitch or C&T.)

I’ll be making another sample before offering the class. Meanwhile, here’s the information on this one.

Quilt Stats:

Name: Making Waves Modified

Source: I re-drafted a pattern from the book Jump Into Patchwork and Quilting

Finished size: 48″ x 48″

Made and quilted by me.

A Swap Block for Donation Quilts

One of my quilt groups makes donation quilts about 40″ square for various organizations. The size is easy to construct and quilt at home, and is appropriate for the children who receive the quilts.  Here are the recent group donations:

We often use swap blocks for our quilts and recently decided on a new swap and I want to tell you about it. One of your quilt groups may enjoy it, too!  Here’s how:

First make a big wonky log cabin block. Our blocks started with a 5″ square, which was modified to make a wonky center.  It was then surrounded by strips from my scrap bins, and occasional strips were trimmed so they were wonky, too.

These big blocks are 21″ square (unfinished).

We cut each block in quarters, so each quarter is 10.5″ unfinished, and started arranging them to make a quilt top that would finish at 40″ square.

This was how we eventually decided to arrange them in the finished top:

And then, of course, we made 4 more:

If you decide to do this, there are only 2 things to watch out for:

  1. As you add strips, keep measuring to be sure the center block remains centered enough so that there will be a piece of it in each quarter when you cut the block up.
  2. It’s easiest if the final round of strips is considerably wider than needed so the block can be trimmed to (unfinished) size easily without running into seams.

This is a really fun way to use scraps!  If you make one, or use this for a group swap, send me a picture!

Two Finishes

I’m going to resurrect Terry Atkinson’s Lucky Stars quilt pattern as a Christmas or baby quilt class for October at Studio Stitch in Greensboro, so I’ve just made two new shop samples.  This is a great pattern because it is quick and easy to make and almost any mistake made during construction can be fixed without much difficulty.  Therefore, I thought people might enjoy making it as a gift quilt or Christmas quilt.

This is an older pattern, and I can’t tell you how many times I’ve made it for various recipients.  Here are my latest versions::

Quilt Name: Baby Stars

Size: 48” x 48”

Fabrics: assorted batiks left from other projects

Made by: me

Quilted by: me

Pattern: Lucky Stars by Atkinson Designs

Quilt Name: Christmas Stars

Size: 64″ x 81″

Fabrics:  Assorted Christmas yardage bought because I liked it

Made by: me

Quilted by: Julia Madison

Have you made a Christmas quilt yet this year?  It’s not too soon to start 😉


Projects from 2014

As part of my effort to develop galleries for this site, here is a review of my projects from the first half of 2014.

The design and tutorial for this zippered pouch came from Noodlehead.

zippered pouch

I made a series of these little zippered pouches, and they have been useful.

These next two bags were made from a book entitled Ruby Star Wrapping.  You can read my review of the book here, if you want.

I continued my interest in improvisational piecing in 2014, making this confetti block…

improv quilt block

Confetti Block, 2014

…and this entry for the Quilt Alliance annual contest:

modern art quilt

Whirlwind, my 2014 Quilt Alliance challenge quilt

I made this quilt for the Pantone Challenge.  It looks better in person than in this picture, and now is used to decorate one of the rooms at our local free clinic:

Applique quilt

Radiating Orchid, my mini-quilt for the Radiant Orchid Challenge

As always, I made a number of donation quilts for Ronald McDonald House.  I used them to try out a variety of techniques and other experiments:

I made this baby quilt because I loved the fabrics:

baby quilt

Baby Dots–Front

baby quilt

Baby Dots–back.  I may like it even more than the front!

And I participated in several swaps, including one involving these blocks.  Don’t even think about the 88 little pieces in the block on the left!!!

I’ve reached my (self-imposed) length limit for a post, so the rest of the 2014 review will be coming up next week!  Please come back 😉

Save

Save

Save

Save