This project was originally developed for Modern Quilts Unlimited magazine. You can read about it here.
Unfinished block size 15″ x 15″
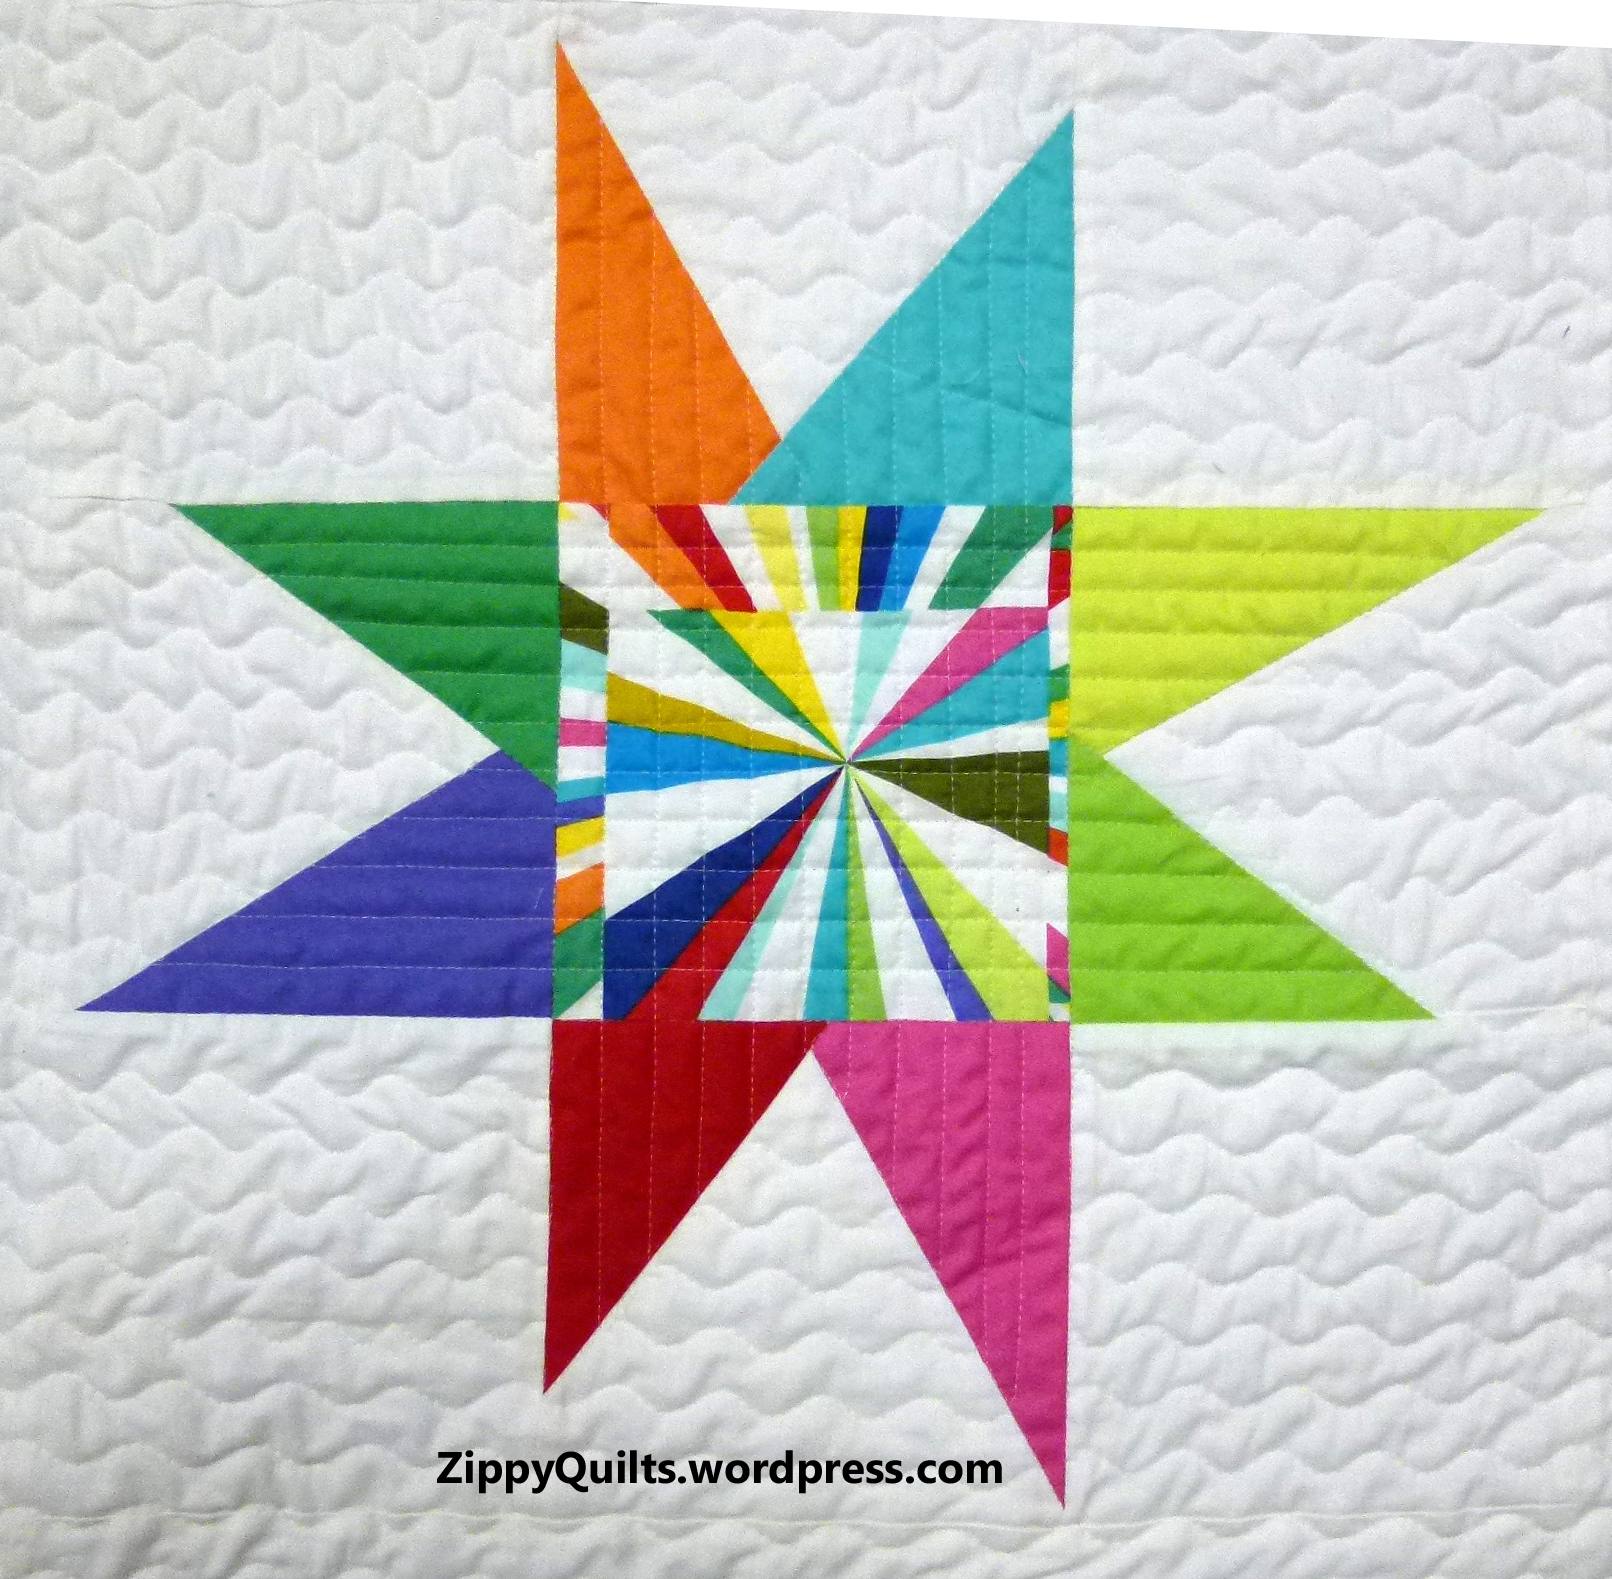
This block finishes 14-1/2 x 14 1/2 inches
Fabric Requirements
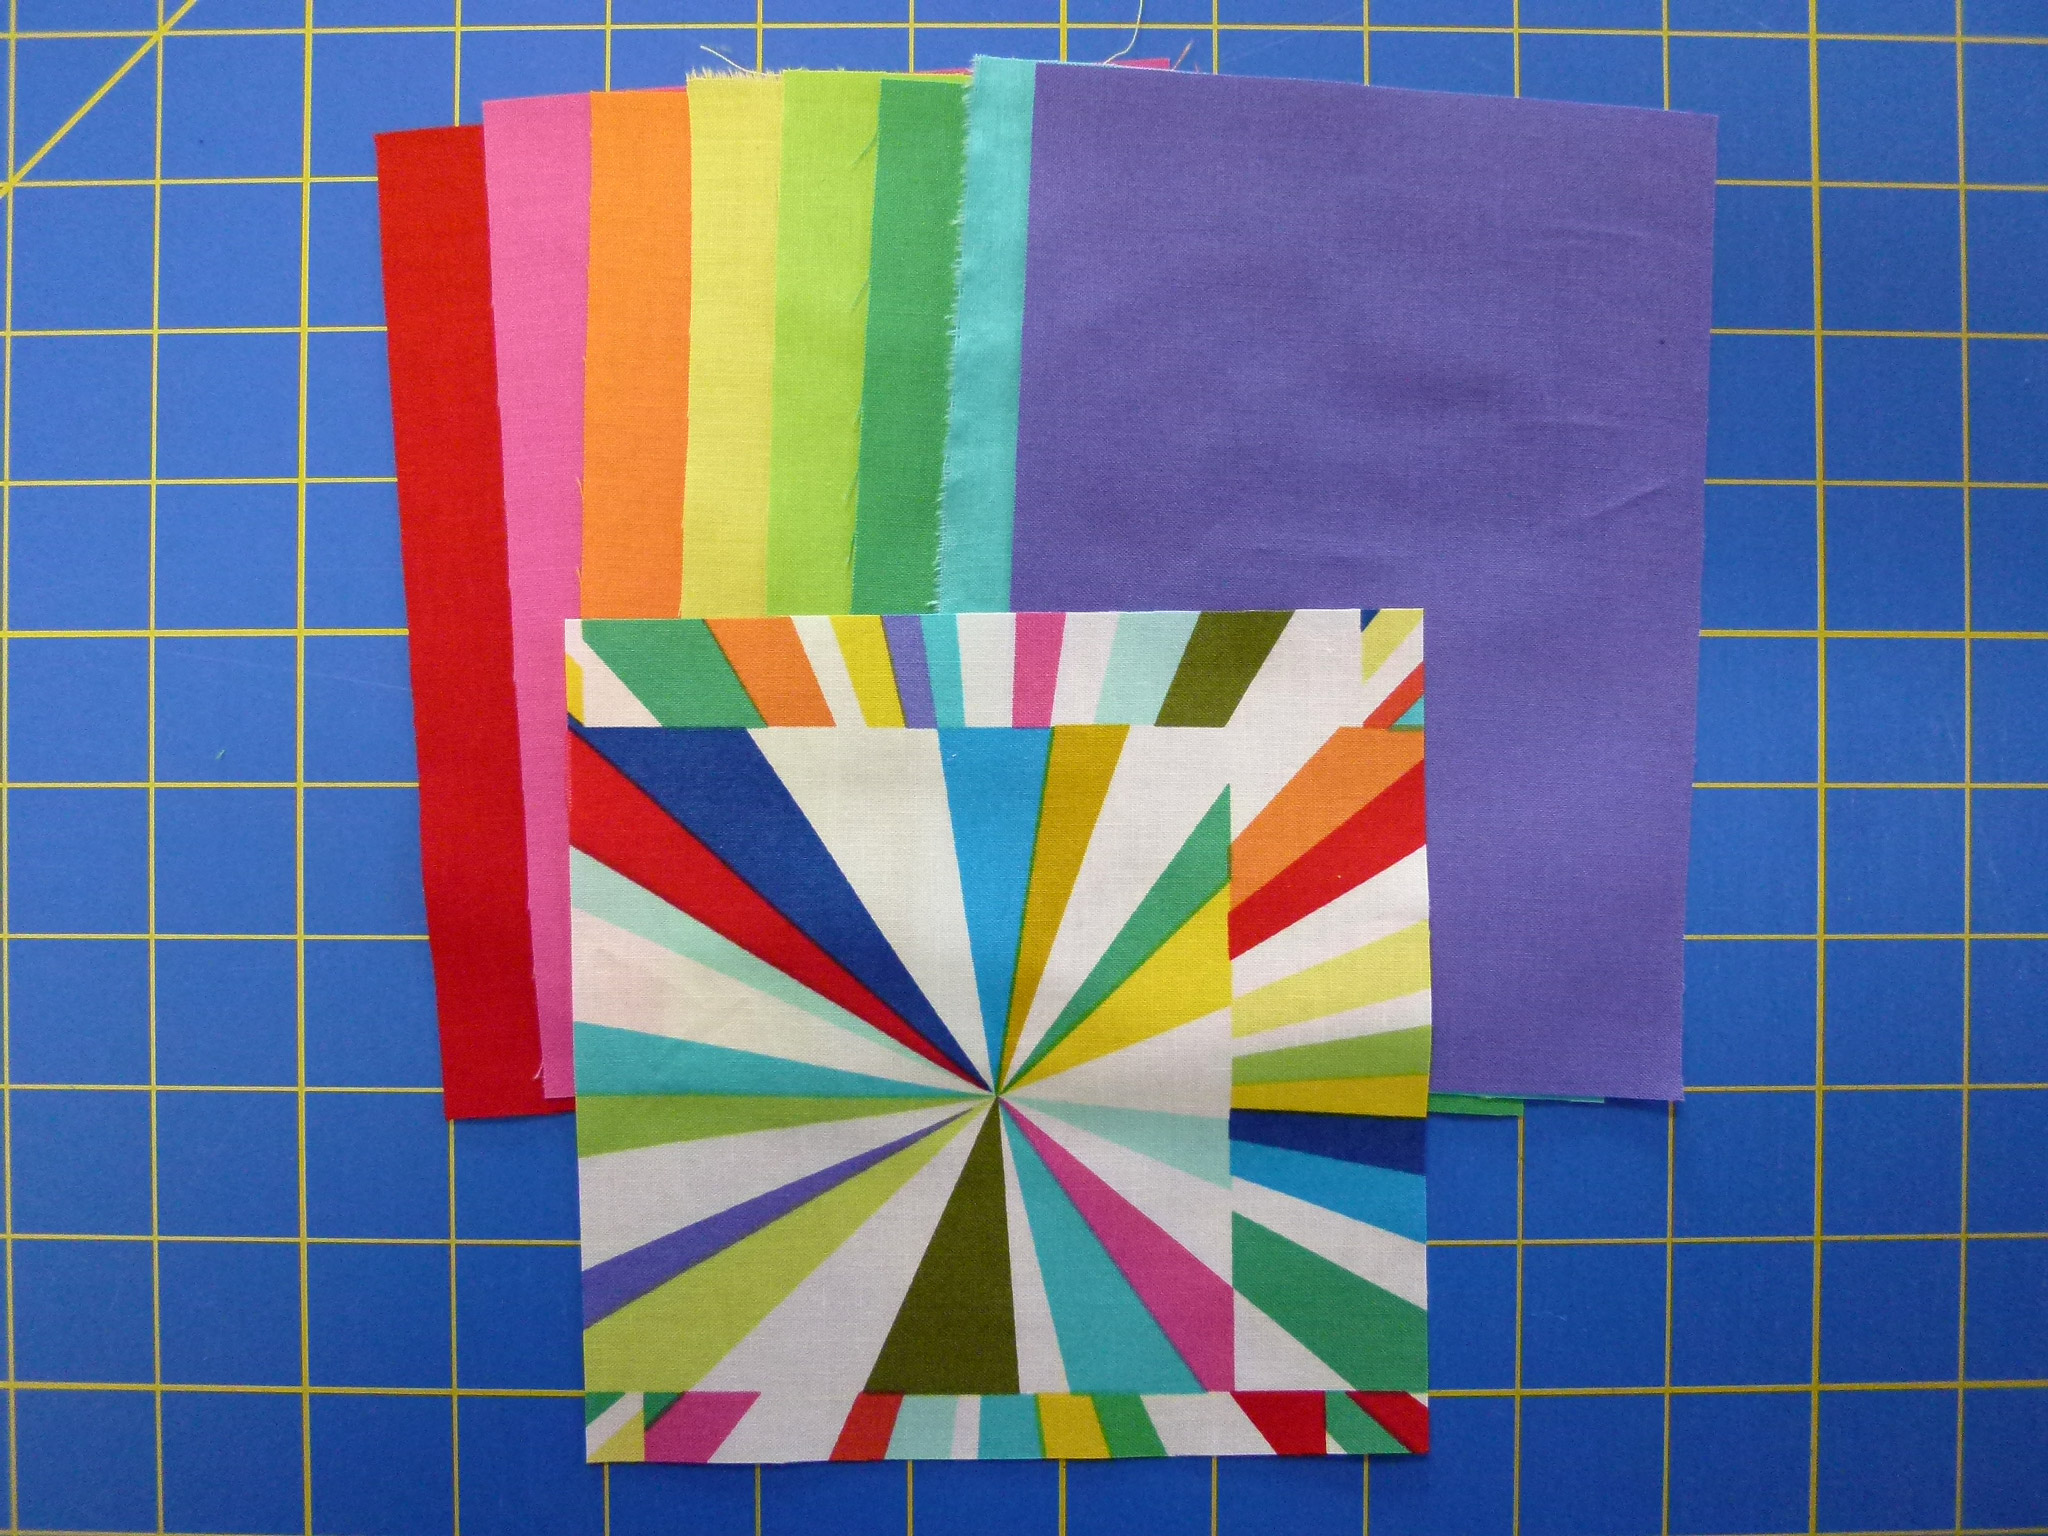
Fabrics supplied by Michael Miller Fabrics, http://www.MichaelMillerFabrics.com
Background fabric 16 1/2″ x 16 1/2″
Star center fabric 5 1/2″ x 5 1/2″
Eight solid fabrics for star rays, each 6 1/2″ x 4 1/2″
Piecing Instructions
Note: all seam allowances are 1/4″.
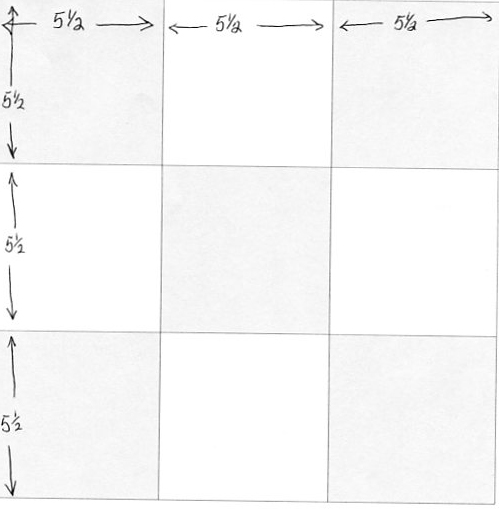
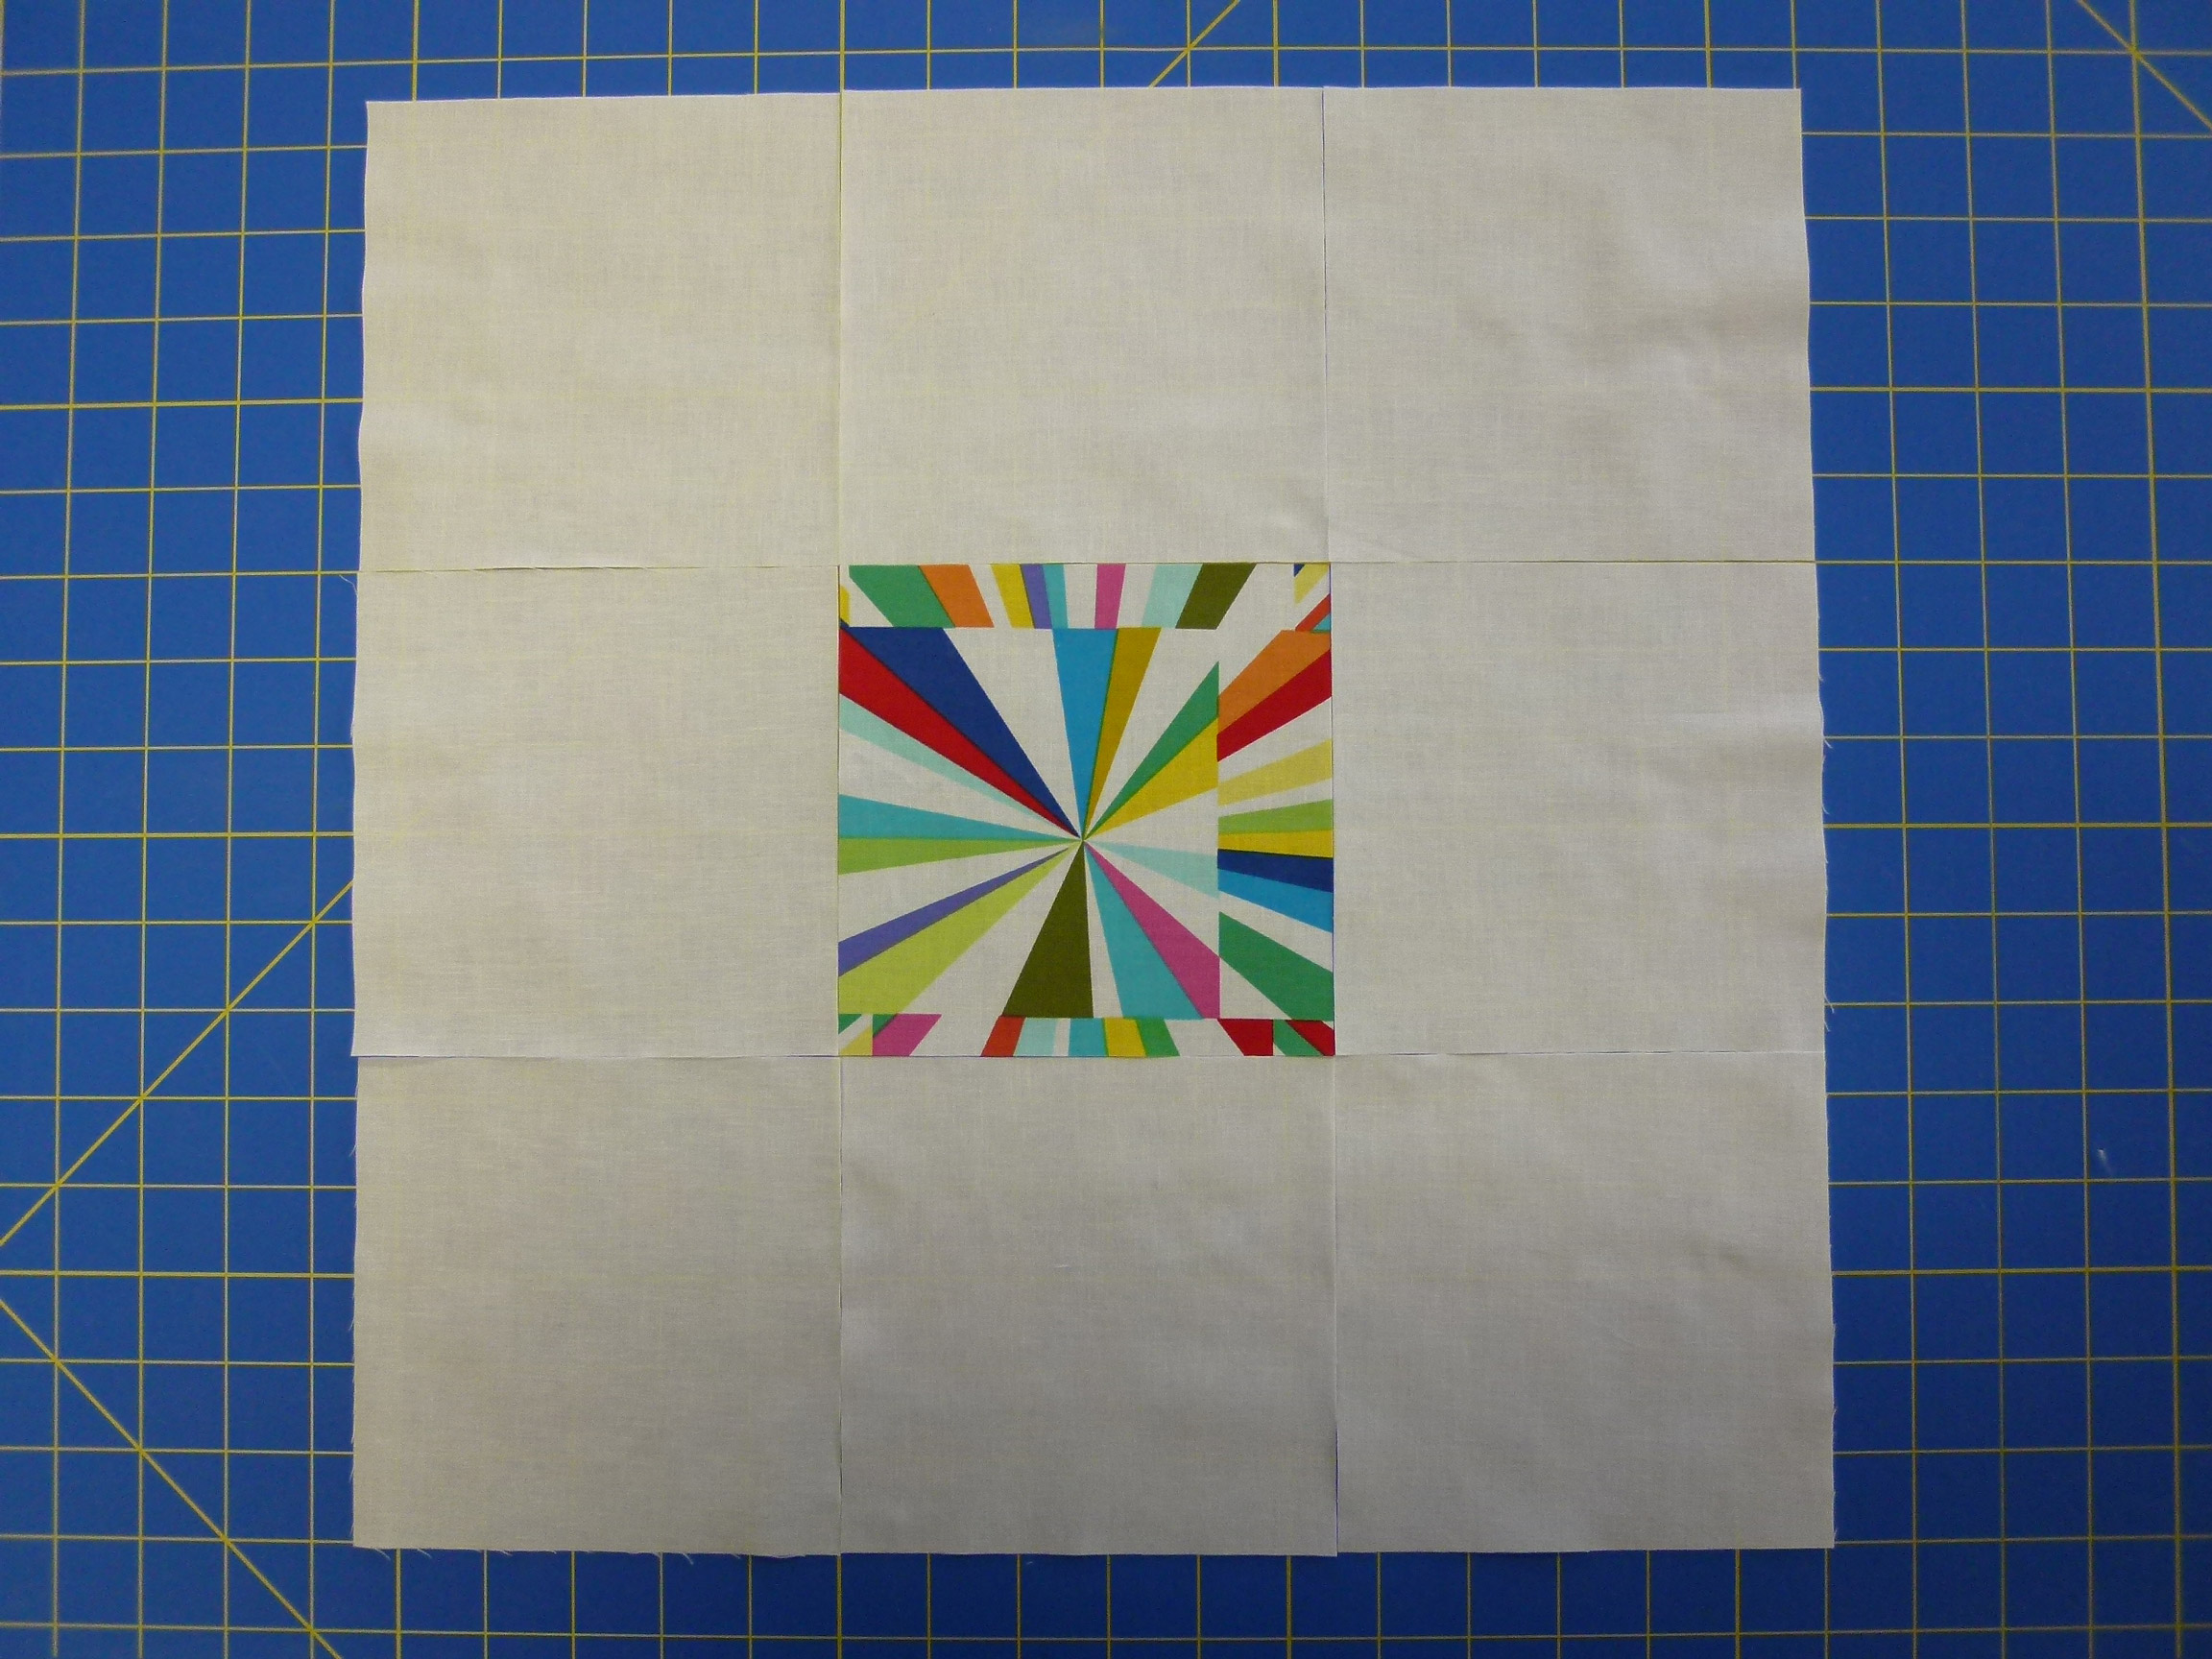
- Cut the background fabric into a 9-patch of 5-1/2 inch squares as shown

- Remove the center square and replace it with a 5-1/2 inch square of your center fabric

Center square surrounded by background squares
- For star rays, build 2 rays on each of 4 background squares as follows:
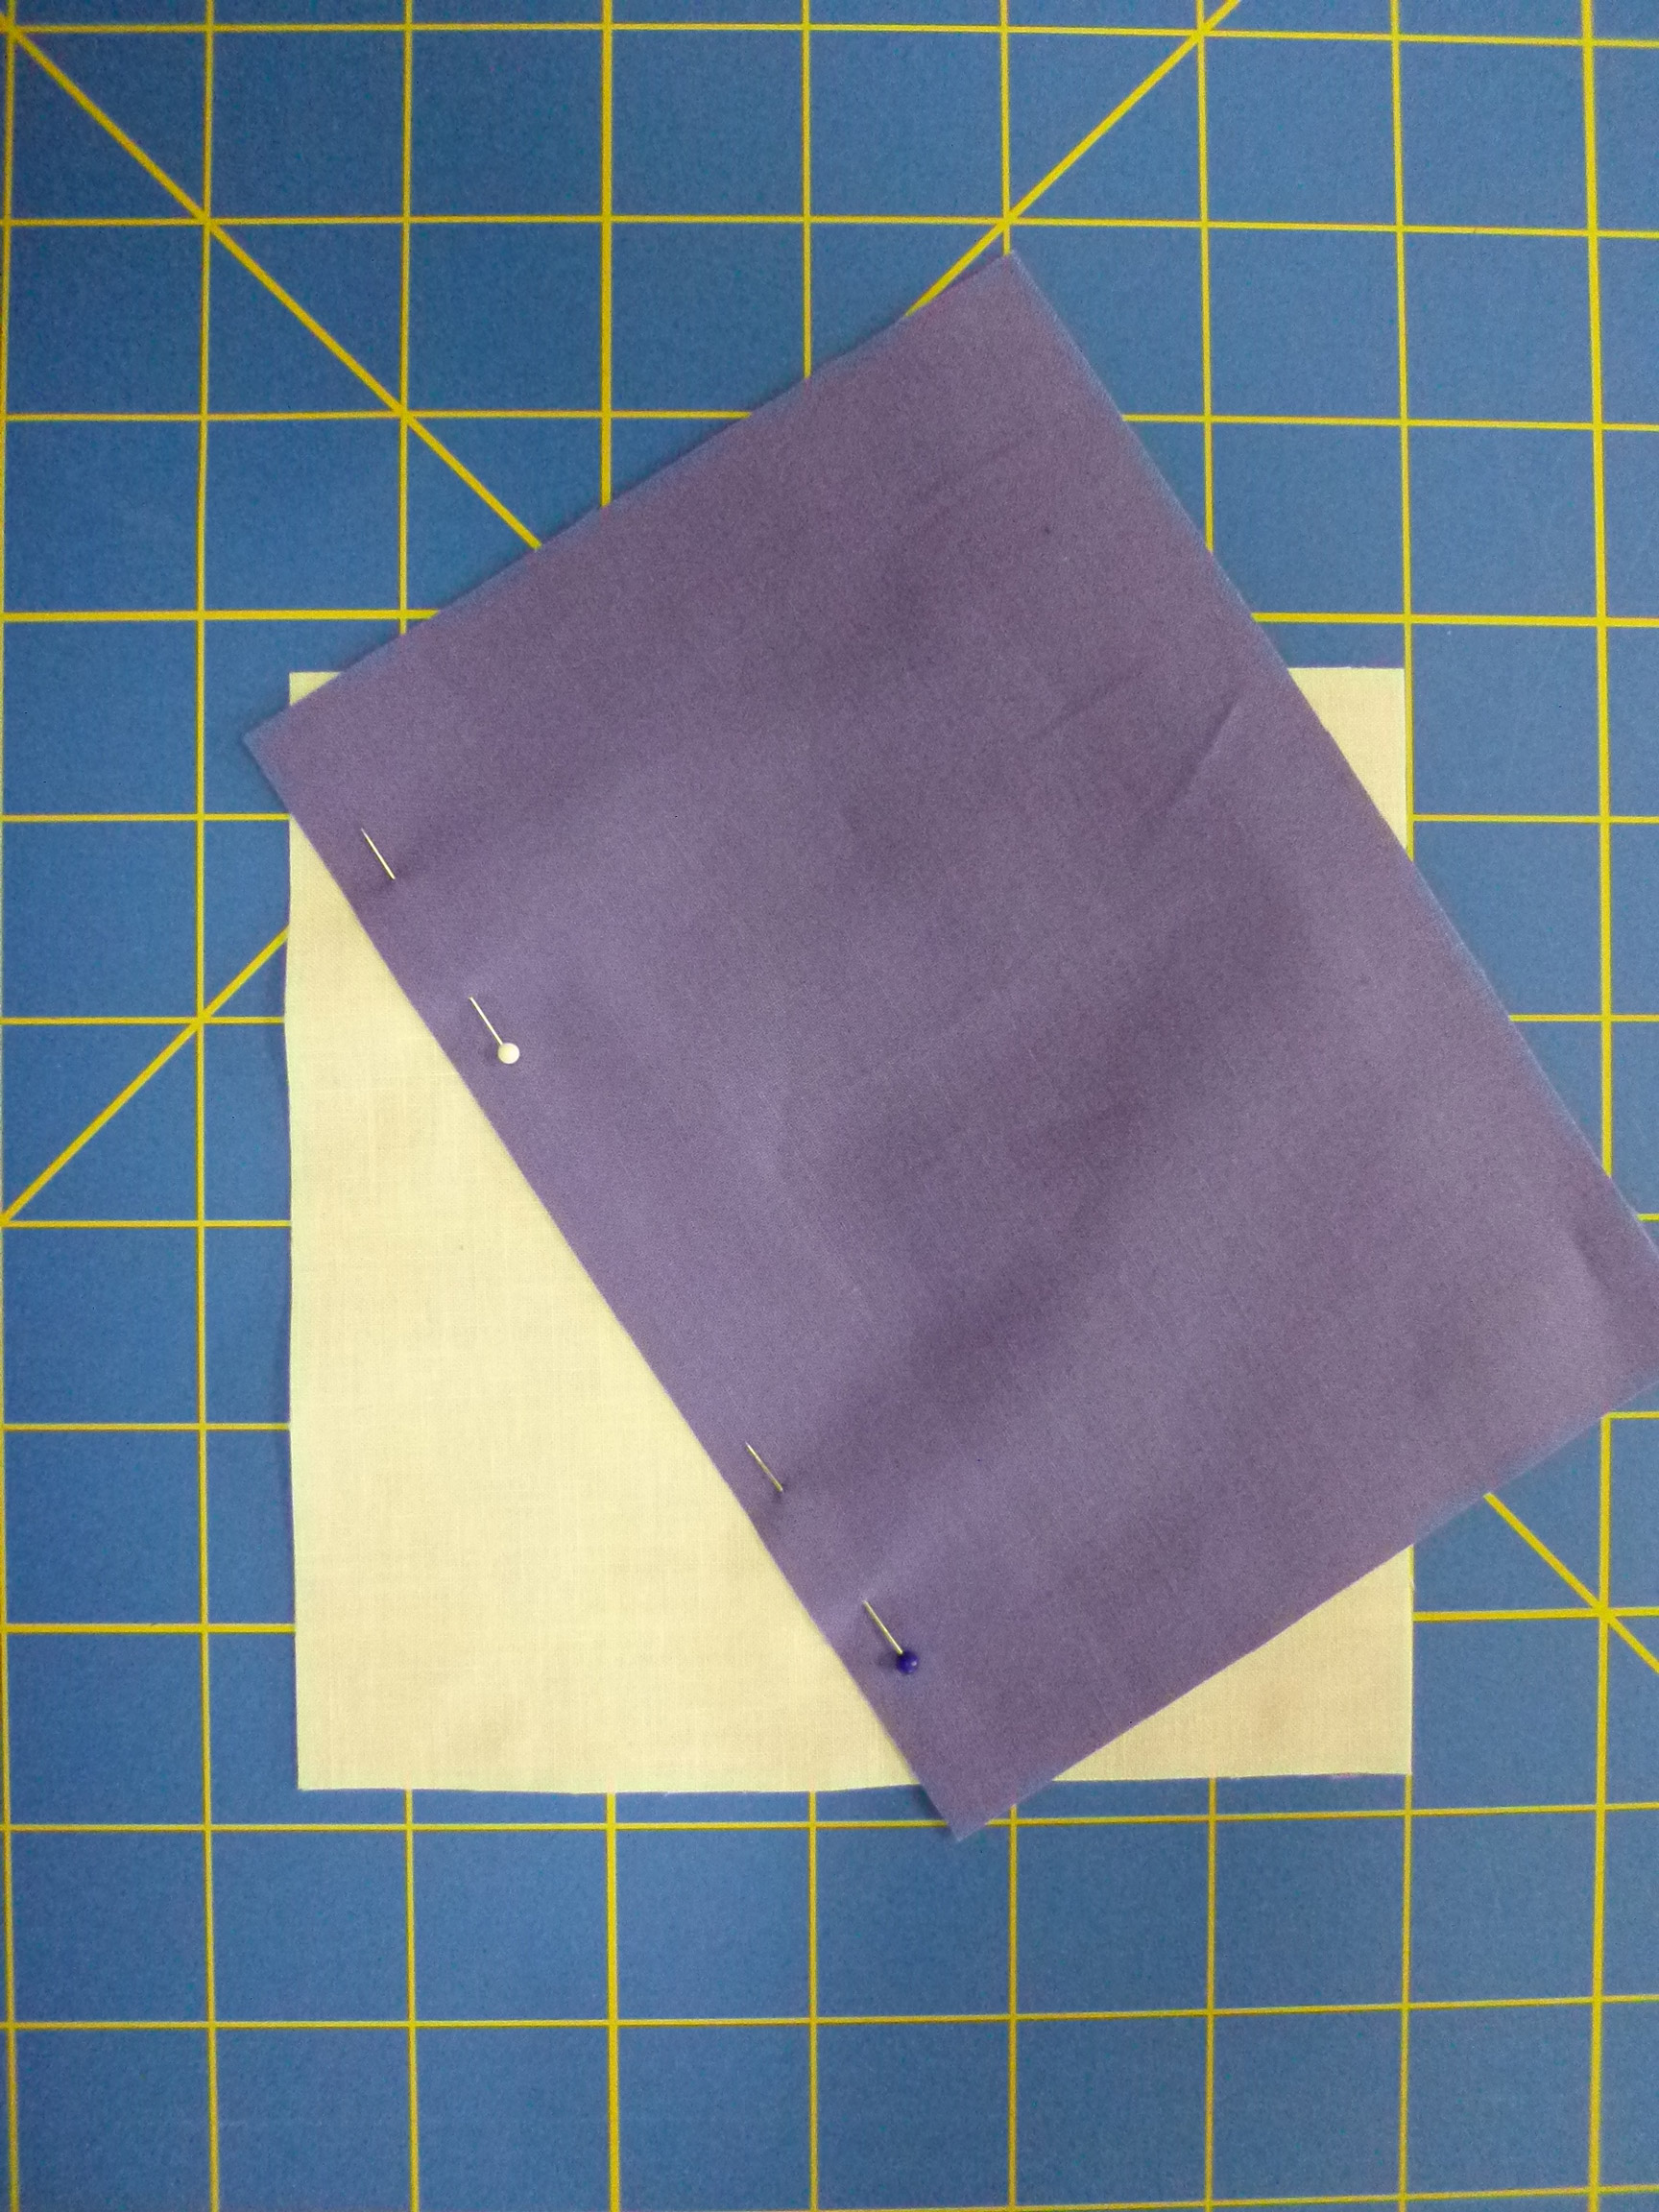
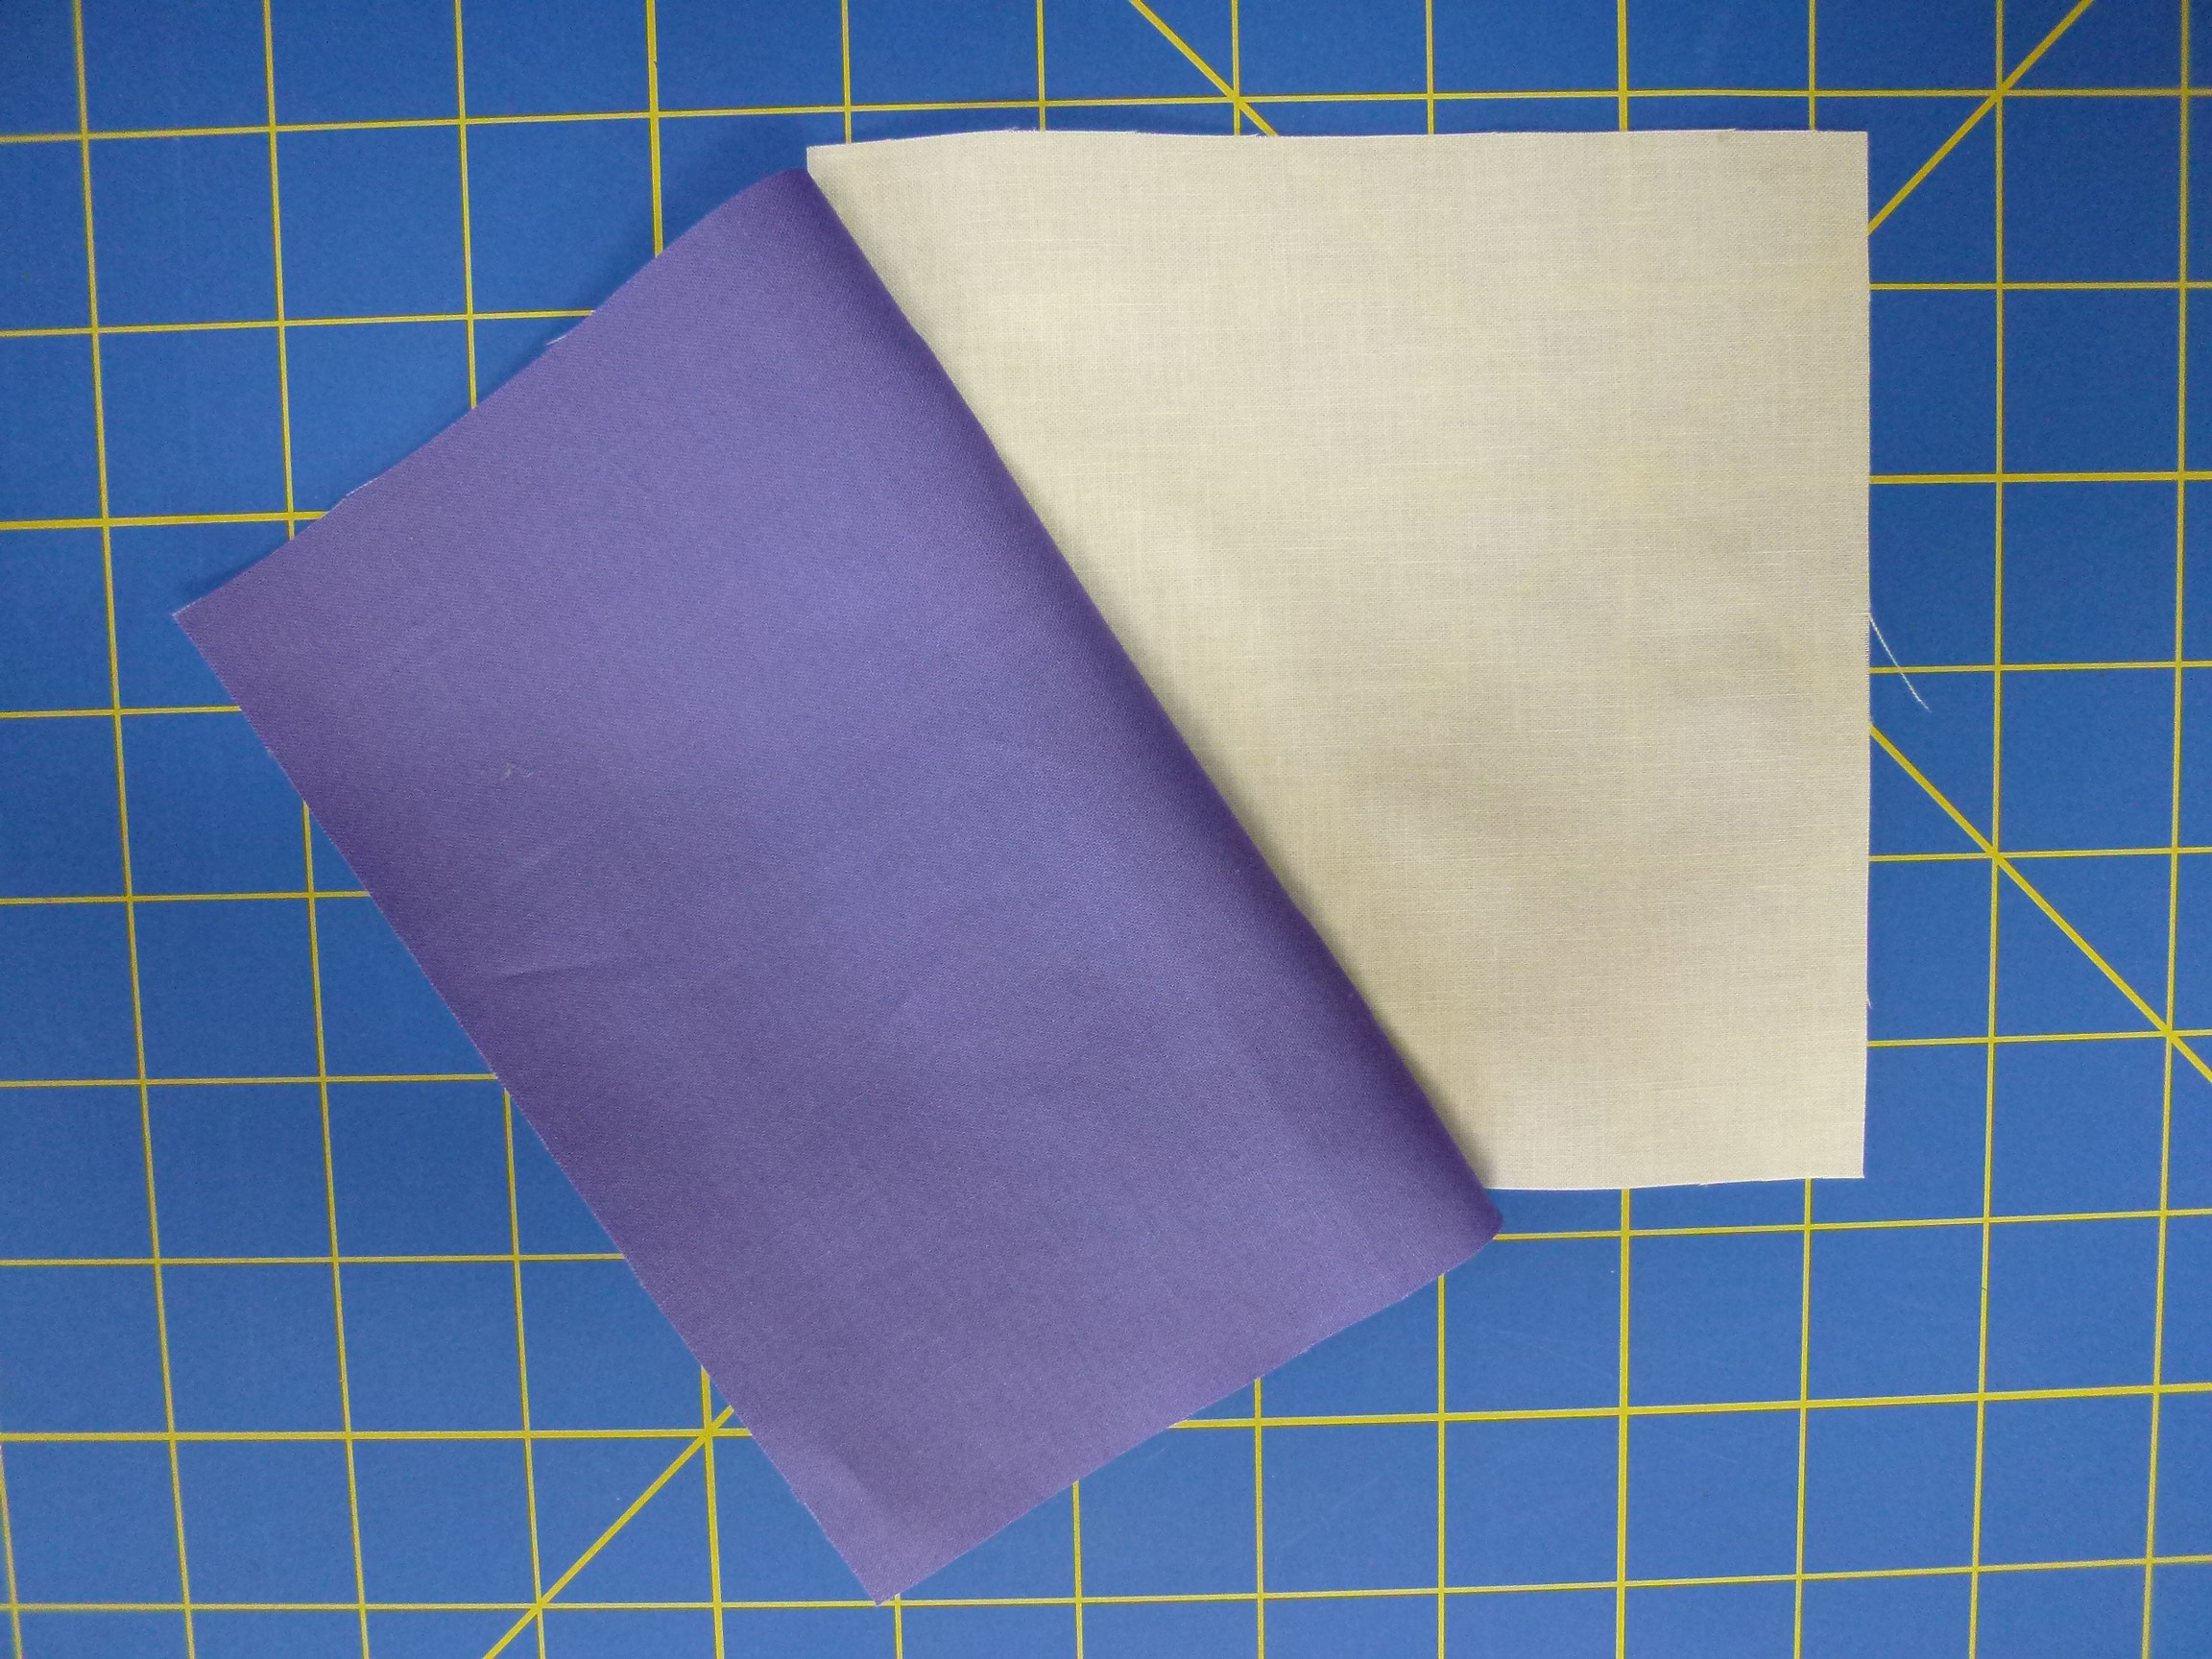
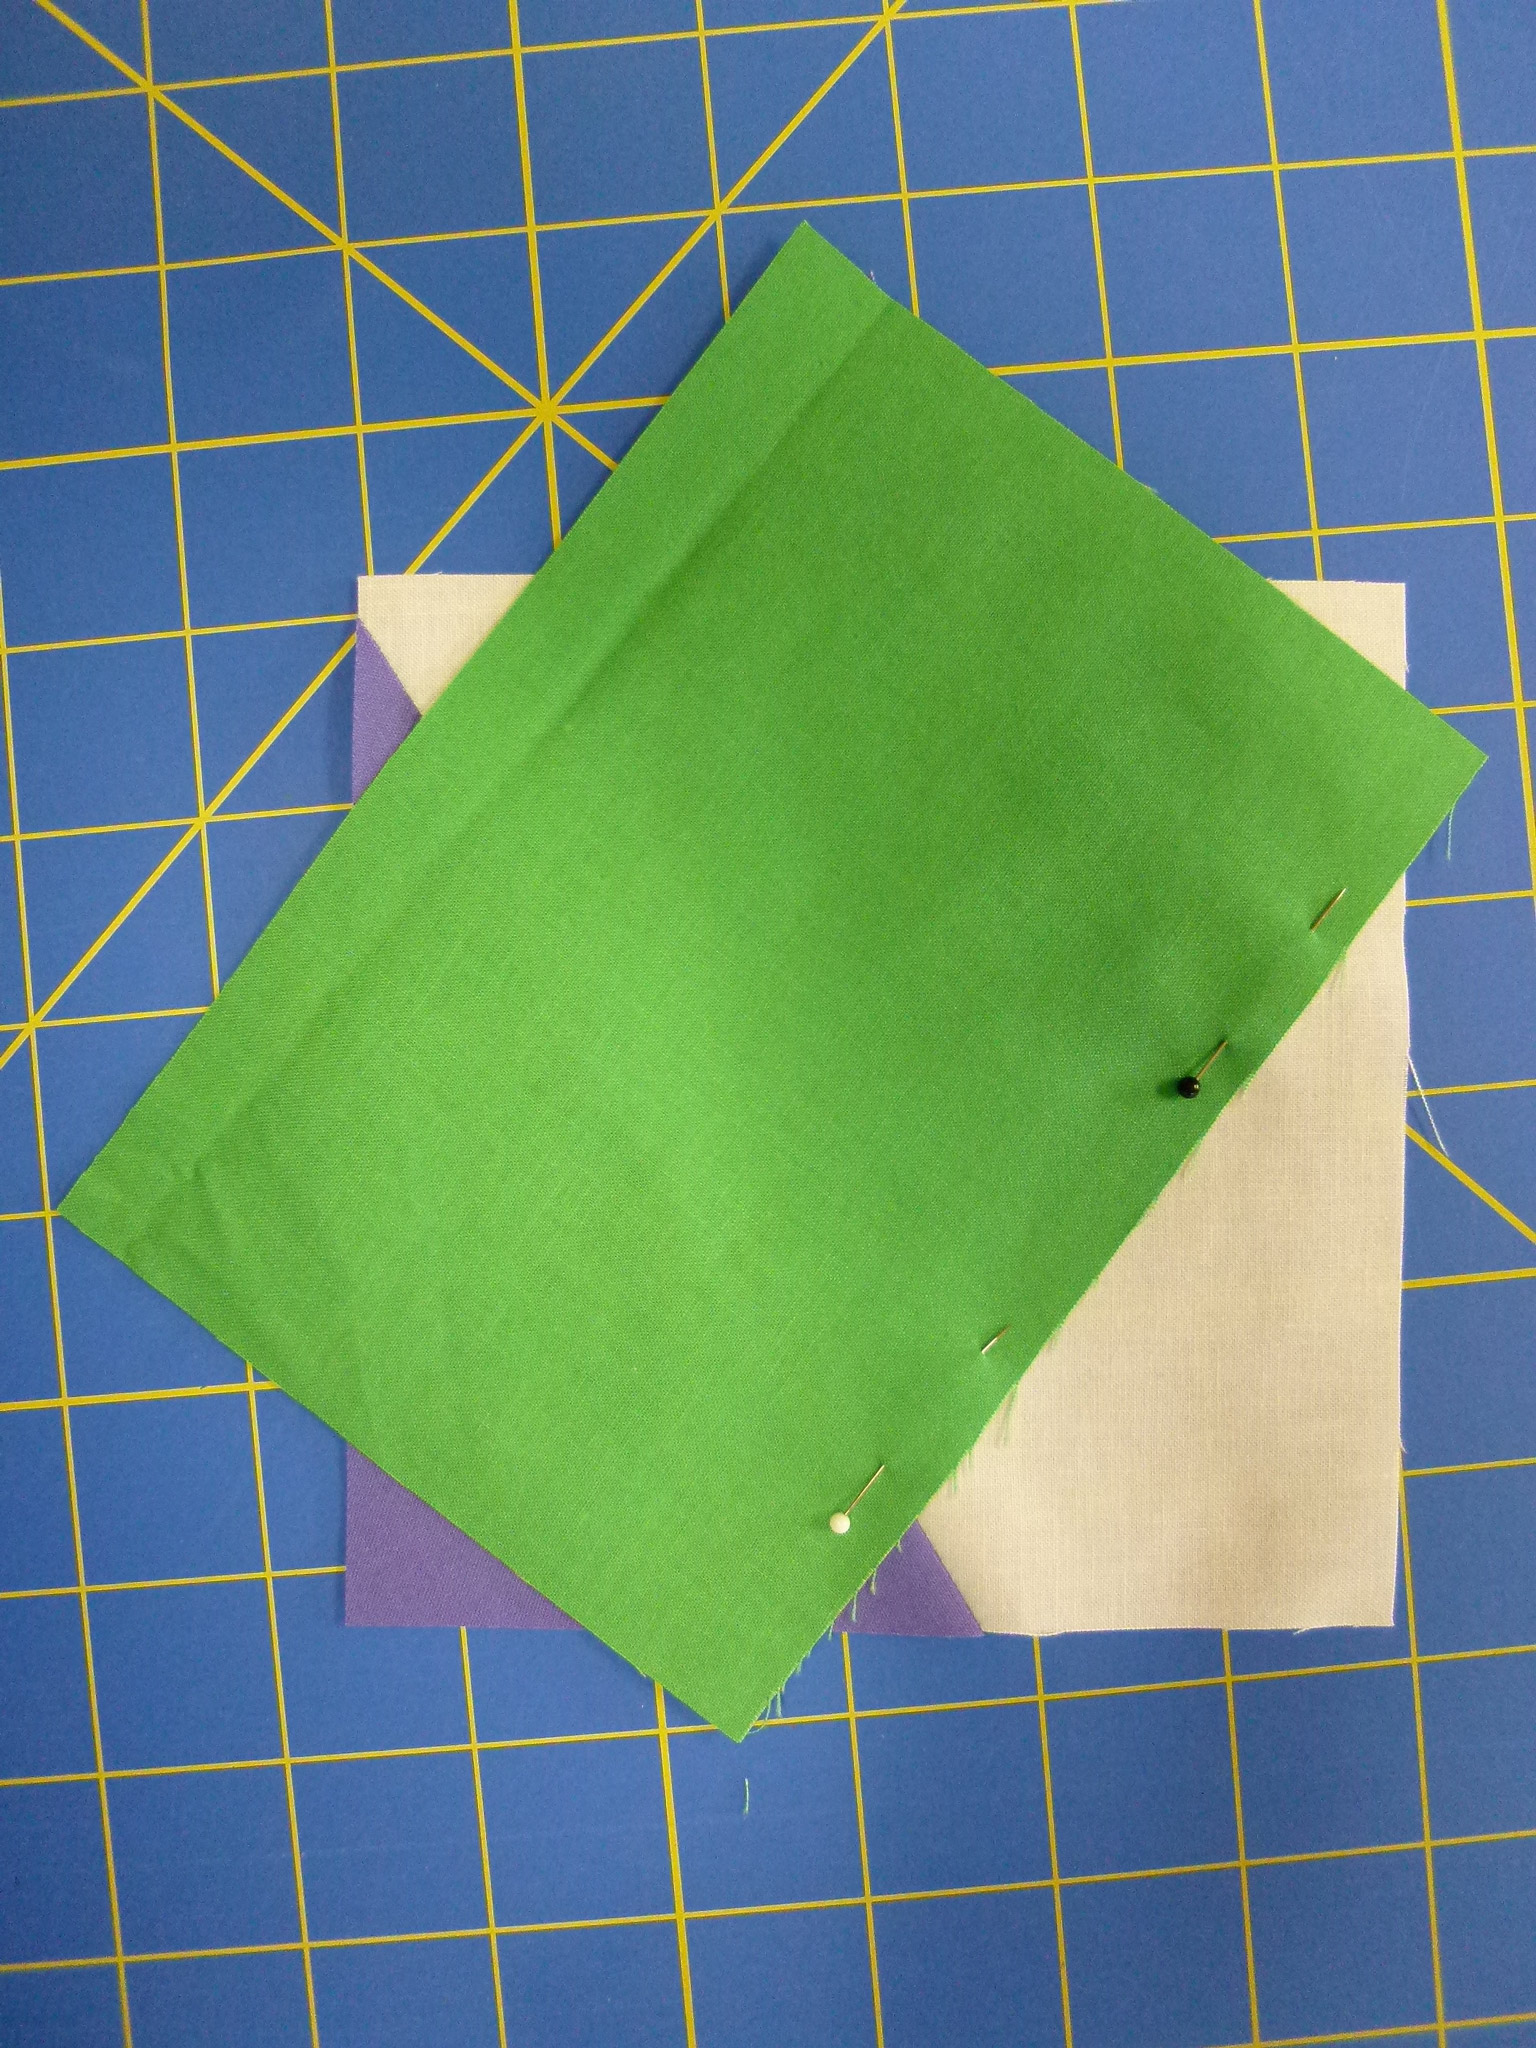
- Lay the one 6 1/2″ x 4 1/2″ piece of solid fabric on a 5 1/2″ x 5 1/2″ square of the background as shown. Place pins approximately where the 1/4″ seam will be along the long edge of the ray and turn along the pins to check placement.
 Adjust if needed to make a star ray that suits you and to completely cover the foundation piece where the star ray will be. Note that you will need to have your ray end at least 1/4″ from the edge if you want to see the point. However, if you want blunt points there’s nothing wrong with that! Here’s an example:
- Reposition the pins and stitch 1/4″ from the edge of the ray.

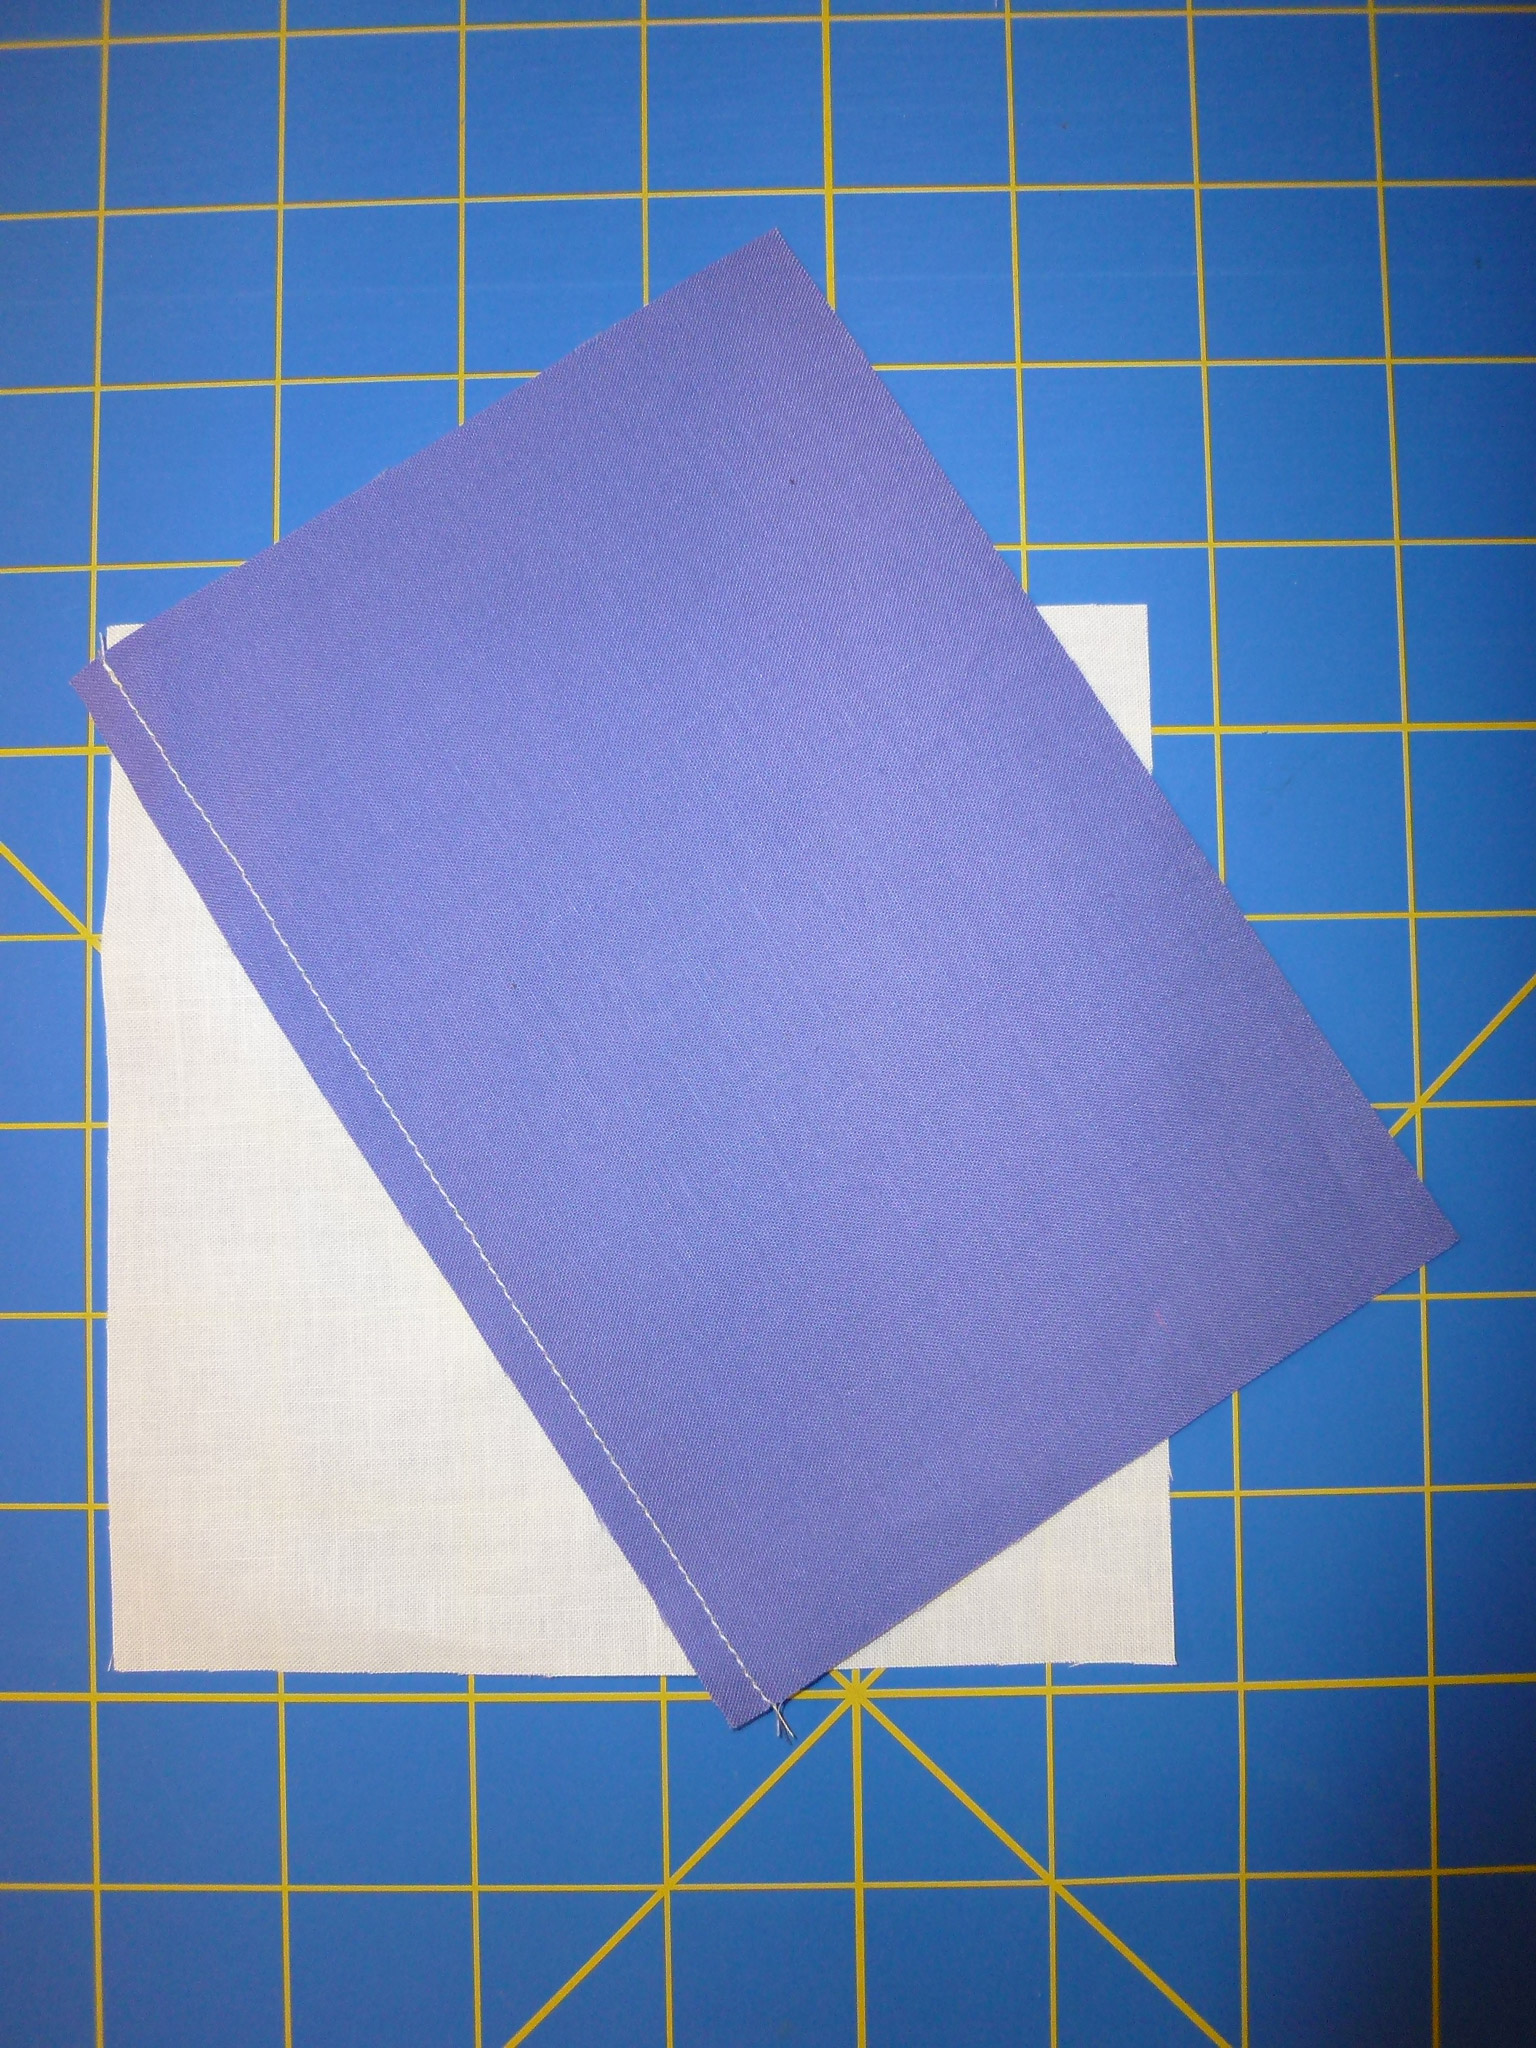
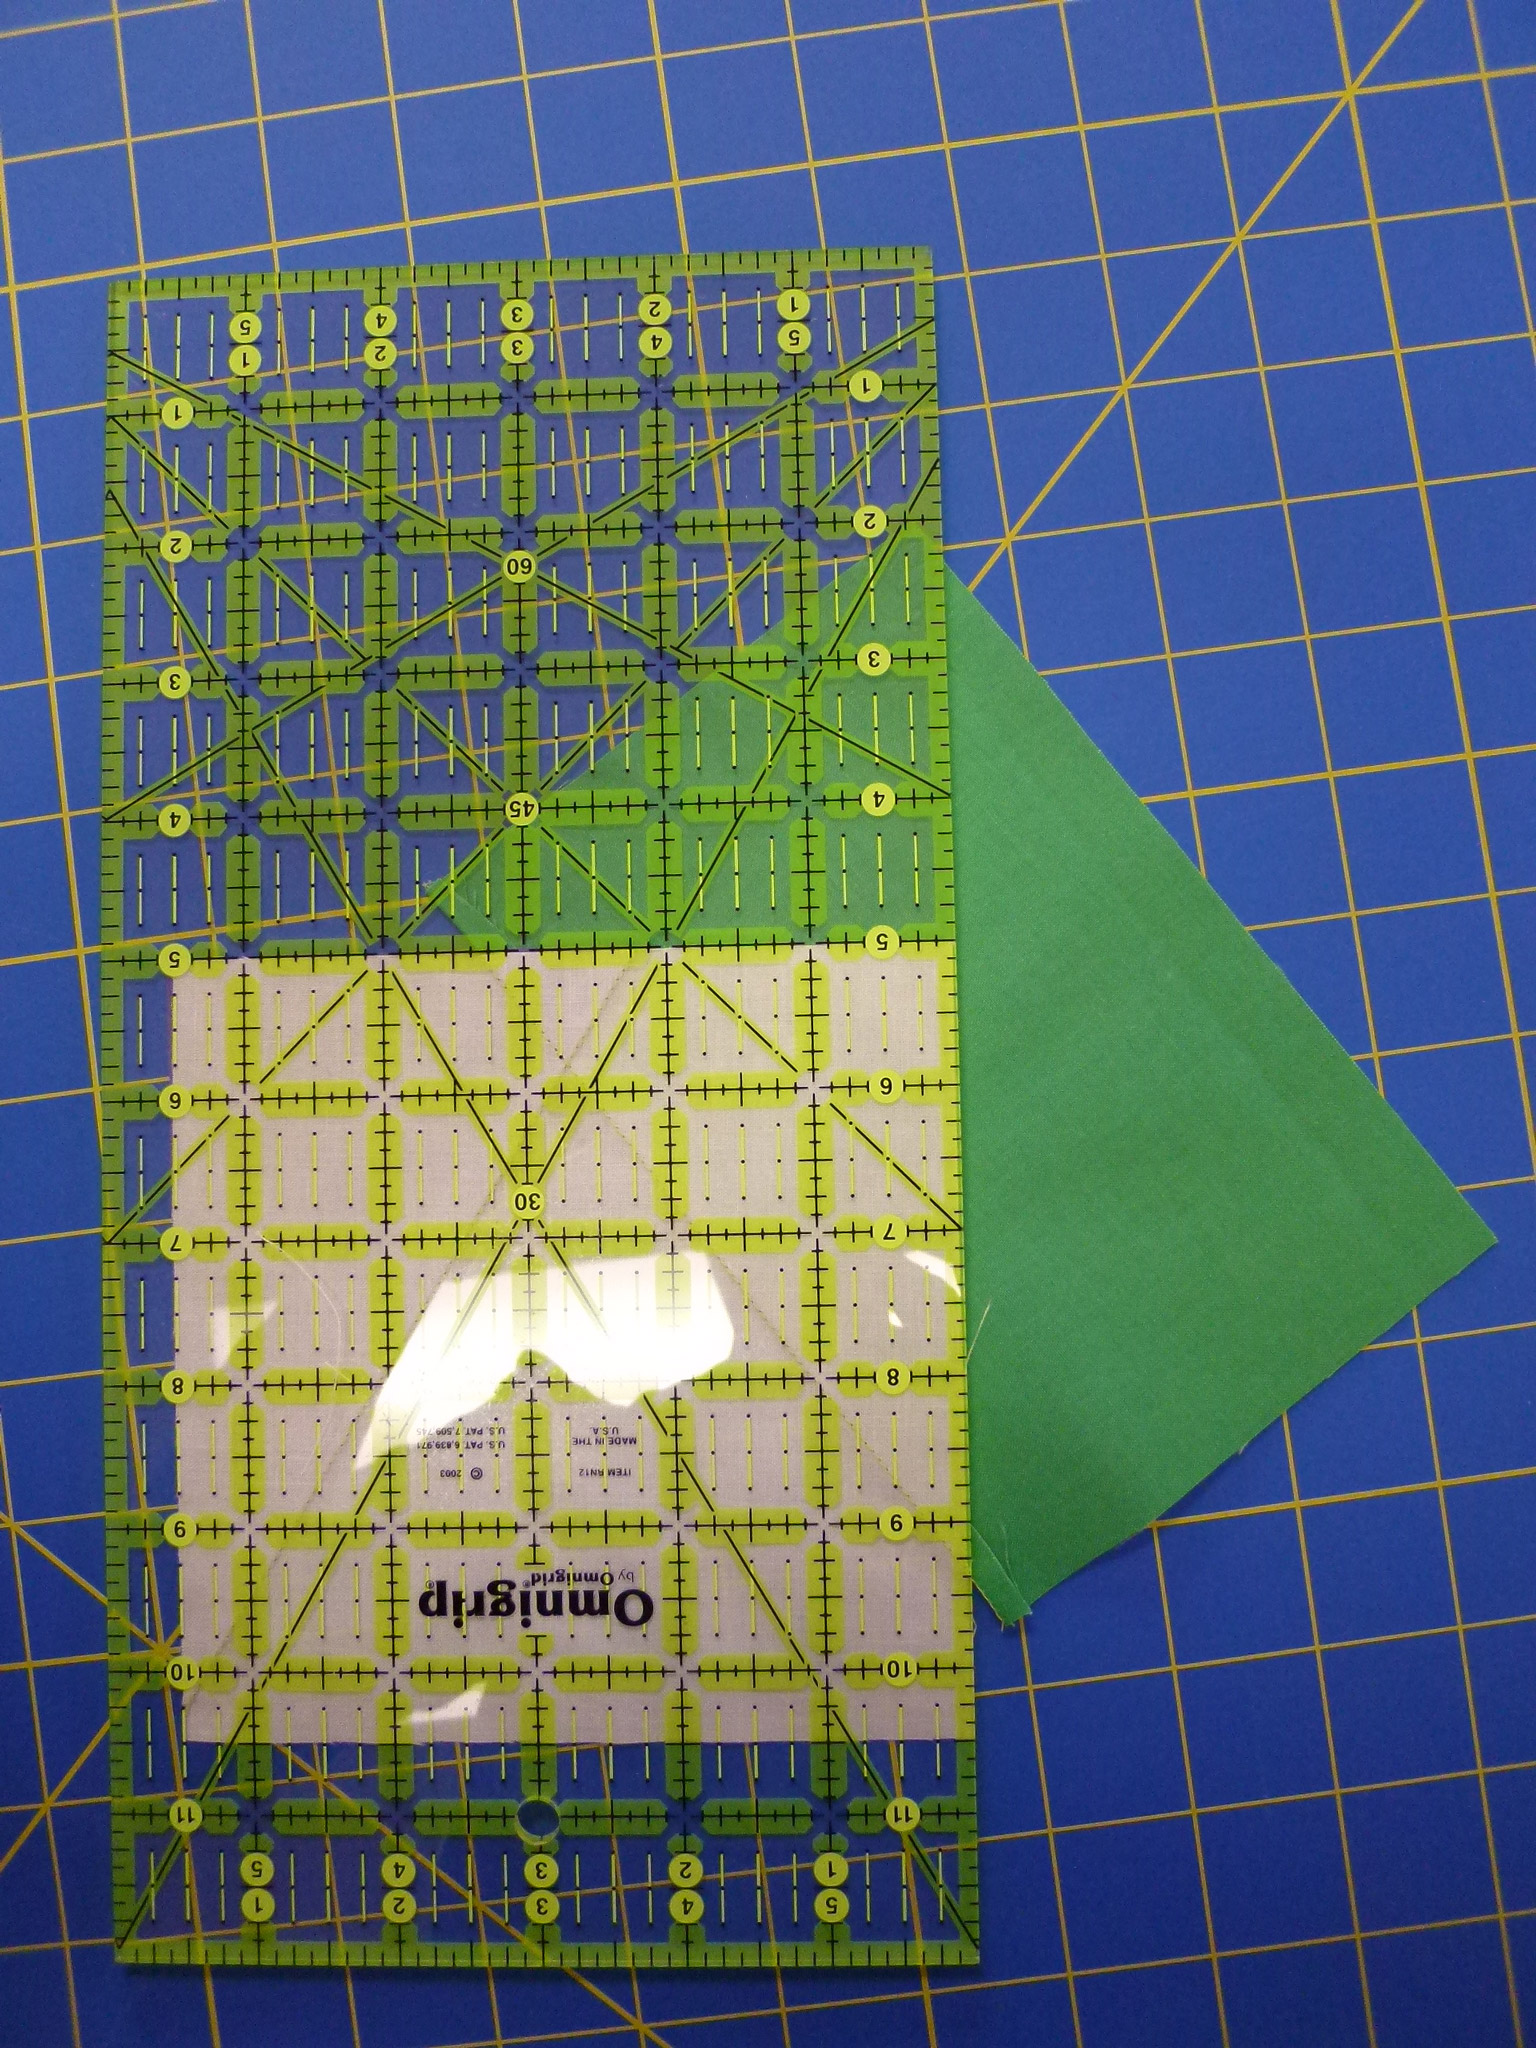
- Remove pins, turn the ray back into place, and press. Trim the side and bottom edges of the ray even with the foundation fabric. Do not remove the foundation fabric under the ray, as it helps keep everything square and stable.

- Place the fabric for the second ray, pin and test position, then stitch, press, and trim as for the first ray.
 Note that the rays need to overlap at least 1/4″ away from the raw edge where this section will join the star center. It’s fine to overlap more than that.

Press the second ray and trim to match the background block.
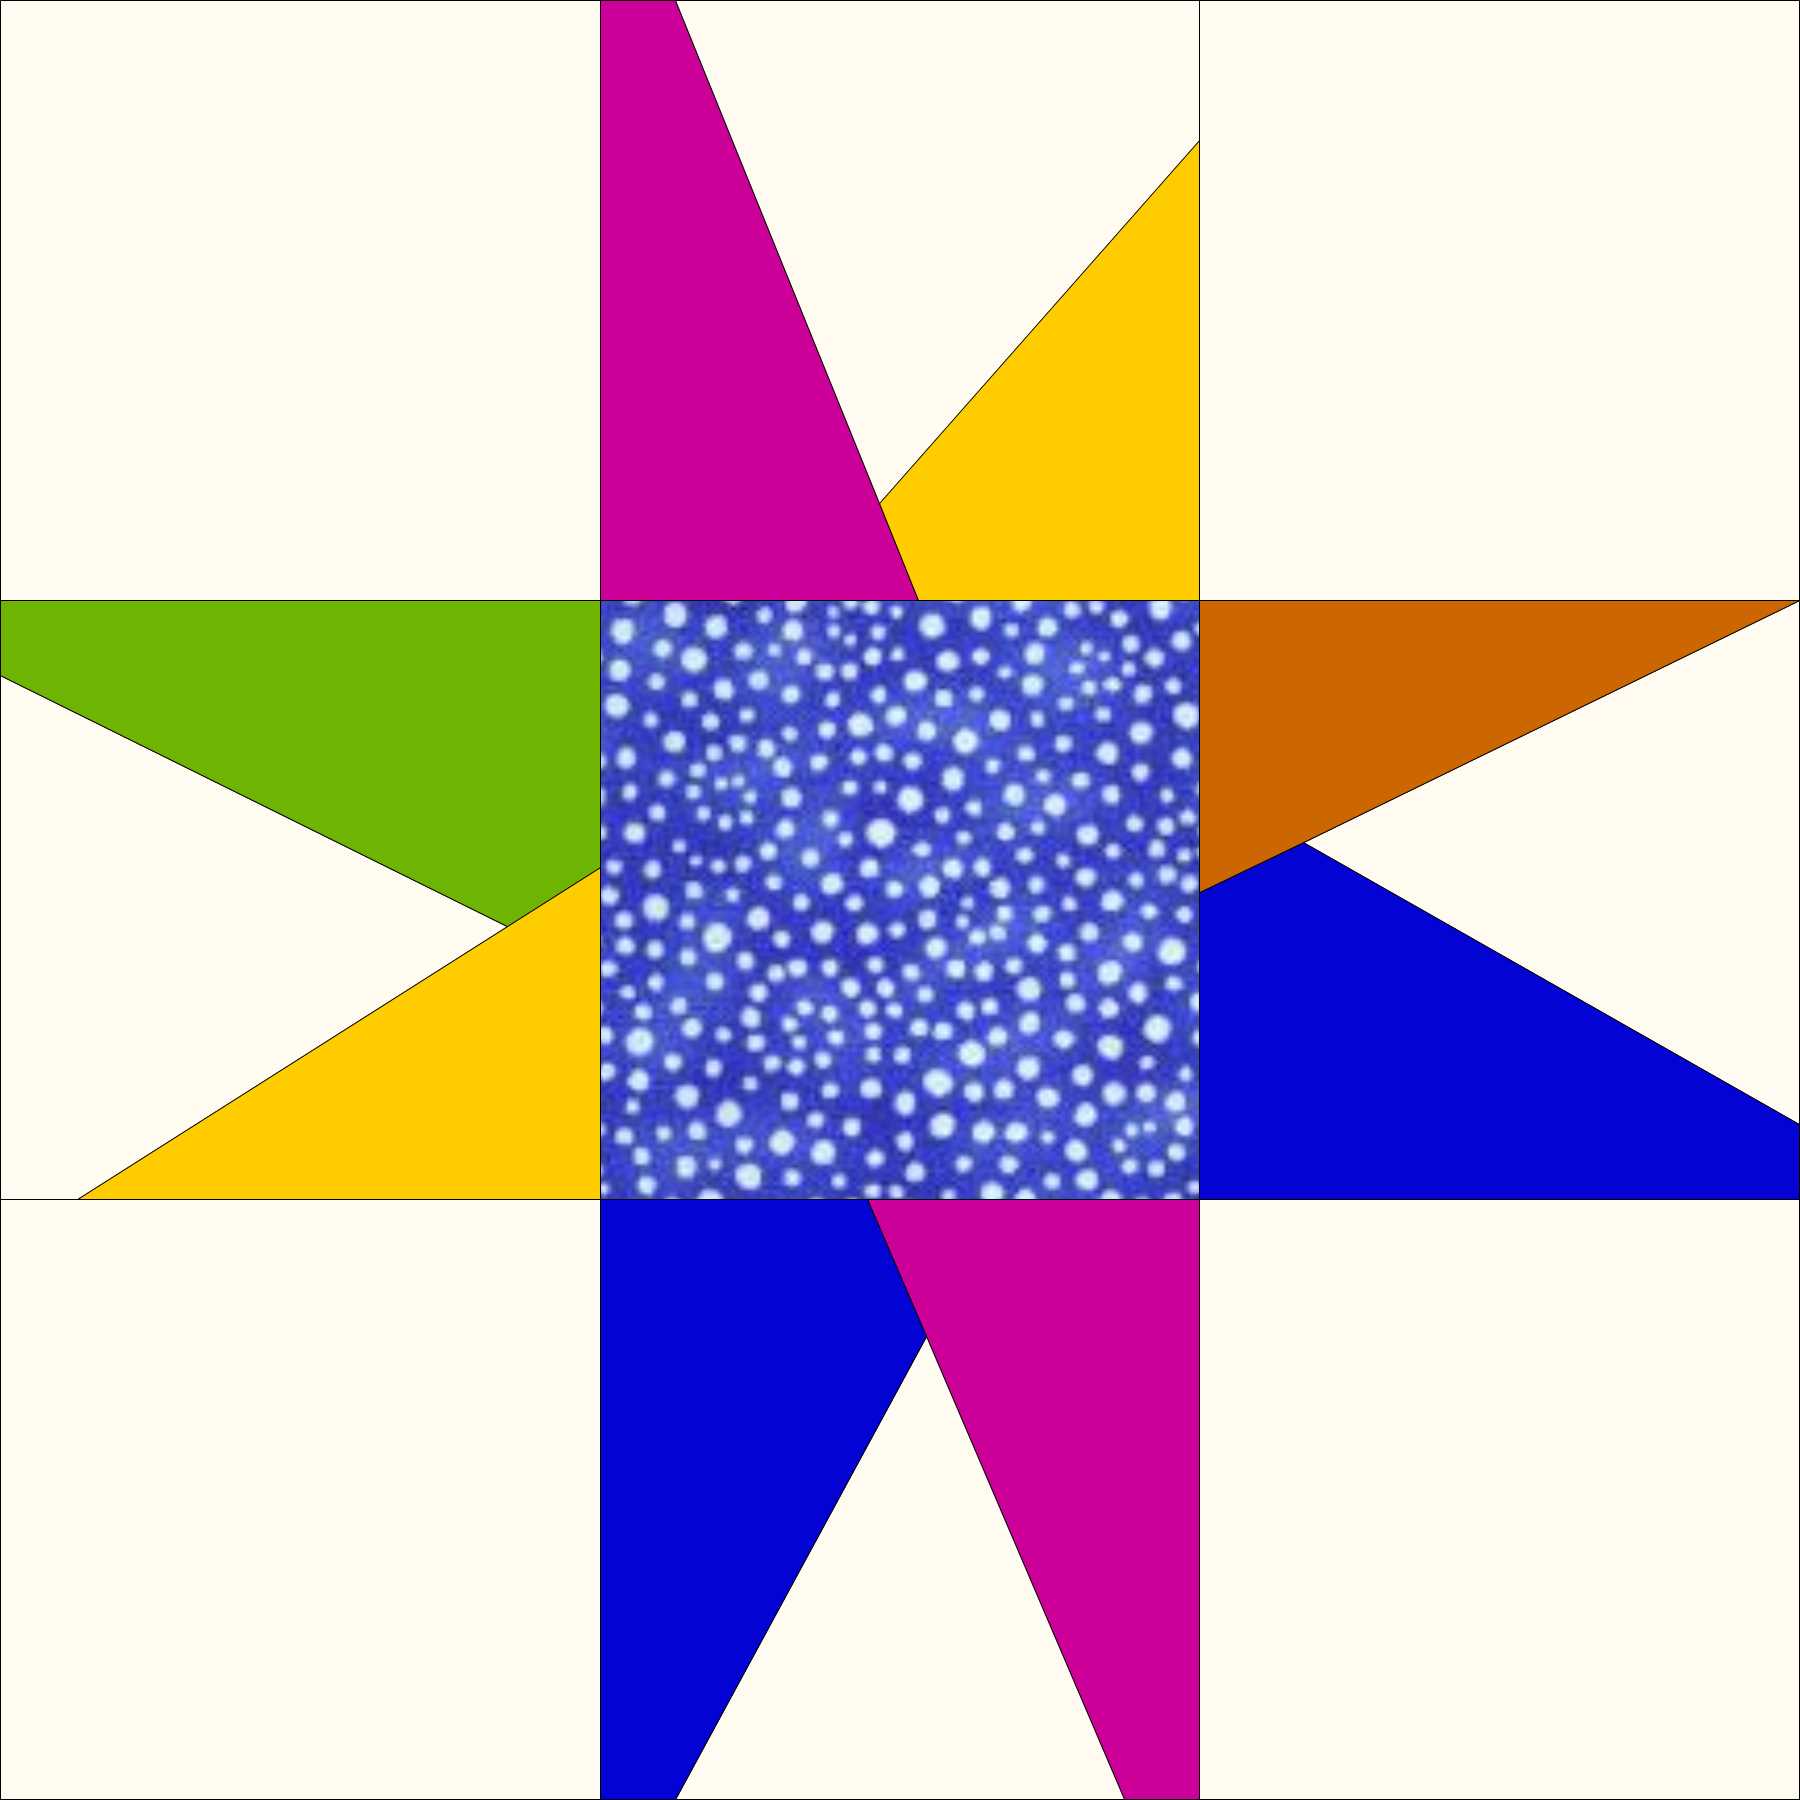
- After building 4 sets of 2 star rays, re-assemble the 9-patch with the plain corners, printed center, and colored rays.

This block finishes 14-1/2 x 14 1/2 inches

