Traditionally, quilts were made from whatever scrap fabric was available. I recognize some of my Mother’s dresses in my Grandmother’s quilts and know that Mother gave the scraps to Granny after making the dress. Another traditional source of fabric is old clothes. Most still have quite a bit of useful fabric even if the cuffs are too tattered to wear.
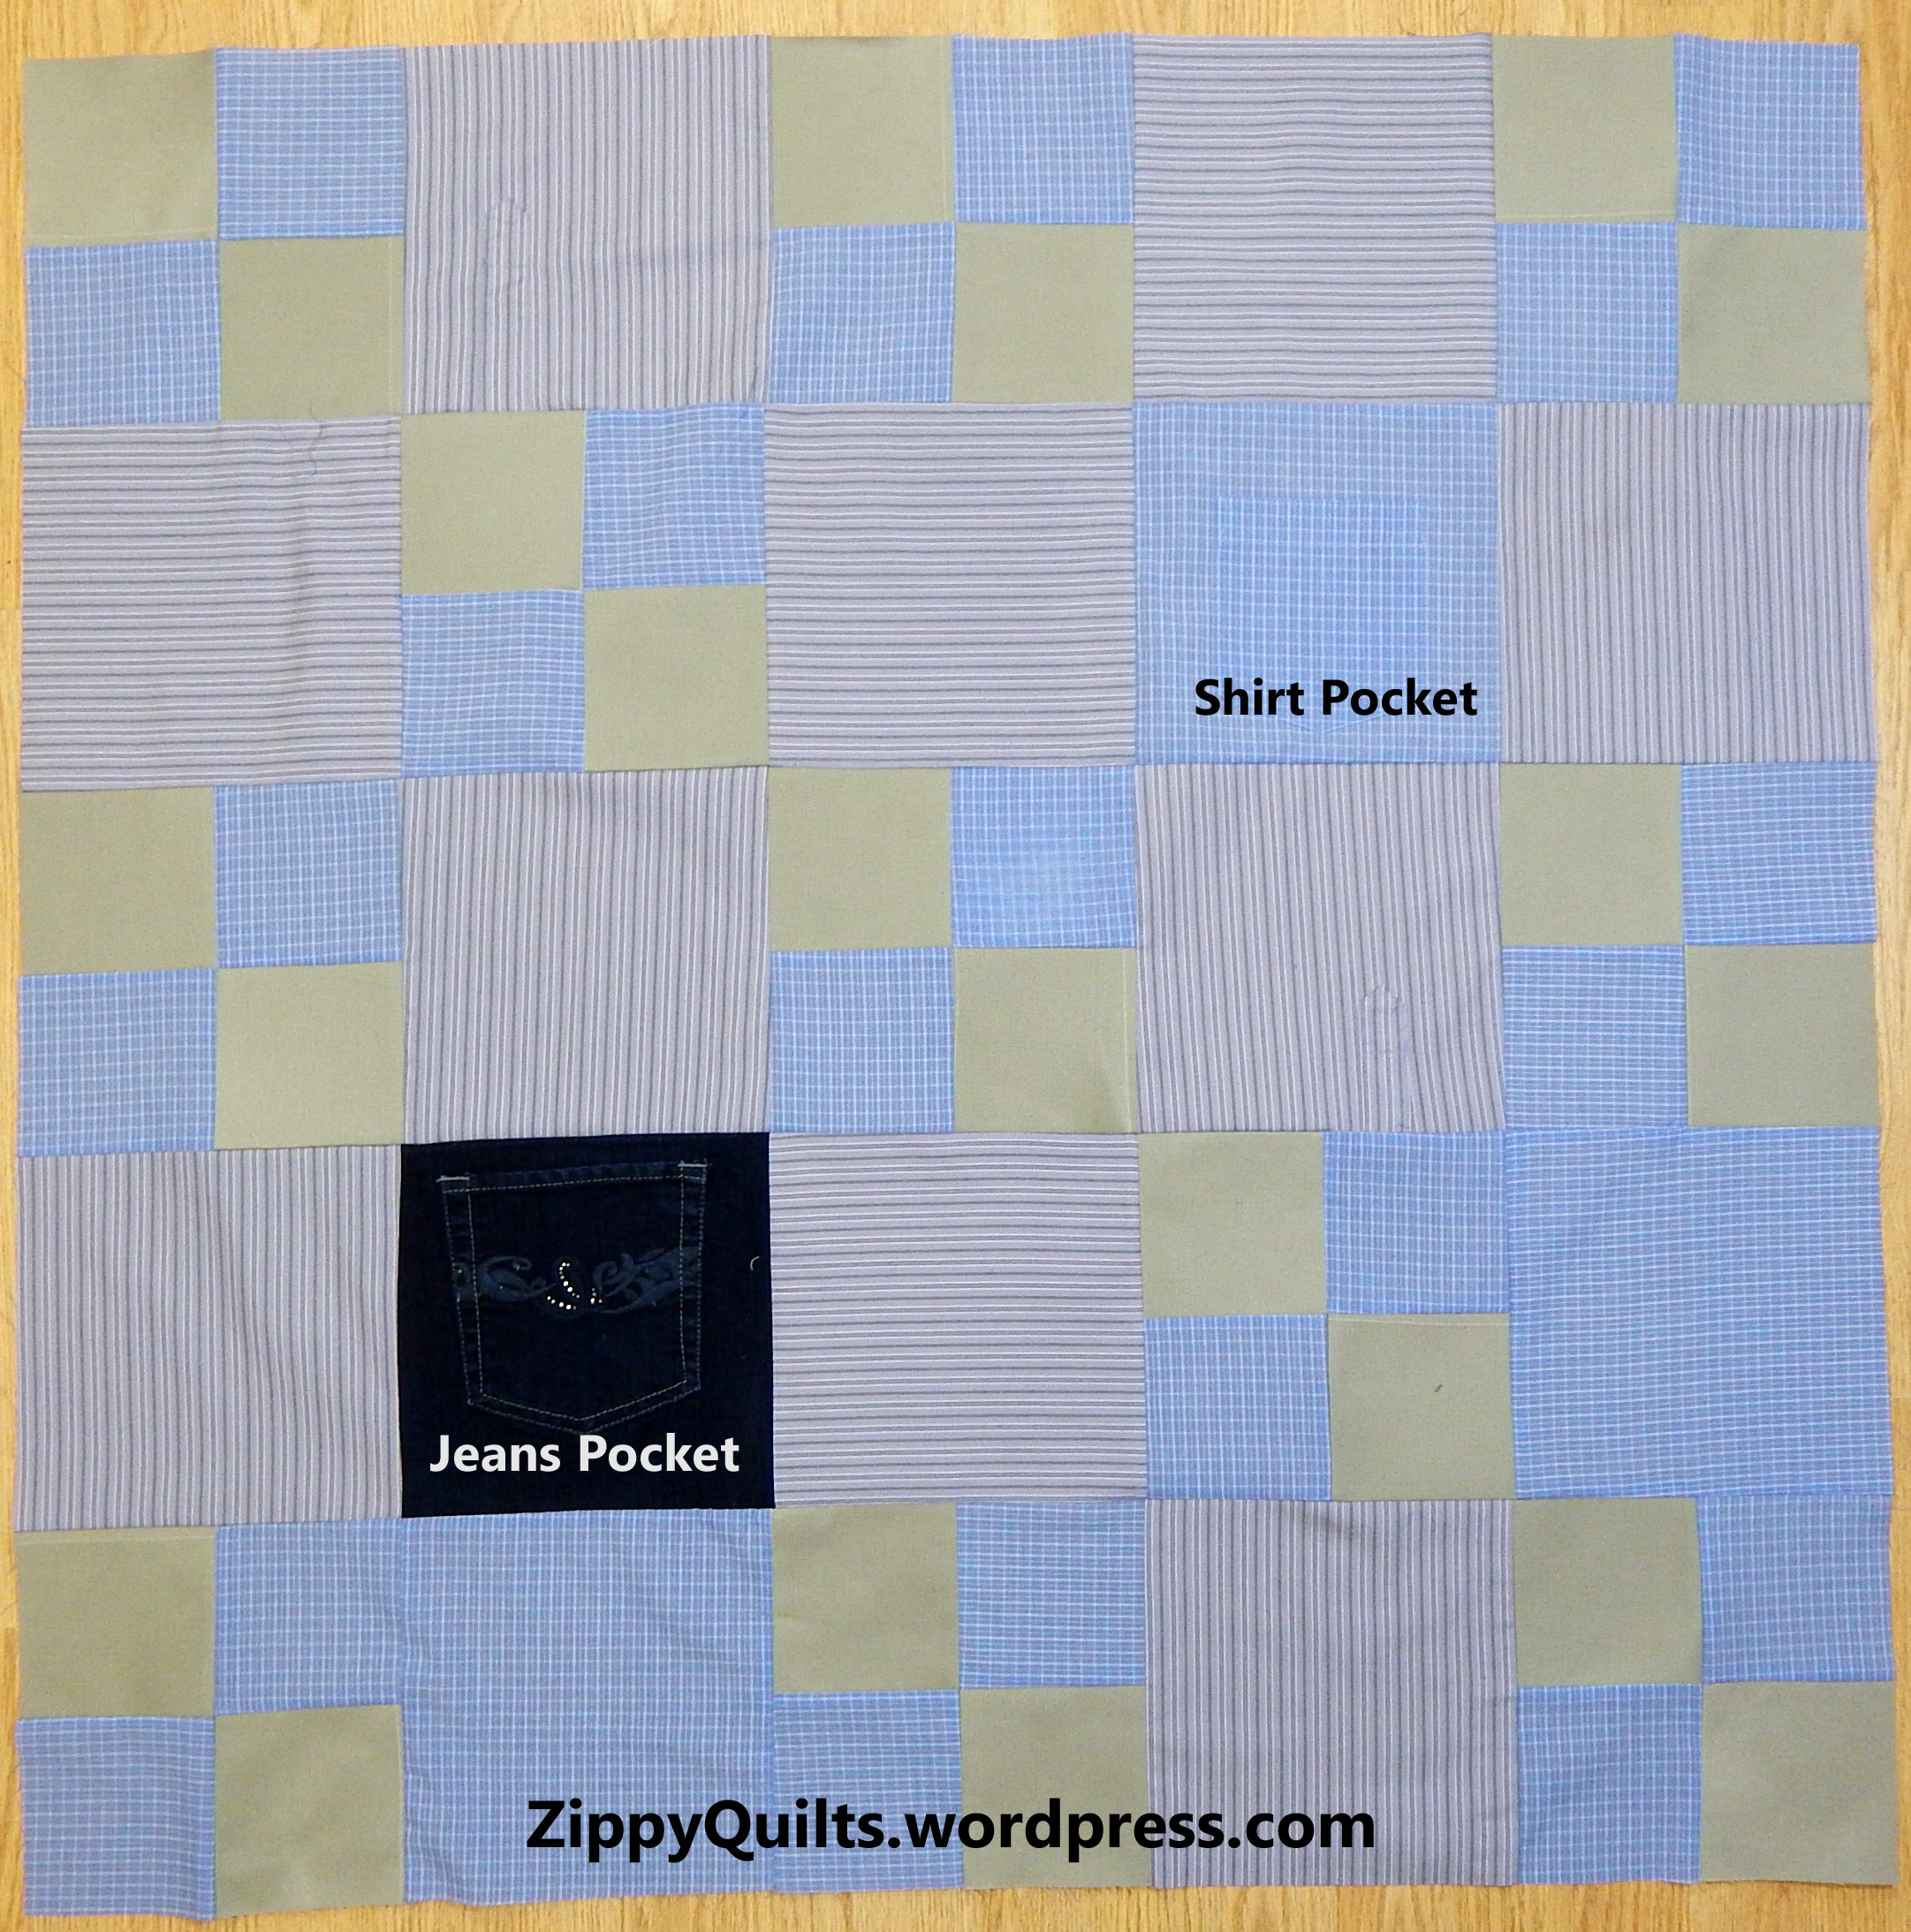
Quilt top made from khaki pants and 2 shirts, 40″ x 40″
So I’ve been saving shirts and pants for years as they were discarded, thinking I’d use them in quilts. (I’ve got a box of discarded neckties, as well.)
Finally I got around to designing a quilt made with 8 inch (finished) blocks to use some of this. When I cut the pieces, I used half a pair of pants, one and a half shirts, and one pocket from a pair of jeans. This means I have plenty of potential quilts in that box of old clothes.

Cut carefully around the seams to remove them from the clothing

Use some pockets, discard others–your choice
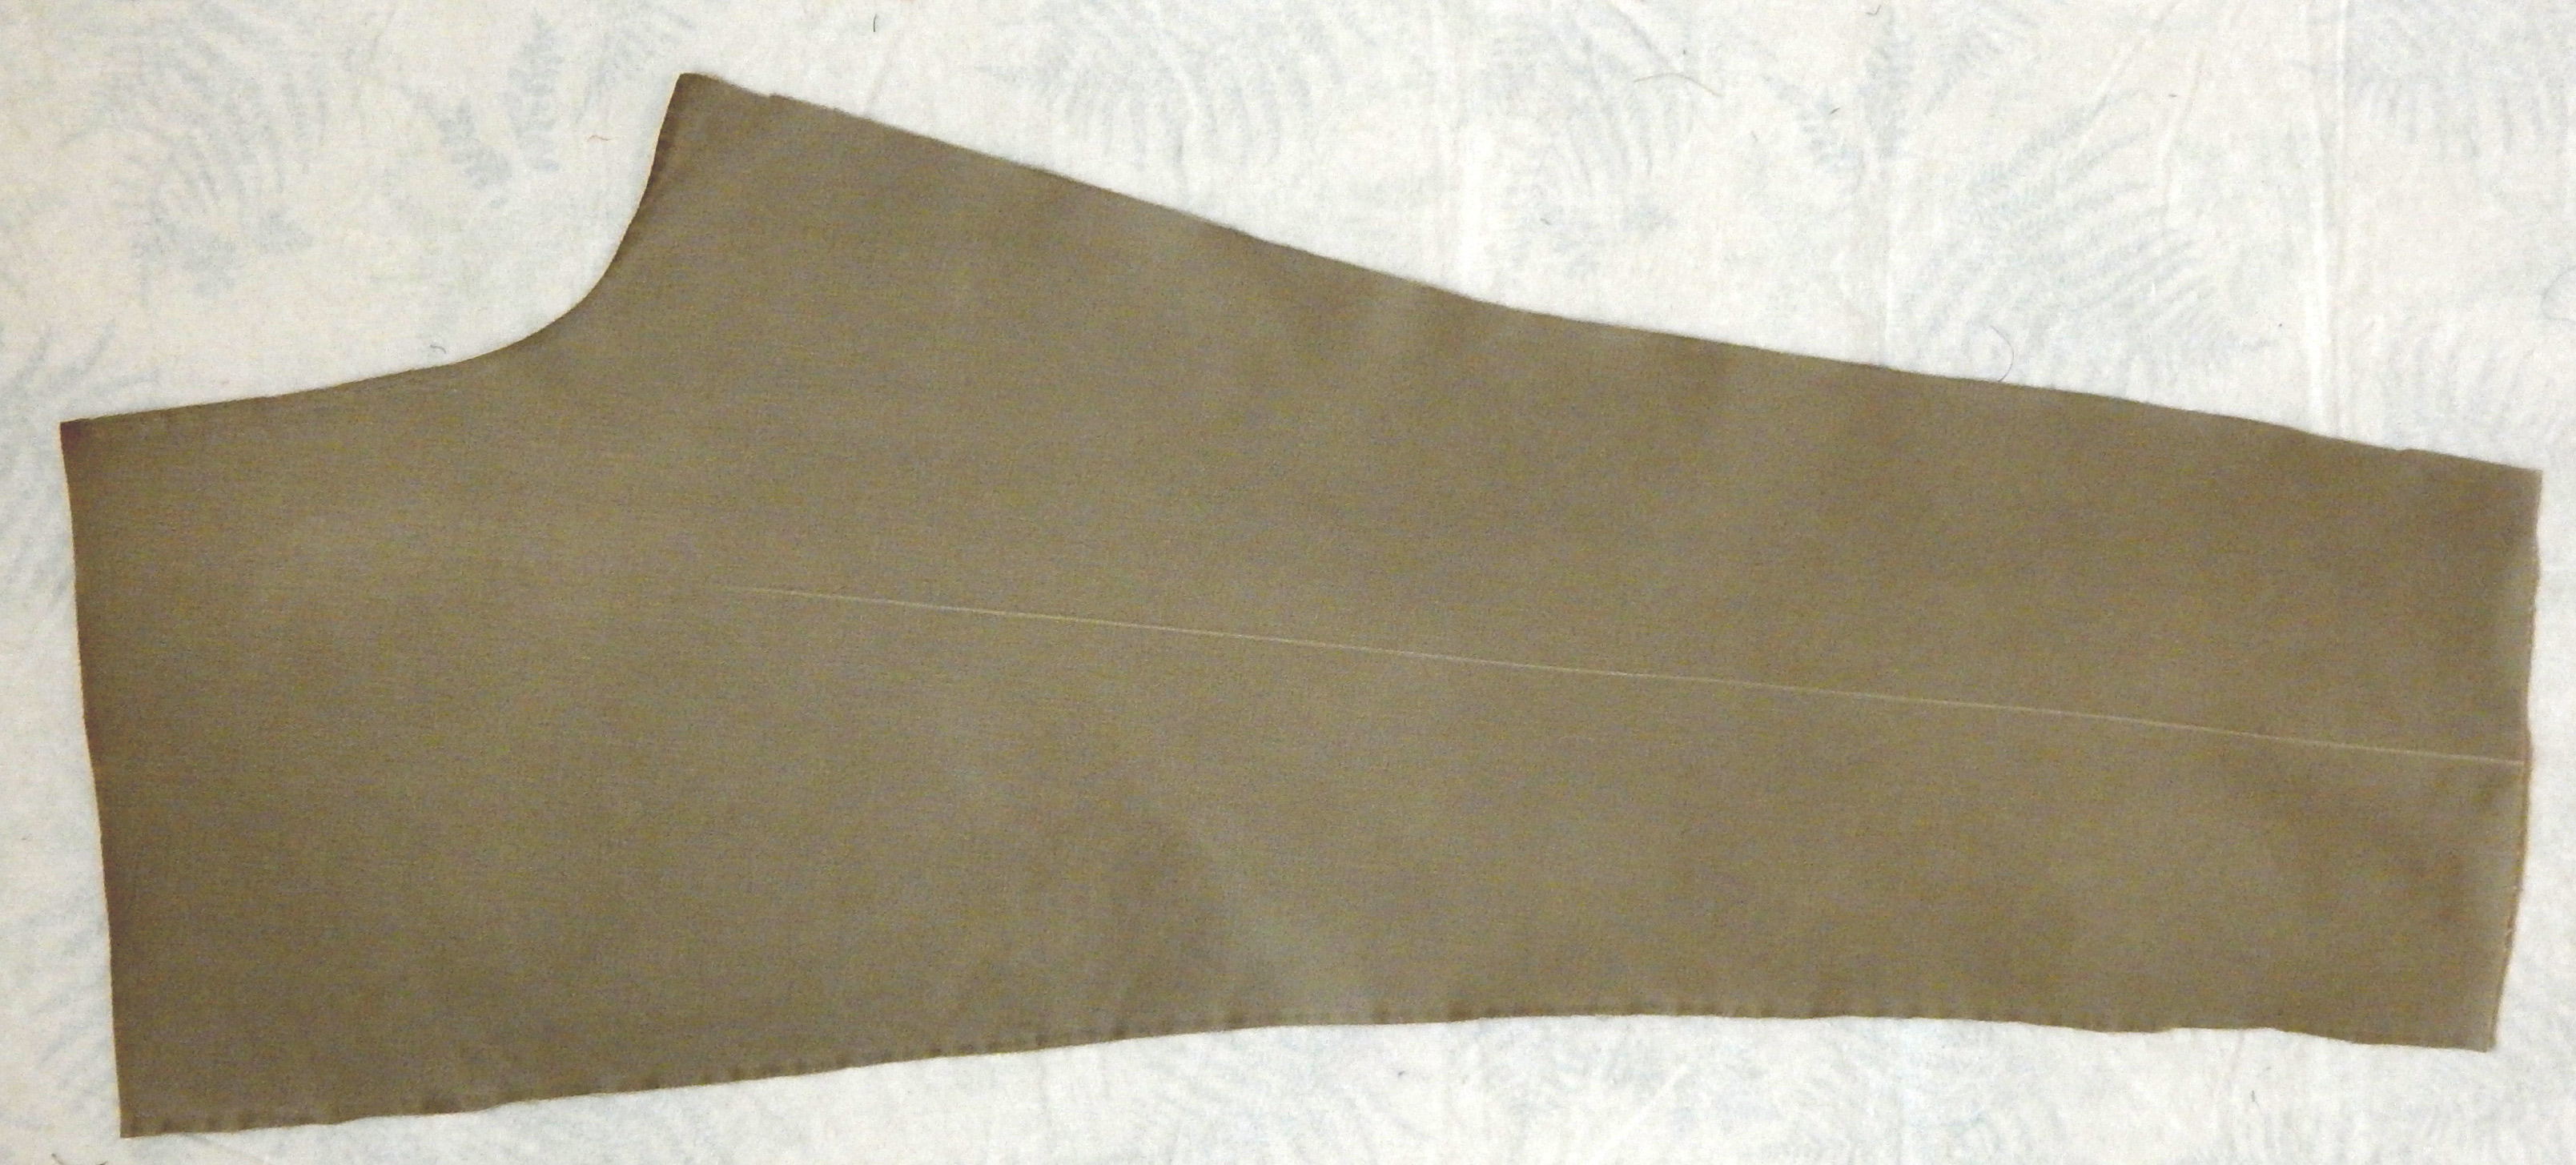
Pants piece with all seams, buttons, and hems removed. Note that the crease should be along the straight grain of fabric, so use it to orient your cutting.
I learned a few useful things:
• It would be better to use smaller (6 or 7 inch finished) blocks, especially when trying to make a block from a pocket.
Consider cutting out pockets so that they can be used to keep treasures in
• I needed to watch out for worn spots. If the worn spot is in a piece of fabric you really want to use (e.g., a pocket or placket), just put a second block of the same fabric behind it.
• The shirt and pants fabrics really do iron nicely! Much easier to get wrinkles out of than regular quilting cotton.
In case you want to do this, here is a quilt diagram with more detailed cutting instructions.. The diagram and instructions are for 7″ finished blocks, since I learned on this first one that 8″ blocks don’t make best use of the available fabric.

7 inch blocks made of shirt and pants fabric, finished quilt 42″ x 42″
One pair of khakis and 2 shirts should be enough for this size, with fabric left over. I had a pair of jeans, so I added a jeans pocket and I’ve shown that option here, so it’s really a pair of pants + part of a pair of jeans + 2 shirts.
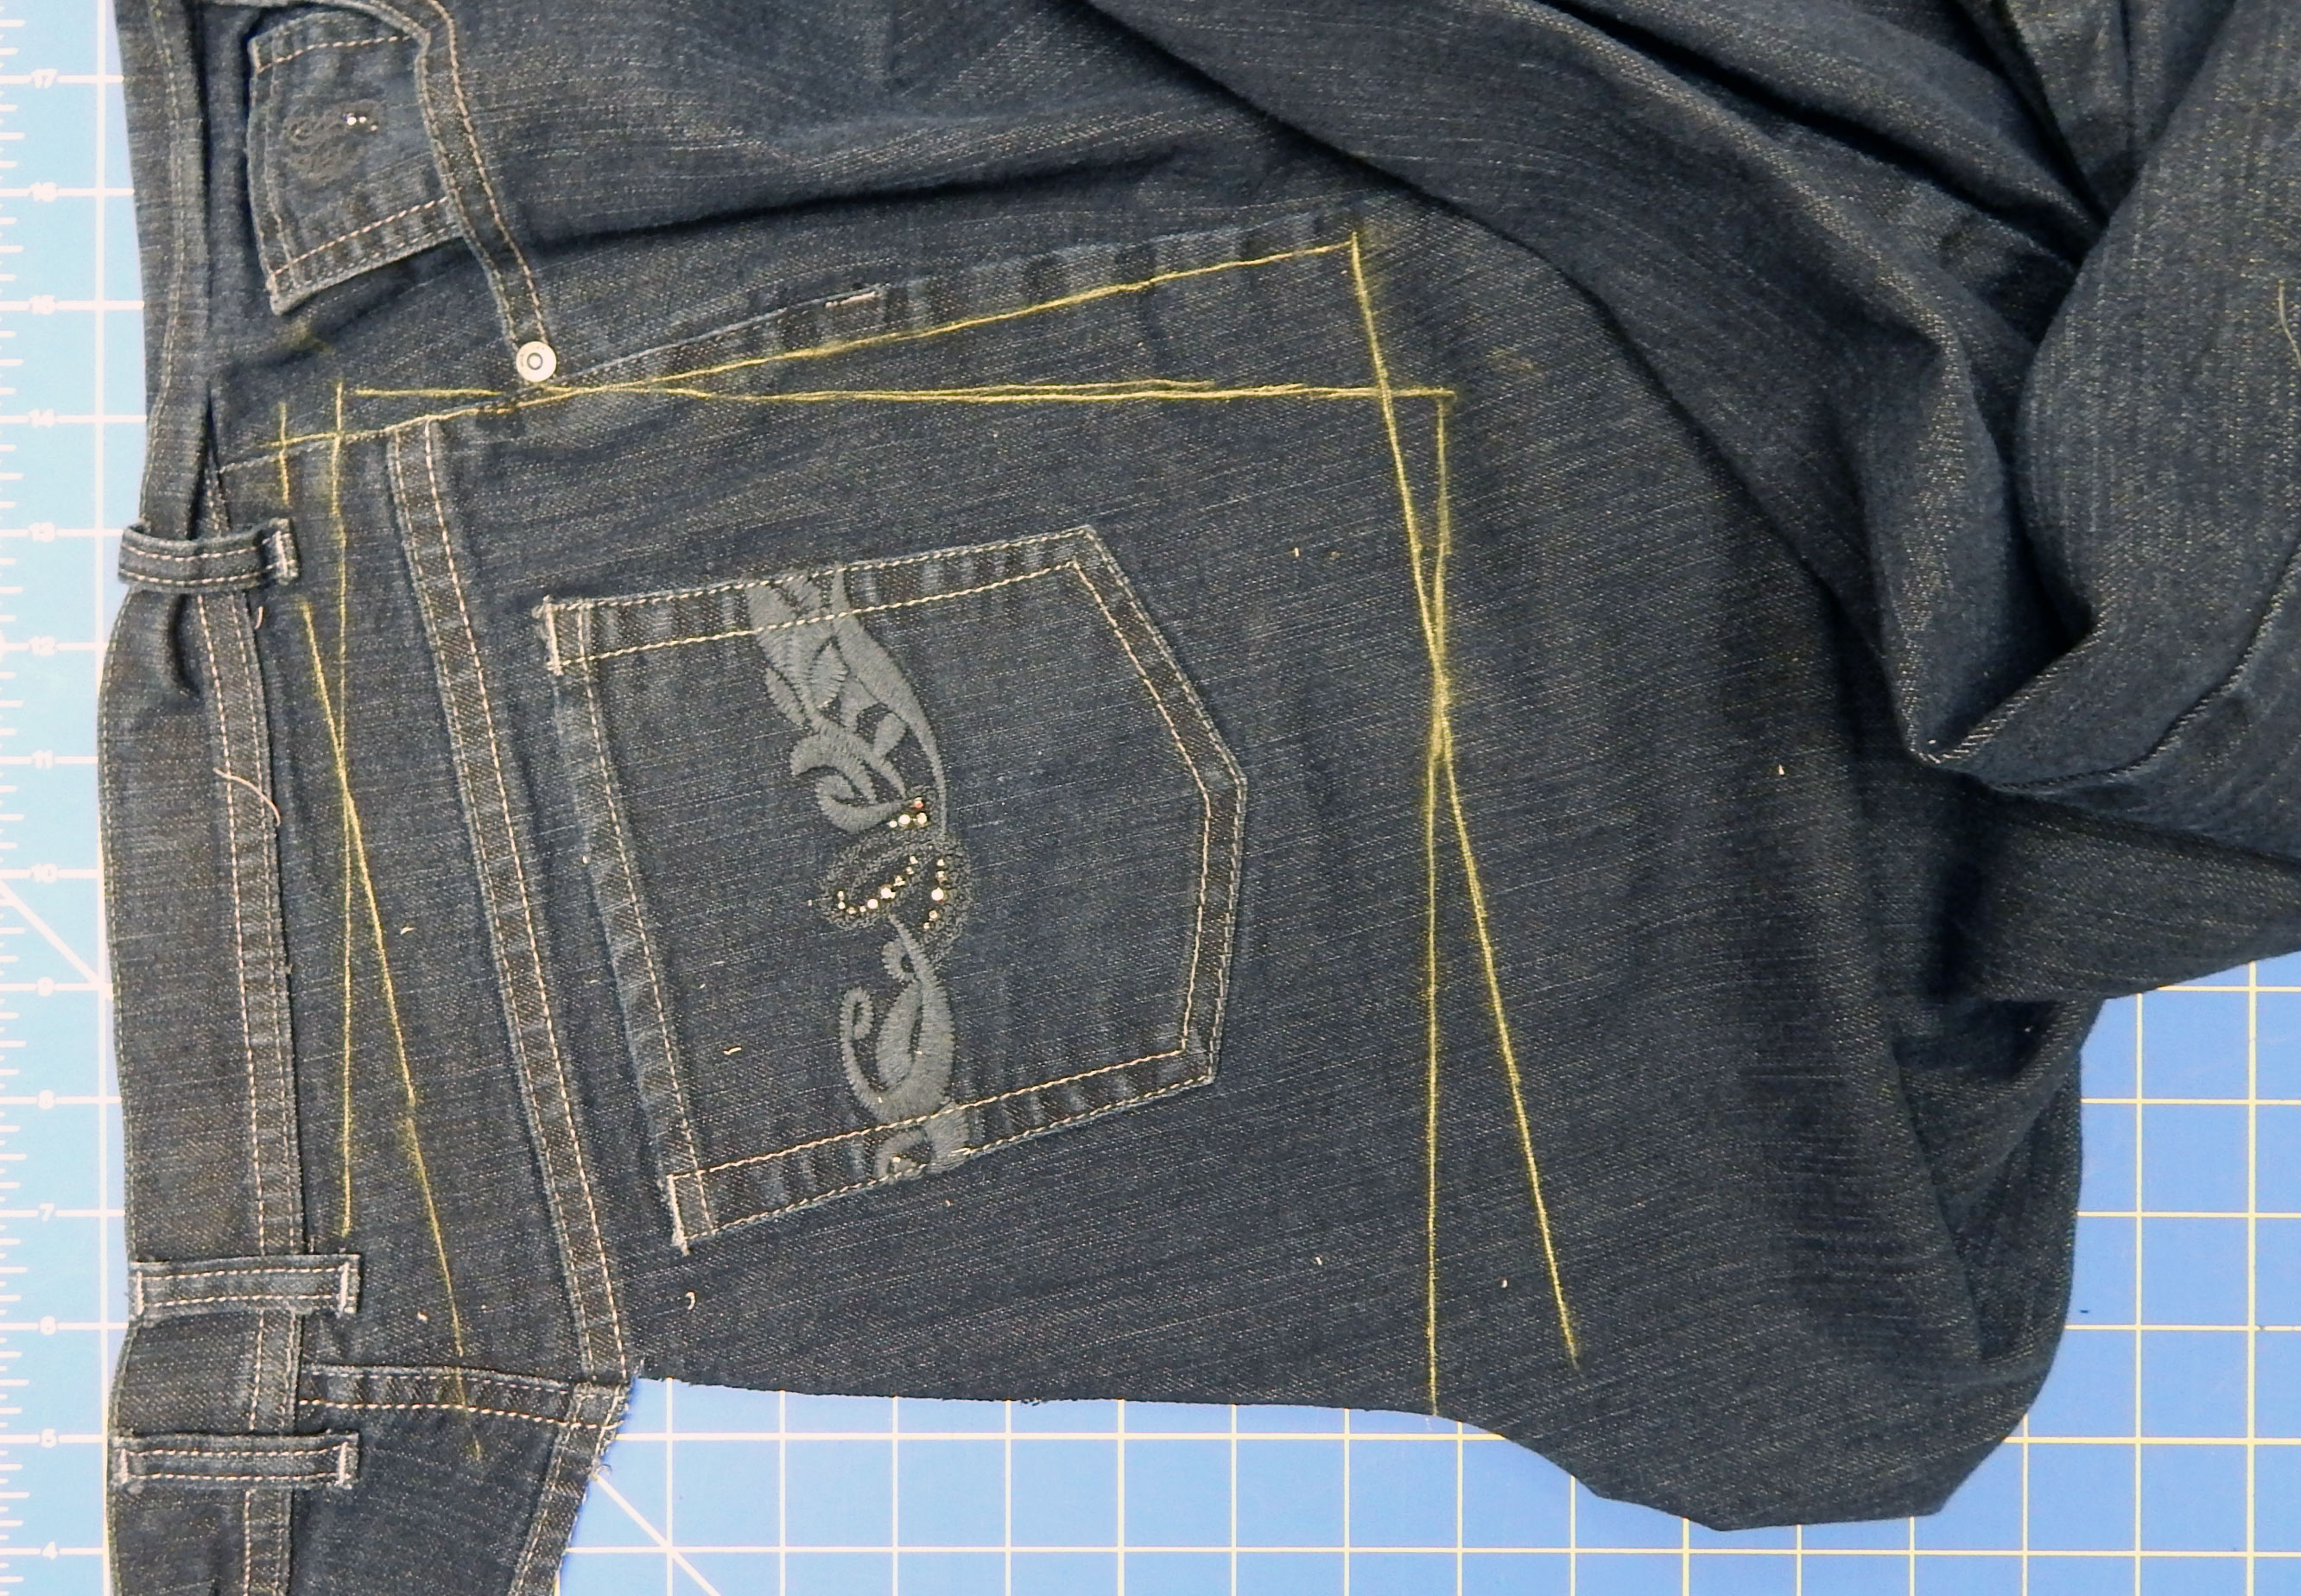
First cut out any pockets you want to use from the shirts, jeans, and pants. Mark a 7-1/2 inch block with chalk or pencil, being sure you leave enough seam allowance above the pocket opening. Then cut with scissors along the lines. The quilt here uses 2 pocket blocks.

Draw the square before you cut out the shirt block, since this can be tricky
Then carefully remove all seams, cuffs, waistbands, and any other features that would make a quilt block too bulky. See pictures above, and here:


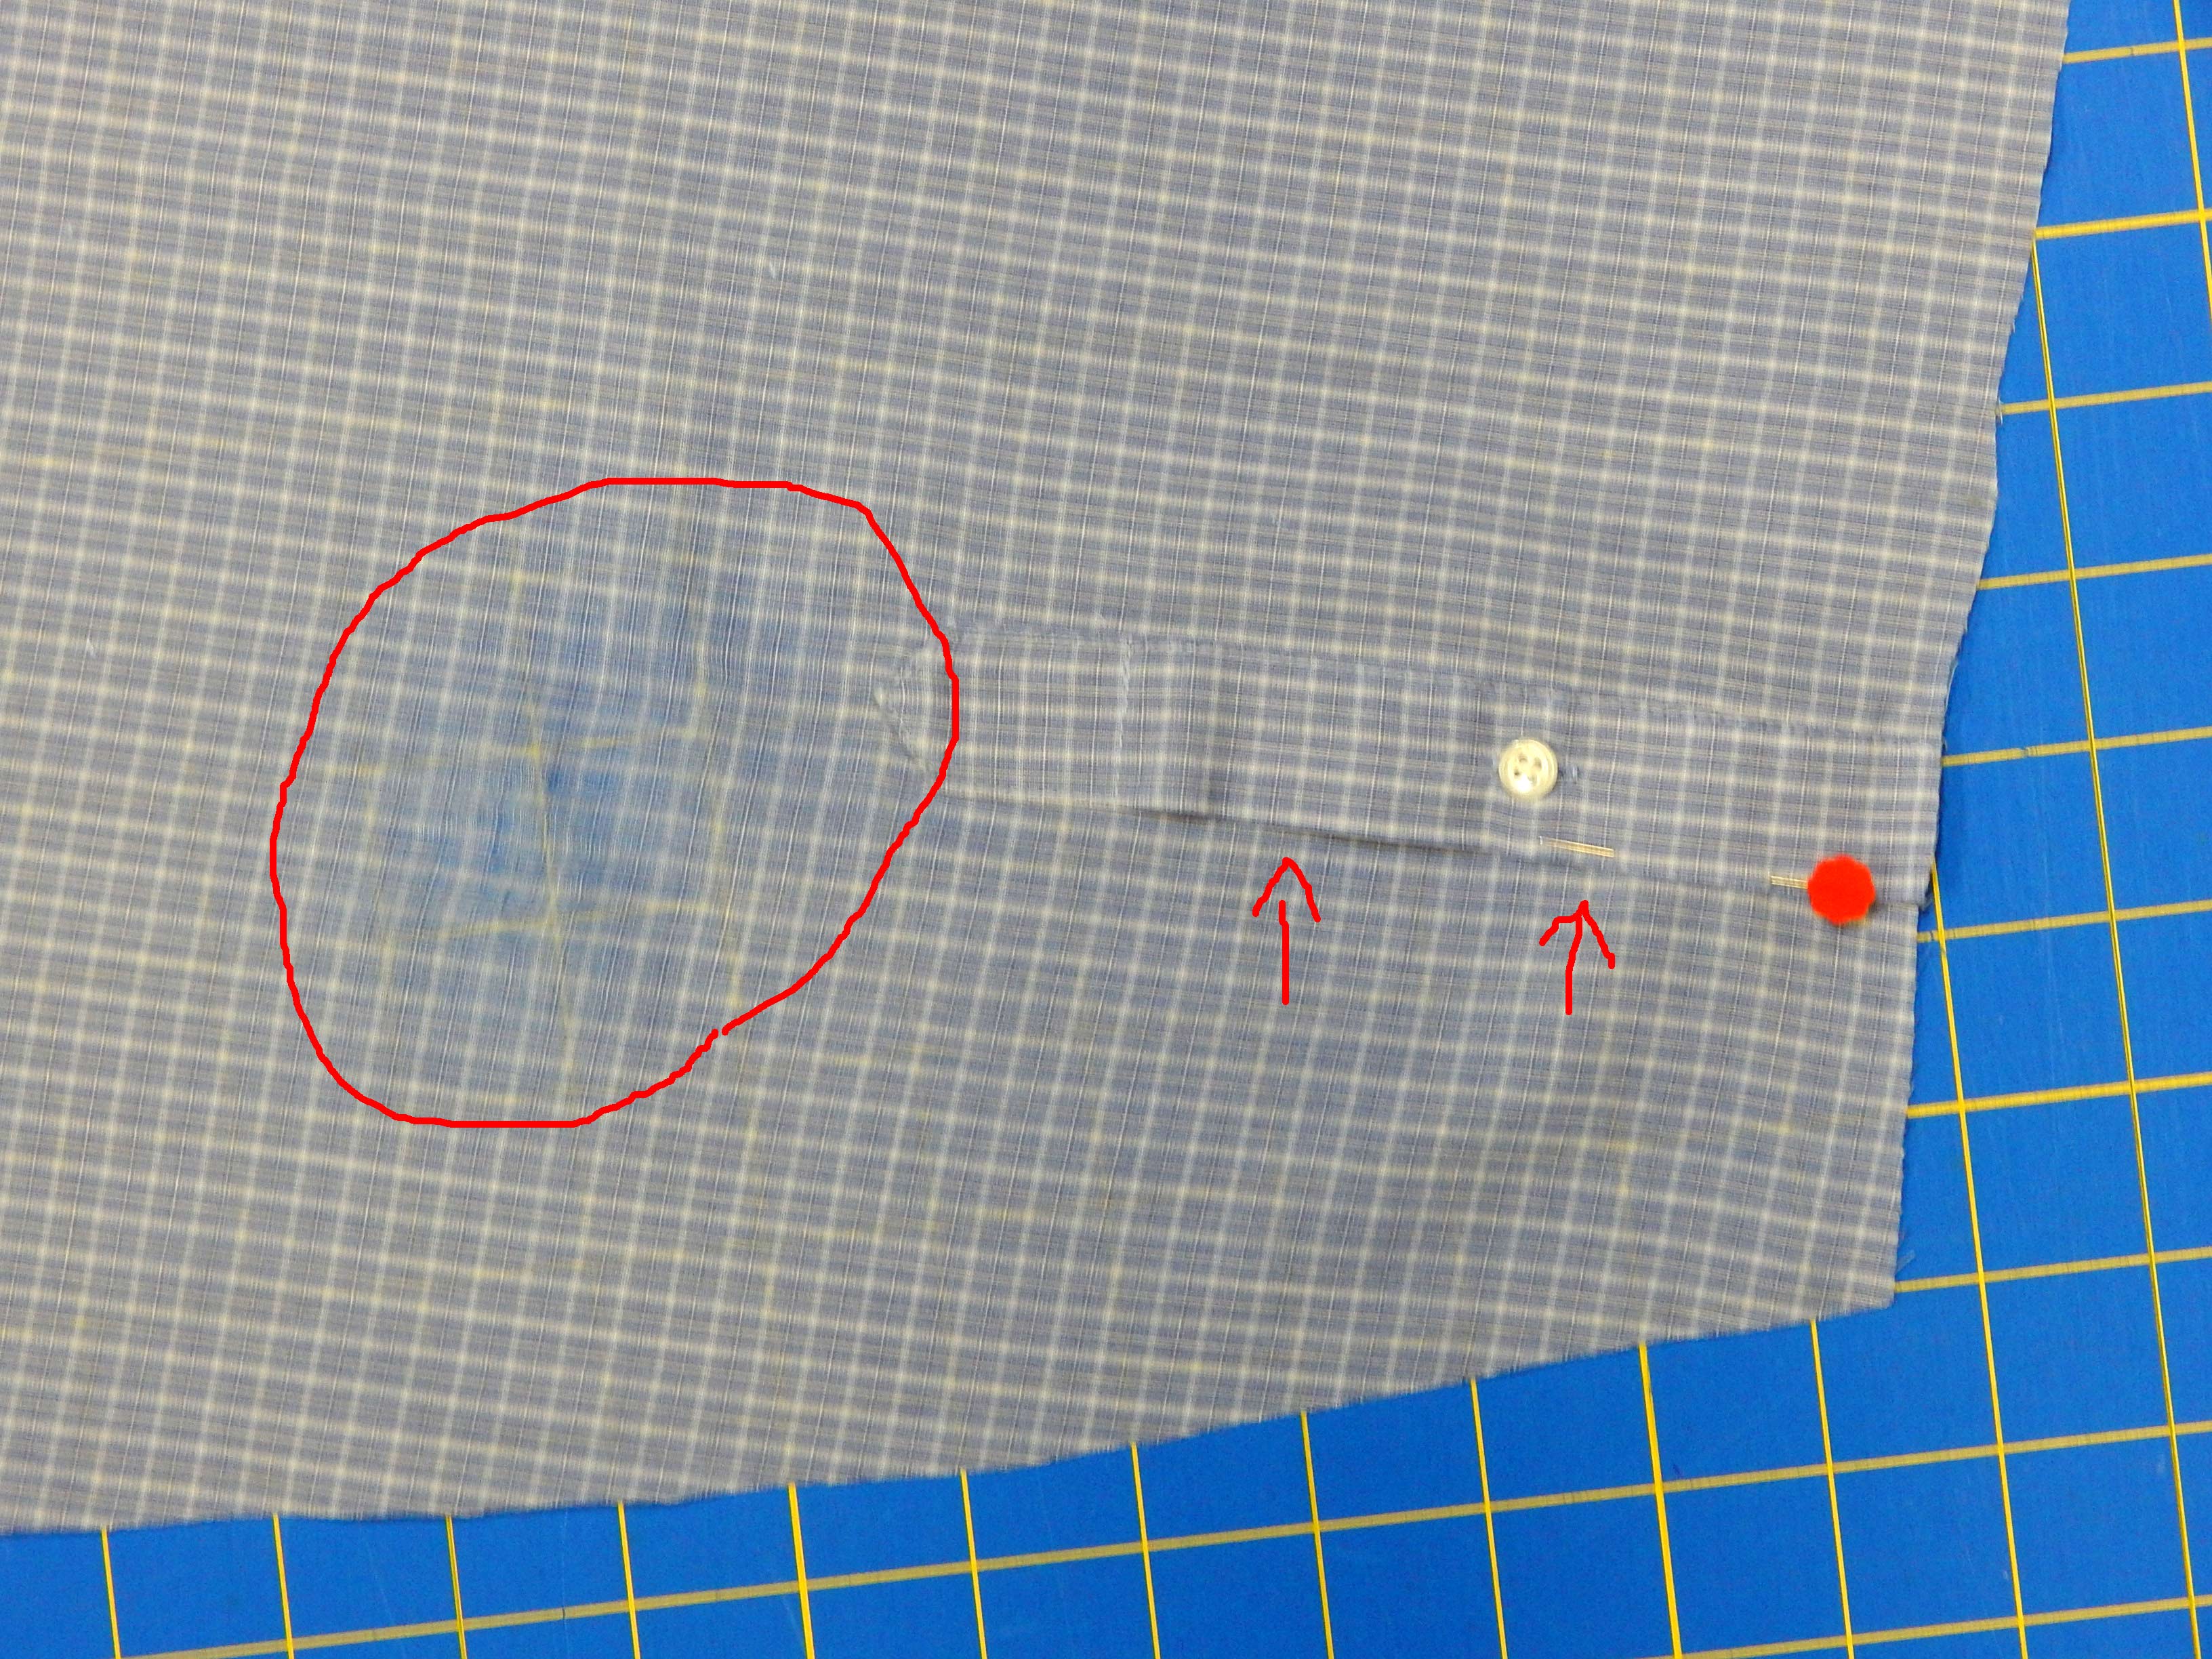
Cut the cuff off the sleeve, since it is rather bulky. Save the sleeve placket and stitch it closed before cutting out a block that includes it. See the arrows below and the red pin head below; they show where to show the placket shut.
Watch out for worn spots like the one circled above.
From the khaki pants, cut 36 pieces 3-1/2 inches square for the 4-patch blocks. See the pictures and captions above.
From the shirts, cut (16) 7-1/2 inch squares for the large blocks. (You’ll need 18 if you aren’t using any pocket blocks). Include the plackets from the sleeves for interest!
From the shirts, cut 36 pieces 3-1/2 inches square for the 4-patch blocks.
Now assemble the 4-patch blocks as shown above, lay it all out, and put it together. (I’m assuming you already know what you’re doing here!)
And DON’T EVER TELL where the shirts and pants were “found” 😉


Great recycling project! I’ve thought on it, but never saved enough to work from. When I run out of stash (ha!) I might shop at Goodwill for “fabric.” Love the idea of using the pocktes.
Thanks for reading! And yes, there is plenty of stash without this😉
Pingback: Memory Quilts | Zippy Quilts
I have made a lap quilt with cotton tops which went well.
new challange with 100% Poly Performance tops, which I assume is
polyester for Running events. Any recommendations
Thanks
I’m sorry to say that after the last experience with poly tops from running events I declared that I will only make quilts from 100% cotton tops. I used interfacing as usual but it didn’t adhere well and my quilter complained! Must keep quilter happy, so here I am saying cotton only. The only thing I can think of is to see if one of those big commercial-style flat presses would adhere the interfacing adequately without melting the shirt or the design on the shirt. If you solve the problem, please let me know!