2015 Donation Quilt #1

A couple of my quilty friends try to make a quilt a month for various charities, so I thought I’d try that this year.  The group with which I make donation quilts sends them to a Ronald McDonald House to be given to sick children.  The House wants all quilts to be 40″ x 40″, which doesn’t seem too big to do one a month.  Here goes….

For January I took some of my orphan blocks and related fabrics and made this quilt.  The blocks also happen to be on my UFO list for 2015, so there’s TWO projects accomplished at once 🙂

Donation quilt

February finish and January donation quilt

The blocks finish 12″ square, which means that with a 2″ border the quilt comes out 40″ x 40″ as planned. The 9-patch blocks were made using the stack and shuffle method I learned years ago from Karla Alexander’s books.  It’s easy and fun.  To end up with blocks this size, I started with 15″ x 15″ squares of fabric (since they’re cut wonky on purpose it takes a bigger starting square than you might think).

The center block has little inset strips using a technique I modified from one of Judy Niemeyer’s ideas.  To make a quarter inch inset that doesn’t “wobble”, do this:

block tutorial

Block pieces, including yellow insert

Cut a 1″ strip of fabric and lay one edge along the raw edge of the piece where you want a narrow inset. Stitch through both the strip and the quilt piece 1/2″ away from the edge, either by using the 1/2″ mark on your machine’s throat plate or by marking the center of the strip.

Quilt tutorial

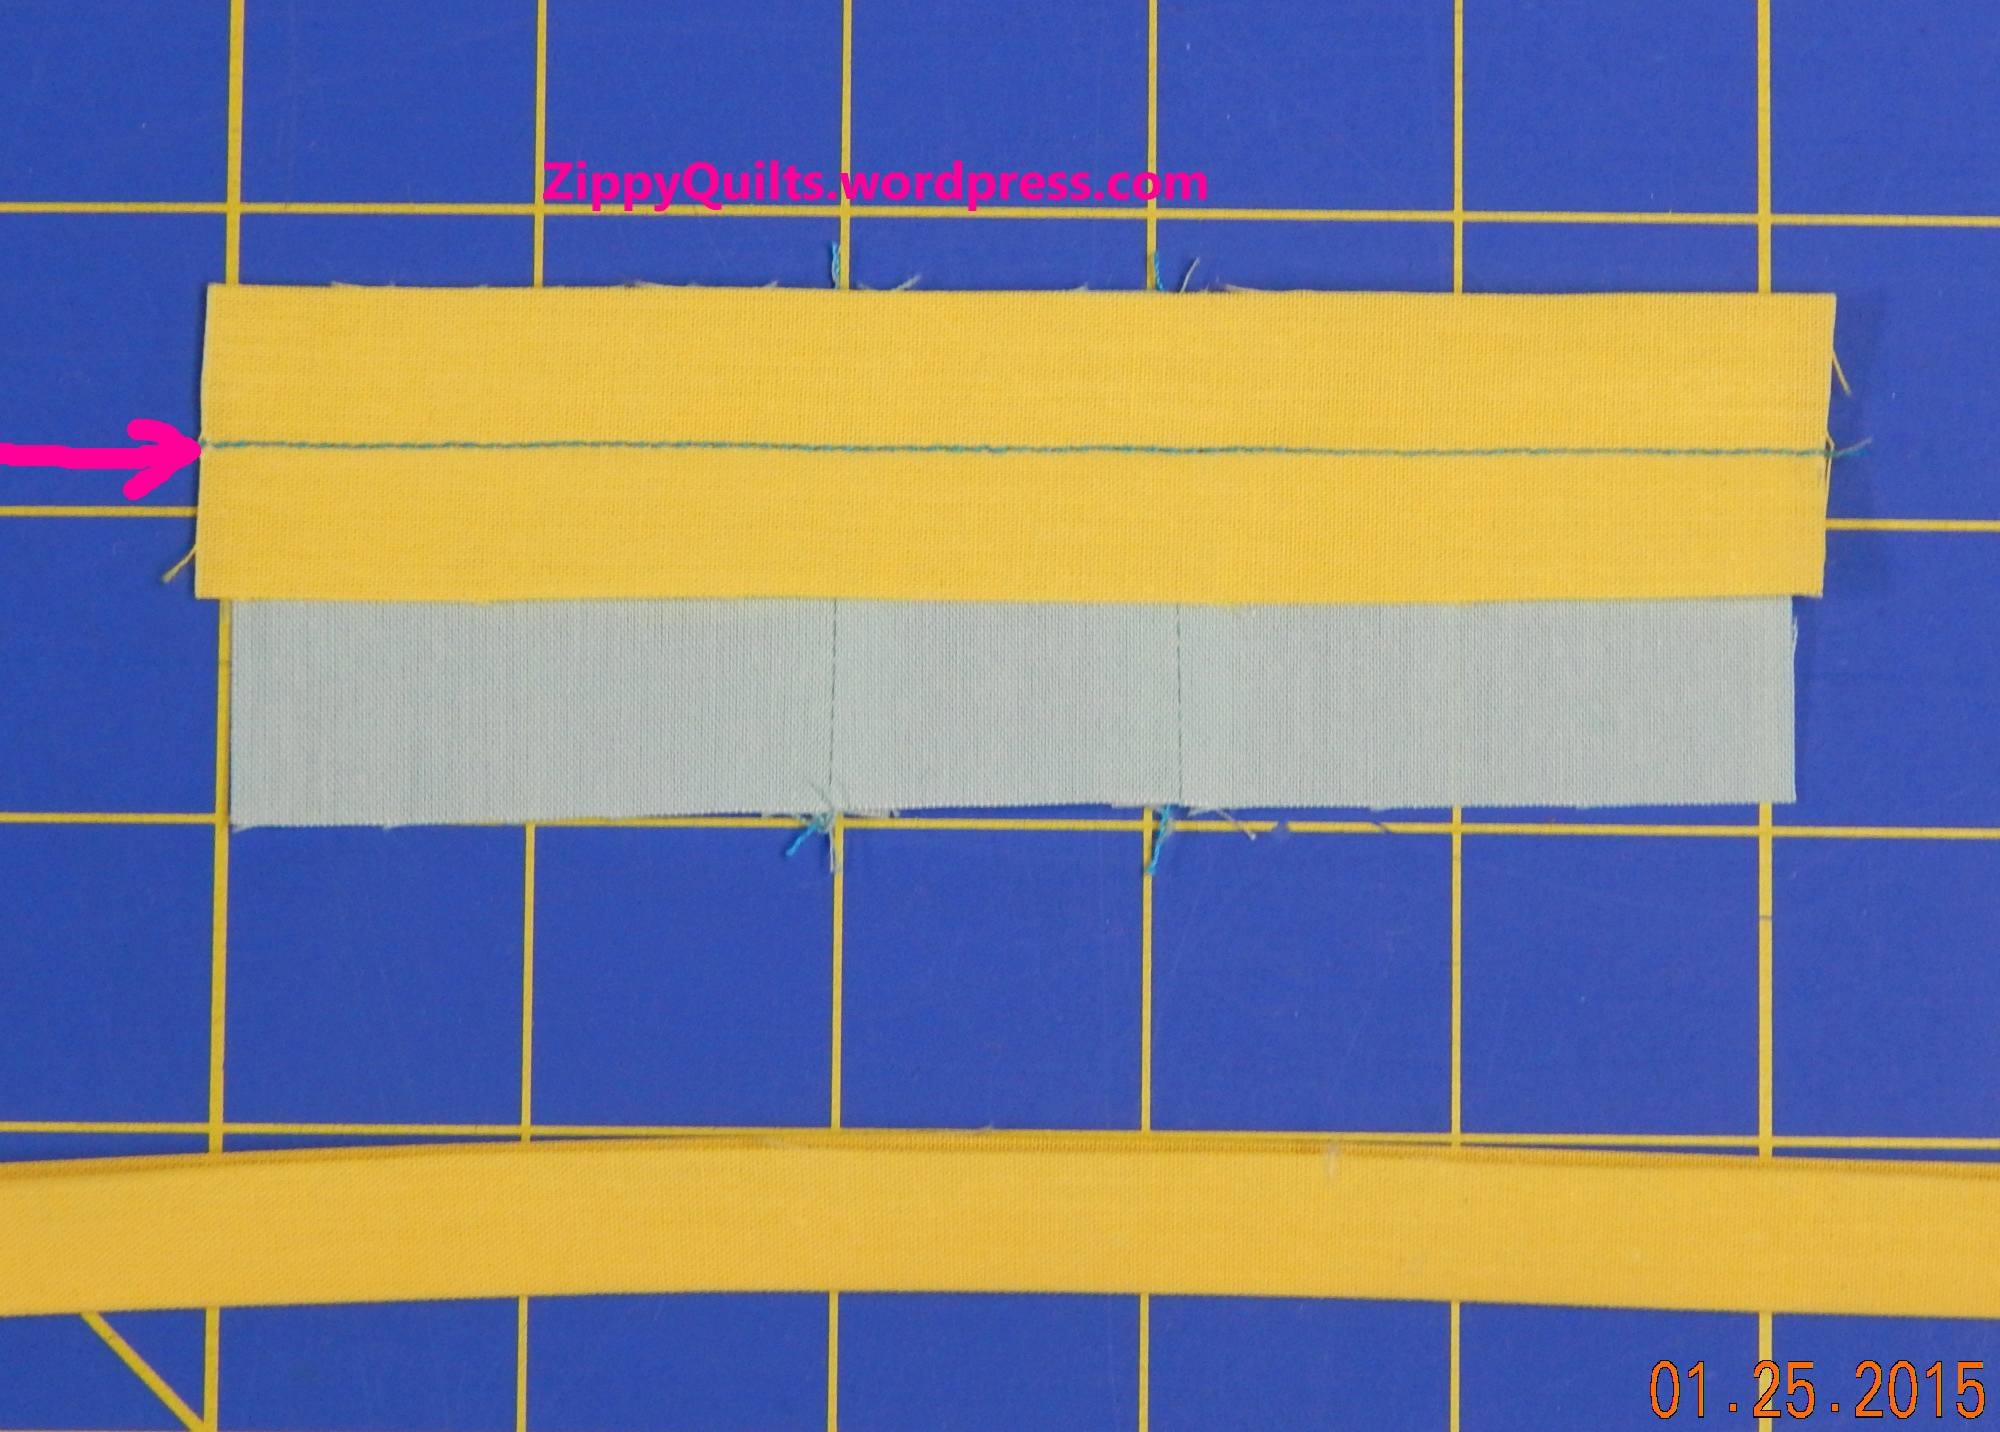
The center pieces of the block have been jointed and the insert laid along the side

Fold and press along the seam-line so that you now have 3 raw edges, all lined up.

quilt tutorial

Strips have been added to all sides of the center pieces and pressed along the seam

I don’t usually trim away the extra fabric because I like the stability, but it DOES make for some weighty intersections if you choose not to trim away the bottom 1 or 2 layers.  Then assemble the block as you normally would, using 1/4″ seams.  The strip you added will show up as a 1/4″ inset.

Let me know if you try either of these blocks.  I thought they were fun!


Tessellations! By Jean Larson

As promised, my friend Jean Larson has written a tutorial on tessellation quilts.  I hope you enjoy it as much as I did!  –MJP

Tessellating designs make me happy.  Tweaking those designs is even more fun.   I want to share the joy of starting with a very, very simple design and watching it blossom.  My inspiration comes from this web site:  http://gwydir.demon.co.uk/jo/tess/

Start with a simple gridded block and create a light/dark design.  Here, I’ve started with a 3 x 3 grid.  Then re-color the same block with the lights and darks reversed

.The grid lines are only for design purposes, and each block can be constructed with a single square block with 2 corner triangles attached using any method you prefer.

Here are some design possibilities…Quilt_1A simple “cat head” quilt using only 2 colors.

Different looks can be achieved with variations in the color placement.

Blocks can be inverted and turned for even more quilt designs.

Just imagine all the possibilities with color in these!!!!!

It’s even more complex when you design with a 6×6 grid.  Here are the positive and negative versions of another block.

These blocks can be constructed using half-square triangles integrated with larger fabric pieces.  If these blocks were to finish at 6 inches by 6 inches.  The center column on each block would be a single 3.5 inch wide by 6.5 in long piece of fabric.  The side strips would include some half-square triangles.

A couple of the quilts that can be made:

Looks like spools, some gray, some white, all standing up.  Same quilt with alternate blocks turned a quarter turn yields a different  clearly recognizable tessellation.  Reminds me of tessellating doggie rawhide chews 😉

Now back to the spool quilt from above.  The “thread” areas have been colored in.  No blocks have been turned.

Jean spool 5This shows the power of color and value (lightness and darkness).   The colored part, being next to the gray and being closer in value to the gray, unites those parts of the block, and gives the illusion that we have all gray spools on a white background, some standing up, some lying down.

I hope these examples can be the seeds to sprout some design experimentation with tessellating shapes.

  1. Start with 2 square grids
  2. Create a positive design, and its negative design
  3. Alternate them in a quilt layout
  4. PLAY!
  5. And play more with color!

Happy Quilting (and Designing)!!   –Jean Larson


“Found” Designs

I took several pictures on a recent trip to illustrate “patterns and palates” I found along the way–or “designs and color schemes” if that has more meaning (though less alliteration).

The first thing I noticed is that, although I think of the Southwestern U.S. in terms of bright colors–turquoise, orange, bright blue–it really is pretty monochromatic, at least in midwinter.  And a lot of the man-made colors that started out vibrant have bleached considerably in the bright sunlight.  So here are a few patterns and color schemes I found interesting. Whether they ever make it into quilts remains to be seen!

These patterns found around the hotel definitely have some possibilities for both piecing and quilting.  And they have so much grey they must be modern 😉

These color schemes were more what I was expecting. But the colors were found more in man-made things than in nature except for the bright sky.  In that picture of the blue building, that IS the sky you see in the top right corner!

There were some beautiful patterns in nature.  The colors were lovely, but were subtle rather than bright except for that SKY!

I especially liked the strips of waterproof nylon cloth, all finished like flags, that were used to screen a construction site we passed.

Lots of great things to see, and this was just a single walk!

What have you seen lately?