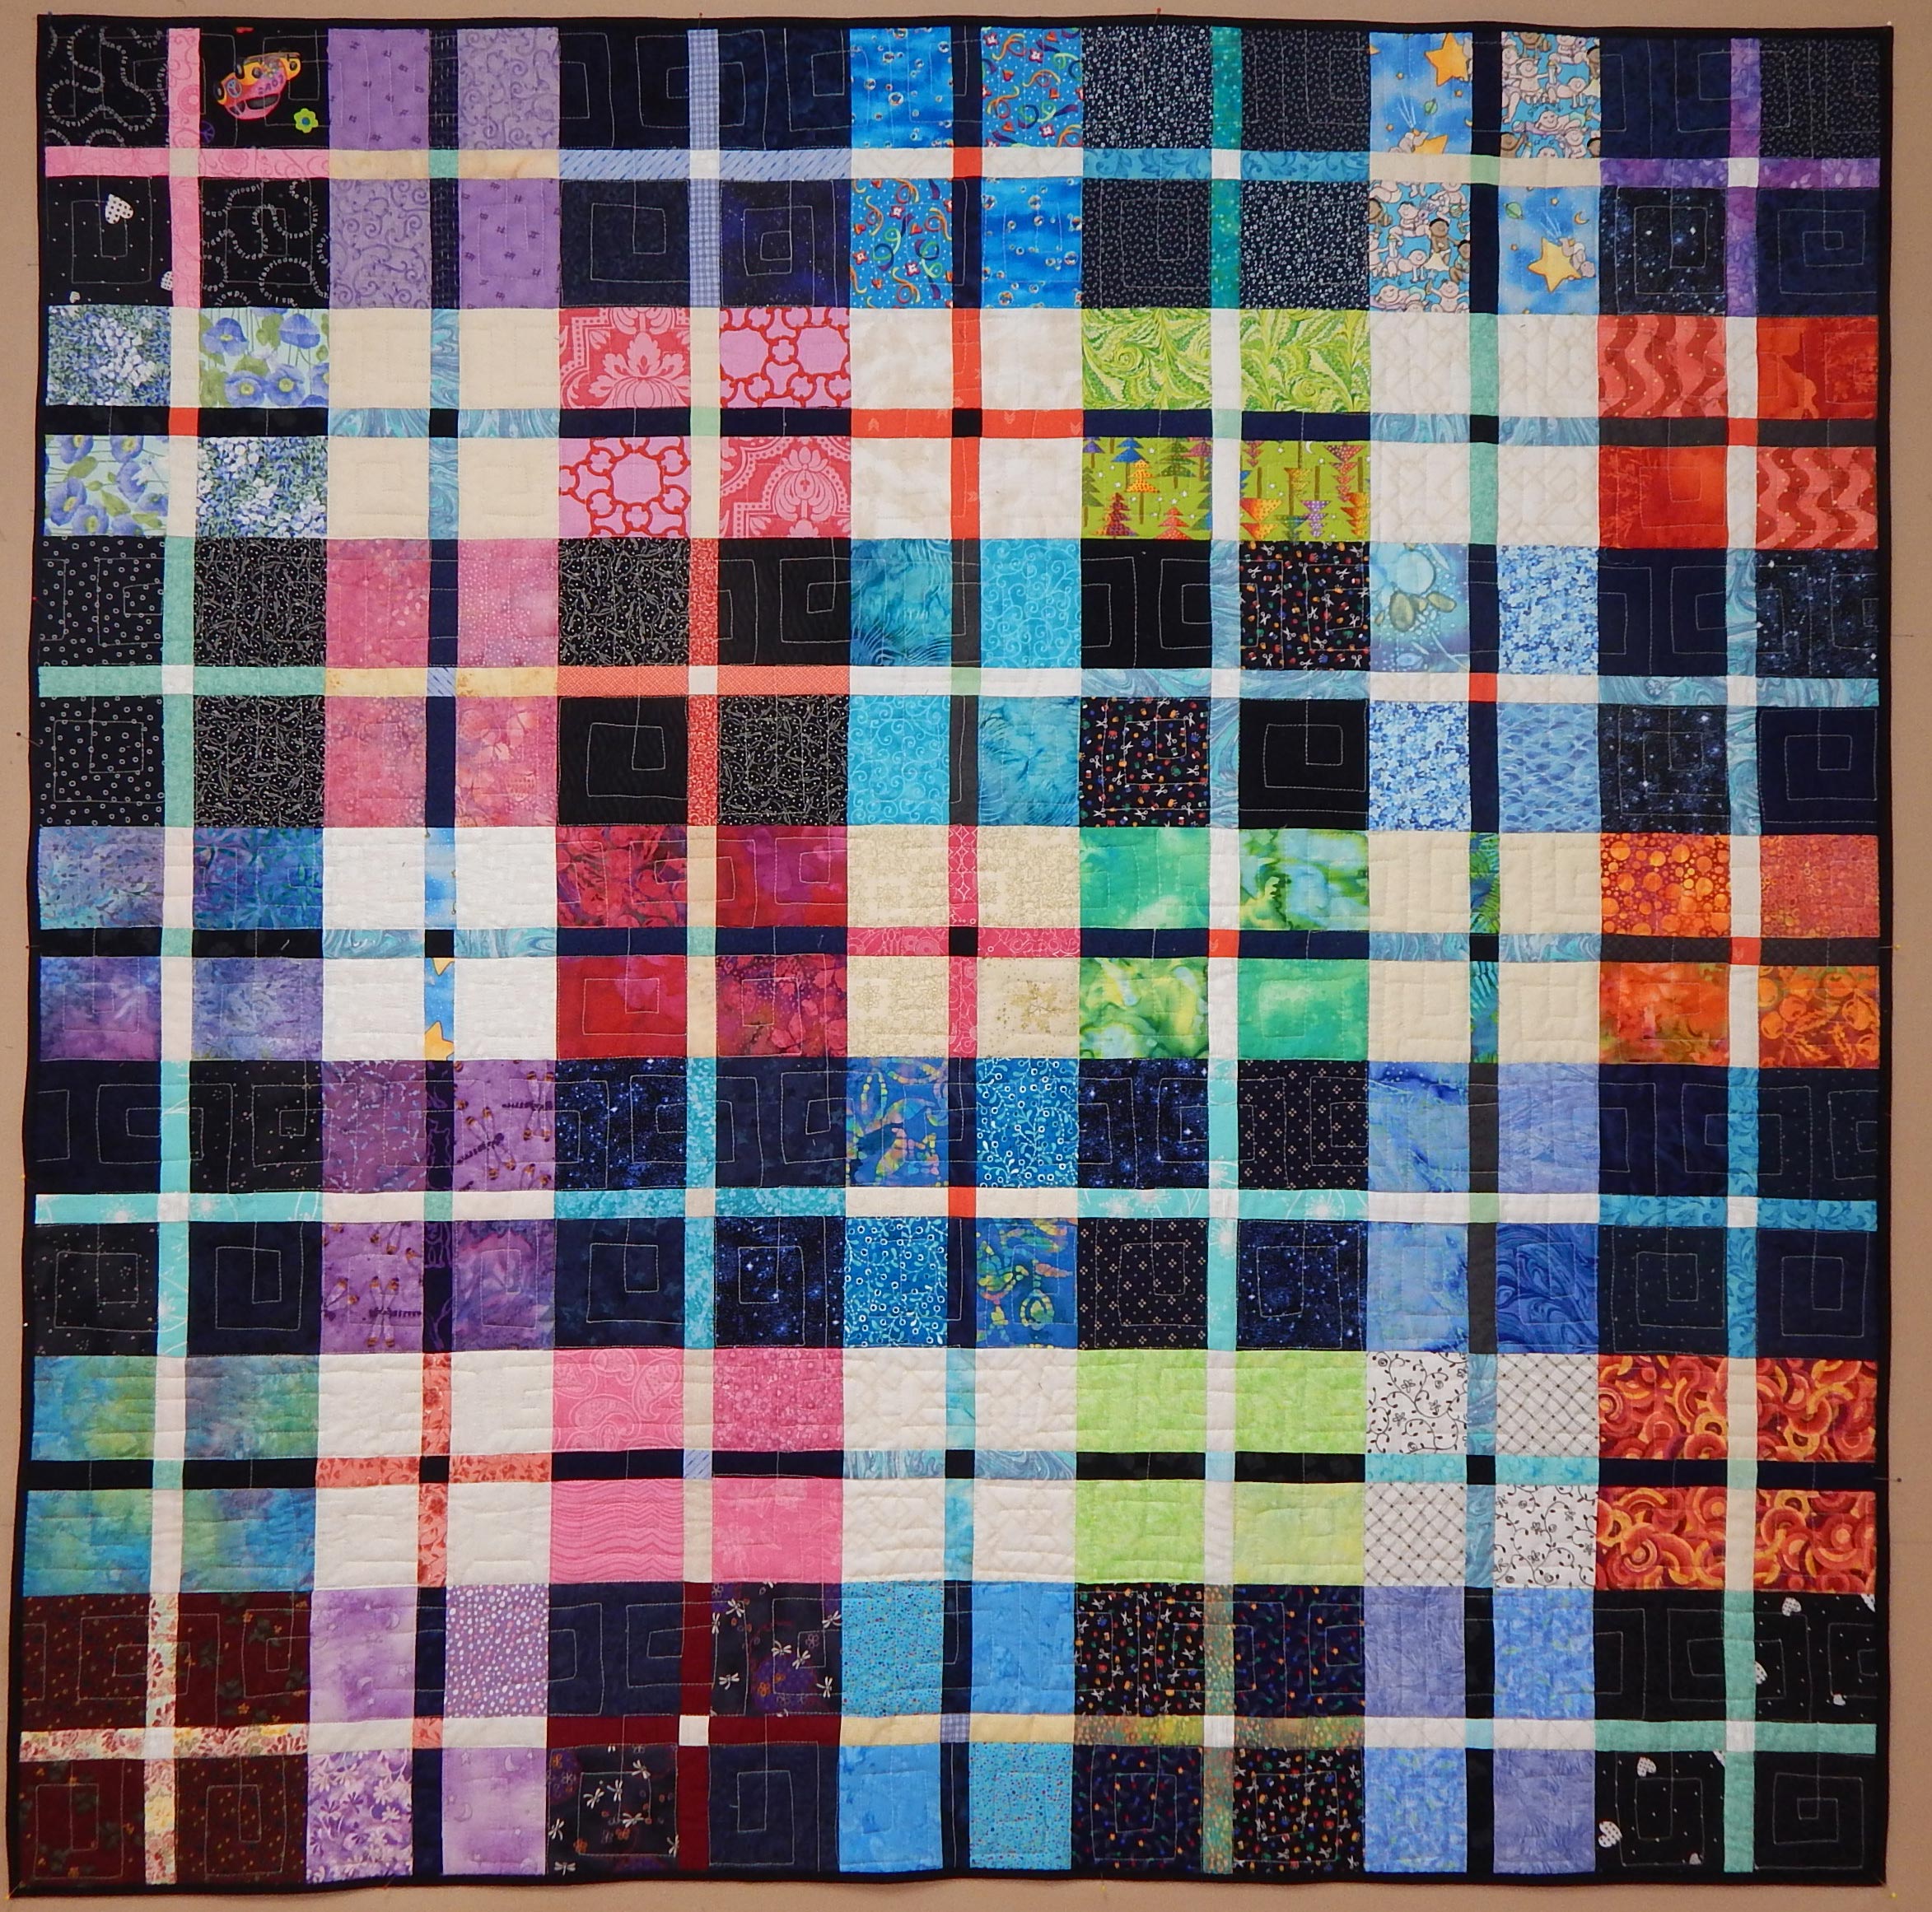
As in, “I get by with…” Anyway, my blogging friend Chela asked for tips on how I matched the doggone intersections in “Plaid-ish”, and several other people commented that intersections are a challenge.

Yes! There were a lot of little intersections to match–good practice!
I’m always glad to have somebody suggest a blog topic, so here we go:
It’s important to note that I learned all these techniques from other quilters, so it’s good to pass them on.
First, a little editorial comment from me. YOU are the only judge of how exact your seams need to be. I’ve made several quilts for the cat. I matched my seams as well as my skills allowed, but I did NOT take any out and re-do them.
- Practice helps the most. I DID say a few bad words while piecing this quilt with orange squares that finished 3/4″, but it was a learning experience (eek!).

You can find the original pattern for this quilt by going to AllPeopleQuilt.com and searching for the “trail mix” pattern
- That consistent 1/4″ seam is as important as you’ve always been told. (Yada, yada.) I like any of the devices out there to help sew an accurate quarter inch seam, including the foot with the little guide on it and a variety of things you can stick to the surface of the machine bed. Most of us have this one mastered.

My tool to help with 1/4″ seam has been around so long the plastic is yellowed!
- With regard to cutting accurately, I’ve been told several times not to use the lines on my cutting mat because they are less accurate (being wider) than those on the ruler. Sometimes I do, sometimes I don’t. If I ever get SO accomplished that the little difference in using the cutting mat to measure is what’s throwing me off, I’ll change 🙂
- When I’m going to have a 4-point intersection, I press seams to the side whenever possible so that they can be nested. This makes a big difference in aligning the intersection precisely, at least for me.

Here are the pieces laid side by side as they will be sewn, so you can see the seams pressed in opposite directions.
- I learned somewhere to put the pin to the side of the intersection that will be sewn second so that the foot is pushing the intersection together. It is the opposite of what I was doing, and it seems to work.

- Even more important, Cindy Williams told me to always sew in the direction shown by the arrow (above) so that the seams are pushed together rather than apart as you sew. That one really does help (thanks, Cindy!). If the piece is small enough, I’ll even use the opposite side of the foot when necessary to be able to sew in this direction
- And now the picky part, but it saves time and frustration. If I have any doubts, I set my stitch length as long as possible and machine baste through the intersection and about 1″ on each side.
 Then I look. If it matches, great; just set the stitch length back to normal and sew the entire seam. Sew right on top of the basting. If the intersection doesn’t match, it’s quick and easy to pull that basting thread out and try again.
- If the problem with matching seams is that the two pieces being joined are not quite the same size, here are a few options.
- Take out a couple of inches of one of the seams and make it either bigger or smaller, depending, and then taper your stitching back into the original seam line an inch or two down from the end where you started.
- If the difference isn’t too much, pin well and then sew with the longer piece on the bottom. The feed dogs sometimes can “ease in” a section that is a bit too big.
- Finally, I choose my limits. Sure these points match, but I really don’t plan on making another quilt that requires bringing 6 seams together any time soon!

Please feel free to email me with questions. And thanks to Chela and others for the idea for a post!


 The fabric used was brought by her daughter from a visit to Cote d’Ivoire. The vendor who sold the fabric gave her the lime green to go with it. This certainly makes a lively wall hanging, which Laura plans to give to the daughter who brought her the fabric.