Off to Ronald McDonald House

If you’ve been wondering what I DO with all the quilts I make, you’re not alone!

Made from the “Tilted Tiles” pattern by Charles Cameron for the MQG

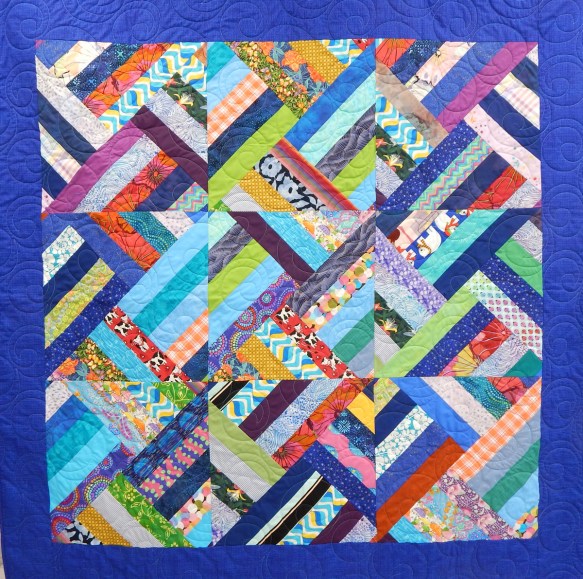
I’ve been holding a number of quilts for some programs I did on scrap quilting, but those are finished now so these quilts are off to Ronald McDonald House. The larger ones are for patients and families at the house; the smaller ones are sent to the NICU to put over incubators.

Made from Tula scraps because I always wanted to make a quilt that looked like the squares overlapped

Modification of the “Turning Twenty Again” pattern made crib size

Modification of a pattern by Sherry Shish

My arrangement of the “disappearing 9 patch” blocks

From a pattern by Sherry Shish

Quilt I designed to use a layer cake. No pattern available.

My arrangement of scrappy HSTs

scrap quilt

Scrap quilt made with strips that finish 1″ wide; no pattern available

Modification of something I saw online; no pattern available

My original design for a crib-size quilt; no pattern available

Modification of a design in “Jump Into Patchwork and Quilting” by Sarah Ashford

My husband said, “Those are some really nice quilts you’re giving away”. Yes, they are; I do not make quick versions of quilts for donation, nor do any of the people with whom I work on donation quilts.

Consider the quilts that have come to light recently after having been sent to the UK during World War II. I think they were valued for their usefulness, but also for their beauty in a difficult time.

Will our donation quilt be worth saving that long? I do want them to be used, but I hope they are beautiful enough to be cared for as well.

Some Fun Hexies

This is one of those patterns that just looked like fun, so I made it. And it was fun. I’ve made Sassafras Lane designs before and the patterns are well written and clever.

Above is the “A side” (if you’re old enough to remember what that means), below is the B side. After I made the blocks with printed fabric I decided solids would be better, so I made blocks with solids and used them on the front. Since I DO NOT need any more orphan blocks, I made a back from the “leftovers”.

And I’m happy to say the longarm quilter found a hexie pattern for quilting it!

Quilt Stats

Name: Hexie Party

Finished size: 55″ x 62″

Pattern by: Sassafras Lane

Made by: me

Quilted by: Linda Nichols

Classes With David Owen Hastings

I read something about David Owen Hastings, a graphic designer who also quilts, and wanted to take a class with him. Luckily within a few months I saw that Mancuso Show Management was having him teach over Zoom as part of their Quiltfest Virtual Schoolhouse, and I quickly signed up.

I should mention that I didn’t just randomly find the Mancuso organization; I was familiar with Quiltfest from when we lived in Eastern Pennsylvania. They’ve produced top-notch quilt shows, so I trusted them enough to try their (sort of pricey) Zoom classes.

The classes did not disappoint. Communication with the Manucso organization was seamless from registration right through the classes. (Like most folks I’ve had some Zoom experience in the past few years, which helped.) Classes started on time and, surprisingly, there were no technical difficulties! Woo!

The first class I took was Indi-Go Modern, which focused on designs in blue and white. I had planned to use my indigo-dyed fabric from a class with Debbie Maddy, but my motifs were too big for the designs David was using. I enjoyed the exercise of designing with two colors and plan to continue the exploration. Here’s my design so far, obviously unfinished:

David’s comment was, “Wow! Really minimal!” or something similar…

The nice surprise at the end of this class was that David talked about how to work out the quilting design for a piece. He even suggested possible quilting designs for some of the student works. I’ve never had a teacher take the design process that far and it was quite helpful.

The second class I took was sewn paper collage, and it was fun, too. In fact, it was far easier to have immediate success. I pasted each collage onto a blank greeting card and put them away for when someone needs a unique card.

My husband’s comment when he saw them was something like, “That would be nice if you’d trim the threads!”

And after the class I decided to weave some of my remaining paper into a collage, so here it is, too.

I recommend classes with David Owen Hastings, as his approach is different and therefore extra useful. He managed to be encouraging to everyone.

I also recommend the Mancuso Schoolhouse platform. Yes, the classes were a little expensive, but still far less than if I’d had to travel for them, and the platform worked well.


Trying a Couple of Things

A few weeks ago two events occurred serendipitously: The final challenge for Project Quilting was “Conquer A Fear”, and a friend helped me try ruler quilting.

Practicing on a piece of fabric where mistakes can’t be seen!

In fairness, I tried ruler quilting a couple of years ago and decided it wasn’t for me–seemed like just FMQ (free-motion quilting) with complications. So maybe I was scared because I wasn’t immediately good at it?

Anyway, after some instruction from my friend I made several practice pieces, then this round quilt for Project Quilting.

It’s not perfect. Not even close. But good enough for now.

And then something else interesting happened. I had recently cut some striped binding at 30 degrees instead of 45 degrees and found that I got the same diagonal stripe effect with less of the stretchy-wobbly-crawly stuff that happens with true bias binding. It worked very well on this quilt:

So I had a little of that striped binding left and decided to use it on the Project Quilting circle. Turns out a 9″ circle really could have benefitted from fully bias (45 degree) binding.

Just look at all I learned in a 9″ circle 😀  Mission accomplished!

And one more thing…finding that striped binding reminded me that I never showed one of my favorite quilts from 2022:

Quilt Stats

Name: Rock Star Granny

Source: Rock Star Granny pattern from Crystal Manning, available here

Finished size: 62″ x 62″ (smaller than the pattern size)

Made by: me

Quilted by: Linda Nichols

Wild Geese: Another Finish

It may seem like I’m finishing a quilt every 15 minutes, but the truth is that I’ve gotten waaaay behind on binding. Since I don’t count a quilt as finished until I bind it, catching up on binding makes me look very productive 😀

This quilt is from a pattern, Wild Geese by Natalie Barnes. It’s available on Etsy here, though I’m sure there are other sources as well.

I’m not entirely sure how I came across this pattern, but I was so impressed with all the interesting angles and bright colors that I bought the pattern and made it immediately. I enjoyed pulling out all the bright scraps!

The pattern was quick and easy to follow. This was a fun quilt to make and I think it’s fun to look at, too.

And BTW, I’ve just learned from Laura, a fellow blogger, that a project that jumps ahead of other things in the queue is called a squirrel! Am I the last to learn that term? Anyway, it’s a good one because most quilters I know have studios full of squirrels, as do I.

Here’s a picture showing the backing and binding.

OK, that backing fabric. I bought it with the idea of cutting it up for an easy kaleidoscope quilt, where the MJ wouldn’t have been quite so obvious! Oh, well.

Quilt Stats

Name: Wild Geese

Designed by: Natalie Barnes of Beyond the Reef

Finished size: 52″ x 71″

Quilted by: Linda Nichols


Up Next: The 25 Year Quilt

I recently decided to make the Postcard from Sweden quilt, which I’ve admired for some time.

The photo above is from the front of the pattern.

I had to search for the pattern, which has always been free courtesy of the designer, Kelly Liddle. I’d like to link you to her, but I can’t find her except on Instagram (@jeliquilts). Anyway, the pattern is now available free for download from Stash Fabrics, here.

I have an extensive stash because, until recently, we lived in a rural area where the nearest “local” quilt shop was at least 45 minutes away. I gathered all 36 colors required for the top from stash!

This picture shows the first 15, so there was quite a stack by the time I had all 36 on the table! This is a 25 year quilt because that’s the period of time over which I’ve collected this stash.

For a few fabrics I had to substitute other choices that were not quite solid.

And even then it sometimes took more than one fabric to get all I needed of an unusual color.

And several of the fabrics had been cut long ago for unremembered projects!

But eventually, the huge stack of fabrics was reduced to a small stack of 6″ strips and the remaining fabrics were put back where they belong.

That was a full day of pressing, cutting, and folding.

I made a few fun discoveries along the way.

First, a couple of the fabrics seem to be poly-cotton blends. They are from before “modern” quilting came along, meaning that only the Amish and Gwen Marston were using a lot of solids, so I had trouble finding solids in the stores. Much of what I did find in fabric shops (which at the time had a lot of clothing fabric) was poly-cotton blend, and I took what I could get. So there’s some poly-cotton fabric in the stash and that will be used in the quilt.

Second, there were solids from several different fabric companies, now that everybody has their own line.

Finally, some fabrics were prewashed and some were not. There’s a whole story there, but I’ll spare you!

I’ve cut those strips into squares and paired them up ready to make HSTs, so progress has been made!

With regard to that stack, I didn’t completely follow the pattern (surprise!). There are excruciatingly precise instructions to enable the quilter to reproduce the original exactly, but I don’t intend to do that. I paired up some colors the way the pattern suggested and did what I wanted with the rest. We’ll see how that works out.

Gathering the fabrics was a fun review of the past 25 years of collecting, and now we can all look forward to the Postcard from Sweden quilt in the future.


Oodalolly: A Finish

I’ve been running across pictures of Rachel Hauser’s Oodalolly quilt for years at various places on the internet. I’ve always admired it and though it would be fun to make, but there was no pattern that I could find. Finally I wrote to Rachel to ask about about it and learned that the pattern is in an E-book she wrote to accompany her color course. She acknowledged that I probably didn’t need to take the course but kindly agreed to sell me just the pages of the book that contain the pattern! So here it is, my very own version of Rachel Hauser’s Oodalolly!

No, there isn’t a funny lower right corner, but that corner swung toward me, creating the illusion!

The pattern was just as much fun as it looks like. I learned some things and enjoyed making it, so it’s a win-win. The only “odd” thing about this quilt is that it is NOT made from scraps (OMG!). I bought a fat quarter bundle of Alison Glass fabrics at a sale a while back, and used it for this quilt. I did leave out some of the less vibrant colors, but there was plenty of fabric without them.

The back is made up from a large piece of lightweight upholstery fabric I was given and a few strips of a sheet.

Quilt Stats

Name: Oodalolly

Finished size: 57″ x 73″

Designed by: Rachel Hauser, website here

Made by: me

Quilted by: Linda Nichols

A Chair Is A Chair

This is coming to you a day early because part of this post is an entry in Kim Lapacek’s Project QUILTING. The current challenge is Sew Not A Square.

But first a little background. On Monday of this past week, I was happy to attend a workshop with Daisy Aschehoug, who calls her business Warm Folk. I didn’t realize until I got to the workshop that I had reviewed a book she wrote with Heather Black a few years ago.

Photo courtesy of C&T

Anyway, Daisy was presenting her Giant Nested Curves workshop and it was within easy driving distance, so a friend and I went for the day!

When Daisy says “giant” curves, she isn’t kidding! Her templates for this project make a circle that finishes 24″ in diameter!  Here are some pictures I took of her class samples; keep in mind that these are 24″ circles.
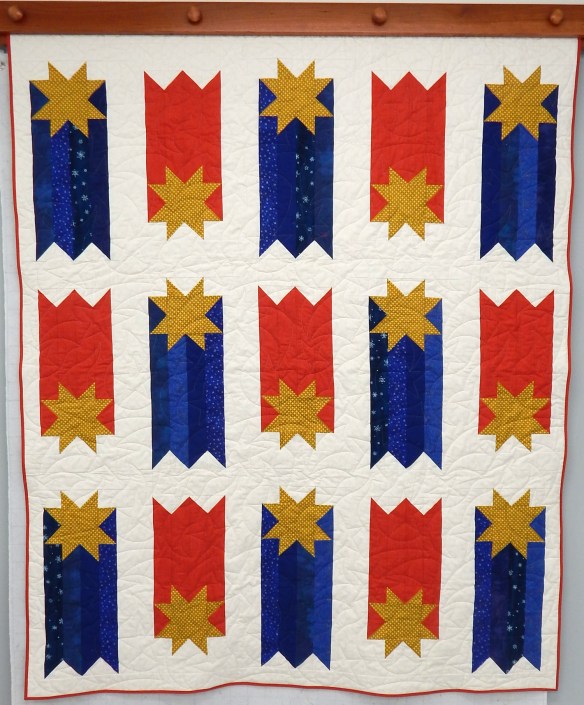
And here’s the quarter circle I got made during class.

Which leads me to the project for the Project QUILTING challenge: The assignment this time was to make a finished quilt with NO SQUARES! Since I had just been making circles, I started with the smallest template, which makes a quarter circle finishing 2″.
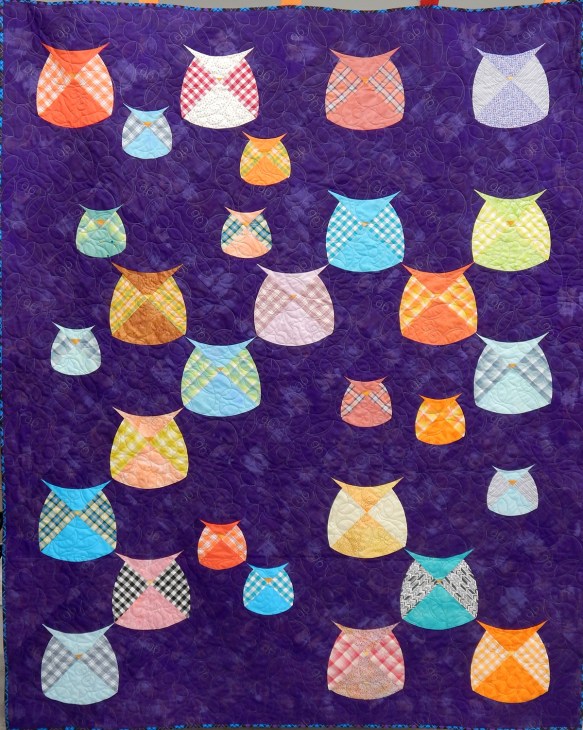
Making a curve that small was a “challenge”, as we like to call it 😀

So I made a second curve, on the end of a rectangle, and combined the two blocks into a chair. I thought it looked like a mid-mod chair, or maybe a Bauhaus chair, so I decided it could be a chair for Gertrude Stein. Which is why the quilting says over and over, “A CHAIR IS A CHAIR IS A CHAIR”. And taking a cue from a friend who recently sent me a quilted postcard, I zigzagged the edges rather than binding–much more practical for a postcard sized quilt.

Quilt Stats

Name: A Chair for Gertrude

Finished size: 3.5″ x 6″

Designed, made, and quilted by: me

Fabrics: cotton, front and back

Batting: Felt

Thread: Superior So Fine

Quarter circle template from Daisy Aschehoug


Glimmer: A Finish

This quilt was made in 2022, but I just got it bound. I took a class at Studio Stitch to make it because the previous quilt I made using the Jaybird Quilts Sidekick ruler gave me fits. Here’s the previous one (pattern here):

Not sure whether it was previous experience or having someone to guide me step by step, but Glimmer went together just fine. Here’s a look at the back and binding:

And here’s a picture of the quilting done by Linda Nichols:

Quilt Stats

Name: Glimmer

Finished size: 60″ x 60″

Pattern by: Jaybird Quilts

Made by: me

Quilted by: Linda Nichols

About Those Improv Blocks…

Back in 2019 I made up my own improvisational block challenge. When the blocks were done, though, I decided it was going to be difficult to put them all together in one quilt. I had chosen coordinated fabrics but used all the colors from the collection, among other problems.  Of course it was intended as a learning experience, and I learned that I should restrict my color options when I experiment with just a few blocks!

Here are all the blocks together:

And just for comparison, here is a more recent series of improvisational blocks in which I did limit the colors:

So I learned, which is good, but then those 2019 blocks have been sitting around for a while. OK, almost 4 years.

I’ve decided to use the 2019 blocks in a series of small pieces that I quilt by hand. This not only gives the blocks something to do but also gives me something to do with my hands during meetings.

Here’s the first piece so far.

The funny thing is that many people at meetings have asked, “What is it? A table runner?” And when I say, “Art” they just look puzzled.

And a lot of times art is puzzling, so I’m good with that 😀

I do need to find a local art quilt group to join, though. Any suggestions?