Chela’s Journal

My blogging friend Chela makes beautiful fabric journals (and other fabric art) and recently used Kraft-Tex to make a cover for last year’s journal pages. You can read about how she did it in her post here.  However, she had some difficulty with pictures on her site, so I have some pictures of her process below:

Chela used a tool to crease the Kraft-Tex, and I do too–it’s tough enough to stand up to this

She also used clips to hold it for sewing–of course you don’t want pin holes!

She decorated the cover of her journal with stitching and buttons–Kraft-Tex can be stitched either by hand or by machine

Chela had trouble with glue for applique, but stitching worked fine. If you want glue, I use the Aleene’s Jewel-It glue with good results on Kraft-Tex

And here are some of her creative journal pages.  Click on any image for a larger view.

You can see Chela’s blog here:  colchasymas.blog

Kraft-Tex Christmas

One of our Christmas traditions is re-usable gift wrap.  I’ve made a number of fabric bags for the purpose over the years, and we have lots of hemmed lengths of holiday fabric that we use for Furoshiki style gift wrap.  (Here’s a link if you want to see an expert doing a Furoshiki style wrap.)

Enter the red Kraft-Tex recently sent by C&T for me to experiment with.  From the time I saw it, I wanted to make a flower to decorate a holiday package.  It took a good bit of experimentation, but here’s what i came up with;

This is the Crimson color of hand-dyed, prewashed Kraft-Tex

I started by cutting pointed ovals about 2″ long and then sewing a little dart in one end to make them 3-dimensional.  I did tie a knot a the point of the dart, but there was no problem with back-stitching at the other end.

I glued the petals to a button with a concave surface to give them some support, then glued a piece of discarded costume jewelry in the middle.  I’m going to glue an alligator clip on the back for attaching the flower to the package.

You may wonder how this flower will do being stored with the wraps between holidays.  The answer is: just fine!  Read on for why.

This color is “Sapphire”

I recently made this little pyramid bag from Kraft-Tex (free pattern here, if you’re interested).  There was no need for batting between layers because the Kraft-Tex has enough body to hold the bag up.

It took some DOING to get this little bag turned right side out after construction because it’s so tiny.  The material actually looked better after all that squishing and twisting than it did before!  There were no permanent creases in it, and it looks much more like leather now that it’s been manipulated a lot.  So, as I’ve said before: was the Kraft-Tex, crumple it in your hands, etc, etc.  It just improves the appearance.Please note:  C&T provides Kraft-Tex for me to play with, but the links in this post are for your convenience.  I do not make money when you buy from them.

Kraft-Tex Tray

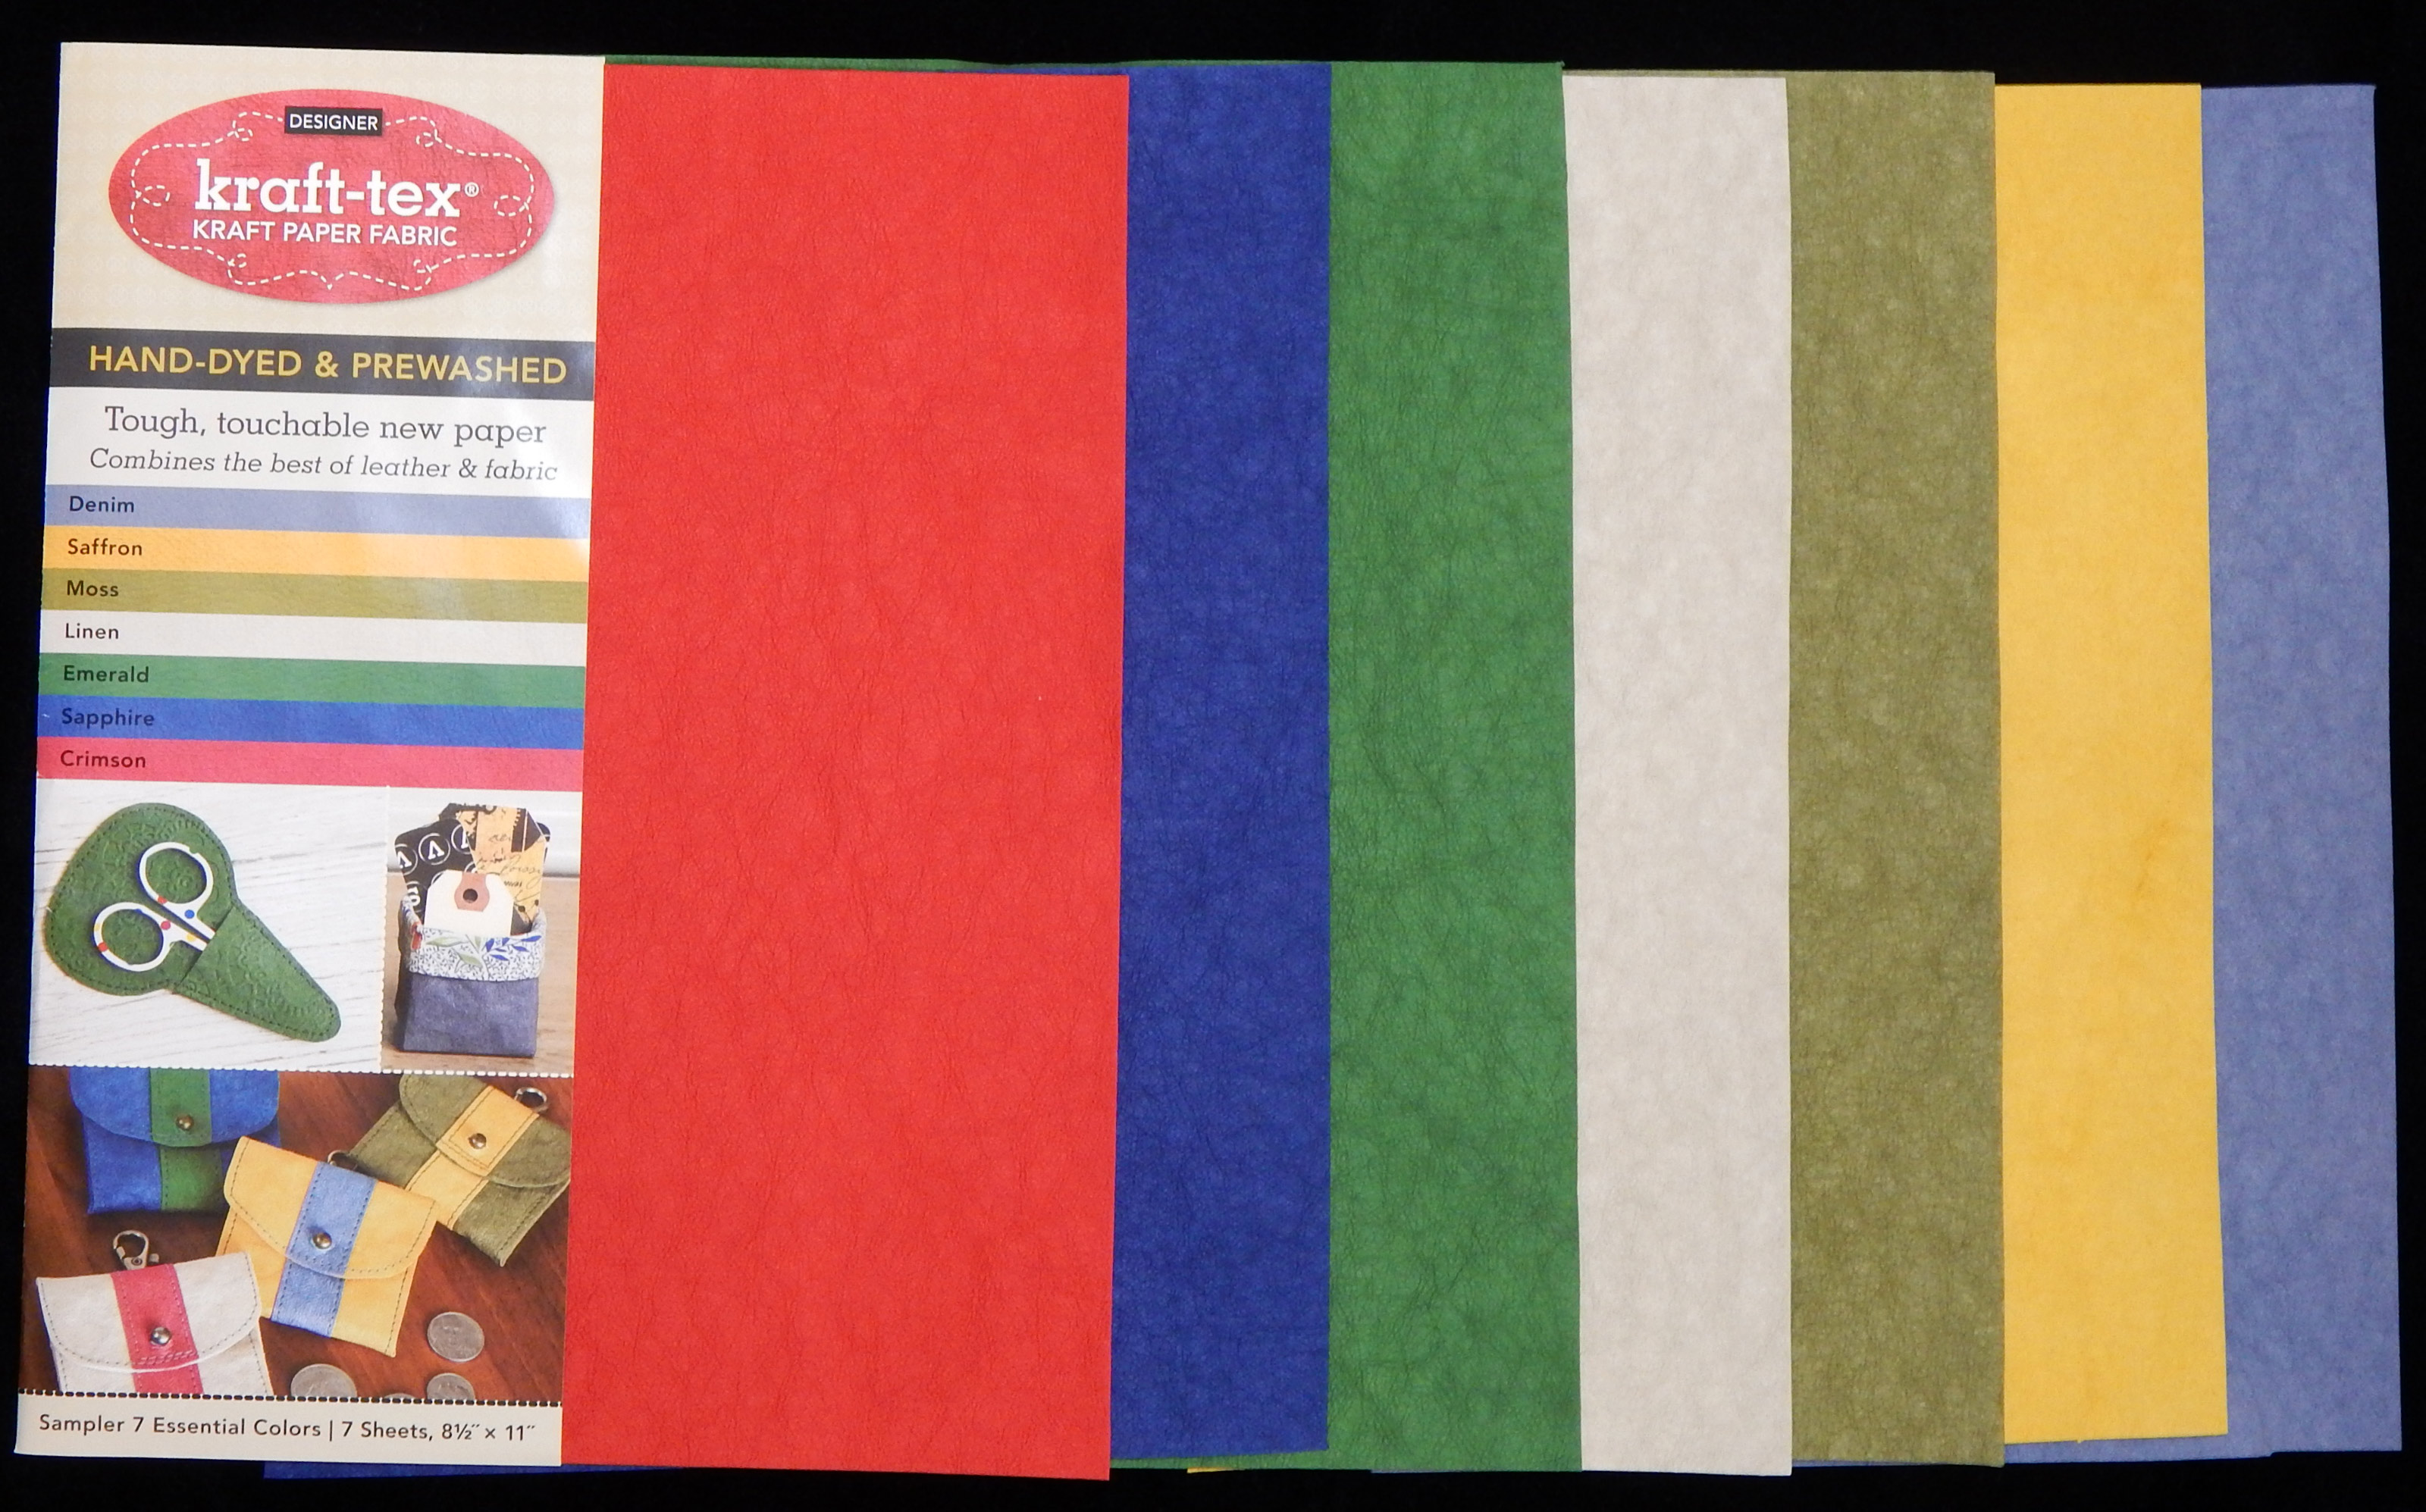
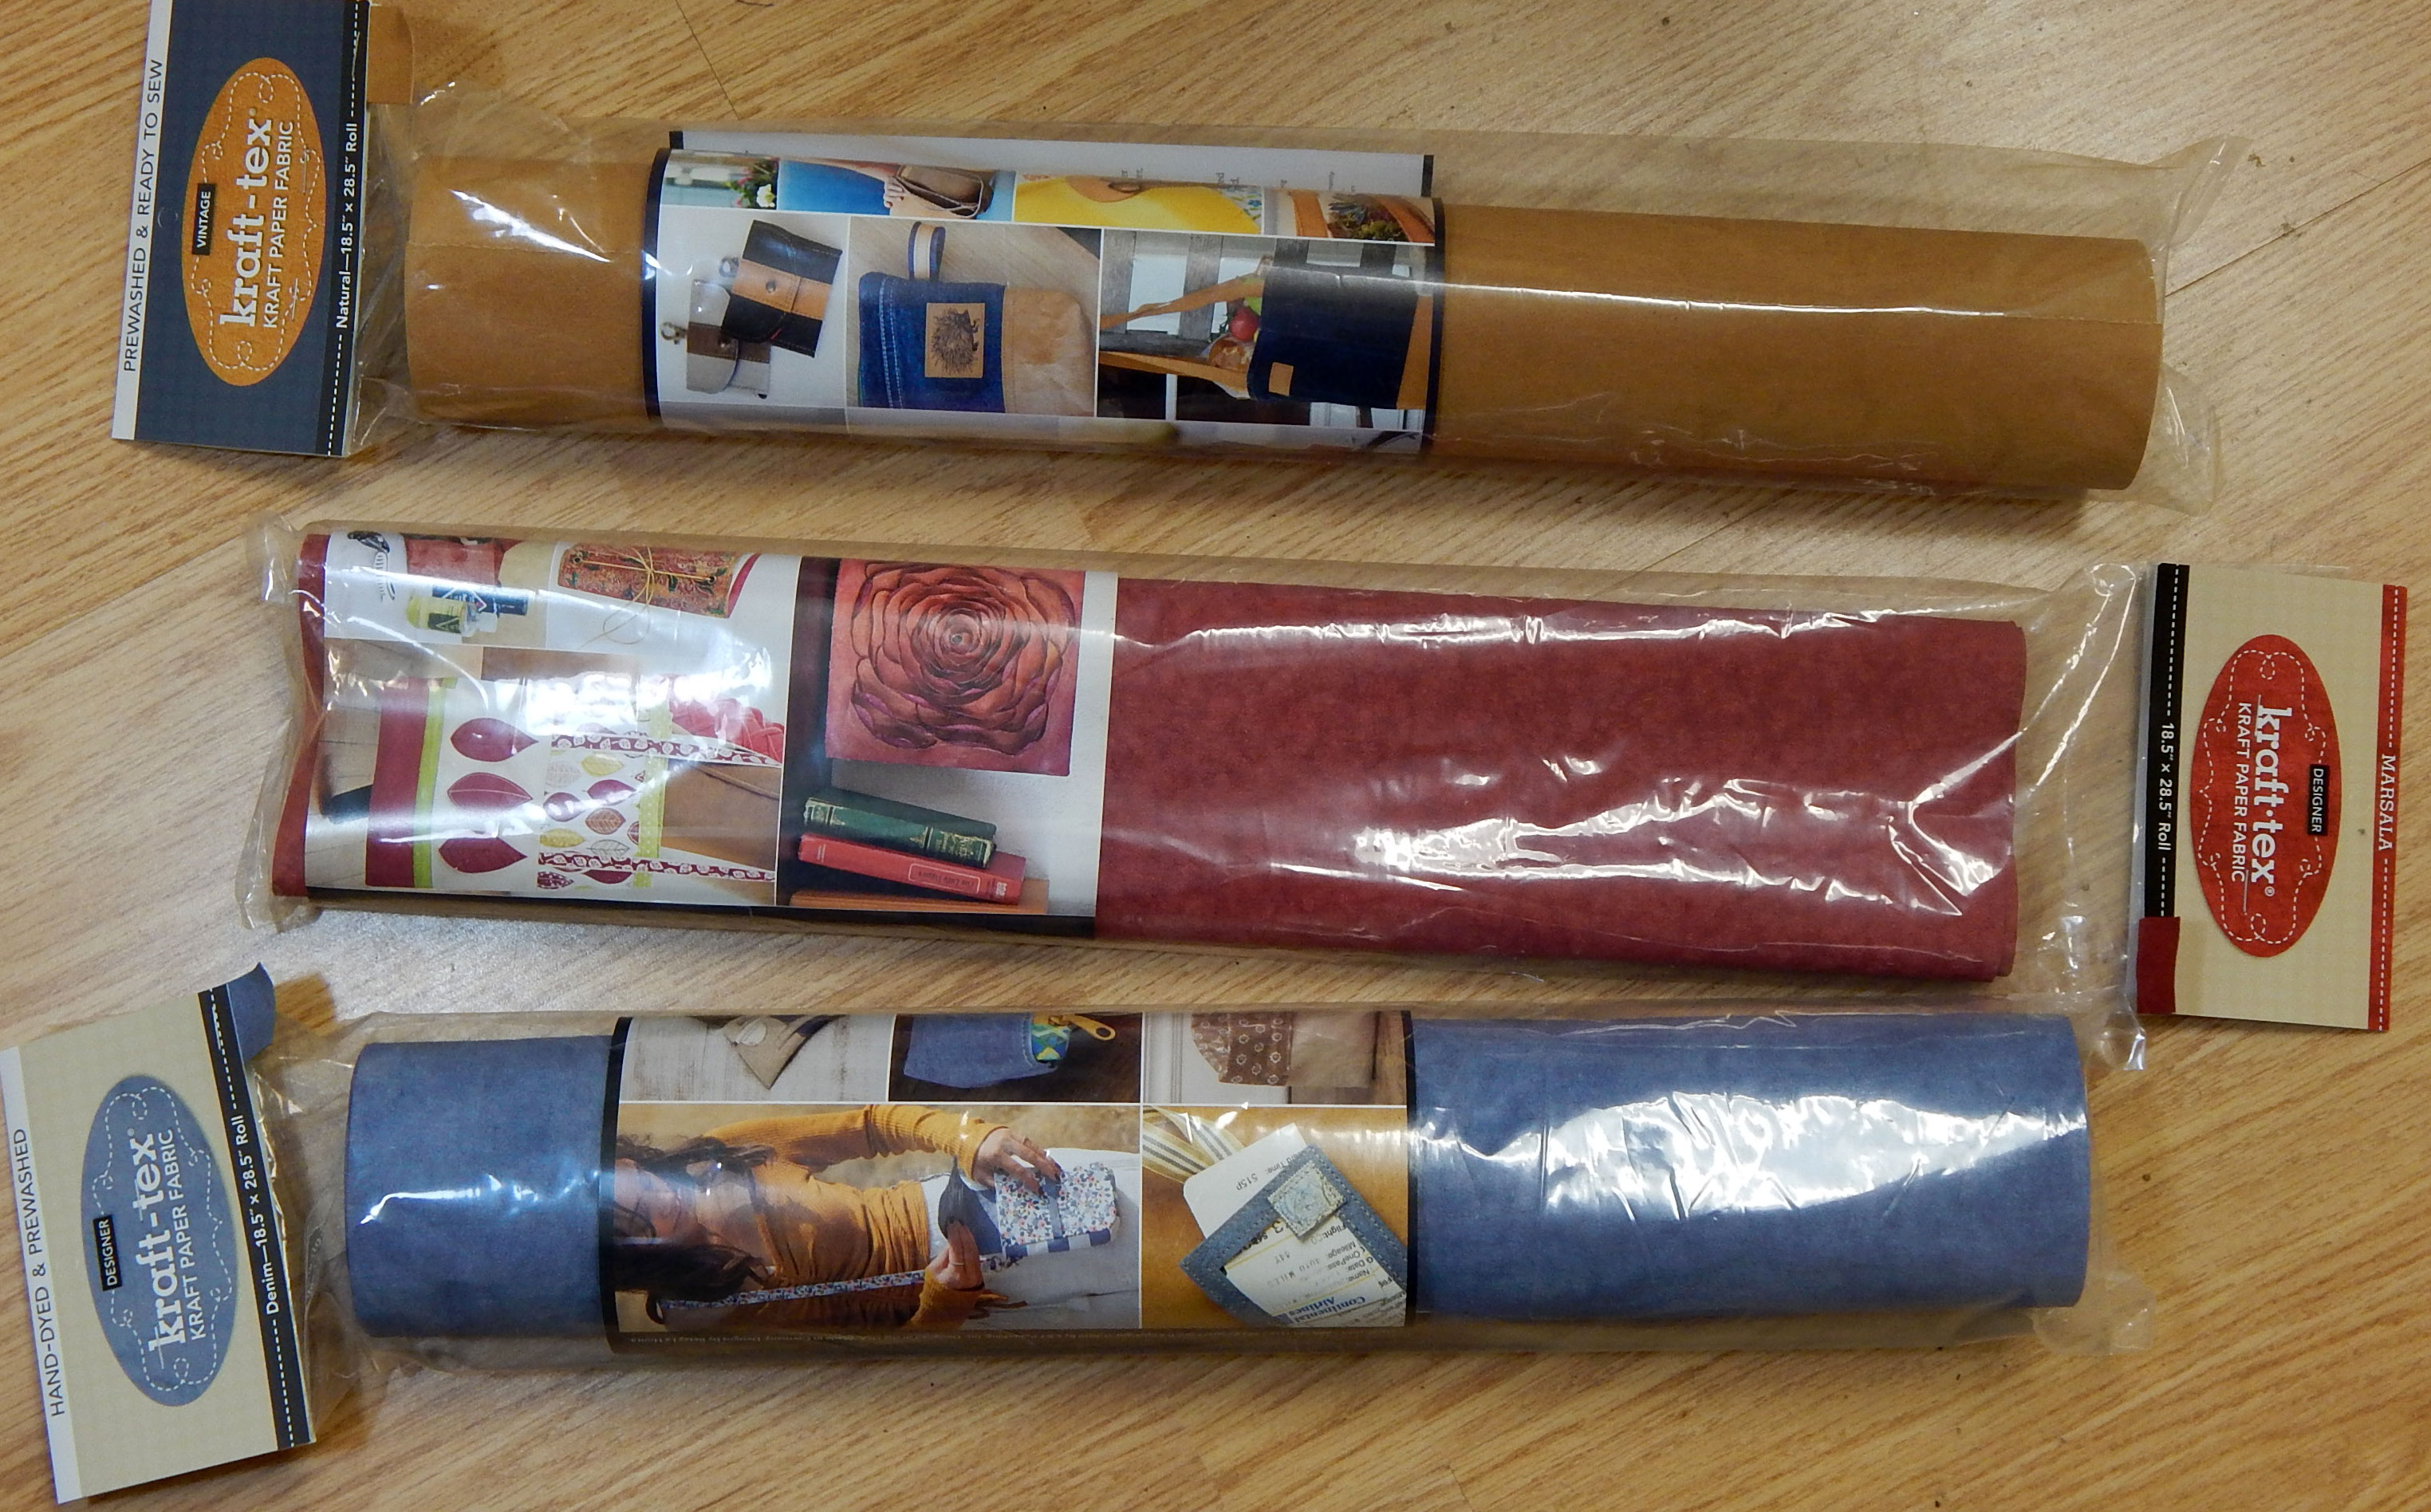
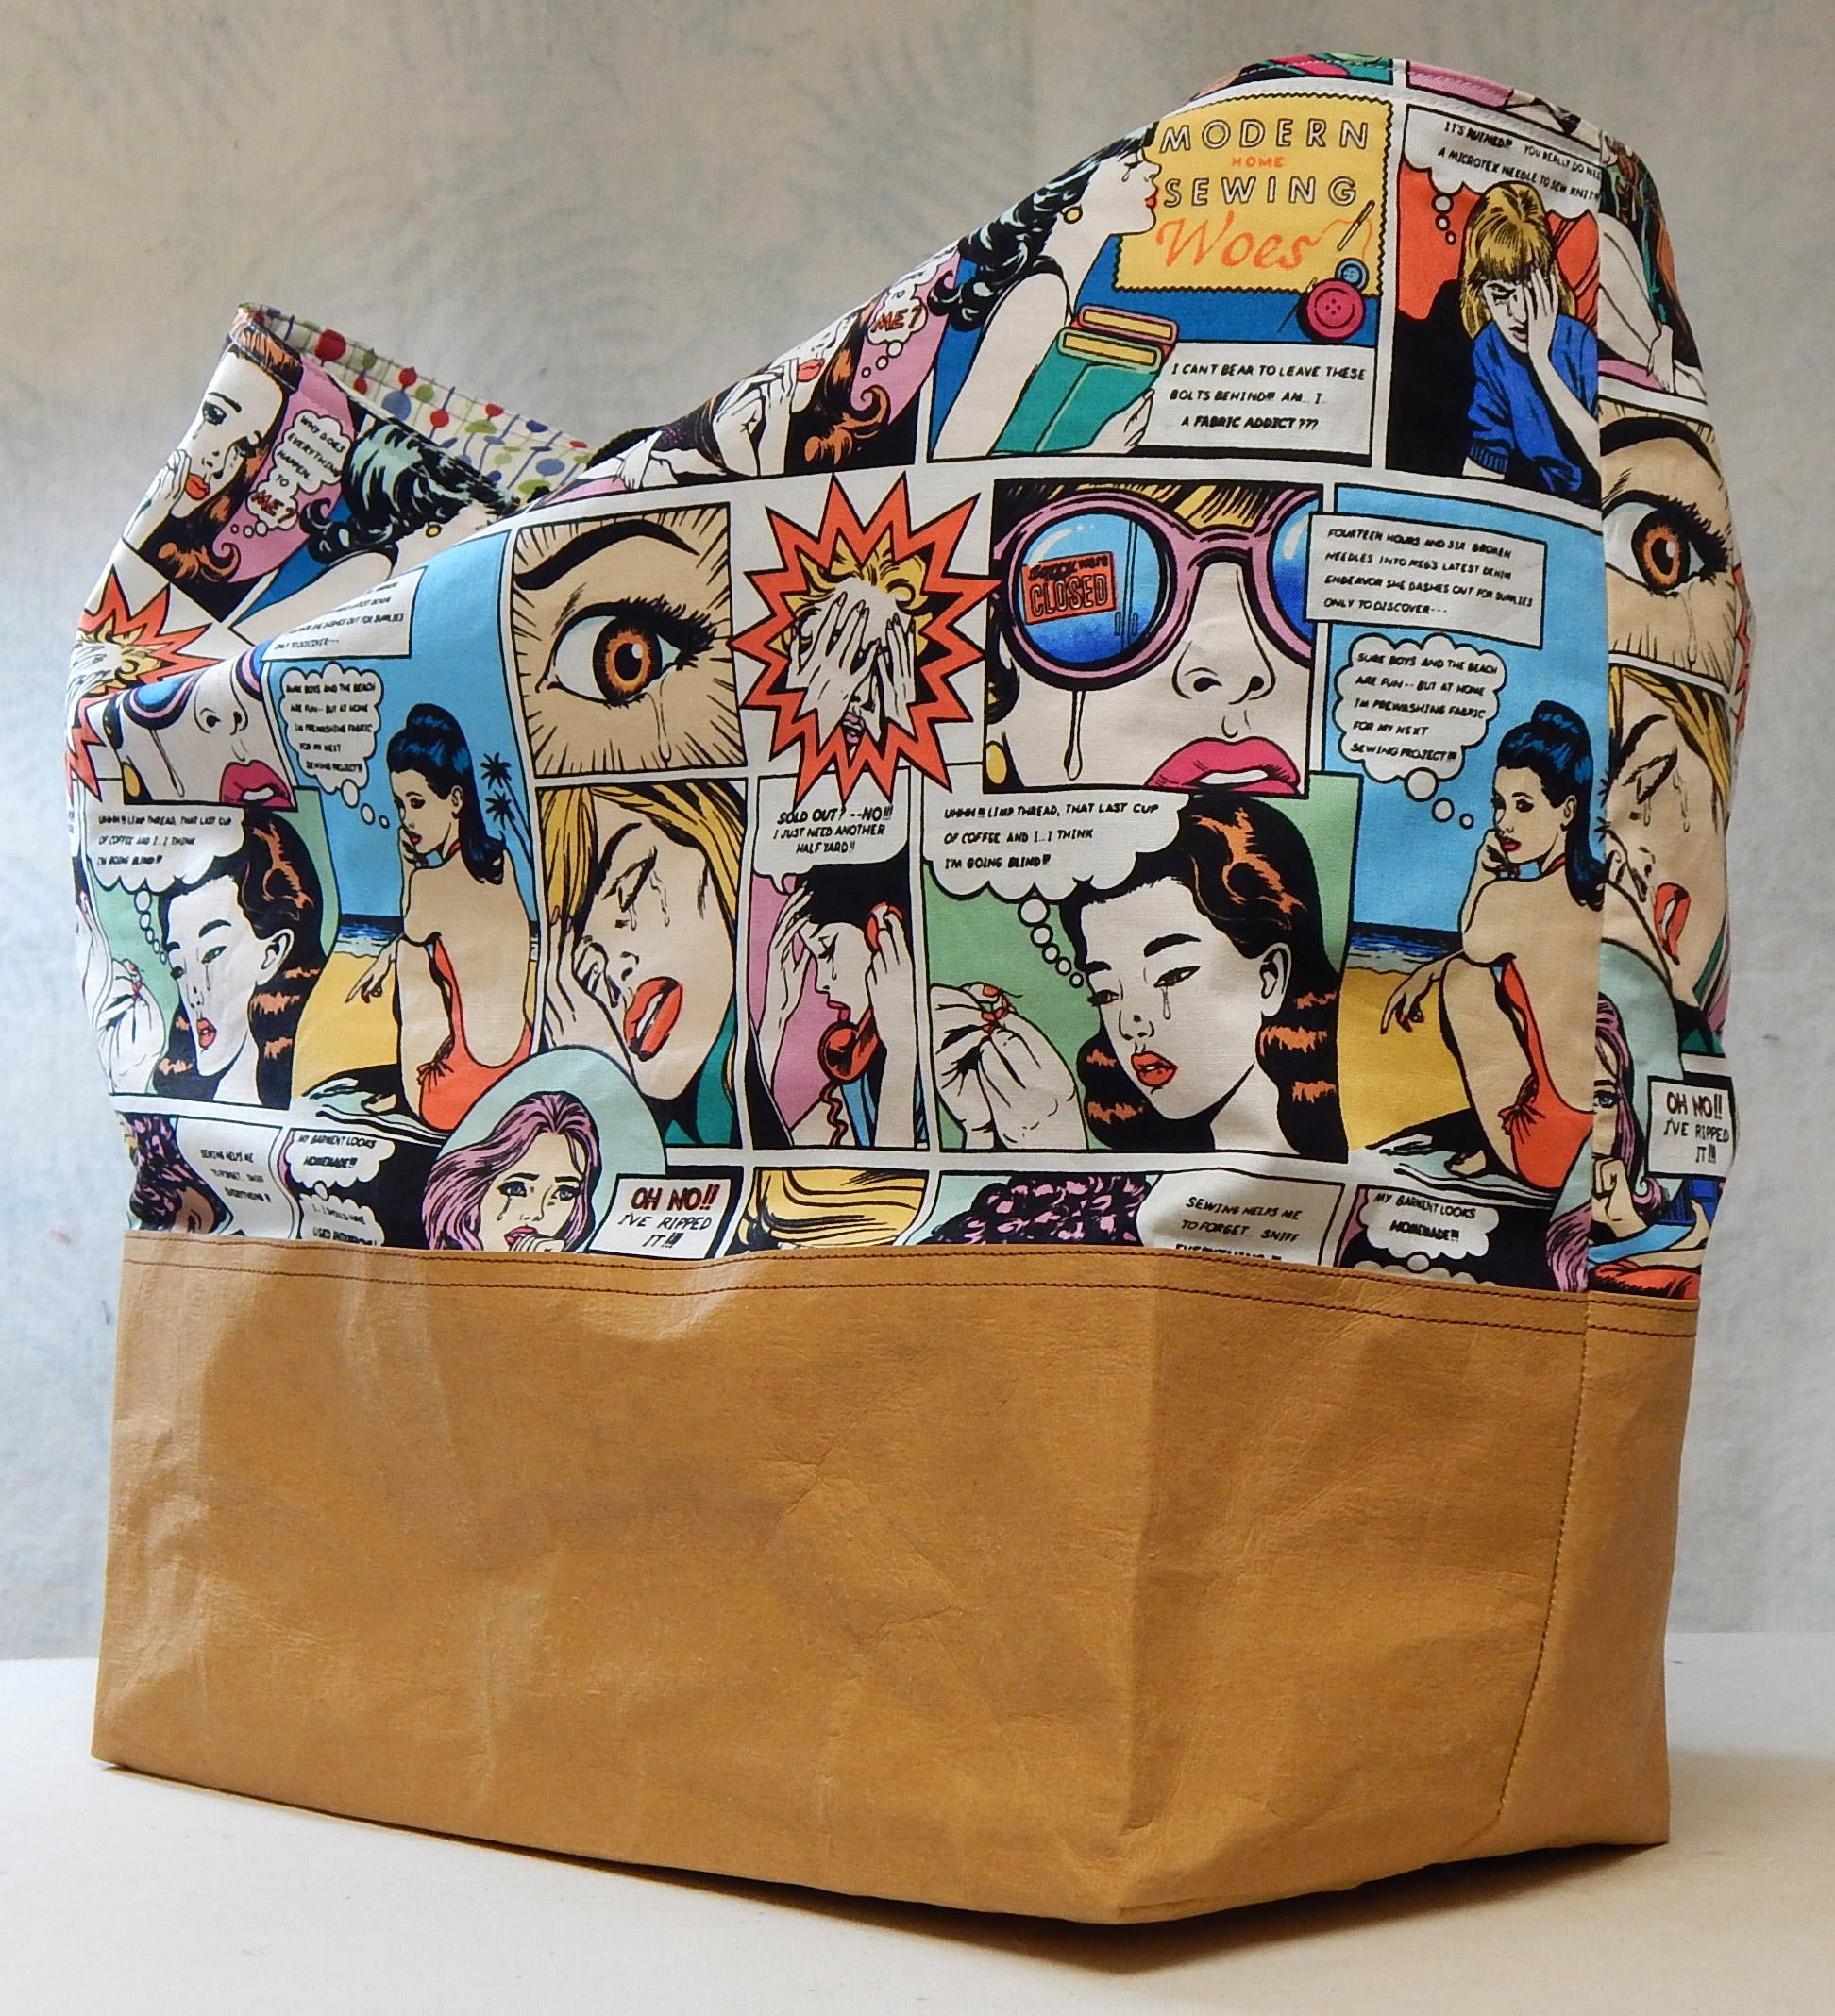
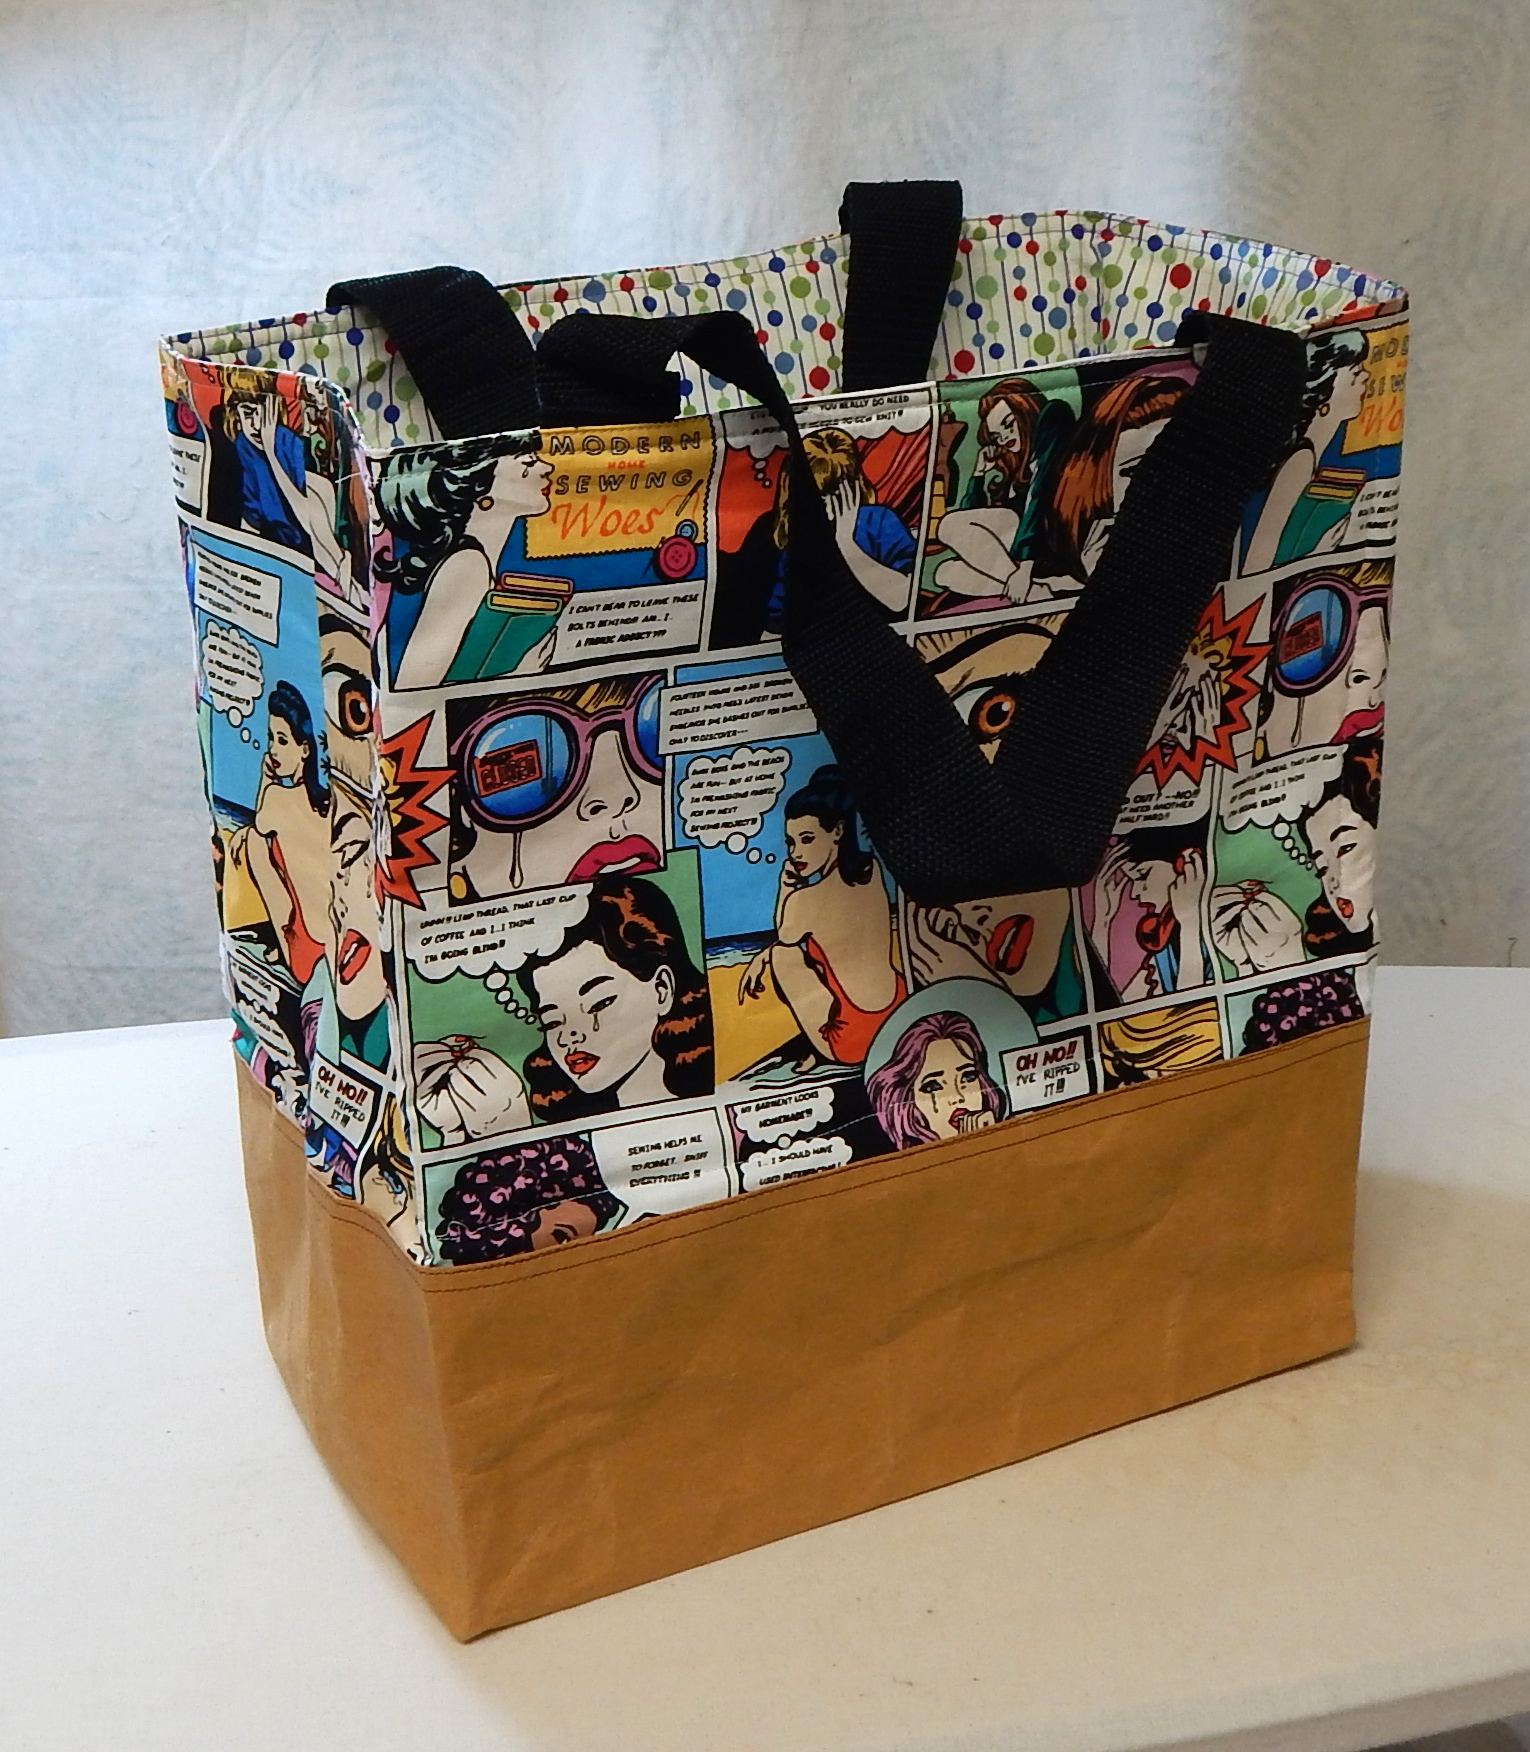
The folks at C&T just sent me a package of the beautiful new hand-dyed, prewashed, Kraft-Tex. (Please note that they provide this to me with no obligation and I do not get a kickback if you buy it.  However, if your local quilt shop doesn’t carry it, you can get it directly from C&T here.)

The denim blue called to me first, and I needed a little tray to go beside my machine.  Unless my tools are “corralled” they tend to roll or bounce off the table when I sew.  The fabric tray I’ve been using was looking a little tired (the sides had sort of collapsed) and I thought Kraft-Tex would be a good material for making a sturdier tool tray.

I made a prototype from cardboard first to figure out the best size and shape for my tools.  Here are instructions for making the tray in case you want one, too:

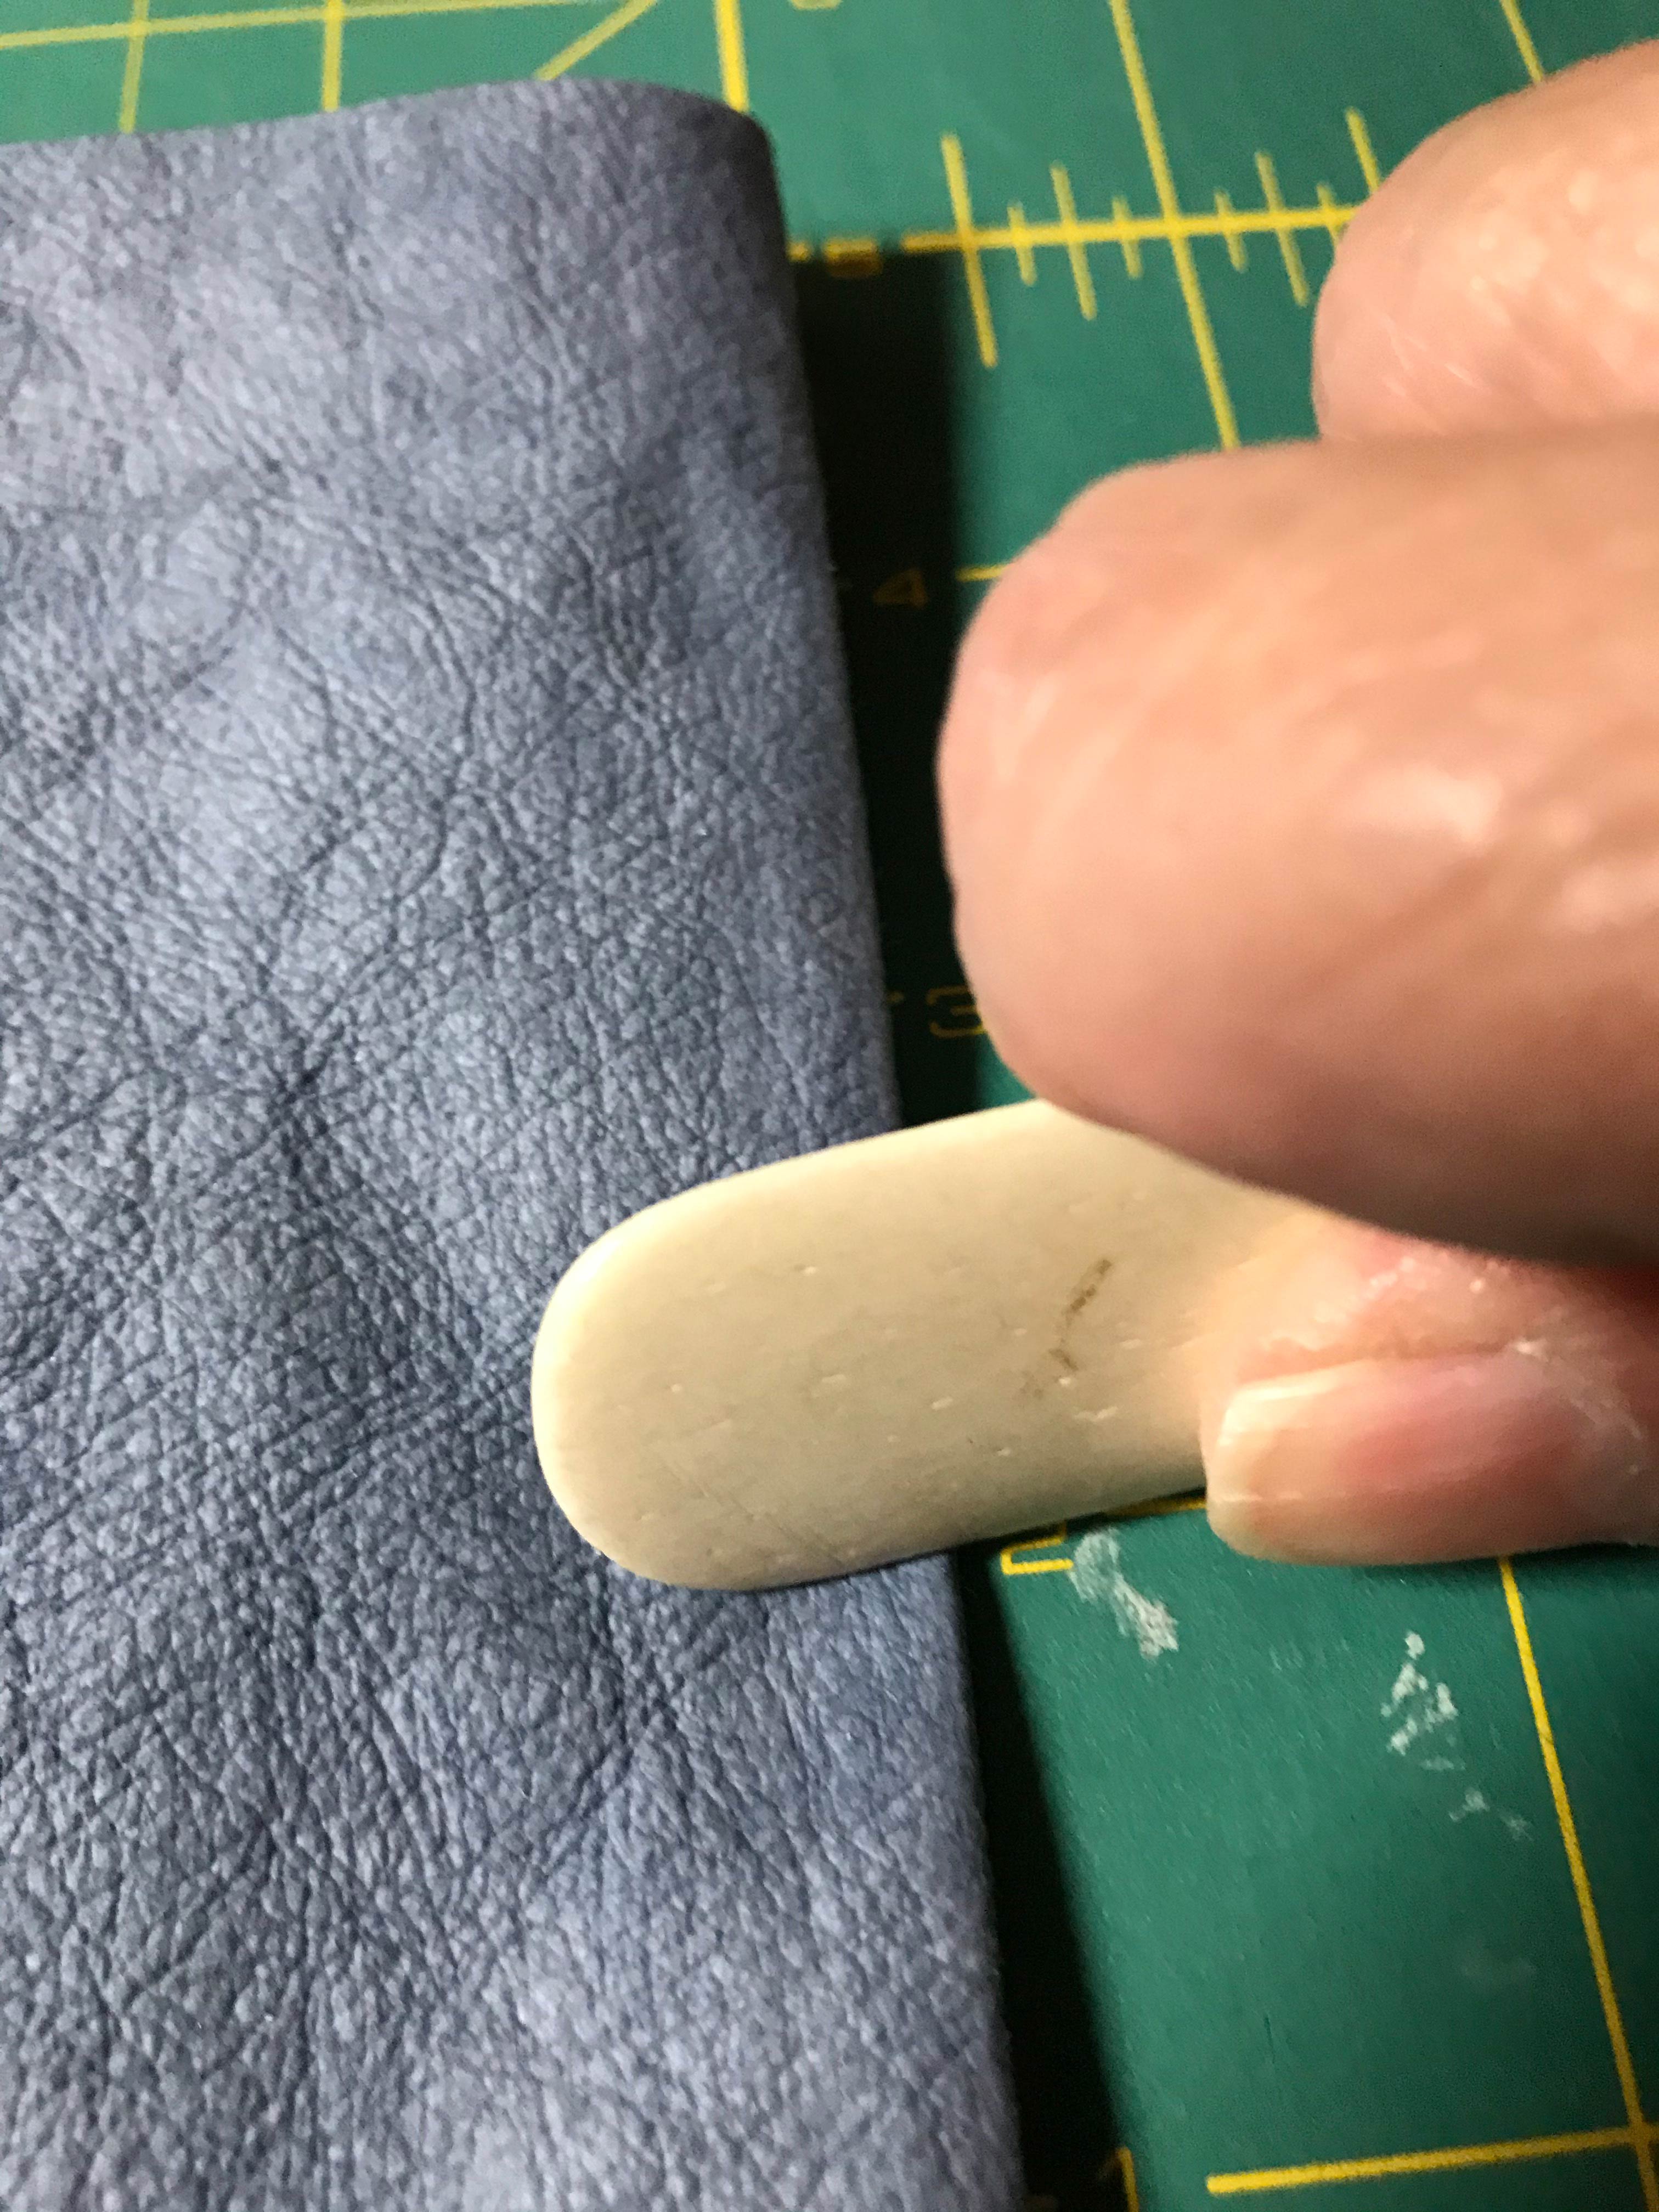
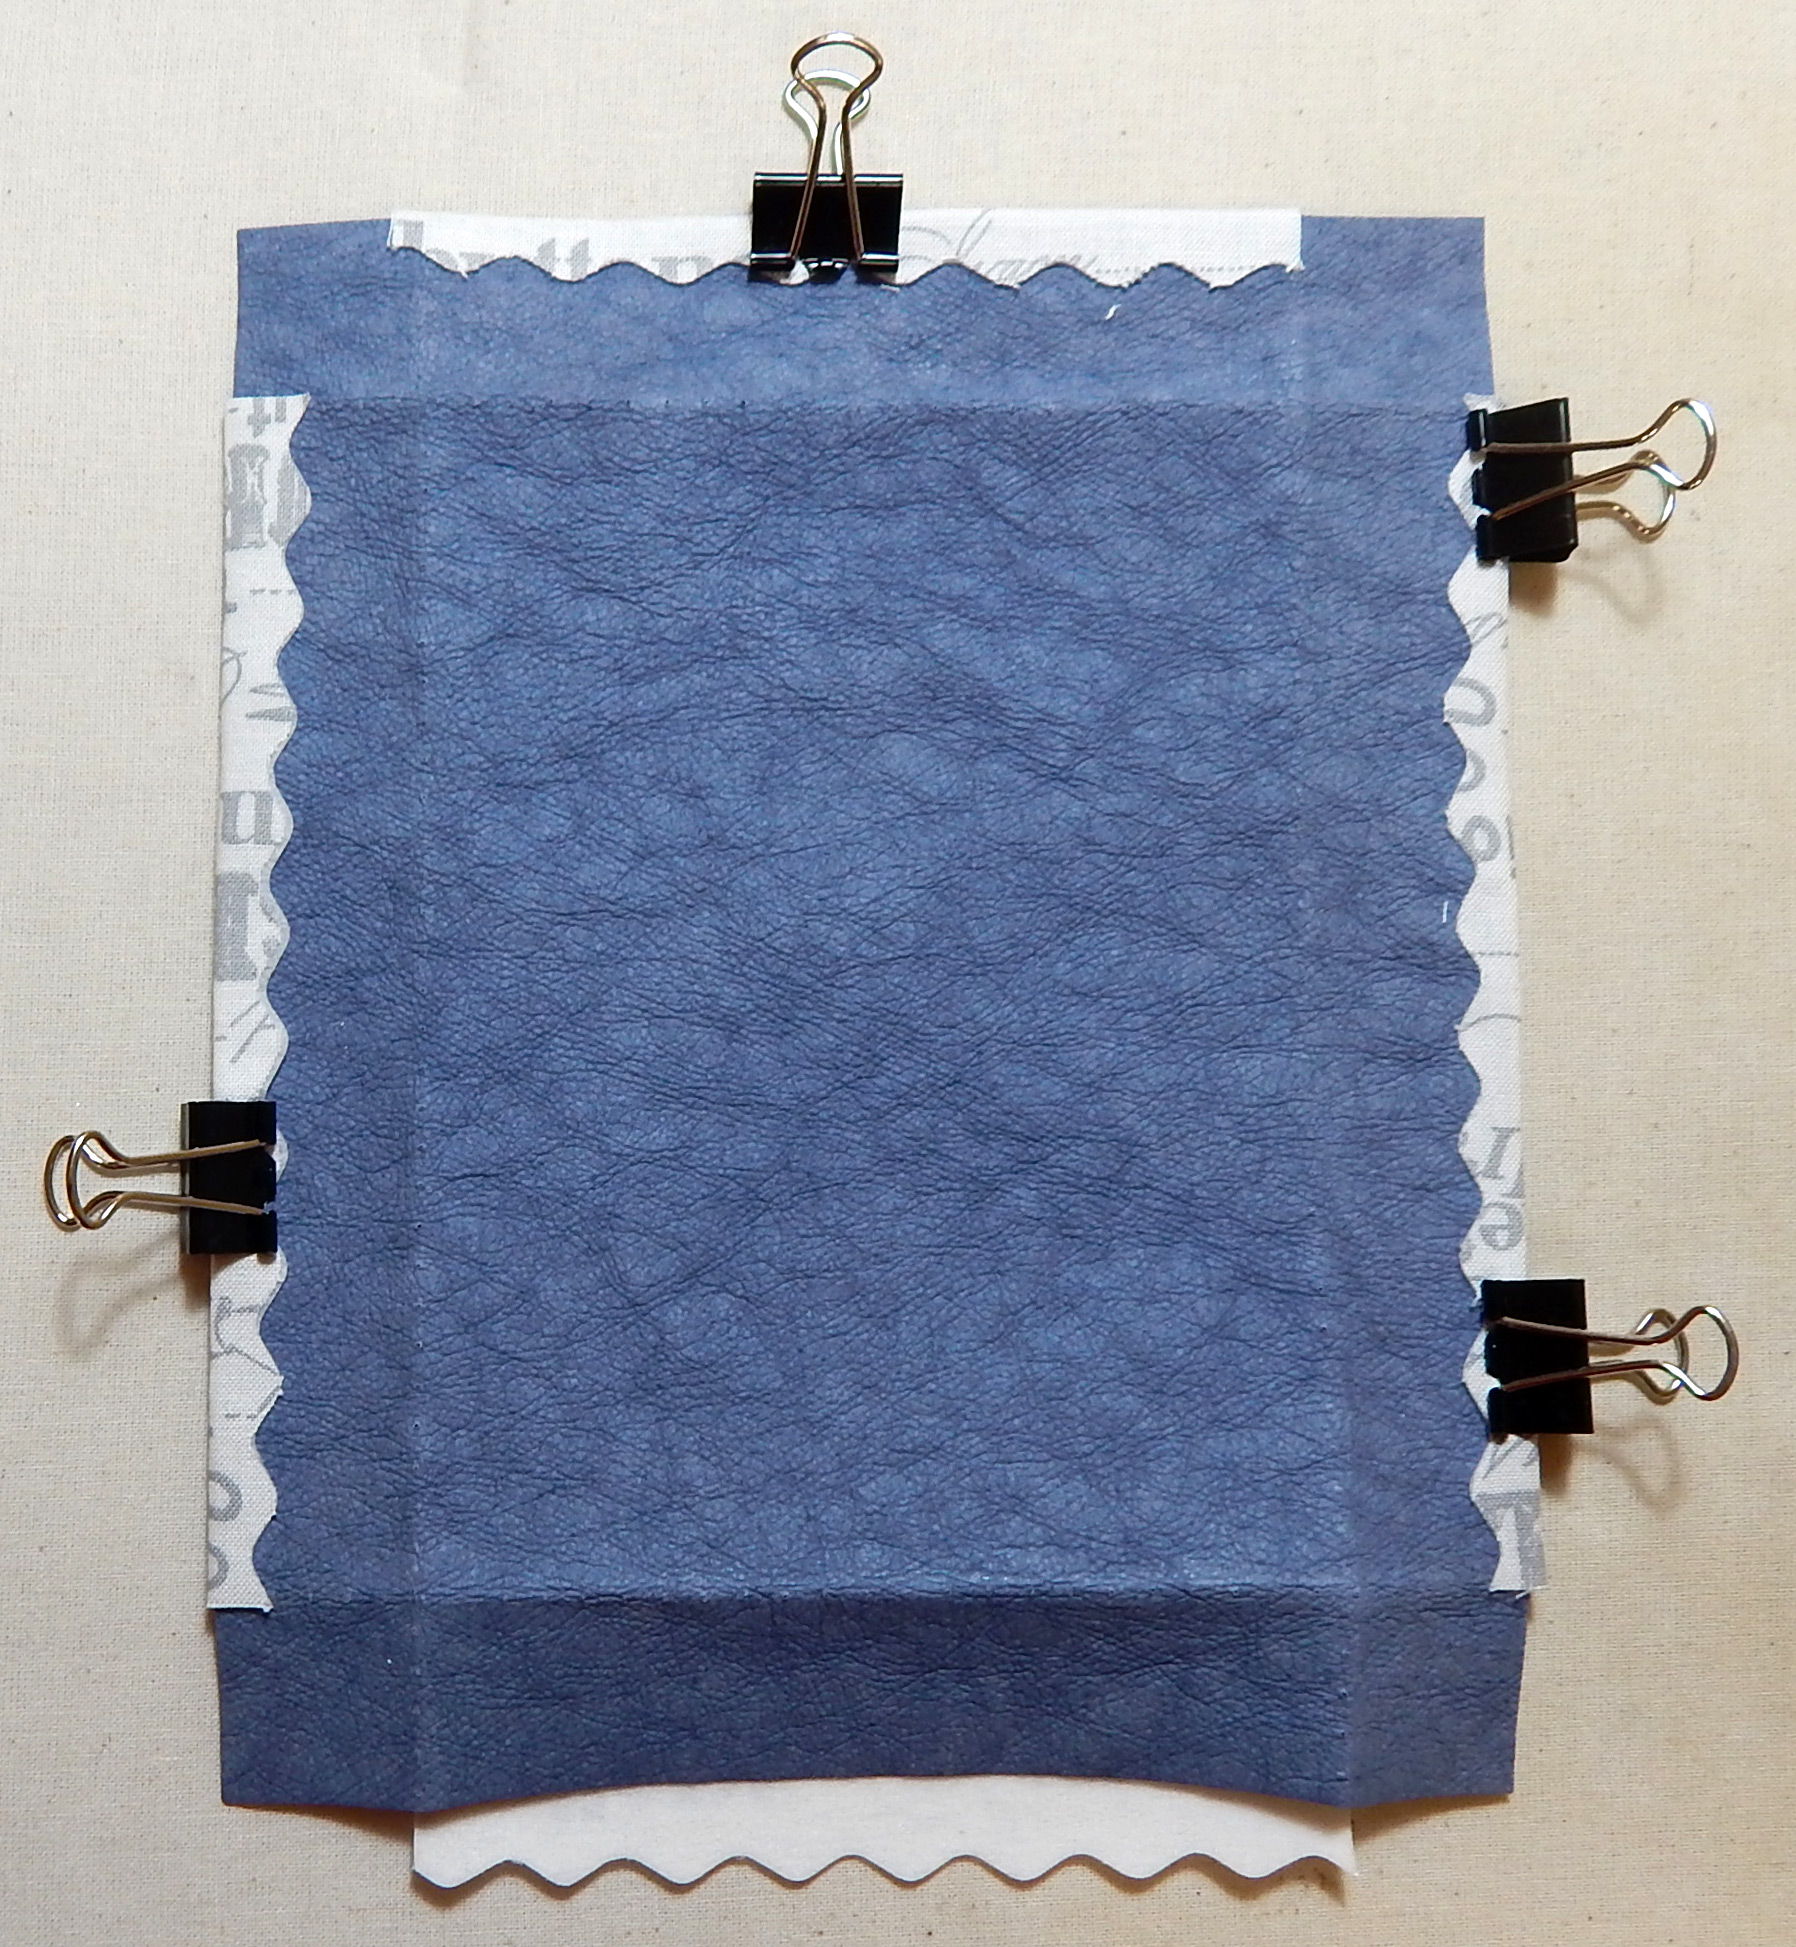
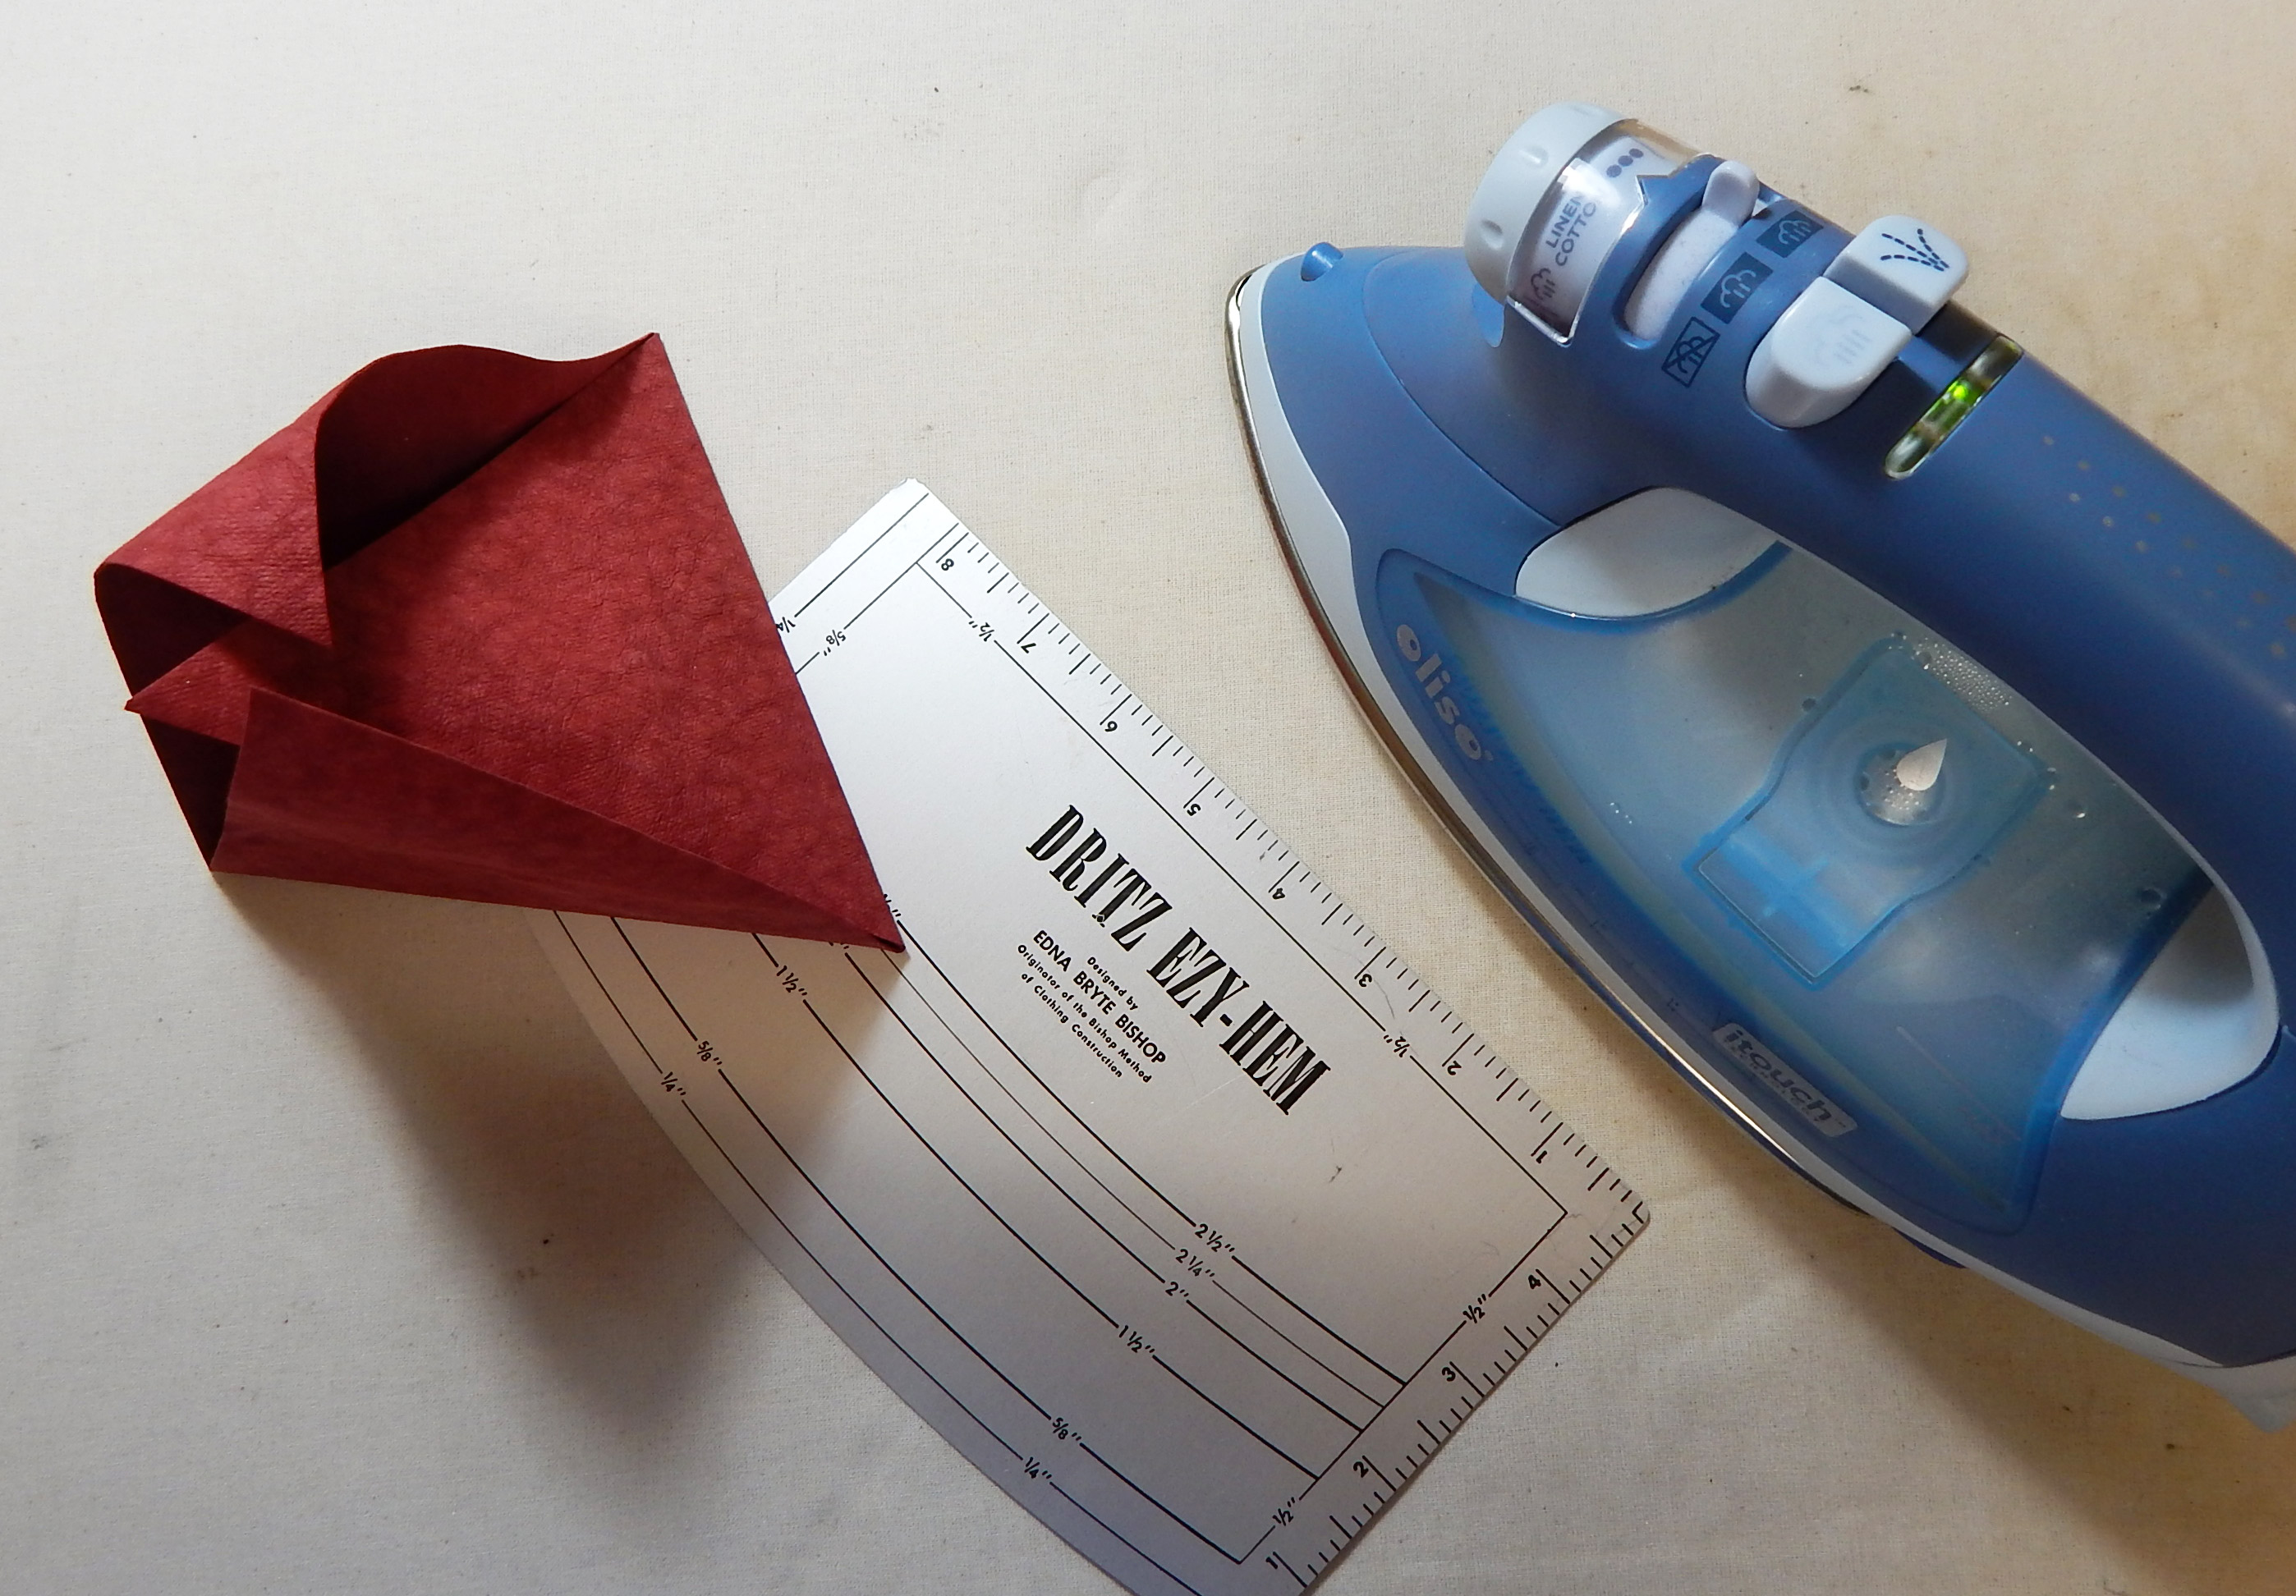
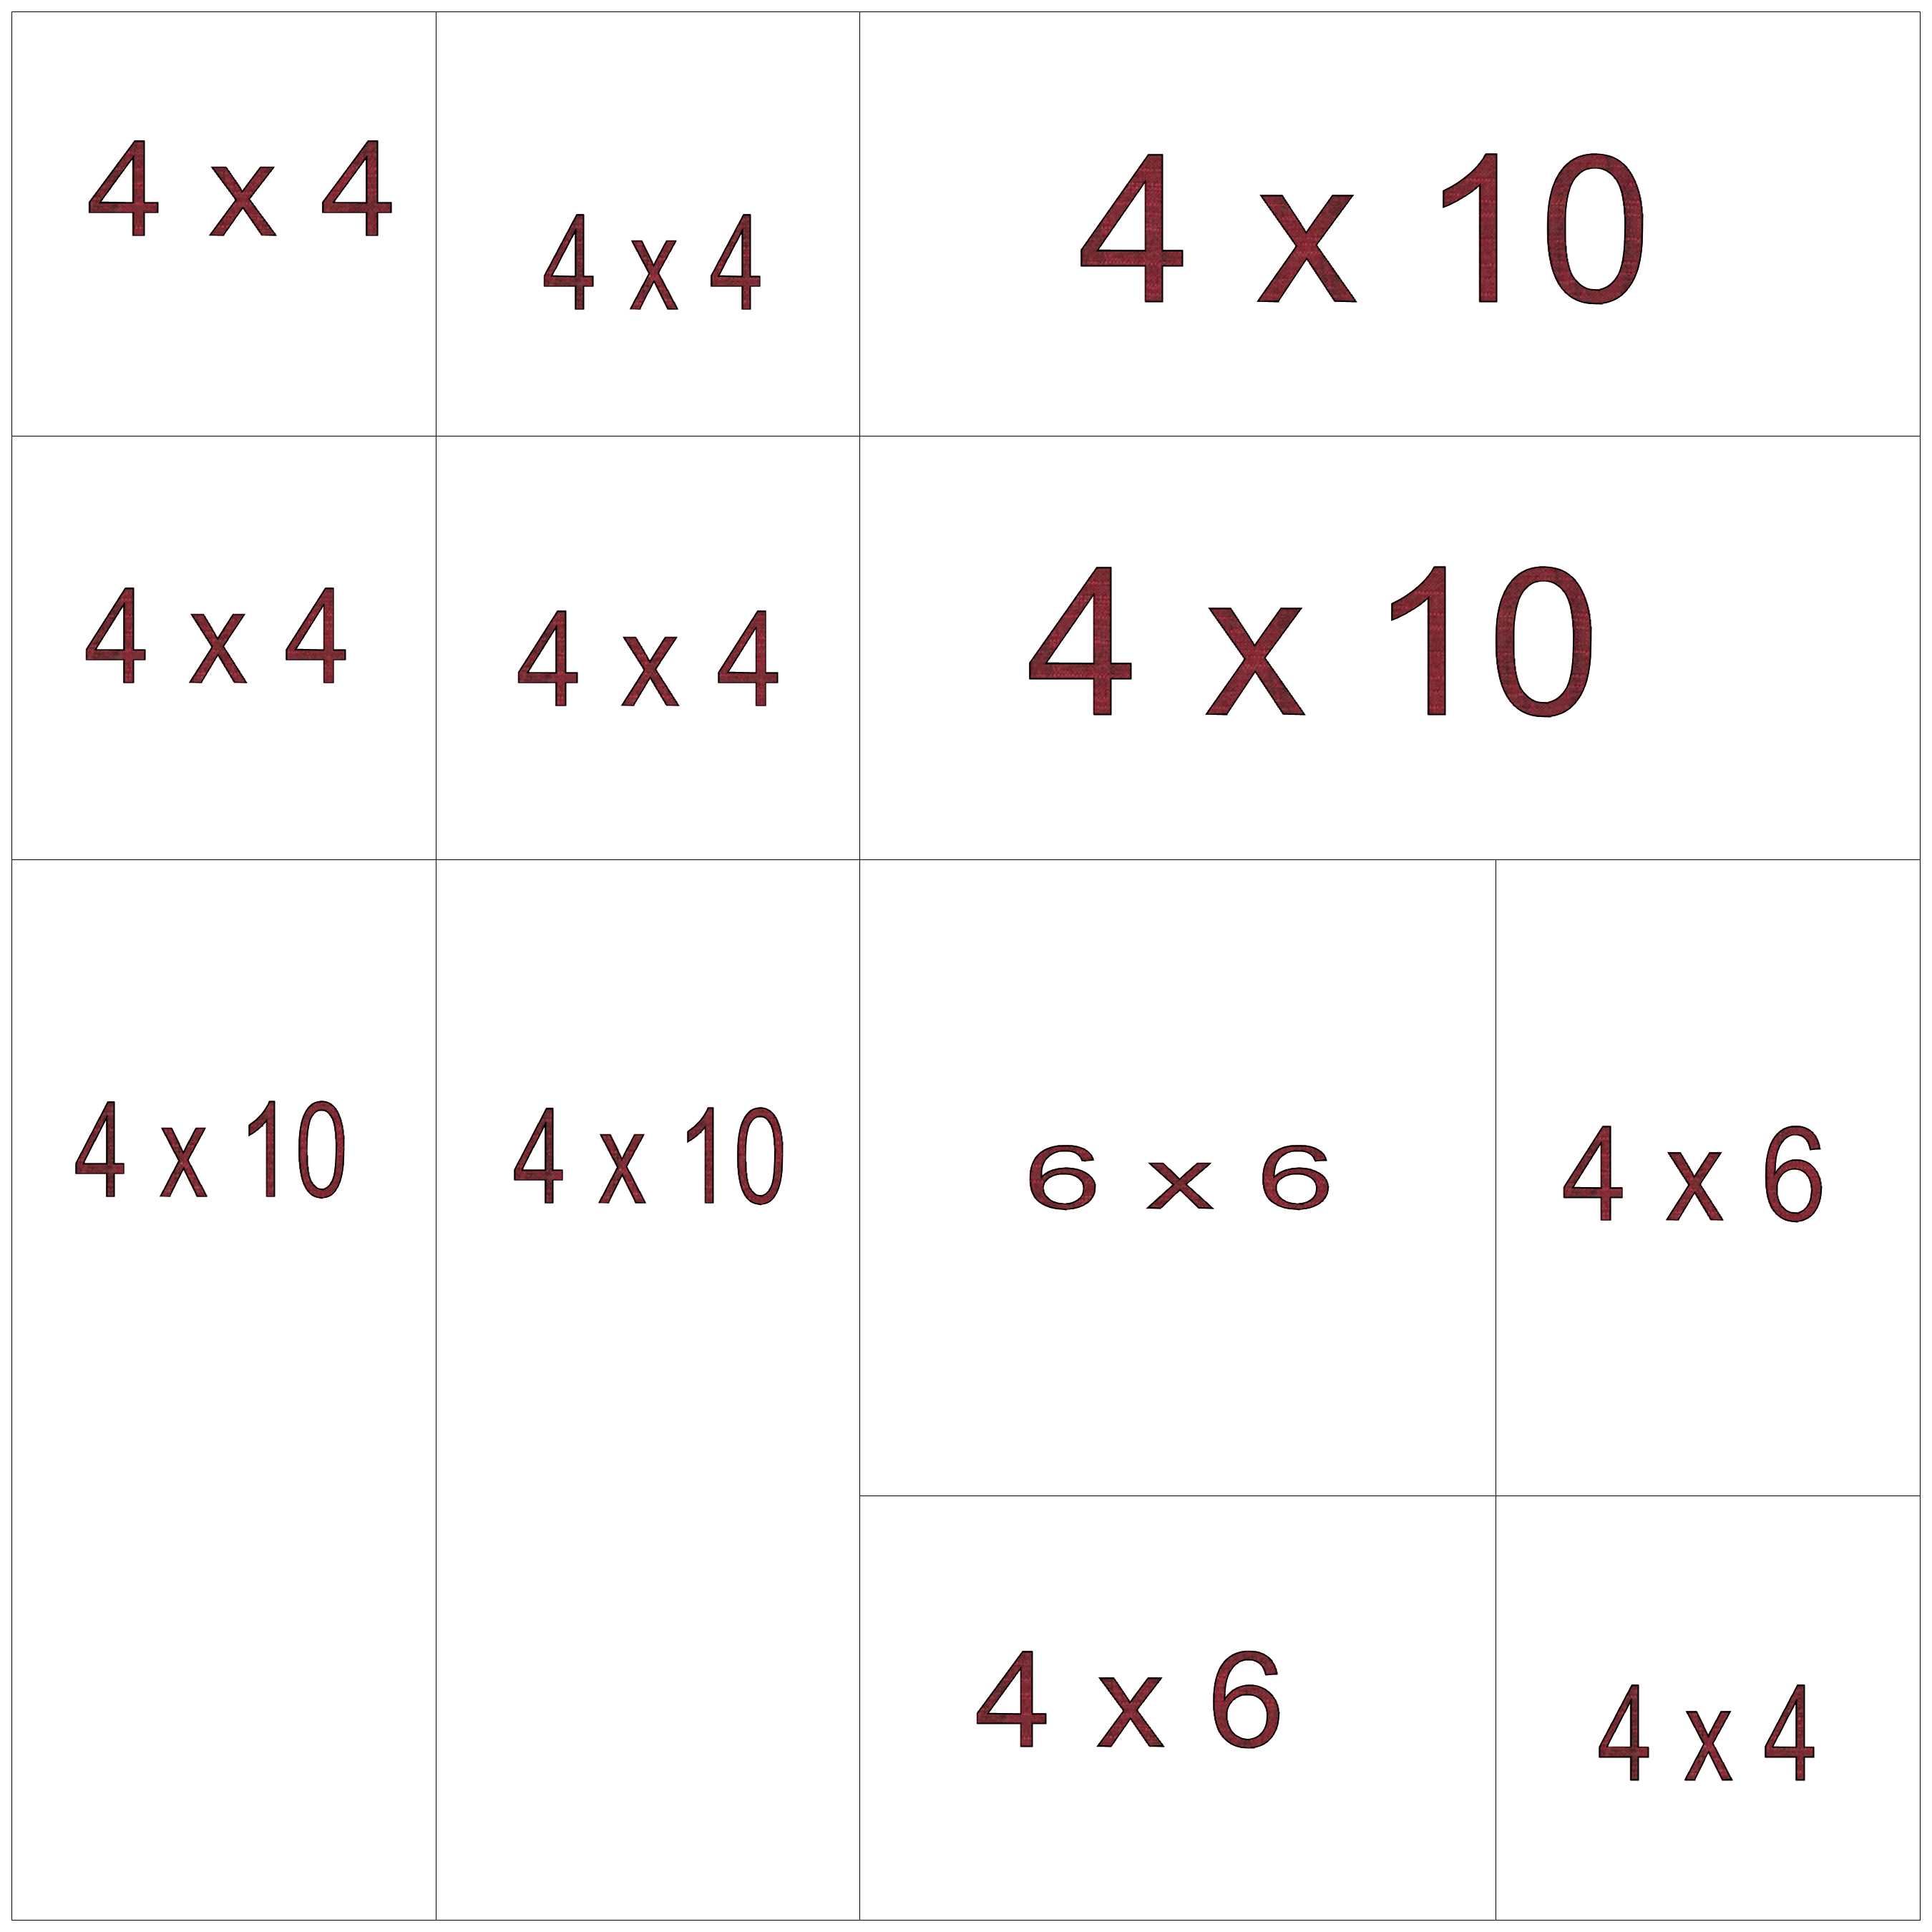
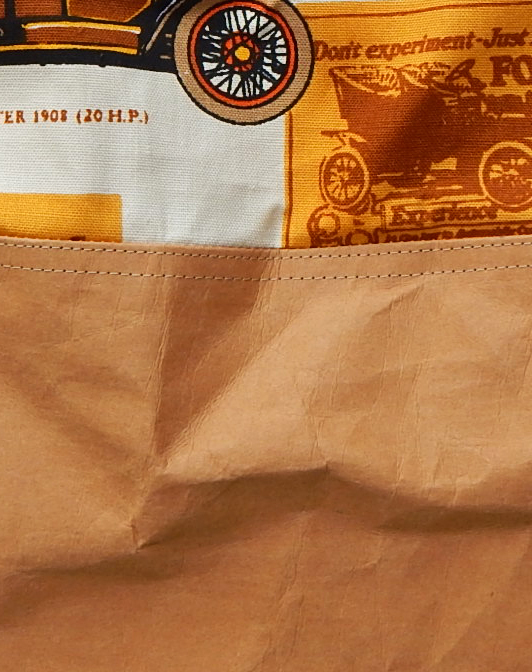
Cut the Kraft-Tex 6-1/2″ x 8″ and mark (with a heat-erasable pen) 1″ in from each side.  Put a #70 needle in the sewing machine, lengthen the stitch a little, and remove the thread.  Stitch around the central rectangle without thread to mark the edges of the tray base and kind of score the Kraft-Tex so it will fold well on those lines.  Fold and press along these lines–it’s fine to fold all the way to the edge even though it wasn’t necessary to sew that far.

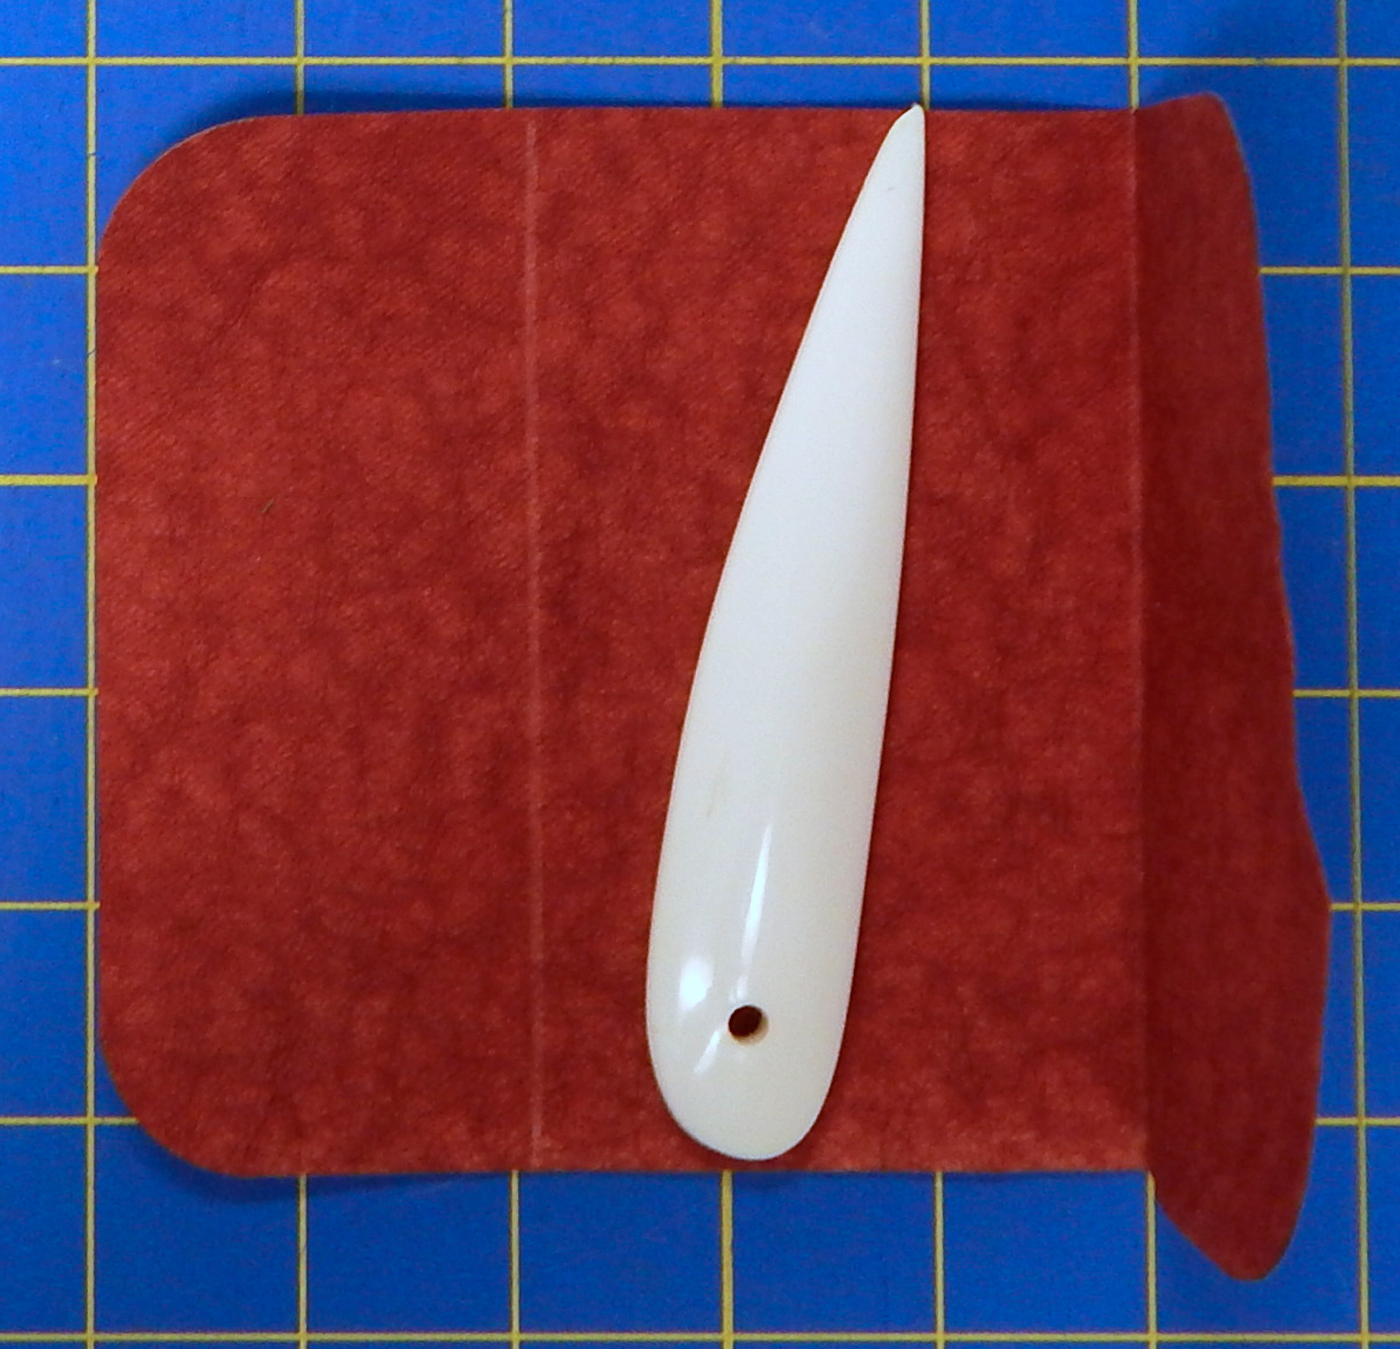
This picture was taken later in the process, but you can see where the material was pressed along the fold lines.  You can press either with or without steam; both work fine without distorting the Kraft-Tex.

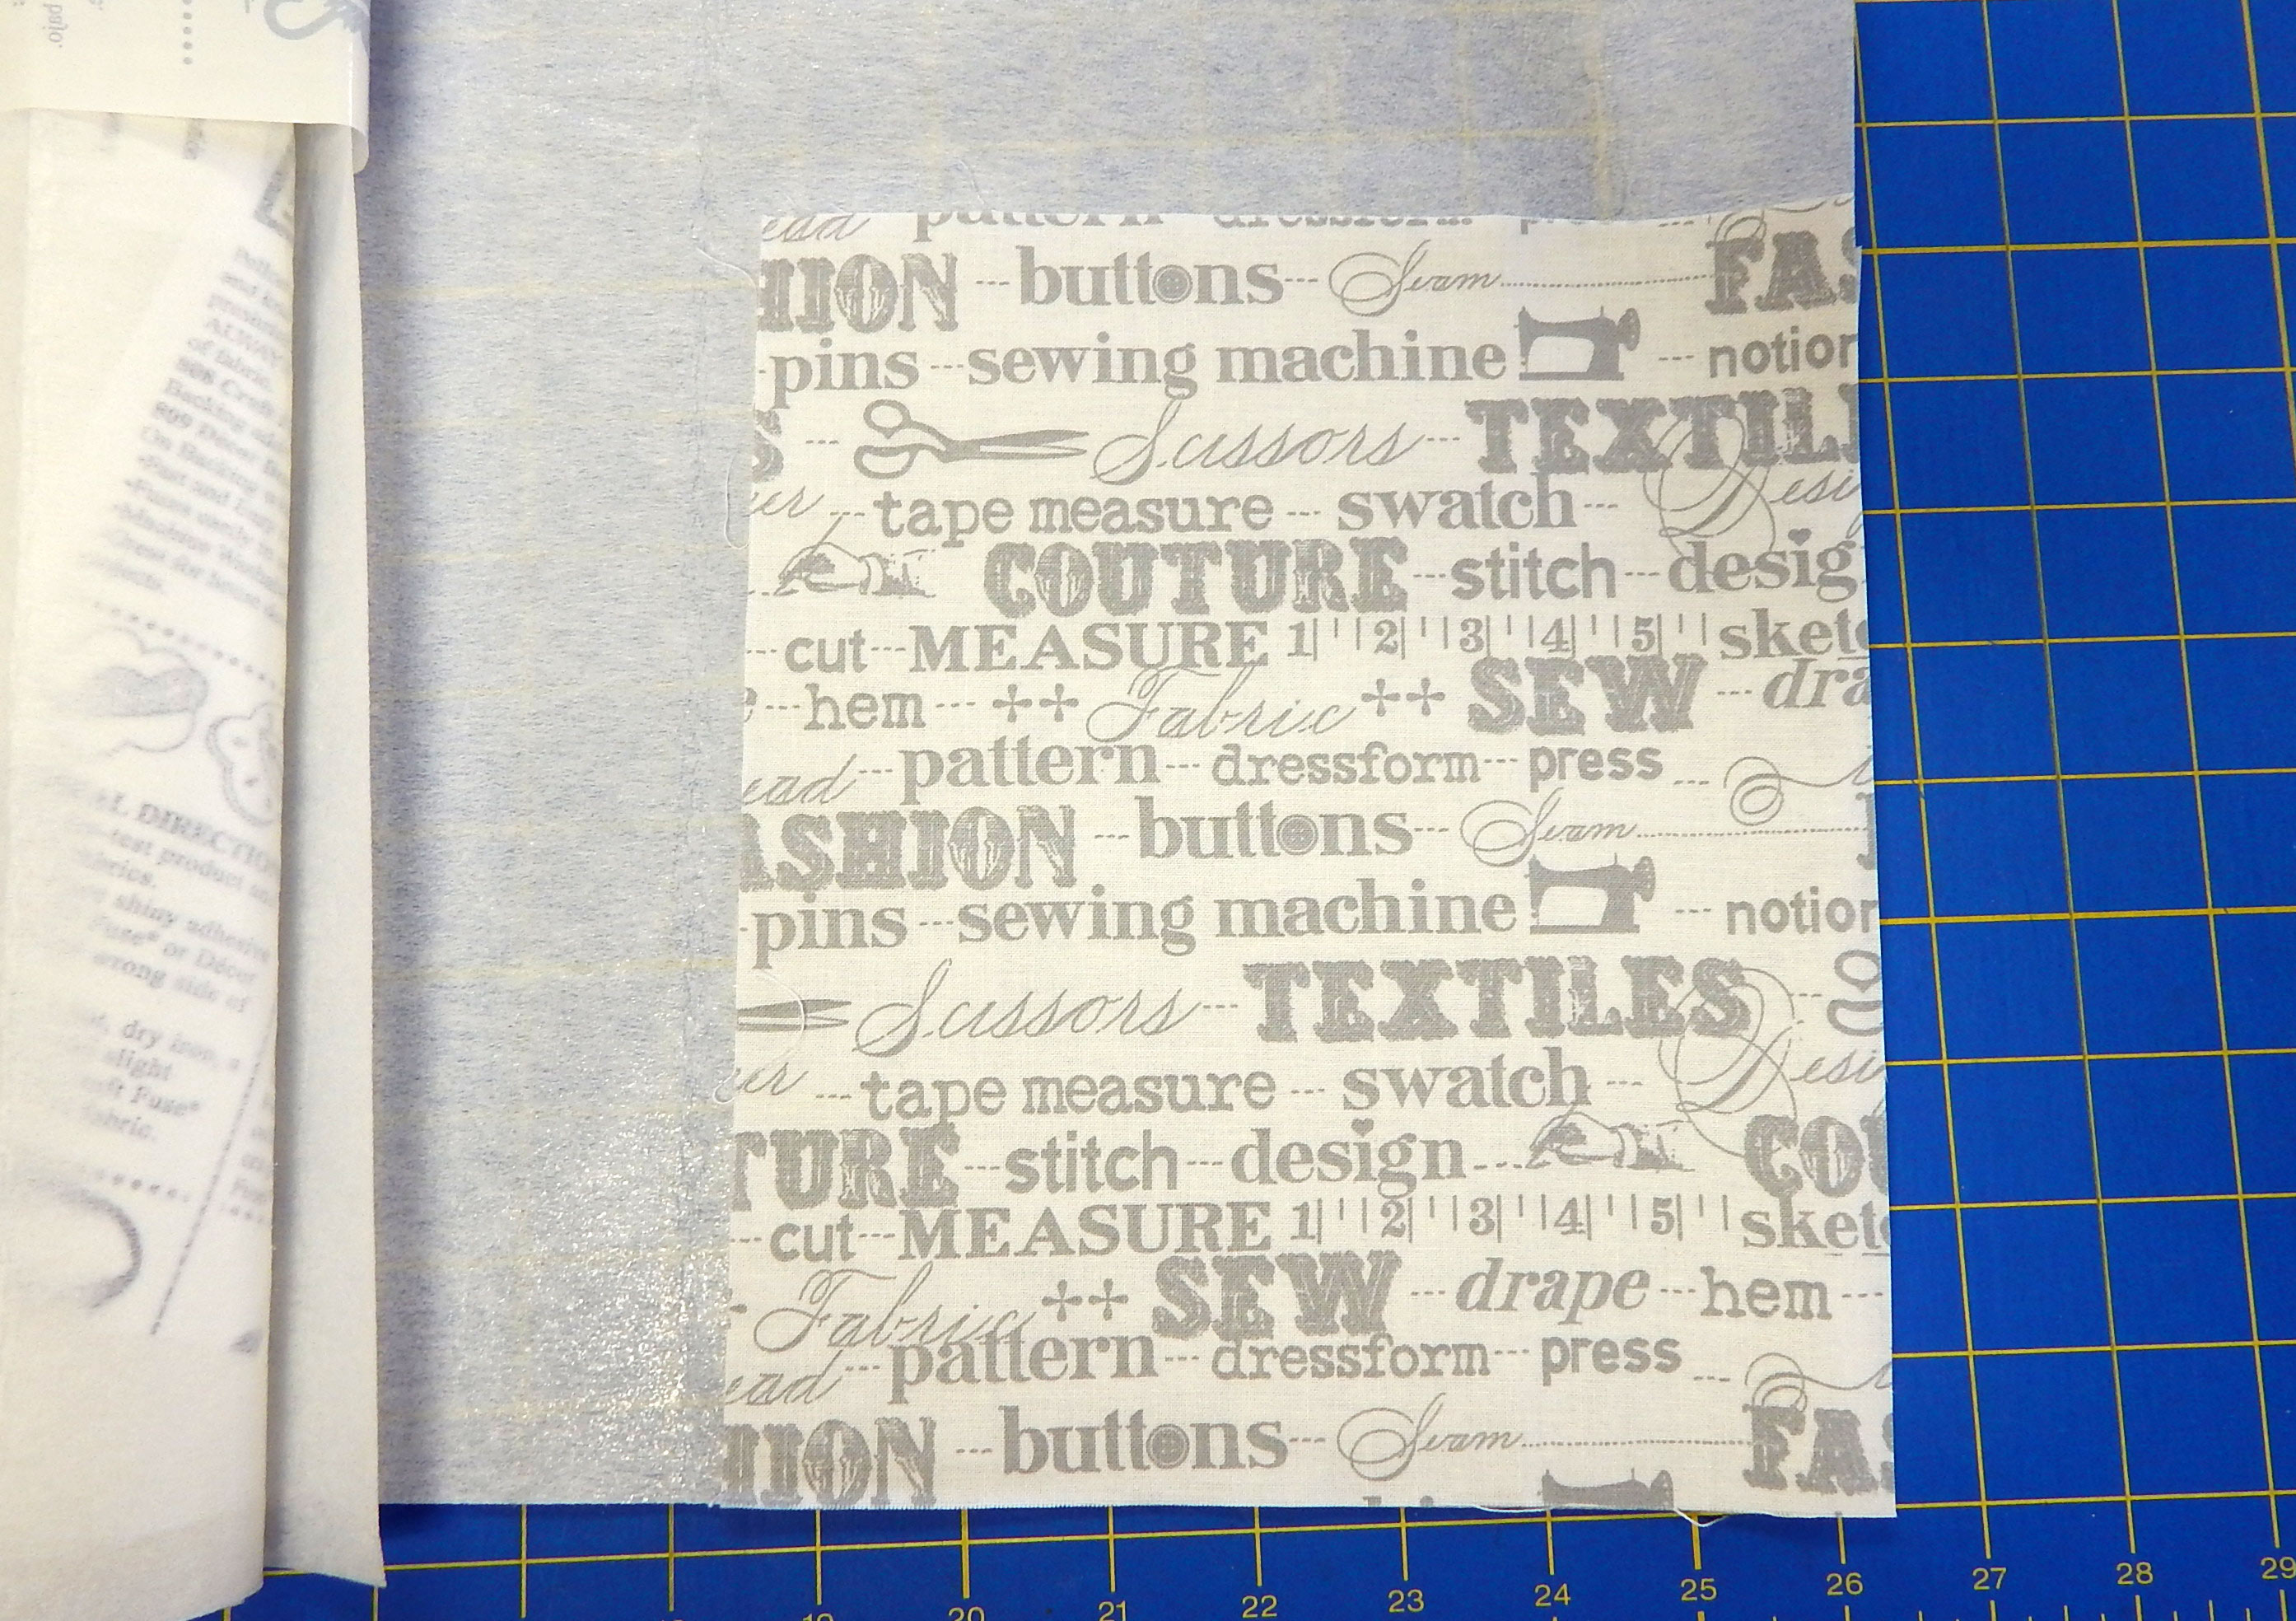
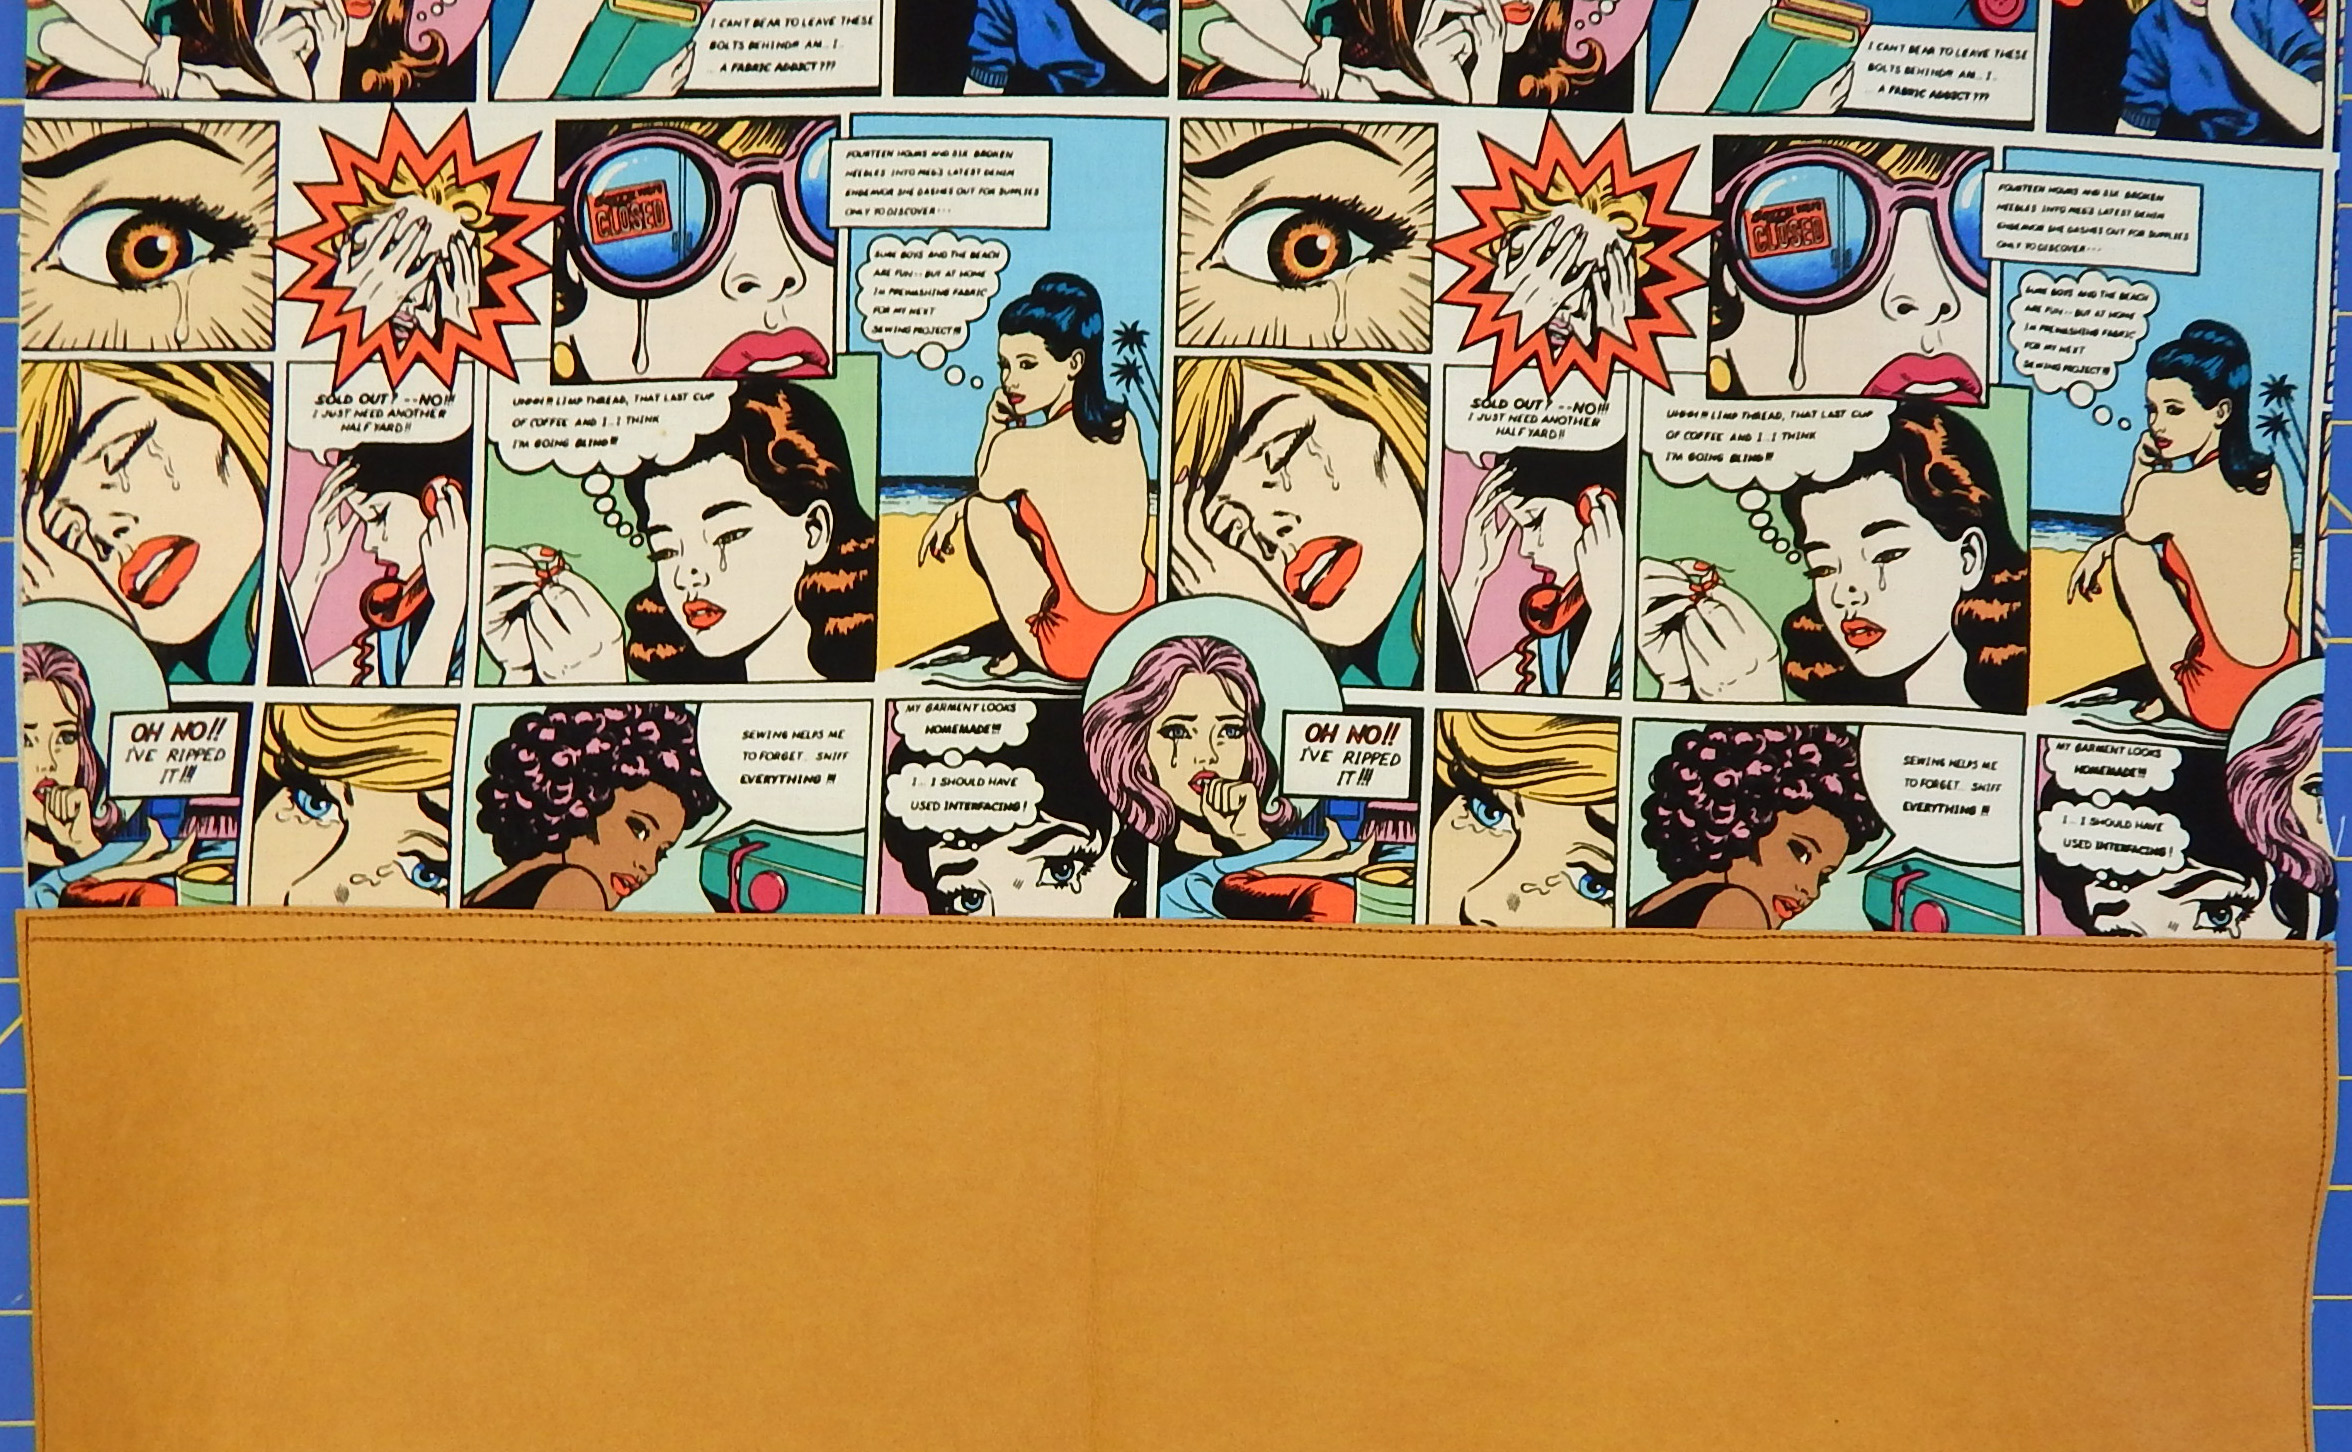
Select your lining fabric and cut it 1″ bigger than the Kraft-Tex in both length and width; my lining fabric was cut 7-1/2″ x 9″.  Fuse the lining material to some stiff interfacing, then apply Heat’n’Bond or your favorite fusible web to the interfacing.

Once all of that is fused, cut the lining down to 7″ x 8-1/2″ using either a pinking blade in your rotary cutter or your pinking shears.  Or, if you don’t want a decorative edge, just cut the edge straight.  NOTE that if you use a pinking blade in your rotary cutter, you will want to cut on the back side of your cutting mat because the blade can kind of chew up the mat.  Also, the blade will chew up the edge of your ruler, so either use an old ruler or cut about 1/8″ away from the ruler.

Now lay the Kraft-Tex down on the fusible side of the trimmed lining.  Note that Kraft-Tex has a slightly different texture on each side, but there is no “right” side–use the one you like best.  Get everything centered, then turn the decorative edge to the outside and clip it in place with something heatproof. Fuse the edges, then the central part of the lining, to the Kraft-Tex.  Again, you can use steam if it helps.

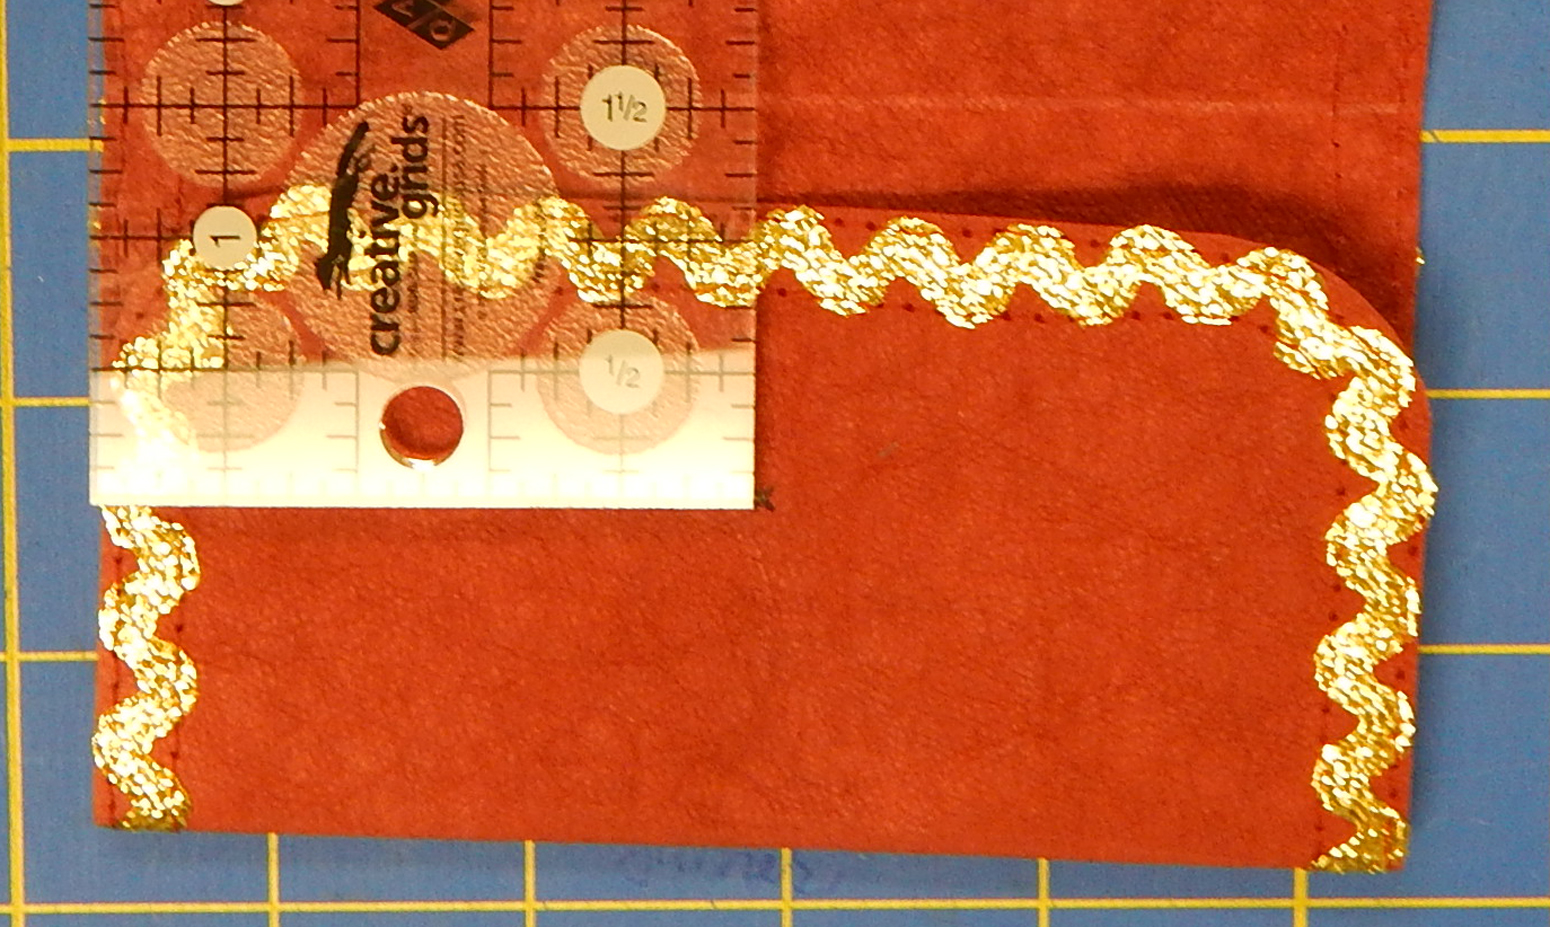
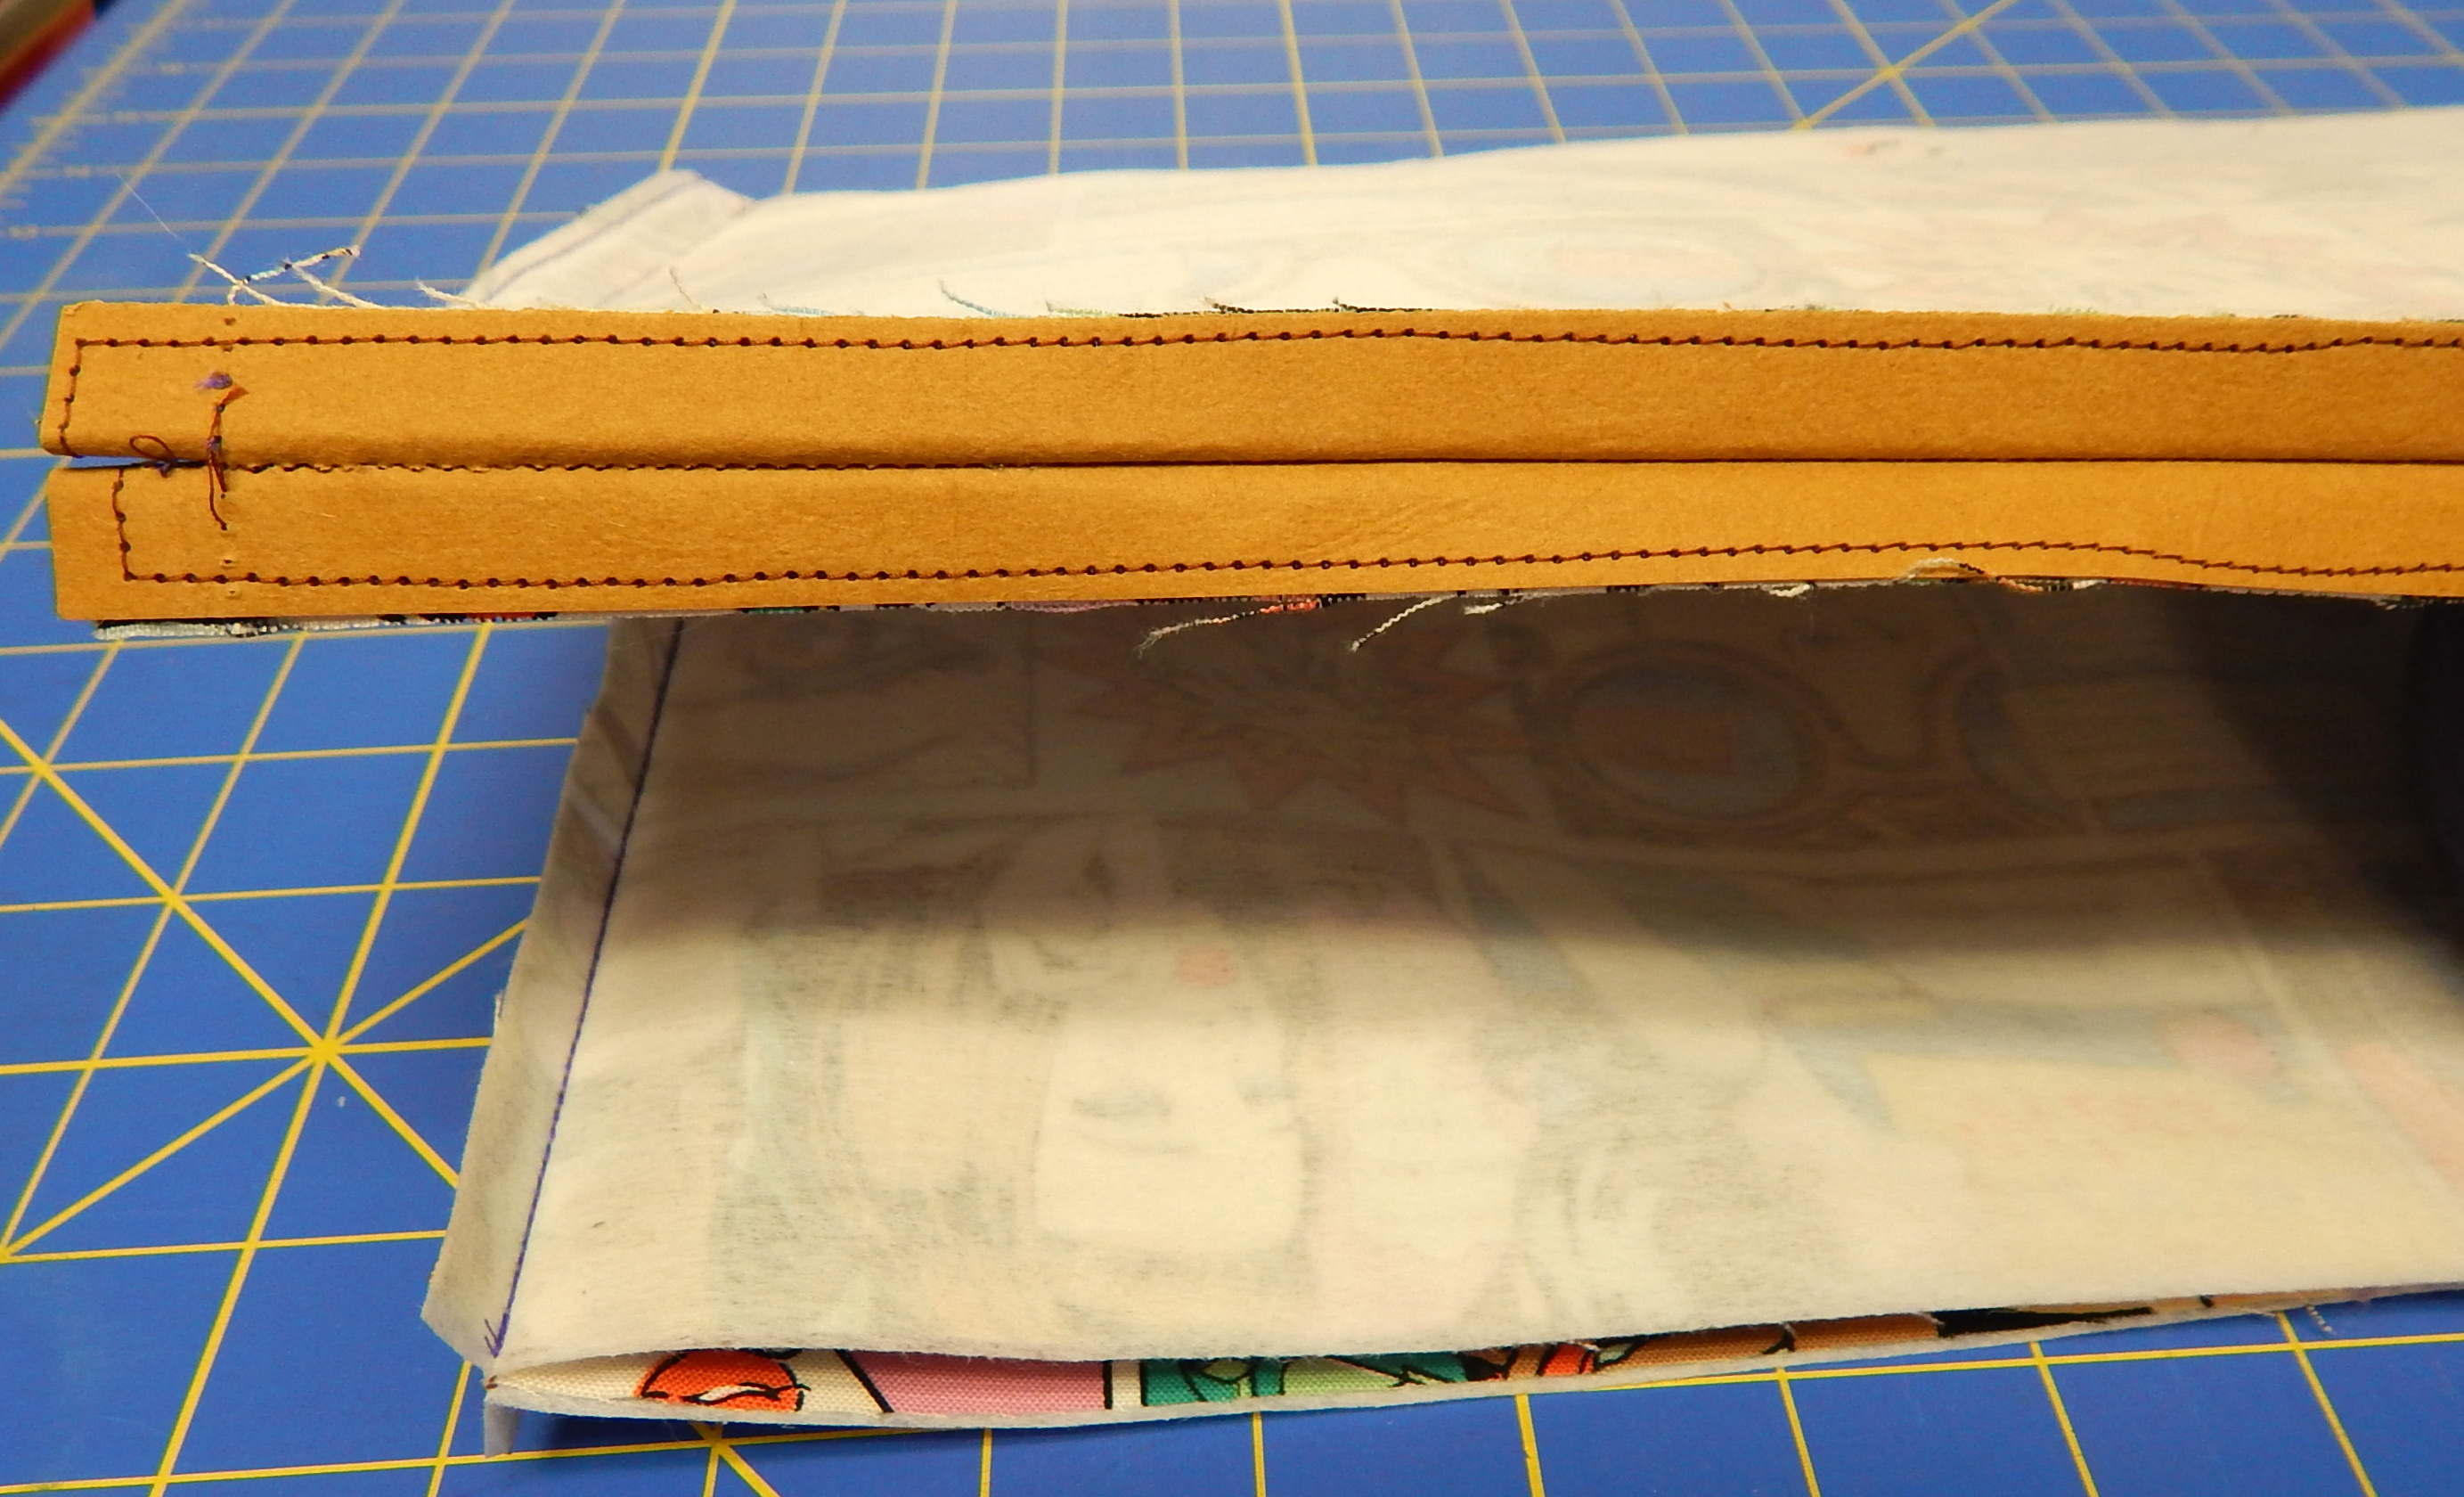
Now put some thread in the machine!  Sew around the edges of the tray bottom where you previously pressed the sides up.  I marked the edges again with heat-erasable marker to make this easier.  This step will help hold the lining in place.  Edge stitch around the upper edge of the tray as well

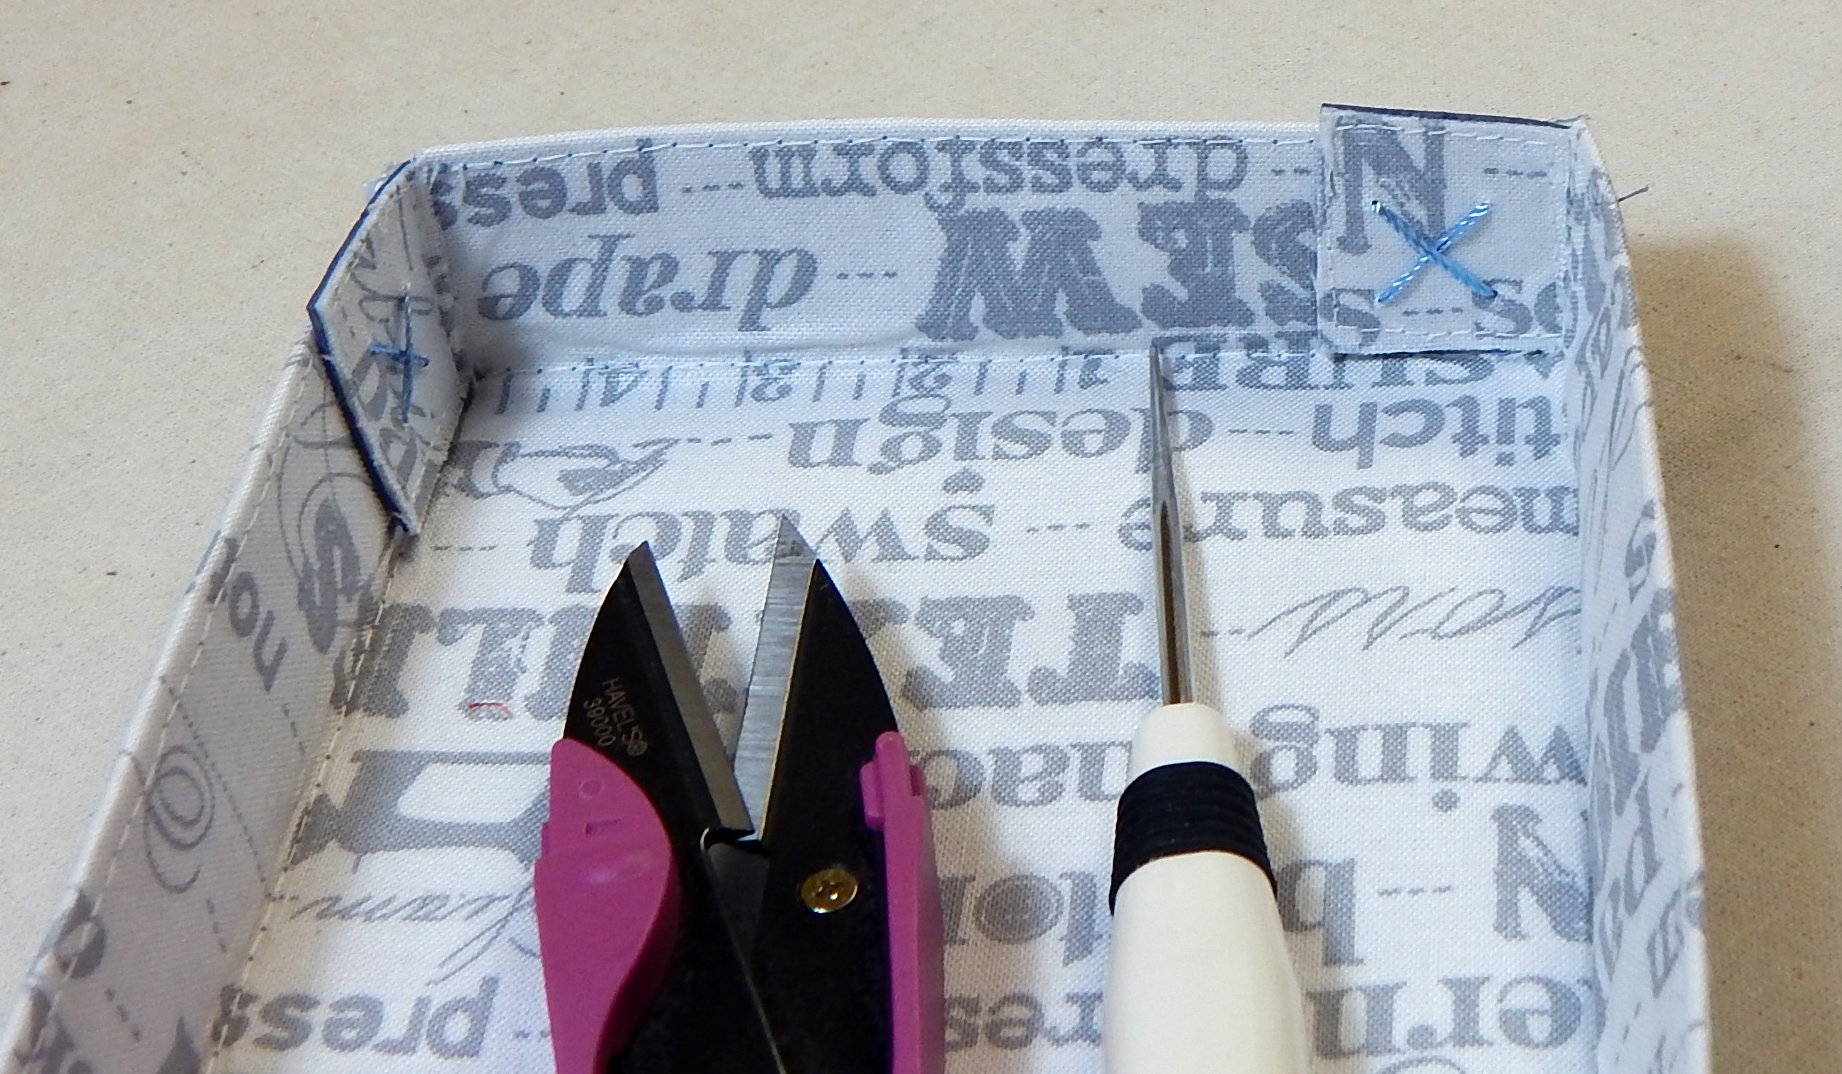
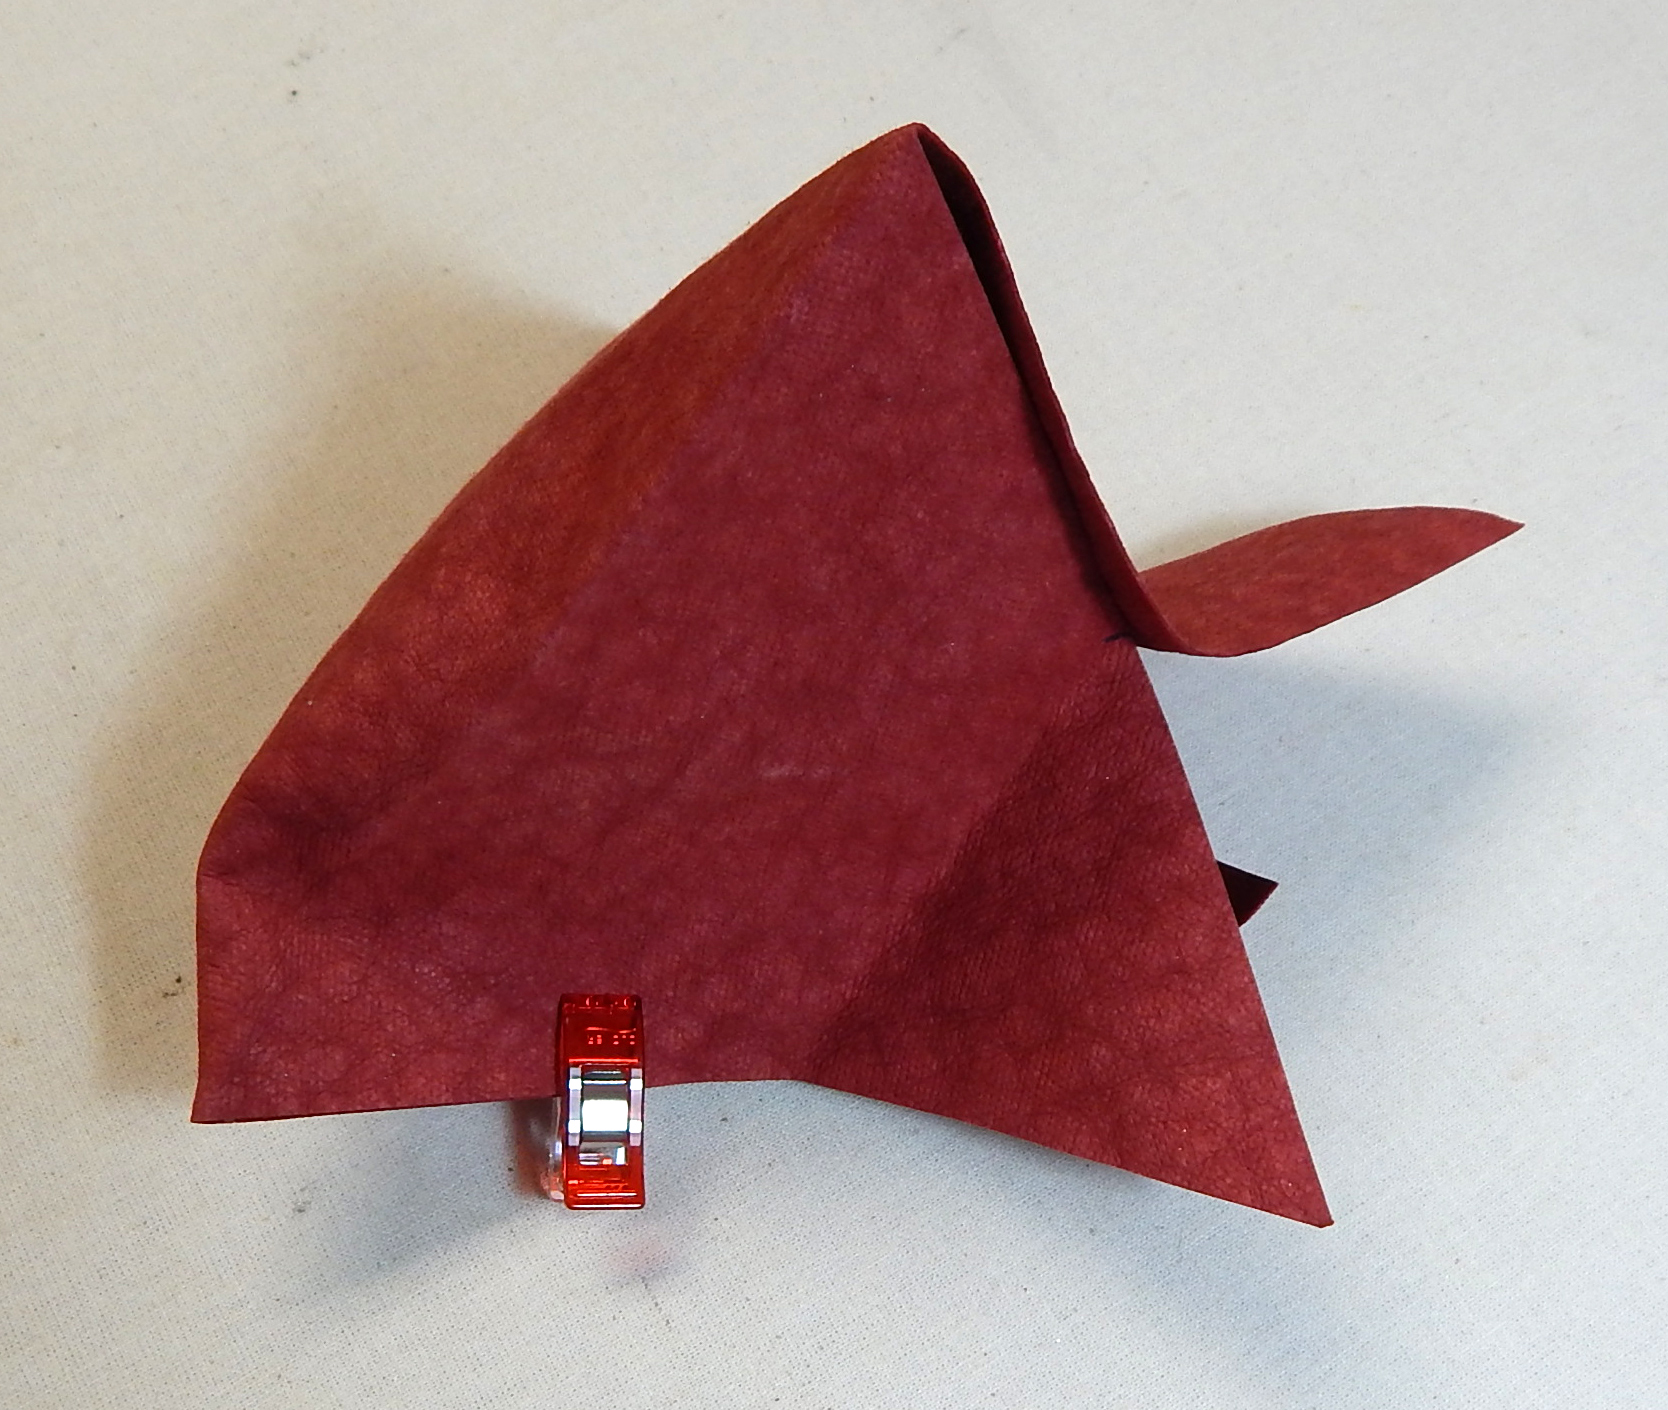
Now don’t do what I did 😉  I mistakenly cut out all 4 corners on my first box.  Just cut one side of each corner to create a flap that can be used to hold the box together!


Here’s how the corner will look finished–see the flaps?

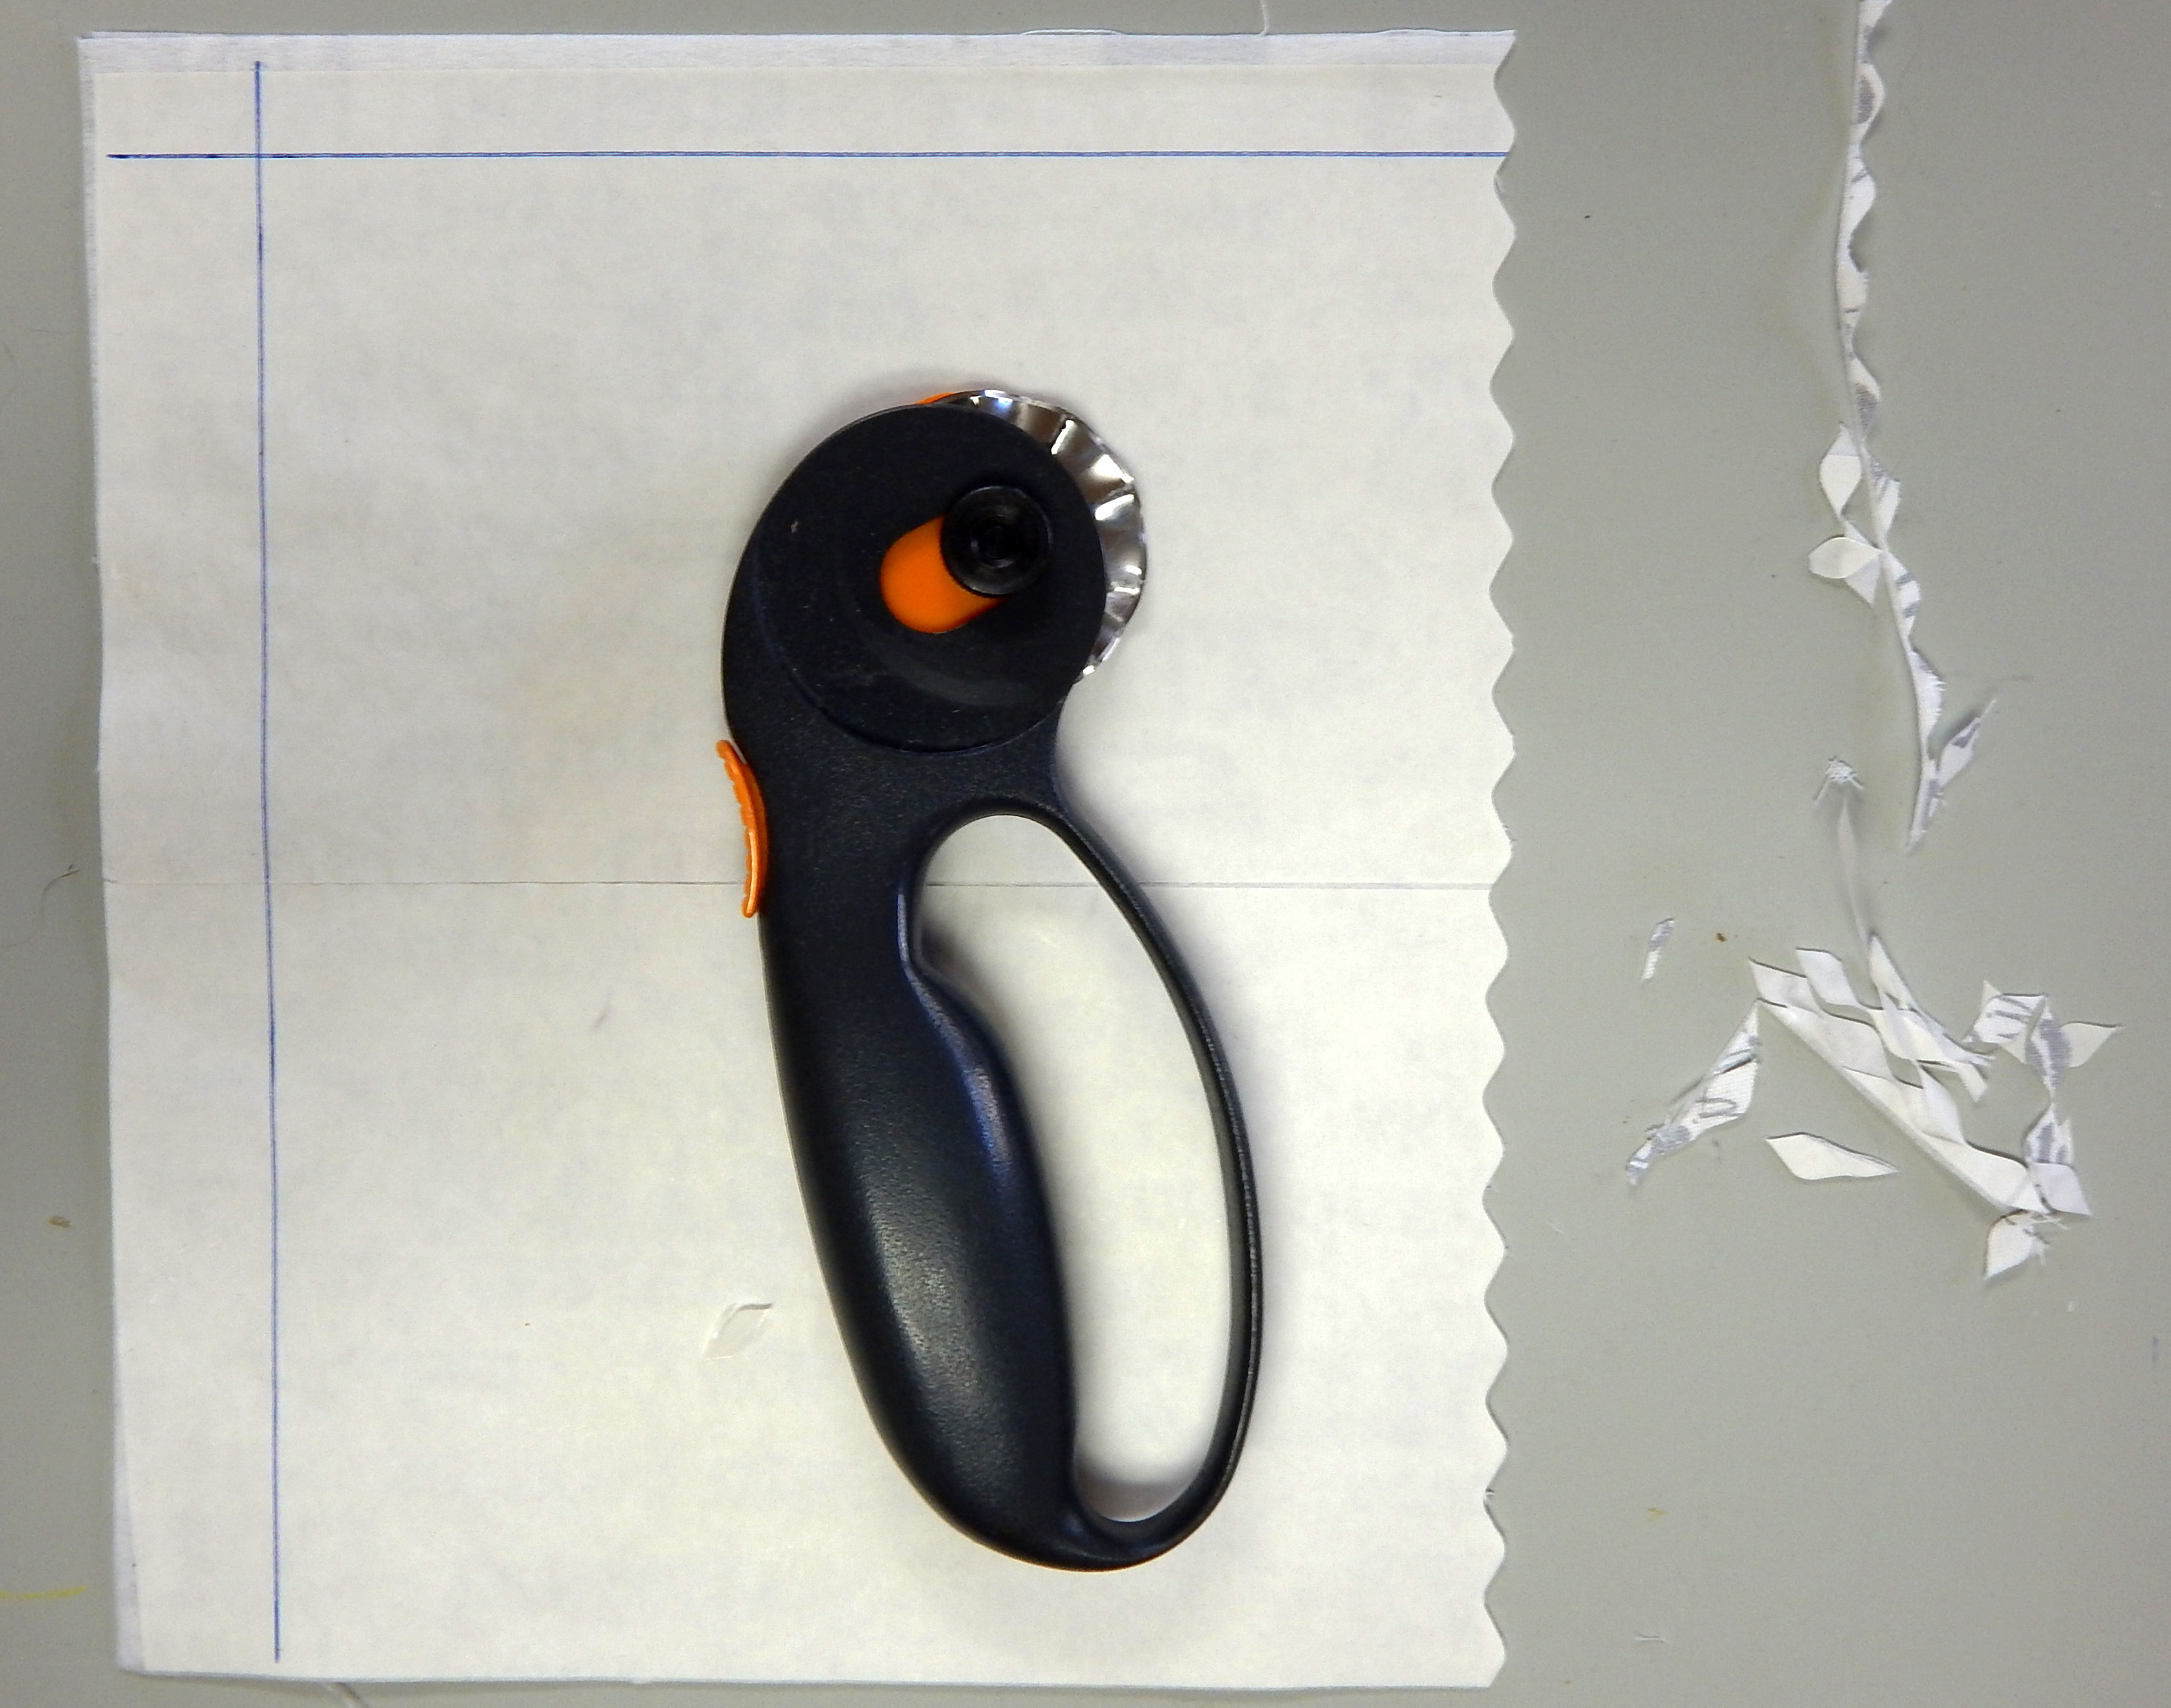
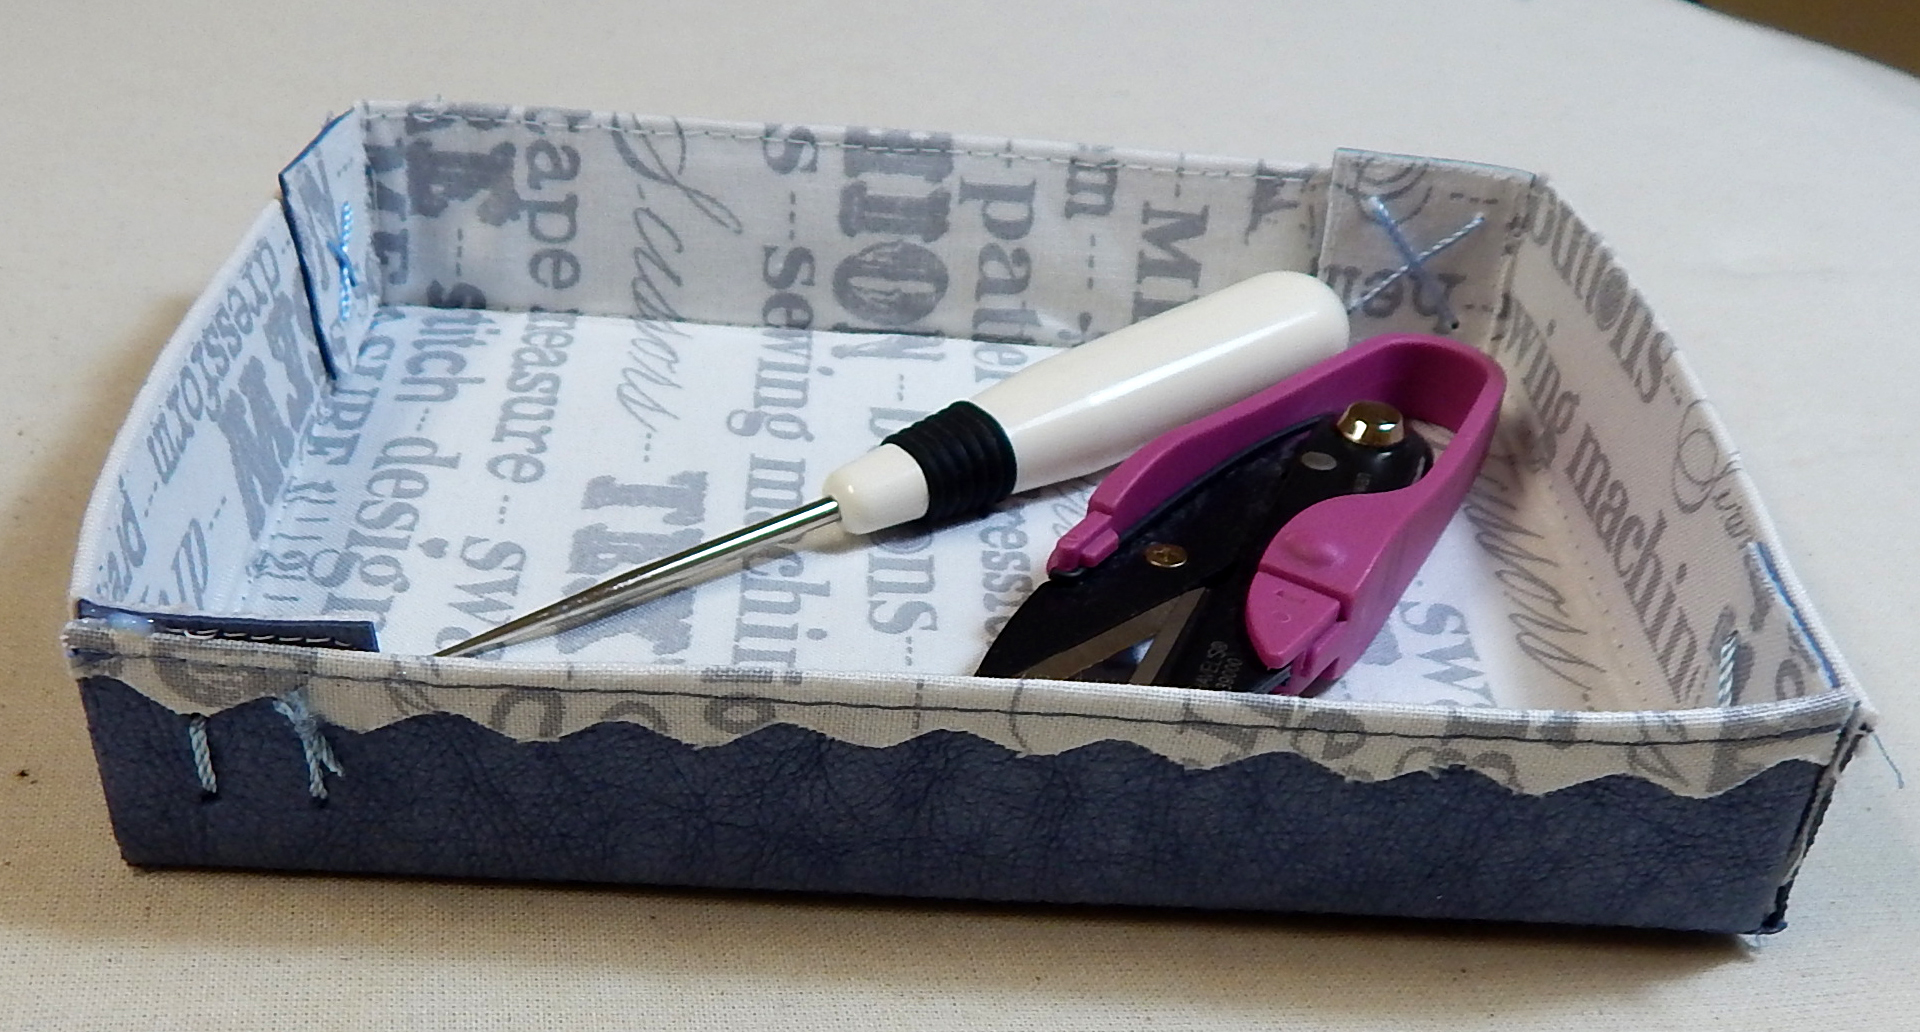
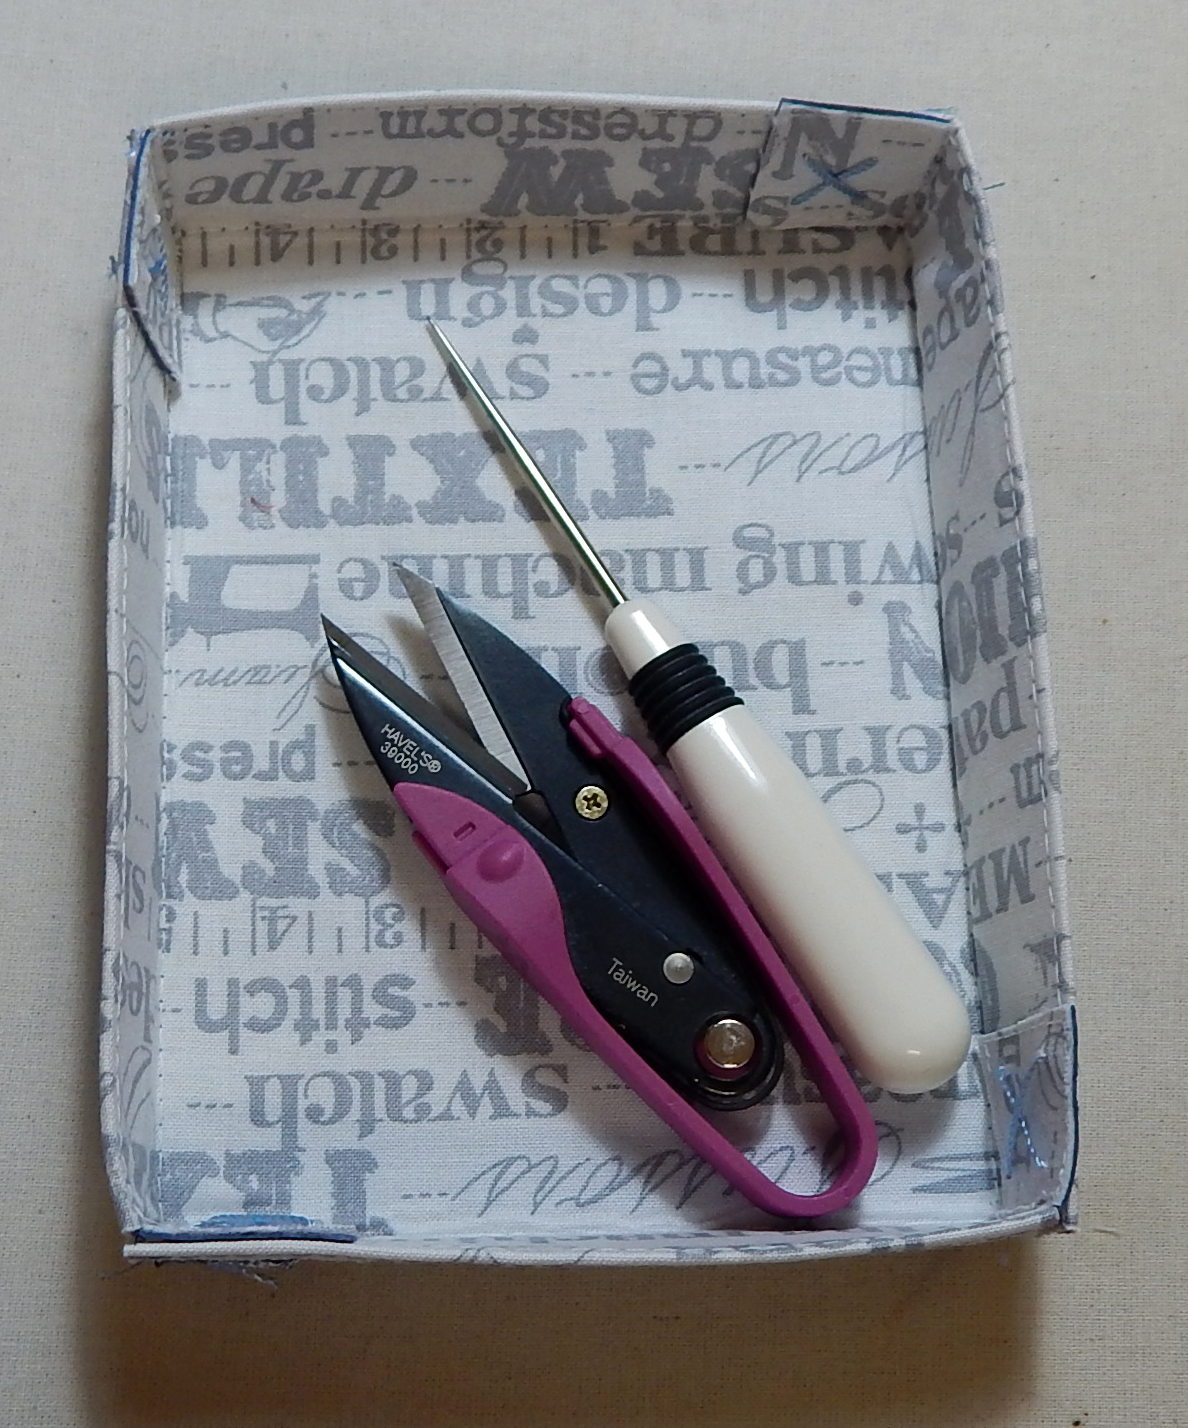
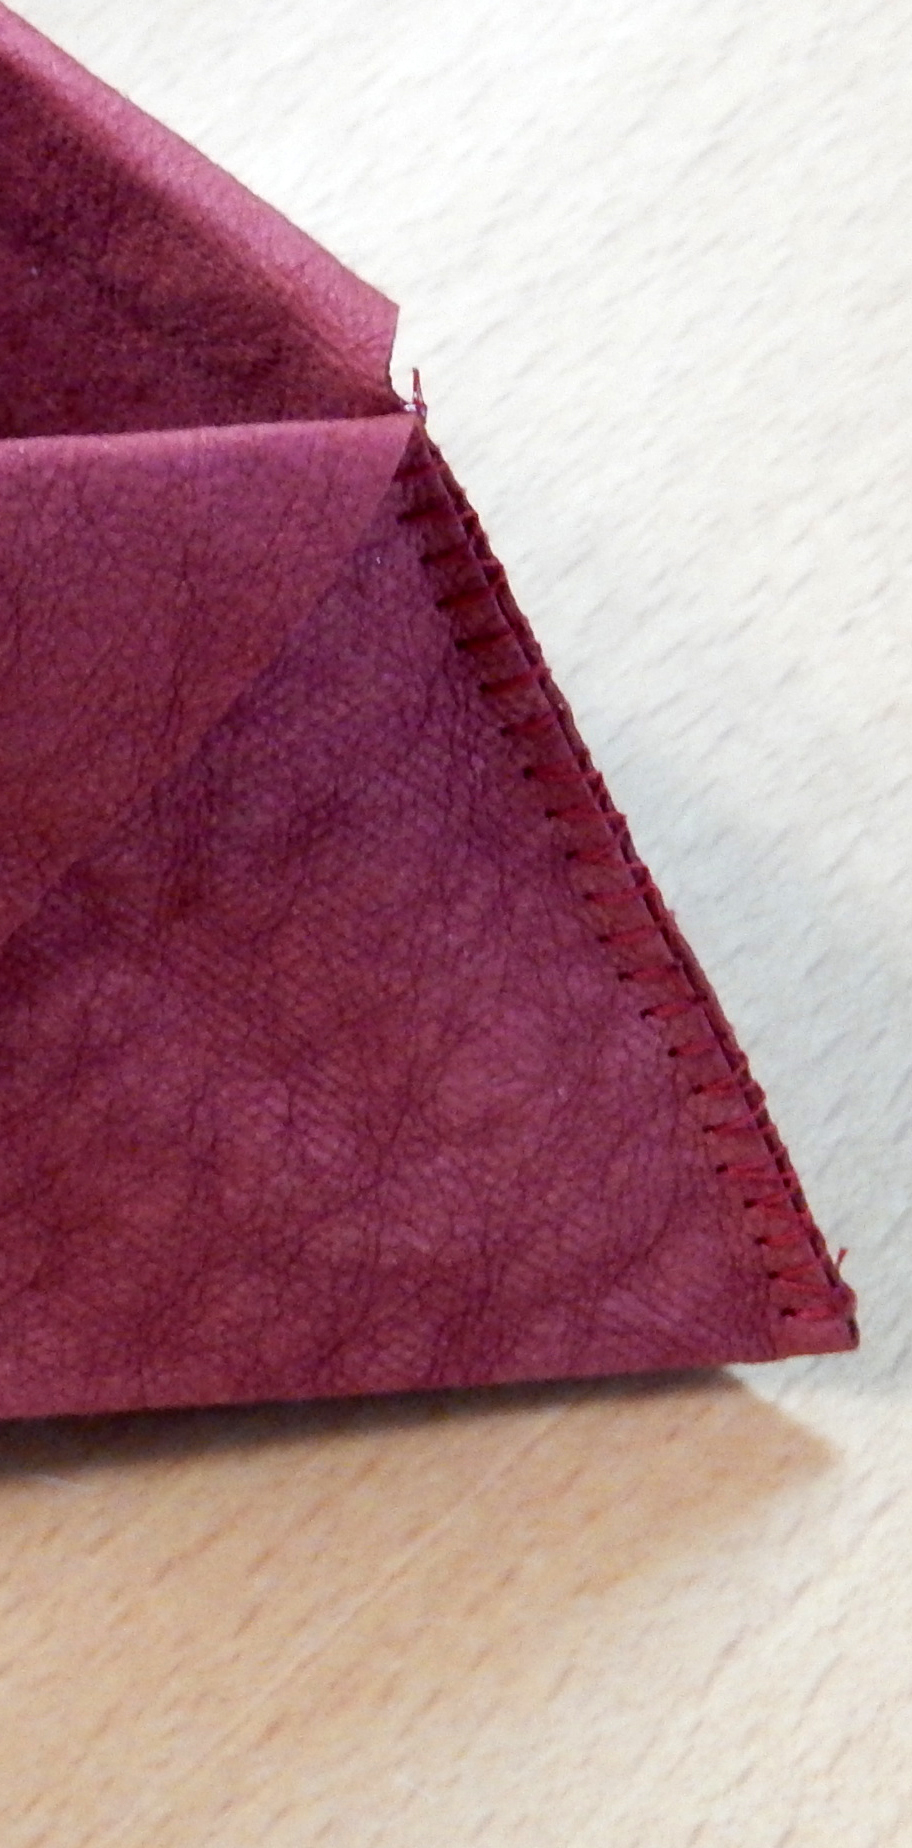
Fold and press the box along the stitching lines bordering the bottom.  Fold the flaps in and glue or sew them in place.  I glued them, then sewed a decorative X in each corner.  I used the awl shown in the picture to punch little holes for the needle to go through when I made the X stitches by hand.

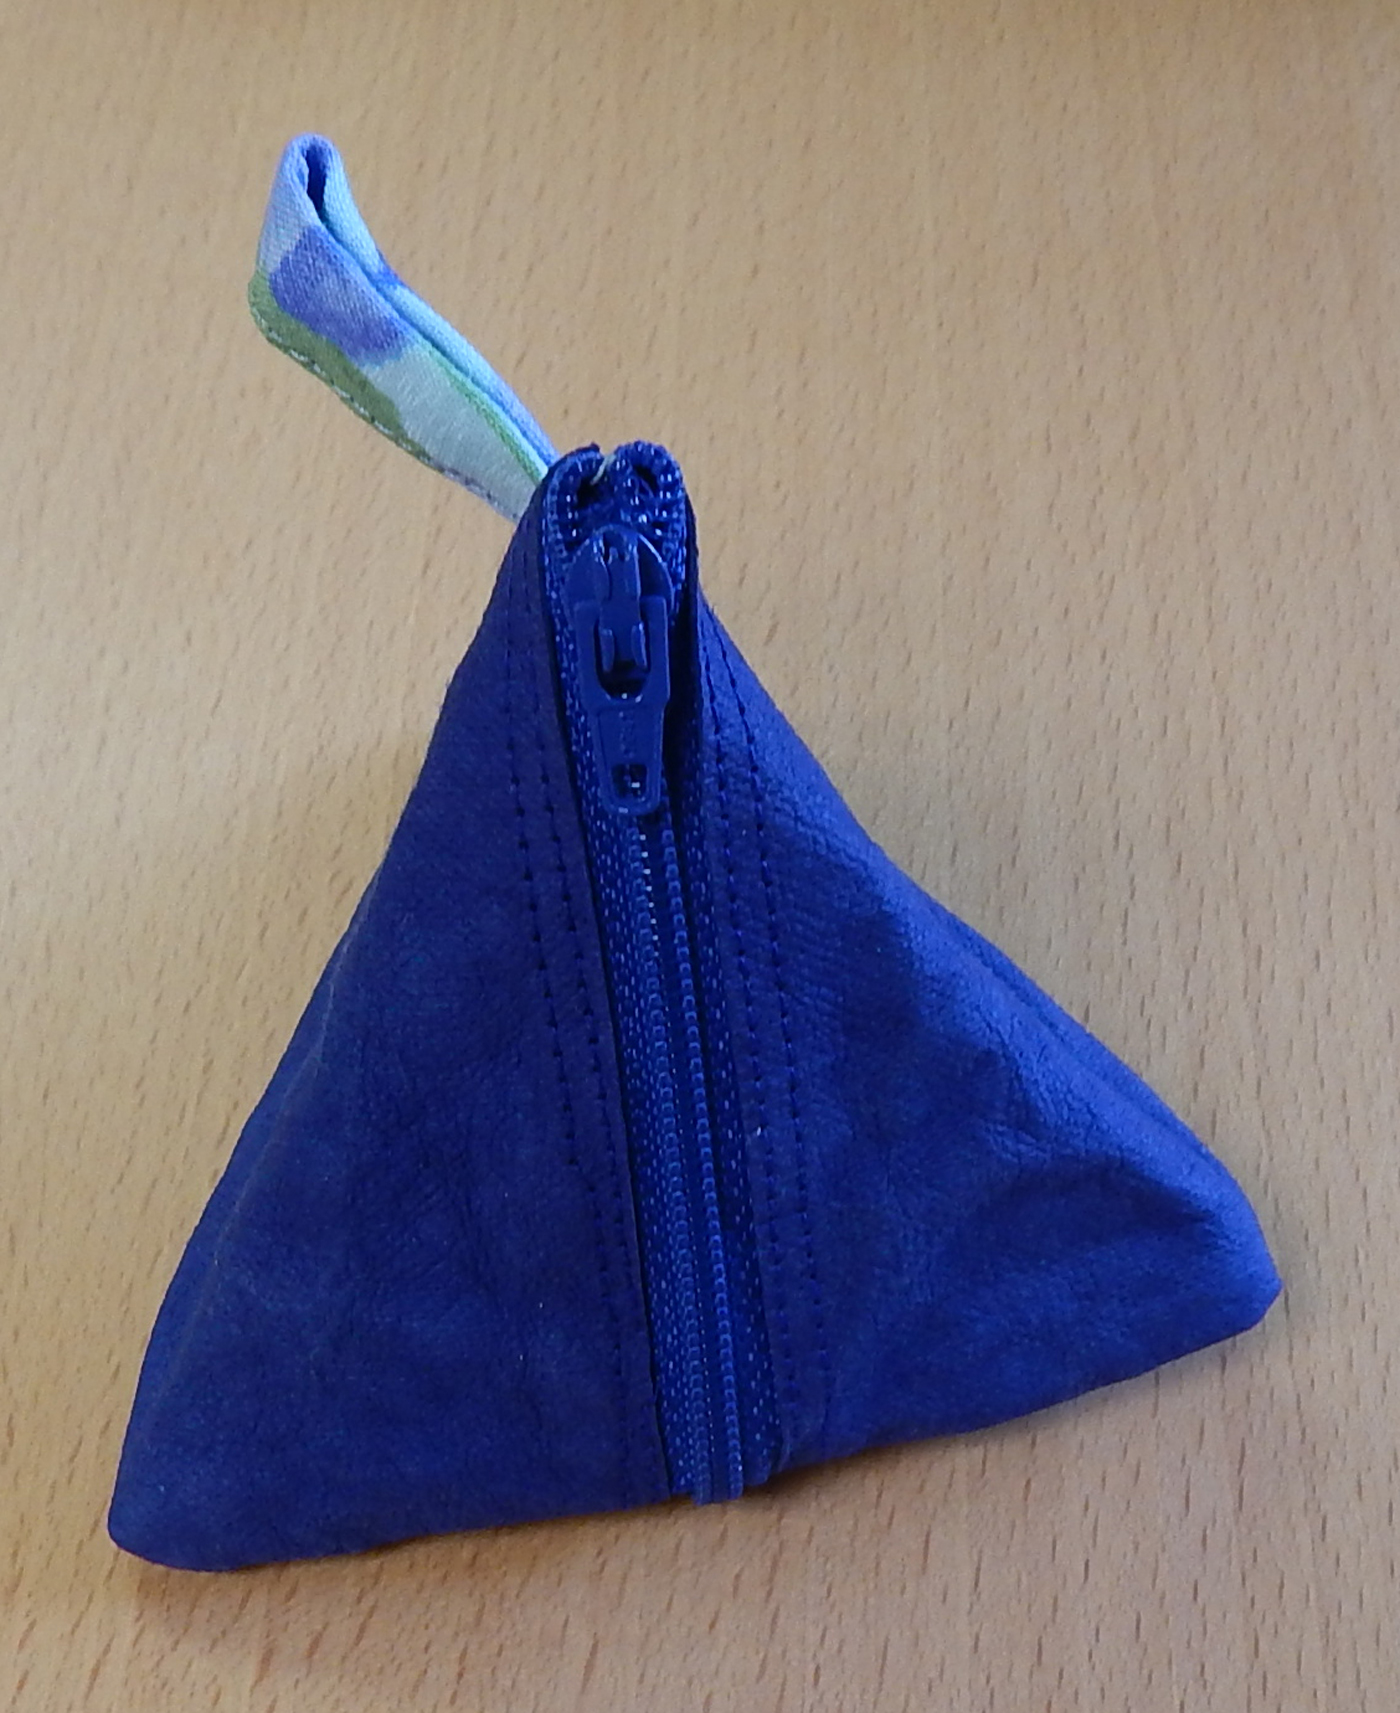
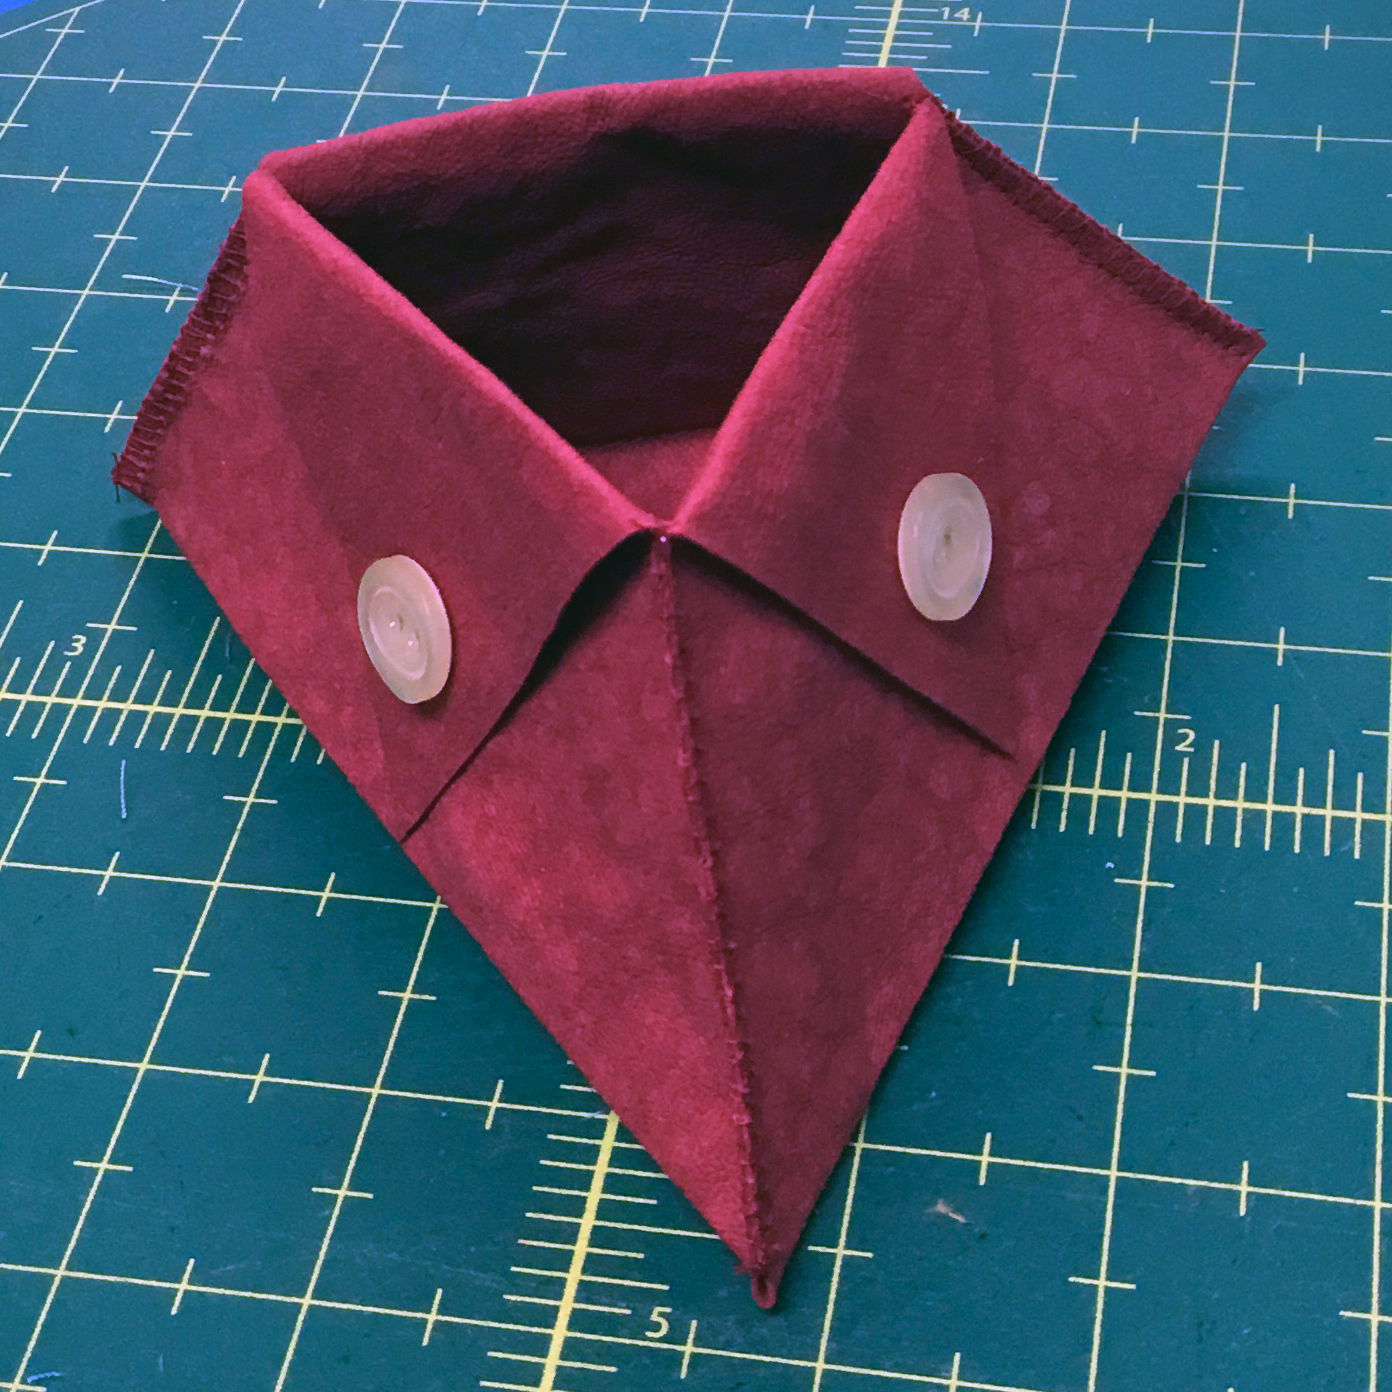
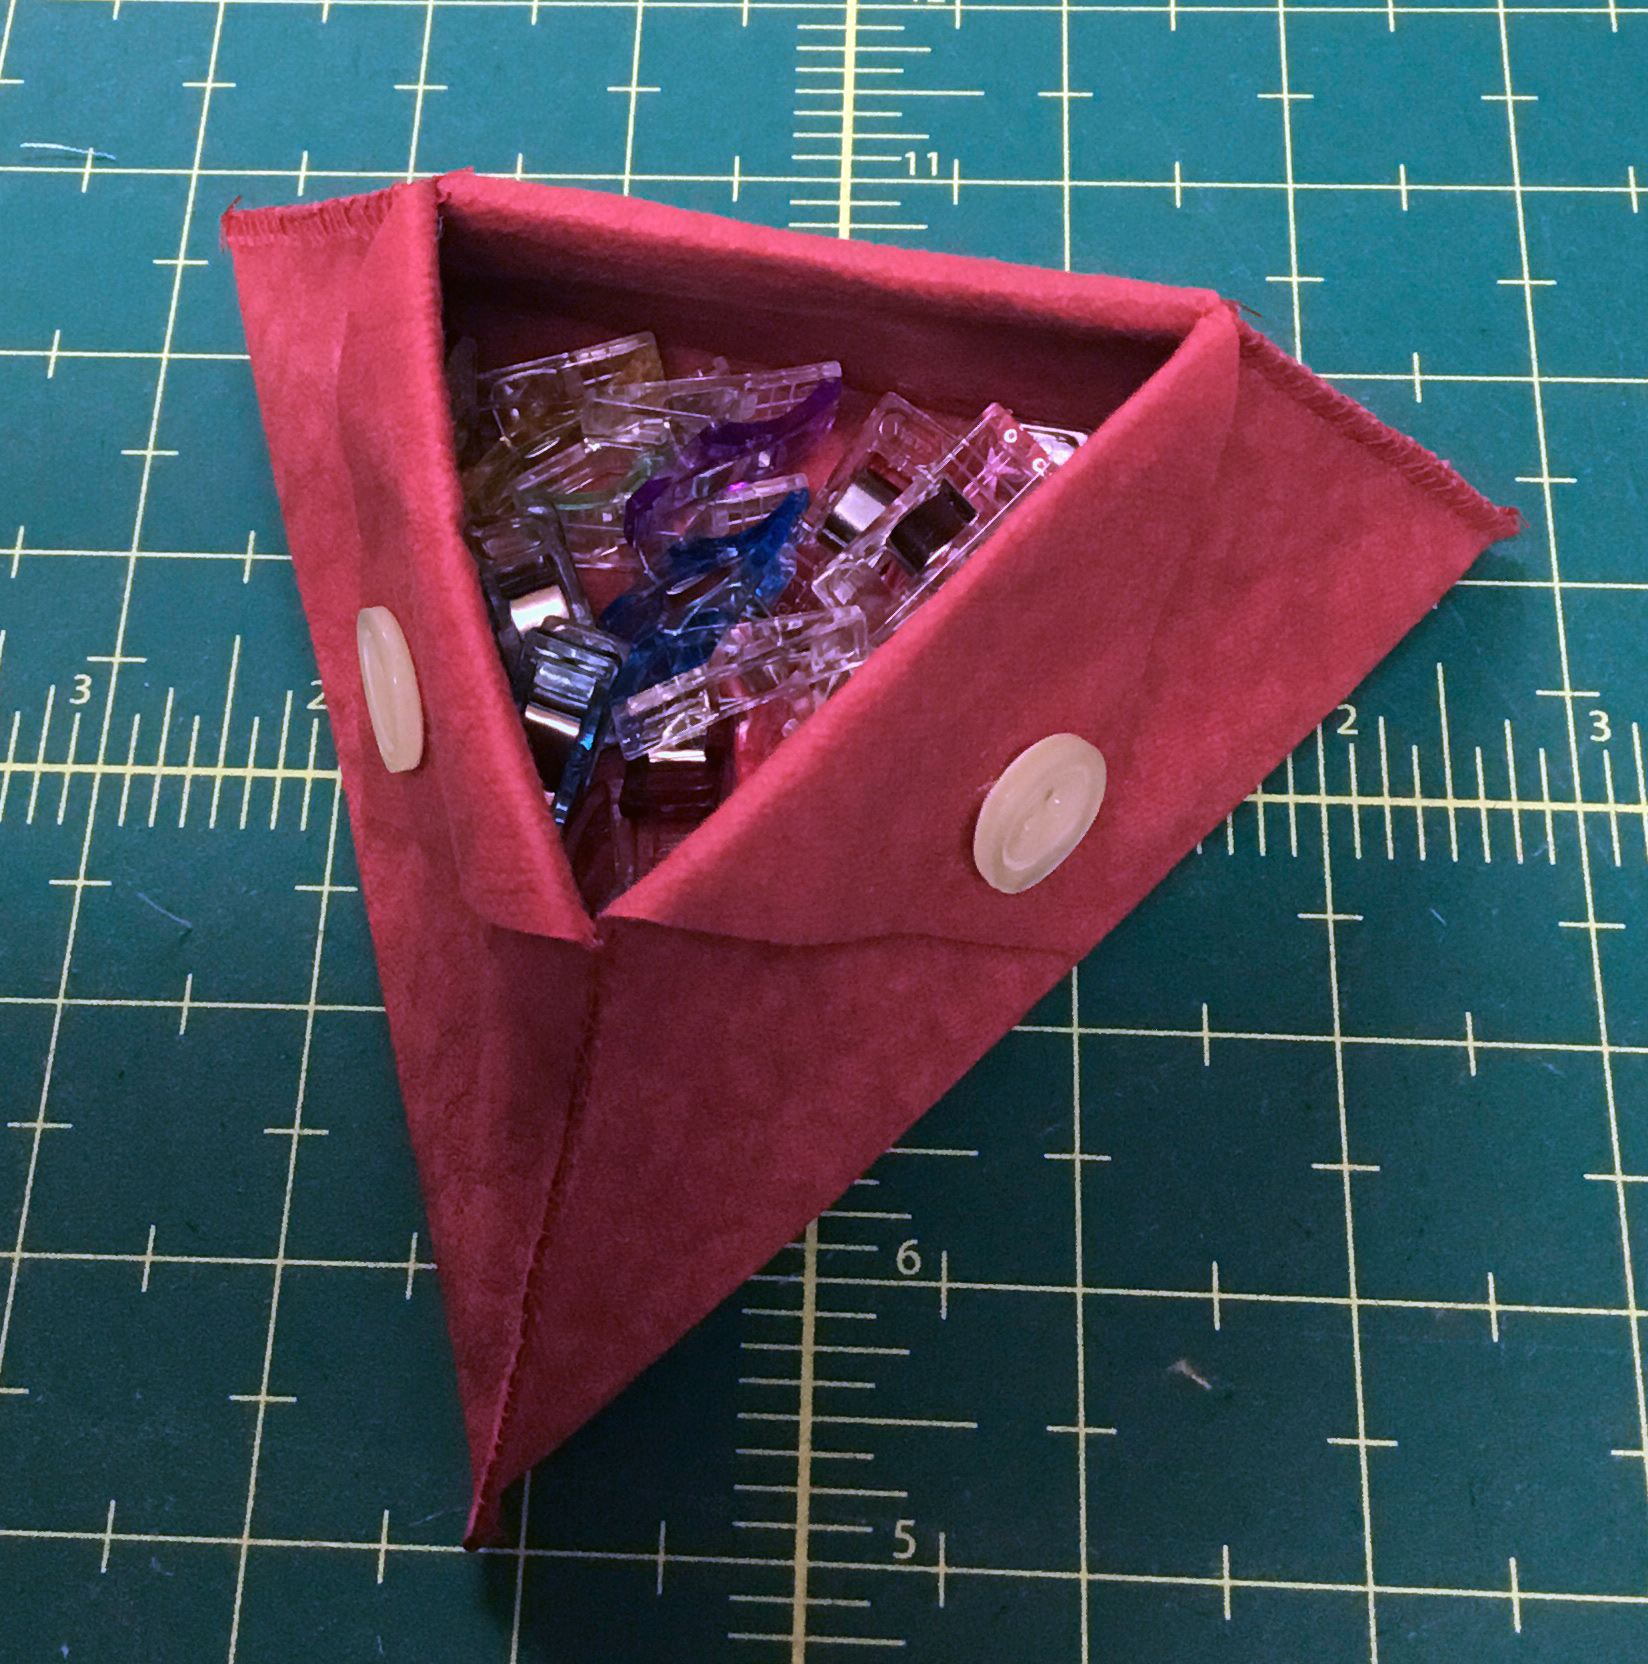
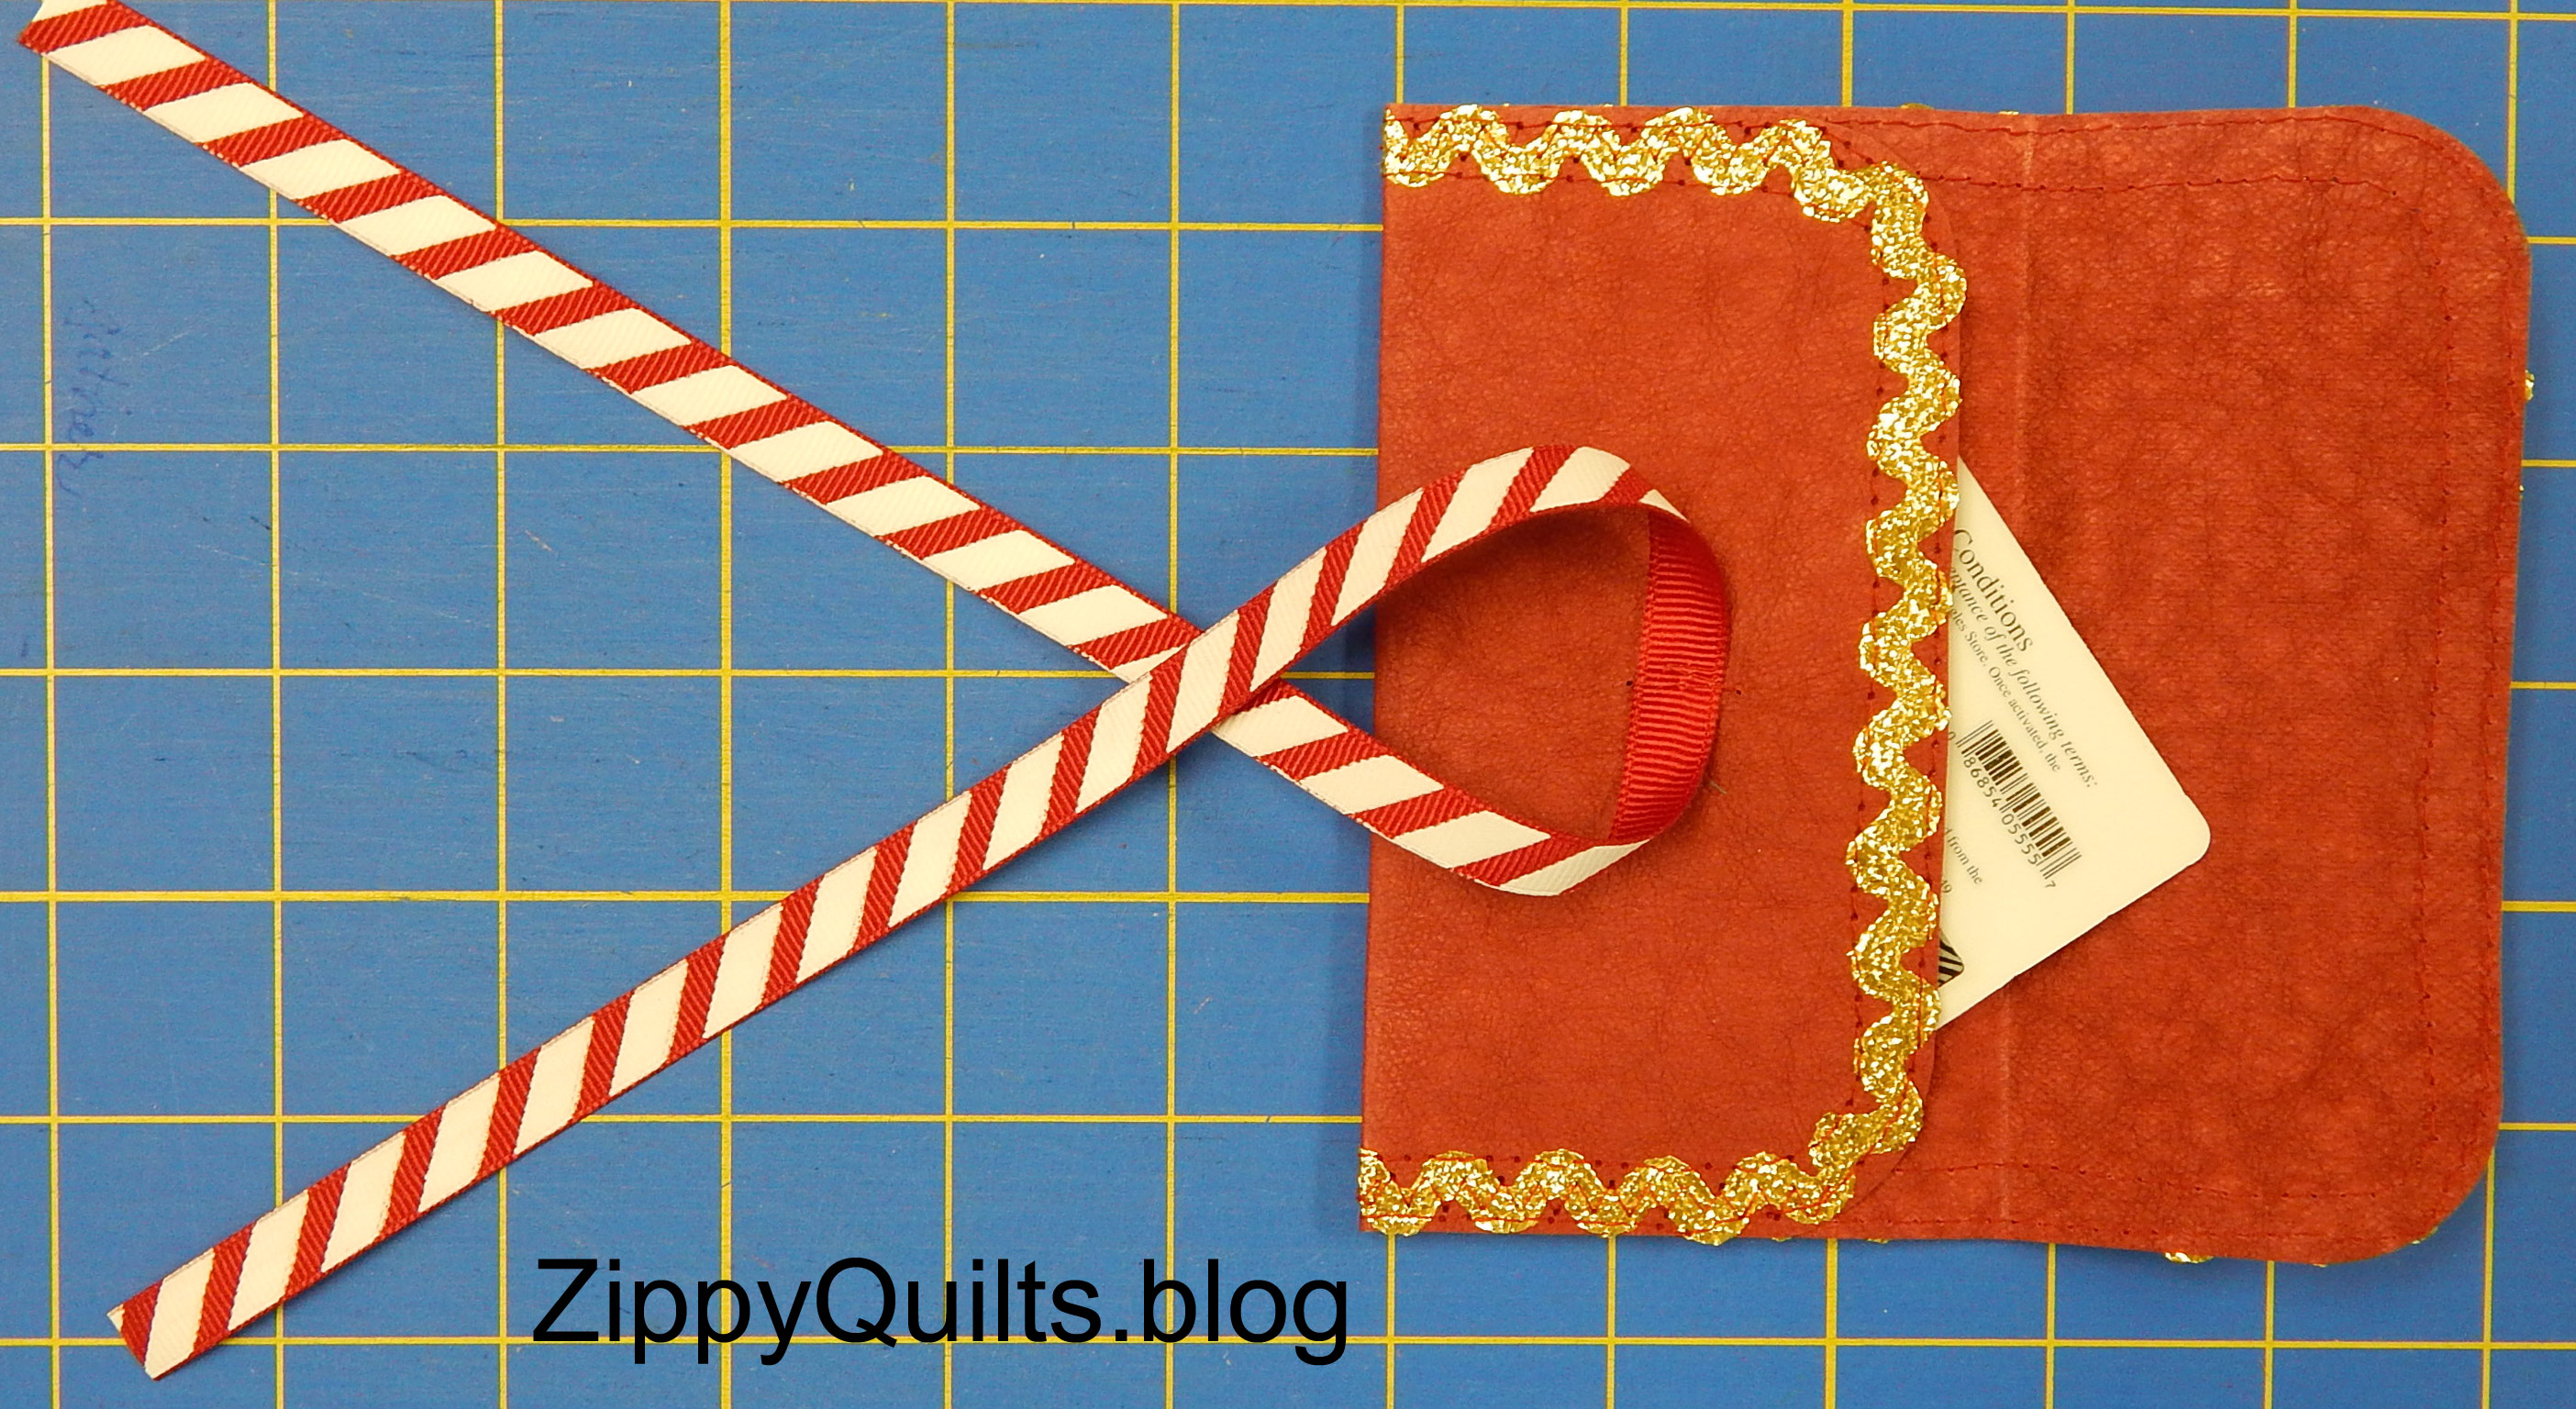
And that’s it!  The resulting tray looks plenty sturdy to hold those little tools beside my machine.  And besides, it was fun to make something new!

What have you been up to?

A Triangular Kraft-Tex Box

Some time ago I saw a little triangular container that someone was using to hold notions, and I made a mental note that it would be fun to make one.

Only problem was that it obviously involved sewing 2 fabrics right sides together, leaving an opening, turning them, etc, etc.  I do not enjoy that process.

The idea stayed in my head, though, and a short while ago it occurred to me that I could make a similar box out of Kraft-Tex without the problem of having right and wrong sides to the material!  So I got out the Marsala color Kraft-Tex the folks at C&T sent me a while ago to give it a try.

I started with cutting a 10.5″ equilateral triangle because that’s the ruler I had!

I put a dot on the Kraft-Tex where each of the arrows points here

There was an embedded central triangle marked on the ruler, so I just put a little dot at each of the points of that to determine where my fold lines would be (see above).

I used my iron and handy metal straight edge to make good creases for the initial folds.

I clipped the edges together (no pins in Kraft-Tex)

and sewed about half way up each side using the blanket stitch on my machine.  It was necessary to squish the box a little to get this done, but it was easy to get it right back into shape.  The buttonhole stitch worked just fine, somewhat wider than the default setting.

I then folded the final “flaps” over the side and stuck them down with a little glue.  Another time I think I might roll these final edges down rather than folding them to give the box more dimension.

I considered sewing on the decorative buttons, but decided to use glue instead.  The type that is made for attaching “jewels” to fabric worked well and dried clear.

I think I may use the box for those little clips that have become indispensable for quilting! 

If you want to try this, it’s very easy.  If you don’t have an equilateral triangle ruler, borrow one from a friend or make a template from cardboard (mark dots at the center of each side).  And please send me a picture if you make one!


Kraft-Tex Baskets

When I finish a quilt, I cut the scraps into usable sizes.  If there’s enough for strips, I cut them and store them in bins by width.  If there are chunks that make good squares for the next scrap quilt (I always have at least one in progress), I cut those and toss them in a pile for use the next time I have a scrap quilt day.scrap block, slabs, scrap quilt

About those piles…it’s easy for the studio to be a mess, so I thought I should have a basket to hold the scrap quilt pieces until I’m ready to make the blocks!  I found a free pattern by Noodlehead that makes baskets in two sizes; you can get it here.

I made the baskets out of some of the Kraft-Tex sent to me by C&T when I agreed to be a Kraft-Tex ambassador.  The patterns have only the corner seams, which are 1/4″, so they worked out very well for Kraft-Tex.  For the smaller one, I did not use any interfacing, but for the larger one I used fusible interfacing as instructed.  Yes, it fused to the Kraft-Tex just fine.  I ironed from the interfacing side, using a press cloth, and it adhered to the Kraft-Tex without difficulty.

I made another one of the larger baskets, adding a handle, and am thinking of hanging it in the laundry room to hold stray socks.  (Although, really, does a missing sock ever show up, or is this a futile plan?)  This picture better shows the lovely color of the Kraft-Tex, which is one of the newer pre-washed offerings.

One final benefit of these baskets–they were fully washable. I have washed Kraft-Tex  in the past, and it came out just fine.   Now to organize some scraps!

Little Green Man Quilt

This block has been floating around on Pinterest for some time, and I really like it so It’s been on my to-do list.

This is a copy from Pinterest, where the block has been widely shared without attribution

I don’t like to borrow things without attribution, so I went in search of just who designed this.  Luckily, my friend Elizabeth was in a bee that used this block, so I learned from her blog that the block was designed by Kylie Kelsheimer.  A friend of Elizabeth’s located the original post for her through the wayback machine.  You can find Elizabeth’s post about all this here (you’ll have to scroll down quite a bit) and the original pattern here.  I see from Elizabeth’s latest post that the pattern is now available through PayHip, but that was not the case when I first investigated it a year ago and started this project.

Which brings me to why I changed it all up.  The original block is small and paper pieced–not my style!  I wanted to make it big and make the stars wonky.  Therefore, the instructions here are NOT for Kylie’s block, though the idea is based on her original block as noted above.  In fact, the block as shown on Pinterest is really 4 blocks, each rotated so that they fit together as shown in the pin.

I drew the block with Electric Quilt so that it finishes 18″ square.  Here it is showing fabrics.

My wonky star block, drawn with Electric Quilt 8

And here is the base block in case you want to make it yourself:

Star base block, drawn with Electric Quilt 8

Here is my tutorial on making sew-and-flip stars, in case you’ve never done it before.

As you can see, I substituted my Little Green Man for 4 of the blocks–those would be the 4 in the lower right-hand corner looking at my layout above.  You will see that I rotated the blocks various ways, which is how Little Green Man ended up in the lower left corner after I substituted him in the lower right.

You can find my instructions for making the LIttle Green Man here.

And here is one of the finished wonky star blocks.

The finished quilt:

QUILT DETAILS

Little Green Man

Finished size: 54” x 72”

A variety of fabrics from different manufacturers

The pattern is outlined in the blog above, but is not available commercially

Quilted by Julia Madison, except for the Little Green Man block, which she left for me because I wanted to avoid any extra holes in the Kraft-Tex I used for applique.

Now, does anyone else recall the “Little Green Man” song from the 1950s?

Tutorial: DIY Gift Card Wrap With Kraft-Tex

We’ve been doing recyclable wraps for many of our gifts for years now, so I decided it was time for the gift cards to have their own recyclable presentation case as well. Here’s the first one.  I am a Kraft-Tex Ambassador, so I cut this from one of the free rolls of Kraft-Tex the folks at C&T sent to me for use in projects for my blog.

I took out a gift card and checked the size, then made a paper pattern 5″ x 7.5″.  I used a spool to round the corners and tested where I wanted the pocket to fold up and the flap to fold down.

I then cut a 5″ x 7.5″ rectangle from some yummy pre-washed Kraft-Tex. (The color is Madeira.) This is the first time I’ve used the Kraft-Tex that comes pre-washed, and it has a very pleasing visual and tactile texture.  I cut the Kraft-Tex with my rotary cutter as I would fabric, and it worked well.

I used the same spool and a pencil to mark rounded corners on the Kraft-Tex, then cut the corners with my good paper scissors.  Even though it sews like cloth, Kraft-Tex is a paper product, so it’s better to use good quality paper scissors to avoid dulling your fabric scissors.

To be sure the Kraft-Tex would fold evenly, I first scored it with my Hera marker then folded it along the score mark and pressed the fold by running the marker over the outside as well.  Note that the sharp point of the marker did make a mark in the material, so be careful.  The mark went into the fold, so it was no problem here.

I then sewed this gold metallic rick-rack (from a yard sale!) around the outside edge.  To do this, I lengthened the stitch on my machine to 3 (on Bernina) and sewed with a straight stitch along both edges, catching the points of the rick-rack.  It’s not a good idea to back-stitch on Kraft-Tex, so I just sewed a couple of stitches over at the finish so the start and finish overlapped.  I did treat the ends of the rick-rack, as well as the ends of the ribbon for the tie, with Fray Check, which dries clear and doesn’t show.  Here are pictures of both sides.

After the rick-rack was attached, I again folded along the lines I had scored previously and marked a spot on the middle of the lower flap that would form the pocket.  So, I made a tiny mark 2.5″ from each side of the piece and 1.5″ below the upper fold as a placement mark for the ribbon.

I cut an 18″ piece of 3/8″ wide ribbon and sewed it to the place where I’d put the dot.  To avoid making too many holes in the Kraft-Tex, I sewed it on with a little Z.  I then pulled the threads to the back where I tied them together to avoid having to back stitch.

Note that the ribbon has to be attached before the pocket is sewn to the back along the sides!  At that point, I checked to be sure the pouch would be the right size for the card when I eventually sewed the pocket up.  Yep, so far, so good.

After attaching the ribbon, I folded the carrier shut along both fold lines and pulled the ribbon out straight to the sides so I could see where to put the holes for the ribbon to come through.  (It may help to clip the flaps down with paper clips to hold it shut for this step.)  I made a little dot 2″ in from each outer edge so that I could punch holes 1″ apart for the ribbon to come through.  I made the holes with an ordinary hole punch.

Then it was time to sew up the sides of the pocket so it would hold the card.  I folded up the pocket and zig-zagged over the rick-rack to stitch the pocket down to the back of the carrier.

Done!  I threaded the ribbon through the holes and tied it in a bow!

And don’t forget to sign your work!


Kraft-Tex Appliqué ! Woo!

Appliqué and I have a love-hate relationship.  I love the look of appliqué sometimes, and I’ve tried several methods, from needle turn to fusible and most things in between.  No method is perfect.

And just to show that I really have tried, here are some samples:

Machine appliqué of these circles was done after the quilting, so the backing and batting acted as stabilizer

The petals were fused on with Heat’n’Bond, and then I buttonhole stitched around them after doing the rest of the quilting, again eliminating the need for stabilizer

The snowmen and noses were a combination of fusible appliqué and Eleanor Burns’s appliqué with fusible interfacing.  I have washed this and it held up fine.

Sunbonnet Sue

Sunbonnet Sue Visits Quilt in a Day was done with Eleanor Burns’s method using fusible interfacing to produce turned edges

So, when I wanted a space alien to go on a quilt recently, I gave the appliqué process some serious thought.  This fabric is part of the background for a wonky star quilt I’m making, and I wanted one block to be a space alien to go with the theme.

Unfortunately, I have not saved the selvage from this fabric, so I don’t know who made it

Then I had an idea (drum roll, please).  The folks at C&T recently asked me to be an ambassador for Kraft-Tex, and since I was already a Kraft-Tex user and had blogged about it 3 times, I agreed.  They sent me some free Kraft-Tex!

I chose Marsala, Denim (hand dyed and prewashed), and natural prewashed for my free Kraft-Tex

Actually, I had already bought this black Kraft-Tex for another project, but I just want you to know that, for the first time ever, I have accepted a donated product for use in my blog.

I’ll have a tutorial on this whole quilt when it’s finished, but here’s an overview of how I used Kraft-Tex to avoid traditional appliqué .  I cut out the alien’s head using one of my circle cutters and attached it to the block with washable glue stick. Then I cut the outline from black Kraft-Tex and put it over the raw edge, with the raw edge kind of centered underneath.

Here is the alien on my design wall

The eye stalks and eyes were cut from Kraft-Tex and all the Kraft-Tex was glued down with the same washable glue.  That all worked well.  I then machine-stitched near the edges of the Kraft-Tex using a size 70 needle and matching thread.  Voila!  I didn’t have to fool with fusibles, bias strips, or much of anything at all.

Kraft-Tex is washable, and I’ll be interested to see how it does in this quilt.  It is stiffer than fabric, but I think that will be OK given the small amount I used on this twin-size quilt.

I can especially see using Kraft-Tex this way in art quilts very soon!

I’ll let you know how this all turns out!

Bag With Kraft-Tex Base

A while back I made a bag for carrying stuff to guild meetings and used some scraps of Kraft-Tex to reinforce the base. I have enjoyed that addition, both because it helps the bag stand up on its own and because I don’t have to worry about putting the bag on the floor.

Kraft-Tex for bags

Then recently I saw this Alexander Henry fabric and of course I was forced to buy it 😉

Alexander Henry fabric showing melodramatic “sewing woes”

I decided to make another tote bag using this tutorial from Bijou Lovely Designs, Holly DeGroot’s blog.  Her tutorial includes the free pattern, so go make it if you want to.  Her instructions and illustrations are excellent.

Here are my modifications for making the base of Kraft-Tex.

Holly’s instructions used the same fabric for the bag lining and the base, so of course I didn’t do that.  I cut the Kraft-Tex base 1/2″ narrower (top to bottom measurement) than Holly’s instructions, because the base on her bag is joined with a 1/4″ seam and then pressed back.  I just appliqued the Kraft-Tex to the bag.  Naturally, that required clips rather than pins–don’t want holes in the Kraft-Tex!

You can see that the fabric wasn’t printed entirely straight; the other side was straighter.  Luckily, this bag is for fun.

You can see my top-stitching here. This is the straighter side 🙂

When it came time to press the seams open, I just folded back the seams that contained Kraft-Tex, then ran the handle of my scissors along the seam to crease the Kraft-Tex into place.

You can also see where I stitched around the edge to hold the Kraft-Tex in place before assembly

The seams were not as bulky as I had anticipated, and gave me no trouble.  The only difficult part was turning the bag right-side-out through the opening in the lining.  The Kraft-Tex was a little stiff for that, but not too bad.

The Kraft-Tex stood up but the bag sides above it drooped

When I got the bag done, the Kraft-Tex part was great, but the rest of the bag was limp despite interfacing.  I took the bag for a shakedown cruise when we went to the big city Saturday, and it was a pain to get things in and out of it because the sides collapsed.  So…

I took out the top seams, inserted pieces of Peltex cut to fit, and stitched all around them.  They needed to overlap the Kraft-Tex a little to make the whole thing stand up.

That makes this “Holly’s bag with significant modifications”, but you can still get the measurements and construction details from her blog.  I like the bag now, and it is a good size.  Next time I’ll use Peltex from the get-go, probably still with the Kraft-Tex.

Review: Kraft-Tex for Bags

I’ve had my eye on Kraft-Tex for some time. It’s a paper product made by C&T

Kraft-Tex review

Kraft-Tex, made by C&T but sold many places

and advertised to sew and wash like fabric but look like leather.  As I’ve probably said before, I’ll try almost anything once 🙂  (And just for the record, I purchased the material used for this project and this review is entirely my own opinion.)

I decided to use Kraft-Tex as the bottom of a tote bag.  There was a helpful video on You Tube (of course!) showing how to use it and showing what it looked like both washed and unwashed.  Because I didn’t want to wash the drapery fabric I was using for the bag, I didn’t wash the Kraft-Tex.

The Kraft-Tex was very stiff right out of the package, so I wadded it up hoping to soften it a little before folding it to make the bag bottom.  I didn’t really need to do that; it folded and sewed very nicely.  It remained extremely stiff but was not at all difficult to stitch with my Bernina, even when it came to sewing through 4 layers as I boxed the bottom of the bag.

Kraft-Tex review

Tote bag made with Kraft-Tex for the bottom section

When I got it all put together it provided a nice substantial bottom for the bag, as I had hoped.  It did not even THINK about tearing like paper when I was working with it. However, I really think it LOOKS like a brown paper bag rather than “like leather” as advertised.  Maybe that’s just because I used it to make a bag.  As you can see from this detail, it did stitch very nicely.

Kraft-Tex bag

Detail of Kraft-Tex and Drapery Fabric Bag

However, the claim that Kraft-Tex “handles like fabric” was absolutely untrue!  It was so stiff that I decided to wash what remained along with the rest of the drapery fabric.  Both washed and dried well on gentle cycle, and the Kraft-Tex was slightly softer after washing. It didn’t handle any more like fabric, though–turning that stiff outer bag through the opening left in the lining for that purpose was “challenging”!

Here’s the second bag, made with washed Kraft-Tex.  Sure enough, it looks the same after washing.  I quilted the upper part of the bag, which gave it more substance than the previous one, so it went better with the stiff Kraft-Tex bottom.

Kraft-Tex review

Bag made after washing the Kraft-Tex and fabric

The pattern I used for this bag was free at Bijou Lovely and was very well written and illustrated.  I’ll probably make the bag again, but I’ll find another use for the Kraft-Tex!