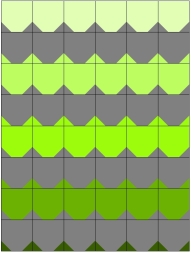
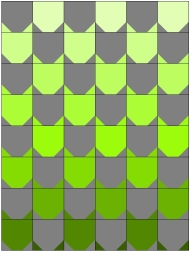
A New Donation!

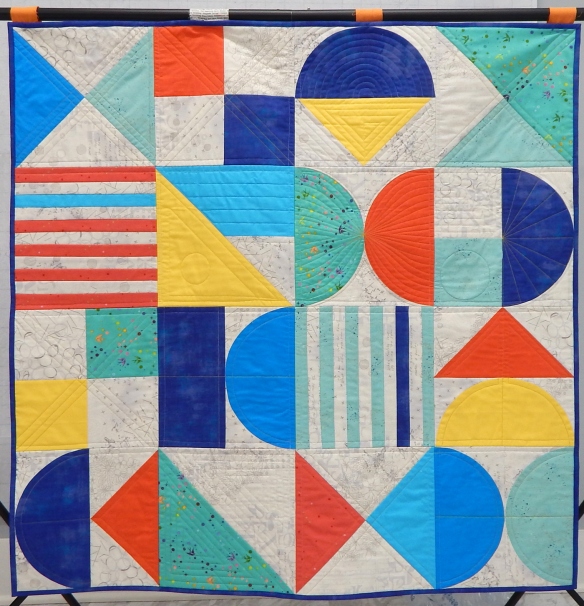
A friend called recently to say that a local charity wanted a quilt to decorate their new office space. I sent a couple of pictures and they were enthusiastic but thought maybe they wanted both quilts! Eventually someone came over to look at some options since both the pictures I sent were very much alike; I didn’t think they’d want two quilt so similar. Of course I was thrilled that somebody wanted my quilts!

The charity is Backpack Beginnings, a local organization whose mission is to give “food and basic necessities directly to children in need” and to connect their families to appropriate community resources. I like the fact that they have a “market” where families can “pick out their own groceries and supplies”.

Anyway, back to the quilts. The Backpack Beginnings representative selected these two quilts to decorate their new space, and I couldn’t be happier that someone actually requested a donation!

This first quilt, 48″ x 48″, is a modification of a pattern by Brigitte Heitland. I made it in 2022 and quilted it using the QAYG method.

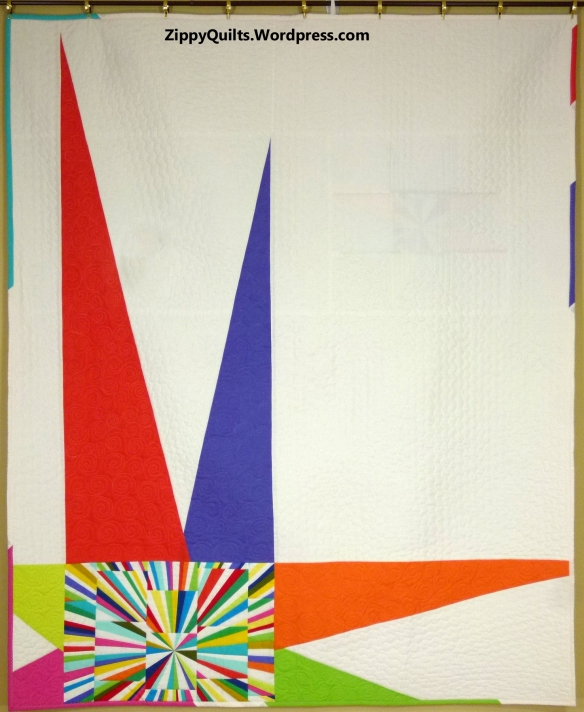
The second quilt has been around a long time! I made it for Modern Quilts Unlimited back in 2014 and quilted it myself. Finished size is 47″ x 57″. It’s one of my favorites, so I’m glad it will be displayed.

Modern Quilts Unlimited magazine

Just FYI, if you’re local, Backpack Beginnings has the quilts they need now, but they still need volunteers!

A WOMBAT

According to a facetious list of quilting terms I have, a WOMBAT is a quilt that is a “Waste Of Money, Batting, And Time”. Which is why I’ve named this quilt WOMBAT.

The full sun on the west side of the house washed out the colors a bit

And here’s the backing!

This was one of the patterns provided by the Modern Quilt Guild. I usually ignore those, BUT in this case a blogging friend made one and it sounded interesting. In particular, she commented, “Who thinks like that?” with regard to the written instructions in the pattern. I like to find out how different designers think and plan, so I jumped in.

In fairness, I learned a couple of things, but I thought the written instructions wasted a lot of printer ink and time giving detailed instructions for things that were easily improvised. Anyway, it’s done. Finished in 2022, actually, but I have a backlog of quilts to bind and blog about, so here it is at the start of 2023. Happy new year to all!

Quilt Stats

Name: WOMBAT

Designed by: Charles Cameron, for the Modern Quilt Guild

Finished size: 63″ x 87″

Made by: me

Quilted by: Elisabeth Pugh

Did anyone else make this quilt? If so, what did you think?


Super Simple Squares

A layer cake of Alison Glass fabric jumped in my cart when I wasn’t looking, and I’ve been wondering what to do with it. Finally, I designed this quilt.

The quilting by Julia Madison is an Urban Elementz panto called “Sound Waves”. I love it!

Quilt stats:

Name: Super Simple Squares

Finished size: 52″ x 52″

Designer: me

Fabric: Alison Glass

Quilted by: Julia Madison

Tessellations again!

In a moment of madness, I agreed to do a program on tessellations for my MQG in Greensboro.  I’ll be posting the same information here so we can all share it and so that these blogs can serve as “handouts” for my presentation.  To start, here’s a blog written by my friend Jean Larson, who has designed and made several award-winning tessellation quilts.  To view some of Jean’s quilts, click HERE.  –MJP

Tessellating designs make me happy.  Tweaking those designs is even more fun.   I want to share the joy of starting with a very, very simple design and watching it blossom.  

Start with a simple gridded block and create a light/dark design.  Here, I’ve started with a 3 x 3 grid.  Then re-color the same block with the lights and darks reversed

.The grid lines are only for design purposes, and each block can be constructed with a single square block with 2 corner triangles attached using any method you prefer.

Here are some design possibilities…Quilt_1A simple “cat head” quilt using only 2 colors.

Different looks can be achieved with variations in the color placement.

Blocks can be inverted and turned for even more quilt designs.

Just imagine all the possibilities with color in these!!!!!

It’s even more complex when you design with a 6×6 grid.  Here are the positive and negative versions of another block.

These blocks can be constructed using half-square triangles integrated with larger fabric pieces.  If these blocks were to finish at 6 inches by 6 inches.  The center column on each block would be a single 3.5 inch wide by 6.5 in long piece of fabric.  The side strips would include some half-square triangles.

A couple of the quilts that can be made:

Looks like spools, some gray, some white, all standing up.  Same quilt with alternate blocks turned a quarter turn yields a different  clearly recognizable tessellation.  Reminds me of tessellating doggie rawhide chews 😉

Now back to the spool quilt from above.  The “thread” areas have been colored in.  No blocks have been turned.

Jean spool 5This shows the power of color and value (lightness and darkness).   The colored part, being next to the gray and being closer in value to the gray, unites those parts of the block, and gives the illusion that we have all gray spools on a white background, some standing up, some lying down.

I hope these examples can be the seeds to sprout some design experimentation with tessellating shapes.

  1. Start with 2 square grids
  2. Create a positive design, and its negative design
  3. Alternate them in a quilt layout
  4. PLAY!
  5. And play more with color!

Happy Quilting (and Designing)!!   –Jean Larson


Fiddlesticks!

I finished this quilt last month, but I’ve been doing a lot of quilting due to quarantine, so I’m behind on showing my work.  This is a scrap quilt, of course.  I’ve been seeing lots of quilts with little strips inserted on Pinterest, and finally got around to developing my own.

First, I got out all my solids, including the Grunge, and cut a 12″ square from each for background.  I planned to trim the blocks to 10.5″ after I finished inserting strips, since I have a 10.5″ square ruler 😀  No point making things difficult; let’s plan for easy!

Then I got out all my scraps and cut them into strips ranging from about 1″ to 2.5″ in width.  I made strip sets and cut them crosswise into strips for the quilt.   The inserted strips were cut in widths varying from 1″ to 2″, which of course means they finished 0.5″ to 1.5″ wide in the blocks.  I made more skinny ones than wide ones.

I just slashed the blocks at random angles.  I did slash and insert only one strip at a time. 

After I’d inserted enough strips to suit me, I trimmed each block to 10.5″ square.

Just look at the fun flower design my quilter used!

And yes, I left 3 blocks unpieced to add interest.

Quilt stats:  Fiddlesticks

Finished size: 49″ x 69″

Designed by me, based on multiple inspirations from Pinterest

Technique: Improvisation

Quilted by Julia Madison

Modern Curves and Stripes

One of the books C&T sent to me recently is Quilt Modern Curves & Bold Stripes, by Heather Black and Daisy Aschenhoug.   I found the quilts in this book to be new and interesting, not just a repeat of what I’ve seen elsewhere..

Photo courtesy of C&T

There are 15 projects in the book, all including curves and stripes, and I would be happy to make all of them!  The one I just HAD to make first, however, is called “Tidbits”:

Tidbits quilt, Photo courtesy of C&T

I’ve got to tell you, I’m in love with this block–it is just the cutest!  I’m thinking I might want to turn it on point to make a raindrop.  Here’s my first block:

The directions for the quilts offer the option of making your own strip sets or using striped fabric..  I used some fun striped fabric I had in stash.

As was the case with the last C&T book I used, the instructions were clear and complete.  For the Tidbits block it is important to keep track of the way stripes are oriented, and there are tips on how to do that.

The book includes templates to trace for each of the quilts, though it would be possible to use curved templates you have on hand if you don’t mind modifying the designs slightly.

I want to make this one next:

Sunset Horizons quilt, Photo courtesy of C&T

BTW, go to the C&T website and sign up for their newsletter  That way you’ll know when they’re having a SALE!  Click this link, scroll all the way to the bottom of the page, and find the box to sign up in the bottom right corner.  They also have a blog you may want to check out. (As always, this is not an affiliate link; it is provided for your convenience and I do not get paid if you click)

OK, more eye candy from the book.:

“Lys” quilt, Photo courtesy of C&T

Festoons quilt, Photo courtesy of C&T

I just love these fresh, modern designs! Which one do you want to make?


Leaf Pounding and Lattice Making, By My Friends

I love to hear from people who have used something from my blog to make something of their own, so here are a couple of examples.

My long-time friend Katy read my blog on leaf pounding and decided to do some of her own.  She was kind enough to send pictures of her first batch.  Each picture shows both the original leaf and the print.  Click on any picture for an enlarged image.

Laura, a blogging friend, made a lattice quilt using instructions from my blog to design it herself.  She made the blocks a little more rectangular than mine, and I like it. The fabric used was brought by her daughter from a visit to Cote d’Ivoire. The vendor who sold the fabric gave her the lime green to go with it.  This certainly makes a lively wall hanging, which Laura plans to give to the daughter who brought her the fabric.

Here’s the finished top:

Please let me know what you’ve done lately, even if it isn’t something from my blog!  I love seeing other people’s ideas 🙂

A Swap Block for Donation Quilts

One of my quilt groups makes donation quilts about 40″ square for various organizations. The size is easy to construct and quilt at home, and is appropriate for the children who receive the quilts.  Here are the recent group donations:

We often use swap blocks for our quilts and recently decided on a new swap and I want to tell you about it. One of your quilt groups may enjoy it, too!  Here’s how:

First make a big wonky log cabin block. Our blocks started with a 5″ square, which was modified to make a wonky center.  It was then surrounded by strips from my scrap bins, and occasional strips were trimmed so they were wonky, too.

These big blocks are 21″ square (unfinished).

We cut each block in quarters, so each quarter is 10.5″ unfinished, and started arranging them to make a quilt top that would finish at 40″ square.

This was how we eventually decided to arrange them in the finished top:

And then, of course, we made 4 more:

If you decide to do this, there are only 2 things to watch out for:

  1. As you add strips, keep measuring to be sure the center block remains centered enough so that there will be a piece of it in each quarter when you cut the block up.
  2. It’s easiest if the final round of strips is considerably wider than needed so the block can be trimmed to (unfinished) size easily without running into seams.

This is a really fun way to use scraps!  If you make one, or use this for a group swap, send me a picture!

A Tale of Many Dots

A couple of years ago I bought this fabric because I really liked it:

Since it was pre-printed fat quarters (FQs), I planned to use it in a pattern designed for FQs.  I added a couple of fabrics that I thought went well with it.  Until I saw it sewn together:

I didn’t like the quilt top once I got it made, so I took out every single seam and set the pieces aside to think about.

I took out the fabrics I had added, thinking perhaps they were the problem.  That helped a little.  However, I decided the dots needed some solid mixed with them.  I took them on a shopping trip with friends and we selected a nice red-orange to mix with them.  Then I re-made the quilt including some of the red-orange.

I still didn’t like it.  And call me lazy if you like, but I was not going to take those pieces apart again!  So, with a what-the-heck attitude, I cut the new top up into circles (big dots!) using my dinner and salad plates as templates.

I pinned various potential backgrounds on the design wall and tried them out.

I think some variation of this is going to be the final design.  Maybe not the greatest ever, but nobody died, so I’m moving on!

Scraps Happen, Part I

When I mentioned recently that I was making a basket to hold scraps as I work on a project, my blogging friend Elizabeth asked how I decide what to do with the scraps.  This first post will be about how I design scrap quilts; the second in the series will be about how I use inspiration from other quilters; the third will be about how I modify published patterns for scrap quilts.

My first improvised scrap quilt was made close to 20 years ago.  I absolutely just starting sewing scraps together and kept it up until I had a collection of blocks.  The scraps were all from an Amish-style quilt I had made, which kept the blocks cohesive.

improvisational blocks

I then added 2 shades of yellow for sashing.

improvisational quilt

Nothing Is Wasted, my first improvisational quilt, 2001-2002

Using scraps from a single project is one way to be sure the scraps all play well together, assuming the fabrics were well coordinated in the original project.  After making the quilt below for Modern Quilts Unlimited with some yummy Cotton Couture fabrics provided by Michael Miller…

quilt photo

My Zippy Star Quilt and Pillow as shown in Modern Quilts Unlimited, Summer 2014

I started sewing all my tiny scraps together and added a tiny paper-pieced star to make a donation quilt for the Quilt Alliance annual contest:

scrap quilt

Confetti Star, 20″ x 20″, 2014.  Some of these pieces finish less than 1/4″ square

I then started combining scraps of a single color to make blocks.  I called them “slabs”, since the idea of making single-color scrap blocks came from Cheryl Arkison (though hers are much more orderly than mine).  Here is one example of a quilt made from these single-color blocks:

On at least one occasion I decided a collection of yellow and orange scrap blocks were booooring, so I cut them up and inserted some bright blue before combining them in a quilt:Improvisational quilt, orange and blue quilt

Sometimes I am “forced” to design a new quilt because the scrap bins are overflowing.  When the strip bins got out of hand last spring, I designed this quilt.  The idea of putting a circle in the alternate blocks came from my friend Jerri.  The triangle blocks were because I have a 60 degree triangle ruler 🙂

Machine applique of these circles was done after the quilting, so there was no need for further stabilizer

On another occasion, some friends and I had way too many 2.5″ blocks, so we developed these blocks and set them on point.  That quilt hung around for a long time “needing something”.  Eventually I added a central motif, and here it is:

The petals were fused on with Heat’n’Bond, and then I buttonhole stitched around them

Another design process I like to use is to simply fill a piece of batting with scraps.  For the table runners shown below, I selected a group of fabrics for the top and a piece of backing fabric about 6″ longer and wider than the finished runner.  I spray basted the batting to the backing, then started filling the space on the batting with pieces of fabric from my collection. I didn’t sew them down until I had a whole section done, since this type of designing involves cutting off bits here and there to keep edges even.

modern table runner

Here is one of the samples for my improvised table runner class

improvisational quilt

I have taught this method as a class, but it proved to be too unstructured for some people, who really just wanted to make my runner.  I continue to use the method for myself but have not attempted to teach it to others again!

So, in response to the question of my process for designing scrap quilts, it’s really just “by the seat of my pants”.  I do start with a collection of fabrics I like together, but otherwise it’s sew first, plan later.  What I’m not showing, of course, is all the “fizzles” that got thrown out along the way!

Please stay tuned for Part II, scrap quilts inspired by other quilters.  And go visit Elizabeth, who inspired this post!