3 Great Holiday Hints

 Feel free to share this post with anyone who may want to give you a gift! 😉

Here are my Top 3 Gadgets of the moment.  You may need them, too!

  1. Oil pen.
    oil pen

    Oil pen

    This handy little oiler has a long, thin tip at one end and a pushbutton at the other, making it possible to dispense just one drop of machine oil in the tight recesses of your machine!  It comes with a secure screw-on cap so you can even carry it around in your pocket like a pen if you want to.  So far mine has never leaked when I’ve thrown it in my gadget bag for workshops and retreats.  My sweetie got mine on Amazon HERE, though there certainly there may be other sources.

  2. Mini vacuum attachments.
    miniature attachments

    Miniature attachments allow use of a standard vacuum cleaner to clean your machine

    My husband got these for me at a big box home and hardware store, but I’ve seen them at quilt shows, too.  The price varies wildly for what appears to be the same set of attachments, so I say shop around and pay less than $10.  These are especially useful for cleaning a serger because a serger gets so messy so fast, but I use them happily on my regular sewing machine, too.  Just attach the adapter to your regular vacuum cleaner and the little attachments clean those hard-to-reach areas of either machine.  I could still use an even smaller tip, but it’s a big improvement over using only a cleaning brush with no suction.
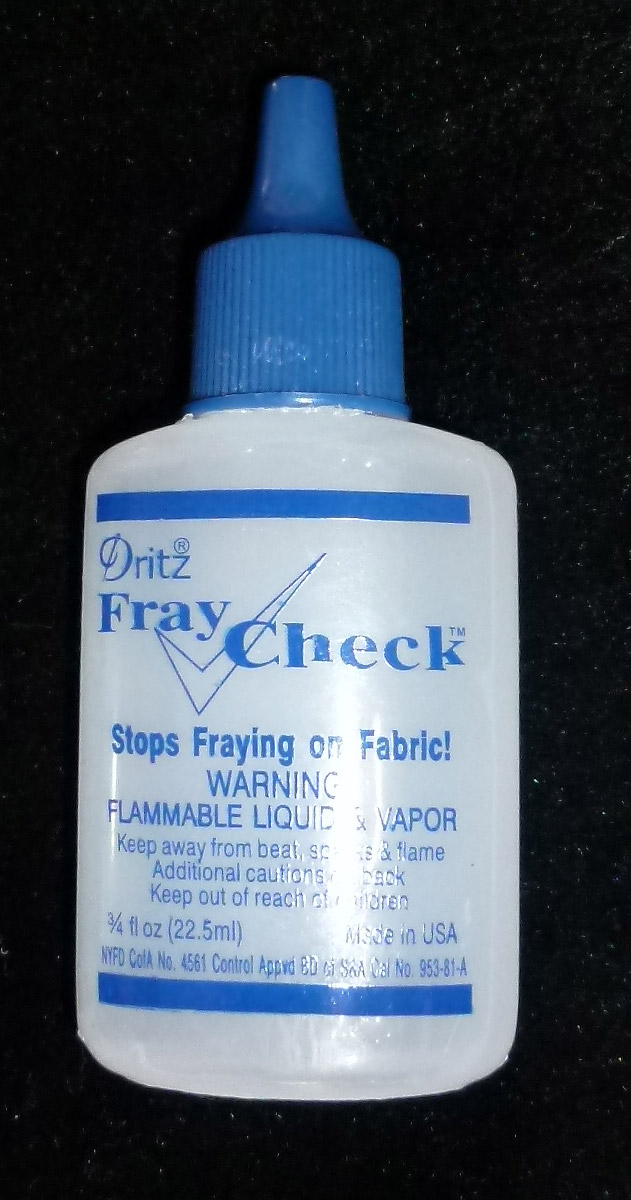
  3. Fray checkFray-Chek Well, it isn’t exactly a tool, but it has many uses this time of year 🙂   I apply it to ribbon ends so they won’t fray and outline my iron-on applique with it before I sew around the edge.  I don’t do a lot of iron-on applique on things that will be washed, but this makes me feel a little more secure when I do. And shown below IS the latest iron-on applique, which I’m showing just for fun.  I made the onesie tie with a tutorial from a blog called Crap I’ve Made. I love it!  Then I made a pattern from one of my husband’s ties and made a grownup-size T shirt for the Father of the child, so they can match!onesie and t shirt with iron-on ties

So:  go drop a few hints!

Orphan Blocks and Scraps

You can make a great quilt from nothing but leftovers–orphan blocks and scraps!  Of course there are a lot of ways to do this, but here’s an easy one to get you started on both using scraps and trying out improvisational quilting.

Orphan blocks:  Go through your collection and pick enough, or almost enough, blocks to go along one edge of the quilt.  Pick some with colors that go together and set the color range for your quilt based on these blocks.

Yin Yang quilt blocks

These are all in the same color range, and of course all the same design–a good start for an orphan block quilt!

The blocks can be a “header” for the quilt, or an insert somewhere inside the quilt, or they can go down one side.  Or across the top and down one side.  Or…well, you get the idea! There are lots of ways to use them.  But if you’re new to improvising your own designs, consider making a row of orphan blocks across the top.

Orphan block quilt

Here’s a design I’ve already made, but I can’t show the actual quilt because I’m entering it in a show

The blocks do not all need to be the same size.  Just add strips to them to make them all the same.  A lot of times you’ll have something like two 7″ blocks and three 8″ blocks.  You COULD add 1″ strips to the smaller ones on two sides, but that’s a little tedious.  Better to add 2″ strips on 2 sides of the 8″ blocks and 3″ strips on 2 sides of the 7″ blocks.

quilt block with border

Quilt block with larger border added on 2 sides

quilt block

quilt block with small border added on 2 sides

See, they’re modern blocks already–asymmetry!  Because of adding larger strips, you didn’t have to fool around with tiny pieces, and you get a full row with fewer blocks.  Win-win!

.

.

In the quilt above it was easy to add grass and sky to adjust the size of the blocks.

After getting the blocks arranged on your design board, go to your scrap bins.  Pick out all the scraps in colors that go with your orphan blocks.  Since I save my scraps as strips, I make a stack of each strip size in the colors I’ve chosen, and I’m ready to go.  If you don’t save your scraps as strips, you really should–it’s so handy!  However, you can also cut strips to get you started.

Yes, it’s perfectly acceptable (and fun!) to make an improv quilt from scraps of any size and shape, but it’s easier with strips.  So if this is your first time, cut strips!

Now join those strips into rows, and the rows into sections, and keep going until you have the size quilt you want.  You’ll probably want to square it up after you get the top pieced; a top made of pieces of different sizes rarely comes out even on all sides.

Here’s another idea, assuming I had several leftover leaf blocks:

orphan block and scrap quilt

Leaves and scraps, assuming I had 5 leftover leaf blocks

Now, go for it!

Orphan Block Table Runner

When I looked at my (er, large!) collection of orphan blocks, I found not only single blocks, but groups of blocks all from the same quilt, and several strips of blocks that looked like they had been almost included in a quilt.  The first such strip I came to was from an improvised batik quilt made with Bold Over Batiks and assorted others.  It was almost 24 inches long and 4 inches wide.

I cut the strip into a length of 12 inches and one of a few inches less, then added fabric to the shorter one so both were 12 inches.  I then joined them lengthwise with a black strip down the center:

table runner

Table runner made from a strip of leftovers

I made a backing by piecing together scraps from my current quilt, which happens to be batiks also.  I just put them together semi-randomly.  (You can see the current quilt at the end of this post.)

quilted table runner

The back was pieced from the scraps that happened to be on the top of the scrap bin!

I quilted the whole thing in the ditch and bound it in black.  I think I like the back almost as well as the front!

Of course, if you have individual orphan blocks instead of a strip, you can make a table runner by joining them, either with or without sashing.  I find that sashing is a good idea because it allows for the use of blocks of different sizes just by varying the size of the sashing.  (I made the mistake once of putting together a “group quilt” and it DEFINITELY required sashing individualized to each block, since apparently everybody in the group had a different idea of the size of a 9″ block.)  Sashing can save your bacon (or table runner) in a case like that.  So here’s a quilt design with blocks of 4 different sizes.  The blocks at the ends had extra sashing added.Table Runner

Finally, here’s a peek at the current quilt-in-progress.  It’s made from the FQs that jumped on me at Quiltfest in July and were shown at the end of an earlier post here. The quilt is up on my sticky wall with a label on each piece so I don’t get confused as I sew it together! Scraps from this were on top of the scrap pile, so I used them for the back of the table runner shown above.

Bermuda Sunrise quilt pattern

This pattern is Bermuda Sunrise

Hope everyone has a good week!

A Quilty Shirt

Orphan blocks make great decoration for denim or chambray shirts.  They might work on

quilt blocks on a work shirt

A decorated chambray work shirt

T shirts, too, but it’s easier to put them on a woven shirt than a knit one, so I vote for “workshirts”.

Here’s an example, modeled by my friend Anna.

These blocks had been around a while 😉  You know how that goes! Then I got a good deal on some chambray shirts and bought them in all the sizes my sisters-in-law wear.  They made good holiday gifts!

I suggest you turn under a 1/4″ hem on all sides of the block and then applique it to the shirt by hand or machine.  Very easy.  I don’t suggest quilting the block first, because even thin batting can feel uncomfortably lumpy attached to a shirt.

quilt block on a shirt

Here’s another orphan block on a shirt

Here’s another one attached to the back of a shirt.  I just sewed around these blocks with a straight stitch, but if you like hand applique, go for it!  If you don’t know sizes and don’t want to guess, you can buy L or XL for most people; if it’s too big just explain it’s meant to be worn as an overshirt 😉

Next week:  turn your orphan blocks into table runners!