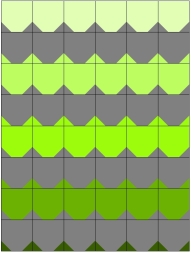
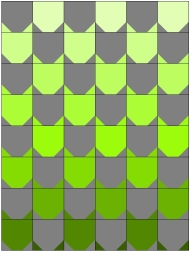
In a moment of madness, I agreed to do a program on tessellations for my MQG in Greensboro. I’ll be posting the same information here so we can all share it and so that these blogs can serve as “handouts” for my presentation. To start, here’s a blog written by my friend Jean Larson, who has designed and made several award-winning tessellation quilts. To view some of Jean’s quilts, click HERE. –MJP
Tessellating designs make me happy. Tweaking those designs is even more fun. I want to share the joy of starting with a very, very simple design and watching it blossom.
Start with a simple gridded block and create a light/dark design. Here, I’ve started with a 3 x 3 grid. Then re-color the same block with the lights and darks reversed
.The grid lines are only for design purposes, and each block can be constructed with a single square block with 2 corner triangles attached using any method you prefer.
Here are some design possibilities… A simple “cat head” quilt using only 2 colors.
Different looks can be achieved with variations in the color placement.
Blocks can be inverted and turned for even more quilt designs.
Just imagine all the possibilities with color in these!!!!!
It’s even more complex when you design with a 6×6 grid. Here are the positive and negative versions of another block.
These blocks can be constructed using half-square triangles integrated with larger fabric pieces. If these blocks were to finish at 6 inches by 6 inches. The center column on each block would be a single 3.5 inch wide by 6.5 in long piece of fabric. The side strips would include some half-square triangles.
A couple of the quilts that can be made:
Looks like spools, some gray, some white, all standing up. Same quilt with alternate blocks turned a quarter turn yields a different clearly recognizable tessellation. Reminds me of tessellating doggie rawhide chews 😉
Now back to the spool quilt from above. The “thread” areas have been colored in. No blocks have been turned.
 This shows the power of color and value (lightness and darkness). The colored part, being next to the gray and being closer in value to the gray, unites those parts of the block, and gives the illusion that we have all gray spools on a white background, some standing up, some lying down.
I hope these examples can be the seeds to sprout some design experimentation with tessellating shapes.
- Start with 2 square grids
- Create a positive design, and its negative design
- Alternate them in a quilt layout
- PLAY!
- And play more with color!
Happy Quilting (and Designing)!! –Jean Larson


