I’m In, But…

The “My Favorite Color is Moda Sampler” came to my attention because Studio Stitch is offering it as a block of the month this year.

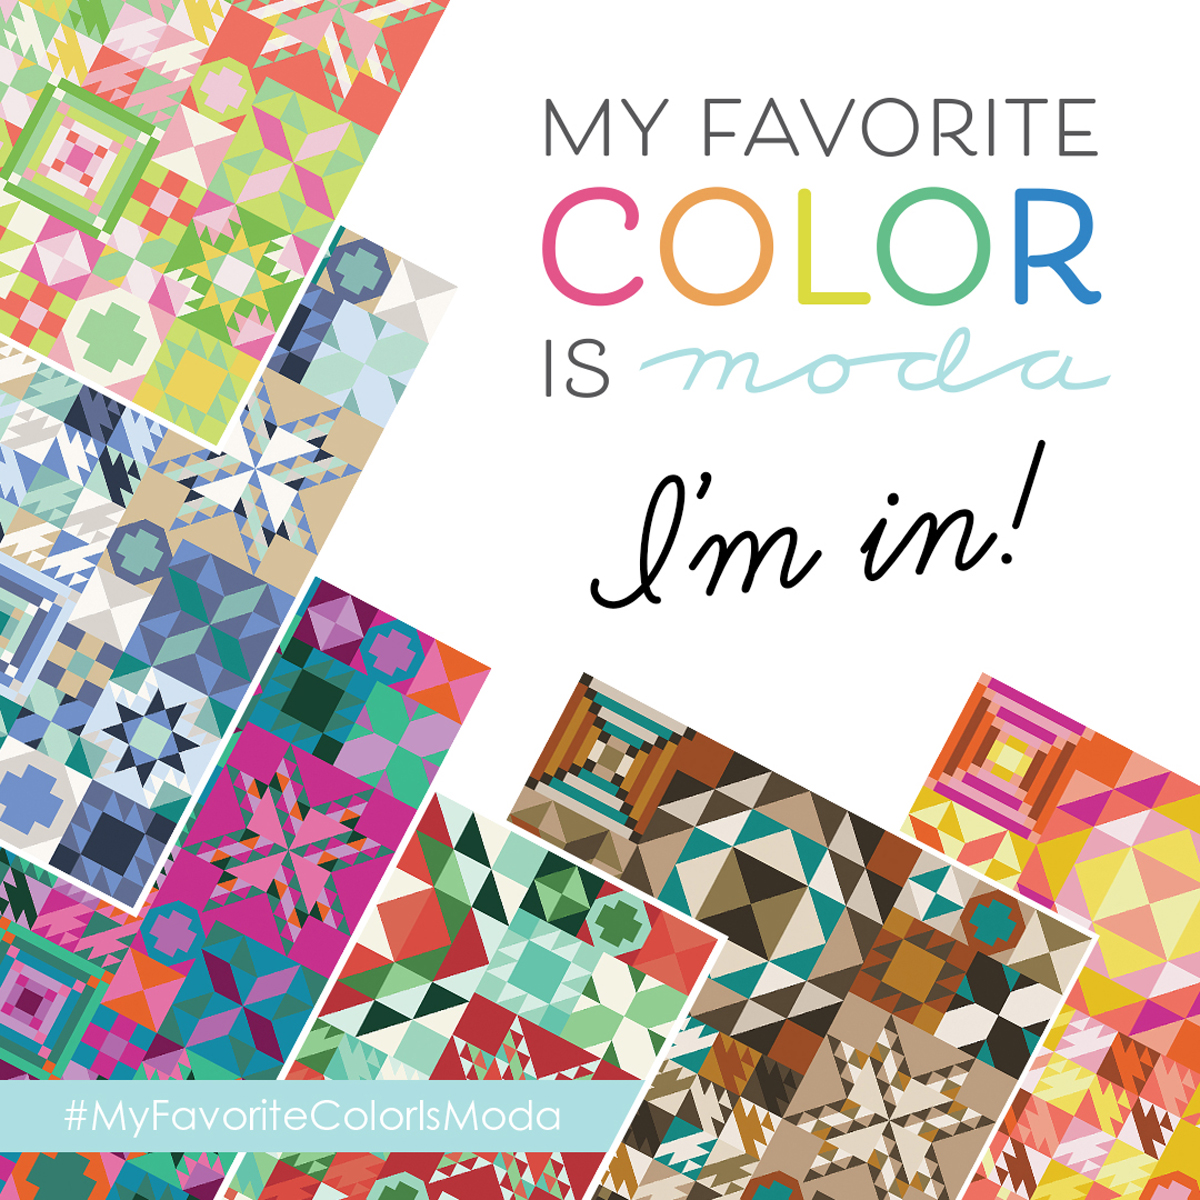
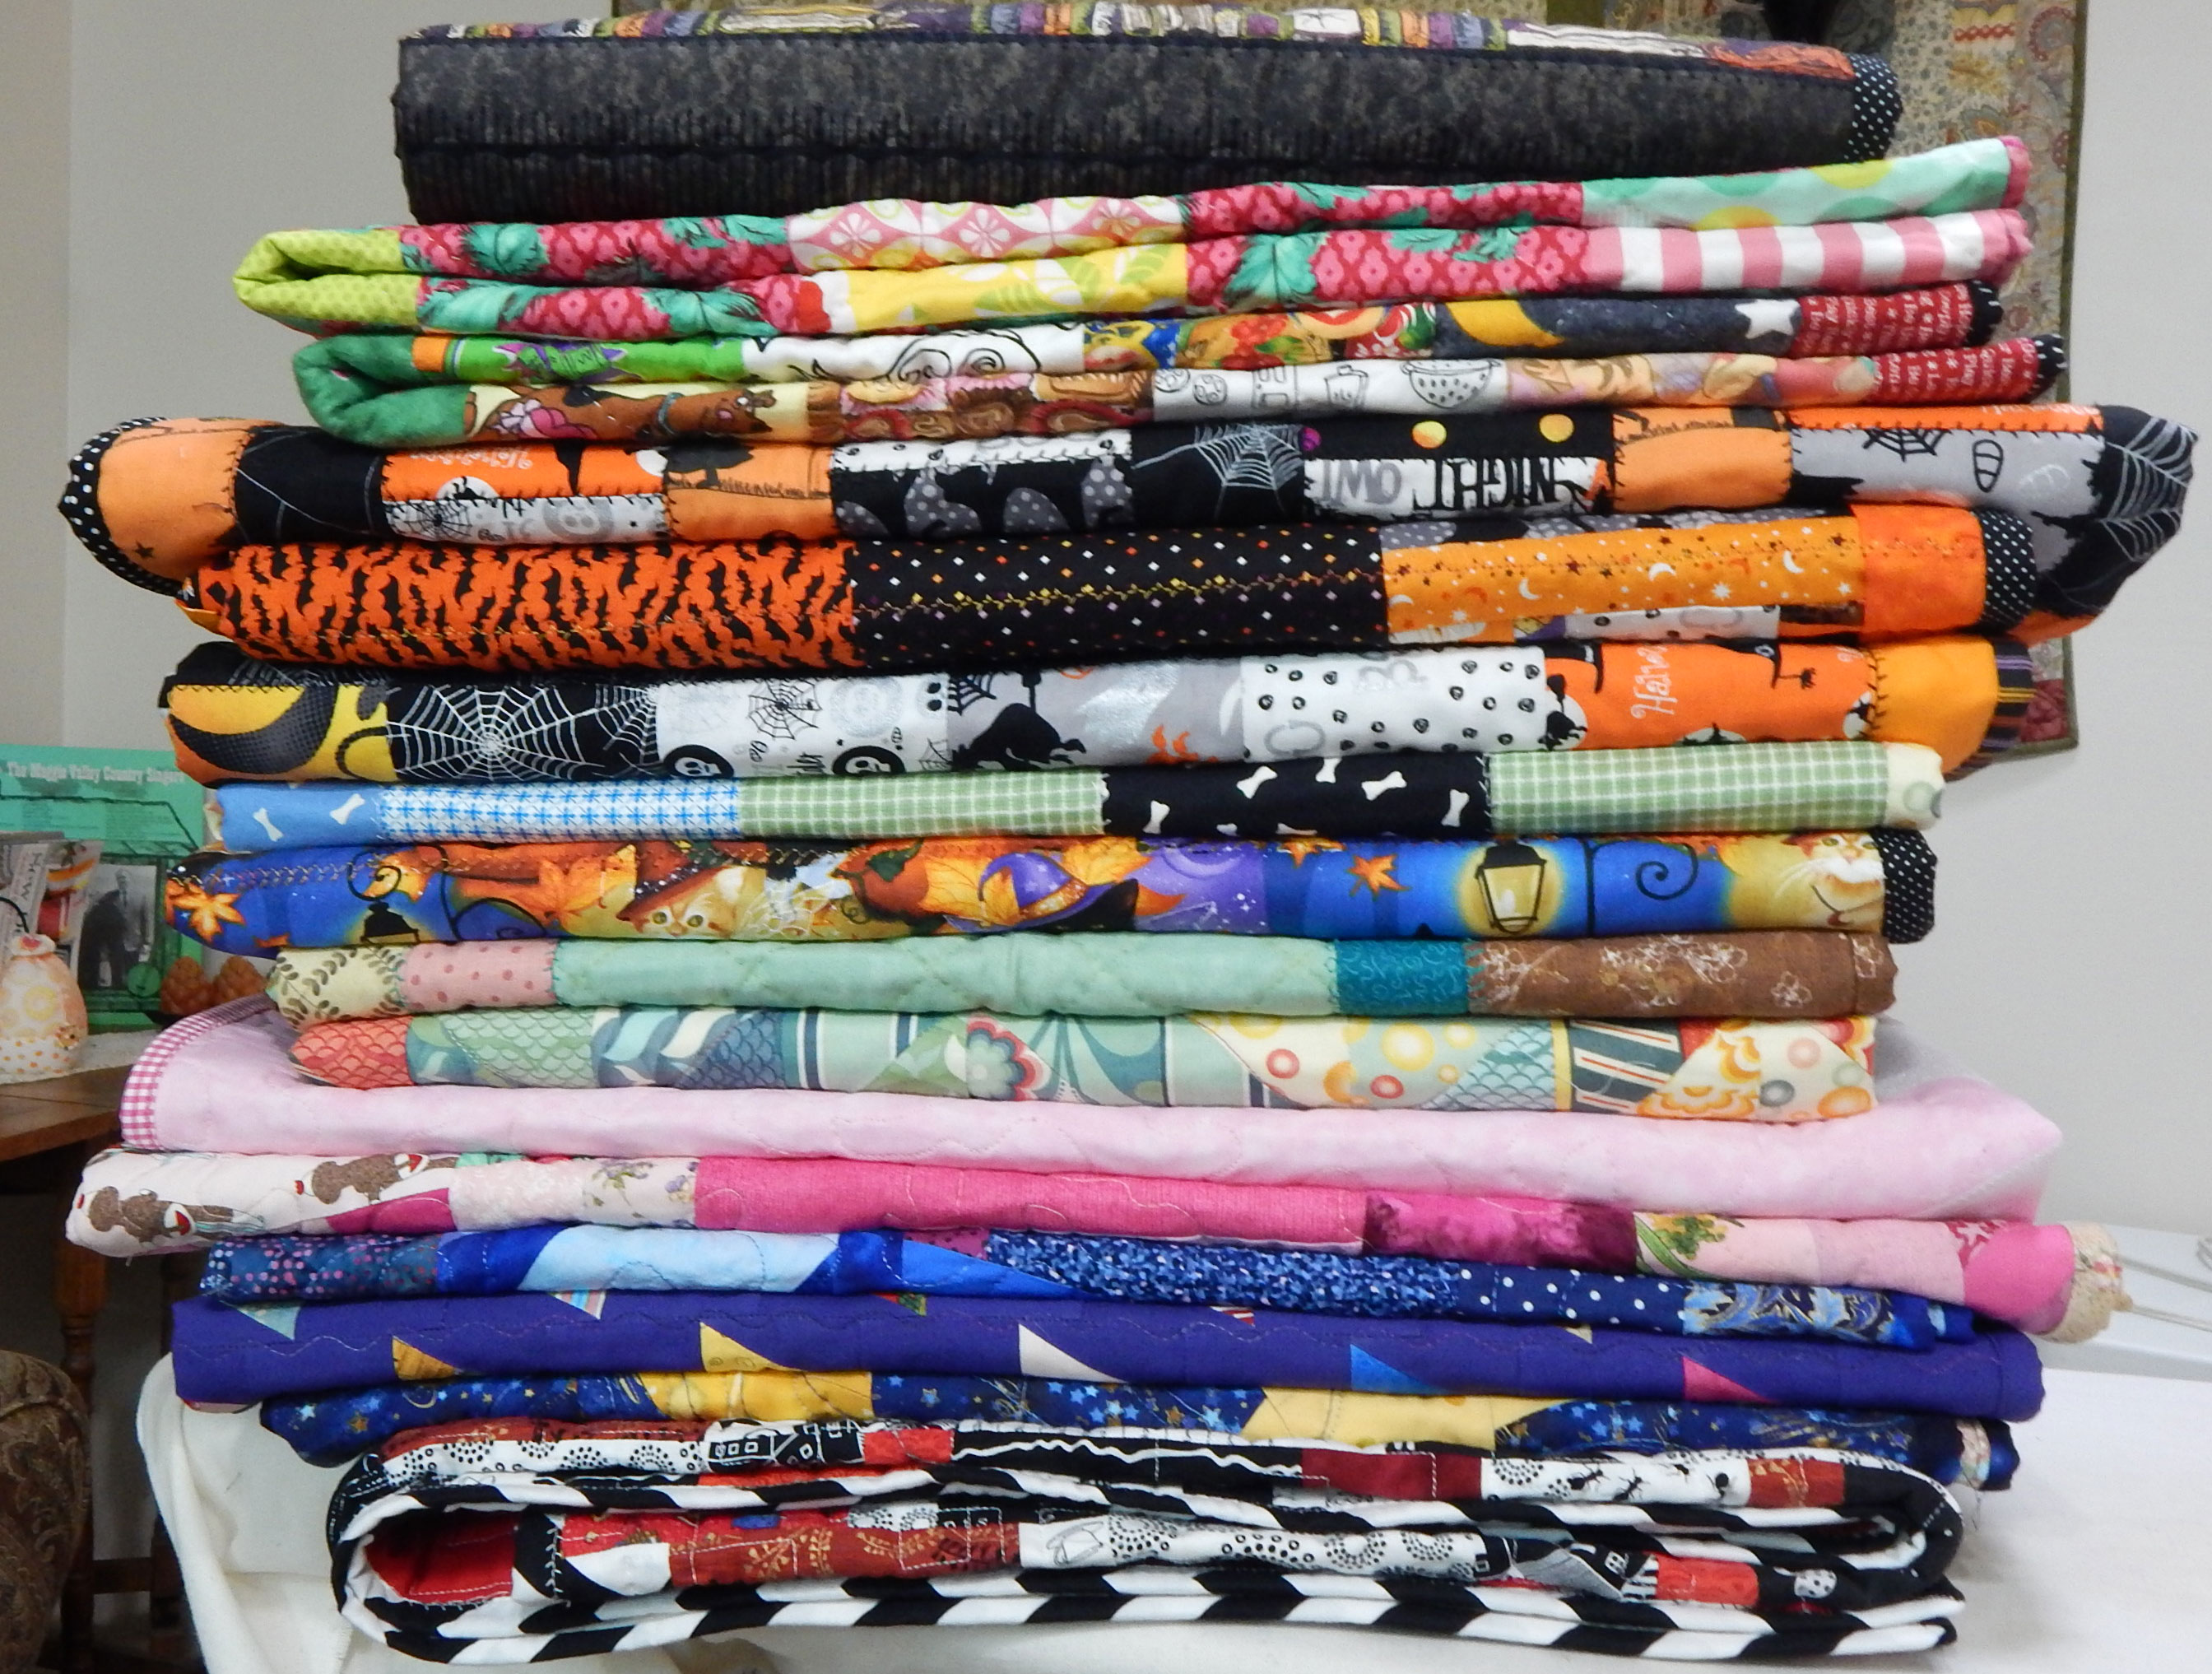
At the same time, I decided to abandon my temperature quilt, which left a lot of solid color yardage to be re-purposed.

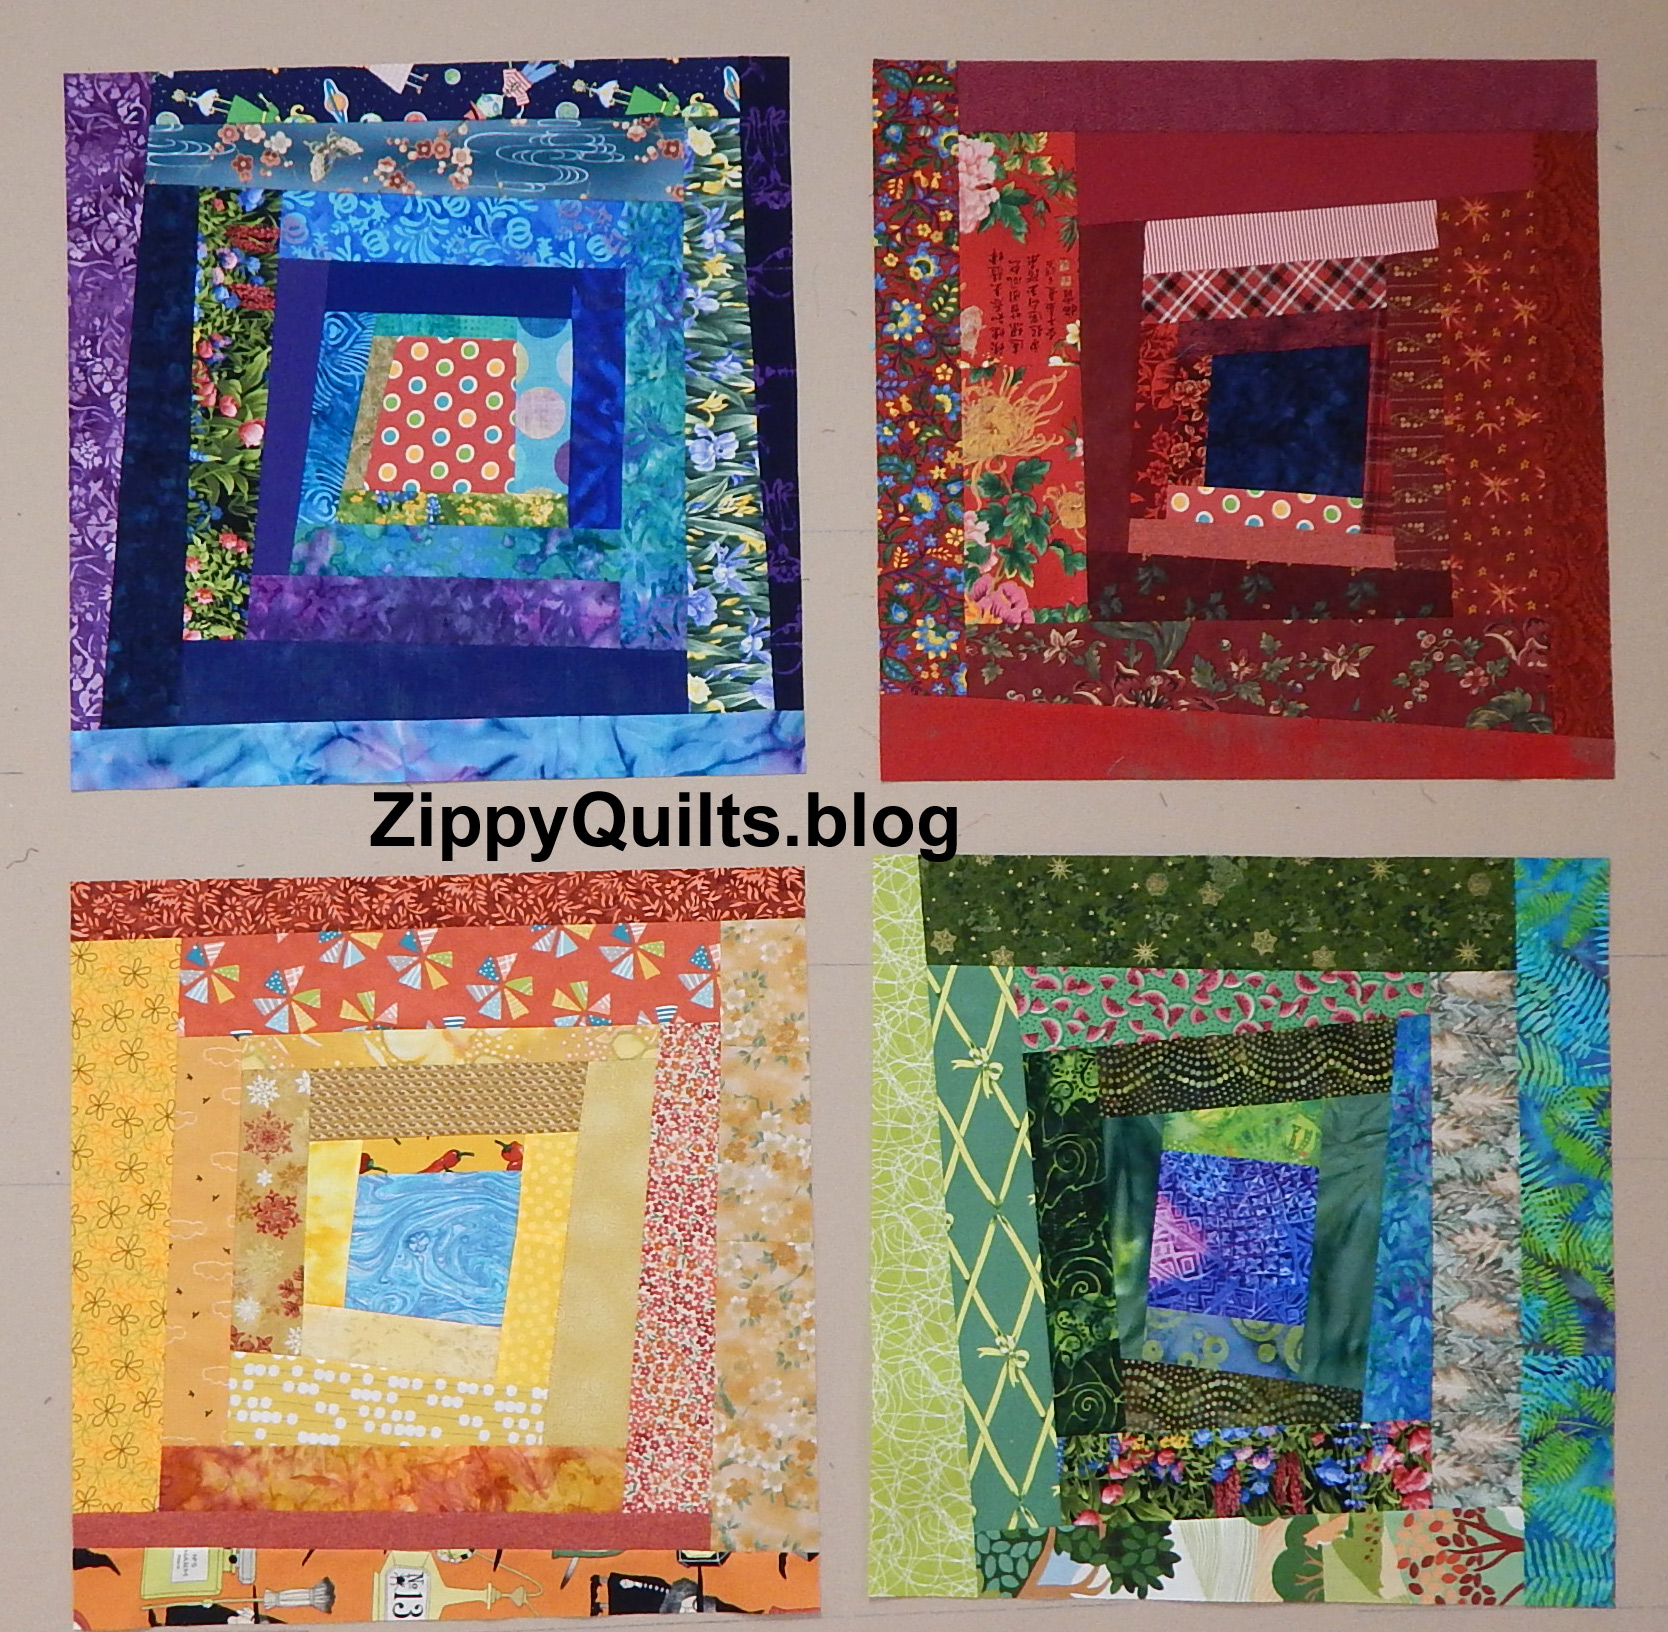
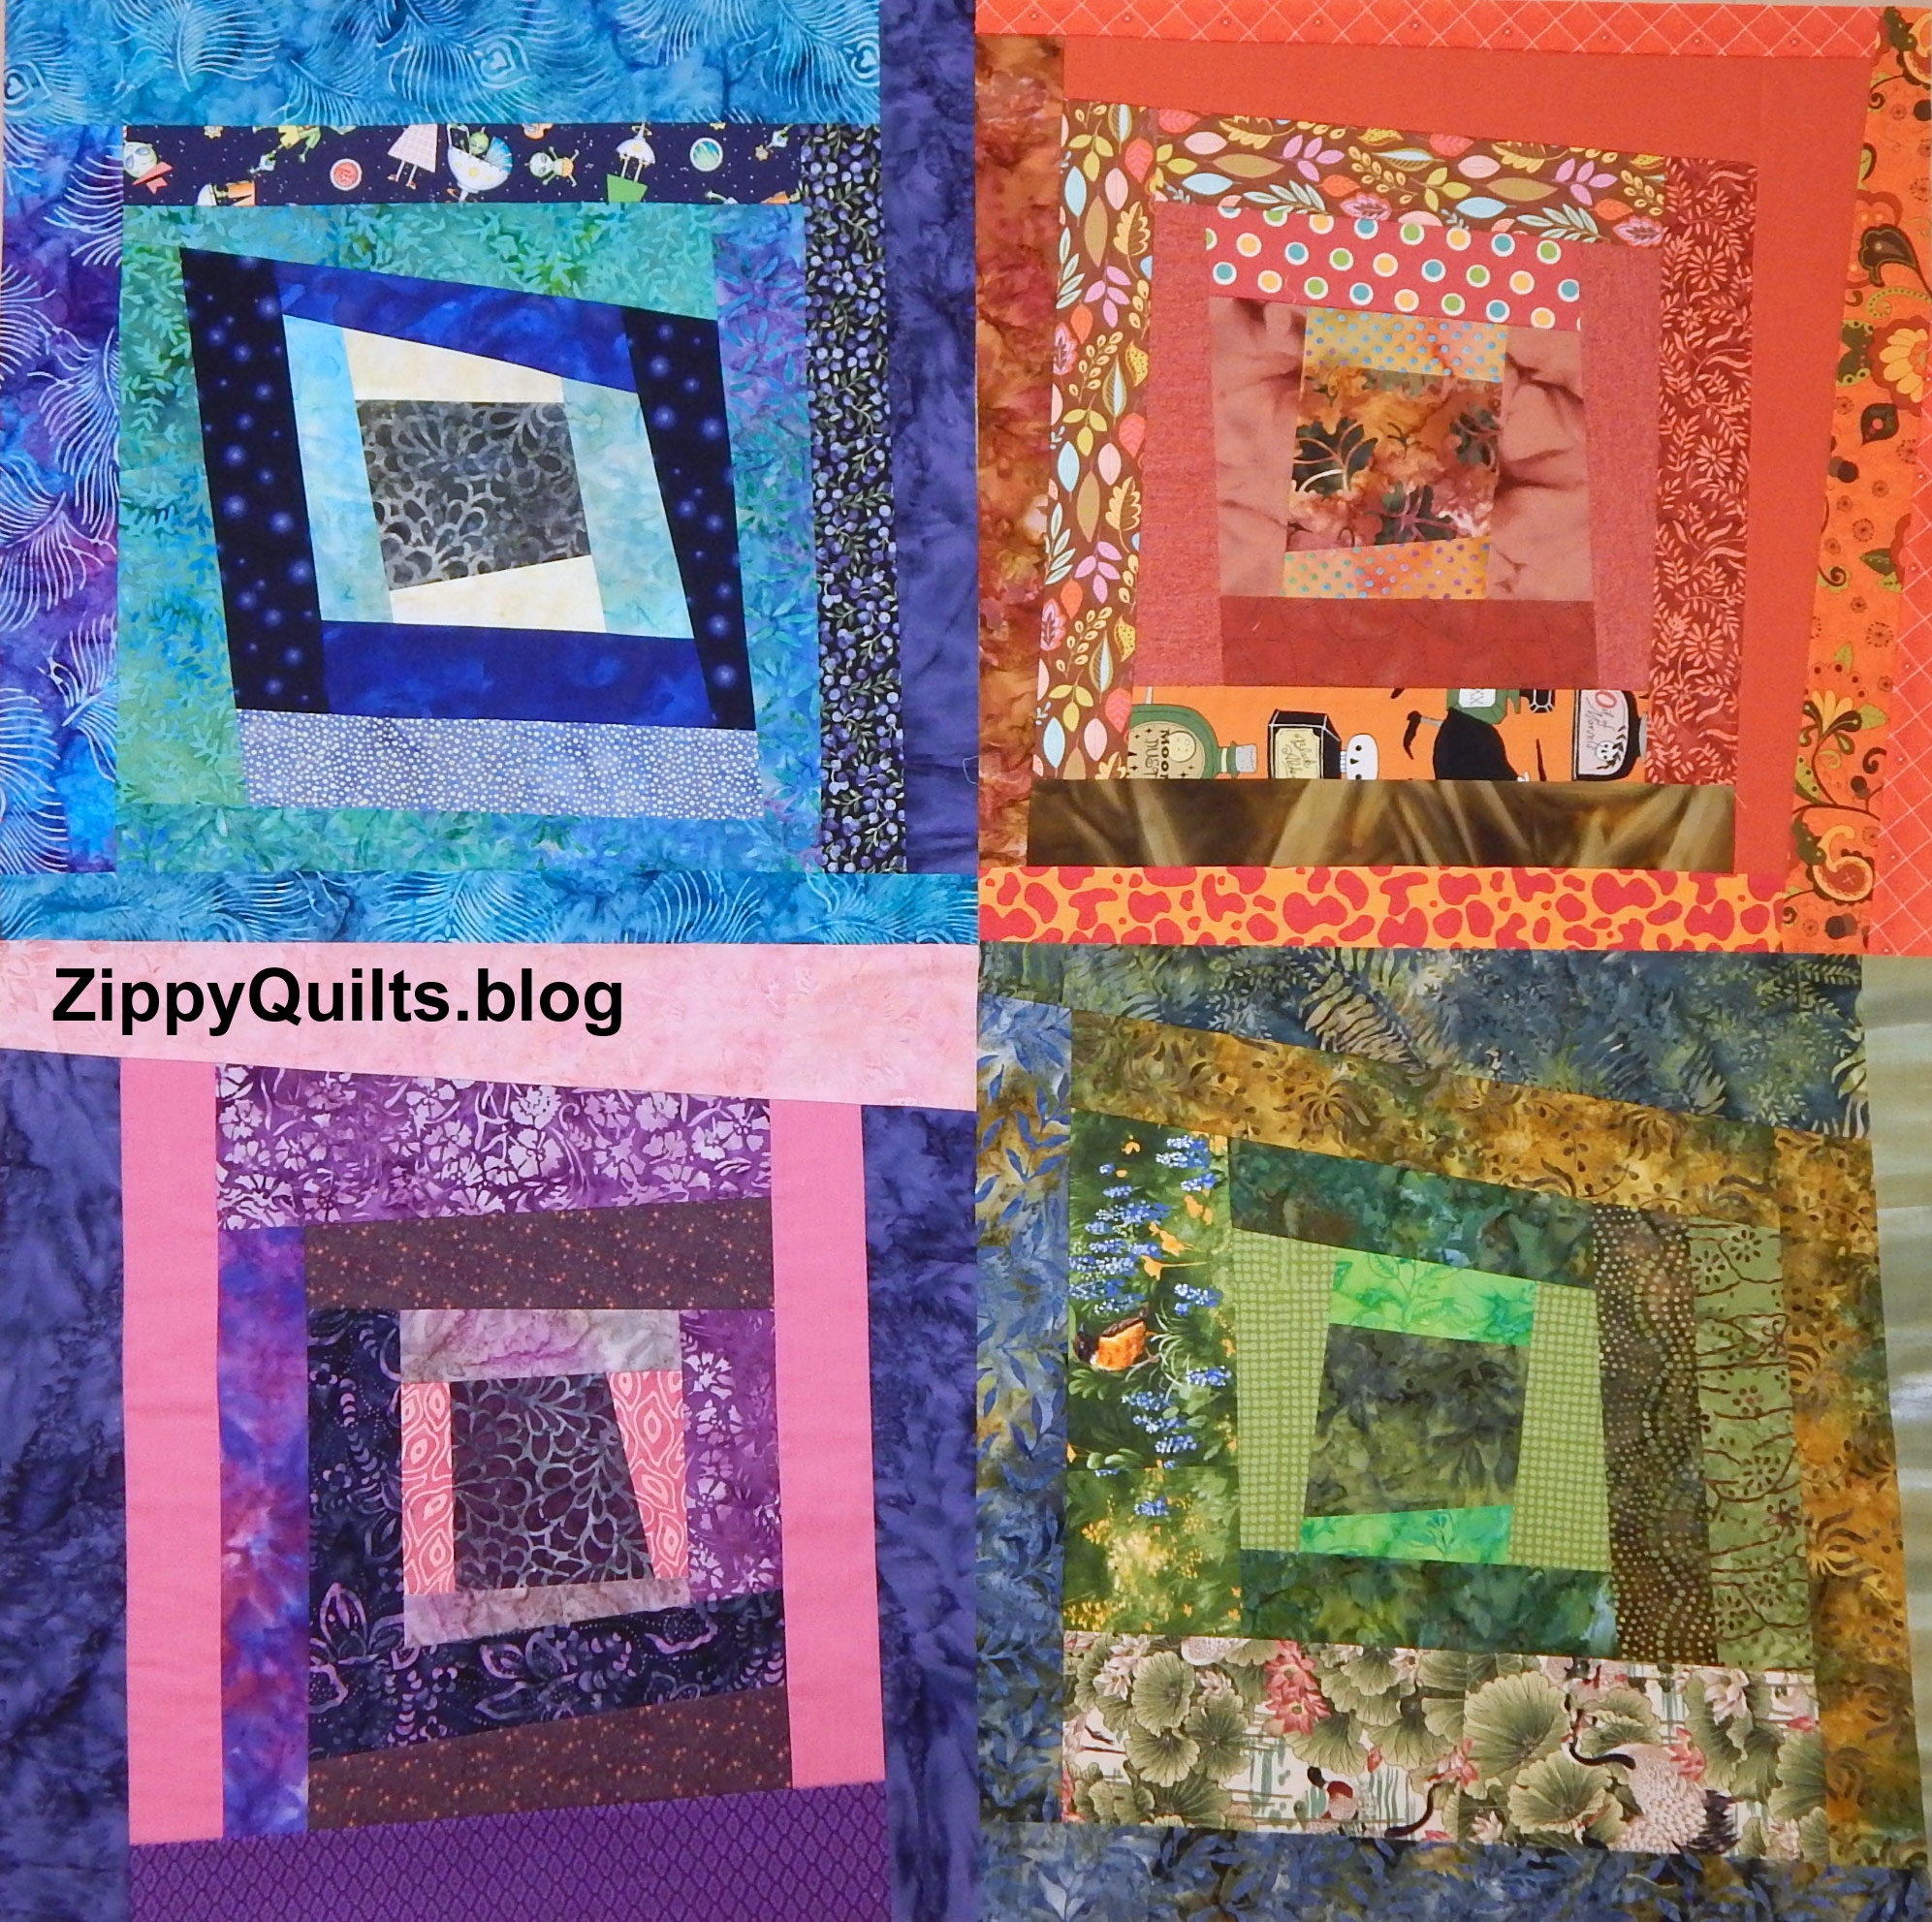
Voila!  I went to Studio Stitch and got the pattern booklet to re-purpose the temperature quilt fabrics!   Of course I don’t follow directions, so I re-drafted Block 1 to change the color scheme and construction methods.

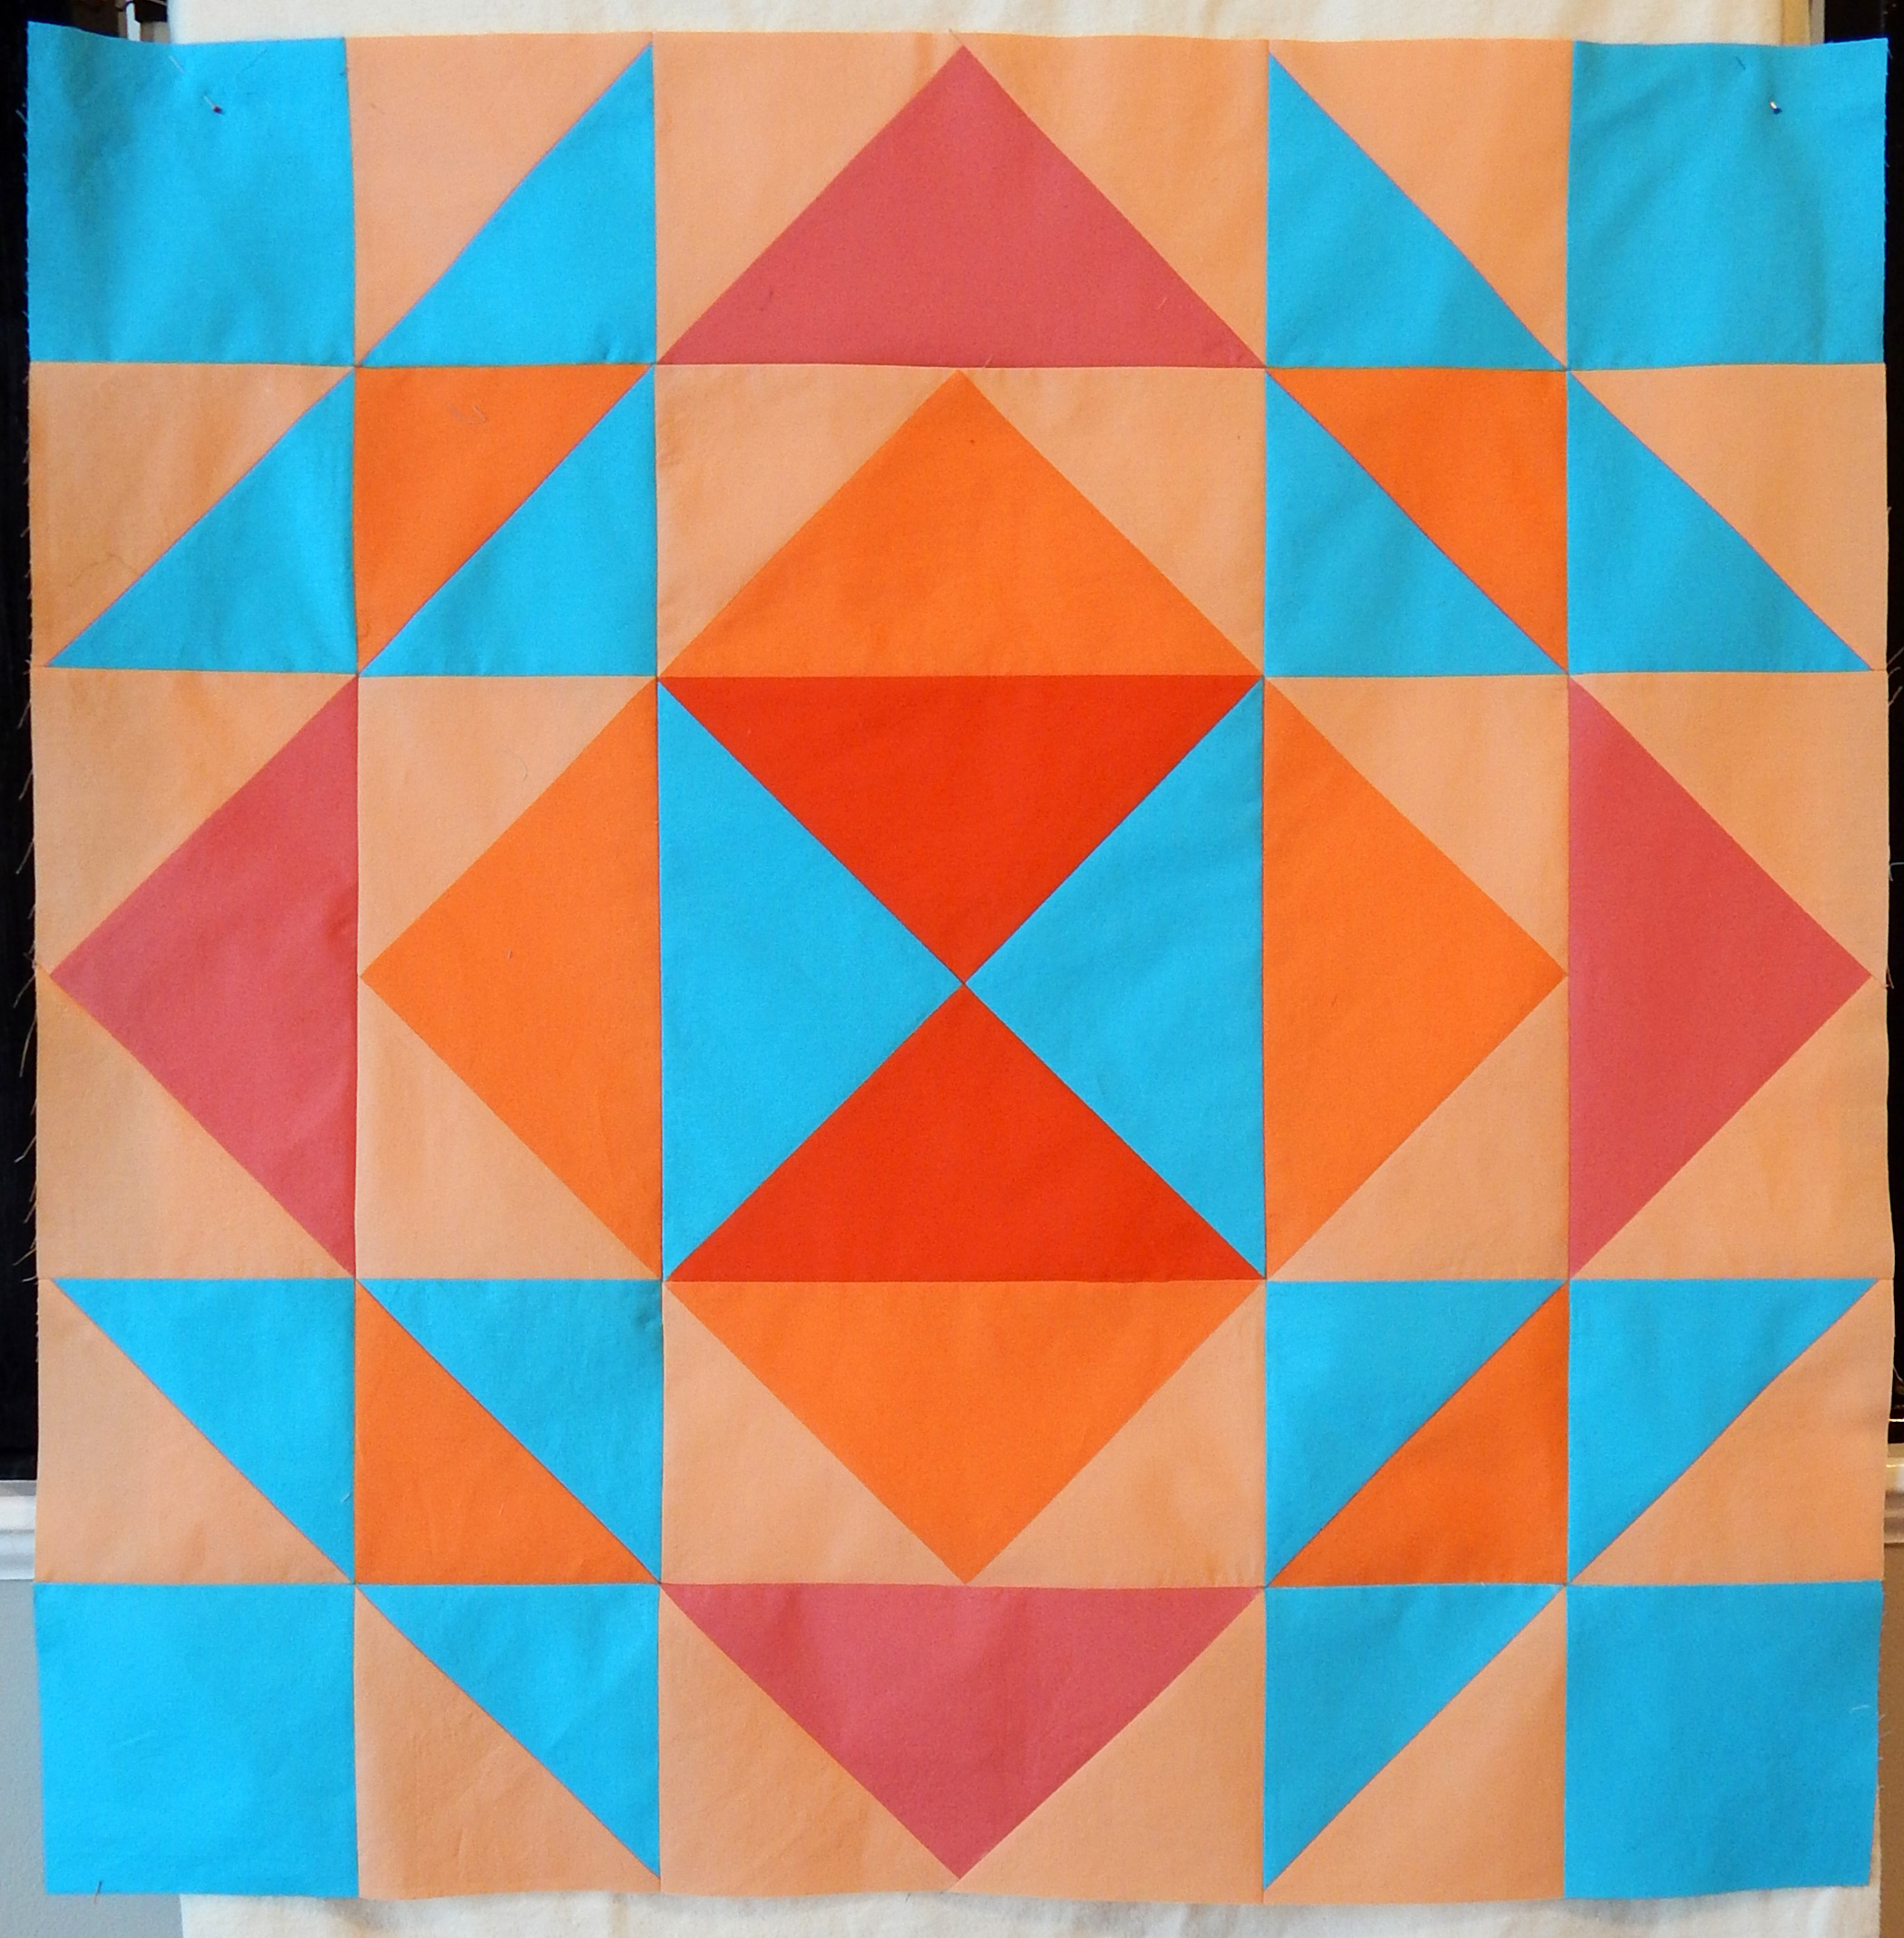
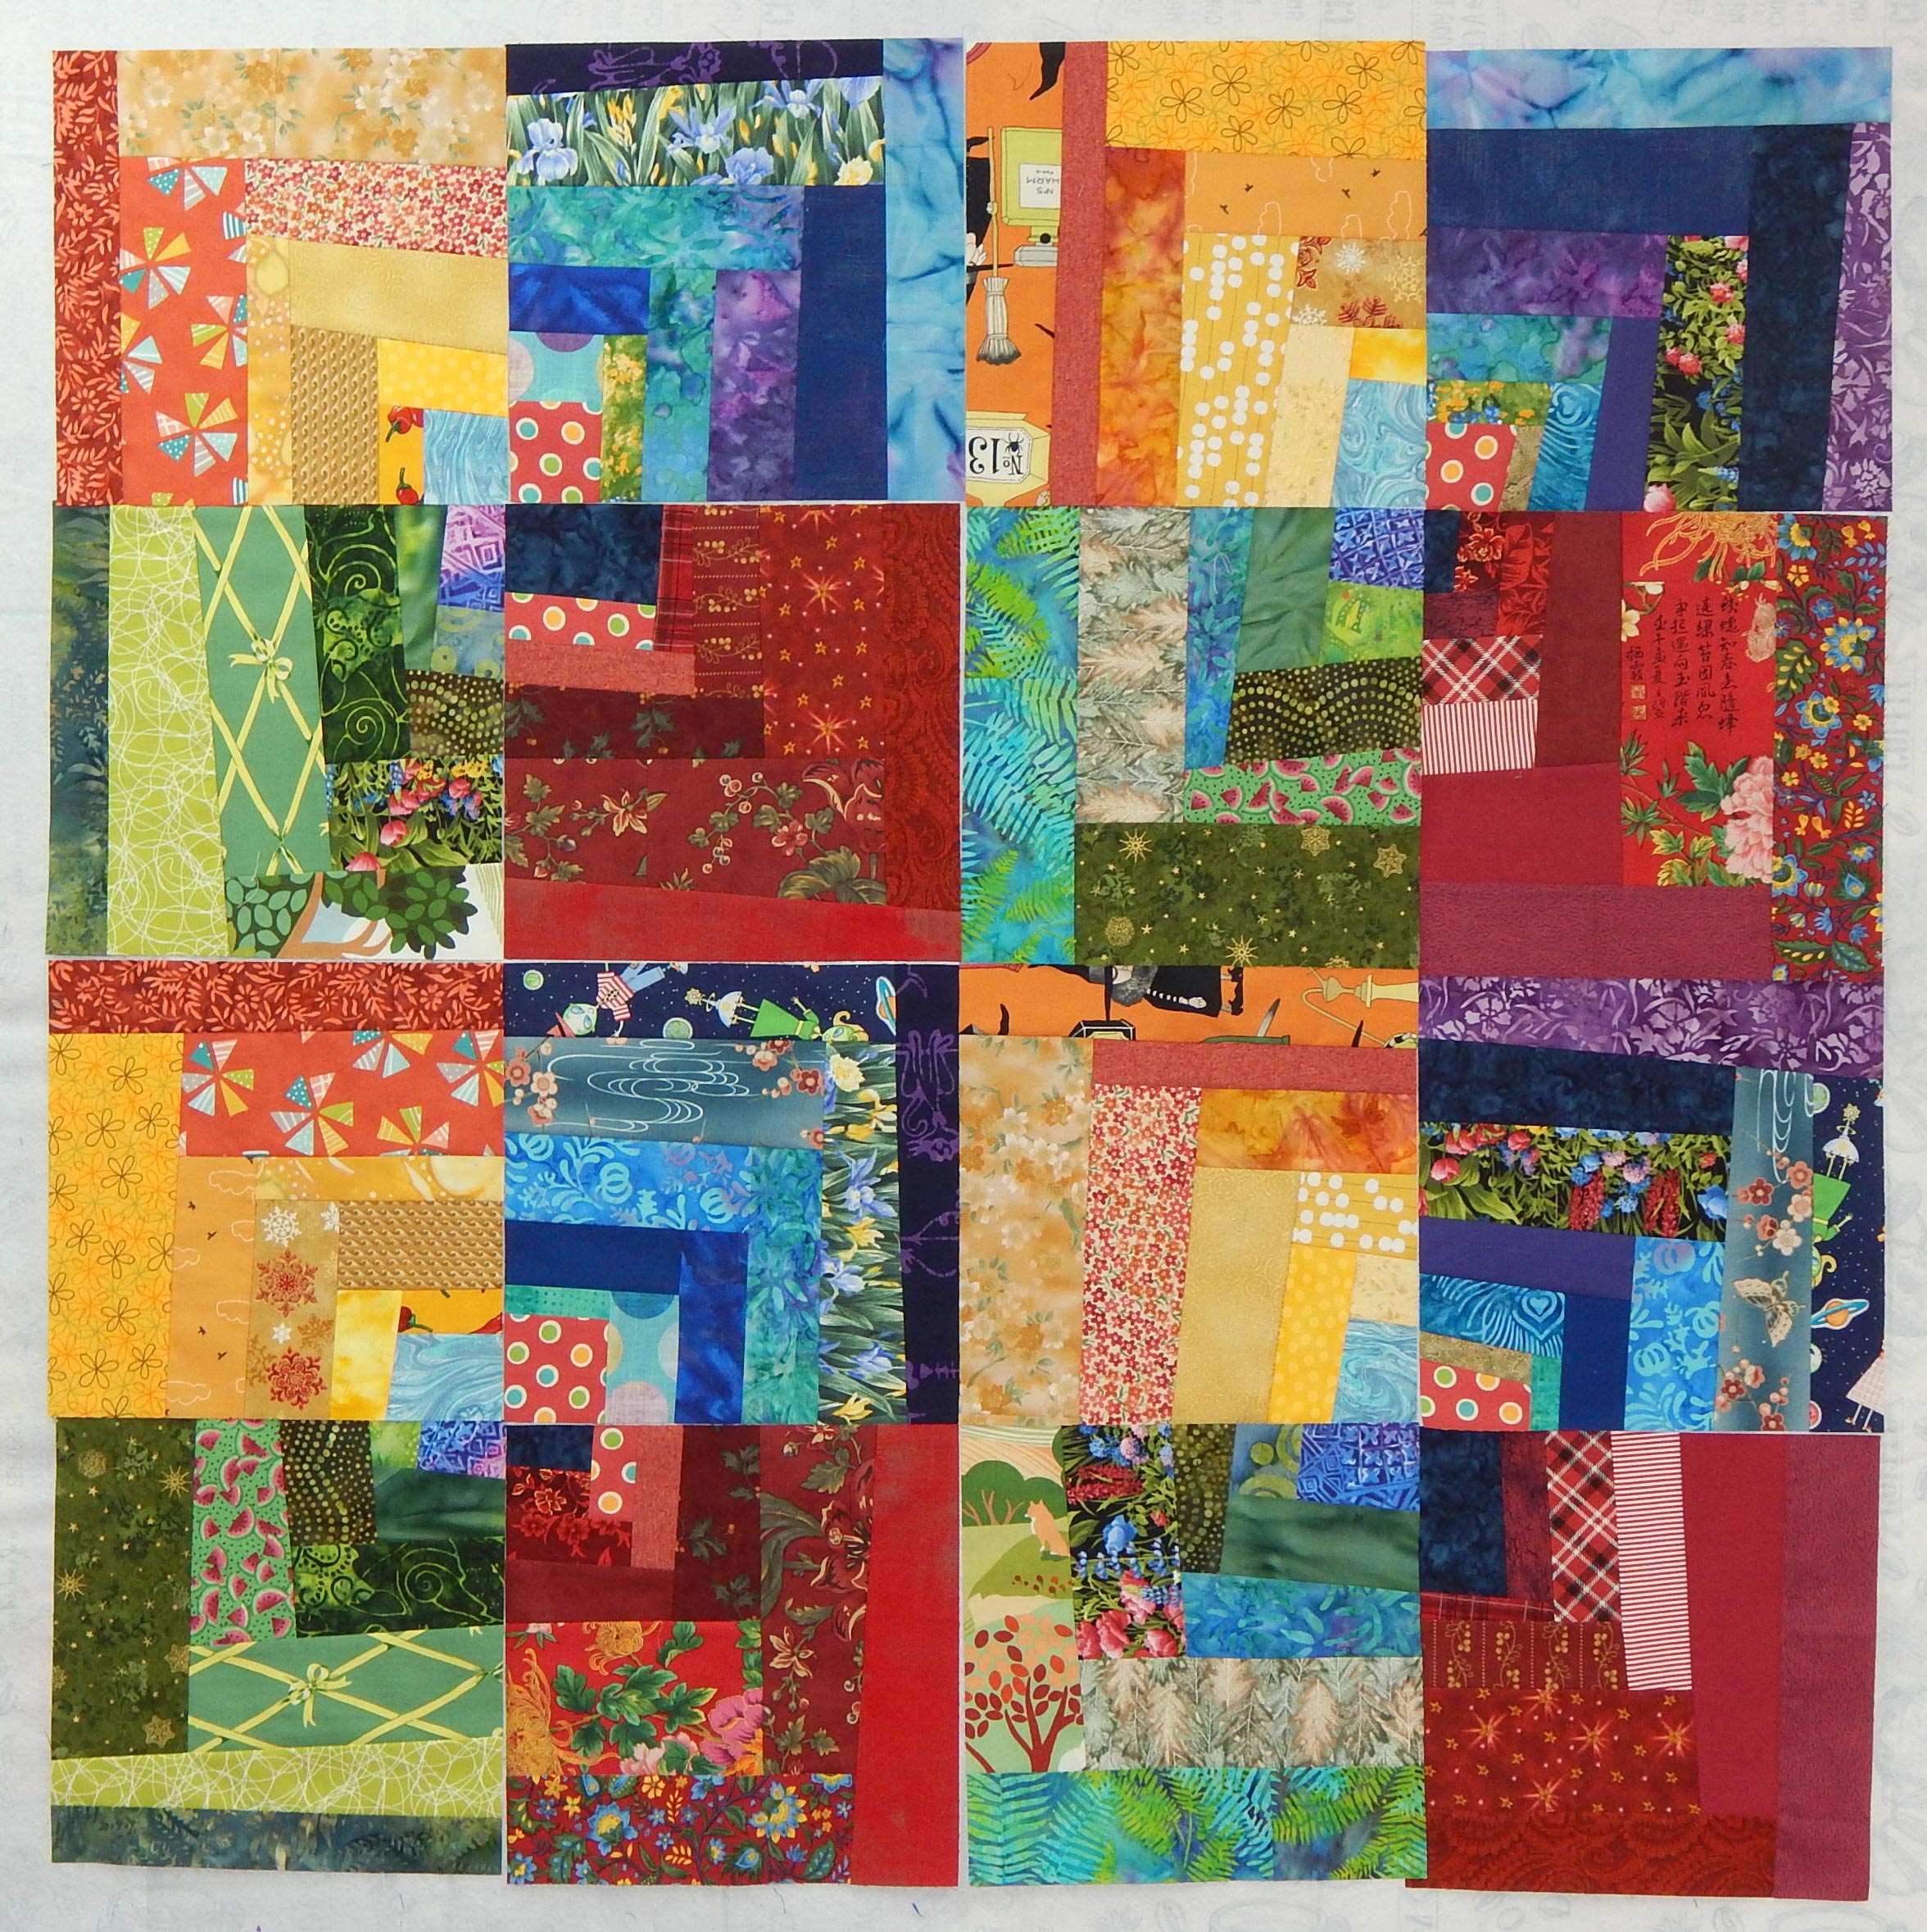
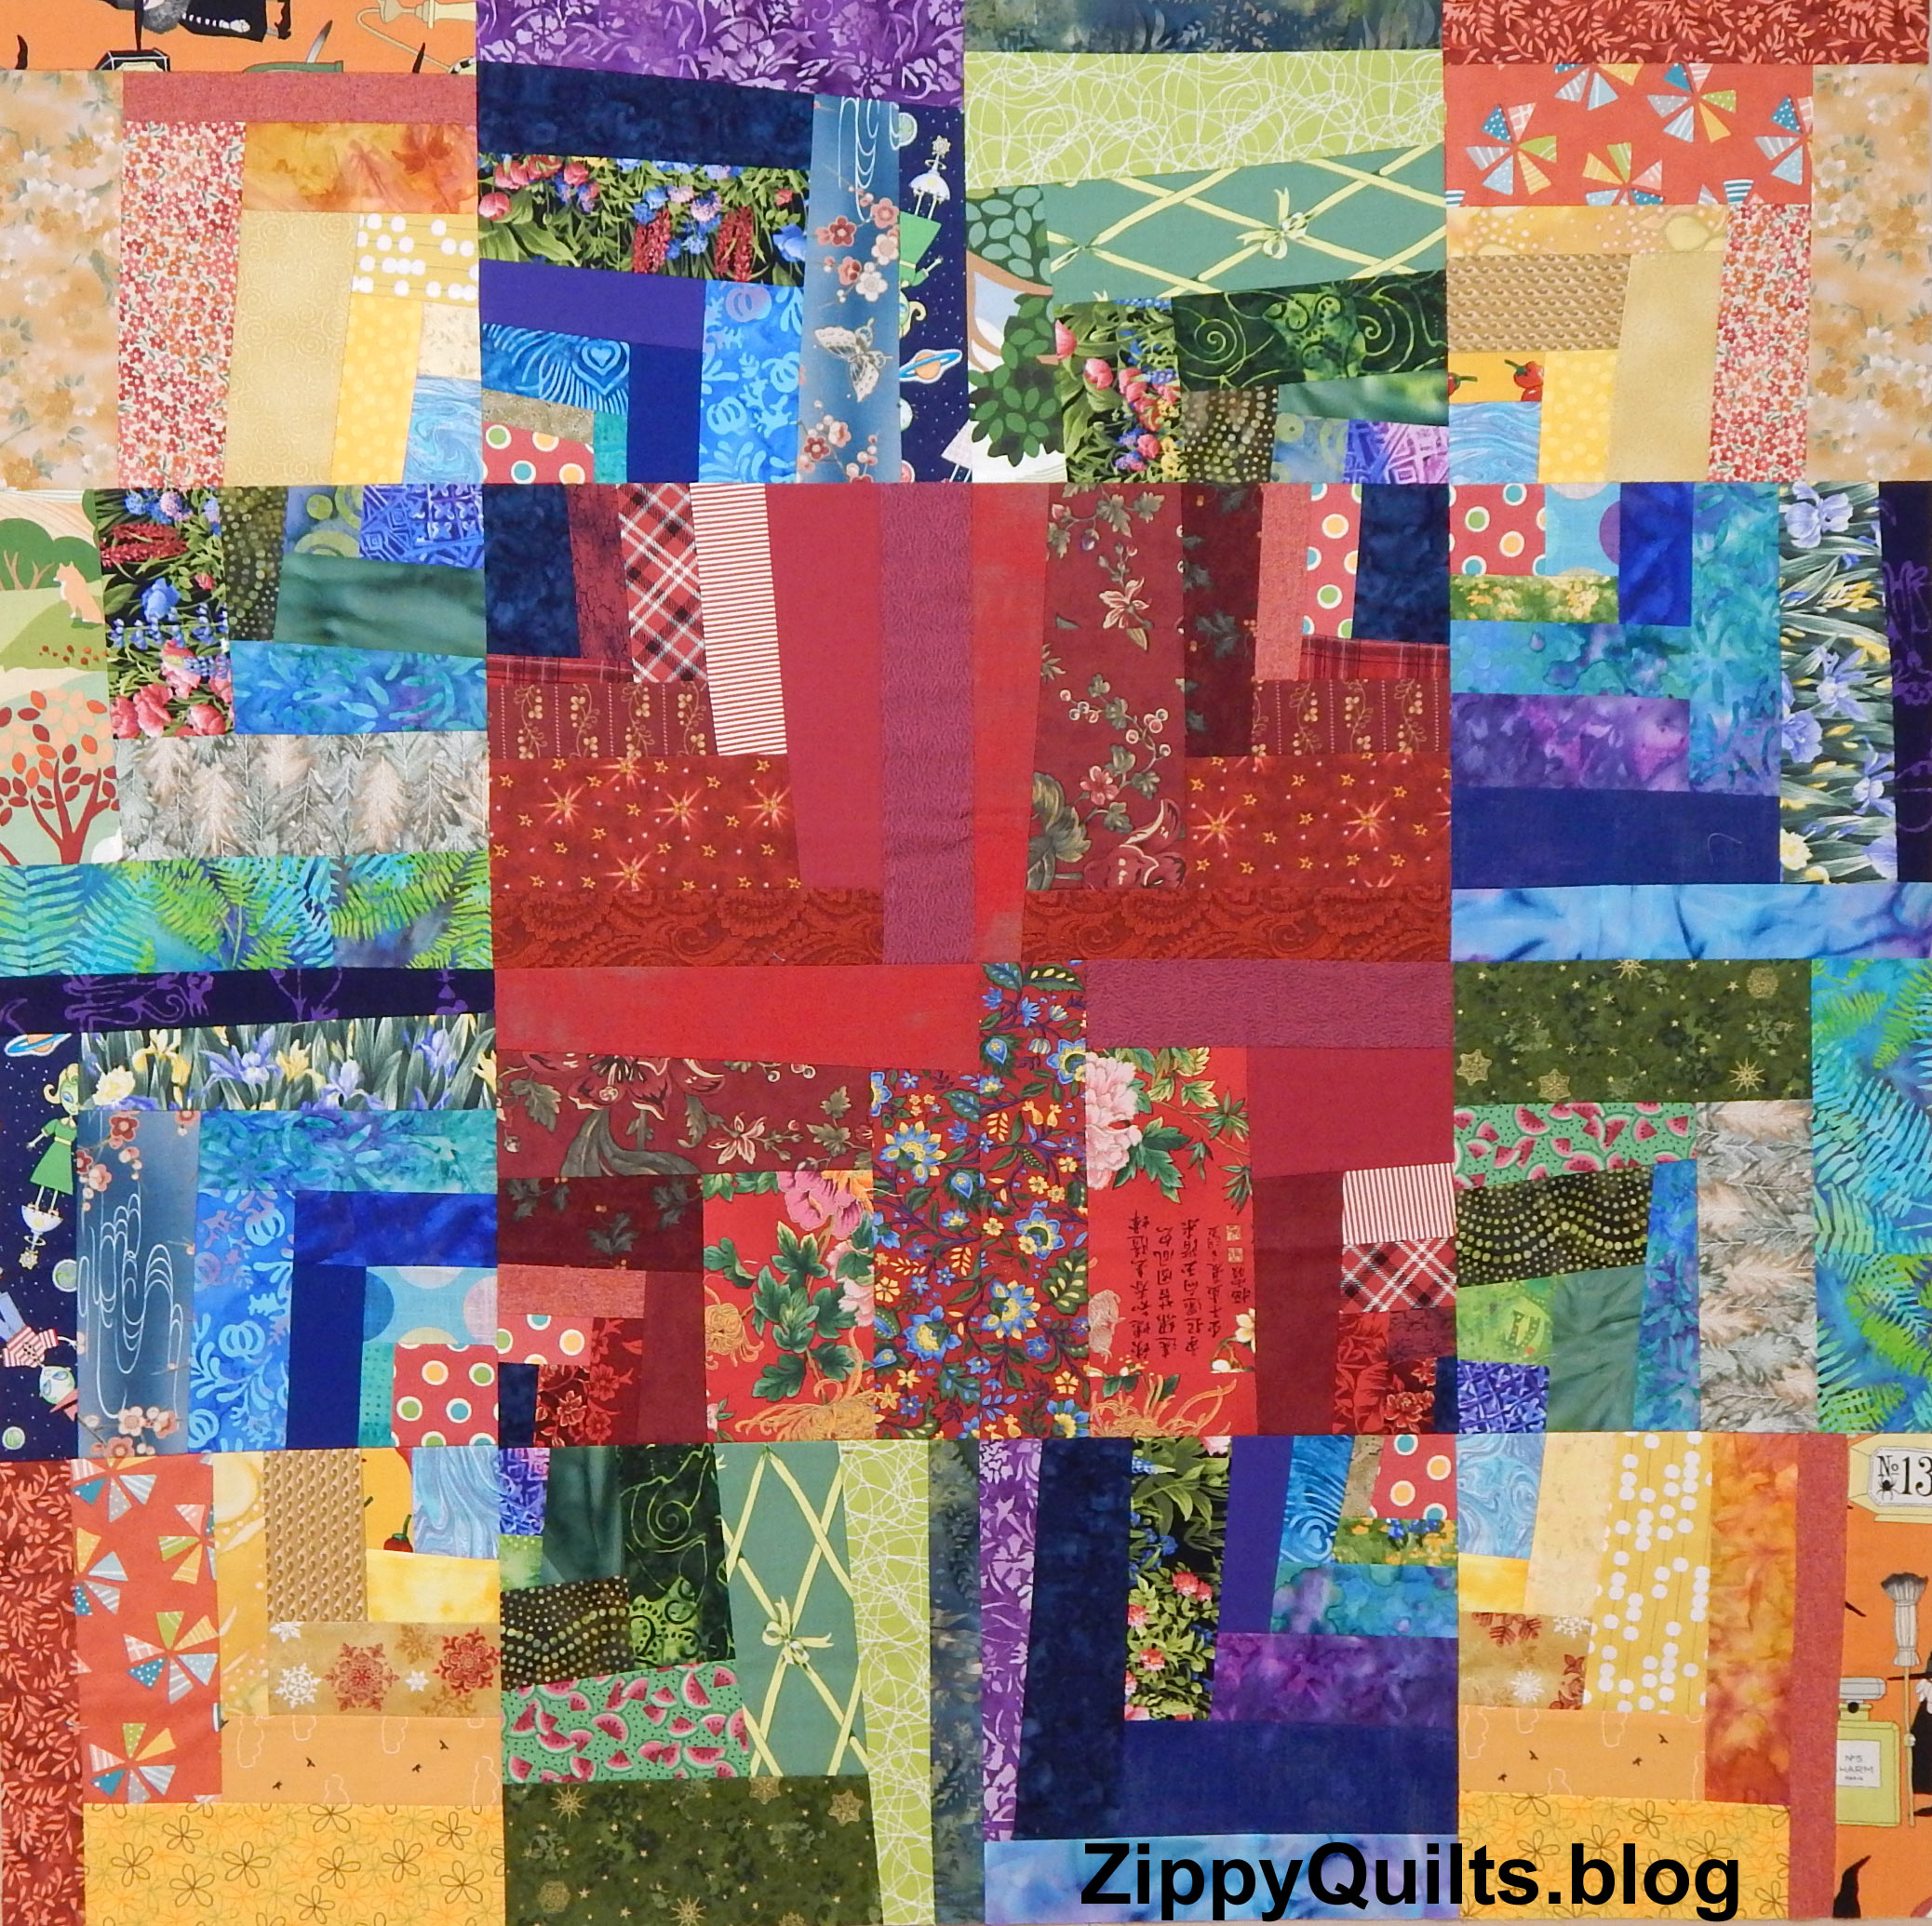
My re-drafted block is constructed as a medallion rather than as the complex 9-patch construction in the Moda booklet.  It’s neither better nor worse, but presents different challenges.  Here are a few tips for having all those points “come out right”:

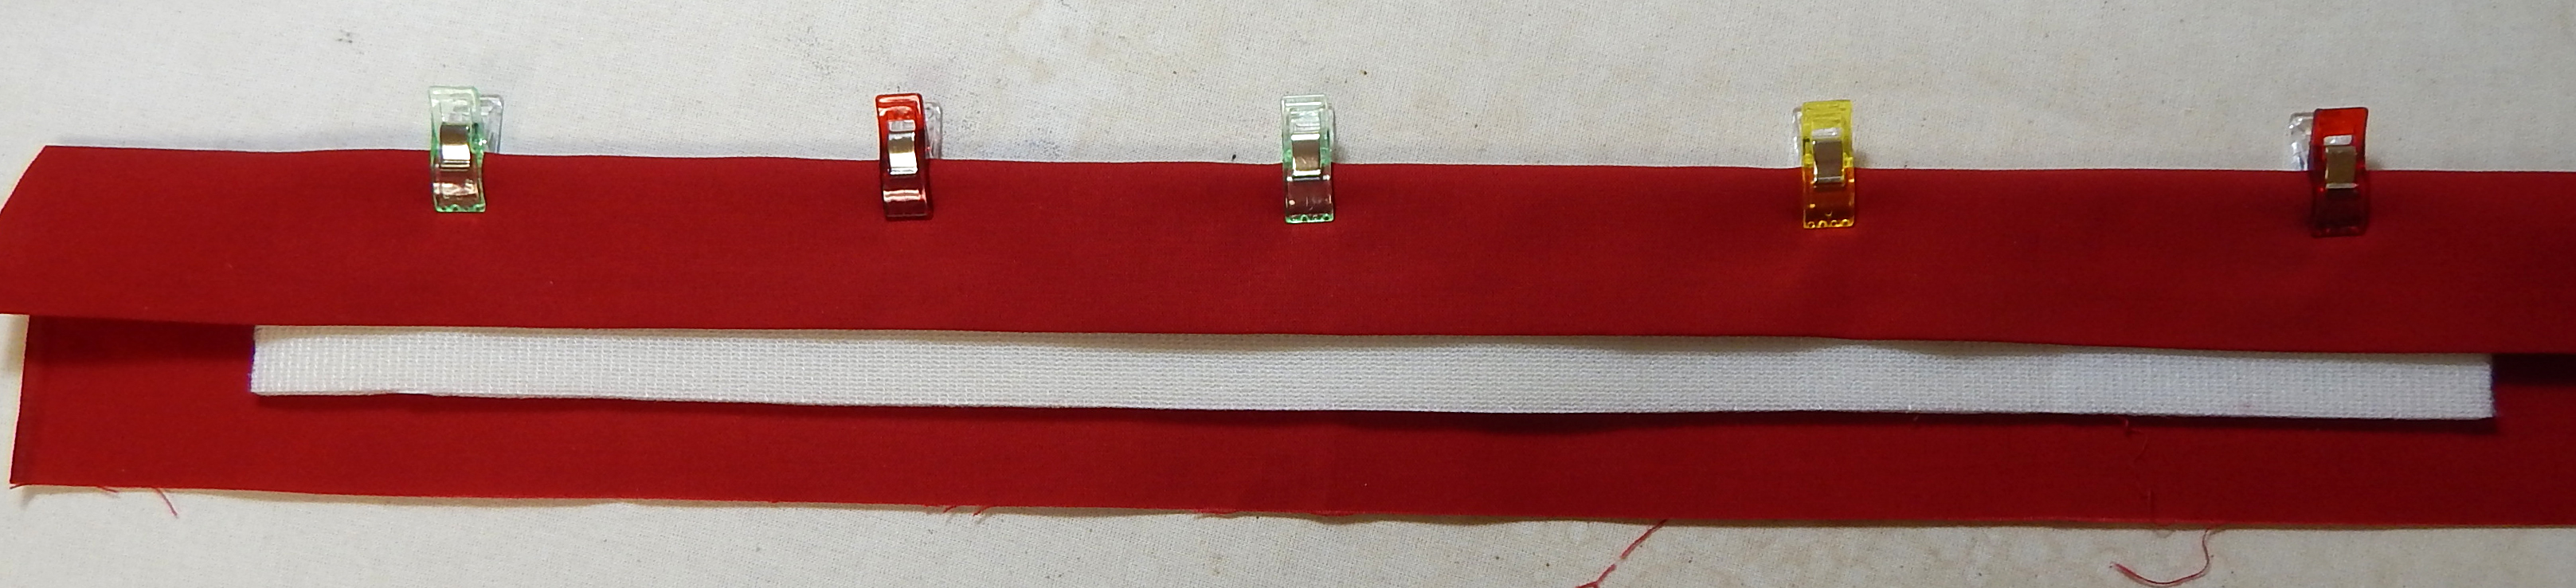
  1.  Of course you already have cut carefully and obtained a uniform scant 1/4″ seam allowance.  Alas, that isn’t enough!
  2. Where points come together, lay the blocks right sides together (RST) as they will be stitched and stick a pin straight through at the point where two fabrics interesect on block 1 and into the point where fabrics intersect in block 2 in order to match up these points.  Keep the pin vertical while you insert pins on either side of it to hold the blocks in place.  Then remove the vertical pin.
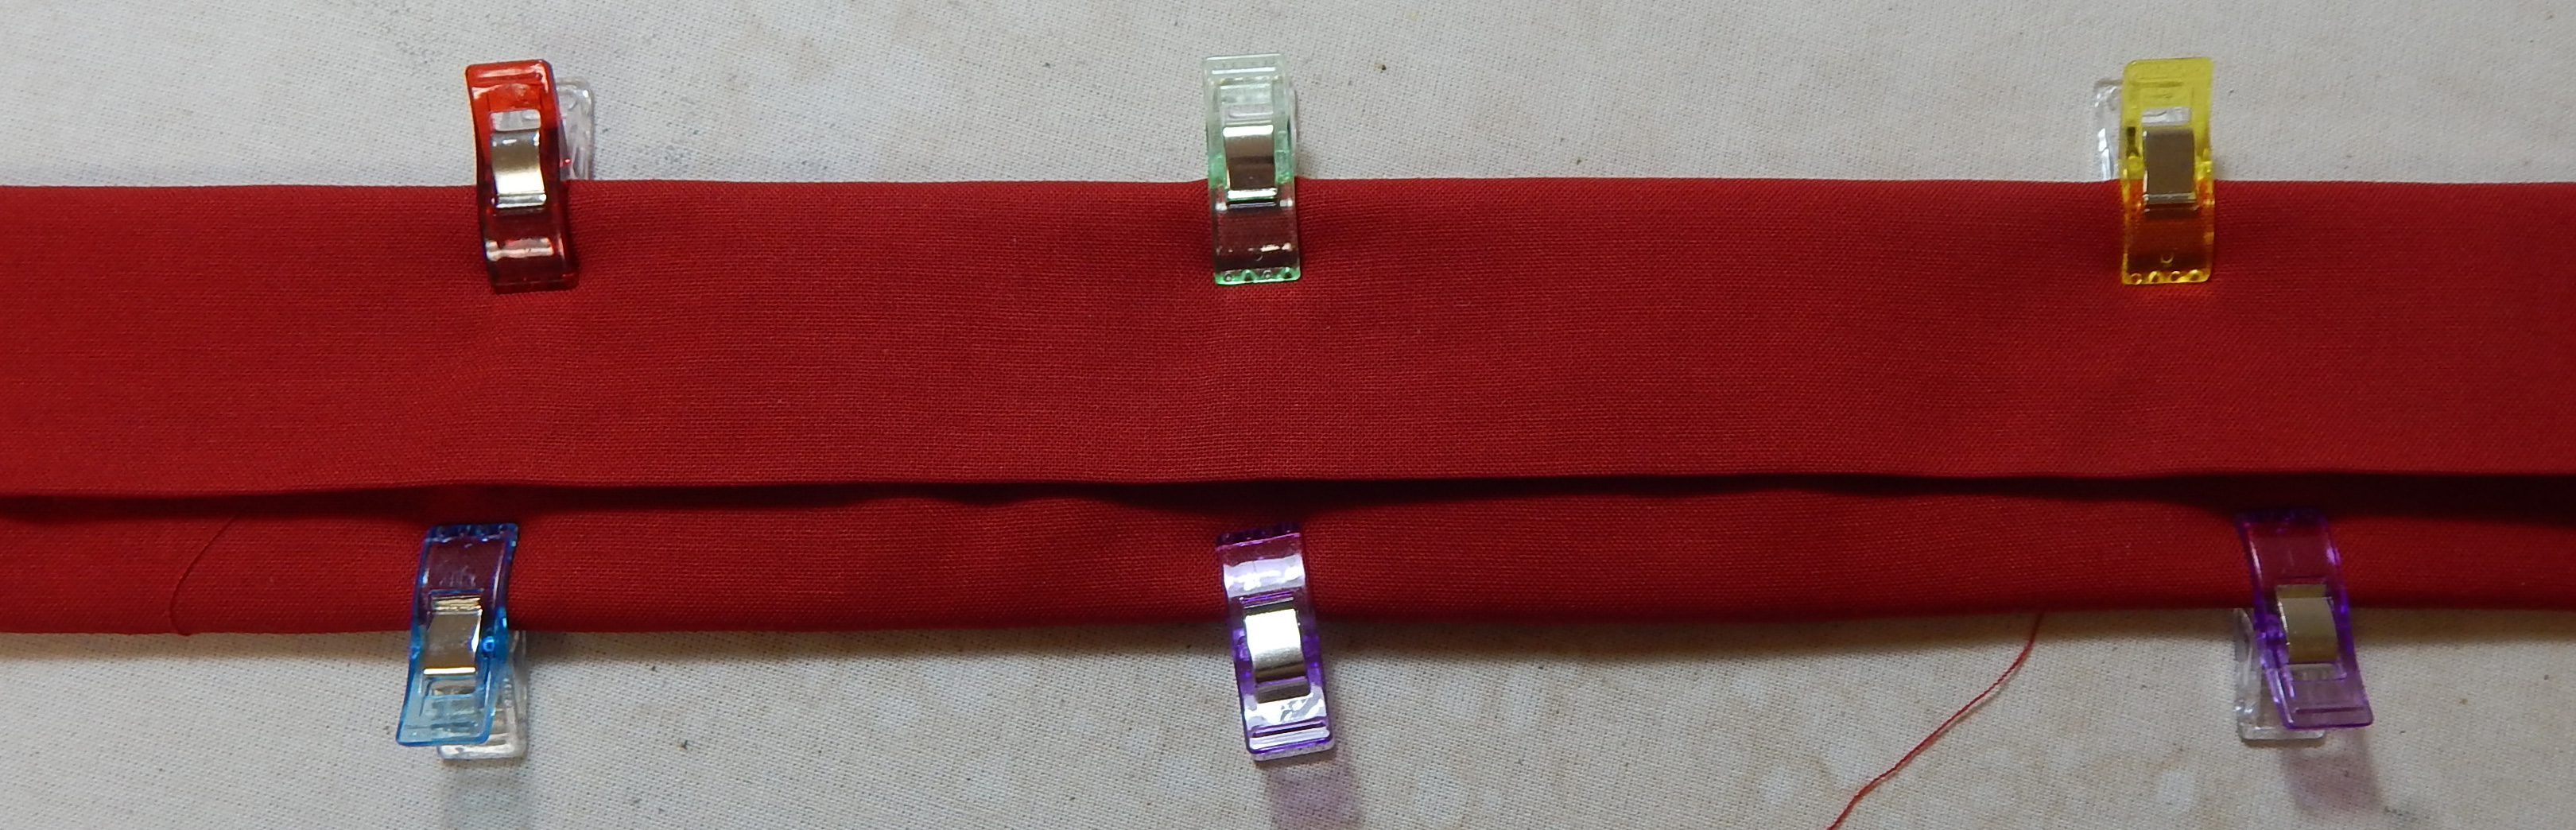
  3. Baste part of the seam, starting about 1″ before the intersection and ending about 1″ after the intersection.  I just use the longest stitch on my machine for this.  Gently open the seam and check the points.  If the match is perfect, return to regular stitch length and stitch the whole seam.  If it’s not perfect, just remove the basting and try again.
  4. When joining rows where multiple points need to match up, do steps 2 and 3 for each of the points!  If one side is a little too long between points, stitch with that side down and the feed dogs will take up the slack.
  5. Set your own standard for what constitutes a perfect match!  If it’s good enough for you, it’s good enough for anybody else!

    My personal standard is “if it’s less than 1/16th inch off, leave it alone! I can see the slight mis-match in the upper left, but really, who cares?

Have fun!

And a big THANK YOU to folks who made suggestions for how I can re-purpose the strips I’ve already made for the temperature quilt.  I almost threw them out!  Now I have some nice ideas on what to do with them.  To be continued.

Kraft-Tex Tray

The folks at C&T just sent me a package of the beautiful new hand-dyed, prewashed, Kraft-Tex. (Please note that they provide this to me with no obligation and I do not get a kickback if you buy it.  However, if your local quilt shop doesn’t carry it, you can get it directly from C&T here.)

The denim blue called to me first, and I needed a little tray to go beside my machine.  Unless my tools are “corralled” they tend to roll or bounce off the table when I sew.  The fabric tray I’ve been using was looking a little tired (the sides had sort of collapsed) and I thought Kraft-Tex would be a good material for making a sturdier tool tray.

I made a prototype from cardboard first to figure out the best size and shape for my tools.  Here are instructions for making the tray in case you want one, too:

Cut the Kraft-Tex 6-1/2″ x 8″ and mark (with a heat-erasable pen) 1″ in from each side.  Put a #70 needle in the sewing machine, lengthen the stitch a little, and remove the thread.  Stitch around the central rectangle without thread to mark the edges of the tray base and kind of score the Kraft-Tex so it will fold well on those lines.  Fold and press along these lines–it’s fine to fold all the way to the edge even though it wasn’t necessary to sew that far.

This picture was taken later in the process, but you can see where the material was pressed along the fold lines.  You can press either with or without steam; both work fine without distorting the Kraft-Tex.

Select your lining fabric and cut it 1″ bigger than the Kraft-Tex in both length and width; my lining fabric was cut 7-1/2″ x 9″.  Fuse the lining material to some stiff interfacing, then apply Heat’n’Bond or your favorite fusible web to the interfacing.

Once all of that is fused, cut the lining down to 7″ x 8-1/2″ using either a pinking blade in your rotary cutter or your pinking shears.  Or, if you don’t want a decorative edge, just cut the edge straight.  NOTE that if you use a pinking blade in your rotary cutter, you will want to cut on the back side of your cutting mat because the blade can kind of chew up the mat.  Also, the blade will chew up the edge of your ruler, so either use an old ruler or cut about 1/8″ away from the ruler.

Now lay the Kraft-Tex down on the fusible side of the trimmed lining.  Note that Kraft-Tex has a slightly different texture on each side, but there is no “right” side–use the one you like best.  Get everything centered, then turn the decorative edge to the outside and clip it in place with something heatproof. Fuse the edges, then the central part of the lining, to the Kraft-Tex.  Again, you can use steam if it helps.

Now put some thread in the machine!  Sew around the edges of the tray bottom where you previously pressed the sides up.  I marked the edges again with heat-erasable marker to make this easier.  This step will help hold the lining in place.  Edge stitch around the upper edge of the tray as well

Now don’t do what I did 😉  I mistakenly cut out all 4 corners on my first box.  Just cut one side of each corner to create a flap that can be used to hold the box together!


Here’s how the corner will look finished–see the flaps?

Fold and press the box along the stitching lines bordering the bottom.  Fold the flaps in and glue or sew them in place.  I glued them, then sewed a decorative X in each corner.  I used the awl shown in the picture to punch little holes for the needle to go through when I made the X stitches by hand.

And that’s it!  The resulting tray looks plenty sturdy to hold those little tools beside my machine.  And besides, it was fun to make something new!

What have you been up to?

A Swap Block for Donation Quilts

One of my quilt groups makes donation quilts about 40″ square for various organizations. The size is easy to construct and quilt at home, and is appropriate for the children who receive the quilts.  Here are the recent group donations:

We often use swap blocks for our quilts and recently decided on a new swap and I want to tell you about it. One of your quilt groups may enjoy it, too!  Here’s how:

First make a big wonky log cabin block. Our blocks started with a 5″ square, which was modified to make a wonky center.  It was then surrounded by strips from my scrap bins, and occasional strips were trimmed so they were wonky, too.

These big blocks are 21″ square (unfinished).

We cut each block in quarters, so each quarter is 10.5″ unfinished, and started arranging them to make a quilt top that would finish at 40″ square.

This was how we eventually decided to arrange them in the finished top:

And then, of course, we made 4 more:

If you decide to do this, there are only 2 things to watch out for:

  1. As you add strips, keep measuring to be sure the center block remains centered enough so that there will be a piece of it in each quarter when you cut the block up.
  2. It’s easiest if the final round of strips is considerably wider than needed so the block can be trimmed to (unfinished) size easily without running into seams.

This is a really fun way to use scraps!  If you make one, or use this for a group swap, send me a picture!

Best Bag Handles

I can’t seem to quit making tote bags, and I’m especially happy to have discovered foam batting, which makes them nice and stiff and doesn’t need to be quilted unless you just want to.

This is one I made several years ago

As a bonus, I’ve discovered that foam batting makes terrific handles for large totes.  I just wrap fabric around it and sew it down, avoiding the awful task of turning a fabric tube inside out to make a handle.  The resulting handle is quick to make and comfortable to carry. Here’s how:

Cut 2 pieces of foam batting about 1-1/2″ wide and about 1″ longer than you want the finished handles to be.  Cut fabric for handles about 4-1/2″ wide and about 3″ longer than the finished handles will be.

Use a heat-resistant straight edge to turn under a crisp 1/2″ on one long edge of each handle.  (I’m using a metal tool made by Dritz for turning up hems.)

Now turn the same long edge under an additional 1-1/4″ and press well.

Tuck the batting into the handle, centering it between the ends, so that one long edge of the batting is firmly inside the handle.

I like to use clips to hold everything in place

Now turn the remaining long edge of the handle fabric snugly around the exposed long edge of the batting and tuck this raw edge under the folded 1/2″ edge.  The ends of the handle will have raw edges, but the long edges will all appear finished now.

Topstitch close to the folded edge.  Place a second line of stitching near the other long edge of the handle so that you have a nice professional-looking handle.

Attach handles as usual, allowing about 1/2″ of the batting at each end to be sewn down to the bag.  The rest of each end, without batting inside, will go smoothly into the side of the bag so you won’t have much of a bulge where the handles are attached.  Sew that down, too.

And you’re good to go!