Where Did You Wear It?

A couple of years ago I made a quilt based on the little triangle codes found on plants at my local nursery.  It sank without a trace when I entered it in a show.

But the idea stayed with me, and earlier this year, when I wanted to make a quilt with social significance, I decided on a QR code.

Since my “day job” involves a lot of treating conditions that condoms might have prevented, I wanted to make a quilt to promote condom use. It’s what we like to call “safer sex”. Now don’t get all huffy on me; sex is a fact of life.

When I went looking for a condom-related QR code, I found this one developed by Planned Parenthood of the Great Northwest and the Hawaiian Islands.

Where Did You Wear It campaign

The folks at Planned Parenthood of the Great Northwest and Hawaiian Islands were gracious enough to allow me to use their QR code

Back in 2012 they put this QR code on all their condoms in a campaign called “Where Did You Wear It?”. Those who scan the code are taken to a website where they can put a pin in a map to show their geographic location–where they wore the condom!

The site also gives some important facts about condom use. The point of their campaign, and my point in making this quilt for show, is to normalize, encourage, and promote the use of condoms when needed.

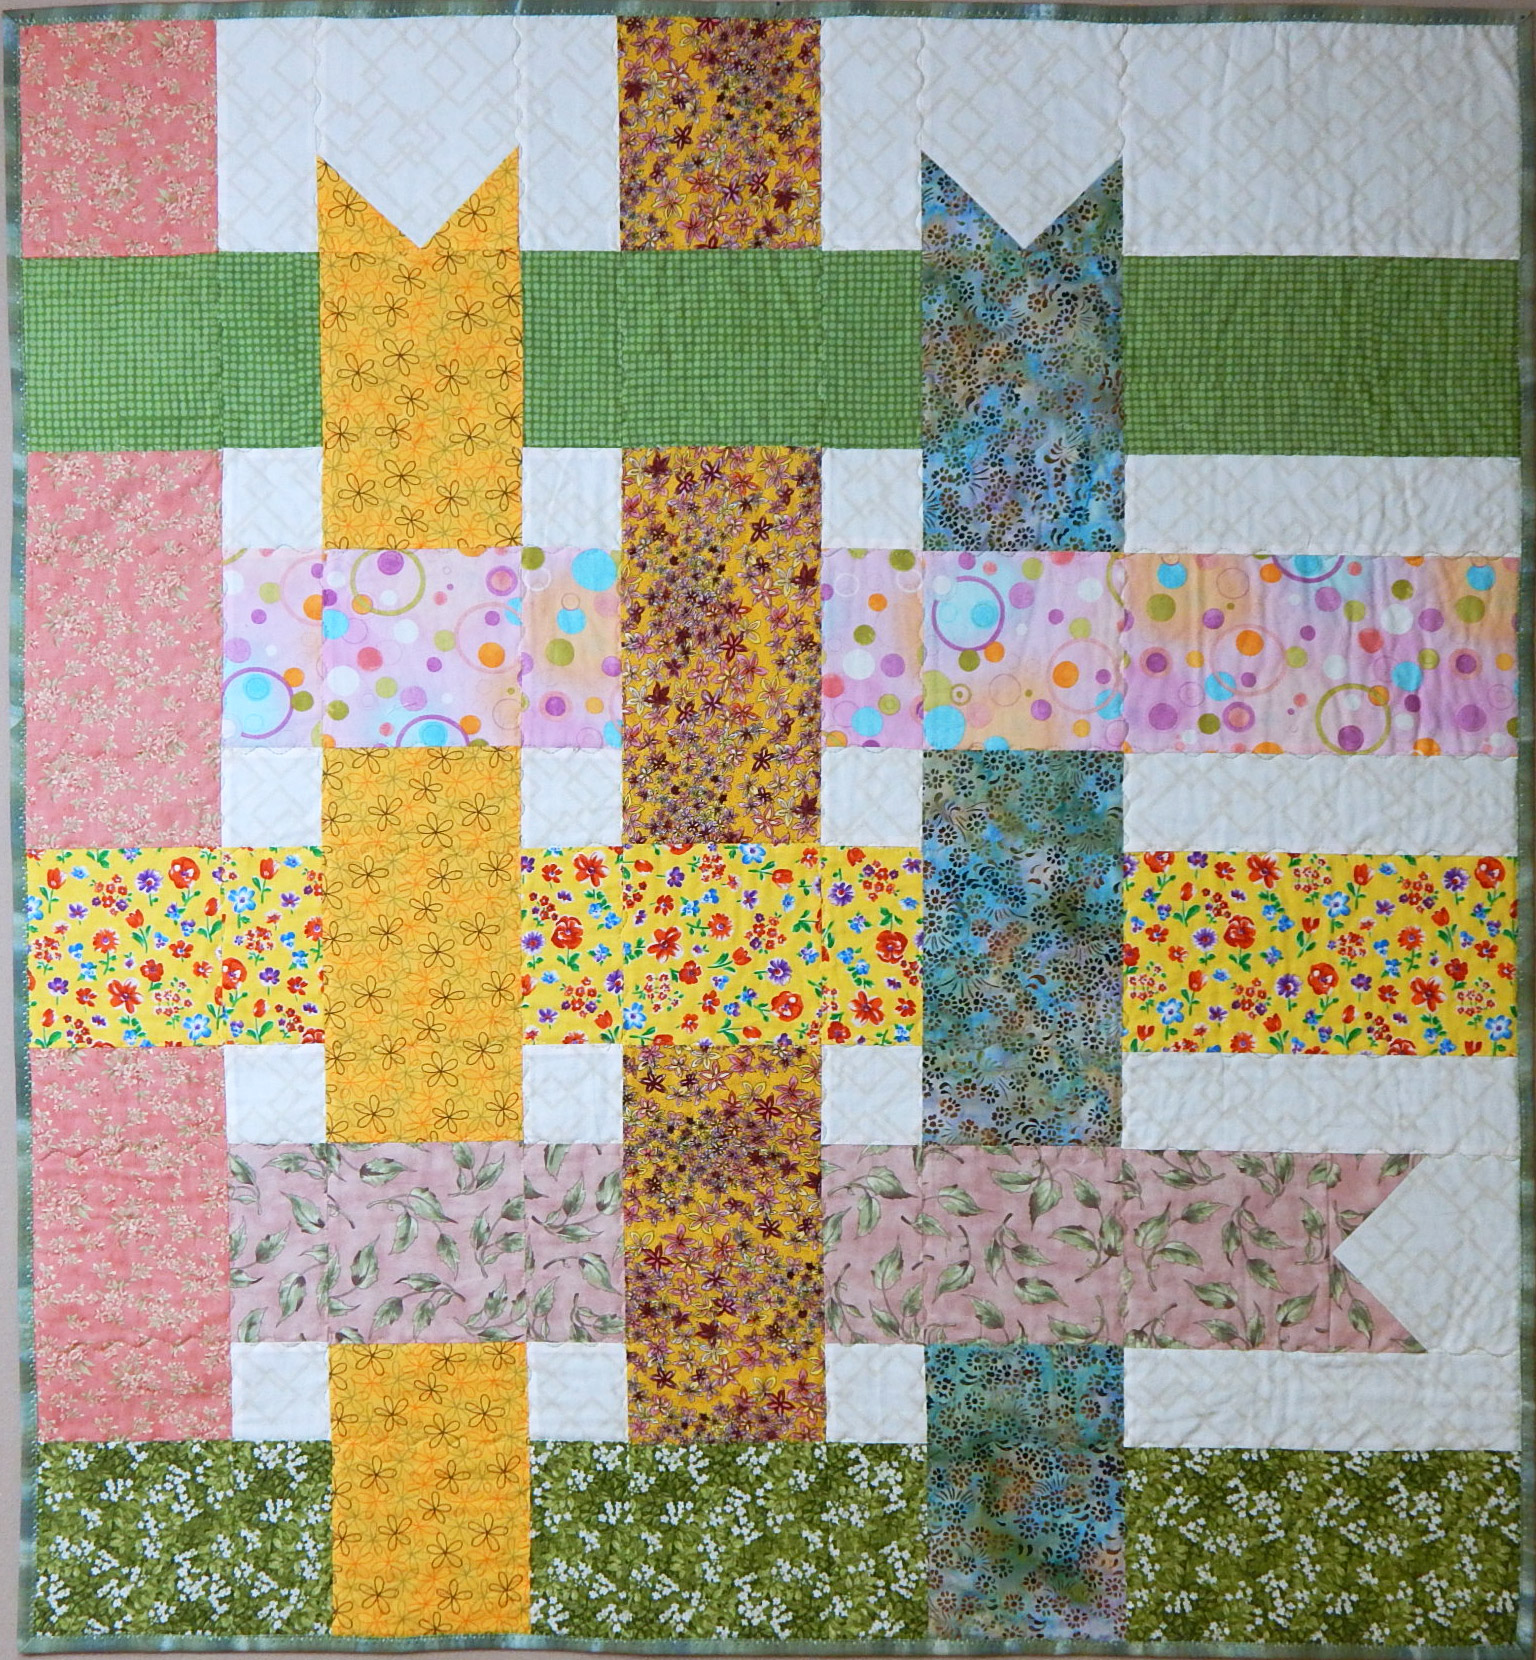
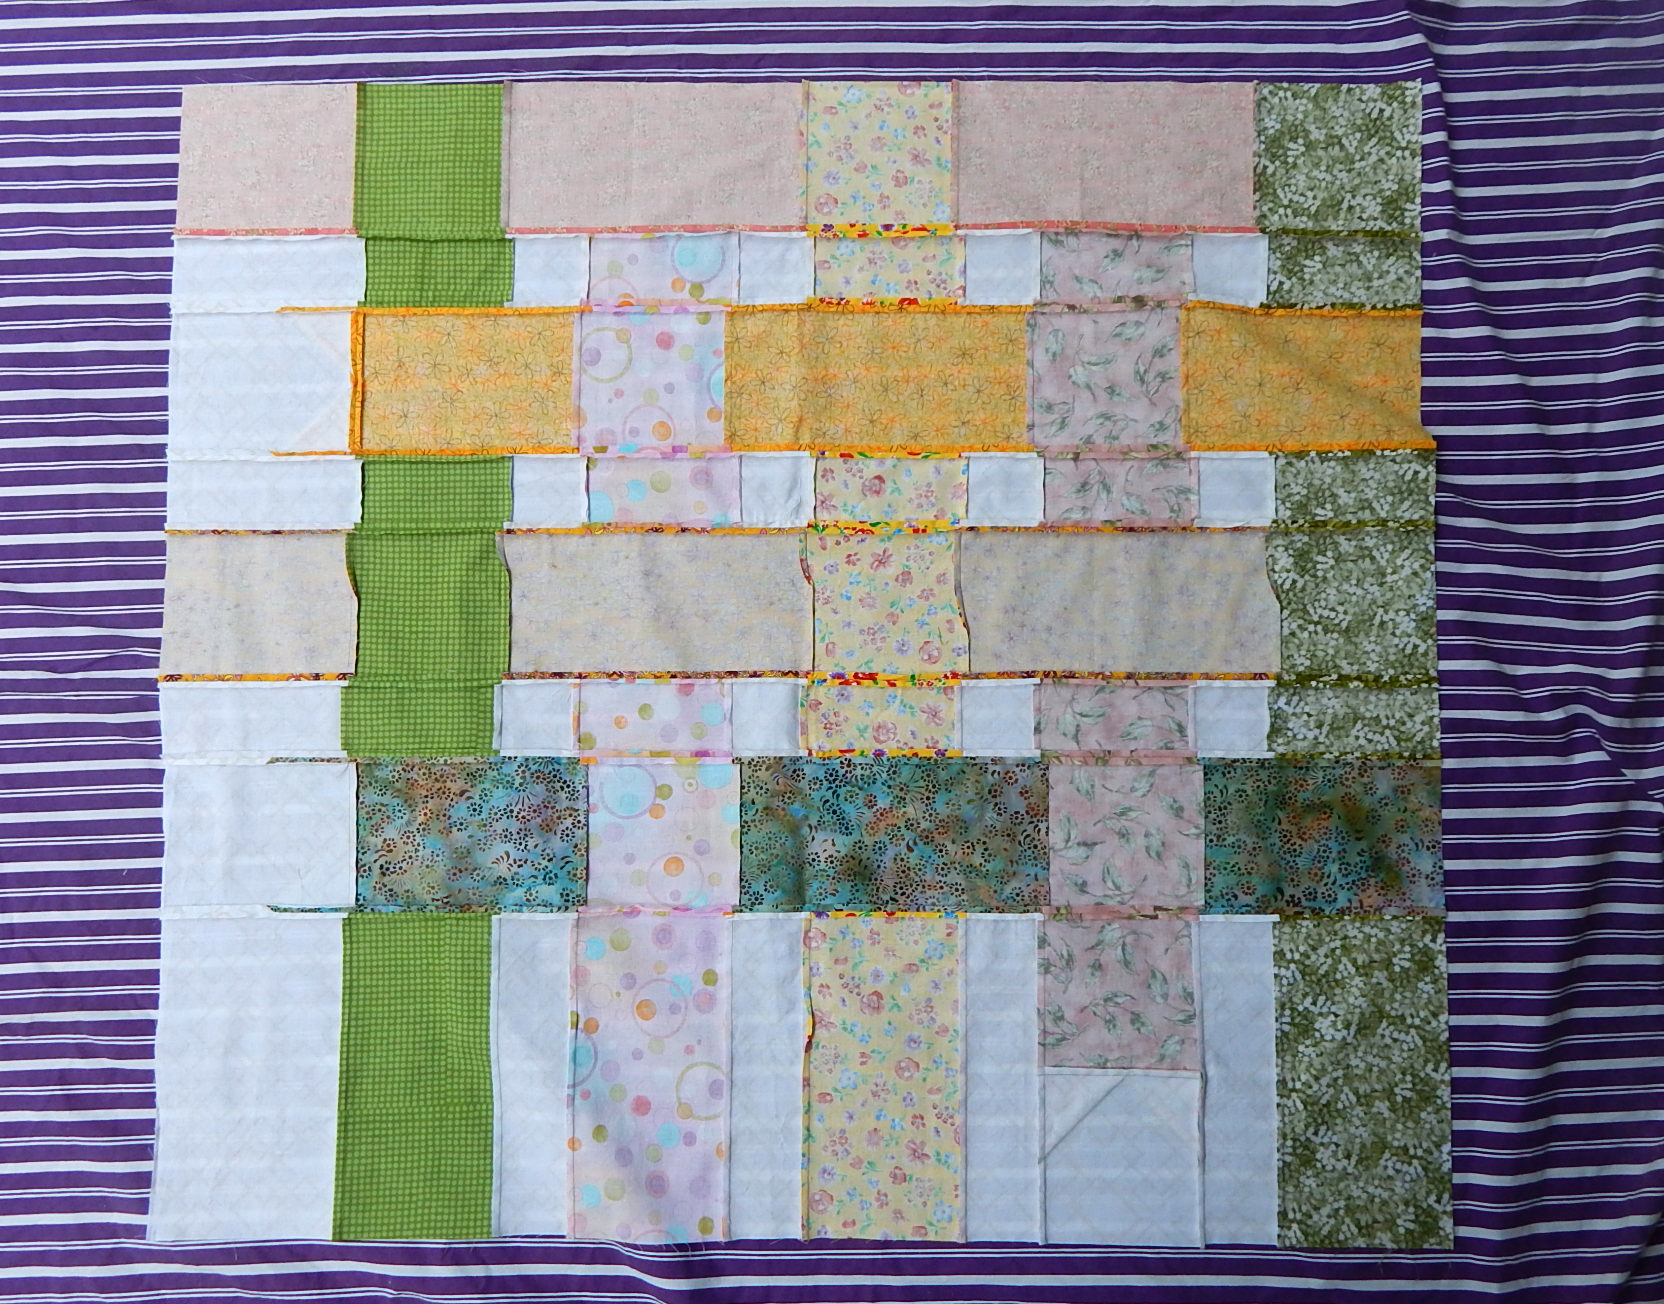
It turns out QR codes are robust little devils, so I was able to re-color it and develop a lively quilt design with the use of my trusty Electric Quilt program:

Where Did You Wear It campaign

Quilt Design from the “Where Did You Wear It?” QR code

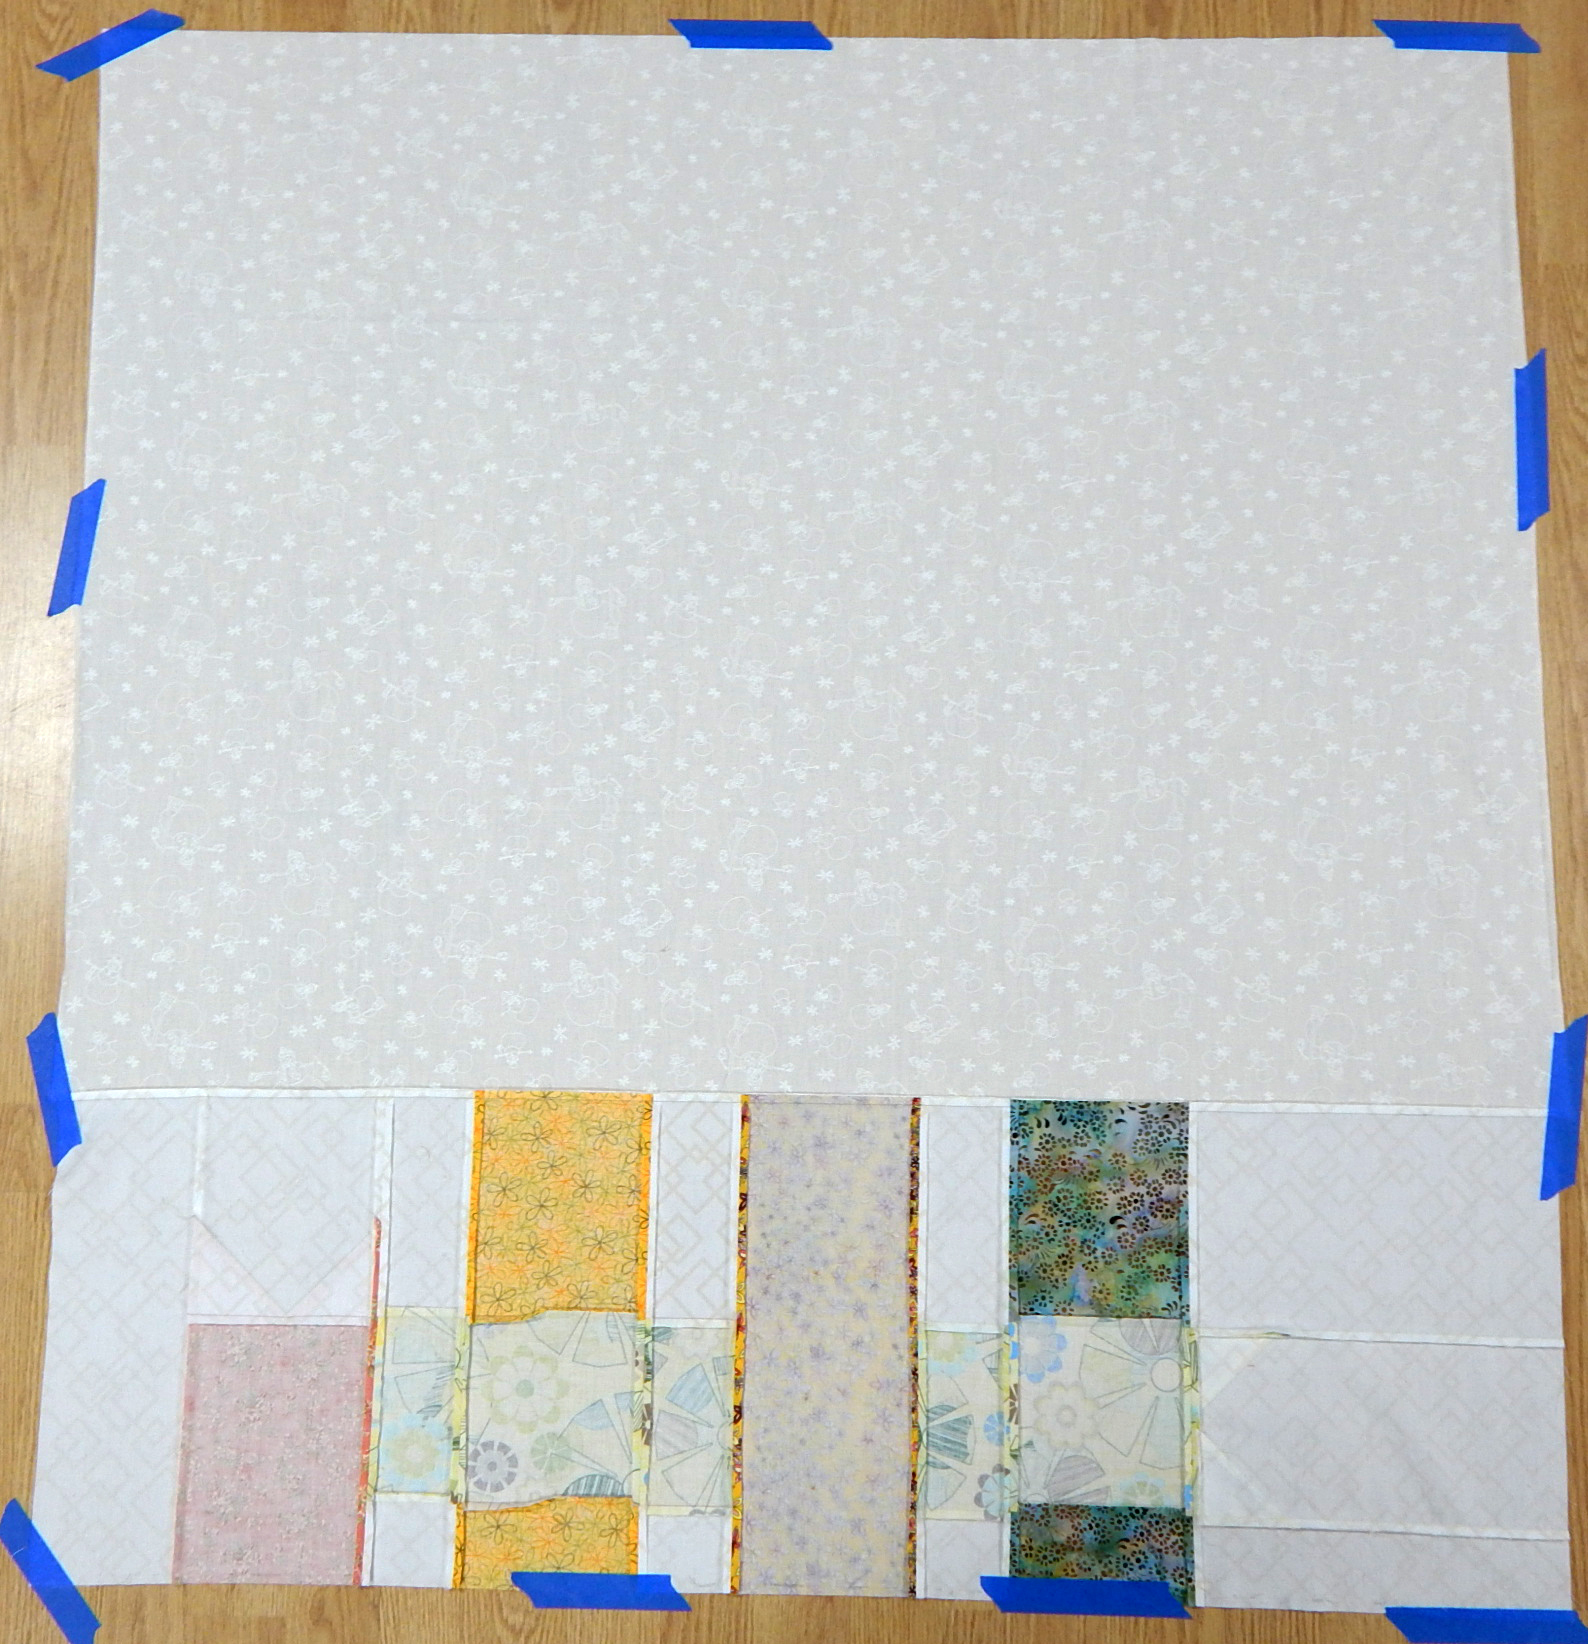
Making this was quite a challenge!  At each step I kept scanning it to be sure it took me to the “Where Did You Wear It?” site.  (You can download any of several QR code scanners to your smart phone or iPad. I used QMark.)

Asheville Quilt Show

The QR Code quilt, ready for its first show. It will the in the Asheville Quilt Show soon!

When I discussed the project with my wonderful son-in-law, he helped me turn my blog address into a QR code, too!  That’s this blog address you see in the TINY QR code making up one block toward the bottom right of the quilt. Scanning it brings you to this post.

Please help me to encourage condom use when appropriate by sharing this post.

Six Finishes!

Last year I pledged (and made) 12 quilts for Ronald McDonald House.  That was a little overwhelming, so I decided on 6 quilts this year.  I’ve now finished the last one, and here they are!  All are about 40 inches square.

The first was made from a pattern called Ribbon Box, available free from Cloud 9 Fabrics.donation-6

The next was from the last of the many wonky 9-patch blocks.  I made these for a quilt, but didn’t like the way they looked all together.  Luckily they look just fine with alternate solid blocks.donation-4

The next two were to use fabric with vehicles, since sometimes we run short on “boy” quilts.

This one was made to use some of my stash of charm squares:donation-2And finally, I just had to make one using a lot of the cute modern prints I’ve been collecting:donation-1These were fun, as always.  I used them to try a few new things, and now they’re ready to go 🙂

Save

Save

Save

Pincushion follow-up

Here are the pincushions made by the talented members of the Franklin Modern Quilt Guild. And just so you know, any quilts you see in the background are samples hanging at A Stitch in Time, where we meet.  How great is that, to meet in a quilt shop?

Be warned:  these are really just snapshots, not my best pictures.  I tried to be as unobtrusive as possible when I took pictures, so there may be odd things in the background.

fmqg19This last one is a “needle cushion”.  Each square is to be labelled with a needle size,so partly-used machine needles can be stuck in and easily found when you need that size again:

Needle Cushion

Needle Cushion

While I’m showing some of the creativity in this group, here are the “share and inspire” offerings for this month:

quilted purse

Jane Threlkeld fused some of her orphan blocks onto backing and made this purse

Linda Harrison made these two quilts from Bonnie Christine fabrics for Art Gallery, and one of them won a prize:

And here is a bright, cheerful quilt by Lynda Doll:modern quilt

Several of our members also belong to an art quilt group, and brought an example of one of their projects.  As you can see, they each made a vase of flowers and the cut them all up and swapped quarters!  The next step will be beads and baubles.art quilt

There’s always plenty of inspiration at these meetings!

Save

Save

Tutorial: Spray Baste a Small Quilt

I’m putting this up because I will be teaching a class soon in which students will be doing some spray basting before class, and I’m hoping to make it easier for those who have never tried it.

The quilt shown here is about 40″ x 40″, an easy size to spray baste.  I have a variation for spray basting larger quilts, but I won’t cover that here.

Start by taping the quilt back to the floor, right side down.  Pull enough to get rid of wrinkles, but do not stretch the fabric.

spray basting

Backing

Next, sweep the porch 😉  If all you have is a deck, that will do, but sometimes the spaces between the boards are a bother.Baste3Lay a large clean piece of discarded fabric on the porch floor.  This is a sheet from a long-ago pre-teen room.  Baste4

Lay the batting on the clean cloth and spray baste it evenly according to the directions on your can. It’s best to do this outdoors to avoid inhaling the spray.

The batting here is Quilter’s Dream Green. It’s made out of recycled plastic bottles.  It works great, and as you will see it doesn’t look green even through this cream colored backing.Baste5

I generally use either 505 or Sullivan’s basting spray.  The only one I avoid is the one that breaks down with heat. I follow Michele Scott’s method of ironing each section of the quilt just before I quilt it, and that obviously won’t work if ironing destroys my spray basting!

Baste6Lift the batting carefully and transfer it to the backing, sticky side down.  Usually I center the backing on the batting, but this quilt is an exception because the design on the front is meant to kind of “wrap around” to the backing.  Keep reading and you’ll see it.

Next, put the quilt top on the clean cloth right side down.  Spray it with basting spray.Baste7

Transfer the quilt top to the batting, sticky side down.  I do this by grasping the top on opposite sides, about at the midpoint, and letting it fold in half (non-sticky sides together) as I lift it.  Then I place the first half on the batting and gently fold out the second half to cover the batting.

Smooth it all out and you’re done!  Remove the tape, quilt and bind.  Here are the front and back:

Questions?  Better ideas?  I’m all ears 😀