When you’ve been quilting as long as I have, you own an endless supply of scraps (and sometimes not much yardage). Therefore, here are a few more recent scrap quilts, all for donation to various places.
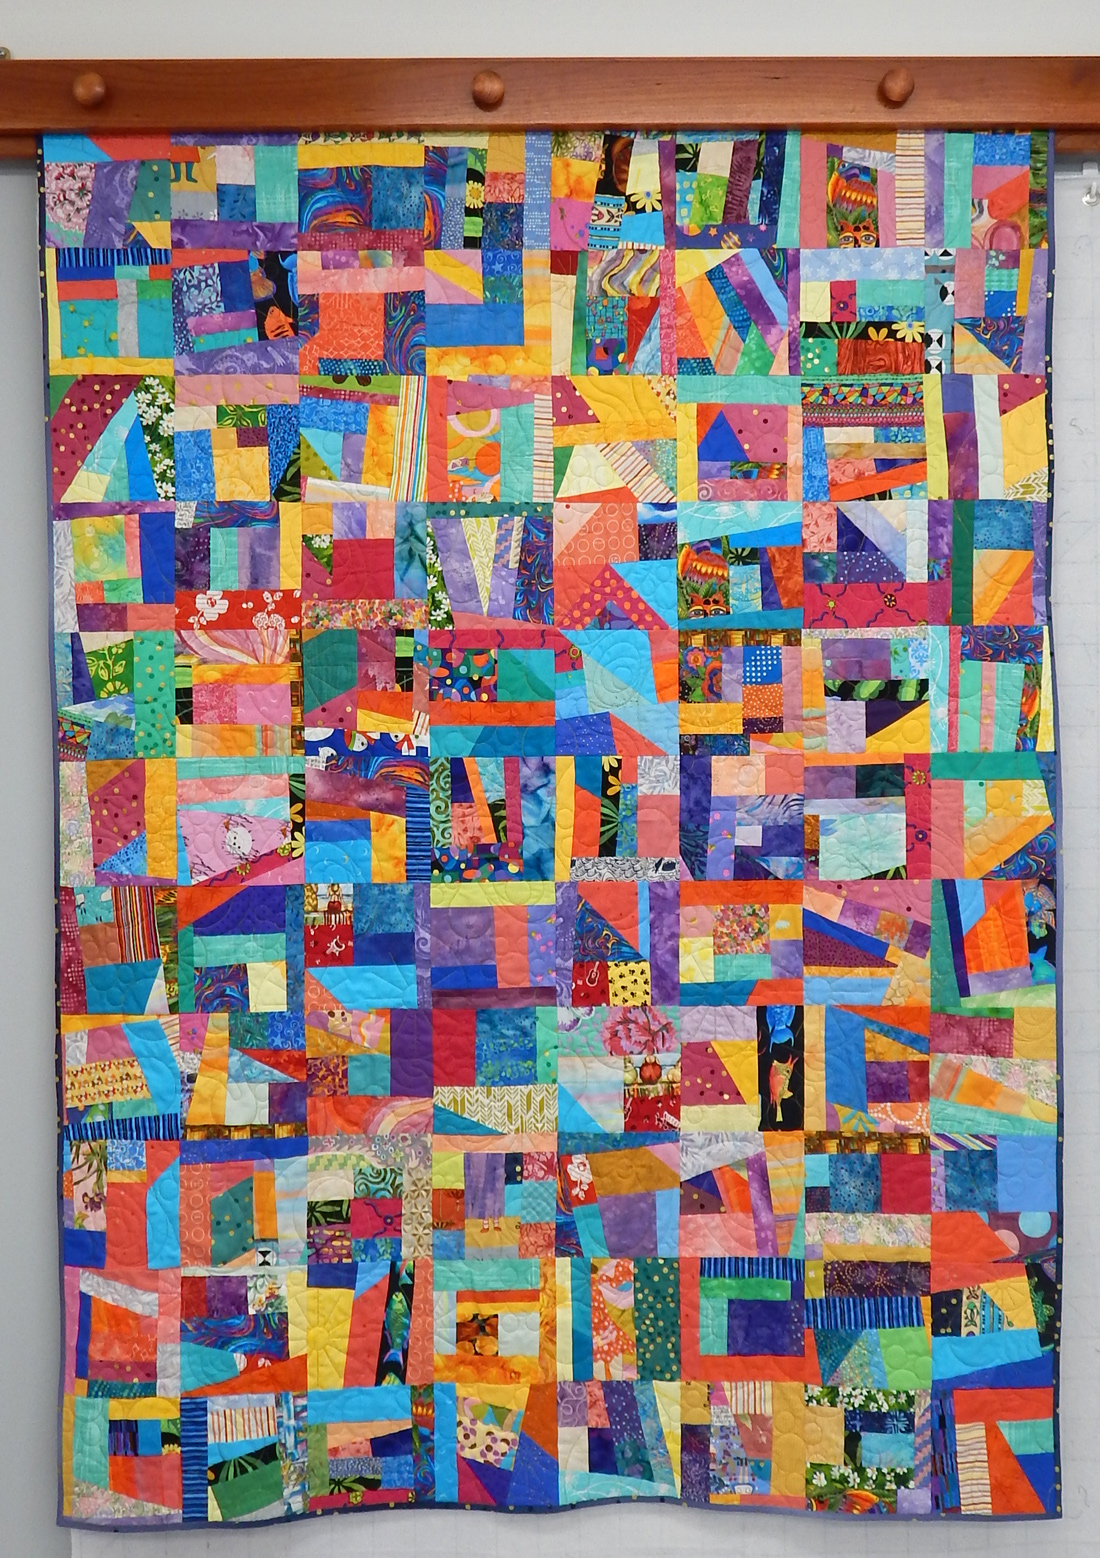
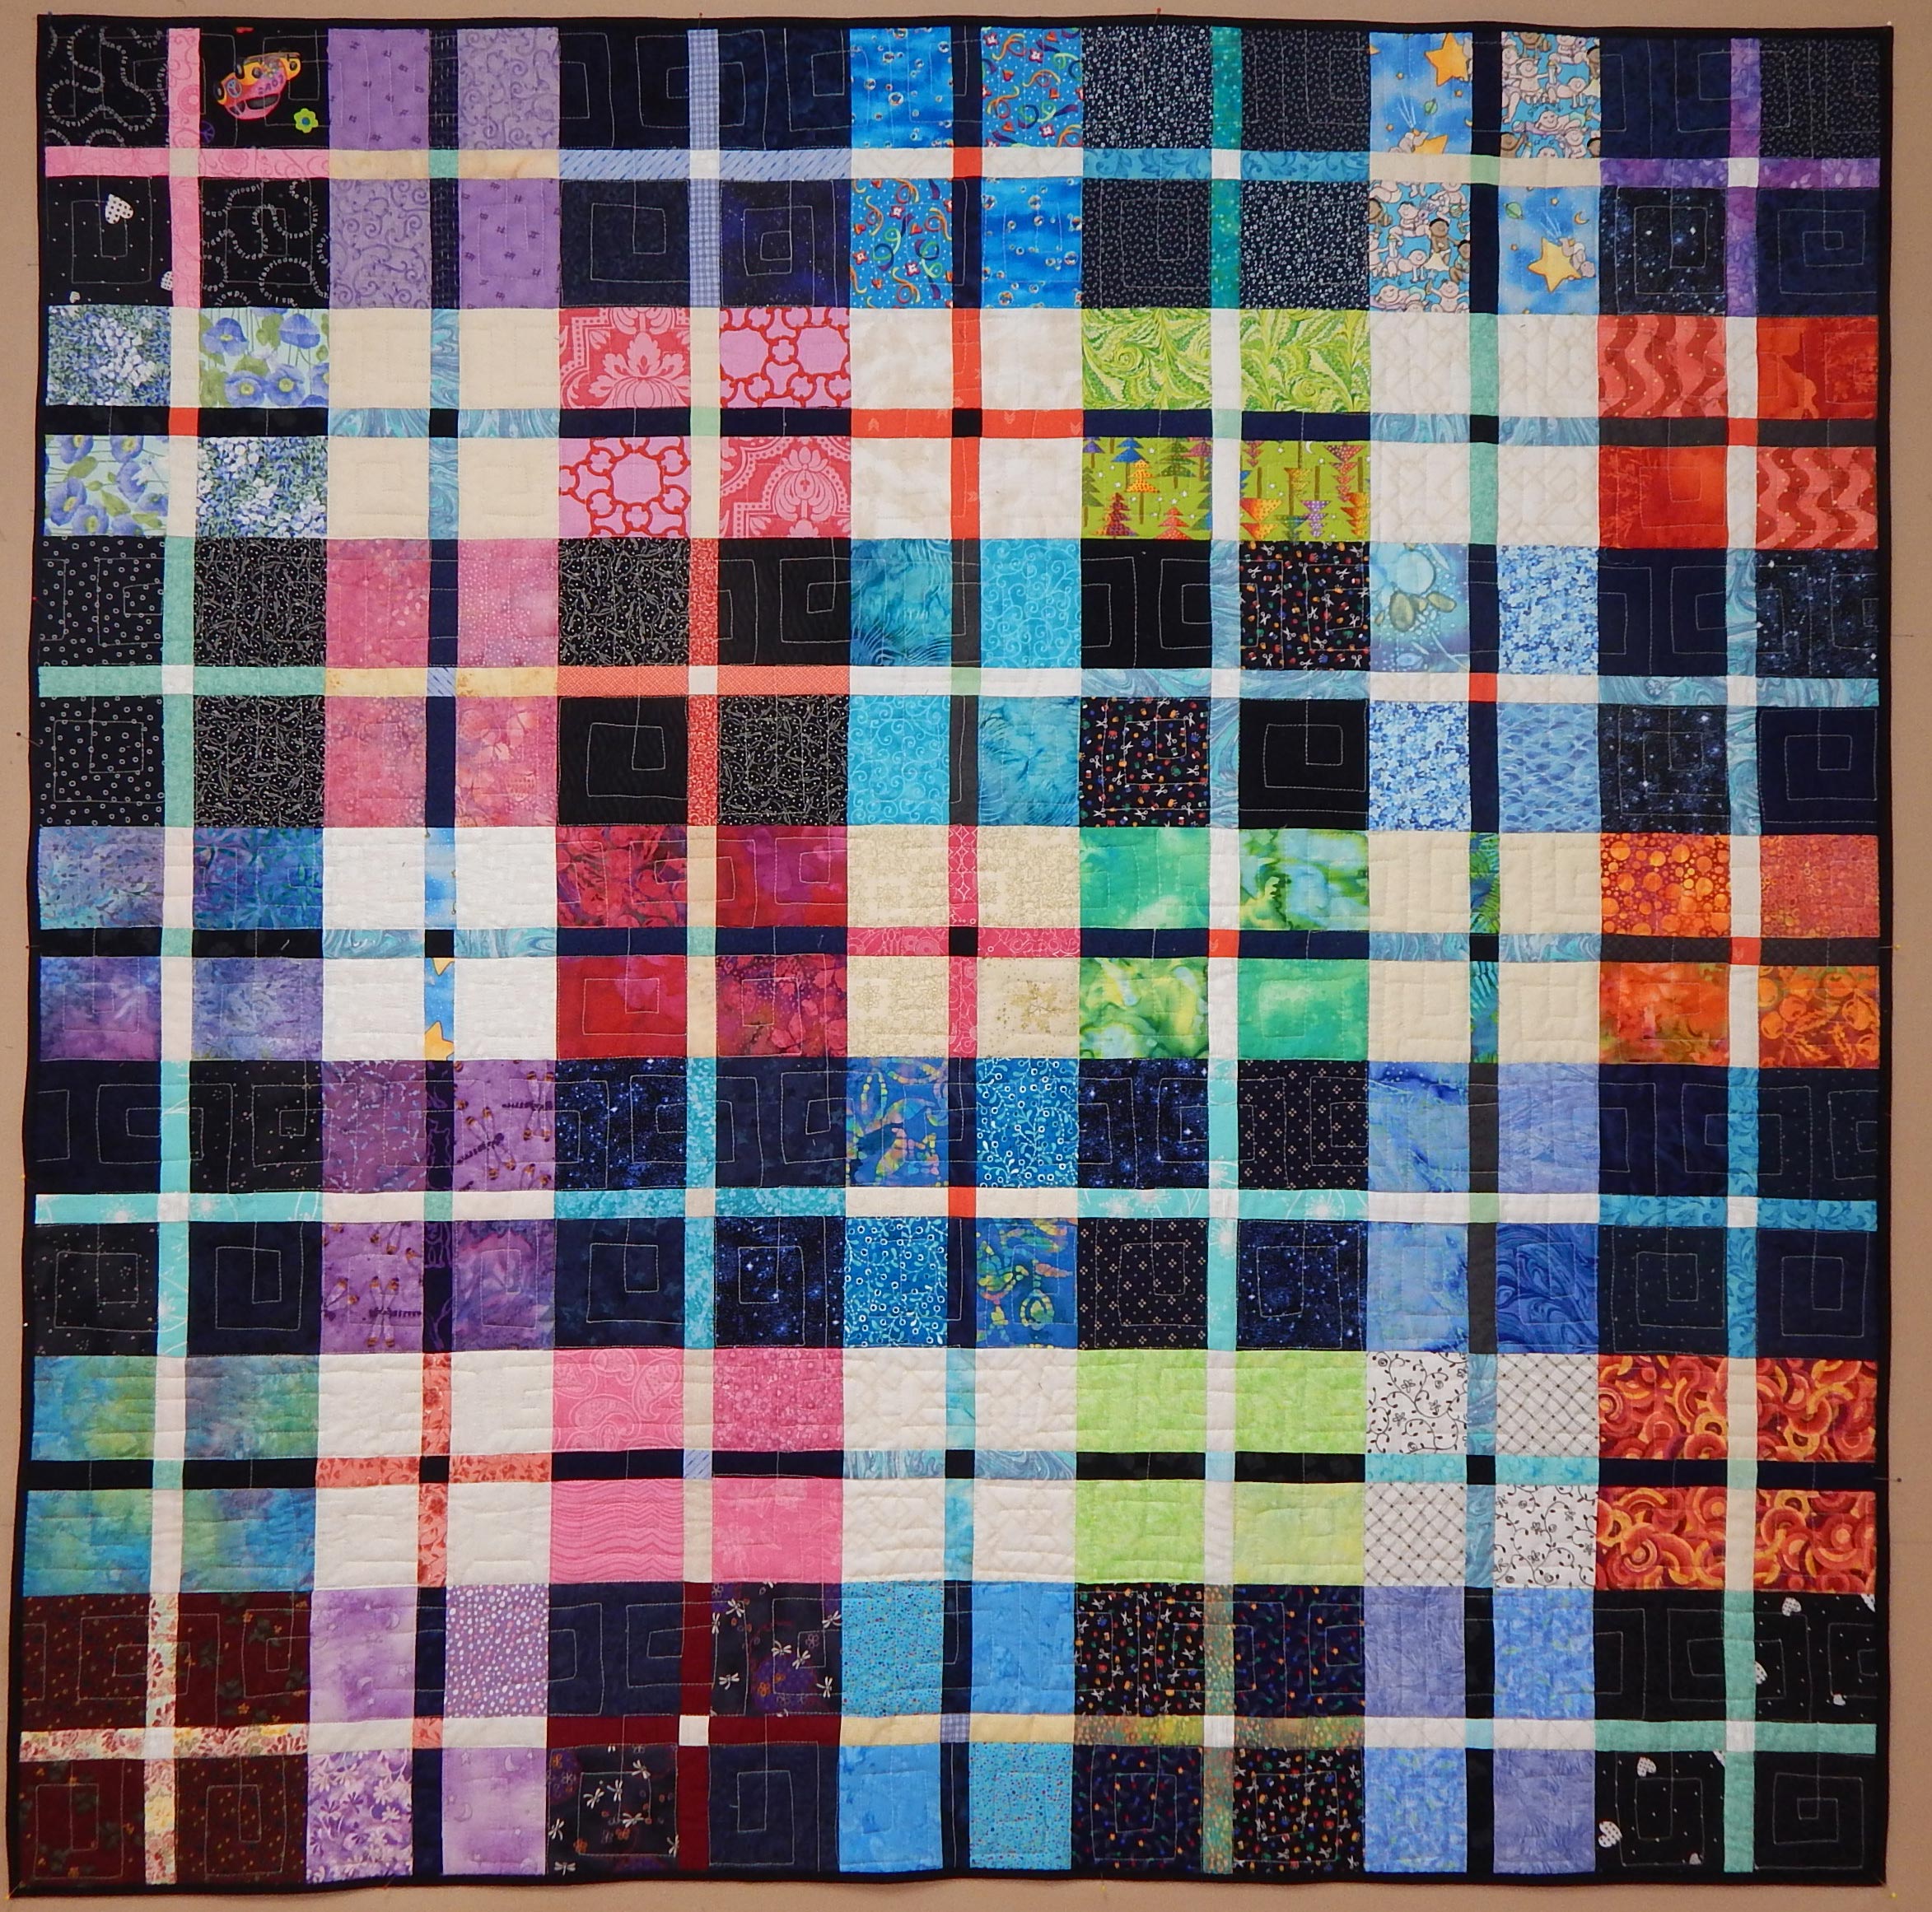
This first one was made from blocks I used as leaders and enders. I took a bag of single-color scraps and joined them randomly, sometimes inserting a spark of another color just for fun. The background is a navy fabric with fun gold swirls that I’ve had for some time and needed to use!

Happy Scrappy, 61″ x 69″; this one will go to Flying Horse Farm
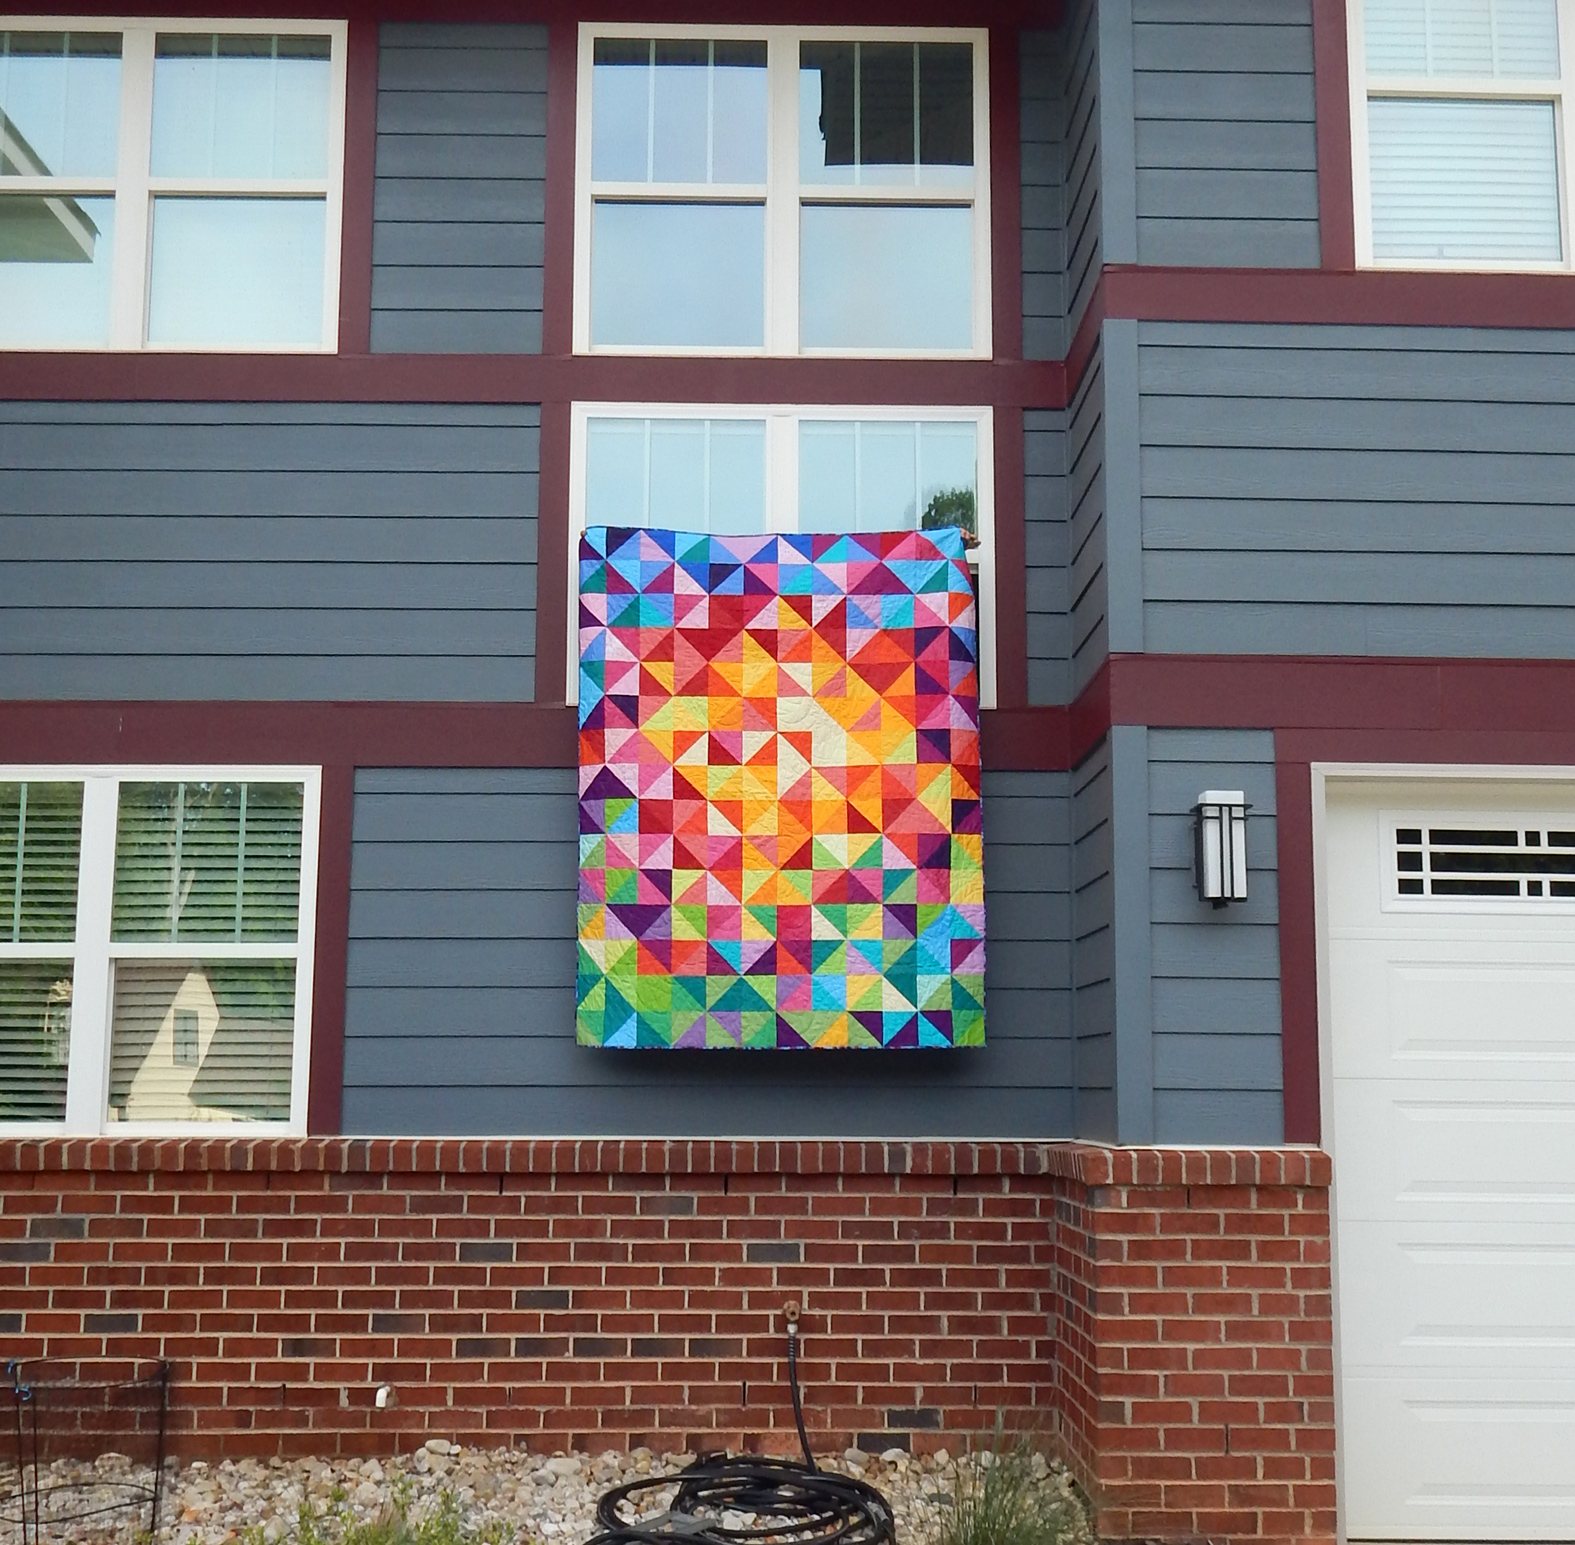
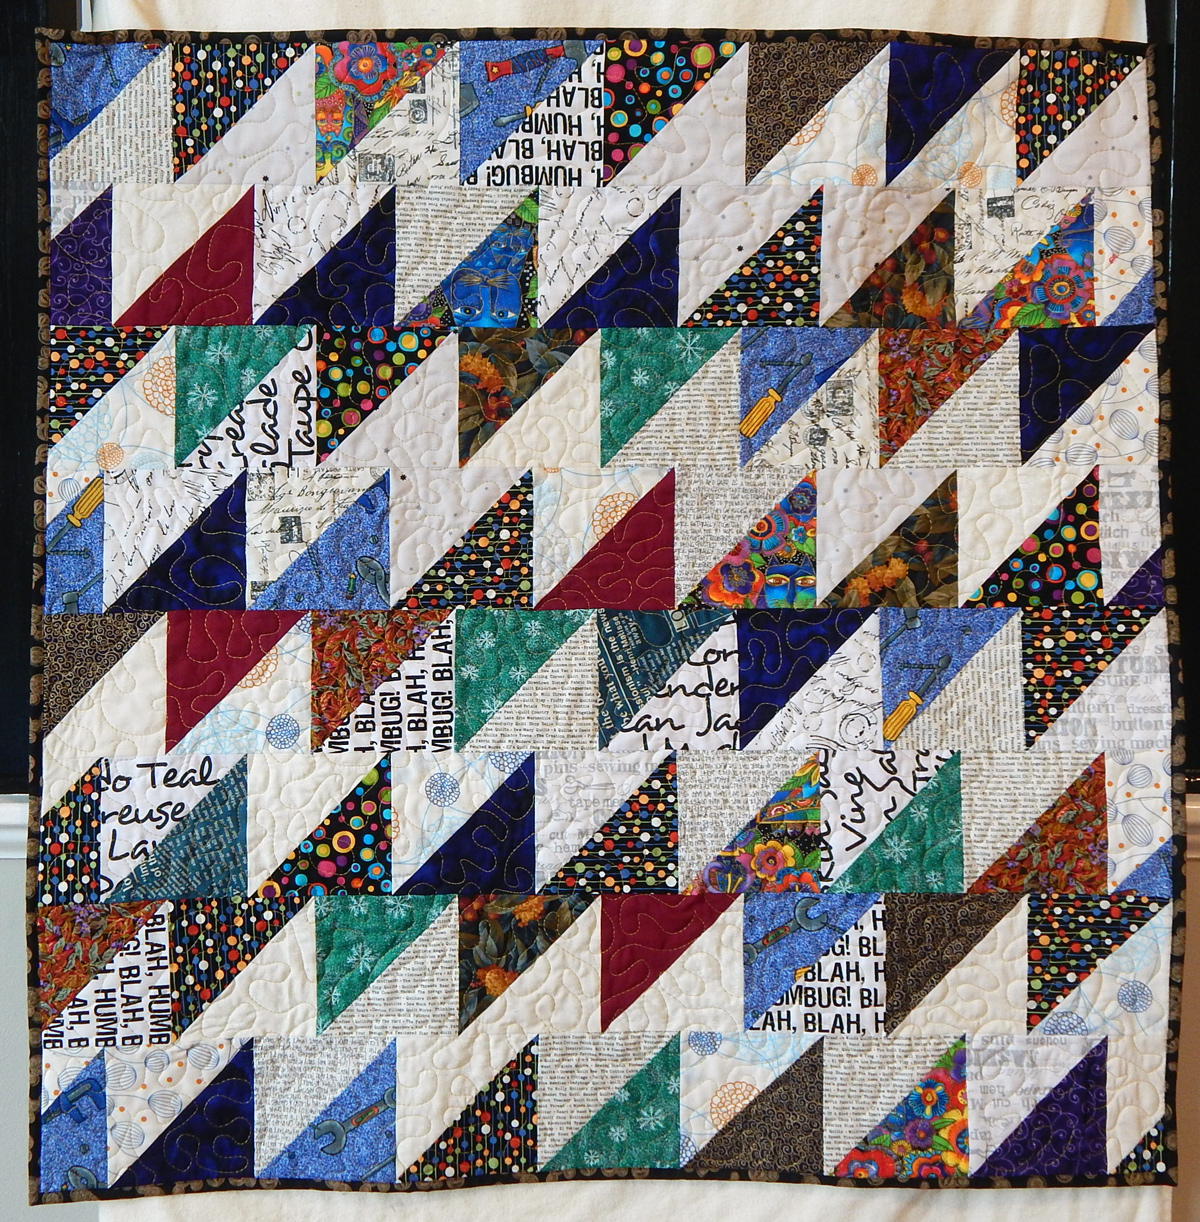
This next quilt was made from a free pattern called Wickedly Easy Quilts, available at byannie.com. However, be aware that the format on the site has changed since I got the pattern. It used to be just a free pattern; now it’s part of a free course. Whatever.
As I’ve mentioned before, I cut my scraps into standard widths and store them that way. This quilt was made by pulling blues, greens, and orange accent strips from those storage drawers.

Wickedly Easy quilt, 49″ x 49″; this is a lap quilt for the senior center
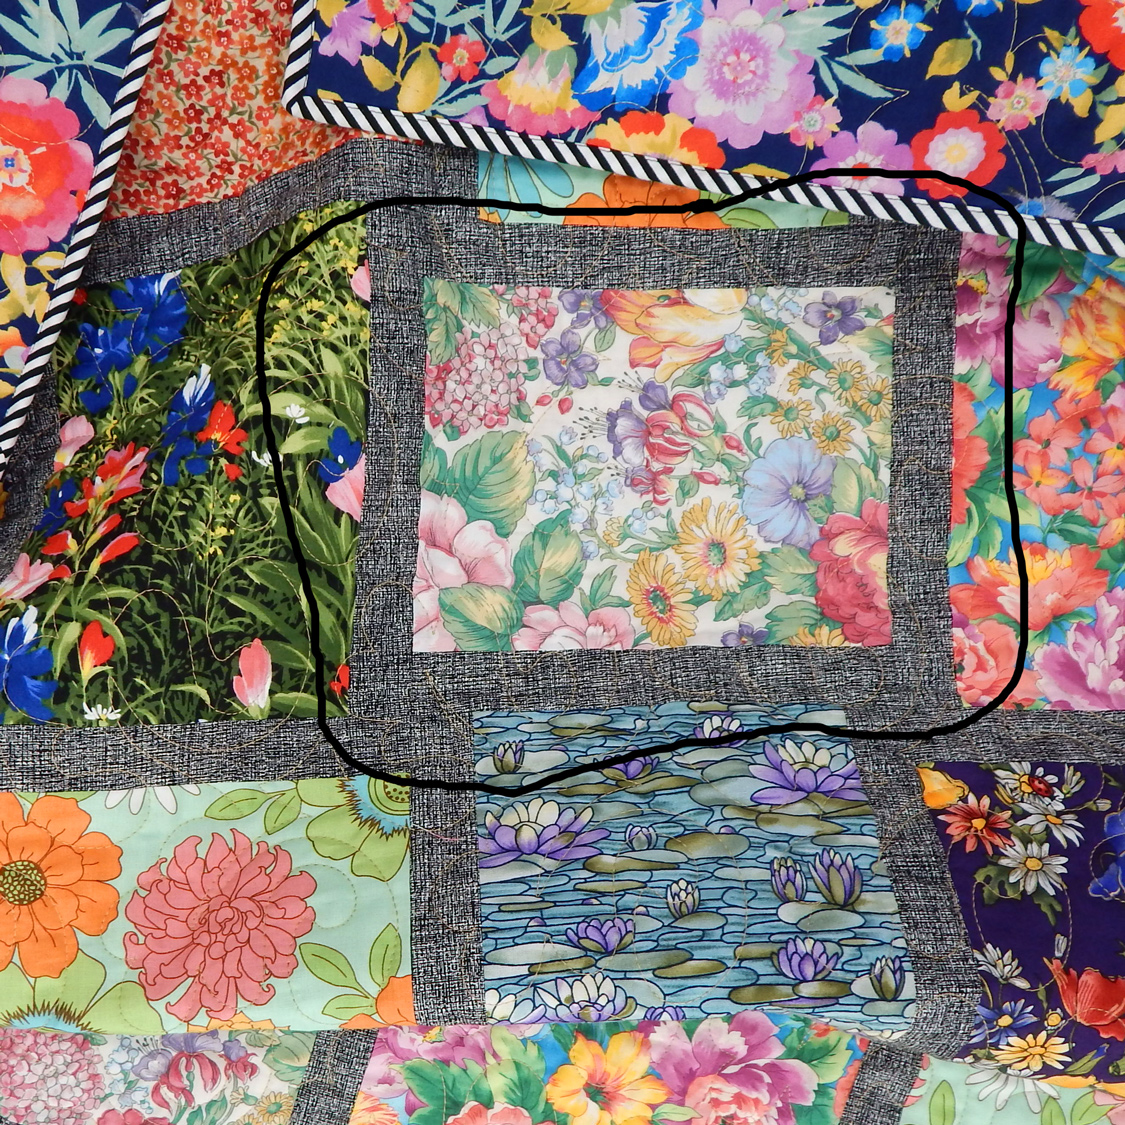
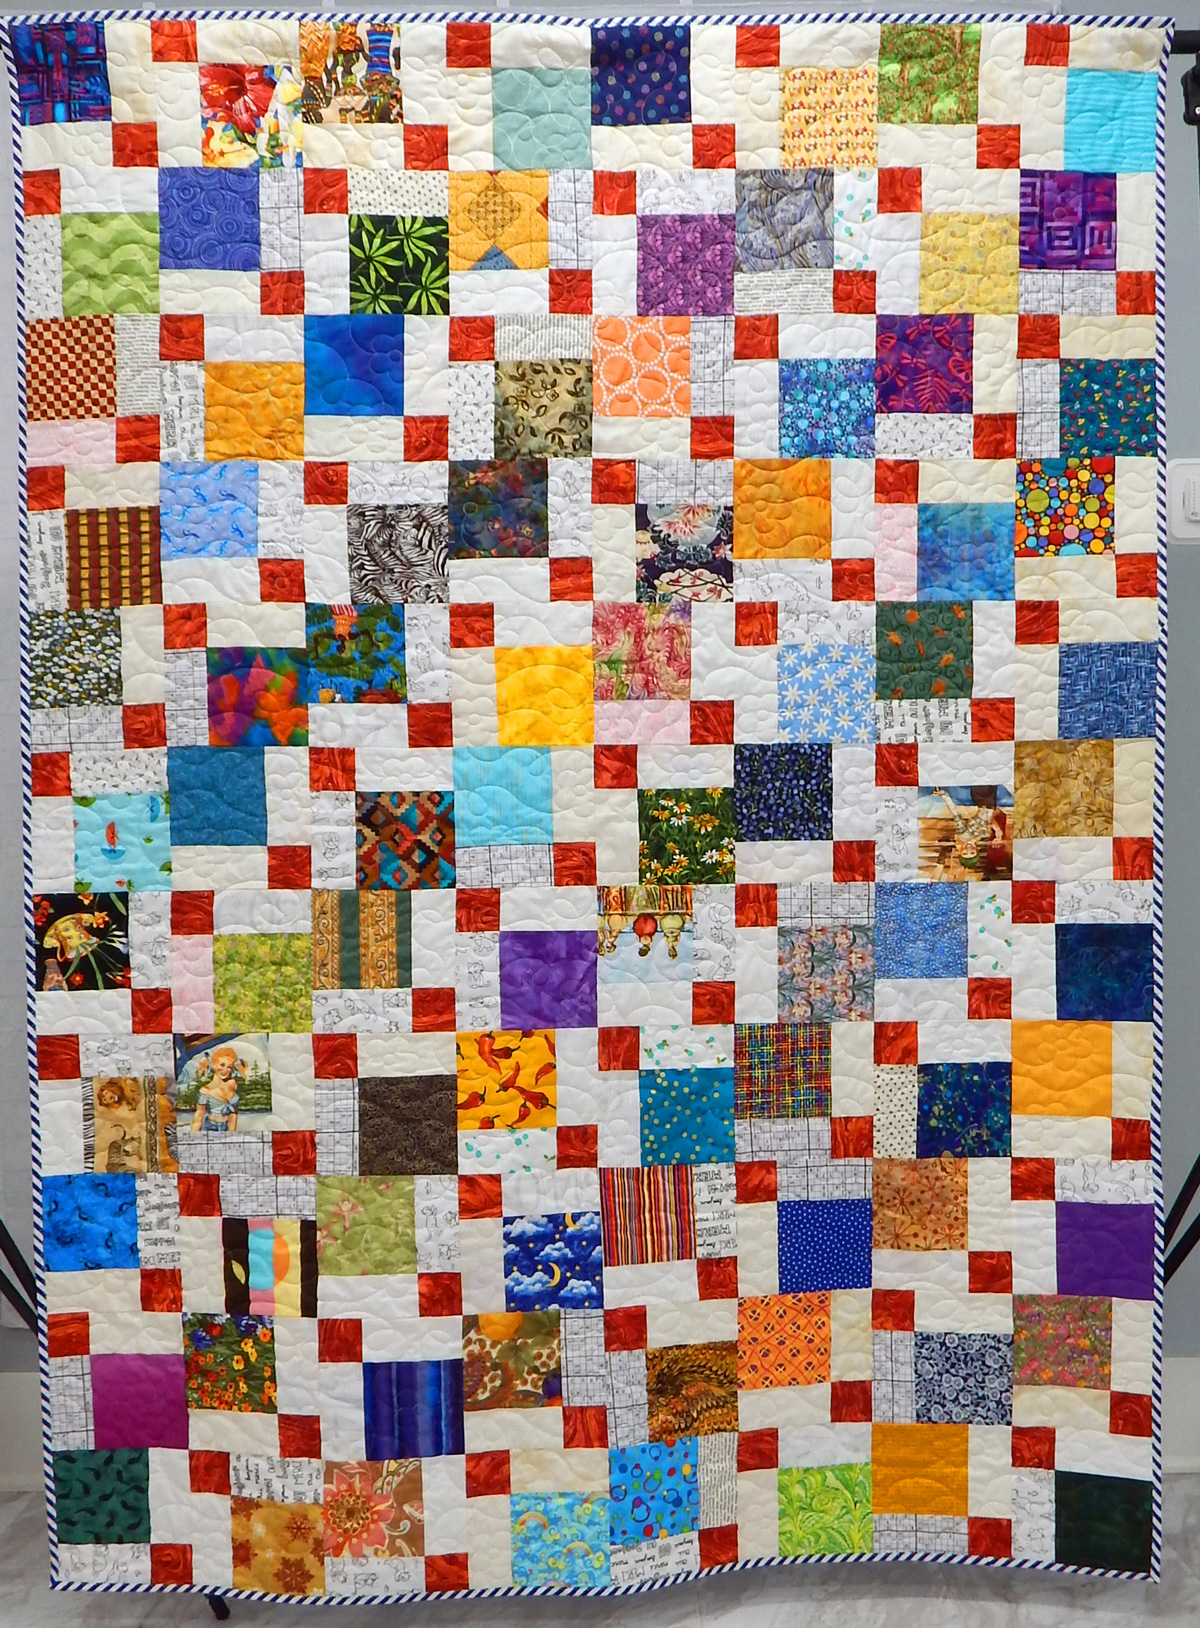
Finally, here is another Circle of Nine quilt using improvisational blocks made from a combination of orphan blocks and scraps.
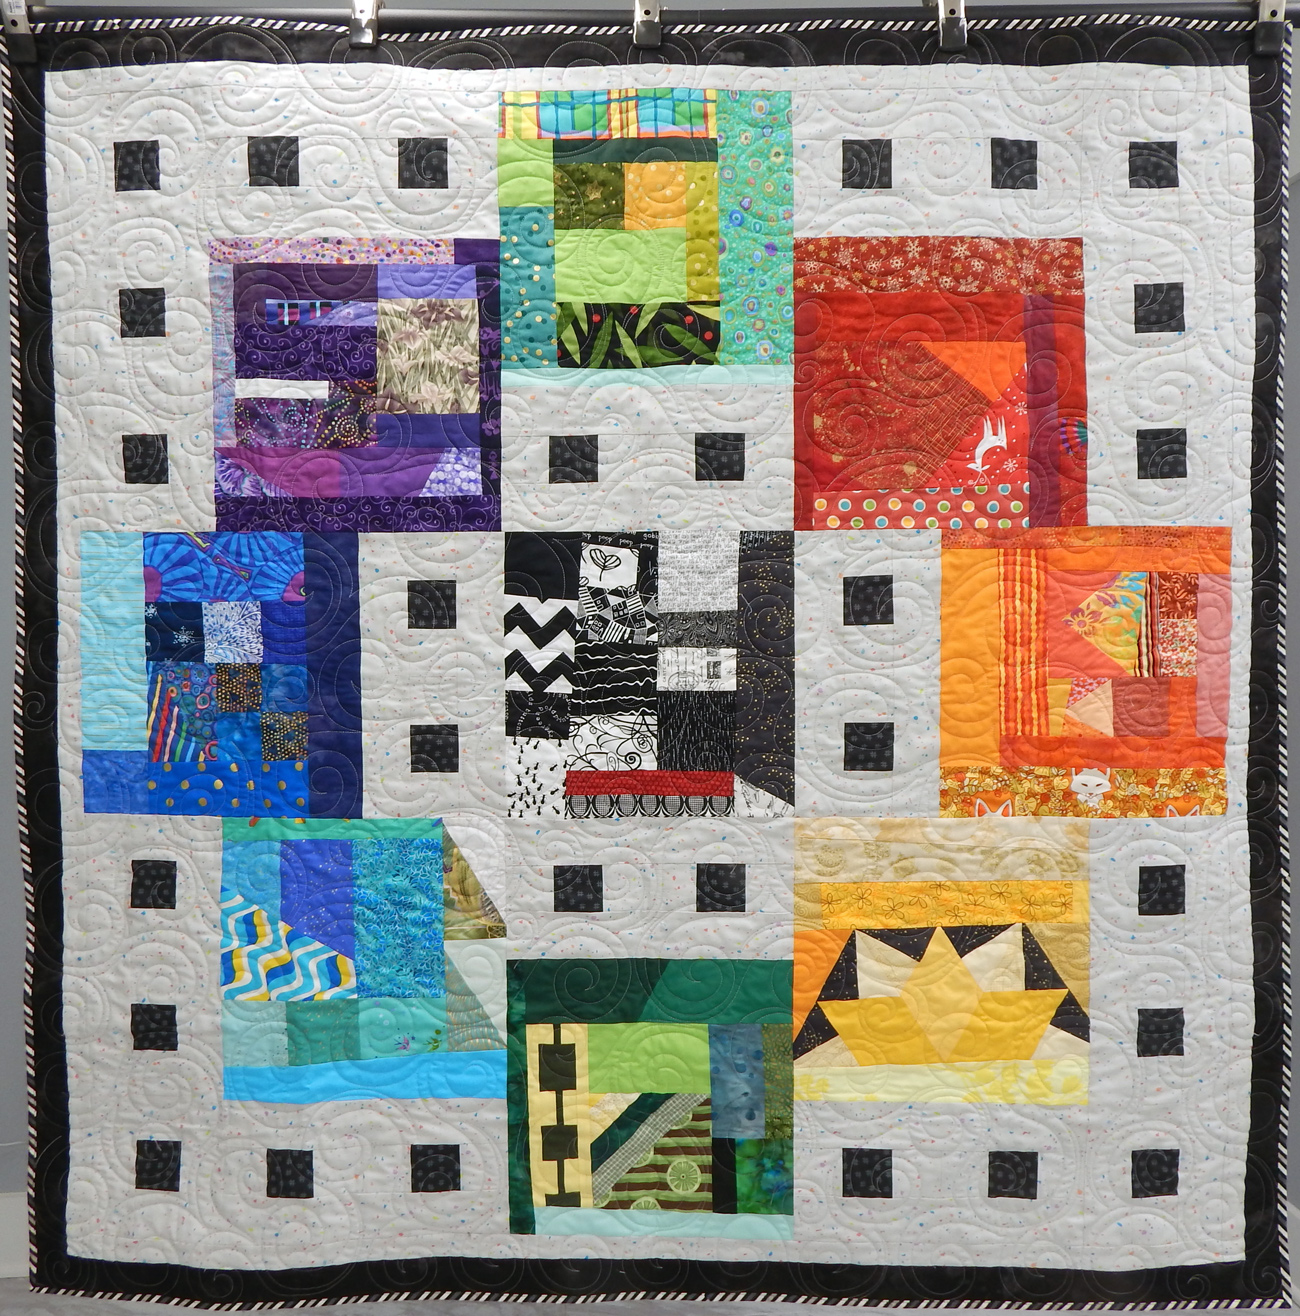
Circle of 9 quilt, 54″ x 54″, a lap quilt for the senior center
Do you have a favorite scrap quilt pattern or method?