A Preschool Project

Our younger grandson is energetic and curious about everything, and one day he walked over to the sewing machine and said, “I want to see what this does!” He selected some scraps and sewed them together with a little help and a lot of watching to keep his fingers out from under the needle! Luckily, my machine has a speed control so I was able to slow it way down to lessen the risk.

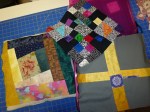
The next time he came to visit, we got out the scraps. He chose everything he liked and we glued the scraps to a piece of paper (8.5″ x 11″, which we used to call “typing paper”!). I didn’t help with selection or placement, only encouraged him to cover the paper completely.

We then went to the sewing machine, where I operated the foot pedal and he guided the fabric-covered paper. He learned how to guide the piece under the foot, and we turned the speed up a little! (Note: If you do this, don’t let the child see where the speed control is!) We used a zigzag stitch to cover the edges more easily, and tried a few other stitches, too.

It took several visits for him to finish the piece with all the edges tacked down. He enjoyed the sewing and was very good at clipping stray threads. I then let him choose a tote bag to which we attached his art quilt 🙂

No, he isn’t old enough to have lost that tooth yet. It was a playground accident!

He was very proud of his creation, though he’s still at that age where kids do the fake smile when they see a camera. The lovey got to ride home in the bag along with a couple of other toys he had brought along.

If you have children who try this, please send me pictures of their creations so I can share.  And have fun!


Three Bag Patterns That Were Worth Paying For

Just as there are lots of great free bag patterns, there are many excellent patterns for sale on the internet. Here are 3 of my favorites.

1. Divided Basket.  This is another pattern from Noodlehead, who also designed one of my favorite free patterns.  The instructions are excellent and the divided basket is cute.  It was just right for a diaper basket for the changing table for my grandson.  It is available here.

fabric basket

Divided basket made from pattern by Noodlehead

2. Clothesline bag/basket.  This pattern is from Indygo Junction and was much easier to do than I had anticipated.  You can read my review of it here, or buy it here.

3. Sweetpea Pods, by Lazy Girl Designs..  This little bag was so.much.fun that I made more than a few!  Once you learn the zipper trick it is easy, quick, and so satisfying.  I’ve given away many of them and I keep a couple on hand for when I need a little gift for someone.  (Of course it should contain chocolate!).  I even gave one to a male friend, and rather than ask “what the heck” he said he’d use it to carry his guitar picks!  The pattern is available here.

And so you know I’m not just blowing sunshine, here’s one I thought was more trouble than it was worth, even though it is very, very cute (and was all over the internet for a while):

Which bag patterns do you recommend?

Another Fun Guild Program

This is part of my occasional series on guild programs, with the hope that it will help others who need to come up with program ideas.

Our modern guild has no money to hire speakers, so we are taking turns sharing our talents. One of our members recently volunteered to teach us block printing on fabric, and she furnished all the materials herself!

block printing quilt fabric

Suzanne brought a beautiful print she had made as an example

A few of us had done block printing in the past, but these blocks were much easier to carve. Apparently the block medium is now made of soft rubber rather than linoleum–a big improvement for the hands and wrists.

block printing

Some people carved abstract designs, using the whole block

Everyone got a square of rubber to carve. Some people carved a design on the square using the entire thing. Some carved an object and then cut out around the object so that it could be glued to a board backing for easier handling.

It was fun to see what everyone did.


Then we were given ink and encouraged to mix the colors, either to produce a variegated print or to produce a secondary color.

The prints were amazing and fun.

I didn’t get a picture of the block used for these fish, but they were very successful.

block printing fabricOur challenge for next month is to use the printed fabric in a project.  Can’t wait to see what everyone does!

Orphan Block Tote Bag

There are a TON of bag patterns out there, and a lot of them are very good.  However, they aren’t really a FAST way to use up orphan blocks!


In contrast, there are several sources of good, sturdy, plain fabric bags that can be decorated with orphan blocks in very little time to make an attractive and useful bag.  If you haven’t run across them, try craft stores.  You can also Google “blank canvas totes” to find lots of options.  I like buying them in dark colors so they won’t show dirt with use!

NOTE:  Even if you didn’t prewash the fabrics for your orphan block, you should prewash the canvas tote.  Otherwise it may ruin your work by shrinking or bleeding color when it’s washed later.

Choose your block and, if you want, quilt it with your choice of batting and a thin backing.  It’s also fine to leave it unquilted.

orphan block

I quilted and bound my block, but it isn’t necessary

Once your block is ready to attach, either bind it or frame it with fabric.  Alternatively, it works fine to just turn under 1/4″ on each edge.  REALLY, you could just zig-zag stitch it to the bag without any edge finish.

The only trick is that you need to make full use of the free arm feature of your machine, and squnch the bag a bit, to sew around the block.  These bags aren’t very big, so it’s entirely do-able.

.

.

DONE!  This is a nice quick-and-easy project and a useful gift.  But don’t use up all your orphan blocks—there are more projects to come!

Final-bag