A Few Favorite Christmas Patterns

If you put up a Christmas tree at your home, the tree skirt probably is part of the fun. Because of that, I thought I’d feature a couple of tree skirts I’ve made in the past few years. The patterns were fun and the only potentially difficult part of the construction was the need for bias binding on the scalloped edges.

Garden Gate Quilts
“Trees All Around”, class sample made from the pattern by Quilted Garden Designs

I love the tree skirt with Christmas trees!. Family members loved it, too, so I had to make more than one 😀 It was also a good way to use some of the Christmas fabrics I’ve been unable to resist! I used fusible applique, so it was pretty quick and easy.

Quilted Christmas tree skirt
Snowmen All Around, my class sample from a pattern by Quilted Garden Designs

A year of so later I found this additional tree skirt pattern by the same designer. I love it too, so of course I had to make it.

Which reminds me of this pattern, by Joni Pike, which I reduced to half size so our daughter could use it as a wall hanging rather than a lap quilt. The pattern is called “Frosty Flakes” #806, but I have been unable to find the publisher on the internet recently.

Frosty Flakes, Sew Special Designs

I loved this one, too. I guess, when it comes to winter holidays, I’m trapped in what my friend Elizabeth calls the “dungeon of cute”. So I’ll quit for now!

What cute stuff have you made for Christmas or other holidays?

Another Scrap Quilt

This started as a “leaders and enders” project to intersperse a little play time with other projects. I cut some scraps into strips, joined the strips lengthwise, and cut across the strip sets to make multi-fabric strips.

The blocks finish 12″ square because I had a square ruler 12.5″ x 12.5″ at hand to trim them as I made them. They are set on point because “why not?”  The biggest challenge was making the setting triangles–of course it would be waaay too easy if one could just cut a regular block in half, but it doesn’t work that way!

If you want to know how to figure setting triangles, All People Quilt has an excellent chart that makes it easy. After starting with the chart, I recommend rounding up to the nearest inch (or centimeter).  The resulting triangle will fit into its space just fine but will stick out from the outer edge of the quilt.  Once the quilt is all sewn together you can just cut off the extra as you square up the top.

QUILT DETAILS

Name: Another Scrap Quilt

Finished size: 63” x 63”

Finished block size: 12” x 12”

Designed and pieced by me

Quilted by: Julia Madison

One thing I enjoy about scrap quilts is seeing lots of little bits from previous projects.  Some of those scraps are older than the age I feel 😀  

An Oldie

I made this quilt years ago at my husband’s request, and when he retired last year it came home with him. It was inspired by a quilt on a calendar I had in 2004 or 2005, but unfortunately I did not save the inspiration. If anyone recognizes where I got this design, please let me know so I can give proper credit.

The fabrics are all Kona cotton because for many, many years that was the only choice in solids.  

Quilt Stats

Design source: unknown, but it came from a calendar

Finished size: 42.5″ x 43″

Pieced and quilted by me, 2005

Summertime Quilt

This quilt was inspired by all the fun text prints I have collected and also by the desire to make something new as a sample for teaching curved piecing.

I used batiks from stash for the colors and I love the combination.  BUT combining batik fabrics, which are lighter weight, with the printed fabrics was a bear!  I do not recommend it.  Ordinarily this block is fairly easy to piece, but this combination made it difficult.  Another doggone learning experience 😀

I did put in a few of my trademark tiny strips of color:

The templates I used are from Back Porch Designs.  I’ve been pleased with them  and think they are reasonably priced.  This is not an affiliate link, but you can find them here if you’re interested. The quilt block used here is a slight modification of a pattern that came with the template.

And here is the back!  Notice the cute “bubble” quilting pattern 🙂

Quilt StatsSummertime

Finished size: 47″ square

Fabric: batiks and text prints, all from stash; backing is a Windham print

Made by: me

Quilted by:  Walker Quilt Co.

More Rabbits!

After showing the Rabbits! quilt made from Debbie Maddy’s “Usagi” pattern, I lent the quilt itself to a local shop that carries the commercial version of Debbie’s Shibori-dyed fabric.  Then I decided to teach the quilt at Studio Stitch in Greensboro, so I made a second quilt using bright Grunge.

I don’t know if you can see it in the close-up below, but I did Quilt As You Go, using Marianne Haak’s method.  She has nice video tutorials on her website if you want to learn.  I found this method easier than some of the older ones, and neater than the “modern”  QAYG method recently publicized elsewhere.  As a bonus, the quilt came out nice and square!

Quilt stats: More Rabbits!

Finished size: 45″ x 45″

Pattern: “Usagi” by Debbie Maddy

Fabric: Grunge for the rabbits; fabric from stash for the sashing, border, and binding

Help from: Jerri on fabric selection

Quilted by me, using QAYG technique

Batting:  Quilter’s Dream,  Dream Green Request Loft

A Little Help From My Friends

As in, “I get by with…”  Anyway, my blogging friend Chela asked for tips on how I matched the doggone intersections in “Plaid-ish”, and several other people commented that intersections are a challenge.

Yes! There were a lot of little intersections to match–good practice!

I’m always glad to have somebody suggest a blog topic, so here we go:

It’s important to note that I learned all these techniques from other quilters, so it’s good to pass them on.

First, a little editorial comment from me.  YOU are the only judge of how exact your seams need to be.  I’ve made several quilts for the cat.  I matched my seams as well as my skills allowed, but I did NOT take any out and re-do them.

  1. Practice helps the most.  I DID say a few bad words while piecing this quilt with orange squares that finished 3/4″, but it was a learning experience (eek!).

    You can find the original pattern for this quilt by going to AllPeopleQuilt.com and searching for the “trail mix” pattern

  2.  That consistent 1/4″ seam is as important as you’ve always been told.  (Yada, yada.)   I like any of the devices out there to help sew an accurate quarter inch seam, including the foot with the little guide on it and a variety of things you can stick to the surface of the machine bed.  Most of us have this one mastered.

    My tool to help with 1/4″ seam has been around so long the plastic is yellowed!

  3. With regard to cutting accurately, I’ve been told several times not to use the lines on my cutting mat because they are less accurate (being wider) than those on the ruler.  Sometimes I do, sometimes I don’t.  If I ever get SO accomplished that the little difference in using the cutting mat to measure is what’s throwing me off, I’ll change 🙂
  4. When I’m going to have a 4-point intersection, I press seams to the side whenever possible so that they can be nested.  This makes a big difference in aligning the intersection precisely, at least for me.

    Here are the pieces laid side by side as they will be sewn, so you can see the seams pressed in opposite directions.

  5. I learned somewhere to put the pin to the side of the intersection that will be sewn second so that the foot is pushing the intersection together.  It is the opposite of what I was doing, and it seems to work.
  6. Even more important, Cindy Williams told me to always sew in the direction shown by the arrow (above) so that the seams are pushed together rather than apart as you sew.  That one really does help (thanks, Cindy!).  If the piece is small enough, I’ll even use the opposite side of the foot when necessary to be able to sew in this direction
  7. And now the picky part, but it saves time and frustration.  If I have any doubts, I set my stitch length as long as possible and machine baste through the intersection and about 1″ on each side. Then I look.  If it matches, great; just set the stitch length back to normal and sew the entire seam. Sew right on top of the basting.  If the intersection doesn’t match, it’s quick and easy to pull that basting thread out and try again.
  8. If the problem with matching seams is that the two pieces being joined are not quite the same size, here are a few options.
    1. Take out a couple of inches of one of the seams and make it either bigger or smaller, depending, and then taper your stitching back into the original seam line an inch or two down from the end where you started.
    2. If the difference isn’t too much, pin well and then sew with the longer piece on the bottom.  The feed dogs sometimes can “ease in” a section that is a bit too big.
  9. Finally, I choose my limits.  Sure these points match, but I really don’t plan on making another quilt that requires bringing 6 seams together any time soon!

Please feel free to email me with questions. And thanks to Chela and others for the idea for a post!


My 2020 Workshops and Guild Talks

I have updated my list of workshops and guild talks, so I’m publishing it here.  Please pass along to anyone who may be looking for presenters.

Guild talks:

  1. “What is Modern Quilting?”  The Modern Quilt Guild has their own definition, but I find that there is not much new under the sun and illustrate this with slides of quilts by the Amish, Gees Bend, Gwen Marston, and others, as well as many quilts shown at QuiltCon, the Modern Quilt Guild’s annual conference.
  2.  “Improvisational Quilting”  I illustrate this with many quilts of my own and have a post on my blog that goes with the presentation for those who want to try improvising.  Here’s the link for the post:  https://zippyquilts.blog/2019/11/03/improvising/I also have three improvisation workshops, two beginner and one advanced.

Workshops:

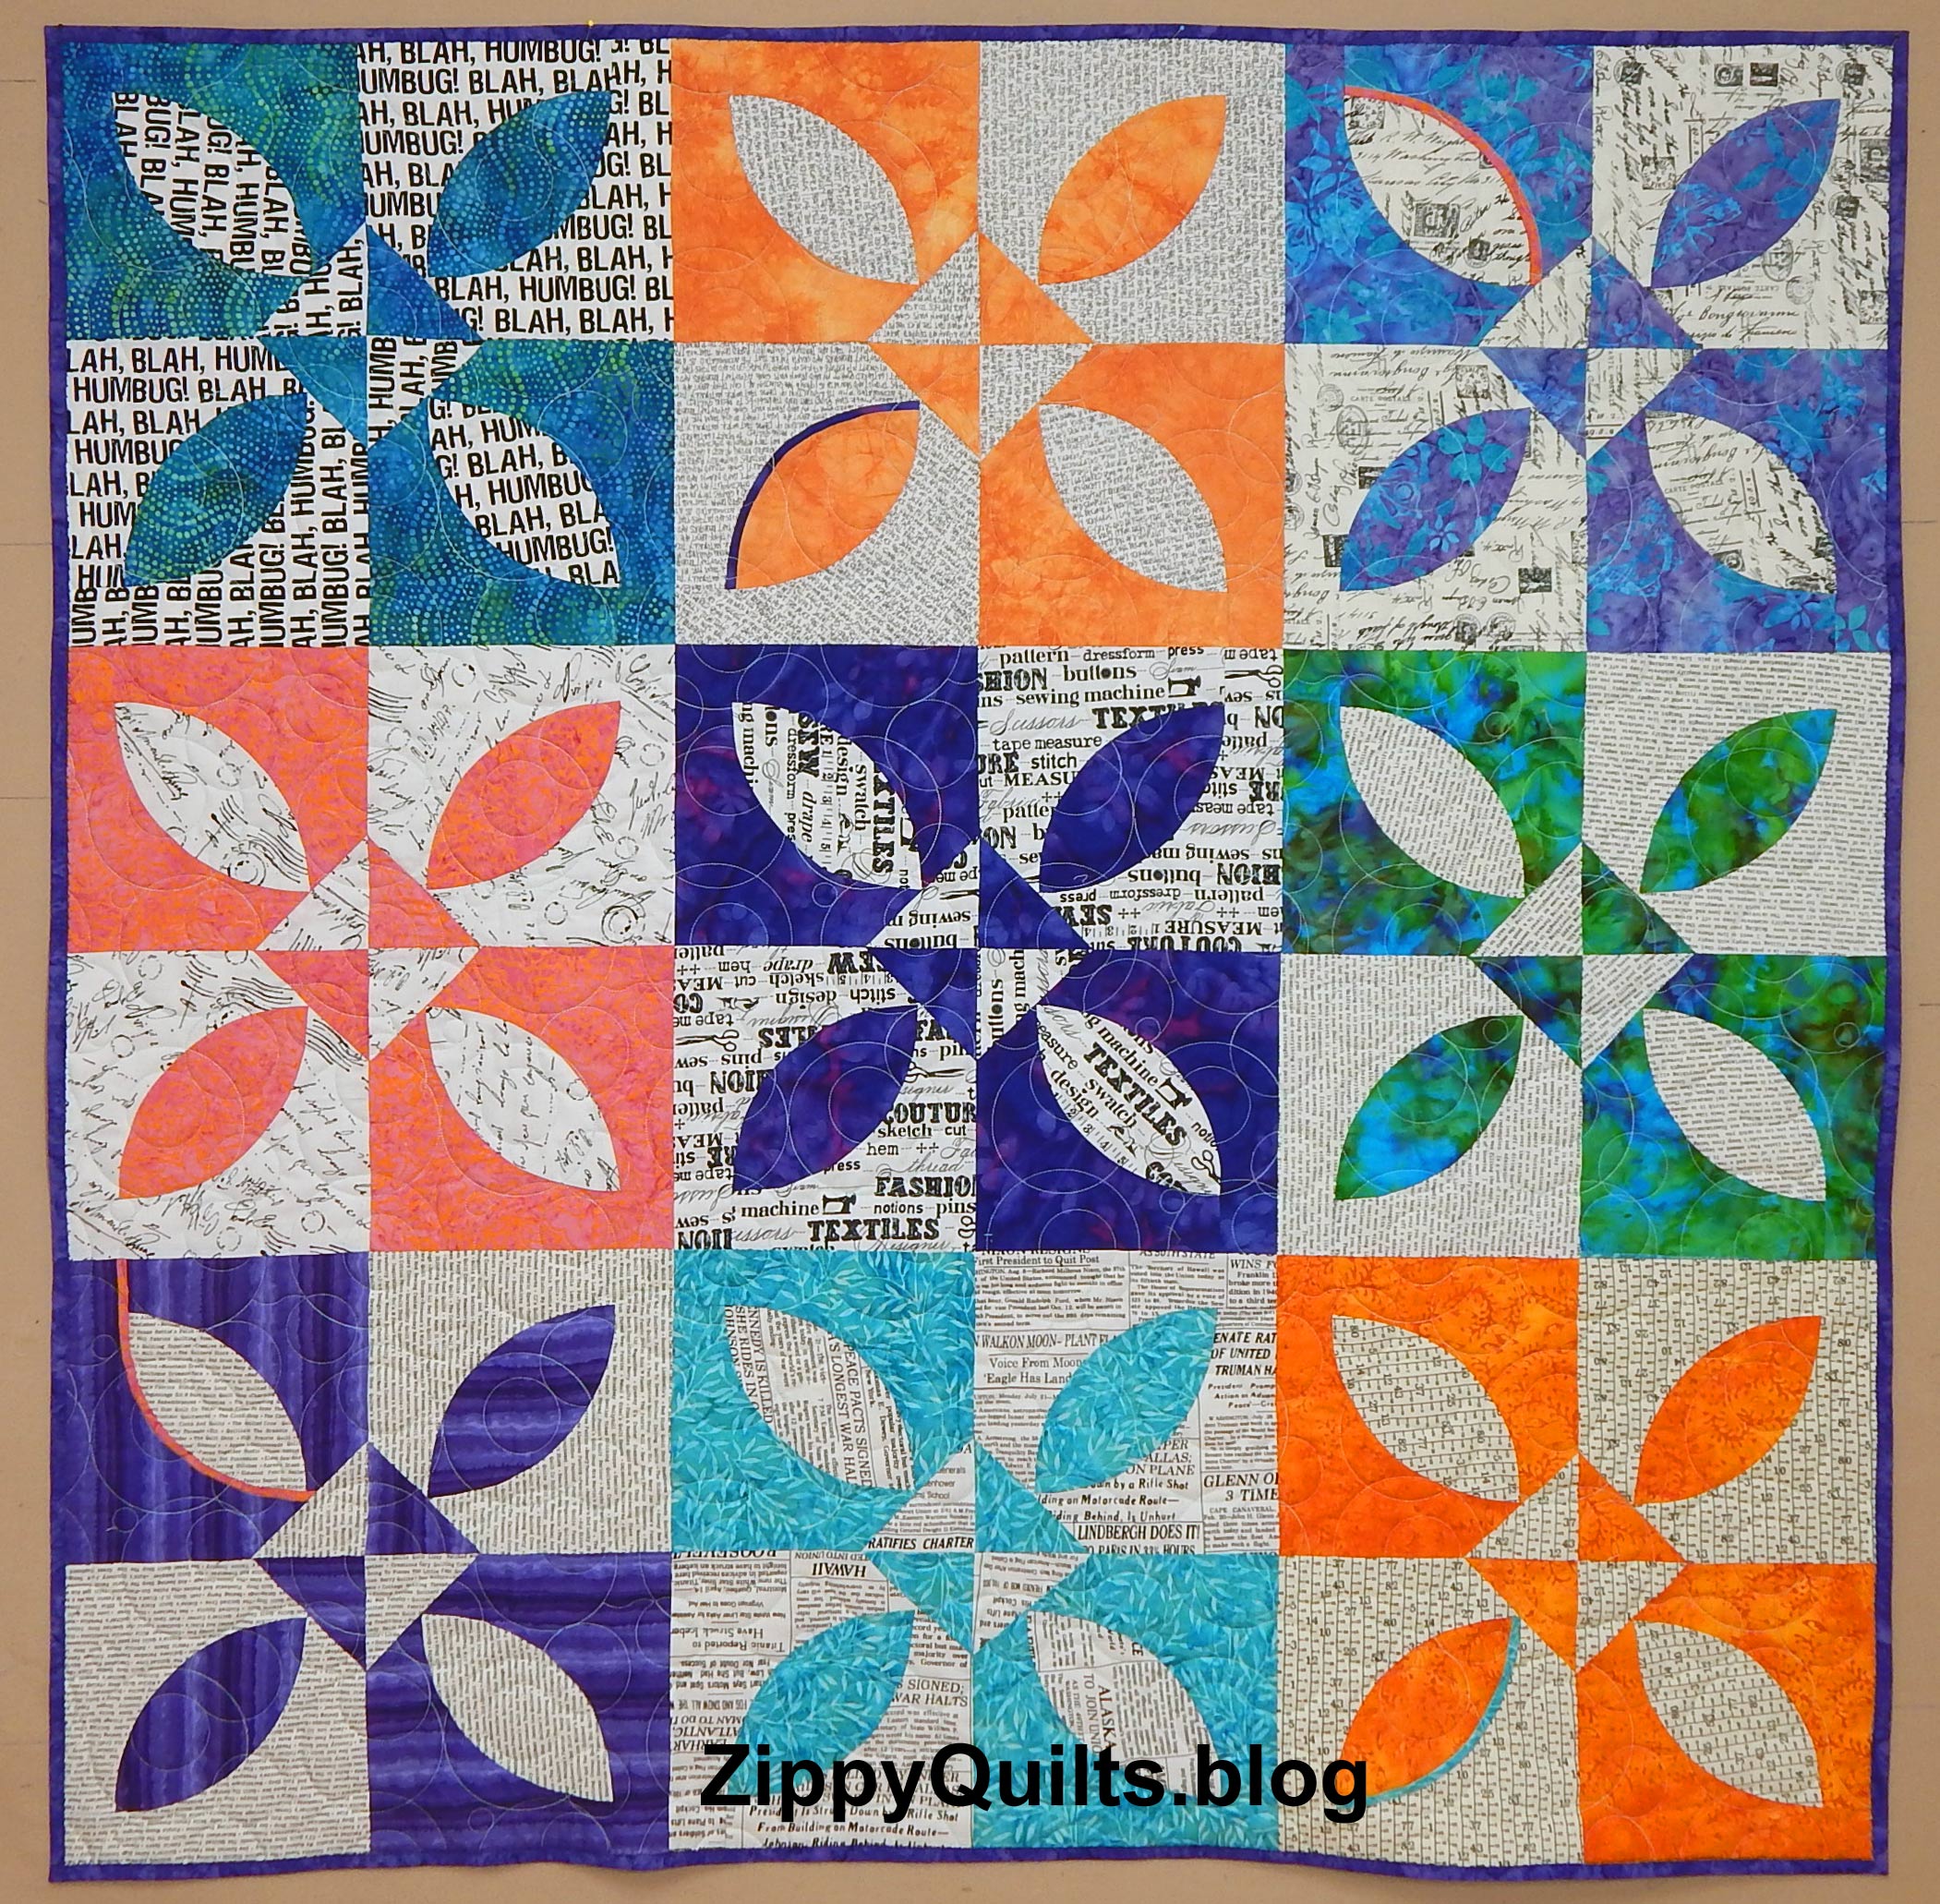
YOW! Learn 3 Ways to Piece Curves  (6 hours)

In this class you will make lively quarter circle blocks that can be assembled in multiple ways depending on your preference.  Three different methods for piecing the curves will be taught, so you can try them all and decide what works best for you.  This quilt can be very traditional (think Drunkard’s Path) or very modern depending on your color choices and how you want to arrange the blocks.  There is no pattern for this class, but the supply list does include templates.

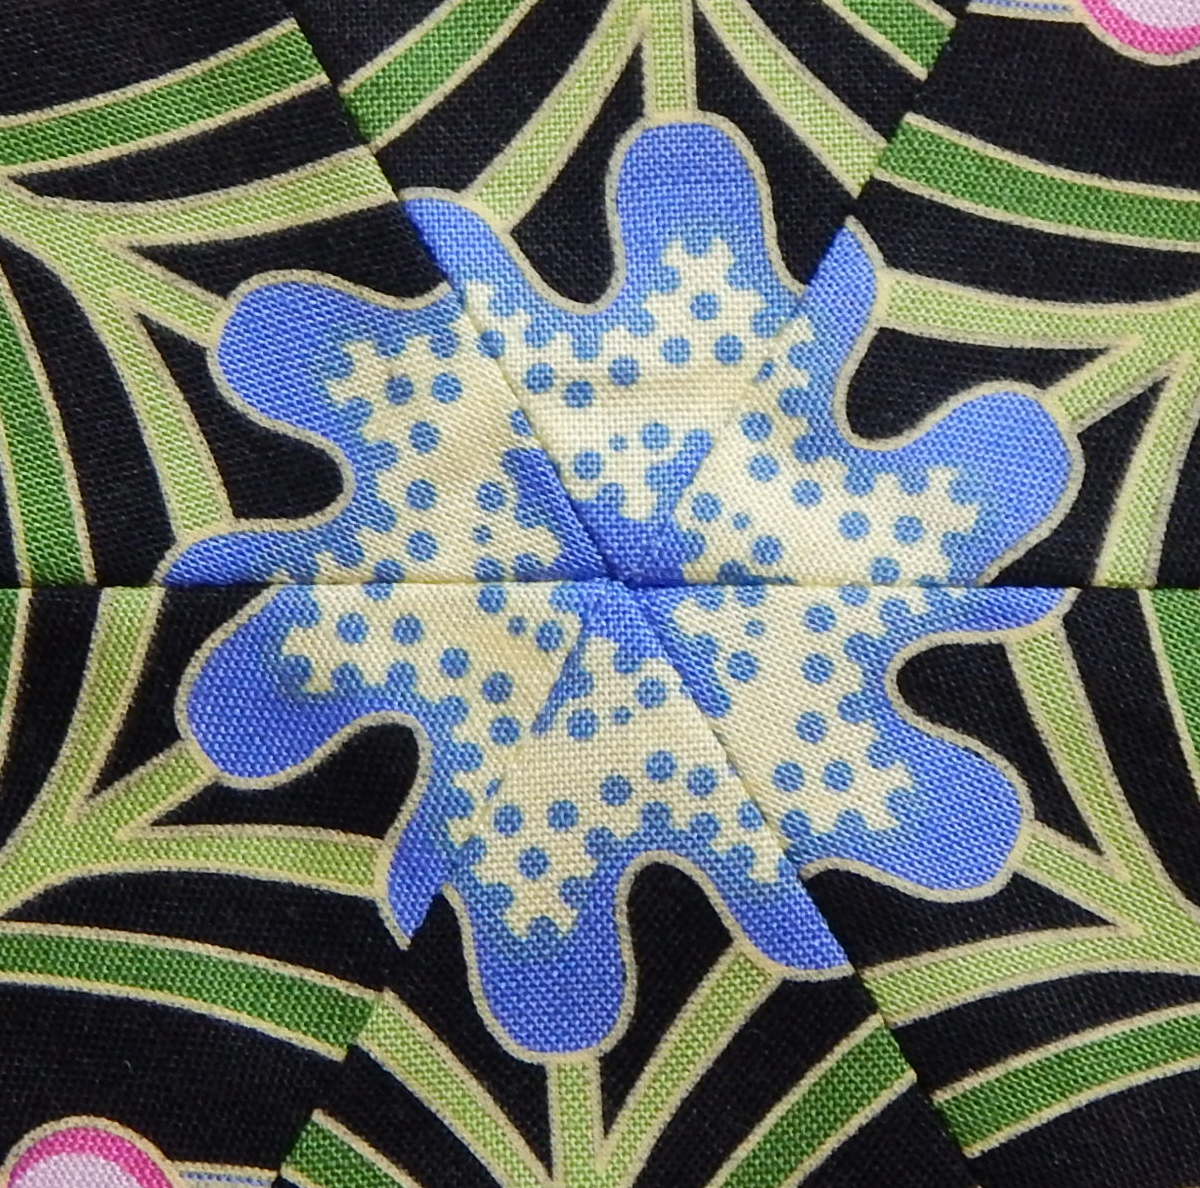
——————————————————————————————————————–Intro to Improvisational Quilt Blocks  (6 hours, but can be shortened to 3 hours)
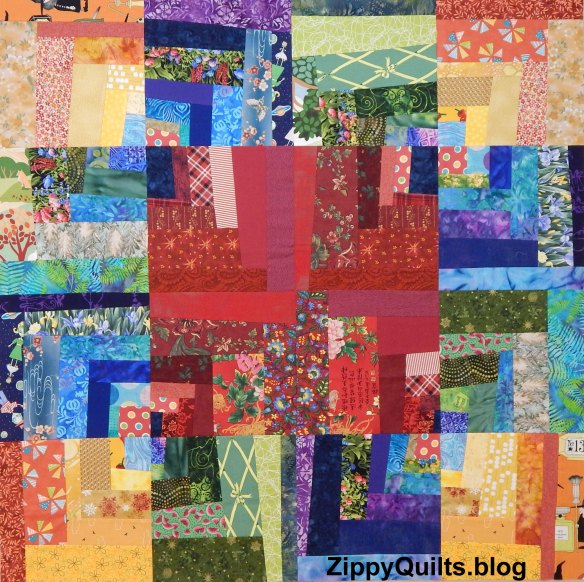
Bring your scraps and learn 3 ways to improvise quilt blocks, then consider ways to combine them into an original quilt.

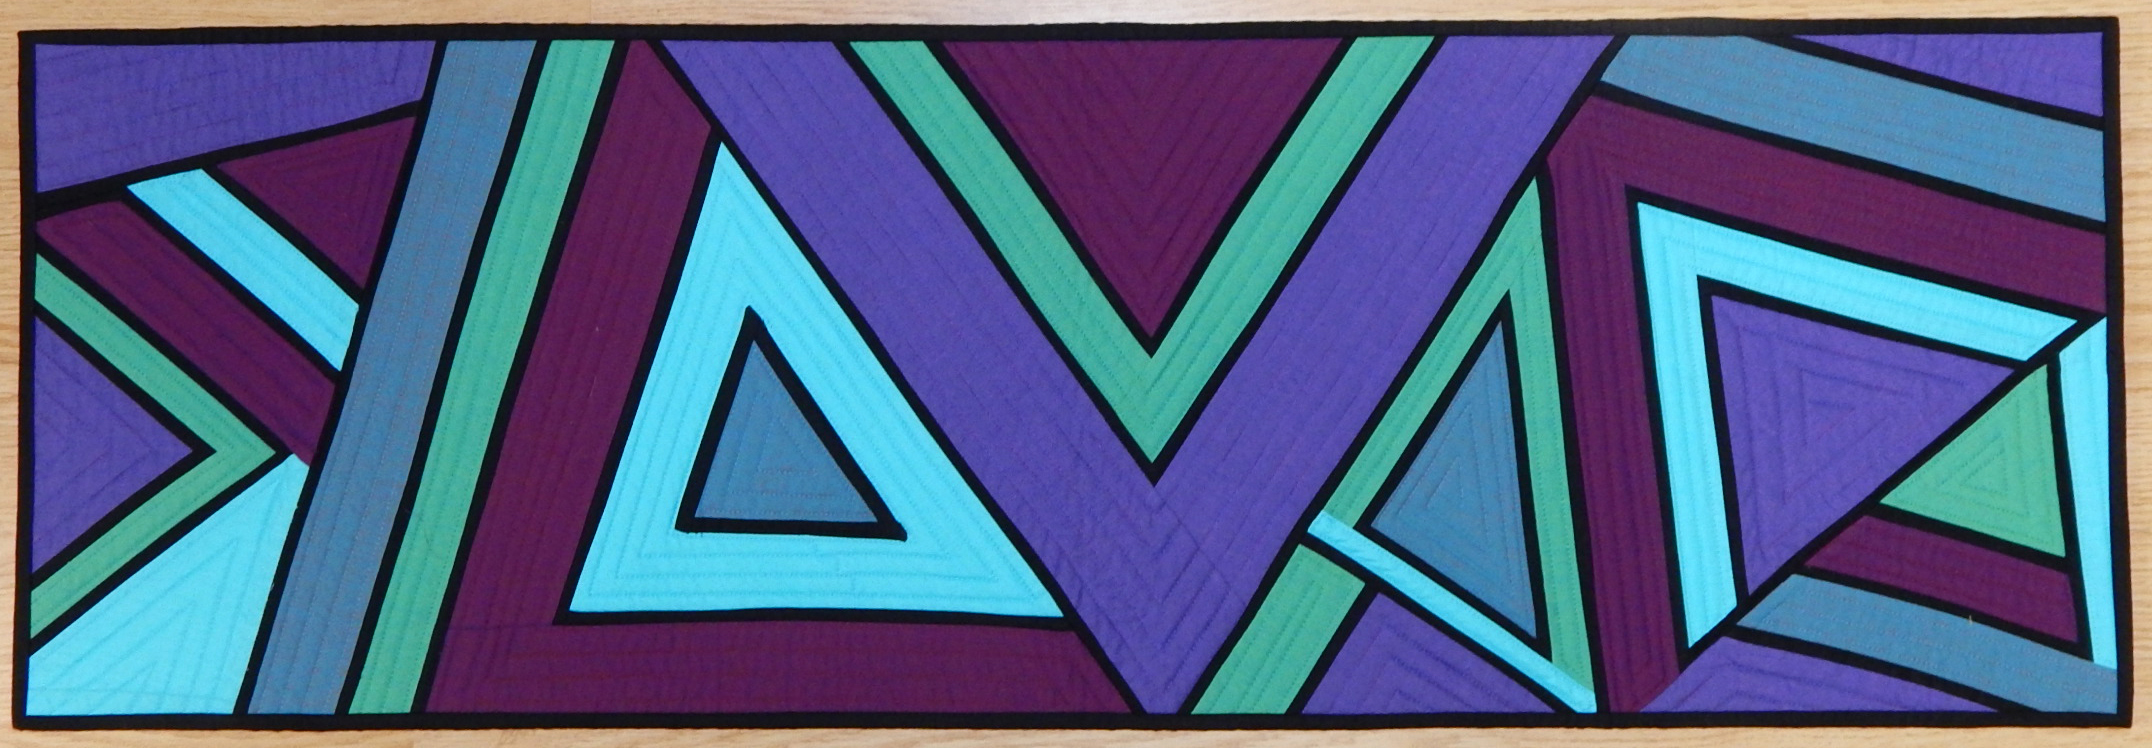
——————————————————————————————————————-Improvisational Design: Table Runner (6 hours)

This is a challenging class in which you will design your own table runner using nontraditional methods.  You will learn about choosing fabrics, designing focal points, and changing your design when you don’t like the way it’s going.  Your runner will not look like mine; it will be your own!

——————————————————————————————————————–Wonky Stars (3 hours)This is an easy introduction to improvisational design.  Bring your scraps and learn to make wonky stars and choose colors that will go well together in a small quilt.

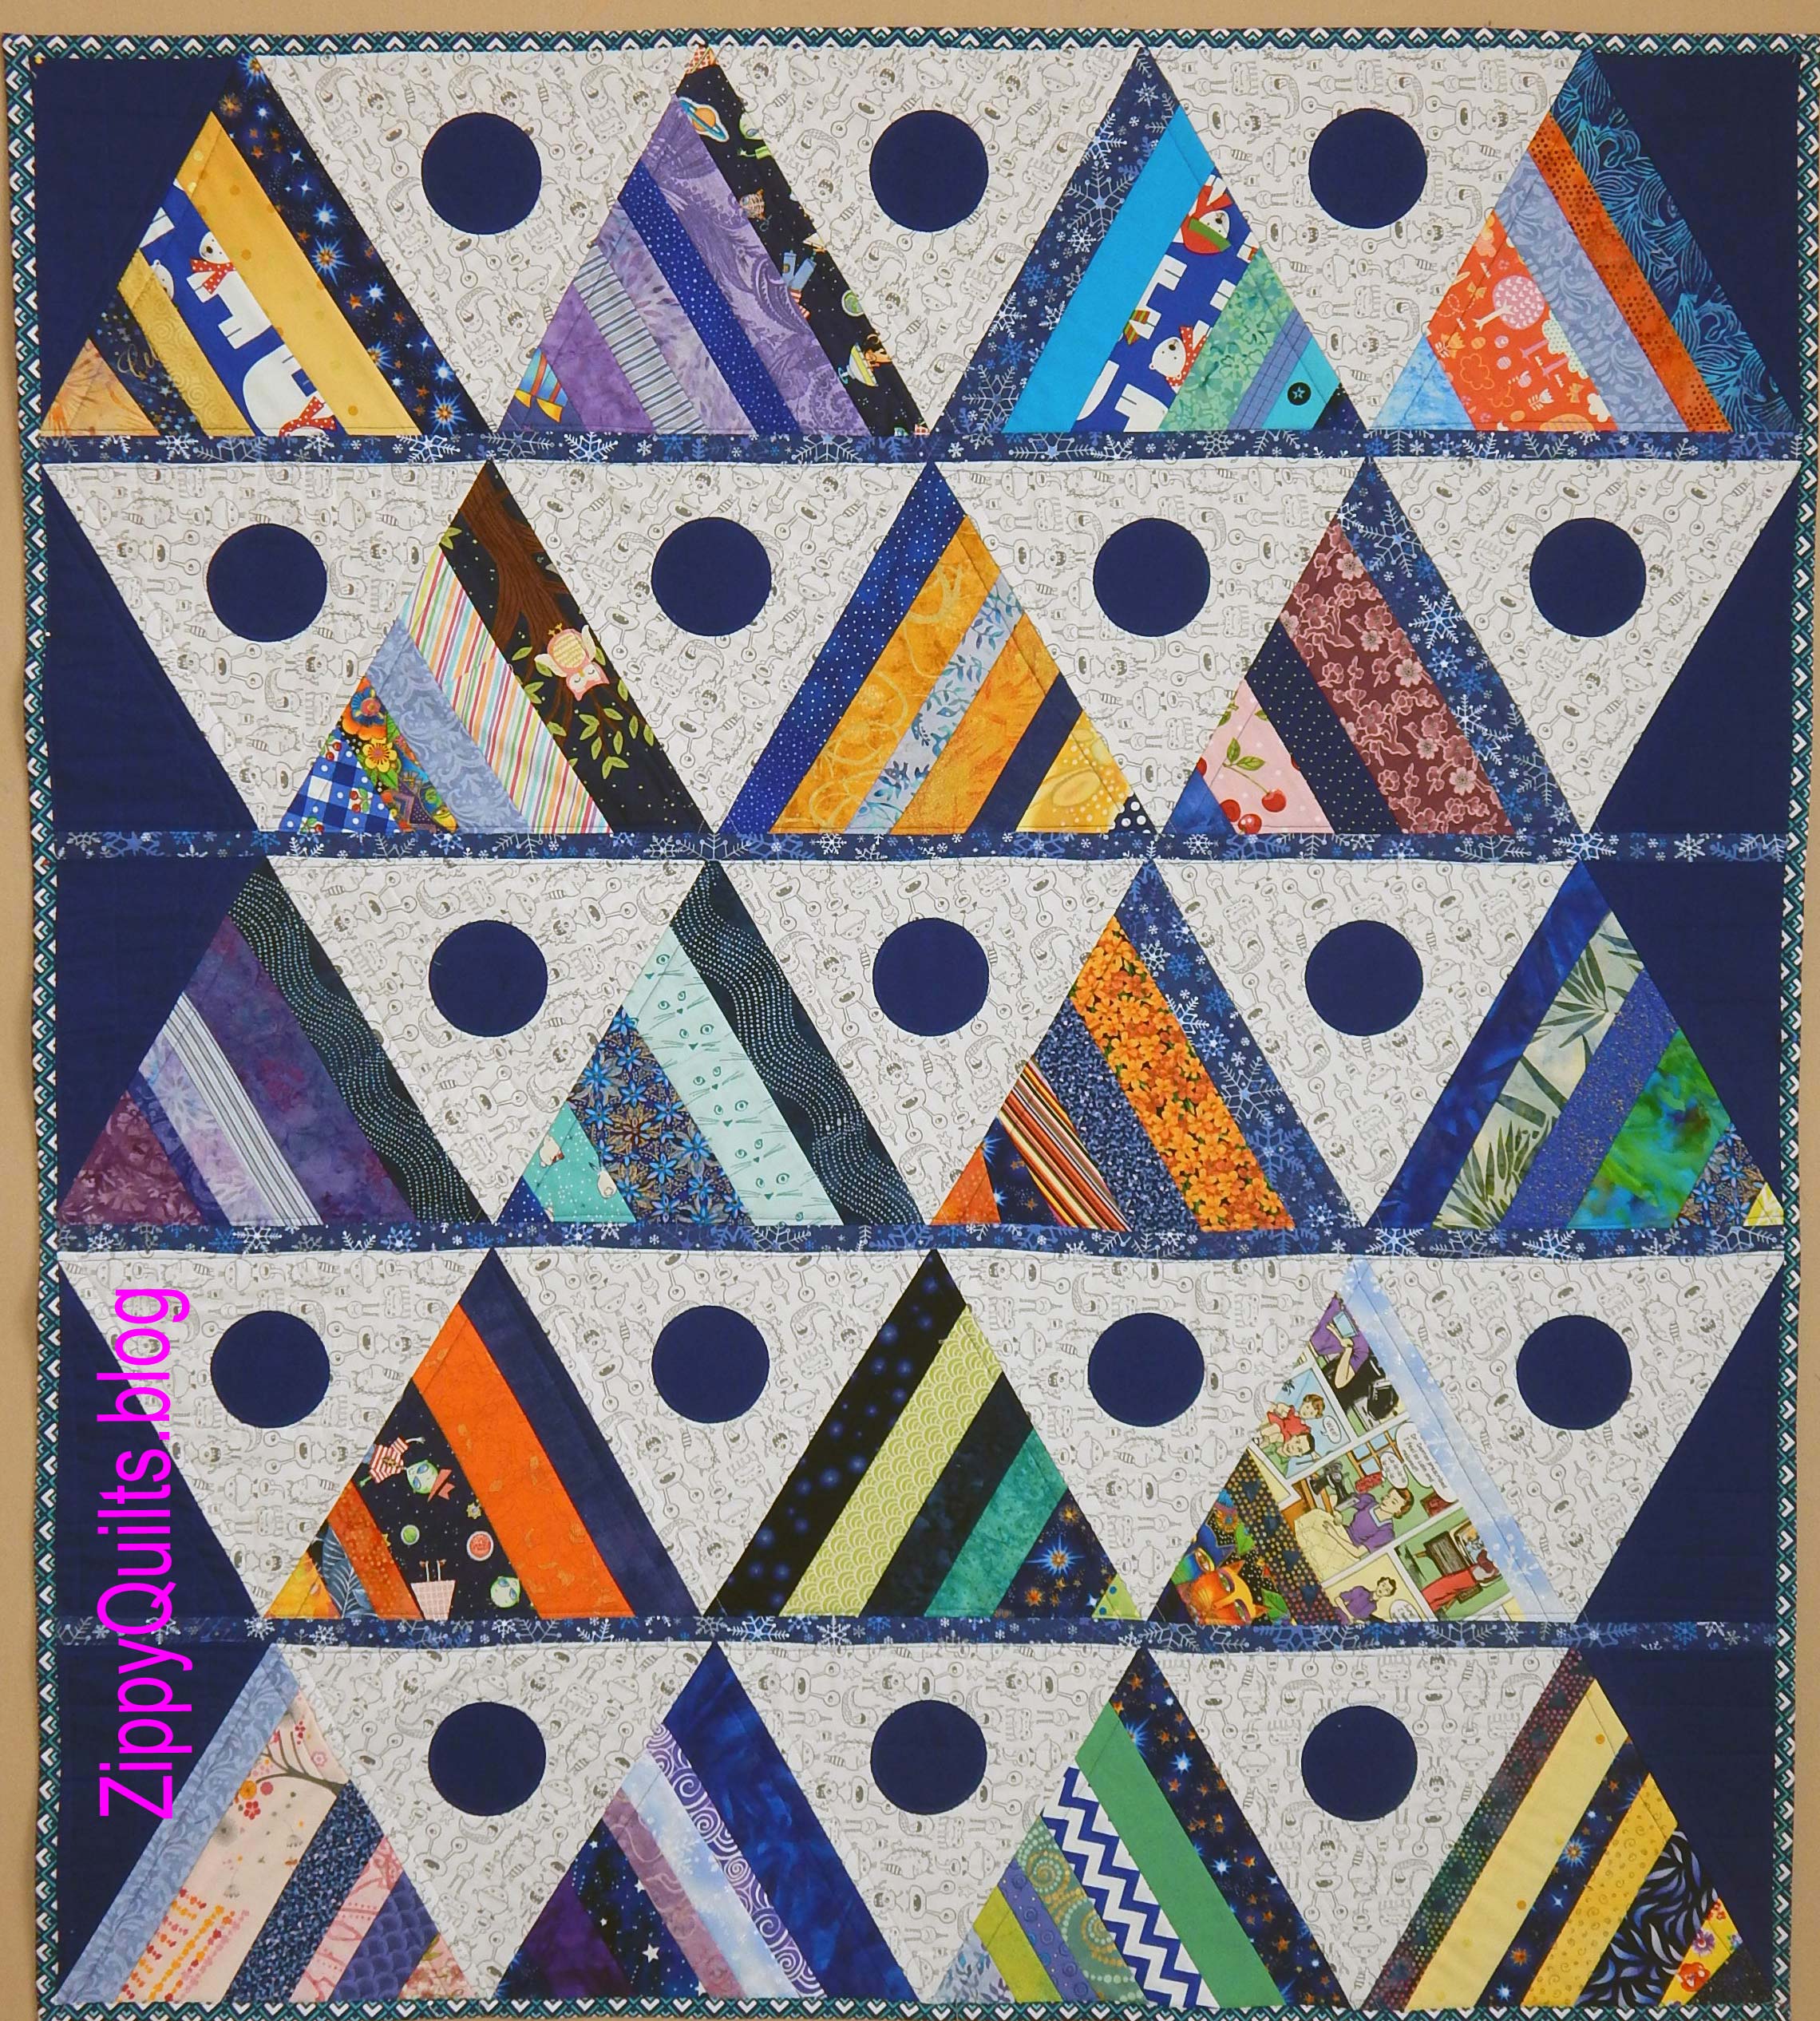
——————————————————————————————————————-Quilt-As-You-Go (QAYG) 3 Ways (6 hours)

QAYG has been around at least since the 1970s, when long arm quilting wasn’t really available.  Although we have many more options now, QAYG remains one way to quilt an entire top yourself without having to maneuver a large quilt on your domestic machine or quilt by hand.  We will learn 3 QAYG techniques in the morning, and you’ll get started with the technique you like best in the afternoon.  Make a quilt like my sample, or bring a pattern of your choice and I’ll help you figure out how to use QAYG with it.

——————————————————————————————————————–Alien Among the Stars (6 hours)

This is a fun class in which to learn how to make wonky stars and a couple of easy ways to applique the alien.  The stars can be made from bright scraps or from yardage.  The alien can be made from Kraft-Tex or from fabric.  I will discuss the pros and cons of using Kraft-Tex for applique and you can check it out on my sample before you decide what you want to do.

——————————————————————————————————————

Some of these workshops will be offered as classes at Studio Stitch in Greensboro (NC).

Any feedback on these offerings is appreciated.  Is there something I should add?  Something that’s been overworked that I should remove?

Have a good week!