A Couple of Little Quilts

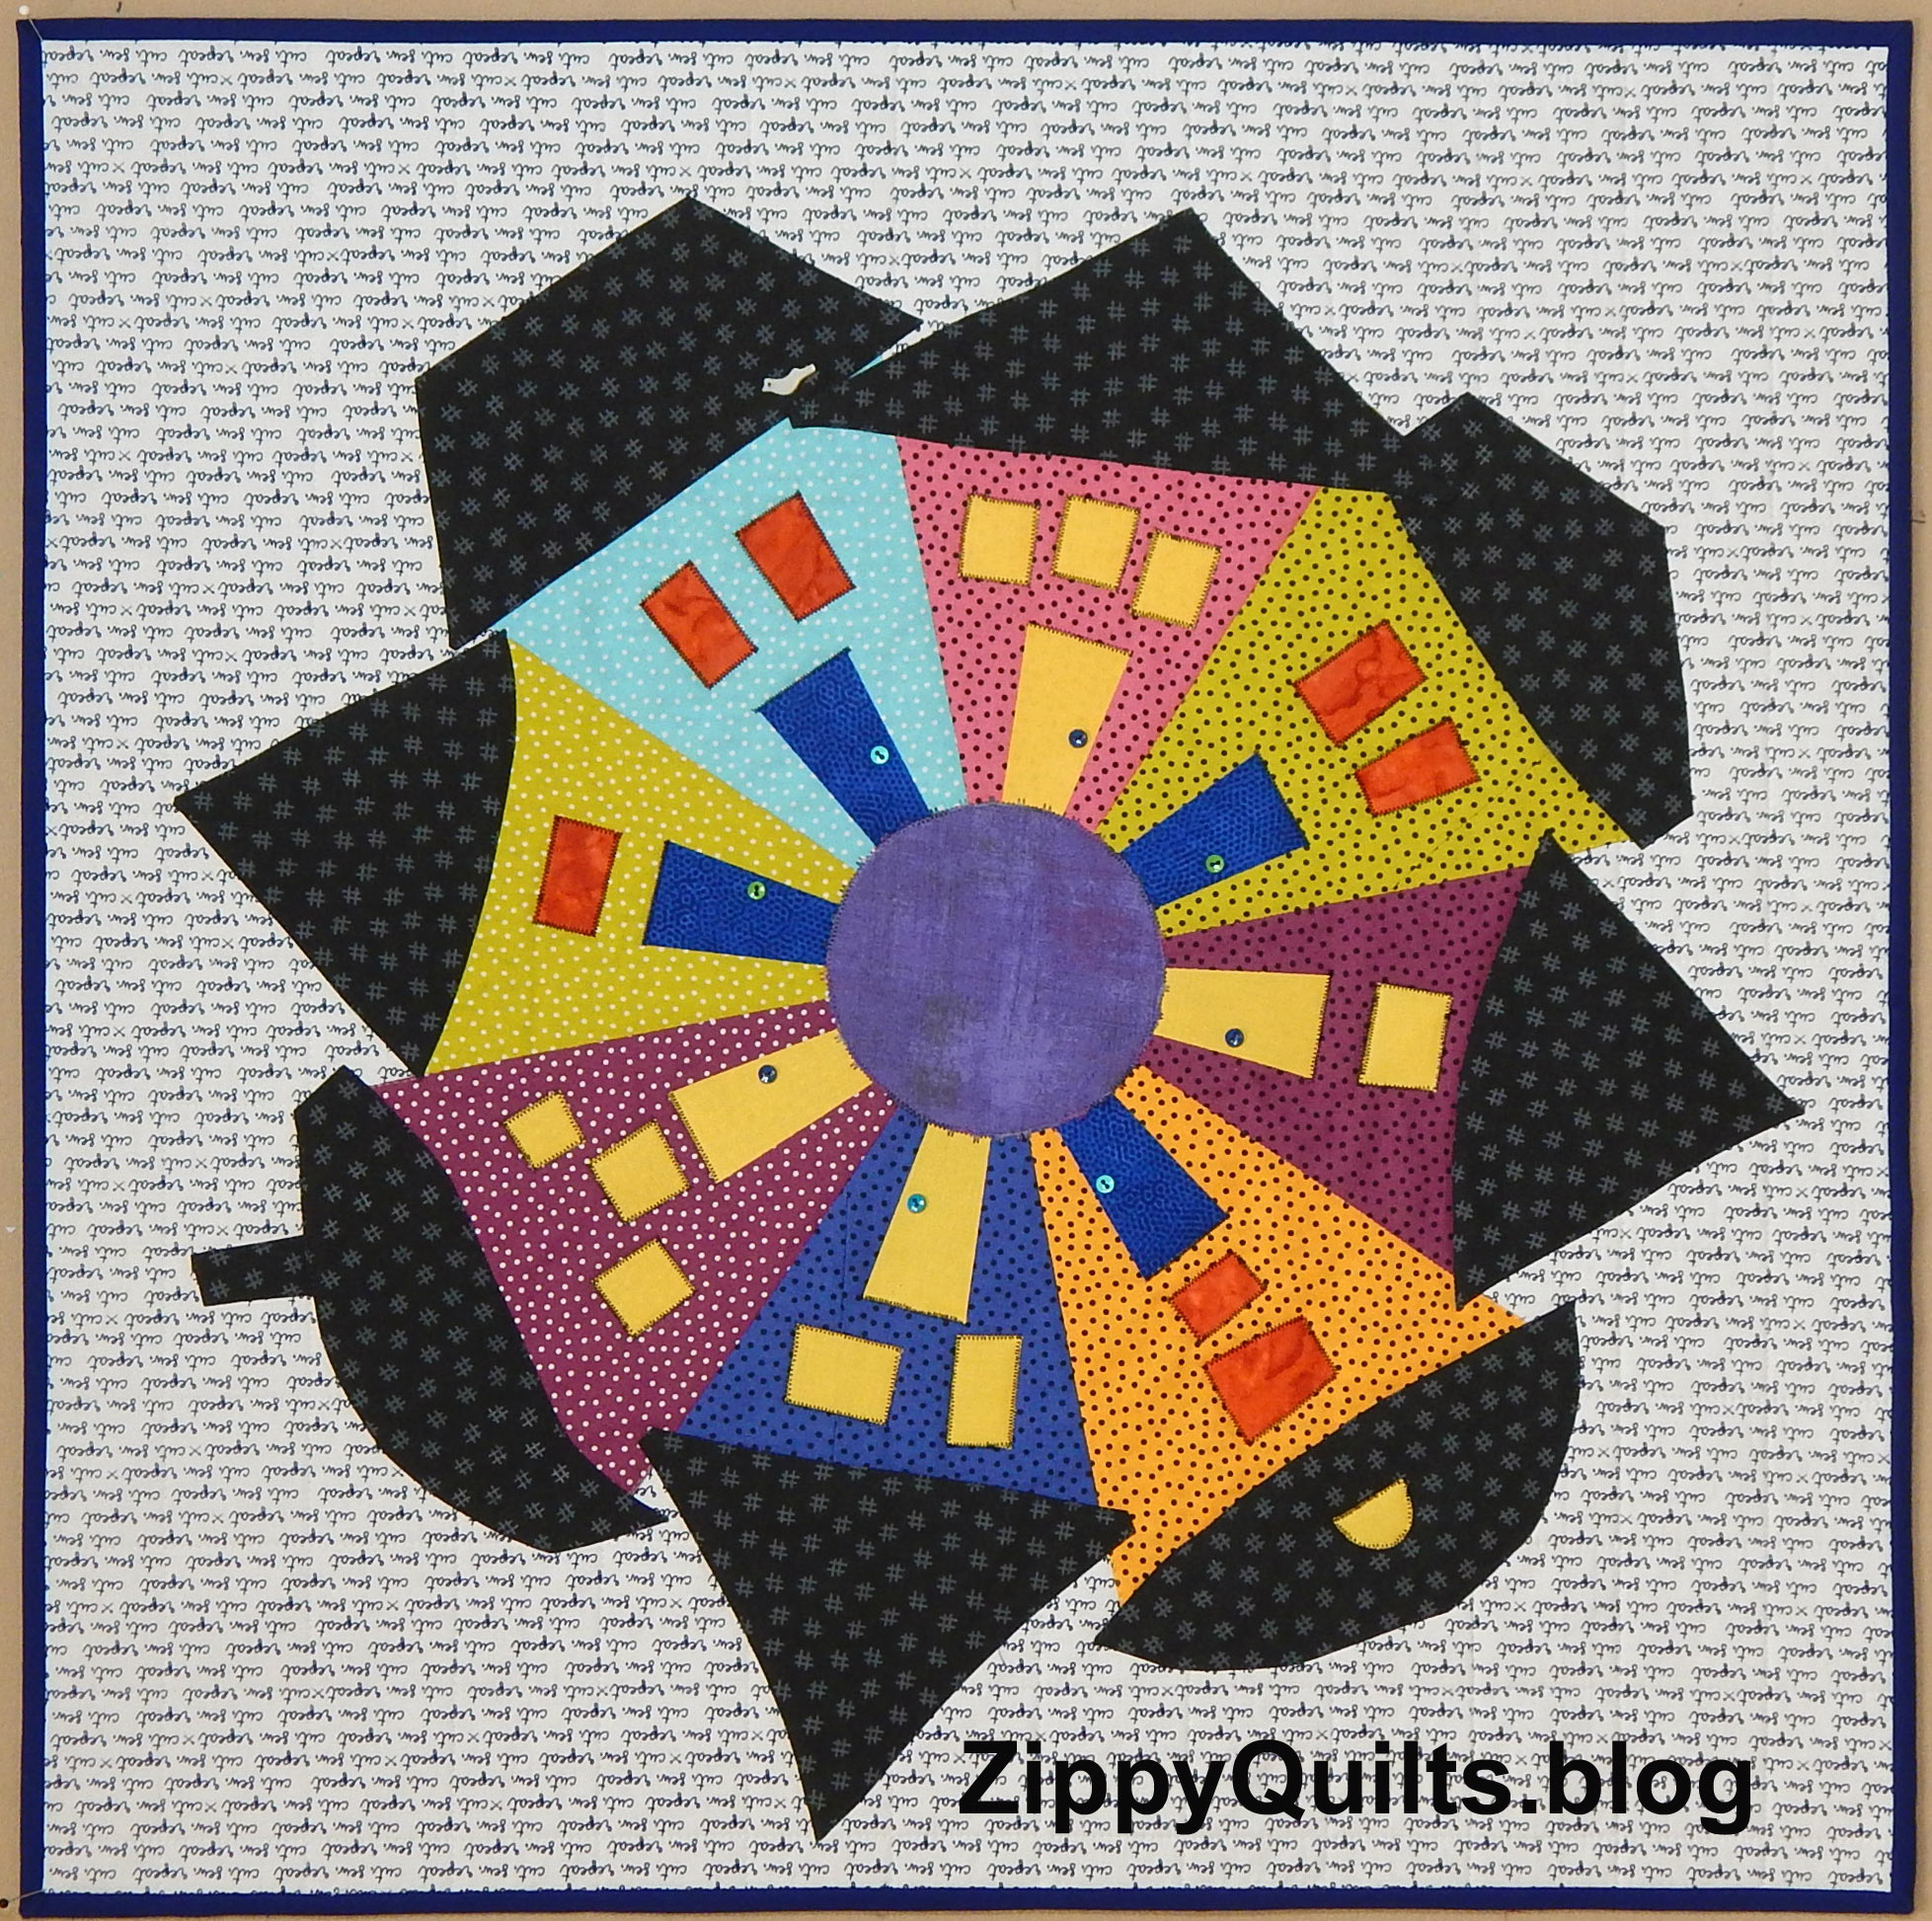
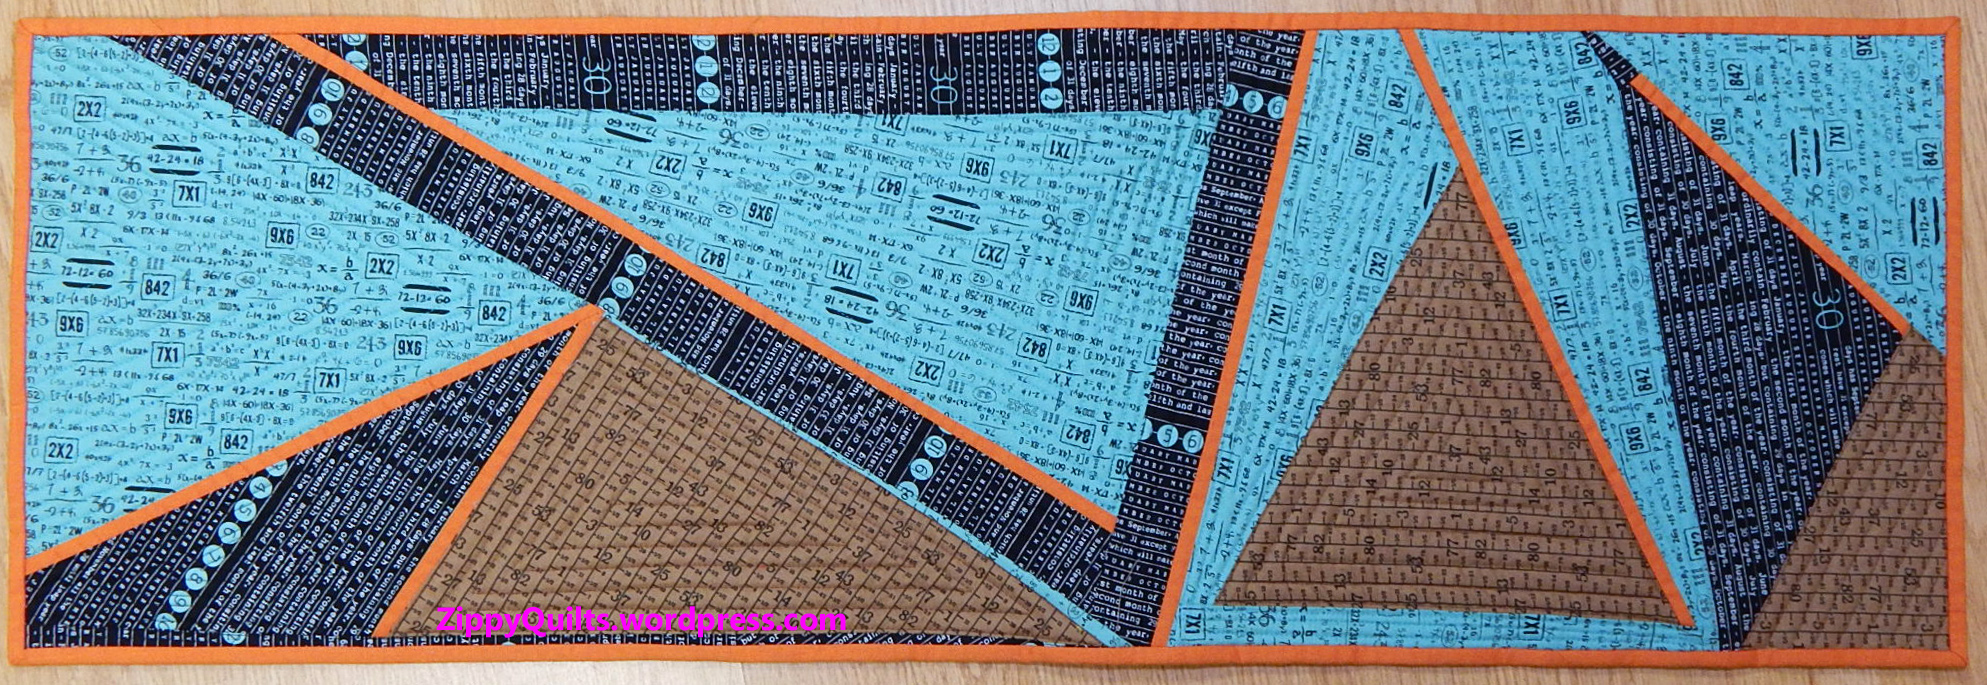
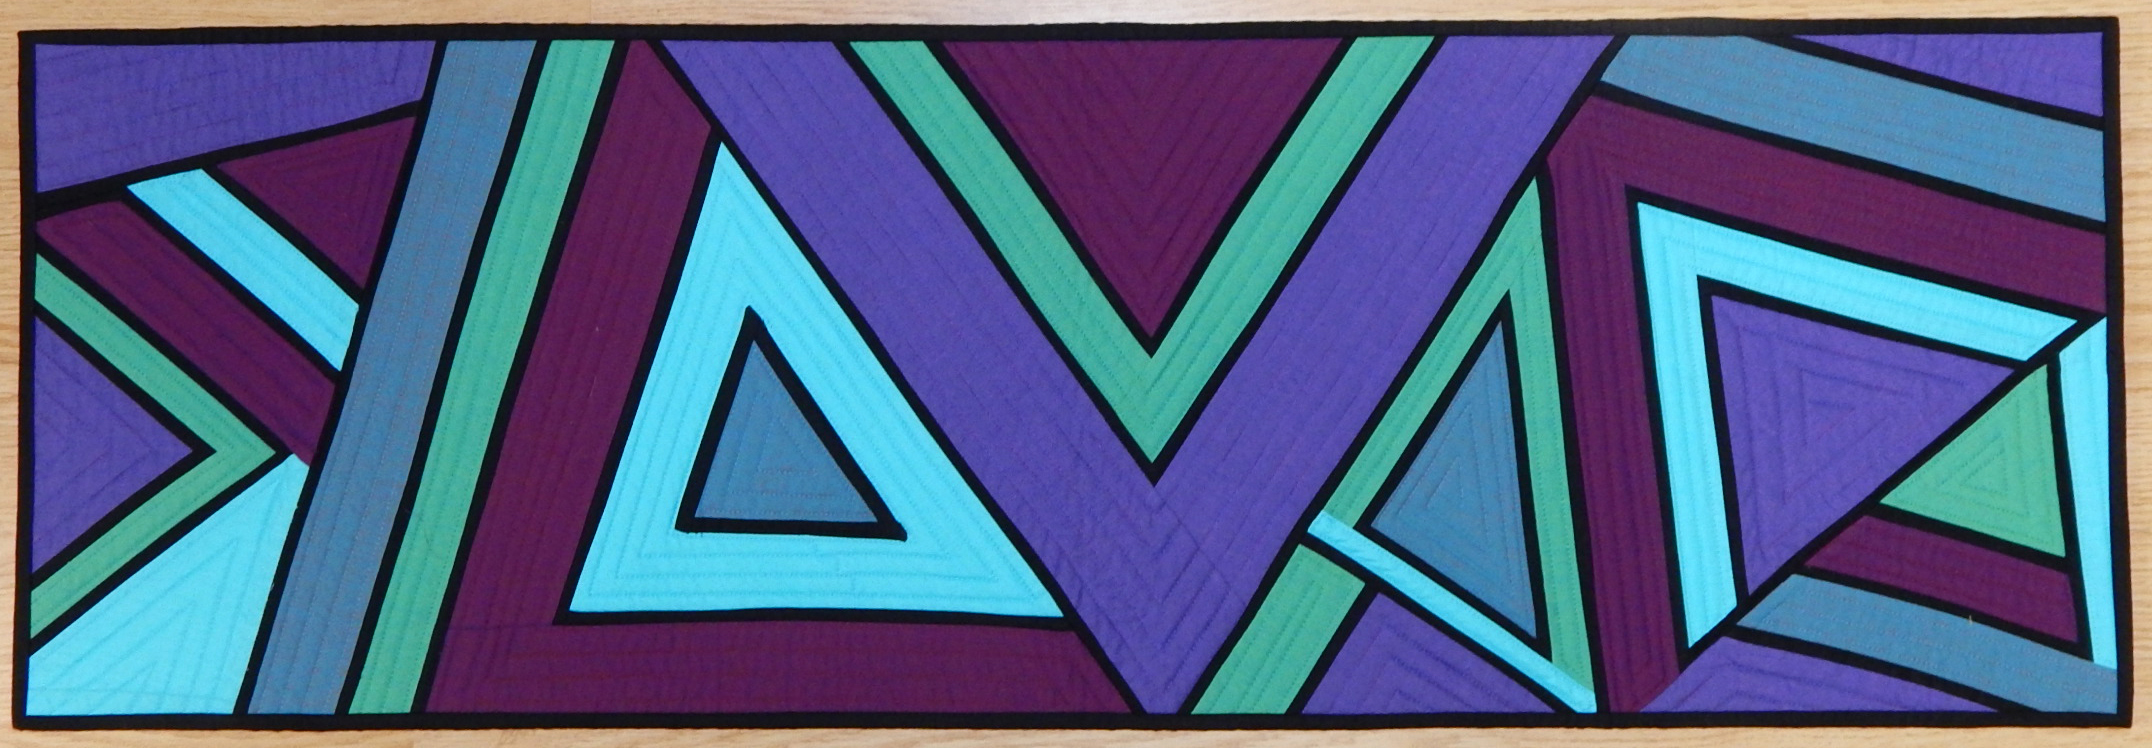
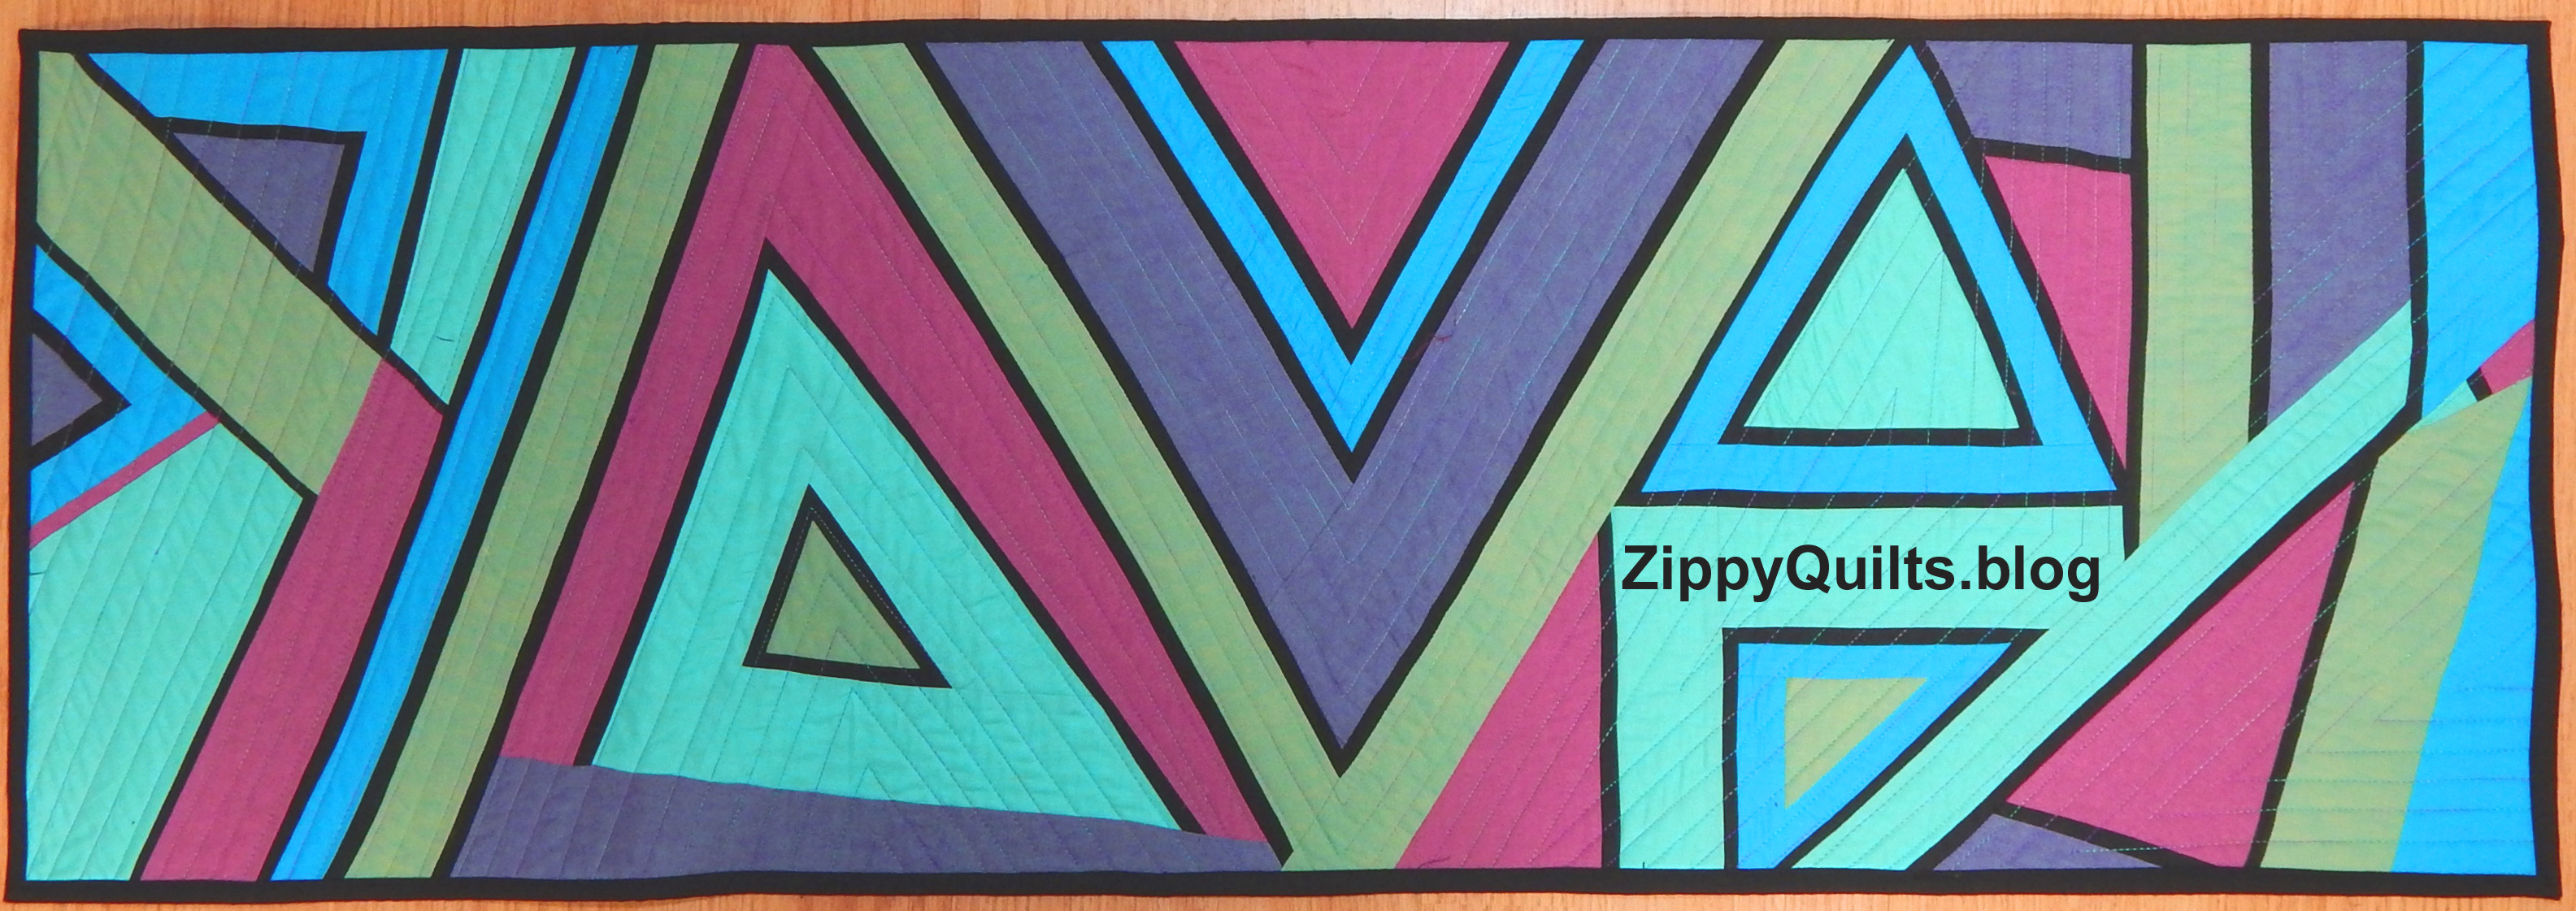
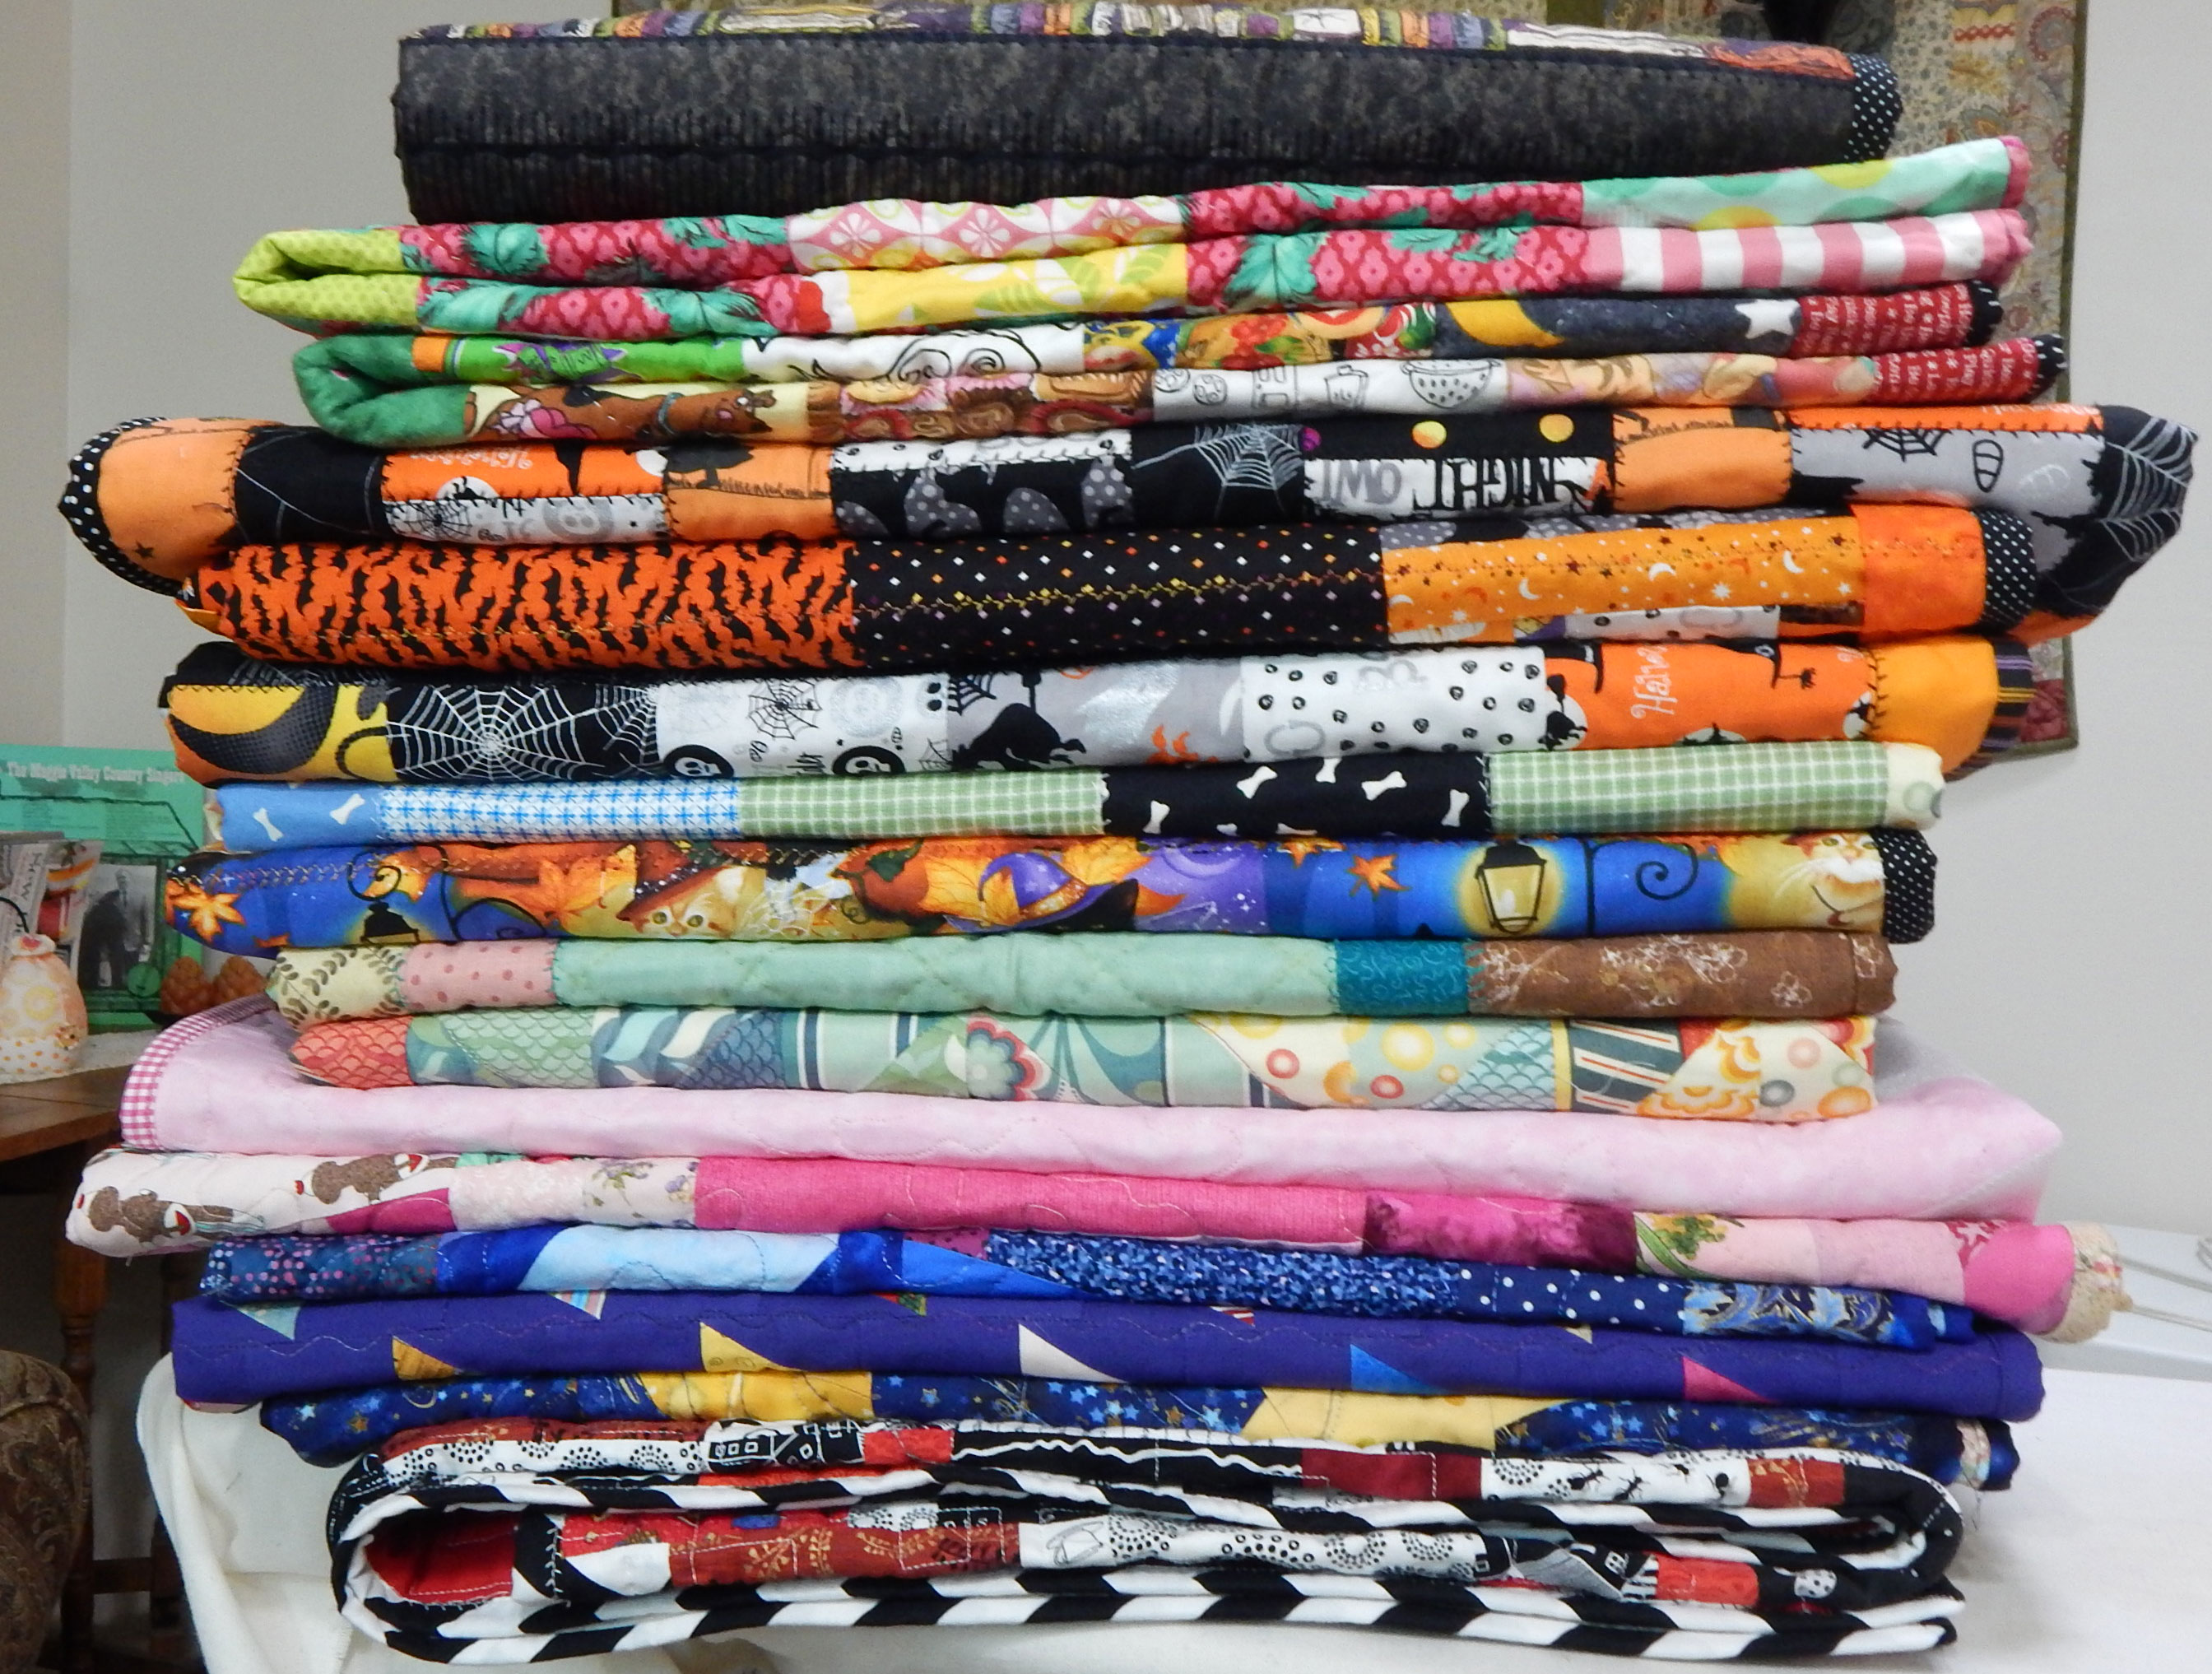
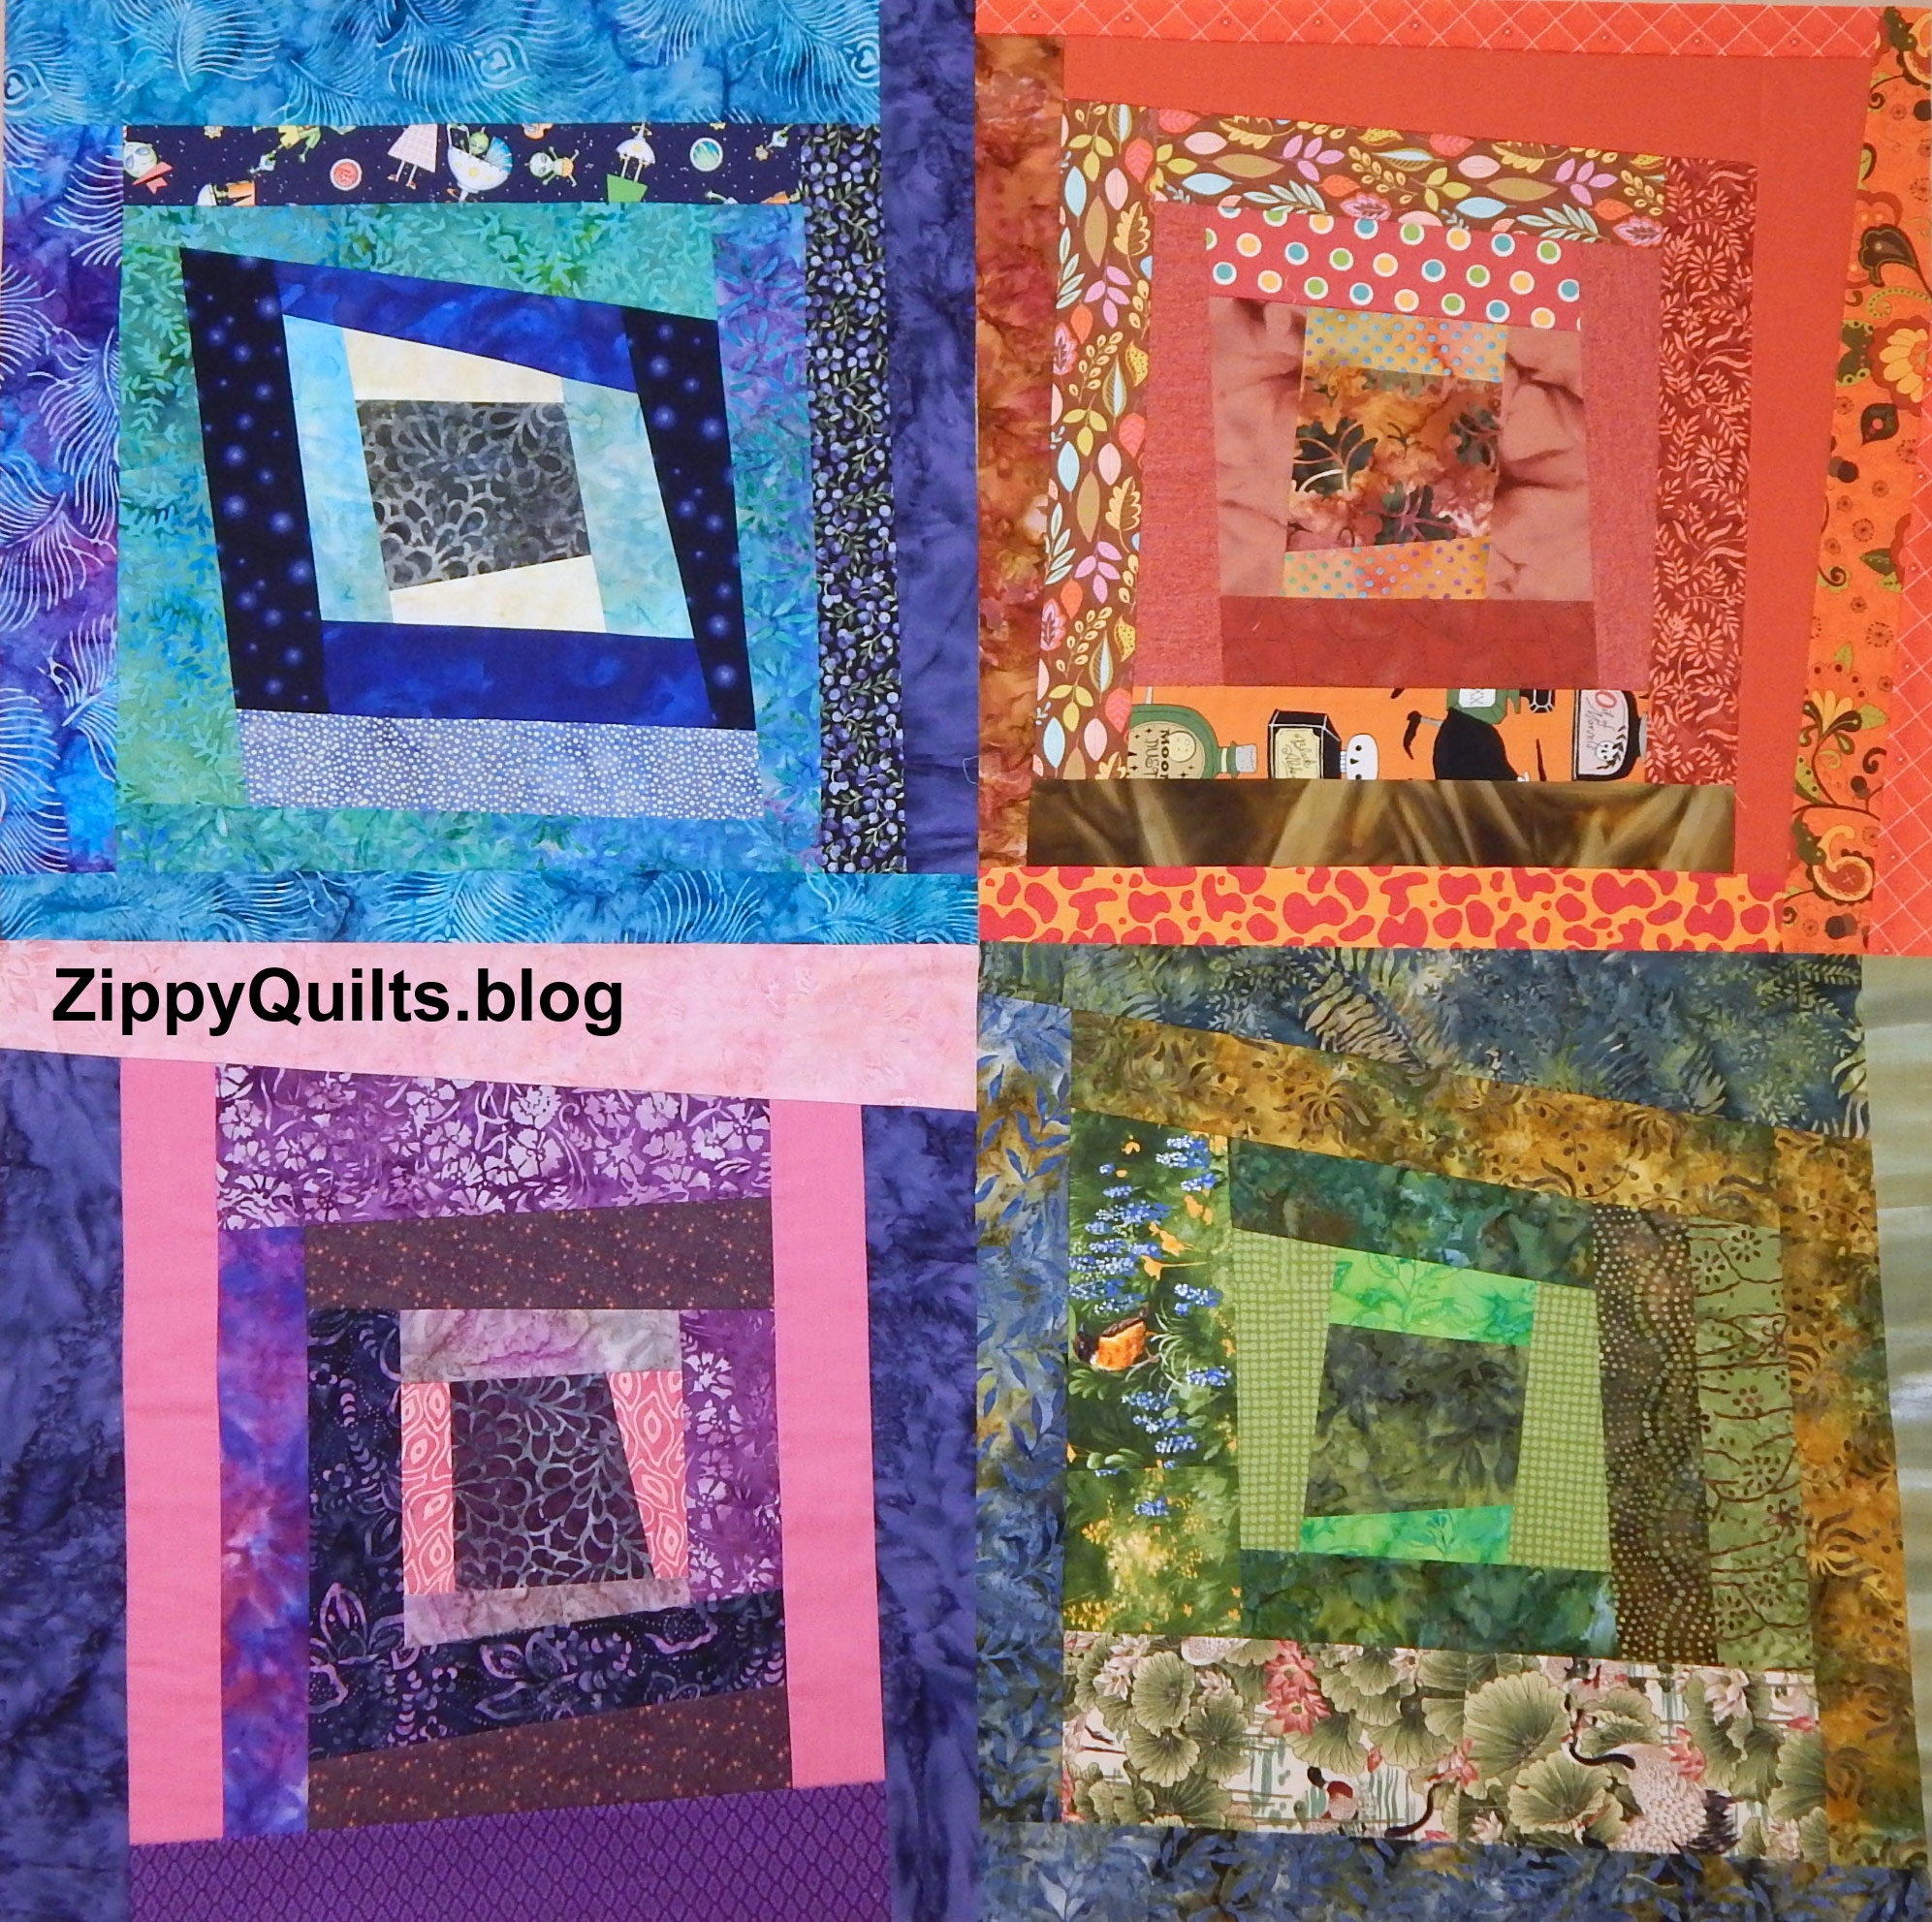
When I was going through my orphan blocks recently, I came across two blocks I wanted to finish as little art quilts.  Both were made for a contest some years ago and has since languished in the orphan bin. I’m not sure how many 12″ square quilts the world needs, but I have always liked these blocks, so I decided to finish them as little art quitls.

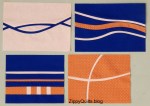
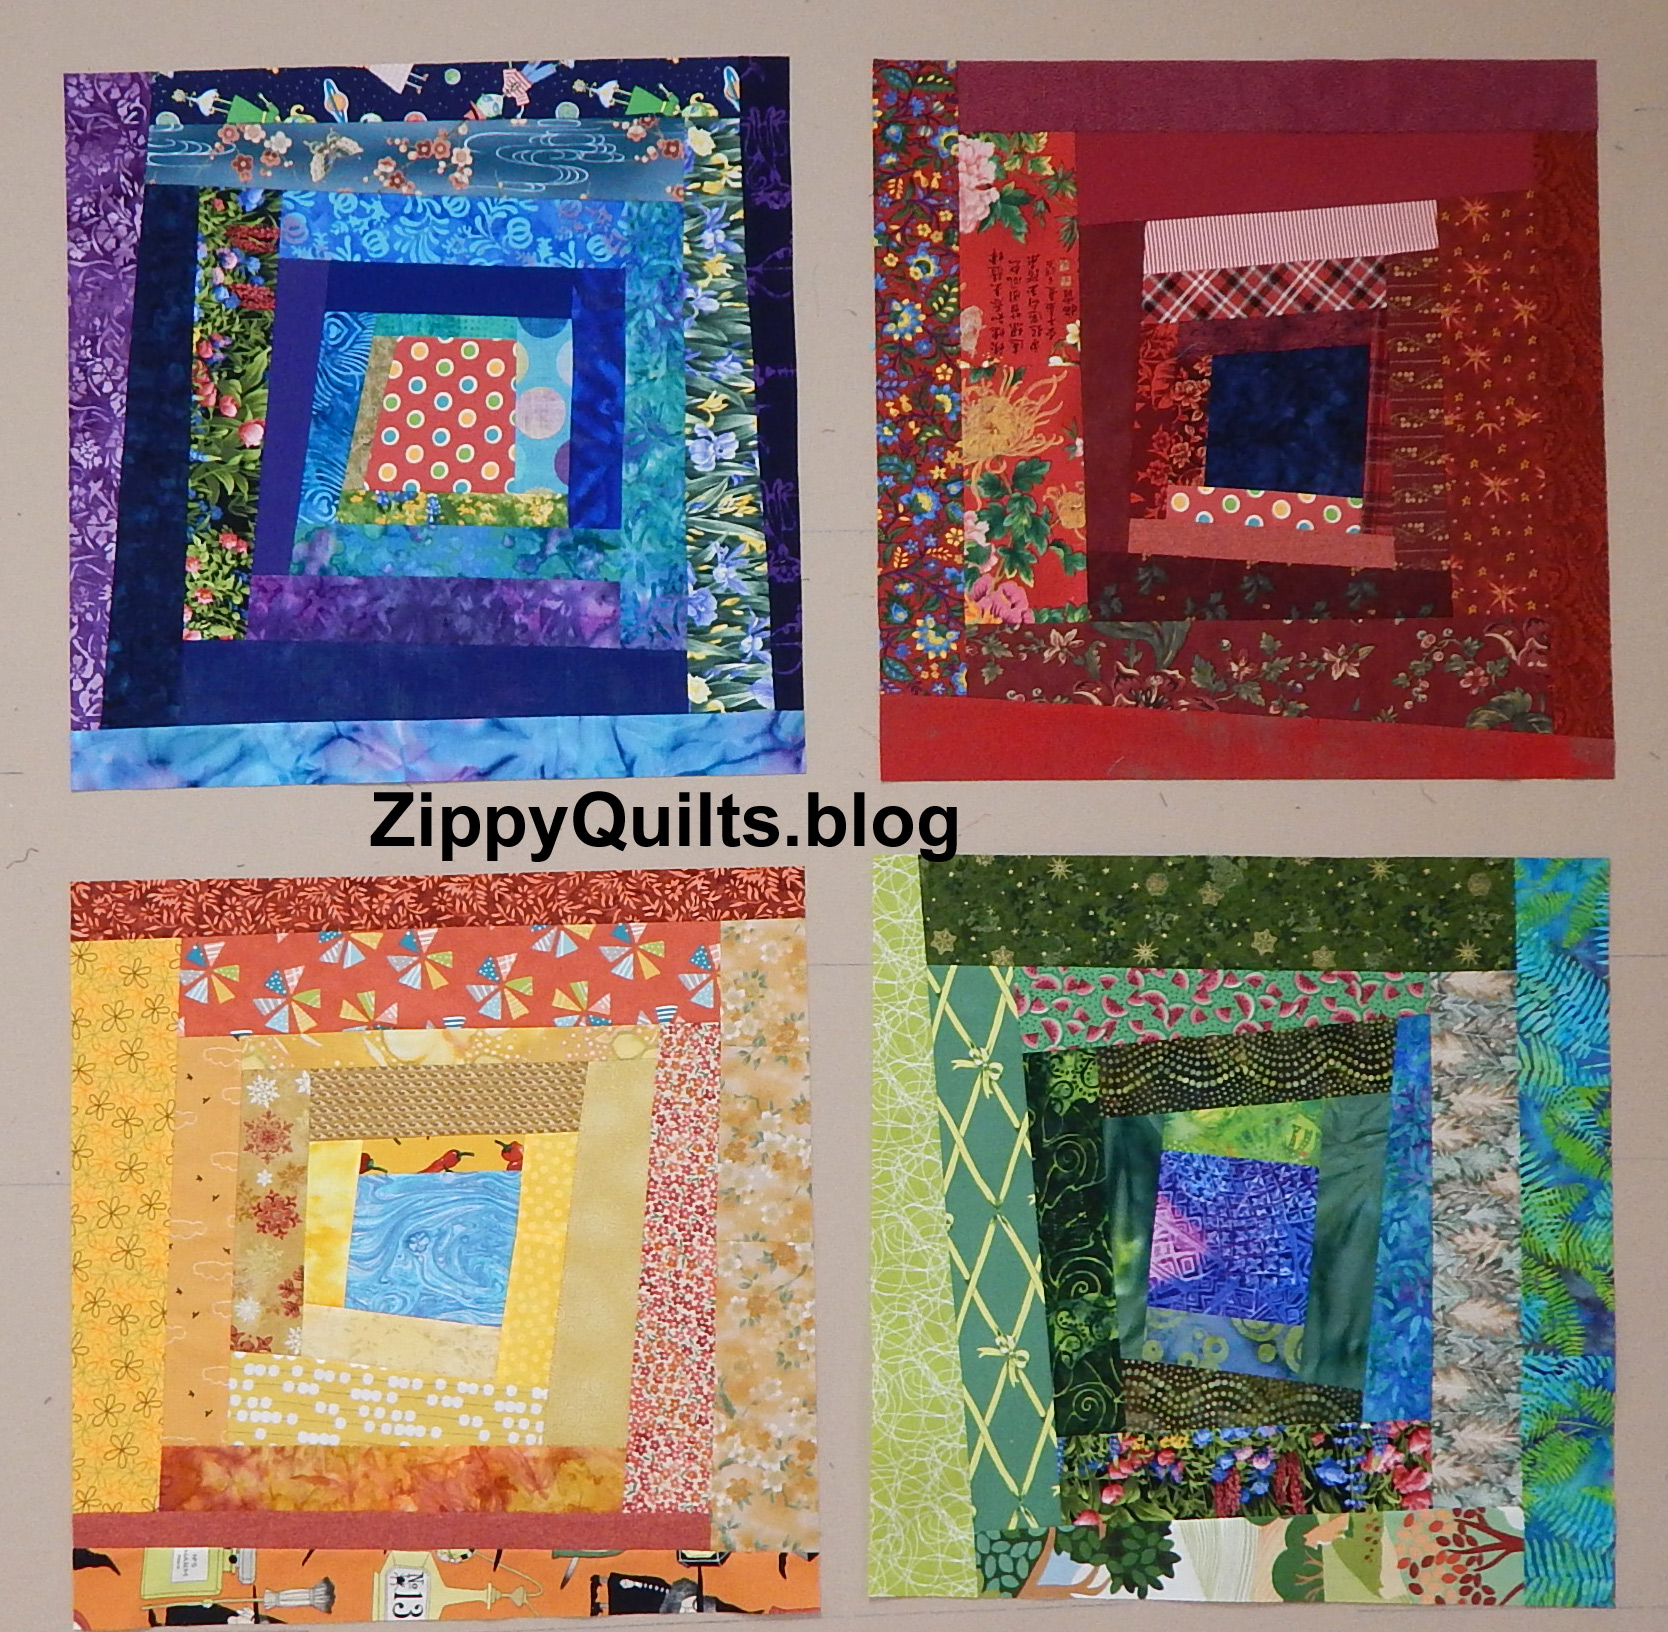
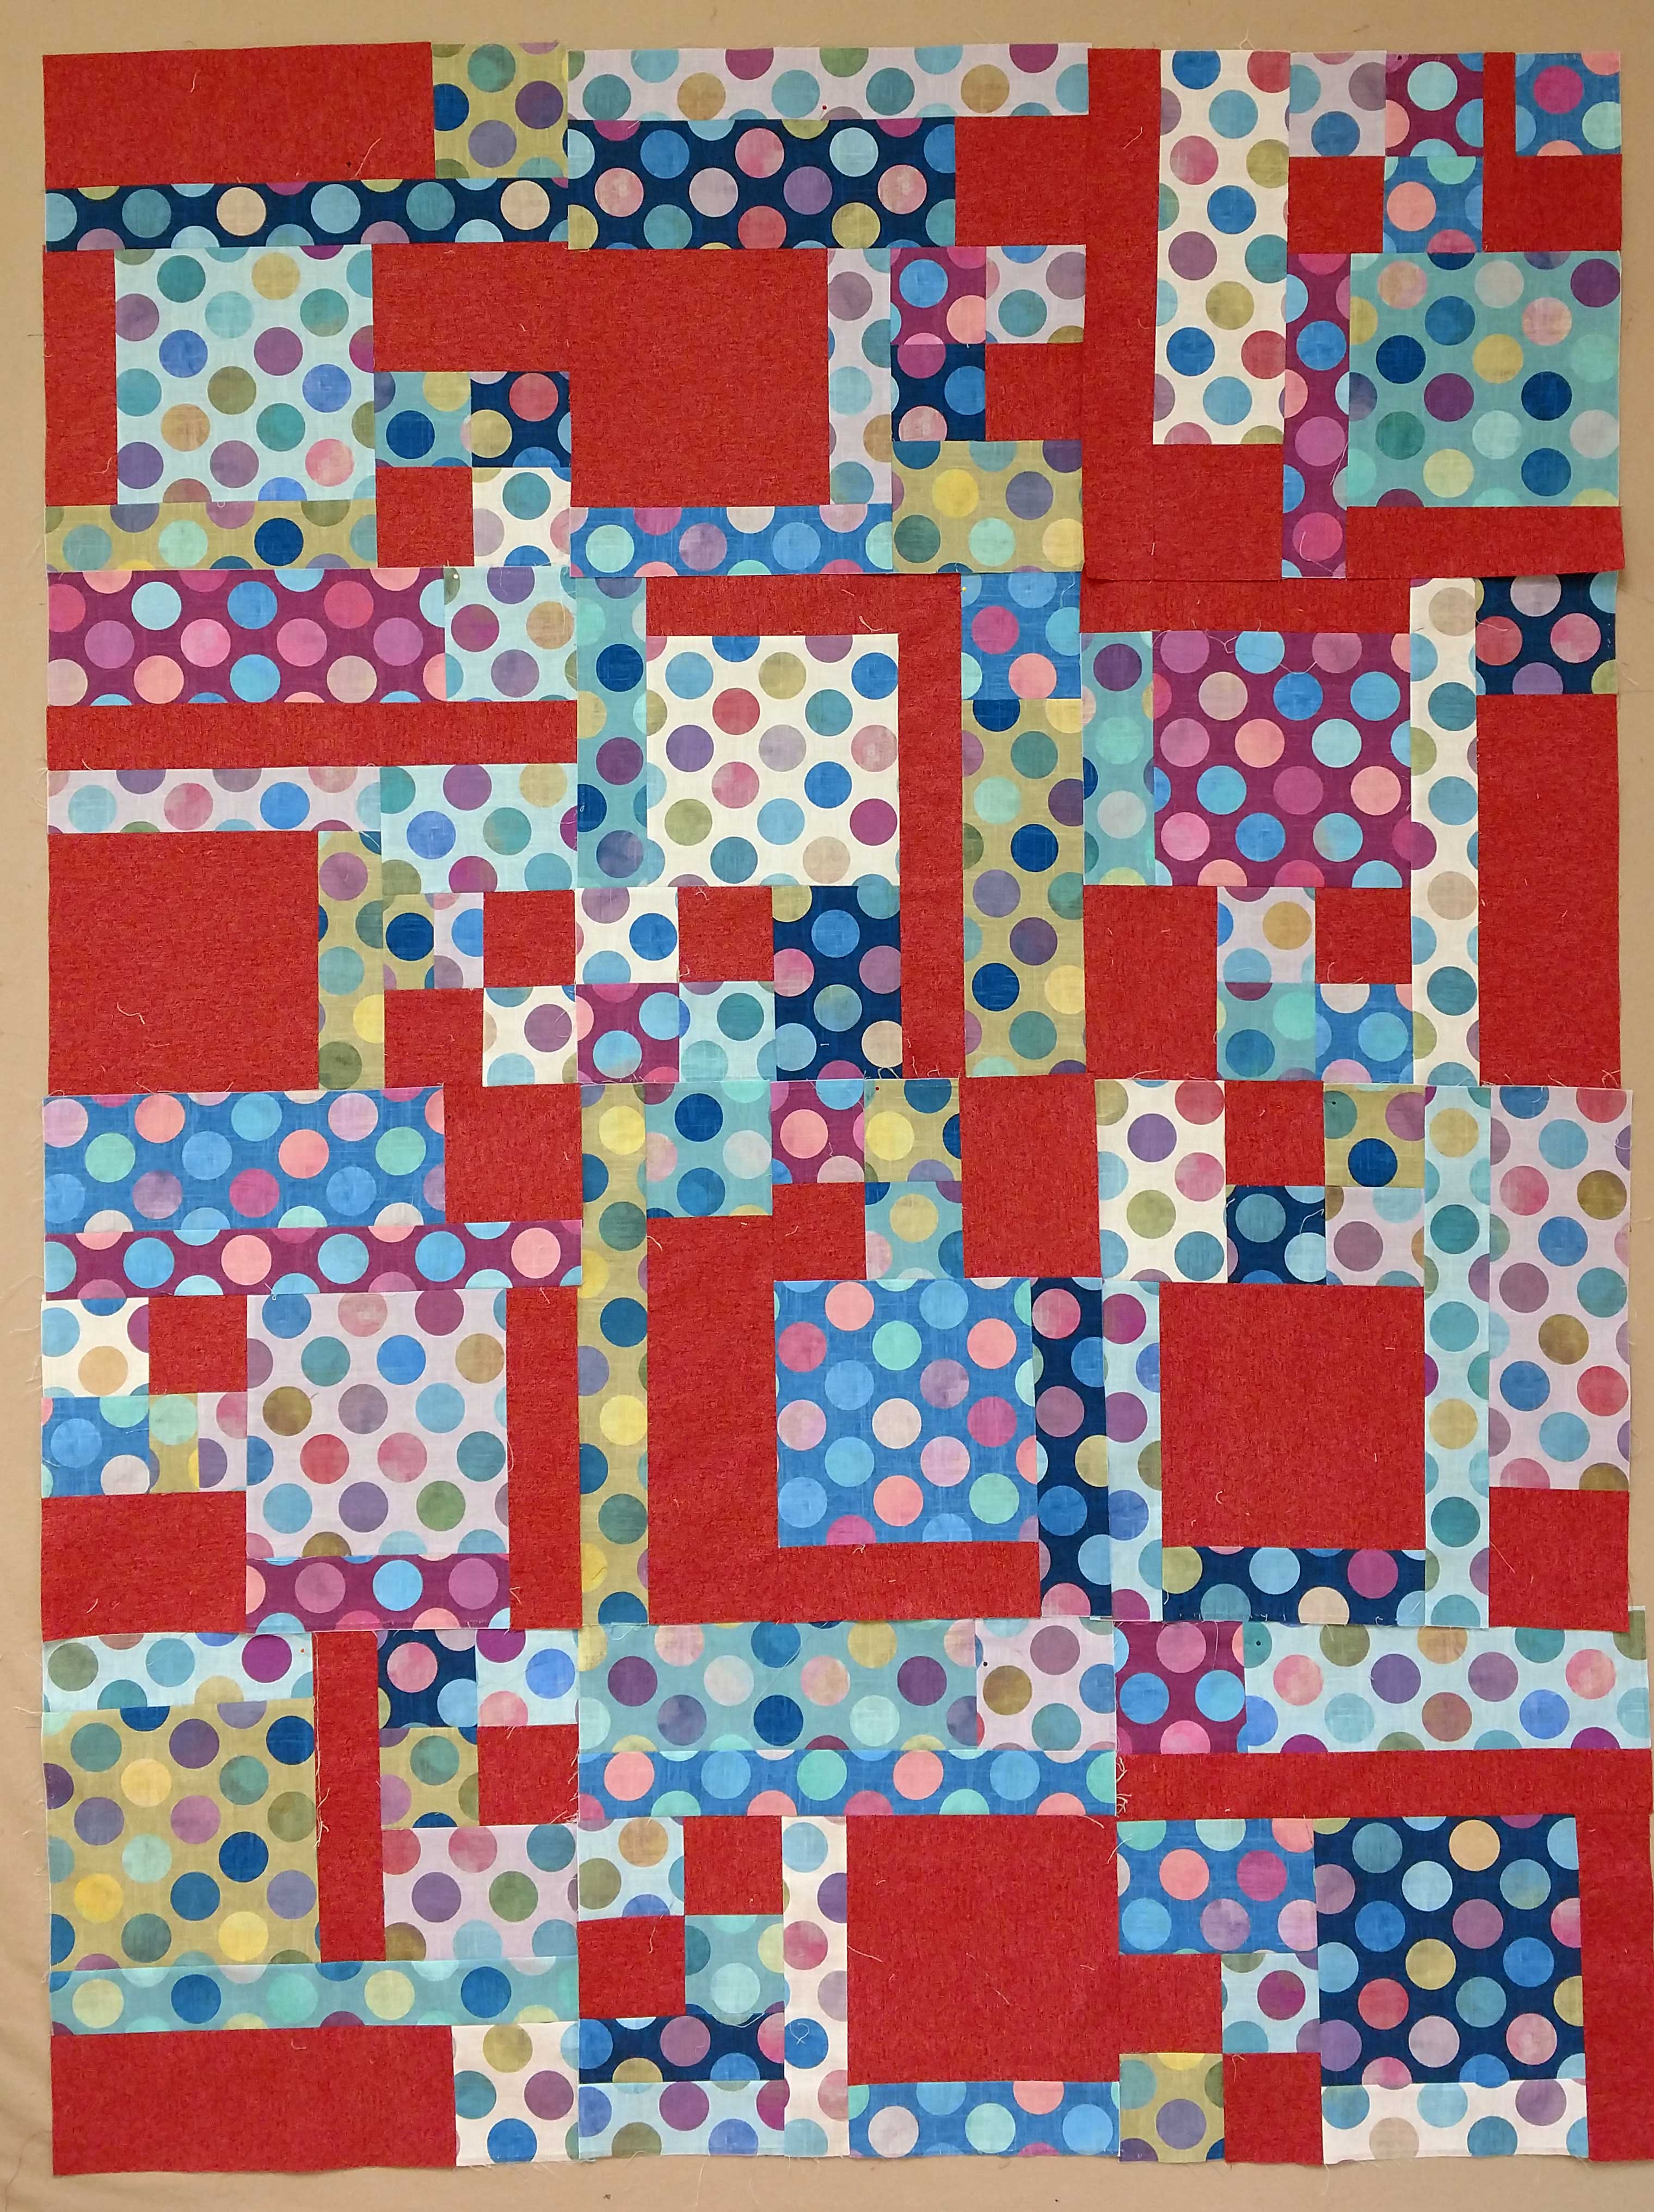
Obviously this first one was inspired by Piet Mondrian and mid-century modern.  I’ve since seen other quilts made with the same idea.

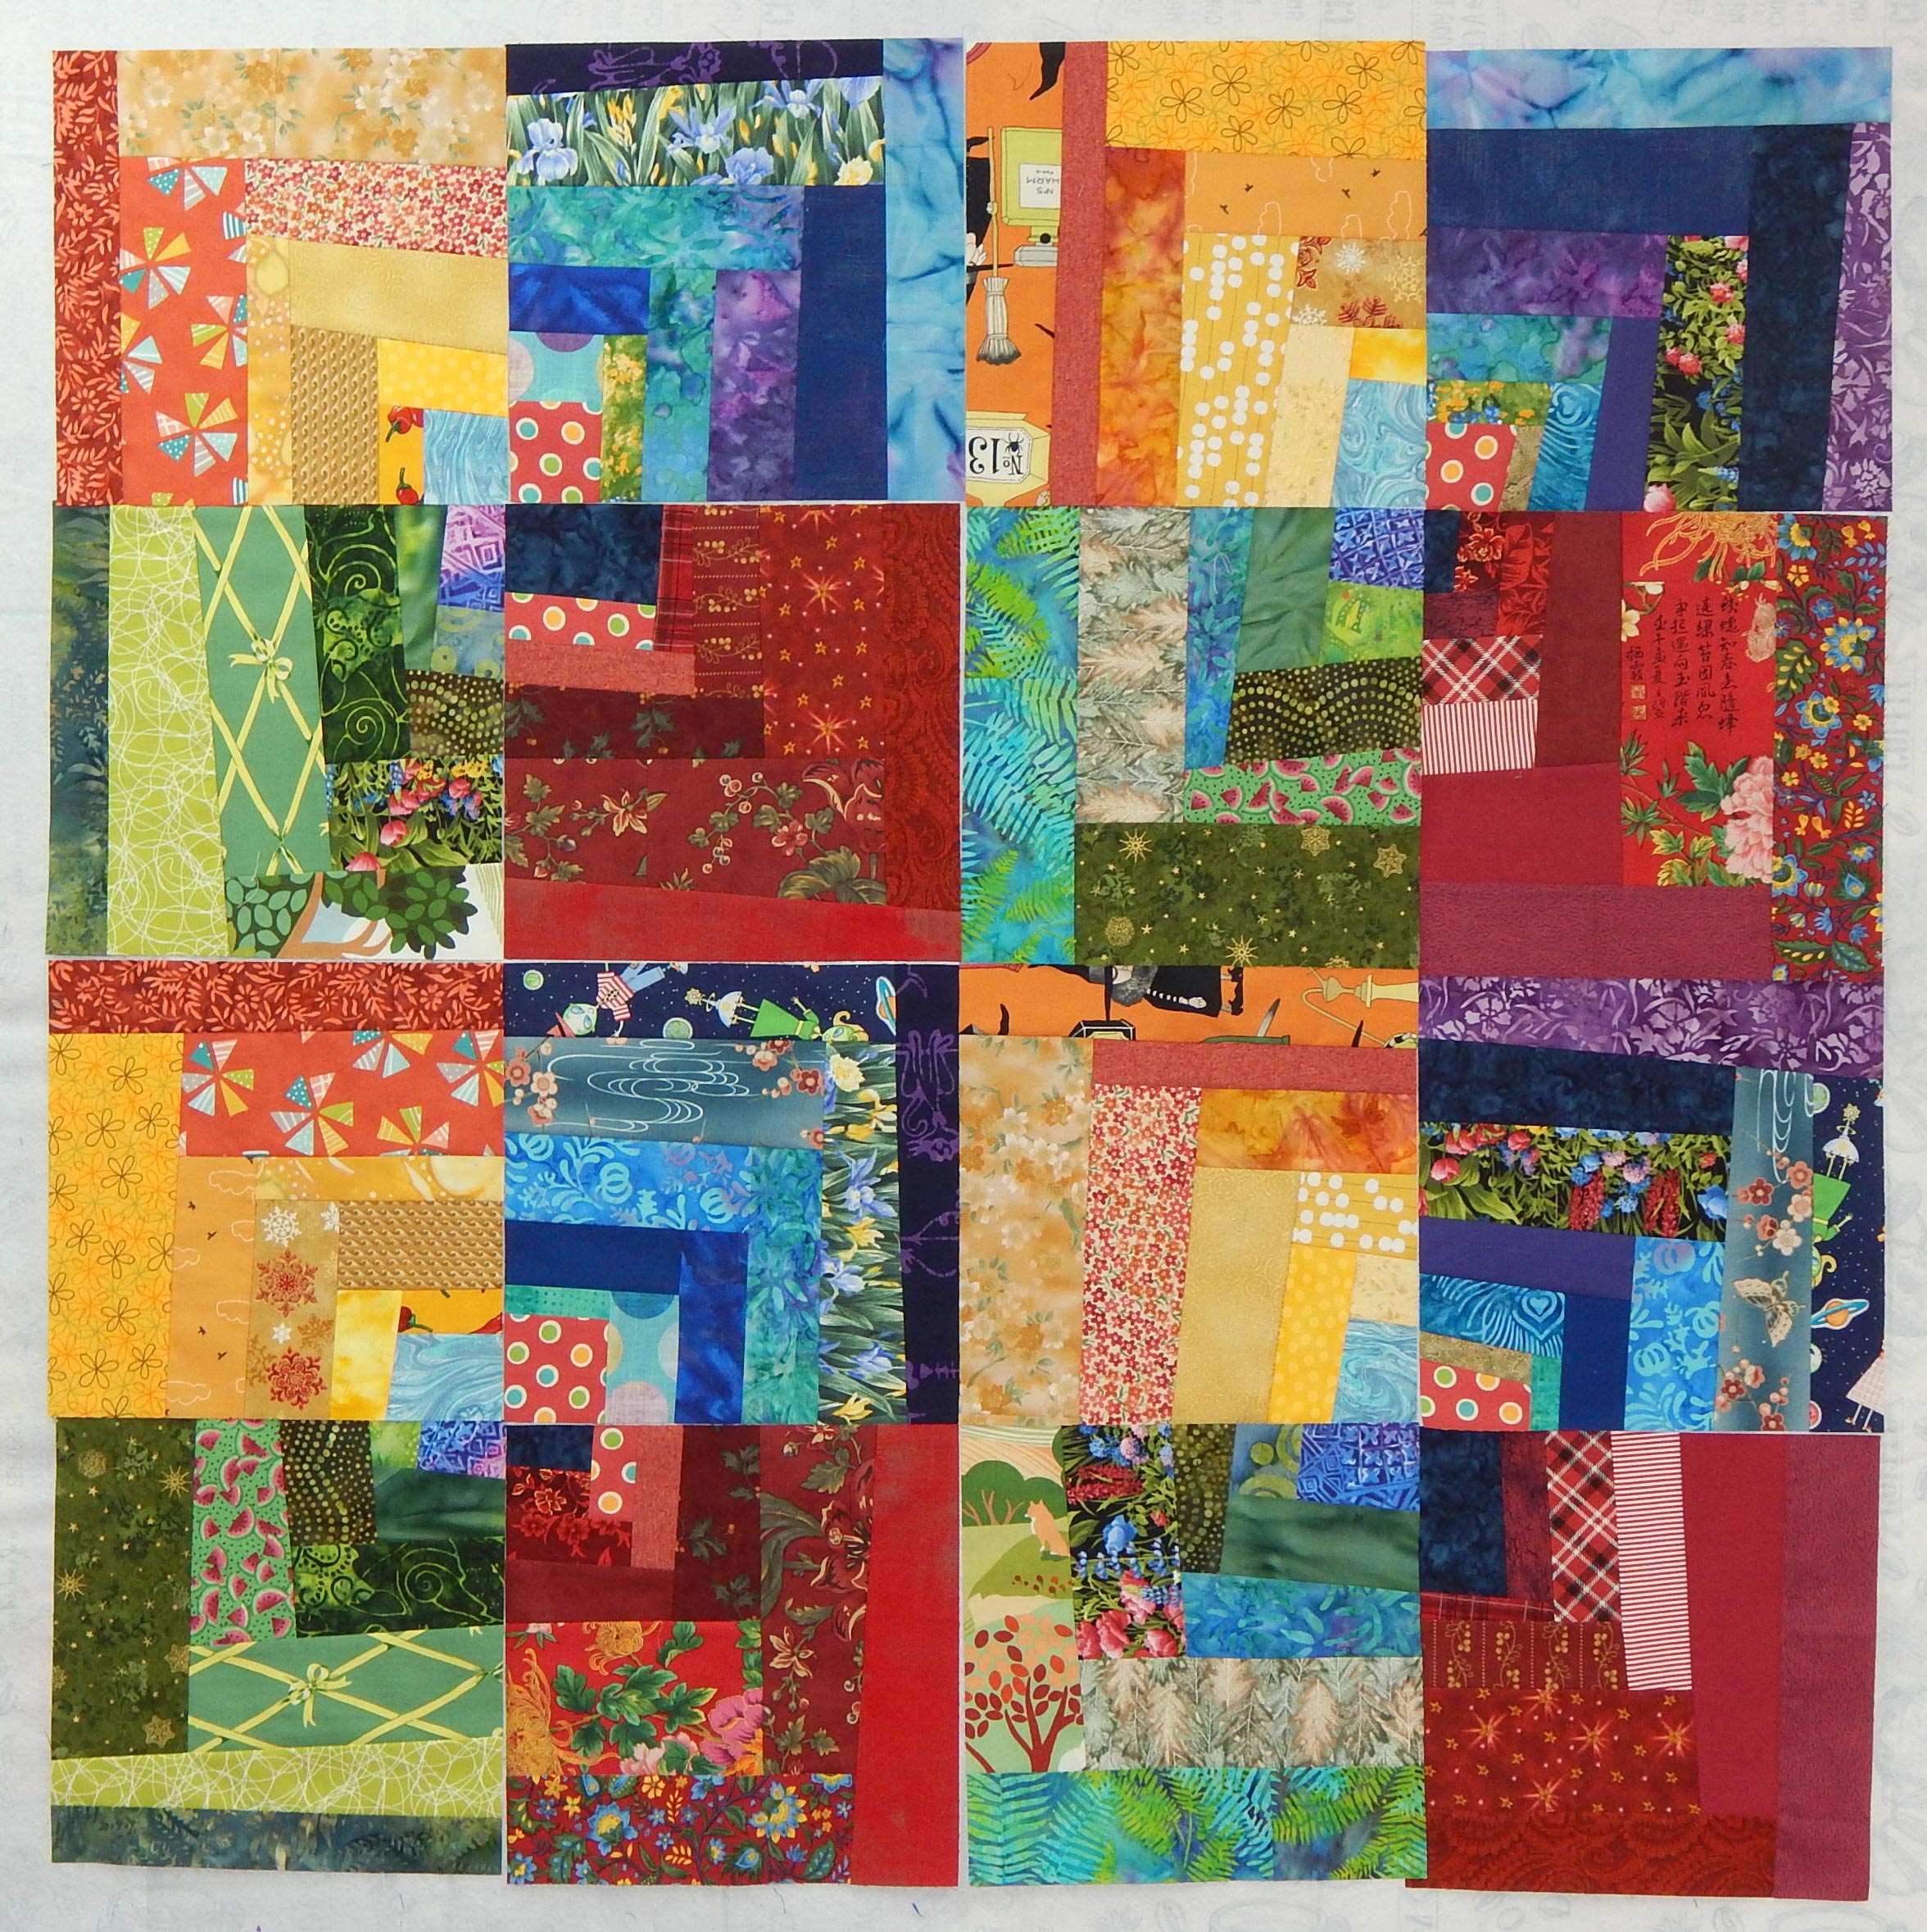
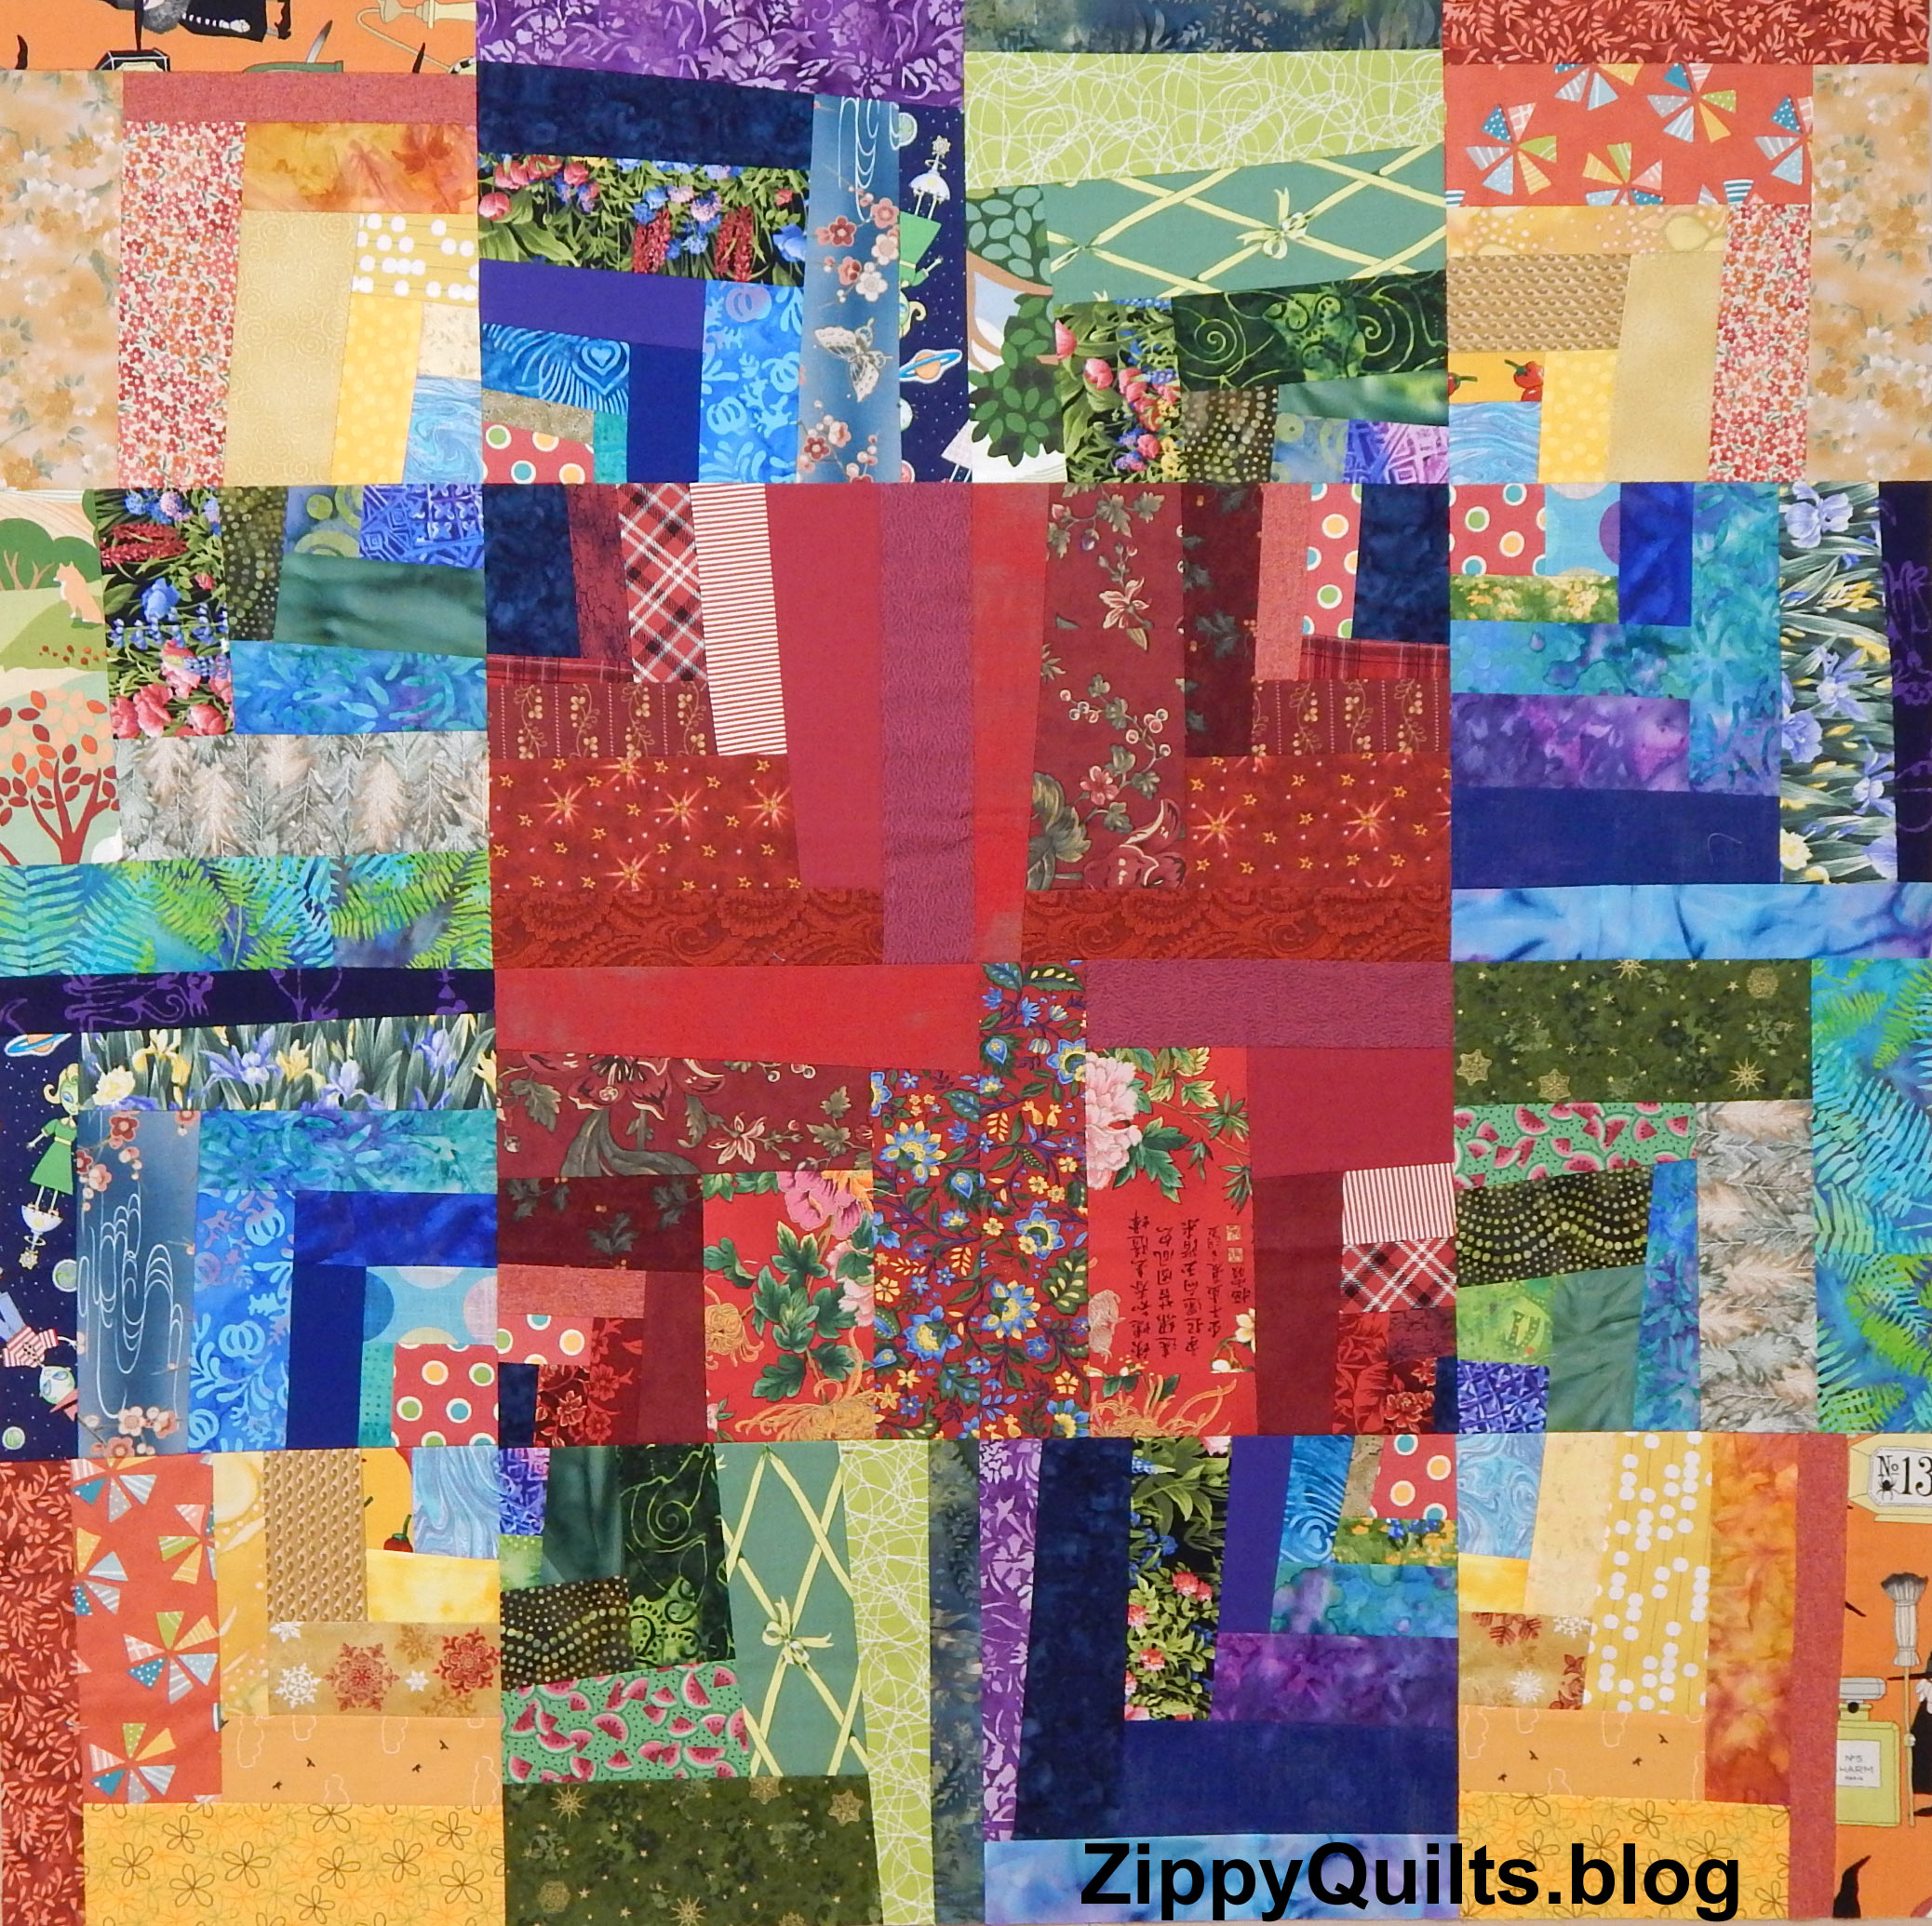
This second one I have turned into multiple quilts and blocks.  It was inspired by a college design class I took years ago.  At the time one of the “best” things to do in creating a design was to get a serious close-up showing only part of an object.  I still like that idea and use it a lot, along with other things I learned in that class. (Thanks, Mark!)

Do you have orphan blocks that could become little art quilts on their own?

I’m planning a couple more blogs on things to do with orphan blocks, so please stay tuned 🙂

And when making masks for friends and family, don’t forget the children.  They need to wear masks, too, if they must go in public.

Sewing Circle

My Mother used to have a group of friends called her “sewing circle” who met in each other’s homes to do hand work on a regular basis.  That was in the days when she didn’t work outside the home and neither did the other ladies–times have changed!  However, I still have a group of friends with whom I quilt regularly.  This little art quilt is in honor of that tradition.

I’d been seeing cute little quilts made with a narrow wedge ruler and wanted to do something similar.  I don’t have a narrow wedge ruler and wasn’t sure I wanted to make anything with pieces that small anyway, so I used my narrowest triangle ruler, a 45 degree wedge.

I cut the wedges with the ruler and just estimated the angle for the trapezoidal doors.  I cut the windows and roofs freehand.  The houses are made from some Jen Kingwell fabric left over from another project.  The background fabric says “cut, sew, repeat”.  I decorated the doors with tiny buttons for knobs and put a bird bead on one of the houses.

Quilt stats:  Sewing Circle

Finished size: 25-3/4″ x 25-3/4″

Designed, made, and quilted by me

It Was A Very Good Year

This year’s finishes:

One bed size quilt:

This isn’t as wonky as it looks, thank goodness! It’s just that I had trouble hanging it for the photo because it’s bigger than the design wall!

And a number of other quilts for various family, or for things I was teaching, or just because I wanted to:

A few of this year’s 13 donation quilts:

And finally, some table runners, art quilts, etc:

These projects were started this year but still aren’t finished:

Yes, quitting my day job really improved my productivity 😀

Improvised Table Runners

Several years ago I made this table runner by my own improvisational method.

modern table runner

Then I made this one, same method, using a lovely group of crossweave fabric.It was accepted for publication in a magazine, and I wrote the instructions, but the magazine ceased publication just before the issue in which my runner was to appear!

While developing the article for Crossweave Runner 1, I made Crossweave Runner 2 so I could take some process photos.

So, while cleaning the studio recently, I found two partially finished runners, the one above and the one below.

I finished these last two runners, and that’s about enough of those for now! It’s good to get even a little project finished and out of the way, especially right before the holidays when I’m thinking about gifts for folks!

A Swap Block for Donation Quilts

One of my quilt groups makes donation quilts about 40″ square for various organizations. The size is easy to construct and quilt at home, and is appropriate for the children who receive the quilts.  Here are the recent group donations:

We often use swap blocks for our quilts and recently decided on a new swap and I want to tell you about it. One of your quilt groups may enjoy it, too!  Here’s how:

First make a big wonky log cabin block. Our blocks started with a 5″ square, which was modified to make a wonky center.  It was then surrounded by strips from my scrap bins, and occasional strips were trimmed so they were wonky, too.

These big blocks are 21″ square (unfinished).

We cut each block in quarters, so each quarter is 10.5″ unfinished, and started arranging them to make a quilt top that would finish at 40″ square.

This was how we eventually decided to arrange them in the finished top:

And then, of course, we made 4 more:

If you decide to do this, there are only 2 things to watch out for:

  1. As you add strips, keep measuring to be sure the center block remains centered enough so that there will be a piece of it in each quarter when you cut the block up.
  2. It’s easiest if the final round of strips is considerably wider than needed so the block can be trimmed to (unfinished) size easily without running into seams.

This is a really fun way to use scraps!  If you make one, or use this for a group swap, send me a picture!

A Tale of Many Dots

A couple of years ago I bought this fabric because I really liked it:

Since it was pre-printed fat quarters (FQs), I planned to use it in a pattern designed for FQs.  I added a couple of fabrics that I thought went well with it.  Until I saw it sewn together:

I didn’t like the quilt top once I got it made, so I took out every single seam and set the pieces aside to think about.

I took out the fabrics I had added, thinking perhaps they were the problem.  That helped a little.  However, I decided the dots needed some solid mixed with them.  I took them on a shopping trip with friends and we selected a nice red-orange to mix with them.  Then I re-made the quilt including some of the red-orange.

I still didn’t like it.  And call me lazy if you like, but I was not going to take those pieces apart again!  So, with a what-the-heck attitude, I cut the new top up into circles (big dots!) using my dinner and salad plates as templates.

I pinned various potential backgrounds on the design wall and tried them out.

I think some variation of this is going to be the final design.  Maybe not the greatest ever, but nobody died, so I’m moving on!

Two Quilts for the Price of Two…

Earlier in the year I ran across this pattern and was intrigued by how different it is from any quilt I’d ever made.

Photo courtesy of Shabby Fabrics and Krista Moser

I’ll try darn near anything, so I bought the pattern and made the quilt.  I almost never buy the fabric used in the original quilt, but I did this time, which is why I say two quilts for the price of two. There wasn’t much in stash that I could use since the design depends on a large number of different colors of ombre fabric.

I love the result!  The pattern was well written and the illustrations were clear.  My only complaint is that the pattern “requires” a particular ruler.  The ruler is expensive and specialized.  I didn’t foresee a lot of use for it, so I didn’t buy it.  I improvised a template, and that worked OK.  Likely the quilt would have been easier with the ruler, but I have my limits!

Here’s a closeup of the hexies quilted by Julia Madison (with gold thread, of course!).

If you go to Krista’s website you can see several other pictures of her quilt, but be warned that you, too, may want to make it!

Here are the quilt stats:

Ombre Blossoms

The finished quilt measures 57 “x 71”

Pattern by Krista Moser, available here

Machine Quilted by Julia Madison

Fabrics are Moda ombre confetti dot metallic

There was fabric left, so I made it all into half-square triangles (HSTs) with black. That allowed so many design possibilities that I dithered for a while a long time.  This was the final decision:

And here is a closeup of the fun quilting done by Julia Madison:

I love this quilt, too.  I used my Tucker Trimmer to make the HSTs, and it is one tool I consider worth the money.  I’ve used a wide variety of tools to make HSTs, and this is my favorite.  (And no, I do not have sponsorship from Tucker Tools!)

Here are the quilt stats:

HST Tumble

Finished size 54″ x 54″

Pattern by me

Machine quilted by Julia Madison

Fabric: Moda ombre confetti dot metallic, and black Cotton Couture by Michael Miller


Lattice Quilt

This design has been around forever and I’ve seen many versions of it, some even published as patterns.Anyway, I decided to teach it as a design-your-own quilt class, since I think the size of the center squares really should depend on the size of the prints you are using.  I made a handout to help each person design his/her own blocks, so I’m sharing the details with you.  All these drawings were made using Electric Quilt 8, which allows for easy export of the picture.

Here is the basic block:

The only trick is to make the block square.  The center is a rectangle, and the size of the side strips has to make the block square.  So, for example, if you cut a center rectangle 3.5″ x 5.5″ (to finish 3″ x 5″), your side strips need to be cut 5.5″ x 1.5″ each so the block (unfinished) will measure 5.5″ x 5.5″ and the finished block will be 5″ square.  Whew!

Actually, it’s easy.  We all drew our blocks (finished size) out on graph paper and remembered to add 0.5″ seam allowance in each direction before cutting each piece!

When the blocks are made, lay them out in a row, alternating directions. This forms the lattice. Two rows look like this:

And when a border is added, all the blocks are “closed” and you have a complete lattice.

And yes, the outer edge will vary in width after the addition of the border.  That’s all part of the fun. The blocks appear to float as they alternate directions.

You can vary the look of the quilt considerably by changing the proportions of the lattice and the central rectangles:

I think this design works especially well with a collection of related fabrics, and one woman brought Christmas fabrics to class:

Another brought fabrics with a camping theme:

This is an easy quilt.  It can be chain pieced easily and the blocks can be trimmed before joining if necessary.

Now, go make one and send me a picture of it!

Scraps Happen, Part III

There is no shortage of patterns for scrap quilts, and often I start with a pattern I’ve found somewhere and modify it to suit me.  I have notebooks full of pictures from magazines and photos I’ve taken of vintage or show quilts, so I use those for inspiration.  Here is a quilt I made by modifying a pattern from a magazine I’d been saving for a long time:

You can find the original pattern for this quilt by going to AllPeopleQuilt.com and searching for the “trail mix” pattern

The above quilt was made from my husband’s old shirts–whether that counts as scraps or yardage is a matter of opinion 🙂

I have some favorite scrap patterns I’ve used repeatedly over the years.  This one, which I learned from Barbara Lenox many years ago, is intended to be made at the end of the year using scraps from all the projects you made that year.  I love that idea and have made several of these.  You can see my post explaining the basic block here.

Another favorite quilt pattern is Junk to Jems, by Linda J. Hahn.  Here is my version which has been modified a fair amount from the pattern.

One thing I love about this pattern is that it is possible to make the elements of each block then re-arrange them so that there are several different variations on the same block.  So yes, my version is not quite like hers.

Augusta Cole is another teacher whose scrap quilts I admire, and I have made several from her Snappy Scrappy Stars pattern.  This makes a great leaders-and-enders project for me and I often use the blocks in donation quilts.

This is a leaders-and-enders project from Augusta Cole’s Scrappy Snappy Stars pattern

Of course, often a quilt starts as a pattern and then veers off course (surprise!).  The quilt below started as a way to use both a linen background and a group of fabrics I had in small amounts.  The original pattern is one of Karla Alexander’s stack and shuffle designs, and you probably can see that if you know the pattern.  This is my variation.Alison Glass fabrics quilt

And finally, even when I buy fabric for a quilt, I often buy fat quarters, which pretty much guarantees a scrappy look.  And I don’t really like making the same block twice, so often I make a variety of blocks for a single quilt.  Here is one last example of a quilt made from a fat quarter bundle, though it appears scrappy.

The pattern is Bermuda Sunset, another one by Linda Hahn.

A friend who is a writer mentioned the other day that her stories sometimes take on a life of their own and lead where she didn’t expect to go.  She asked if my quilts do that, too.  Absolutely!  Start out headed for A, end up at Q!

It’s all good. 🙂

Scraps Happen, Part II

Many of my scrap quilts are inspired by other quilters.  I still find it useful to start with a collection of fabrics I think “go together”.  In that regard, I do NOT worry about color per se, though I recognize that color is a big “bugaboo” for many quilters.  I do find it useful to decide at the outset whether the quilt is to be bright or muted colors, but beyond that I don’t worry much.  And of course I break that rule sometimes, too.

One of my first inspired-by-others adventures was a series of quilts I made after reading Gwen Marston’s books.  I just love her aesthetic, and wish I had been able to take a class with her while she was alive.  Here is a quilt I made for the Quilt Alliance annual contest a few years ago, based on Gwen’s published quilts:

improvisational quilt

“Gwen Visits the Farm” is a quilt I made for the Quilt Alliance contest; the black fabric has words representing animal sounds such as “quack”

I also used a collection of Cherrywood scraps to make this quilt based on Gwen’s “liberated log cabin” idea:

improvisational quilt

Cherrywood Toss, 59″ x 61″, 2016.  My favorite part of this was making the background out of a mixture of dark colors.

Also, taking a cue from my friend who makes a small art quilt each week, I made these 3 quilts based on lessons in one of Gwen’s books:

I continue to learn from the quilters I consider “the best” by making quilts inspired by their ideas.  A recent one was inspired by Maria Shell’s tutorial on improvised flying geese:

The colors of the quilt blended with the colors of my chimney, where I stuck it up to be photographed

Of course, not all such experiments are particularly successful.  I love Freddy Moran’s aesthetic, but this table runner based on her ideas didn’t turn out very well, in my opinion.  I expect to make more things using her ideas, and they’ll improve 🙂

I designed and made this runner for a guild challenge

Since, at this point in my quilting career, most of my fabric collection is scraps, there will be many more scrap quilts to come!  Next week I’ll discuss how I use scraps in quilts made from patterns.