Plaidish–Color Gets the Credit, Value Does the Work

I found this quilt on Pinterest and followed the link to the directions because I thought it was such a great example of “color gets the credit, value does the work”.  Also, it used a lot of scraps!  In particular, I had TWO bins full of 5″ charms from a swap group I used to belong to, and I used an entire bin to make this quilt 🙂

You can find the free pattern here: Kitchen Table Quilting

Yes! There were a lot of little intersections to match–good practice!

If you ask Ms. Google or search on Pinterest, you can see many variations made by other quilters.

QUILT DETAILS

Name: Plaidish

Finished size: 63.5” x 63.5”

Designed by Erica at Kitchen Table Quilting

Made by me

Quilted by Julia Madison

A Swap Block for Donation Quilts

One of my quilt groups makes donation quilts about 40″ square for various organizations. The size is easy to construct and quilt at home, and is appropriate for the children who receive the quilts.  Here are the recent group donations:

We often use swap blocks for our quilts and recently decided on a new swap and I want to tell you about it. One of your quilt groups may enjoy it, too!  Here’s how:

First make a big wonky log cabin block. Our blocks started with a 5″ square, which was modified to make a wonky center.  It was then surrounded by strips from my scrap bins, and occasional strips were trimmed so they were wonky, too.

These big blocks are 21″ square (unfinished).

We cut each block in quarters, so each quarter is 10.5″ unfinished, and started arranging them to make a quilt top that would finish at 40″ square.

This was how we eventually decided to arrange them in the finished top:

And then, of course, we made 4 more:

If you decide to do this, there are only 2 things to watch out for:

  1. As you add strips, keep measuring to be sure the center block remains centered enough so that there will be a piece of it in each quarter when you cut the block up.
  2. It’s easiest if the final round of strips is considerably wider than needed so the block can be trimmed to (unfinished) size easily without running into seams.

This is a really fun way to use scraps!  If you make one, or use this for a group swap, send me a picture!

Lattice Quilt

This design has been around forever and I’ve seen many versions of it, some even published as patterns.Anyway, I decided to teach it as a design-your-own quilt class, since I think the size of the center squares really should depend on the size of the prints you are using.  I made a handout to help each person design his/her own blocks, so I’m sharing the details with you.  All these drawings were made using Electric Quilt 8, which allows for easy export of the picture.

Here is the basic block:

The only trick is to make the block square.  The center is a rectangle, and the size of the side strips has to make the block square.  So, for example, if you cut a center rectangle 3.5″ x 5.5″ (to finish 3″ x 5″), your side strips need to be cut 5.5″ x 1.5″ each so the block (unfinished) will measure 5.5″ x 5.5″ and the finished block will be 5″ square.  Whew!

Actually, it’s easy.  We all drew our blocks (finished size) out on graph paper and remembered to add 0.5″ seam allowance in each direction before cutting each piece!

When the blocks are made, lay them out in a row, alternating directions. This forms the lattice. Two rows look like this:

And when a border is added, all the blocks are “closed” and you have a complete lattice.

And yes, the outer edge will vary in width after the addition of the border.  That’s all part of the fun. The blocks appear to float as they alternate directions.

You can vary the look of the quilt considerably by changing the proportions of the lattice and the central rectangles:

I think this design works especially well with a collection of related fabrics, and one woman brought Christmas fabrics to class:

Another brought fabrics with a camping theme:

This is an easy quilt.  It can be chain pieced easily and the blocks can be trimmed before joining if necessary.

Now, go make one and send me a picture of it!

Little Green Man Quilt

This block has been floating around on Pinterest for some time, and I really like it so It’s been on my to-do list.

This is a copy from Pinterest, where the block has been widely shared without attribution

I don’t like to borrow things without attribution, so I went in search of just who designed this.  Luckily, my friend Elizabeth was in a bee that used this block, so I learned from her blog that the block was designed by Kylie Kelsheimer.  A friend of Elizabeth’s located the original post for her through the wayback machine.  You can find Elizabeth’s post about all this here (you’ll have to scroll down quite a bit) and the original pattern here.  I see from Elizabeth’s latest post that the pattern is now available through PayHip, but that was not the case when I first investigated it a year ago and started this project.

Which brings me to why I changed it all up.  The original block is small and paper pieced–not my style!  I wanted to make it big and make the stars wonky.  Therefore, the instructions here are NOT for Kylie’s block, though the idea is based on her original block as noted above.  In fact, the block as shown on Pinterest is really 4 blocks, each rotated so that they fit together as shown in the pin.

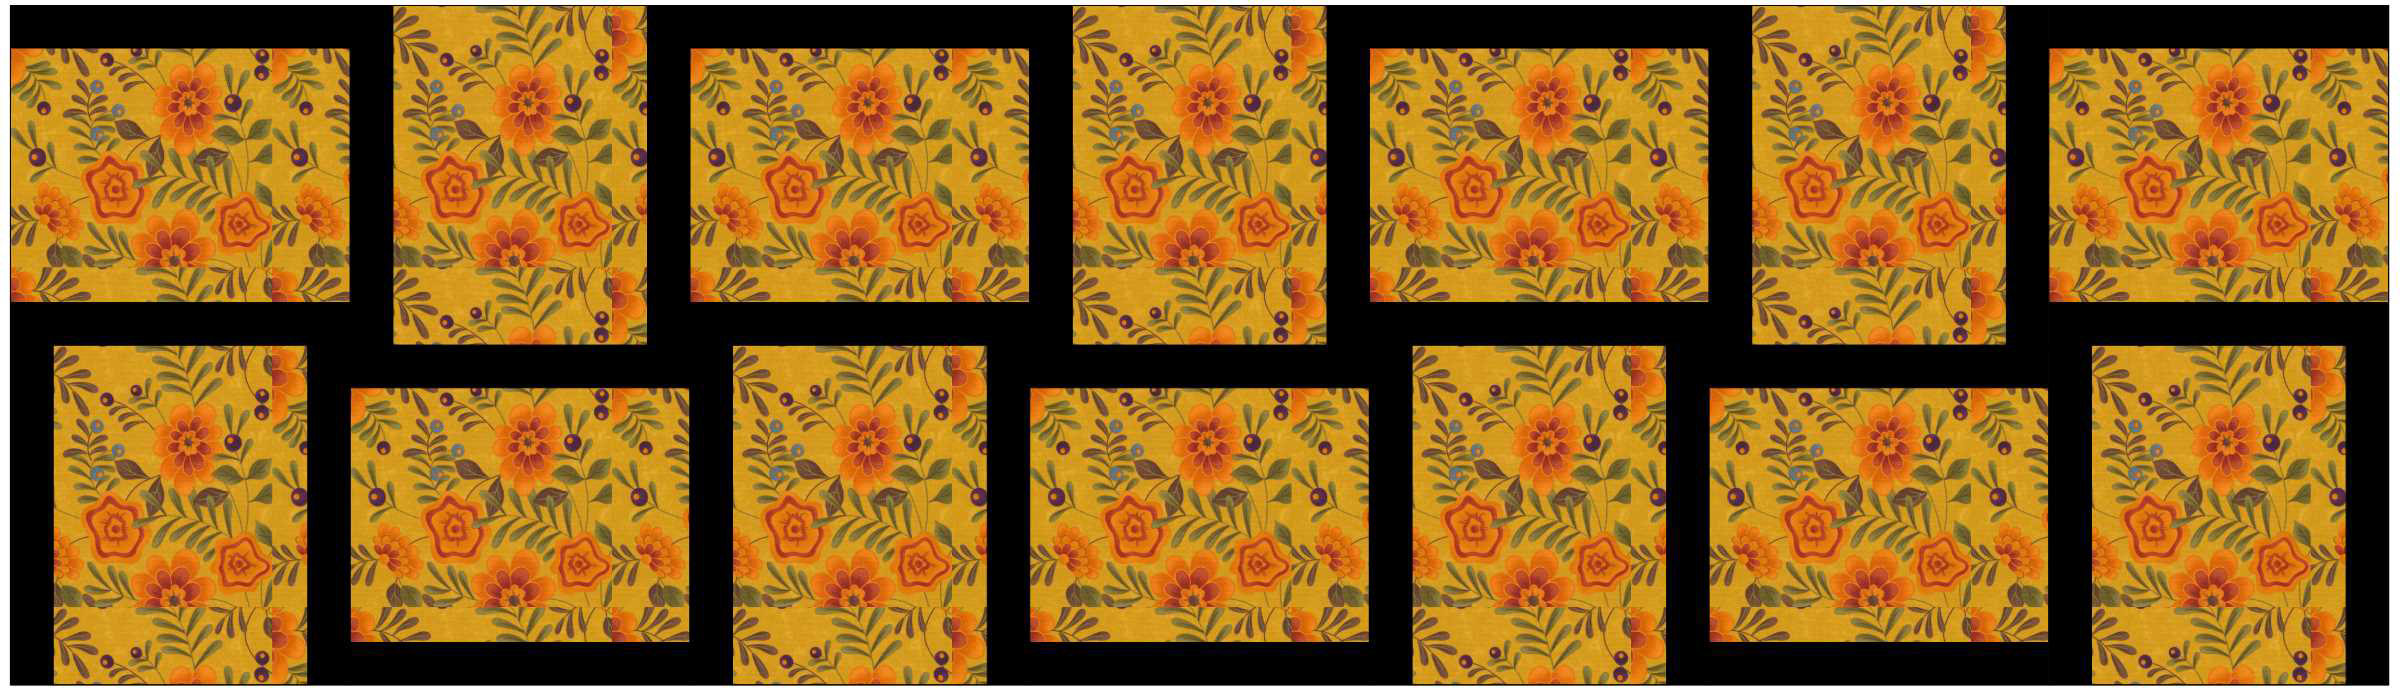
I drew the block with Electric Quilt so that it finishes 18″ square.  Here it is showing fabrics.

My wonky star block, drawn with Electric Quilt 8

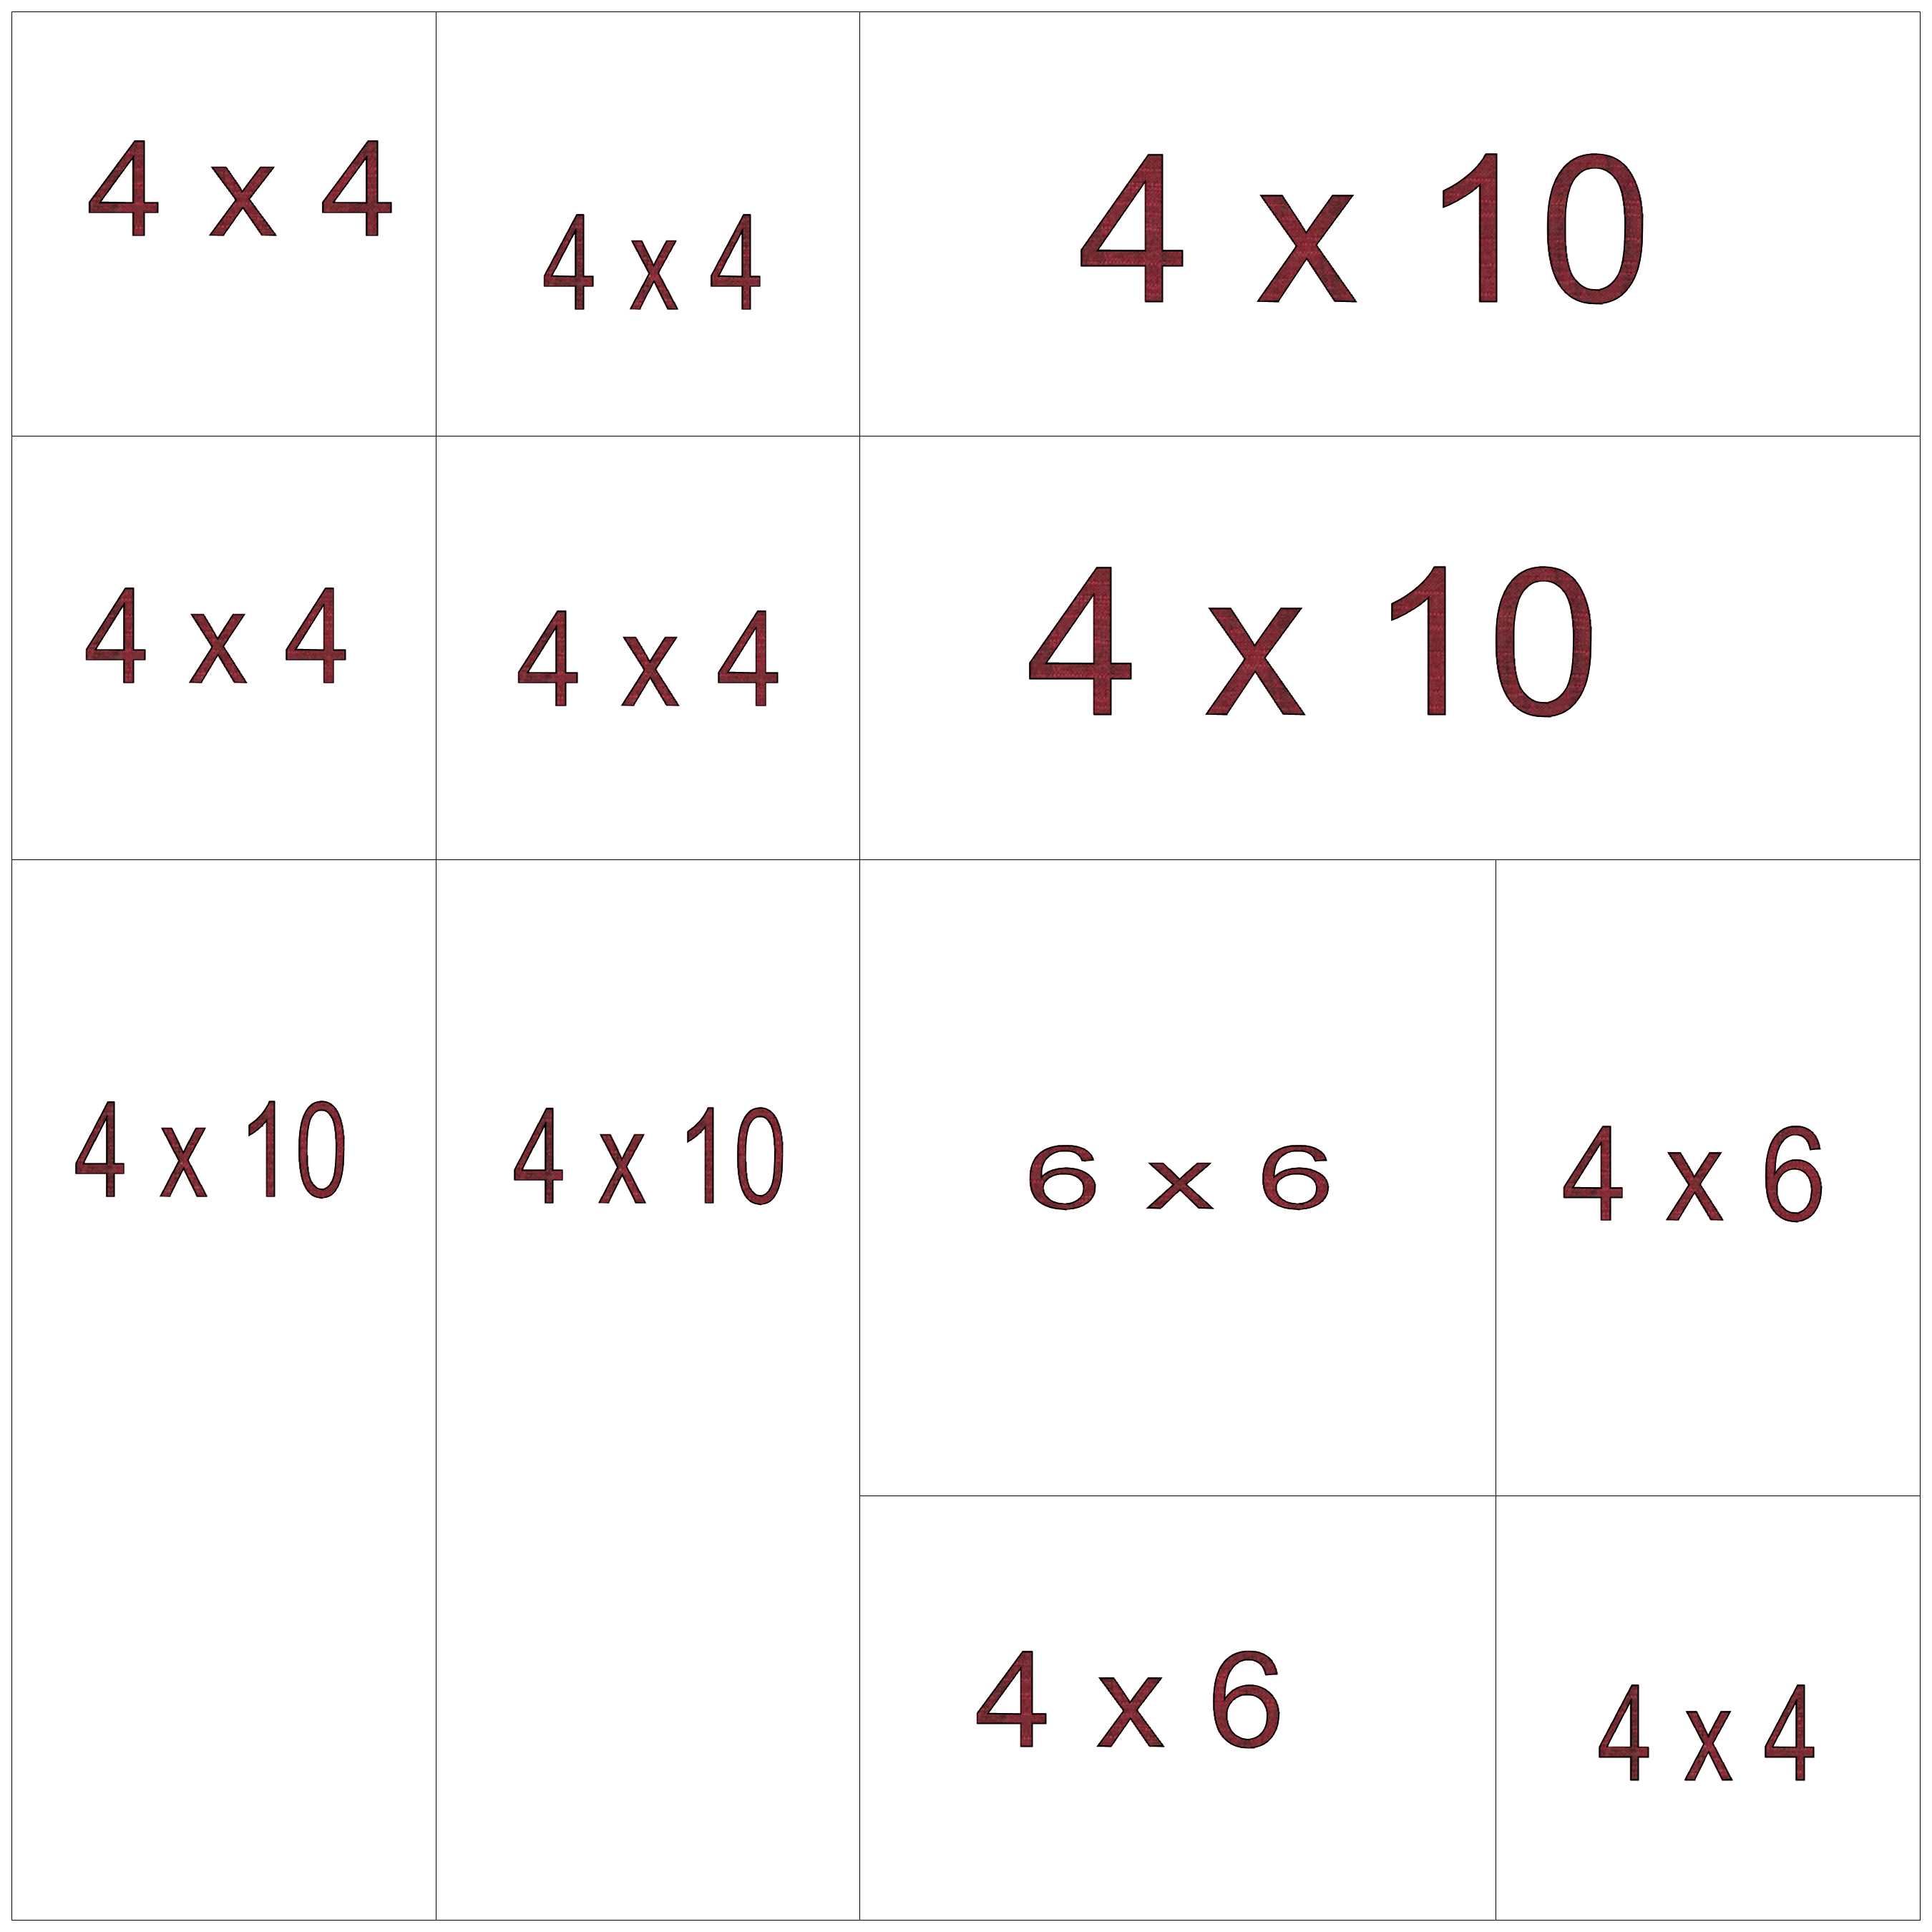
And here is the base block in case you want to make it yourself:

Star base block, drawn with Electric Quilt 8

Here is my tutorial on making sew-and-flip stars, in case you’ve never done it before.

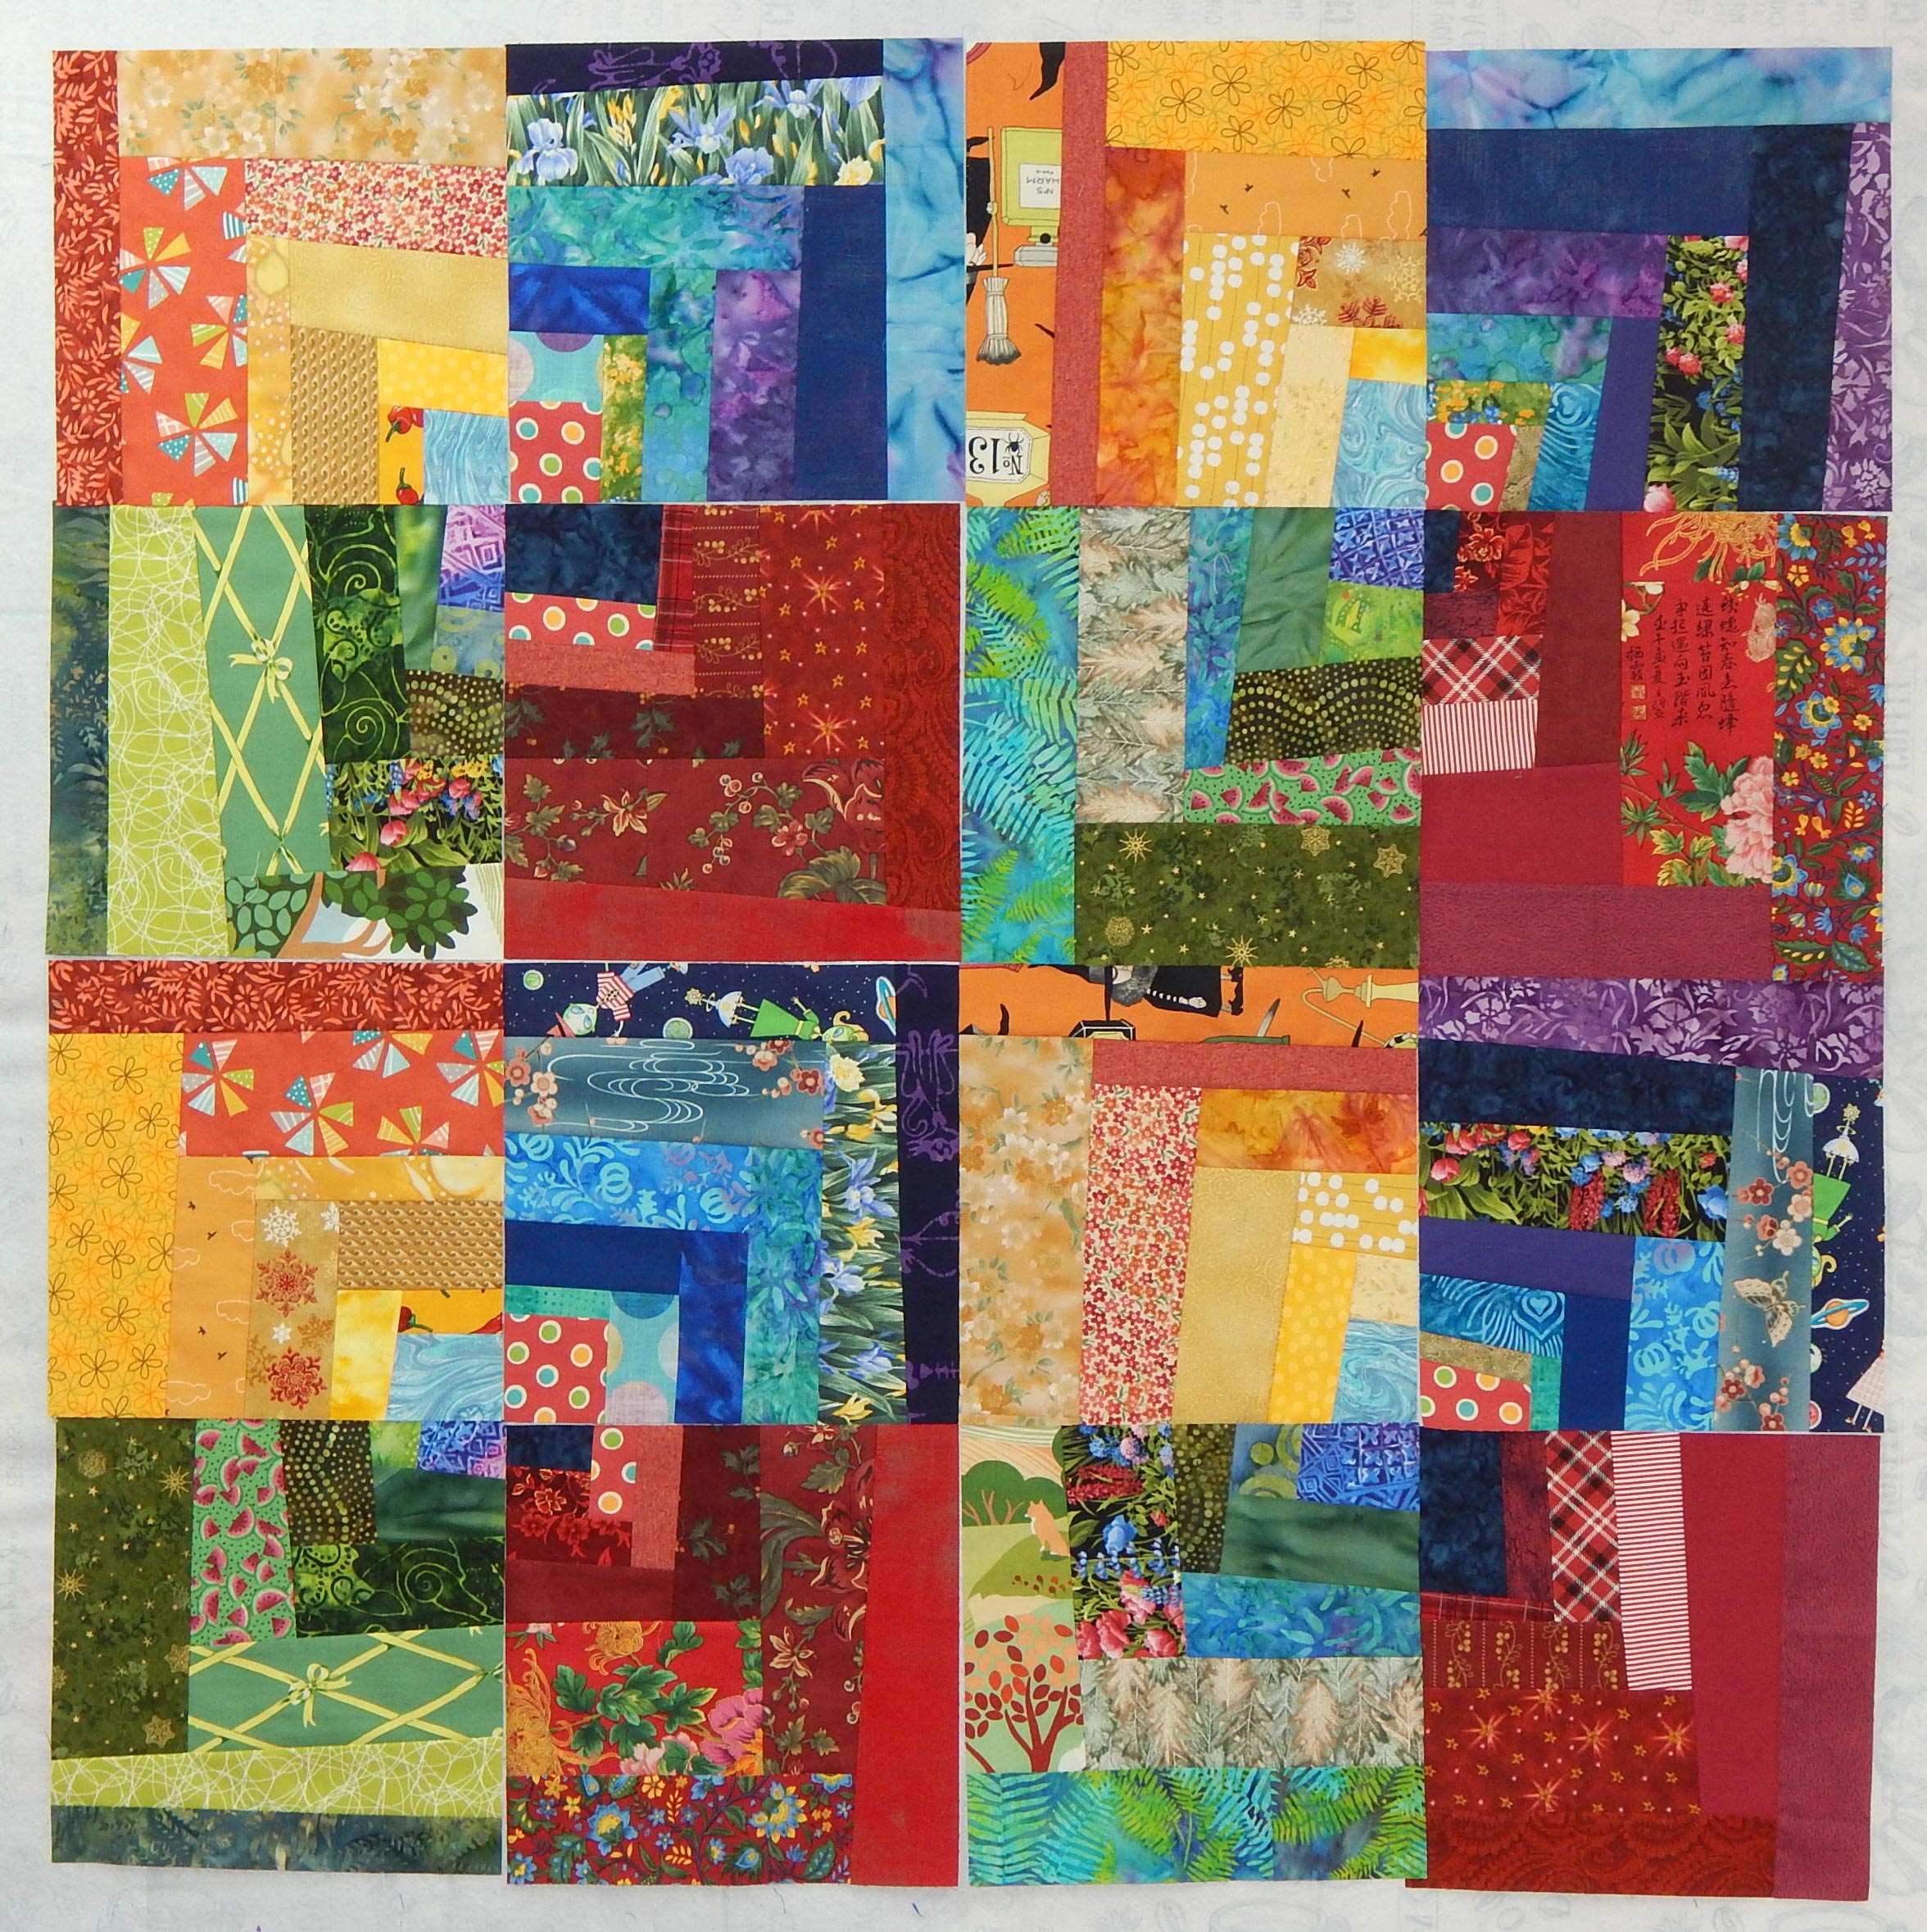
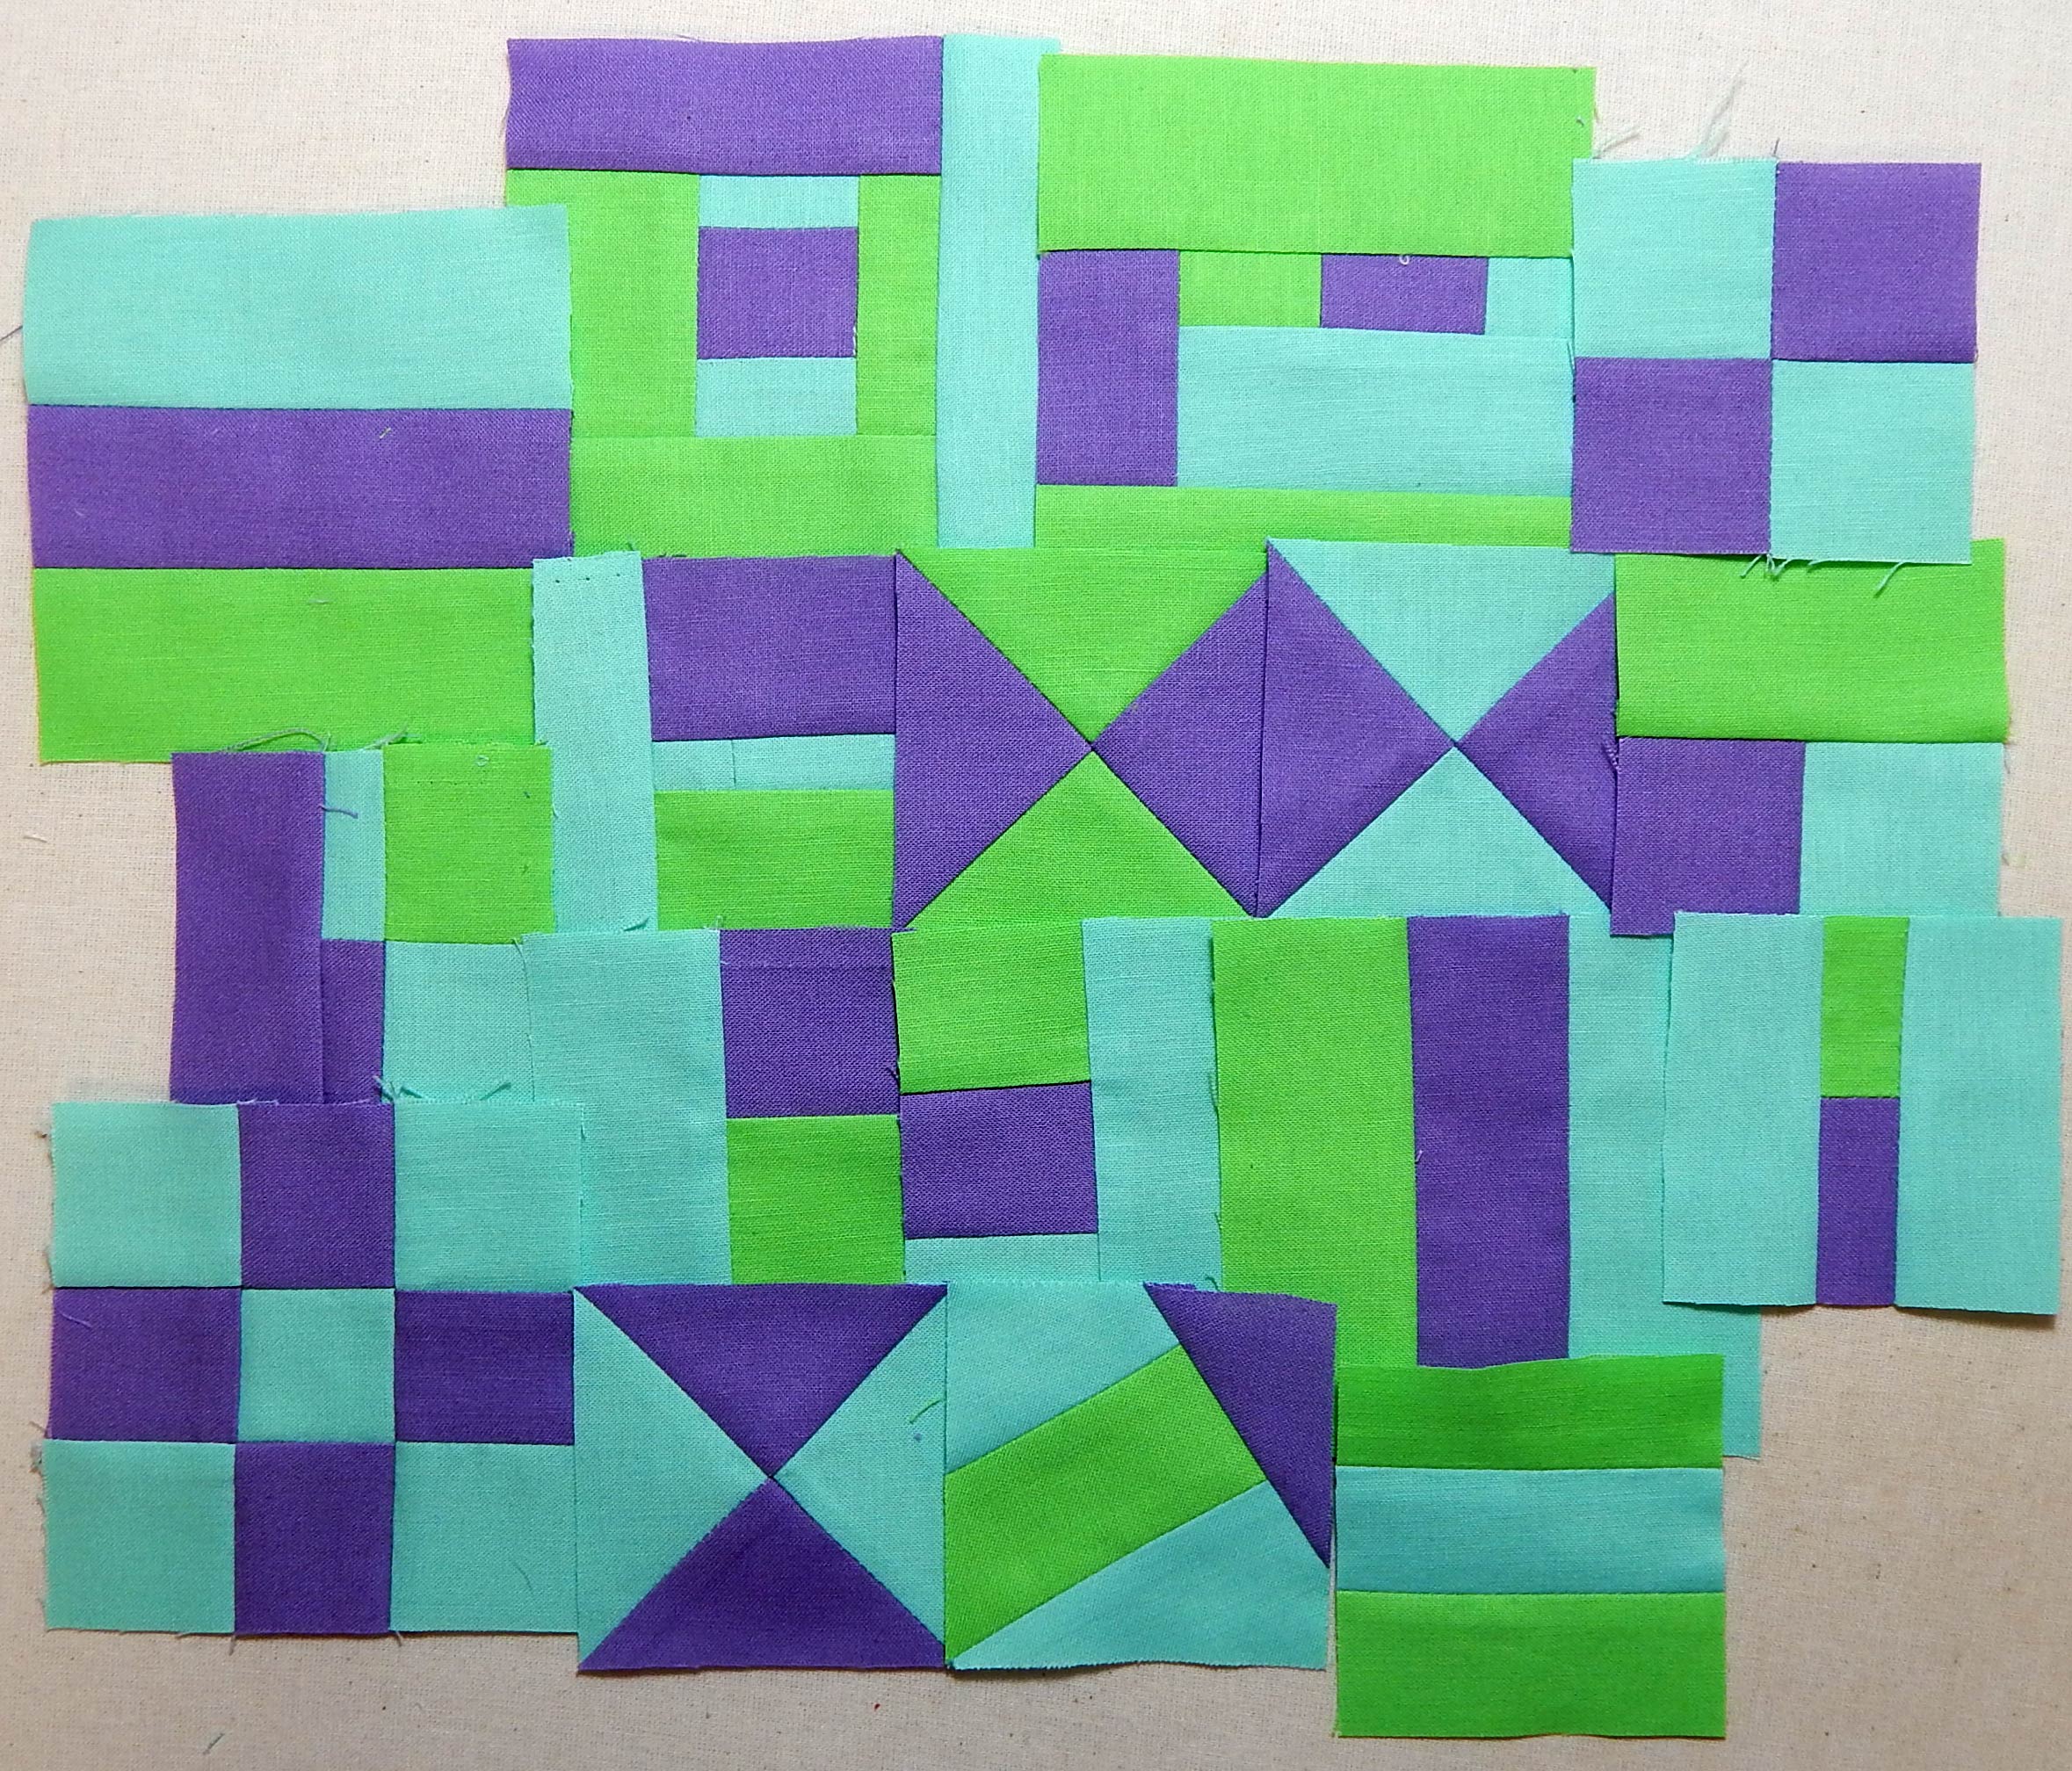
As you can see, I substituted my Little Green Man for 4 of the blocks–those would be the 4 in the lower right-hand corner looking at my layout above.  You will see that I rotated the blocks various ways, which is how Little Green Man ended up in the lower left corner after I substituted him in the lower right.

You can find my instructions for making the LIttle Green Man here.

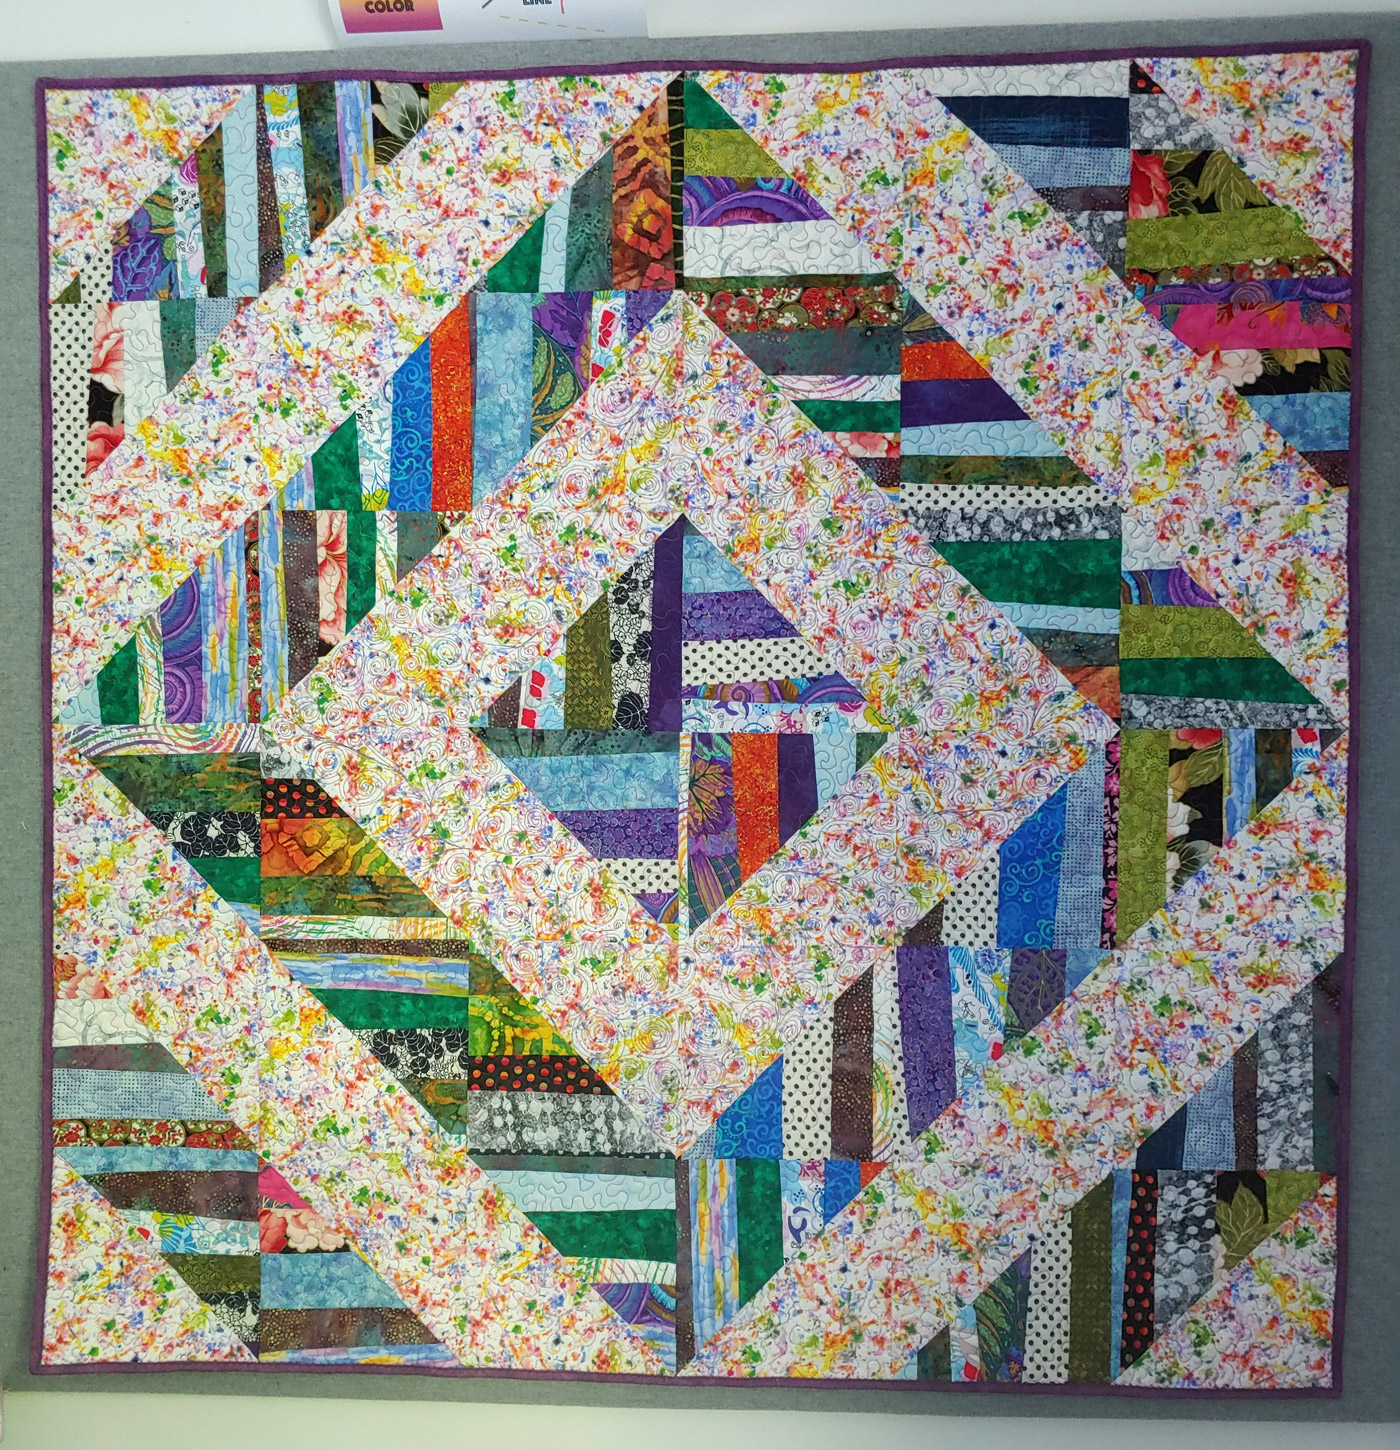
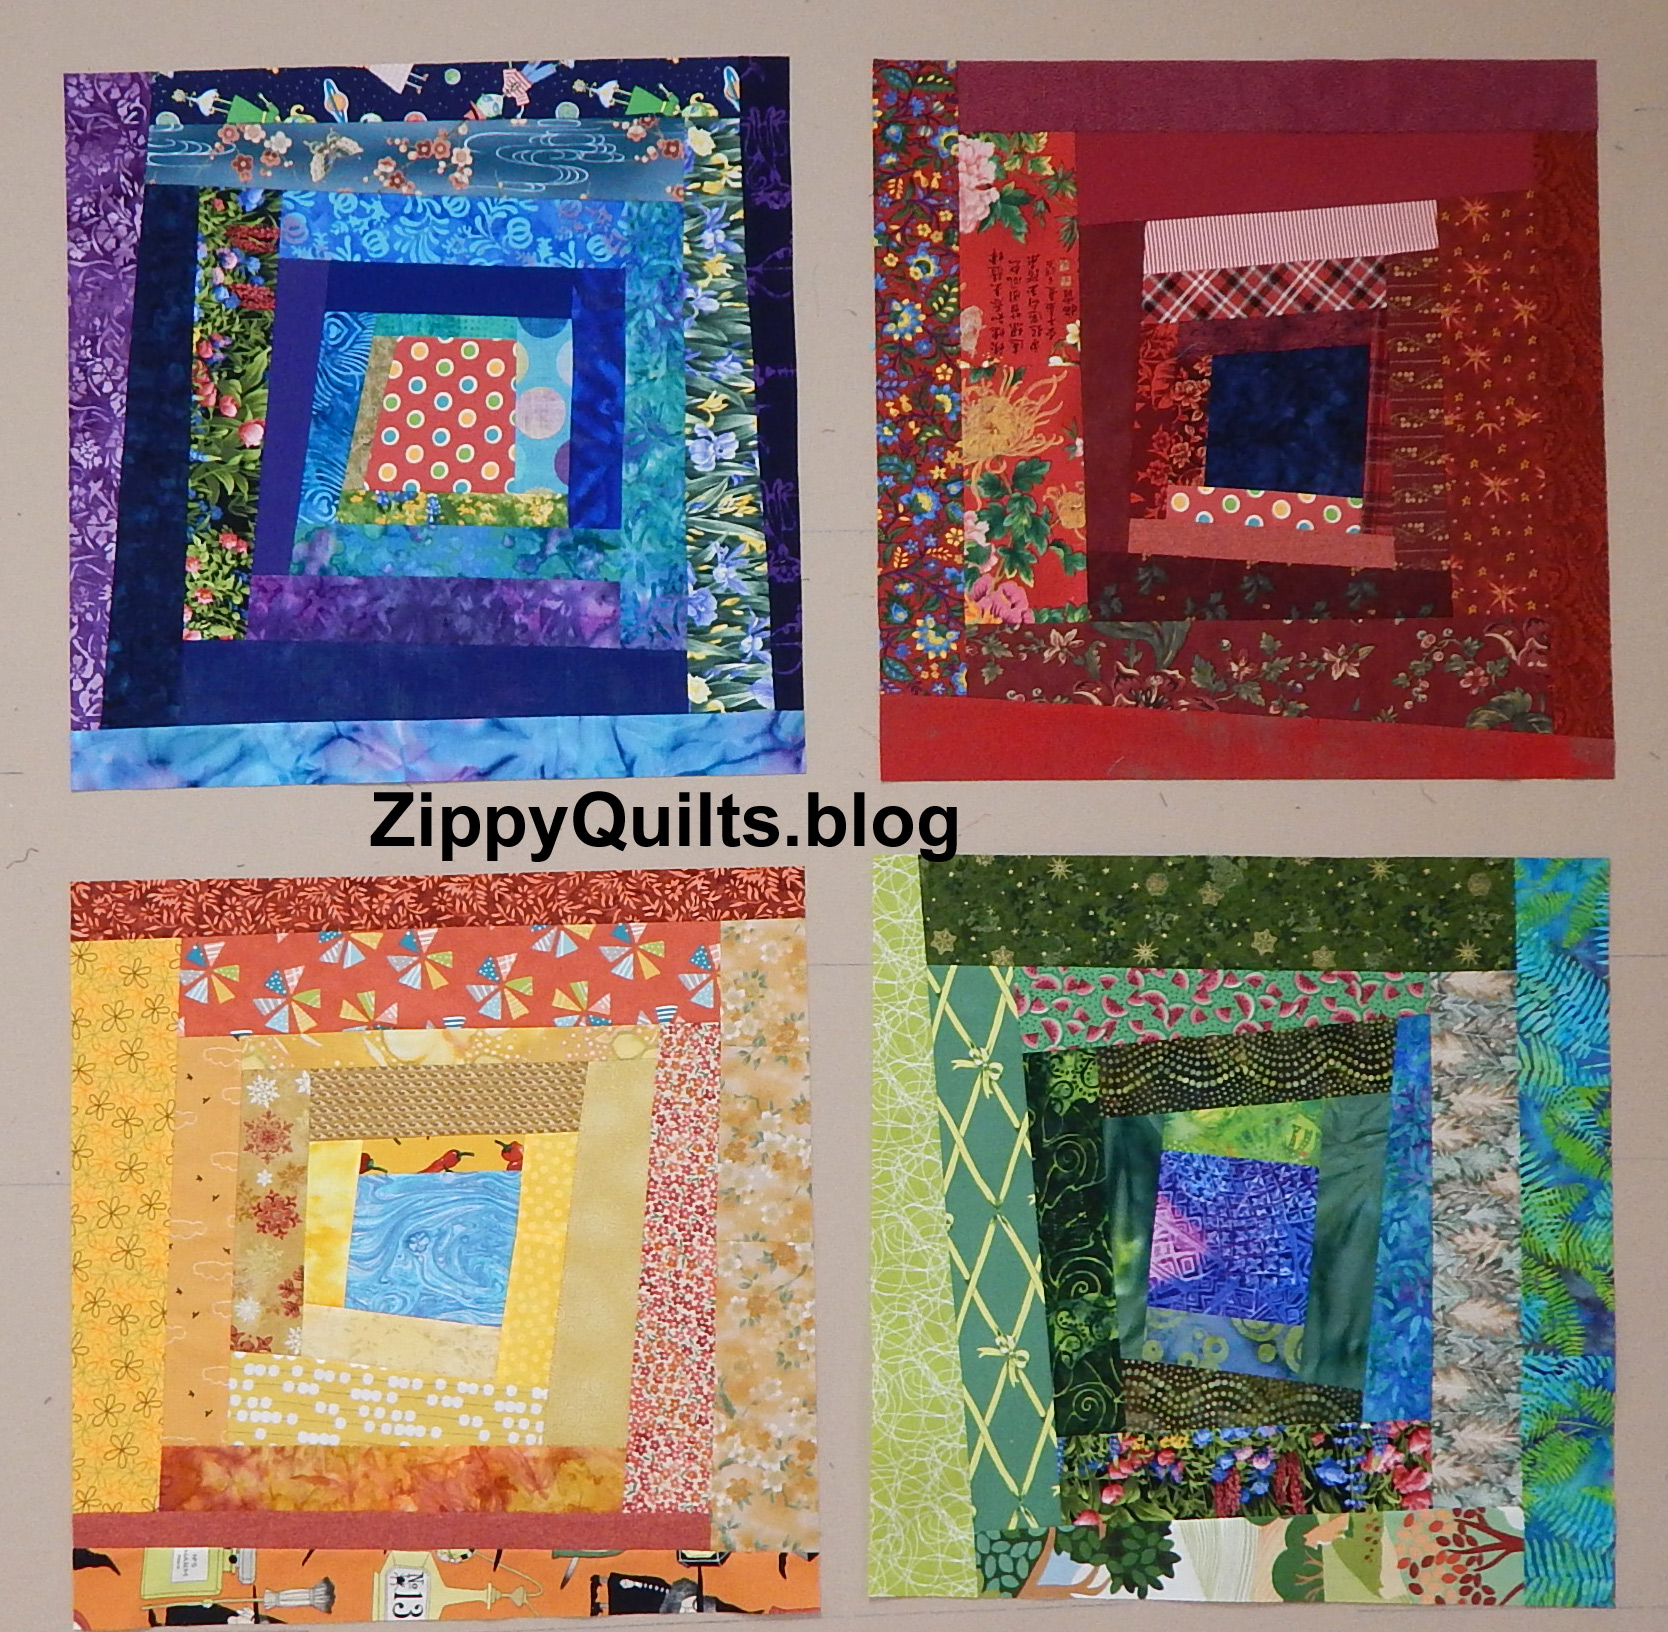
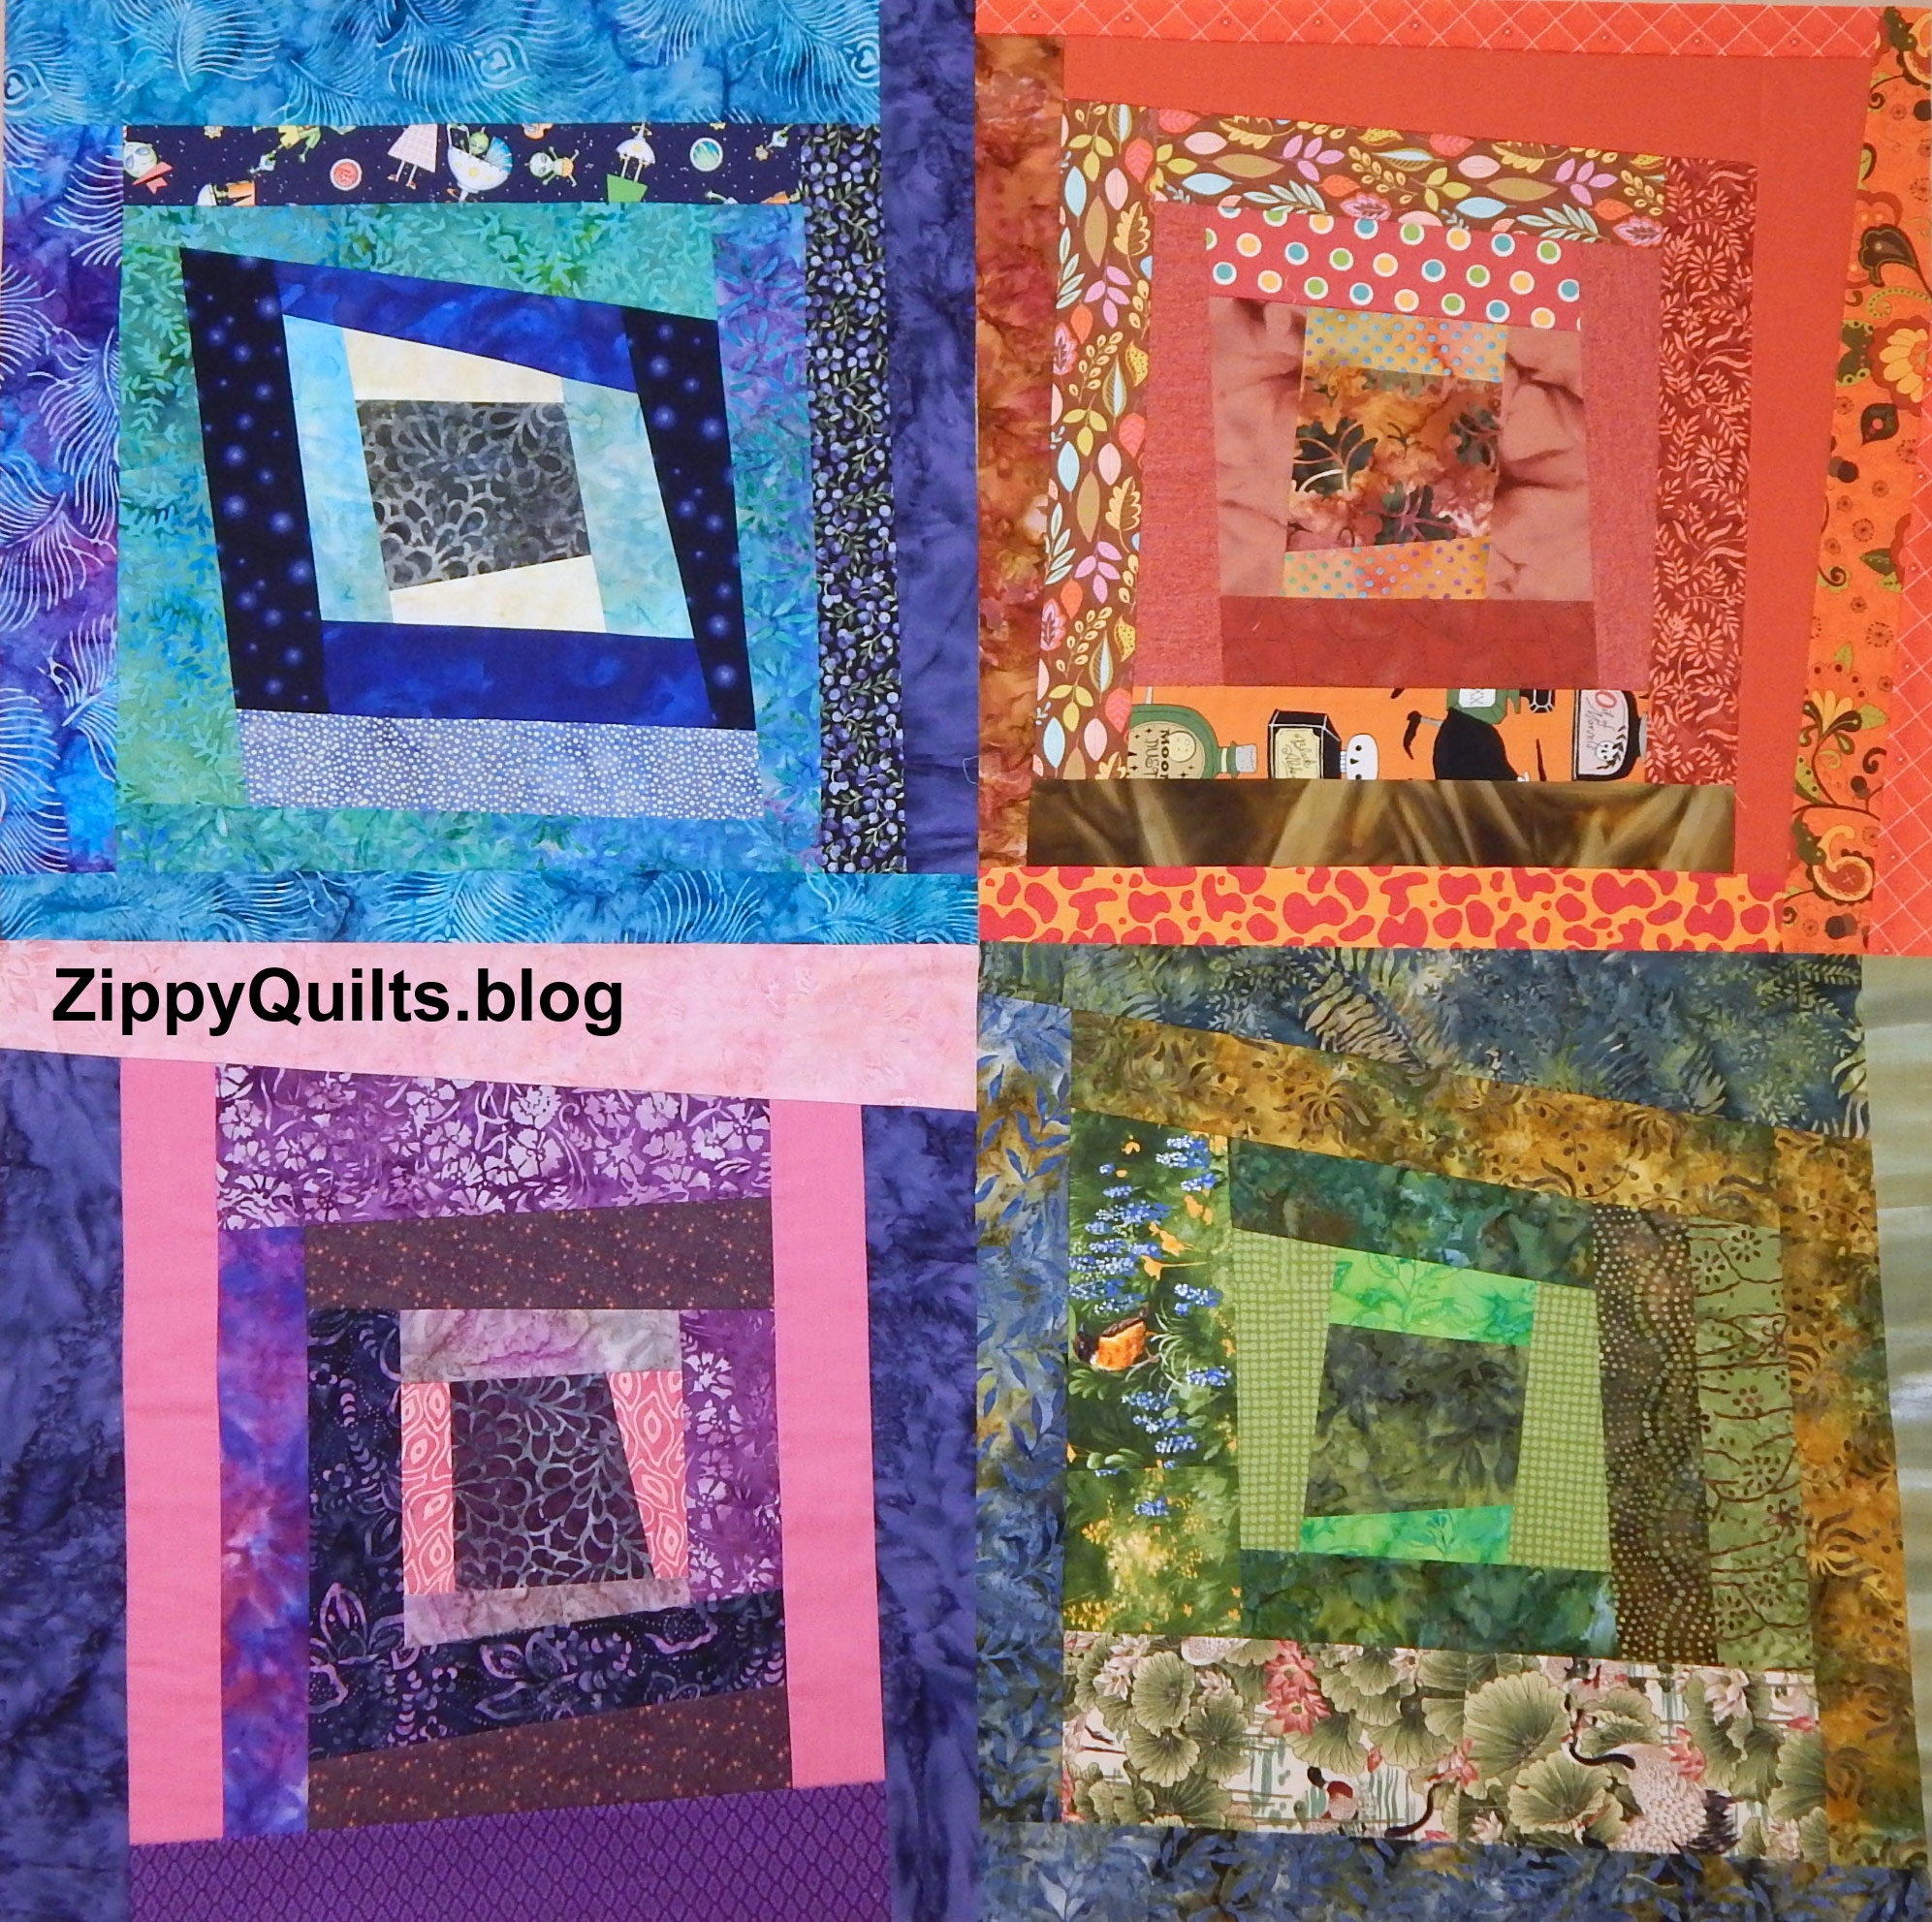
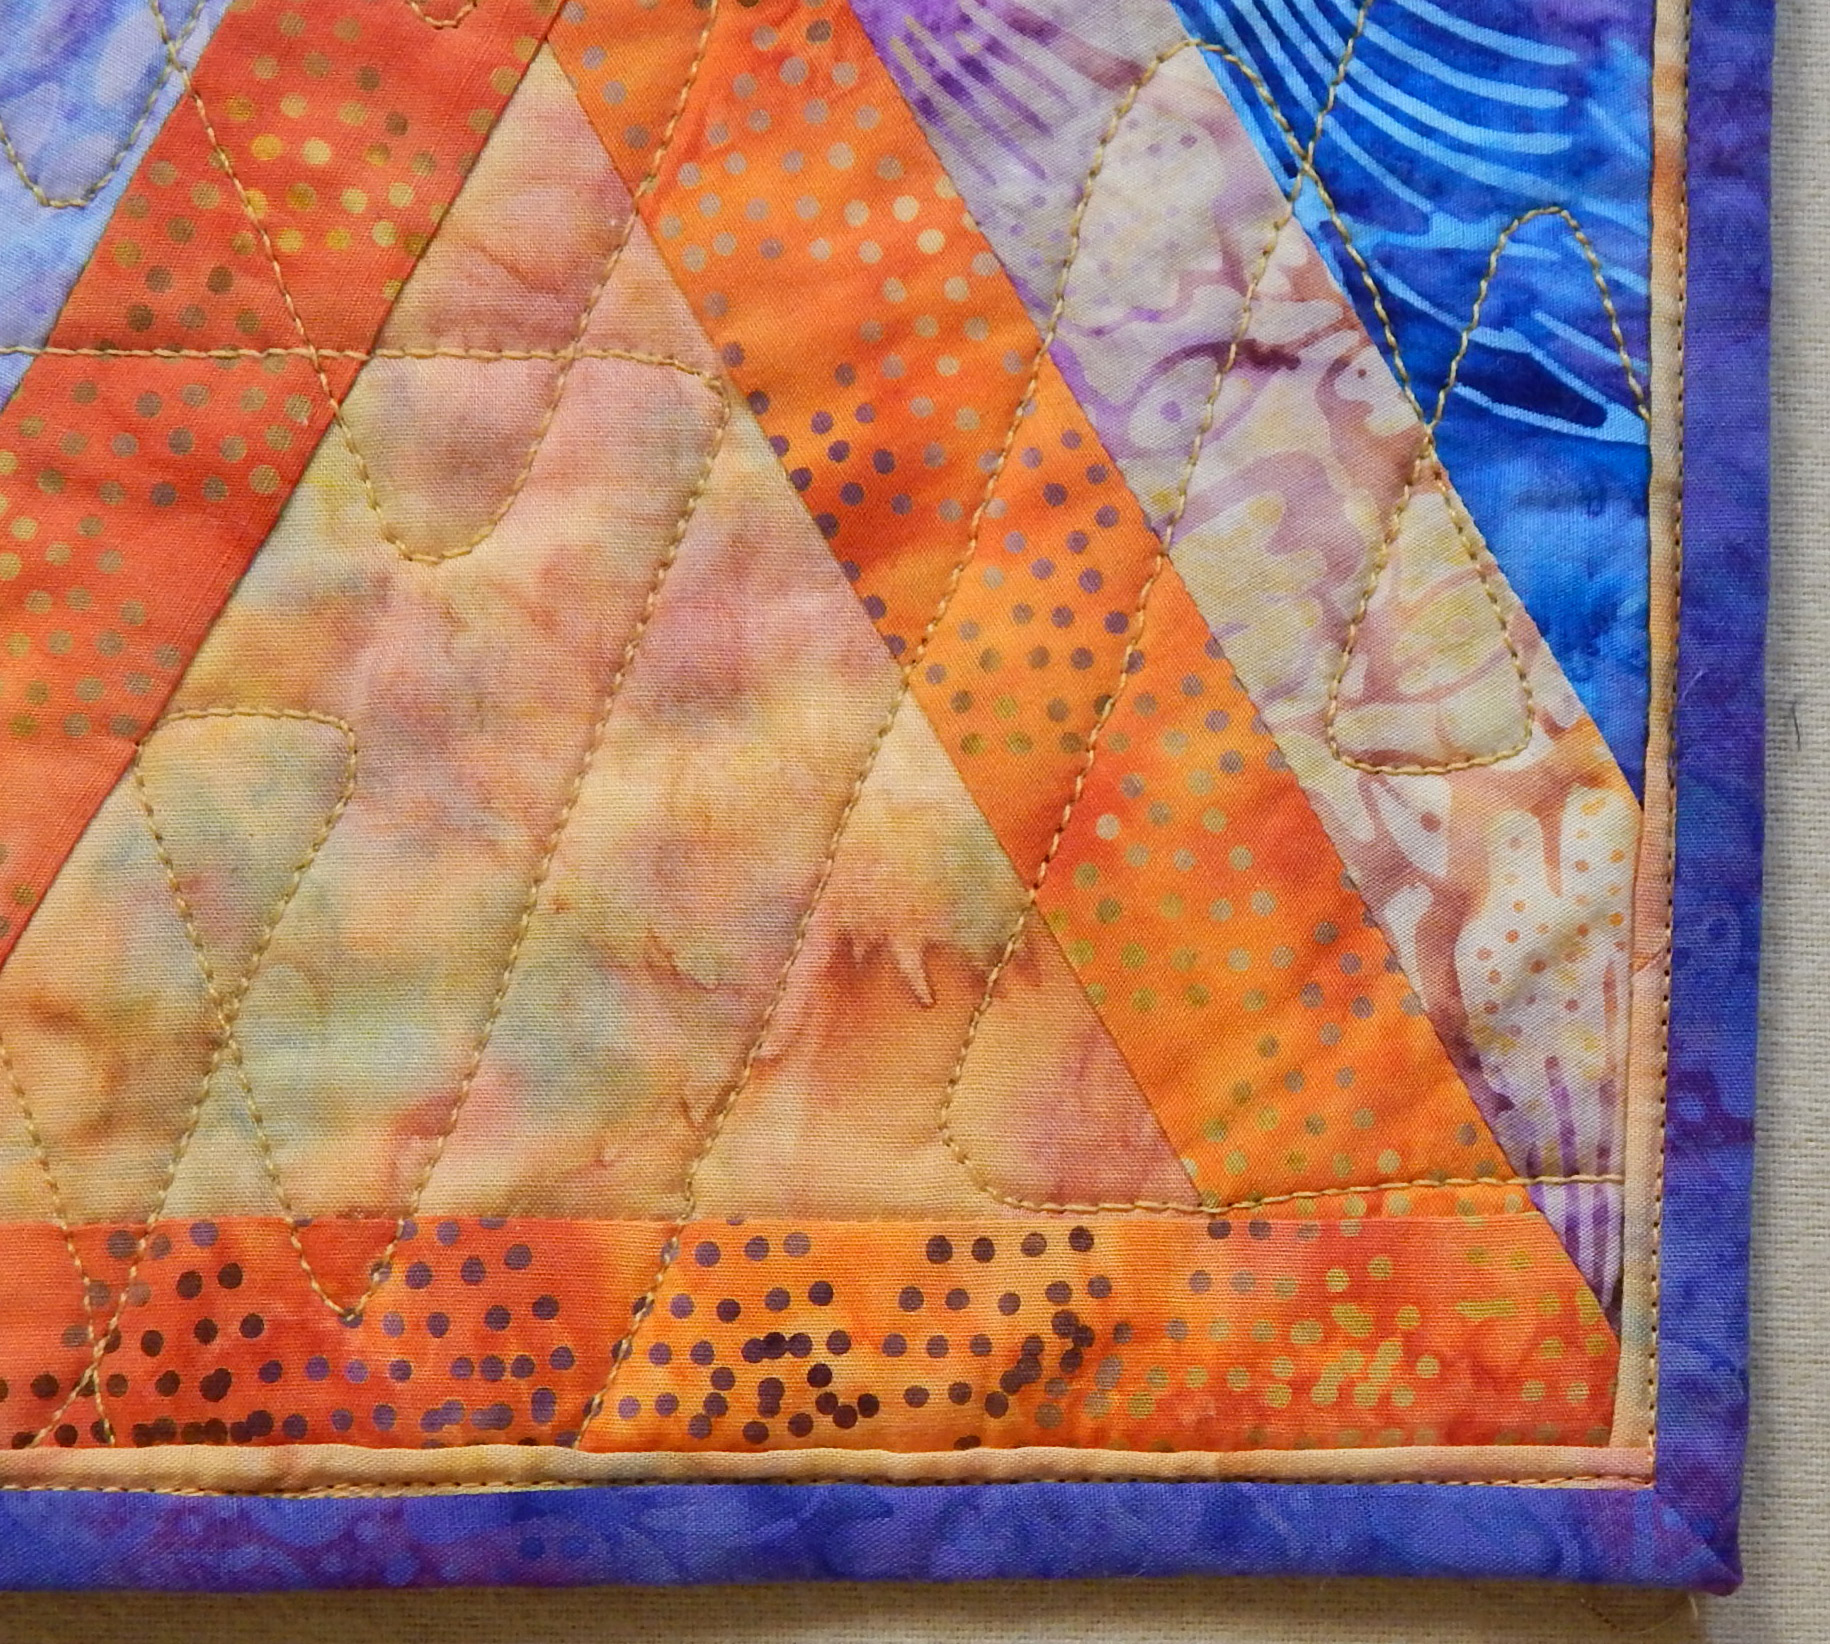
And here is one of the finished wonky star blocks.
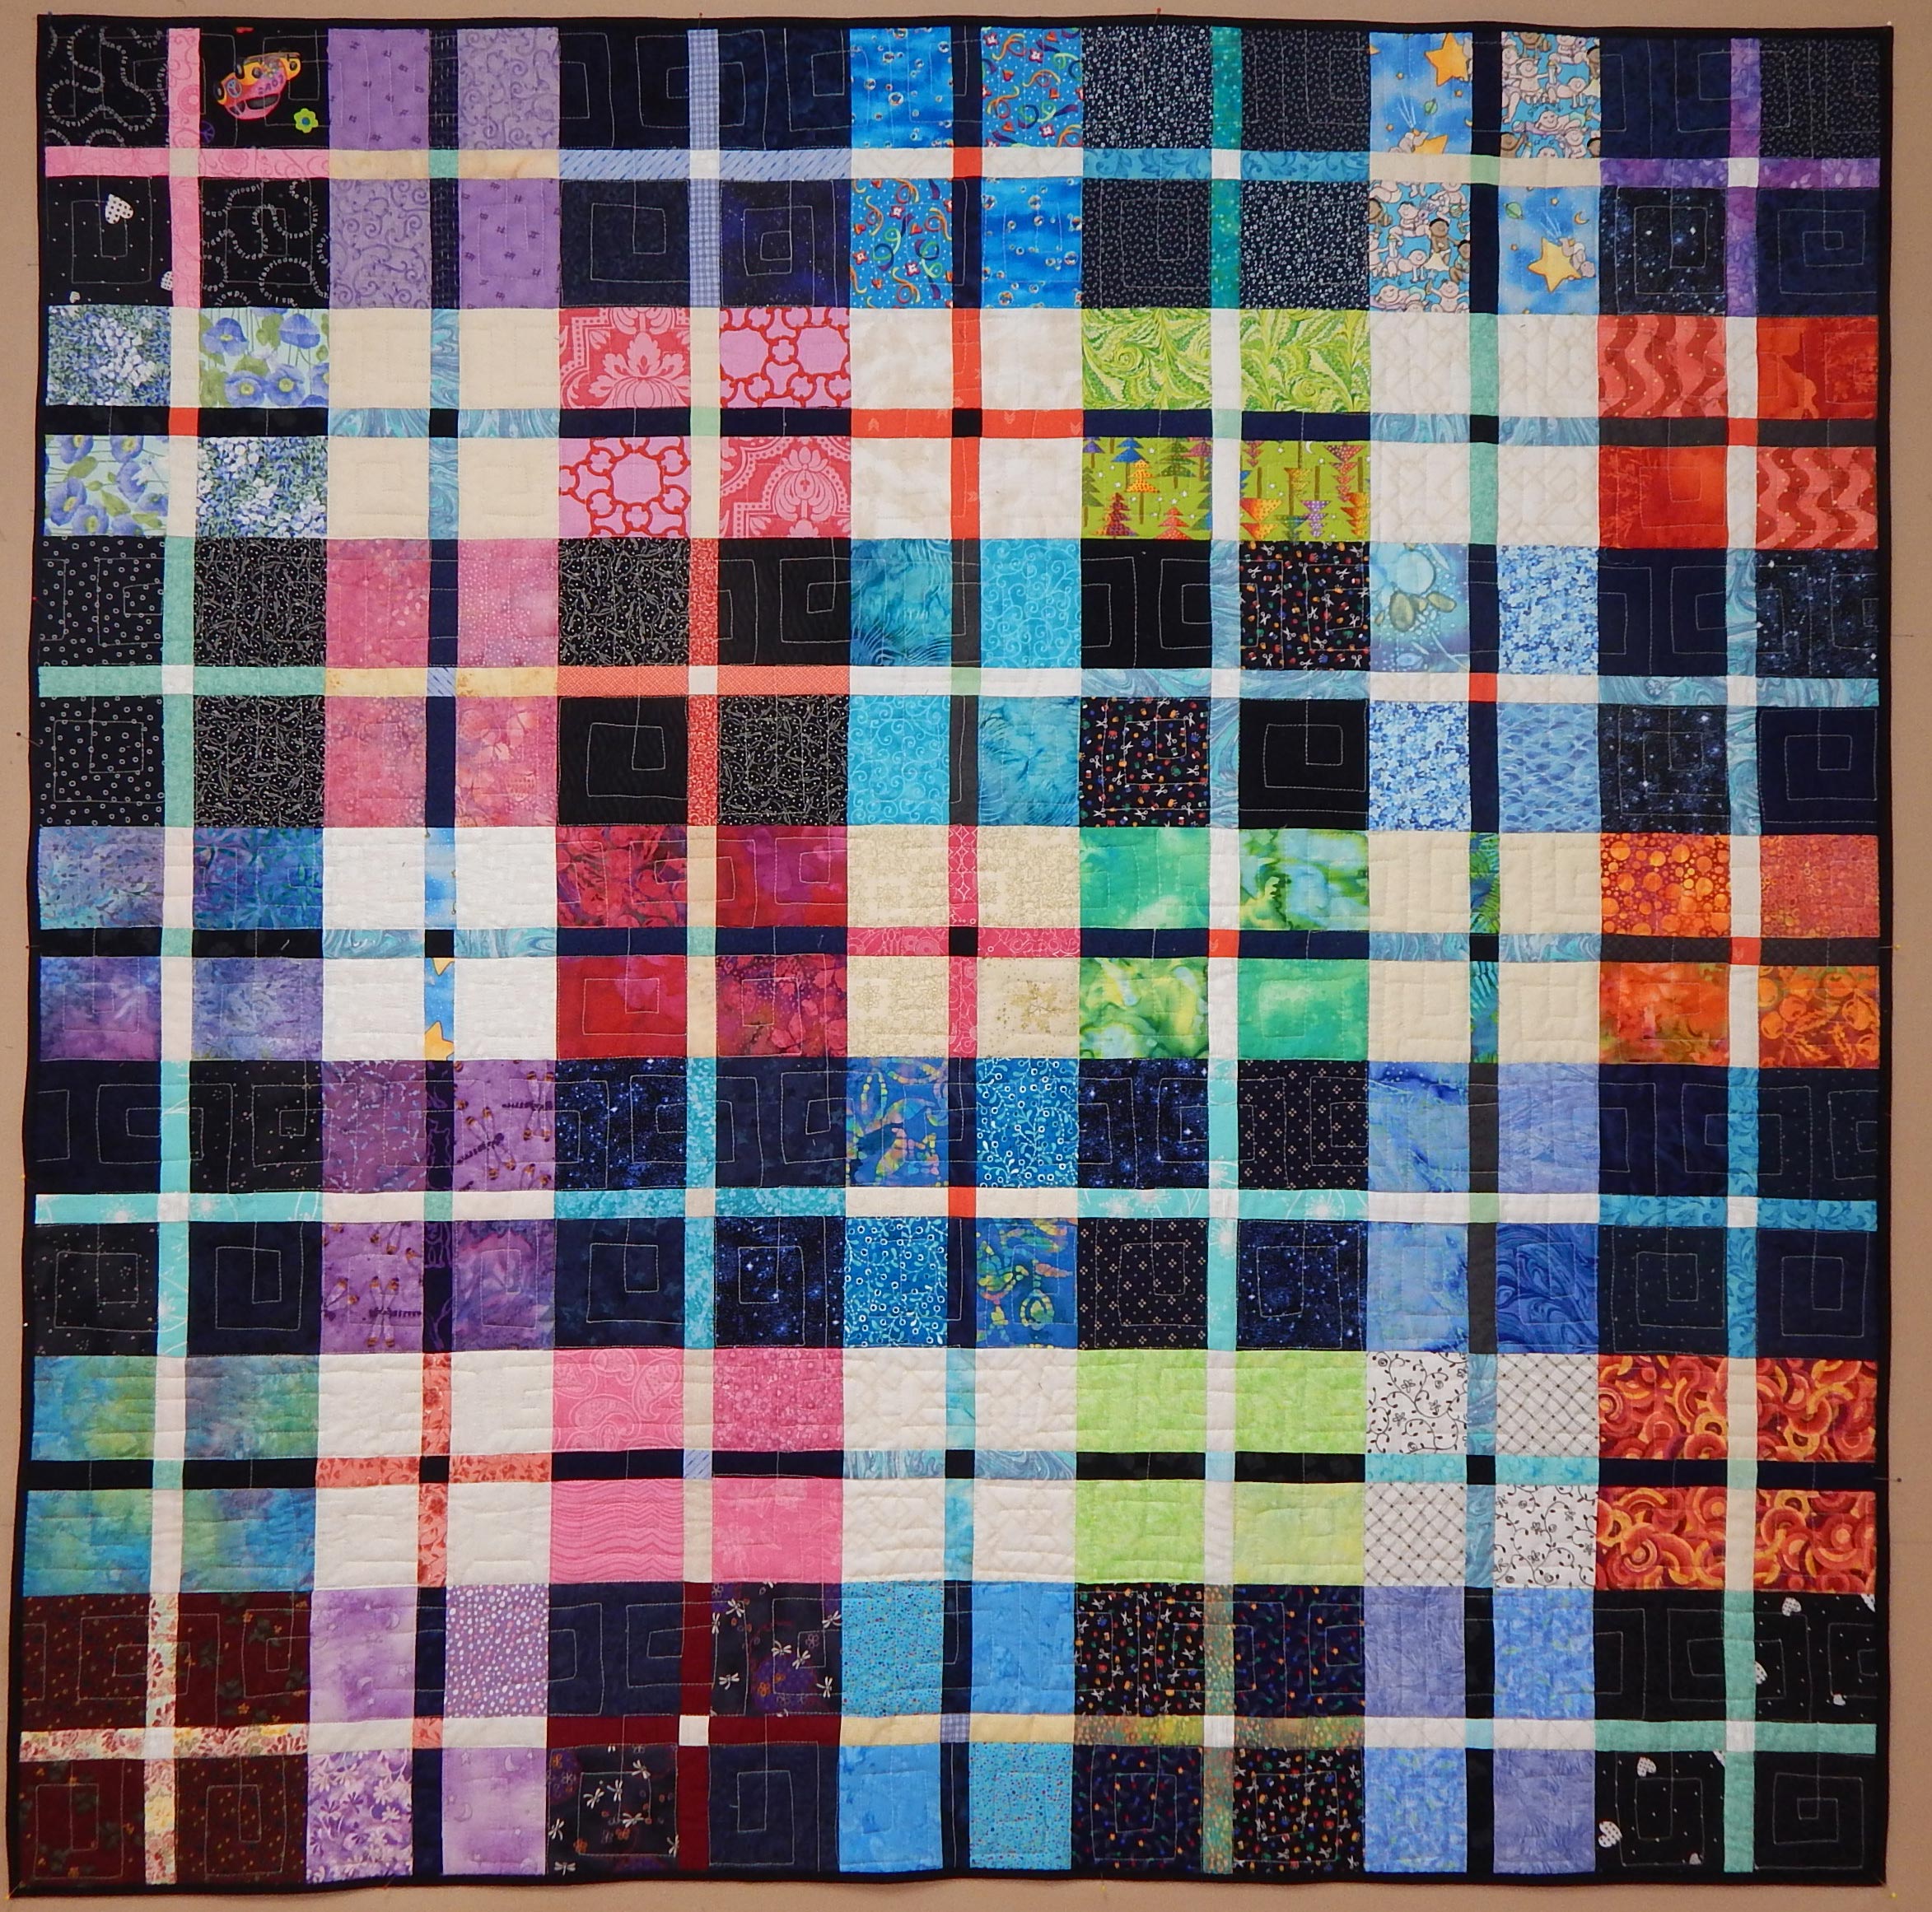
The finished quilt:

QUILT DETAILS

Little Green Man

Finished size: 54” x 72”

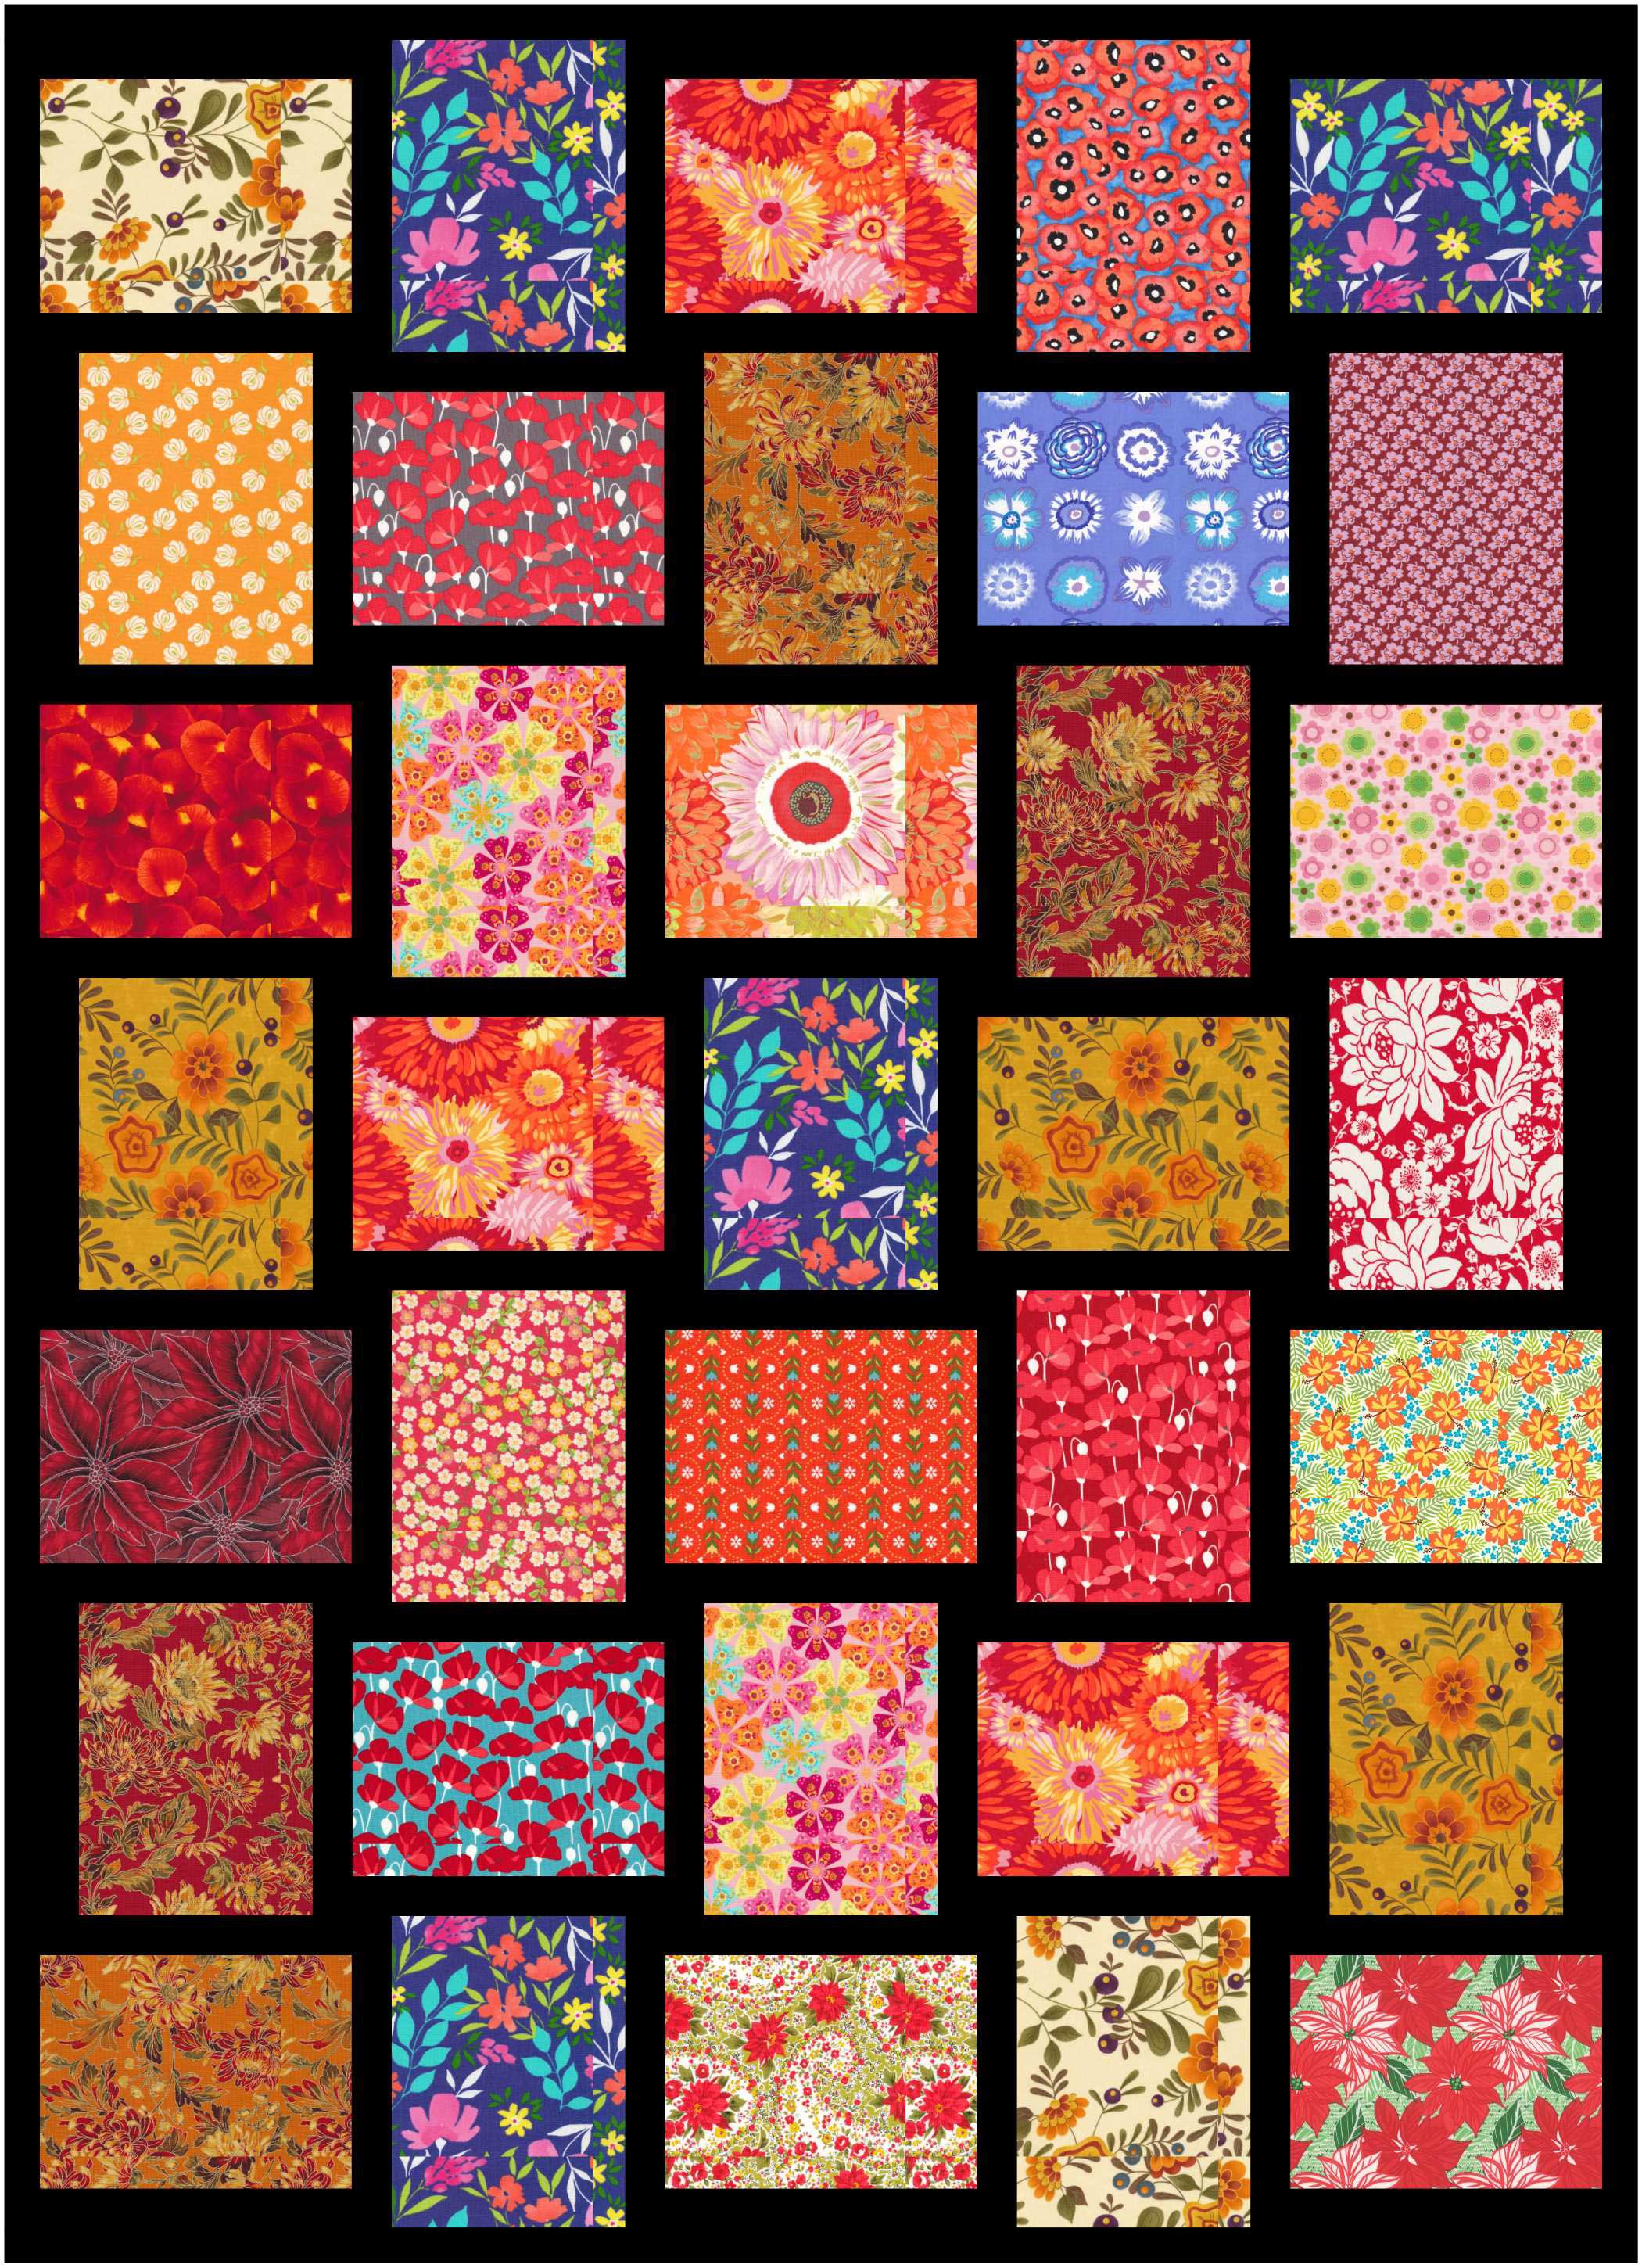
A variety of fabrics from different manufacturers

The pattern is outlined in the blog above, but is not available commercially

Quilted by Julia Madison, except for the Little Green Man block, which she left for me because I wanted to avoid any extra holes in the Kraft-Tex I used for applique.

Now, does anyone else recall the “Little Green Man” song from the 1950s?

One Mistake Makes Two Quilts!

A while ago one of my blogging friends posted a picture of her “red rails” quilt.  She makes these quilts to use up 1.5″ x 3.5″ scraps, so it seemed perfect for me.  I cut my scraps into strips varying from 1.5″ to 4.5″ in width and store them in drawers, sorted by size in 0.5″ increments.  Here are some of those (stuffed) drawers:

Since I had a lot of 1.5″ strips and wanted to make another donation quilt, I got started.  Her quilt is “red rails” because the center strip of every block is red.  I have a lot of blues, so mine became “blue rails”.  I drew it with EQ8 to start with, to be sure I knew what I was doing:

Blue Rails, drawn in EQ8 based on a quilt by Nann at withstringsattached.blogspot.com

I got busy sewing 1.5″ strips together in sets of 3 and cutting the sets into 3.5″ squares.  Then I started making the blocks.  Before I knew it, the 1.5″ bin was almost empty and I had a lot of little 3.5″ blocks.

I joined them in groups of 4, and that’s where I went wrong.  It turns out there is a right way and a left way for the blocks to twirl in sets of 4, but I didn’t realize that at first!

Trust me, no matter how you rotate these two blocks (drawn with EQ8), they do not match up!

So, I will have TWO blue rails quilts, one rotating in each direction.  Here’s the first one, which I am donating this month.  Another doggone learning experience 😀

Blue Rails donation quilt, about 40″ square

What have you learned lately?


Equilateral Triangles

I love triangles and I love log cabin quilts, so what could be better than triangle log cabins?
This was made using Moda’s pattern for Wild Waves Batiks, available free here.
I used a 60 degree triangle ruler rather than the template provided, and it was not at all difficult.

The backing is fabric I got off the sale rack at one of my favorite shops.

I wanted to try my hand at getting a quilt to come out completely “squared up” for a change. I don’t usually worry about it–after all, most of my quilts are intended to keep people warm rather than hang on a wall, so what difference does it make?  However, just for a challenge…
I used Susan Cleveland‘s instructions for squaring and stabilizing a quilt while applying tiny piping around the edge.

Here is my pile of tiny piping

I took a binding class with Susan years ago, and I highly recommend it. I used her Piping Hot Binding tool and binding instructions, which I also recommend. The whole process was well organized (Susan could have been an engineer!) and her directions were easy to follow.

Here is a detail of the binding.  My quilt came out nice and square (OK, it’s a rectangle, but you know what I mean!).

The quilting was done by Julia Madison, and you can see in the photo here that she used a triangle motif to go with the quilt.

The quilt finished 50″ x 53″.  The pattern finished larger, but I quit when I got done making triangles 🙂

Some Tiny Blocks

My modern guild is making a charity quilt for QuiltCon 2019, and the requirements include a predetermined palate and blocks with pieces no larger than 1″ in at least one dimension.  The theme is “small piecing”.  Here is the palate:

At the last meeting, our guild had chunks of fabric about 8″ x 10″ cut for us to take home and make little blocks.  The blocks are going to be used to construct something else, so the only requirement is that they finish either 2″ or 3″ square.  I took these 3 colors:

And here are some little blocks I made.

The quilt has to be twin size, so it’s going to take a LOT of these babies!  It will be fun to see what other guilds do when QuiltCon comes around in February.

Thanks to everyone who offered an opinion about my choice of accent color for the shirting quilt.  There are two different blocks in the quilt that use the tiny accent squares, and I’ve decided to use orange for this one and rust for the other.  Here are a couple of the blocks with orange.  Those tiny orange squares finish 3/4″.  Eek!

I’ll keep you posted.


A Finish to Start 2018

This scrap quilt started out when I saw Tonya Ricucci’s “Lego Quilt” tutorial.  I didn’t use her method; you can see my “improvements” here.  I made changes to make the quilt easier for me to construct, and arranged the blocks a little differently, but I’m sure you can see this is based on her idea.

scrap quilt

Scrap quilt made with strips that finish 1″ wide

For 2018, I plan to set aside pieces of each quilt I make so I can have a “scrappy 2018” quilt to remember all my projects!  I named my version of Tonya’s quilt “Scrappy New Year”, and I guess the next one will be “Scrappy 2018”.  Really the pieces in this quilt are so small that every project should have enough left over to put in the quilt.

scrap quilt

Detail of Scrappy New Year

As for the 2017 version shown here, I estimate it contains 1,680 pieces. I have a friend who has beat that number by quite a bit; you can see one of her quilts, (with 5,496 pieces!) here.

A Nice Surprise and a New Scrap Project

ribbonFirst, the surprise: One of my quilts, Cherrywood Toss, won first place in the Modern category at my local show! Needless to say, I was thrilled!

improvisational quilt

Cherrywood Toss. Read about it here.

And then it was on to a new scrap project!  I’ve been wanting to make a scrap quilt with a zillion pieces ever since my friend Jerri made her postage stamp quilt.

I came across the “lego quilt” on Pinterest and followed the links to this post by Tonya Ricucci of Lazy Gal Quilting, which gives specific directions.  Go visit her post–there’s a cool picture of an antique quilt that gave her the idea.

lego quilt

Strips on my design wall

Tonya made her 10″ (finished size) blocks using 1-1/2″ strips composed of scraps of various sizes.  She mentioned that there was some difficulty getting them to come out the right size.  Because of that, I am making my strips 11″ long unfinished so I can trim the blocks to 10-1/2″ wide after they are assembled.  Also, I’m making the first strip in each block 2″ wide unfinished so I can trim in that direction as well.  lego-2

So far I’m just making strips and putting them on the design wall to be sure I have a balance of values throughout the quilt.  I’ll let you know how it goes.  This takes a LOT of time!  And like most scrap quilts, it doesn’t seem to use up even 10% of the available scraps!  So far I’ve used only one drawer of the scrap cabinet!!!!

This might be a good leaders-and-enders project, since it seems like it could take forever.  I’ll let you know how it turns out 🙂

Six Finishes!

Last year I pledged (and made) 12 quilts for Ronald McDonald House.  That was a little overwhelming, so I decided on 6 quilts this year.  I’ve now finished the last one, and here they are!  All are about 40 inches square.

The first was made from a pattern called Ribbon Box, available free from Cloud 9 Fabrics.donation-6

The next was from the last of the many wonky 9-patch blocks.  I made these for a quilt, but didn’t like the way they looked all together.  Luckily they look just fine with alternate solid blocks.donation-4

The next two were to use fabric with vehicles, since sometimes we run short on “boy” quilts.

This one was made to use some of my stash of charm squares:donation-2And finally, I just had to make one using a lot of the cute modern prints I’ve been collecting:donation-1These were fun, as always.  I used them to try a few new things, and now they’re ready to go 🙂

Save

Save

Save