My Modern Sampler, Blocks 9 and 10

Channeling Gwen Marston, I made a couple of “liberated” quilt blocks for the sampler.  This means they were cut without a ruler and the pieces are deliberately “wonky”.

modern sampler, modern quilt block

Liberated Hole in the Barn Door blocks finish about 5″ square

Some current authors are making a big deal of cutting without a ruler, but Gwen Marston has been doing it for years.

I DID use a ruler to make the original background square.  Here are the steps:

modern quilt block

I cut the big square using a ruler, the subdivided it into a 9-patch freehand

modern sampler quilt

Corners done, time for the sides

modern sampler

Sides done using method similar to the corners: pin, check, then sew and trim

modern sampler

Ready to be sewn together!

For Block 10, I cut my scraps into strips.and lined them up.

modern quilt block

Scraps cut into strips and pieced with black and white background

The widths of the colored strips and the white strips between them are semi-random. The sashing between the columns finishes 2″, and the block finishes 12″ square.

A few more blocks and then I’ll have to decide how to set them!  Here are the previous posts about My Modern Sampler:

Block 8

Painter’s Tape Block

Humbug Star

Improv Block I

Pretty Blocks

My Own Modern Sampler–It May Take a Year!

Modern Sampler: Painter’s Tape Block

For the next block in my modern sampler, I used an improvisational technique that first occurred to me several years ago: I outline the size I want my final piece to be with painter’s tape and then fill it with whatever shape I’ve decided to use.

My first exploration of this technique was a T shirt quilt.  The motifs from the shirts were many different sizes but could all be cut as rectangles or squares.  I outlined a rectangle about 55″ x 68″ on one of my carpets and stated filling it with shirt pieces.  I selected a modern fabric to fill in the holes, and here it is:

Improvised T Shirt Quilt

Improvised T shirt quilt

The shirts were all cut into rectangles and squares, and the fill-ins therefore were rectangles and squares as well.  I’m not saying this is easy, but it sure was more fun than just making a bunch of blocks the same size and lining them up.

So for the next Modern Sampler Block, I outlined an 8-1/2″ square on my cutting mat and started filling it with triangles.

Improvised quilt block

Starting a square that will finish 8″

I added 1/4″ strips between the triangles to give the whole thing definition.  Then I just kept addiing triangles (that I cut randomly) until it was done.

Improvisational quilting

Improvised triangles block

No chance of a pattern for this one.  To make it, just cut a triangle you want to start with and then keep adding on.  I have a couple of deliberate exceptions to my “rules” so that the eye doesn’t just keep saying “yes”, it has to stop occasionally and say, “hey, wait!” The only trick is to keep finishing with a straight edge so you can easily add on the next section.

Try this technique! I hope you enjoy it!

Here are the previous posts in my Modern Sampler series:

Humbug Star

Improv Block I

Pretty Blocks–better look at this one!

My Own Modern Sampler–It May Take a Year!


My Modern Sampler: Humbug Star

I recently read one of Gwen Marston’s books, and she had directions for a sew-and-flip star.  Like most of modern quilting, this star has been published by multiple people in multiple places, so it’s not new.  However, if you’ve never done sew-and-flip, you can find my tutorial below.  It’s a very fun technique.

flip and sew star

There’s a major flaw here!

So, HUMBUG!  Can you see what I did wrong?  I didn’t see it until I took the picture!  I rarely rip out seams in my improvised blocks, but this was too much for the perfectionist who whispers in my ear much of the time.  So here’s the corrected block:

Sew and flip tutorial

Humbug Star

This block finishes 12″ X 15″.

Here are the links to my other modern sampler blocks so far.

My Own Modern Sampler–It May Take A Year!

The Modern Sampler Continues

Improv Block I


And here is the tutorial on the sew-and-flip star.

This project was originally developed for Modern Quilts Unlimited magazine.  You can read about it here.

Unfinished block size 15″ x 15″

modern star block

This block finishes 14-1/2 x 14 1/2 inches

Fabric Requirements

modern quilt fabric

Fabrics supplied by Michael Miller Fabrics

Background fabric 16 1/2″ x 16 1/2″

Star center fabric 5 1/2″ x 5 1/2″

Eight solid fabrics for star rays, each 6 1/2″ x 4 1/2″

Piecing Instructions

Note: all seam allowances are 1/4″.

  1. Cut the background fabric into a 9-patch of 5-1/2 inch squares as shownCutting Diagram
  2. Remove the center square and replace it with a 5-1/2 inch square of your center fabric

    Center square surrounded by background squares

    Center square surrounded by background squares

  3. For star rays, build 2 rays on each of 4 background squares as follows:
  • Lay the one 6 1/2″ x 4 1/2″ piece of solid fabric on a 5 1/2″ x 5 1/2″ square of the background as shown.   Place pins approximately where the 1/4″ seam will be along the long edge of the ray and turn along the pins to check placement.  Diagram-3-web Adjust if needed to make a star ray that suits you and to completely cover the foundation piece where the star ray will be.  Note that you will need to have your ray end at least 1/4″ from the edge if you want to see the point.  However, if you want blunt points there’s nothing wrong with that!  Here’s an example:Blunt point example
  • Reposition the pins and stitch 1/4″ from the edge of the ray as shown below:Diagram-5-web
  • Remove pins, turn the ray back into place, and press. Trim the side and bottom edges of the ray even with the foundation fabric.  Do not remove the foundation fabric under the ray, as it helps keep everything square and stable.Diagram-4-web
  • Place the fabric for the second ray, pin and test position, then stitch, press, and trim as for the first ray.Diagram-6-web Note that the rays need to overlap at least 1/4″ away from the raw edge where this section will join the star center. It’s fine to overlap more than that.

    Diagram-7-web

    Press the second ray and trim to match the background block.

  1. After building 4 sets of 2 star rays, re-assemble the 9-patch with the plain corners, printed center, and colored rays.

    modern star block

    This block finishes 14-1/2 x 14 1/2 inches

The Modern Sampler Continues

These next two blocks were made from inspirations I found on Pinterest (yes, I love Pinterest!)  The first I simply copied because I loved the colors and their arrangement in the original artwork by Richard Paul Lohse.

Modern Quilt Block

Quilt block based on the work of artist Richard Paul Lohse

Here’s a drawing of how I constructed this block, with measurements, if you want to copy him, too.  There are 4 units, each 4″ finished (4-1/2 inches for each unit before joining) so that the entire block is 8″ finished.  I’ve marked the size to cut each piece on one of the 4 units, assuming you can take it from there 🙂

modern quilt block

Layout for block based on art of Richard Paul Lohse

If you look up the artist Richard Paul Lohse, you’ll see that a lot of his designs would make terrific blocks or whole quilts.  Great sense of color!

The second block was made from a tutorial I found at a website called Piece By Number and you can find the free pattern on her site here.

modern paper pieced block

Circle of Geese block made from a pattern at PieceByNumber

This block was easier than it looks thanks to paper piecing.  I enjoyed making it, though I feel no need to make another right away!

I think these two blocks have a lot of ZIP for the relatively little amount of effort they required.  The Lohse block depends very much on choice of color, so be sure to lay out the fabrics and look at them a while before cutting.  Have fun!

My Own Modern Sampler: It may take a year!

I’ve had some beautiful solids and black/white text prints in a box waiting for me to have time for them, and I’ve been studying all my favorite inspirations trying to decide how to use this stash.

modern quilt fabrics

Quilt-in-Waiting

Then it came to me:  I don’t have to choose!  I’ve been wanting to make my own modern sampler quilt for some time, and this is it.  I’m going to make lots of different blocks, JUST BECAUSE I WANT TO MAKE THEM and then combine them into this quilt.

Here’s how it will go:  I’ll make a block whenever it strikes my fancy and will post about it here in case you want to make it, too.  Some will be original, some traditional or designed by other quilters.  I’ll make a quilt when I have enough blocks, but I’m giving myself a year. Blocks will range in size from 3″ to 12″ and they won’t all be square!

Here are the first couple:

modern quilt block

Two 9-patch blocks cut freehand; these finish 6 inches square

Obviously the 9-patch isn’t a new block, and there are “modern crosses” all over the web, like this one from Allison at CluckCluckSew, so my idea isn’t unusual.

Modern Quilt

Quilt by Allison at CluckCluckSew.com

The point is, I enjoyed doing it!  These blocks are just for fun.

I figure these are too easy to require instructions, but I blogged about how to insert those narrow yellow bands, so check it out here if you want to know how I did it.  And, since they are cut freehand and end up a little wonky, I started with 8 inch squares to get 6 inch finished-size blocks.

I hope you’ll follow along with my sampler even if you don’t make the blocks.  I’ve already made the next two (which are far fancier than these), and I’ll blog about them next week!


Tessellations! By Jean Larson

As promised, my friend Jean Larson has written a tutorial on tessellation quilts.  I hope you enjoy it as much as I did!  –MJP

Tessellating designs make me happy.  Tweaking those designs is even more fun.   I want to share the joy of starting with a very, very simple design and watching it blossom.  My inspiration comes from this web site:  http://gwydir.demon.co.uk/jo/tess/

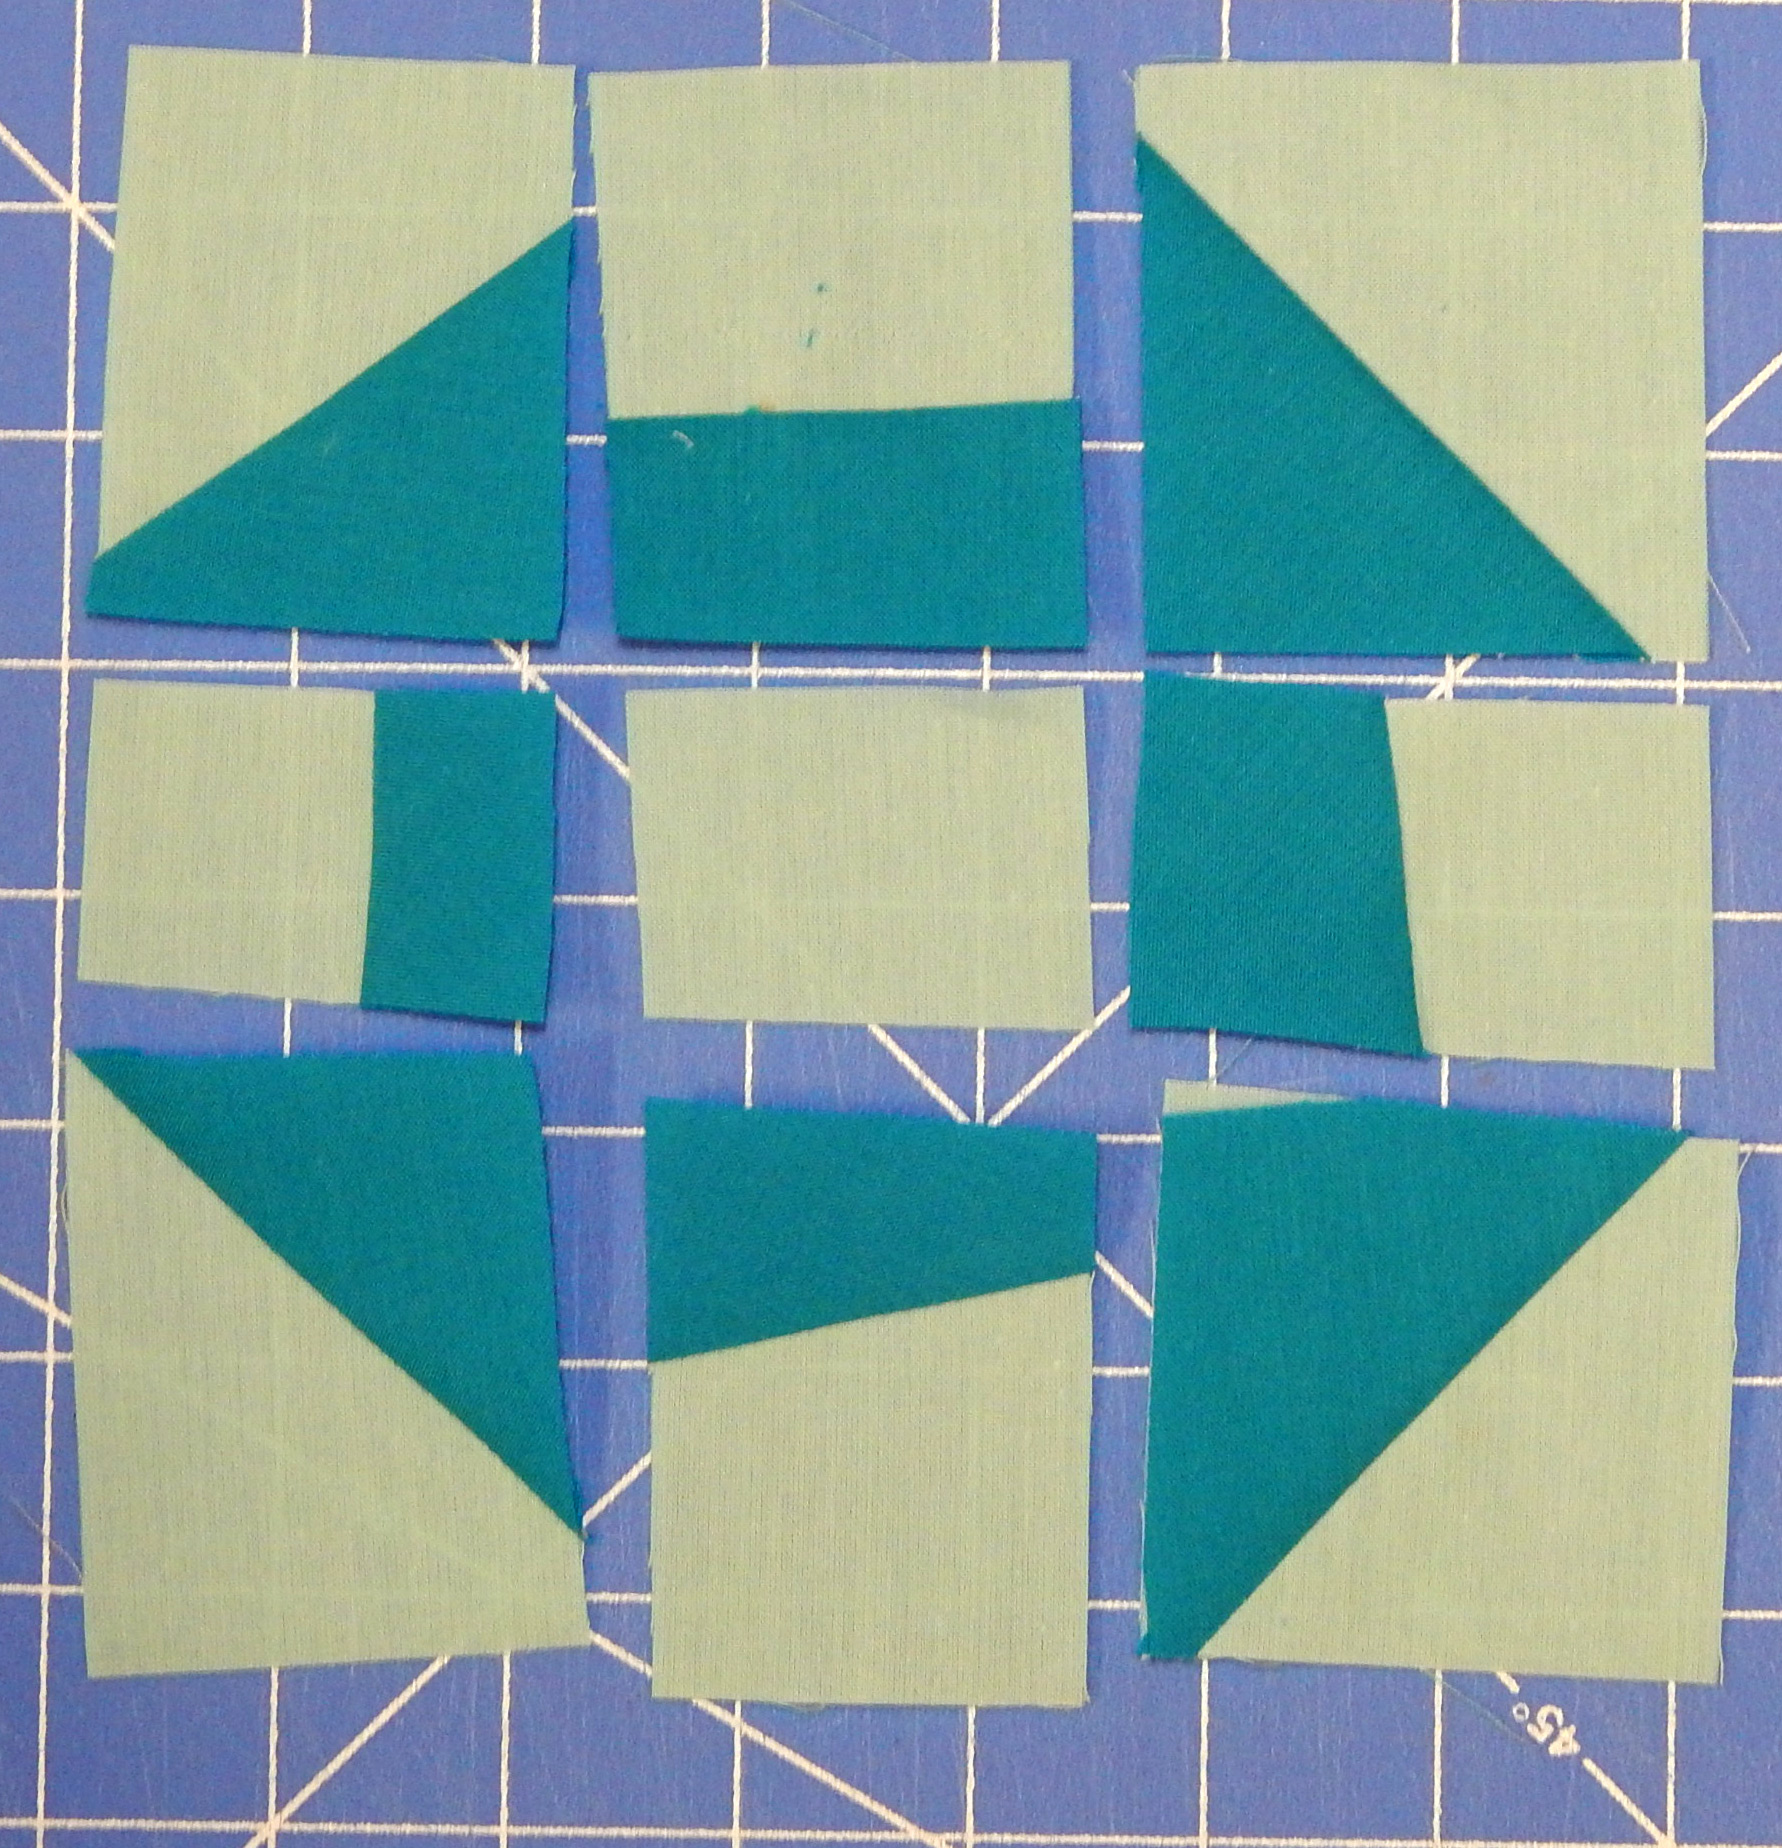
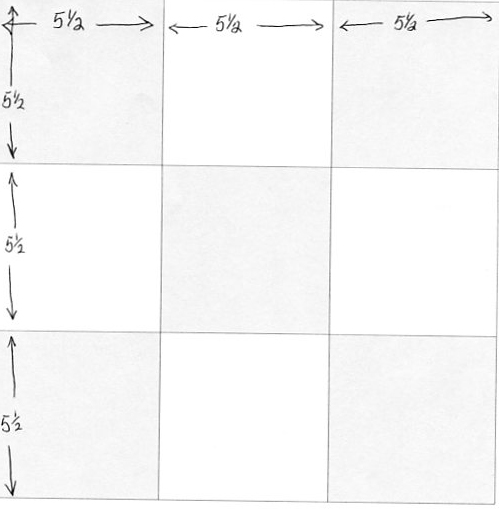
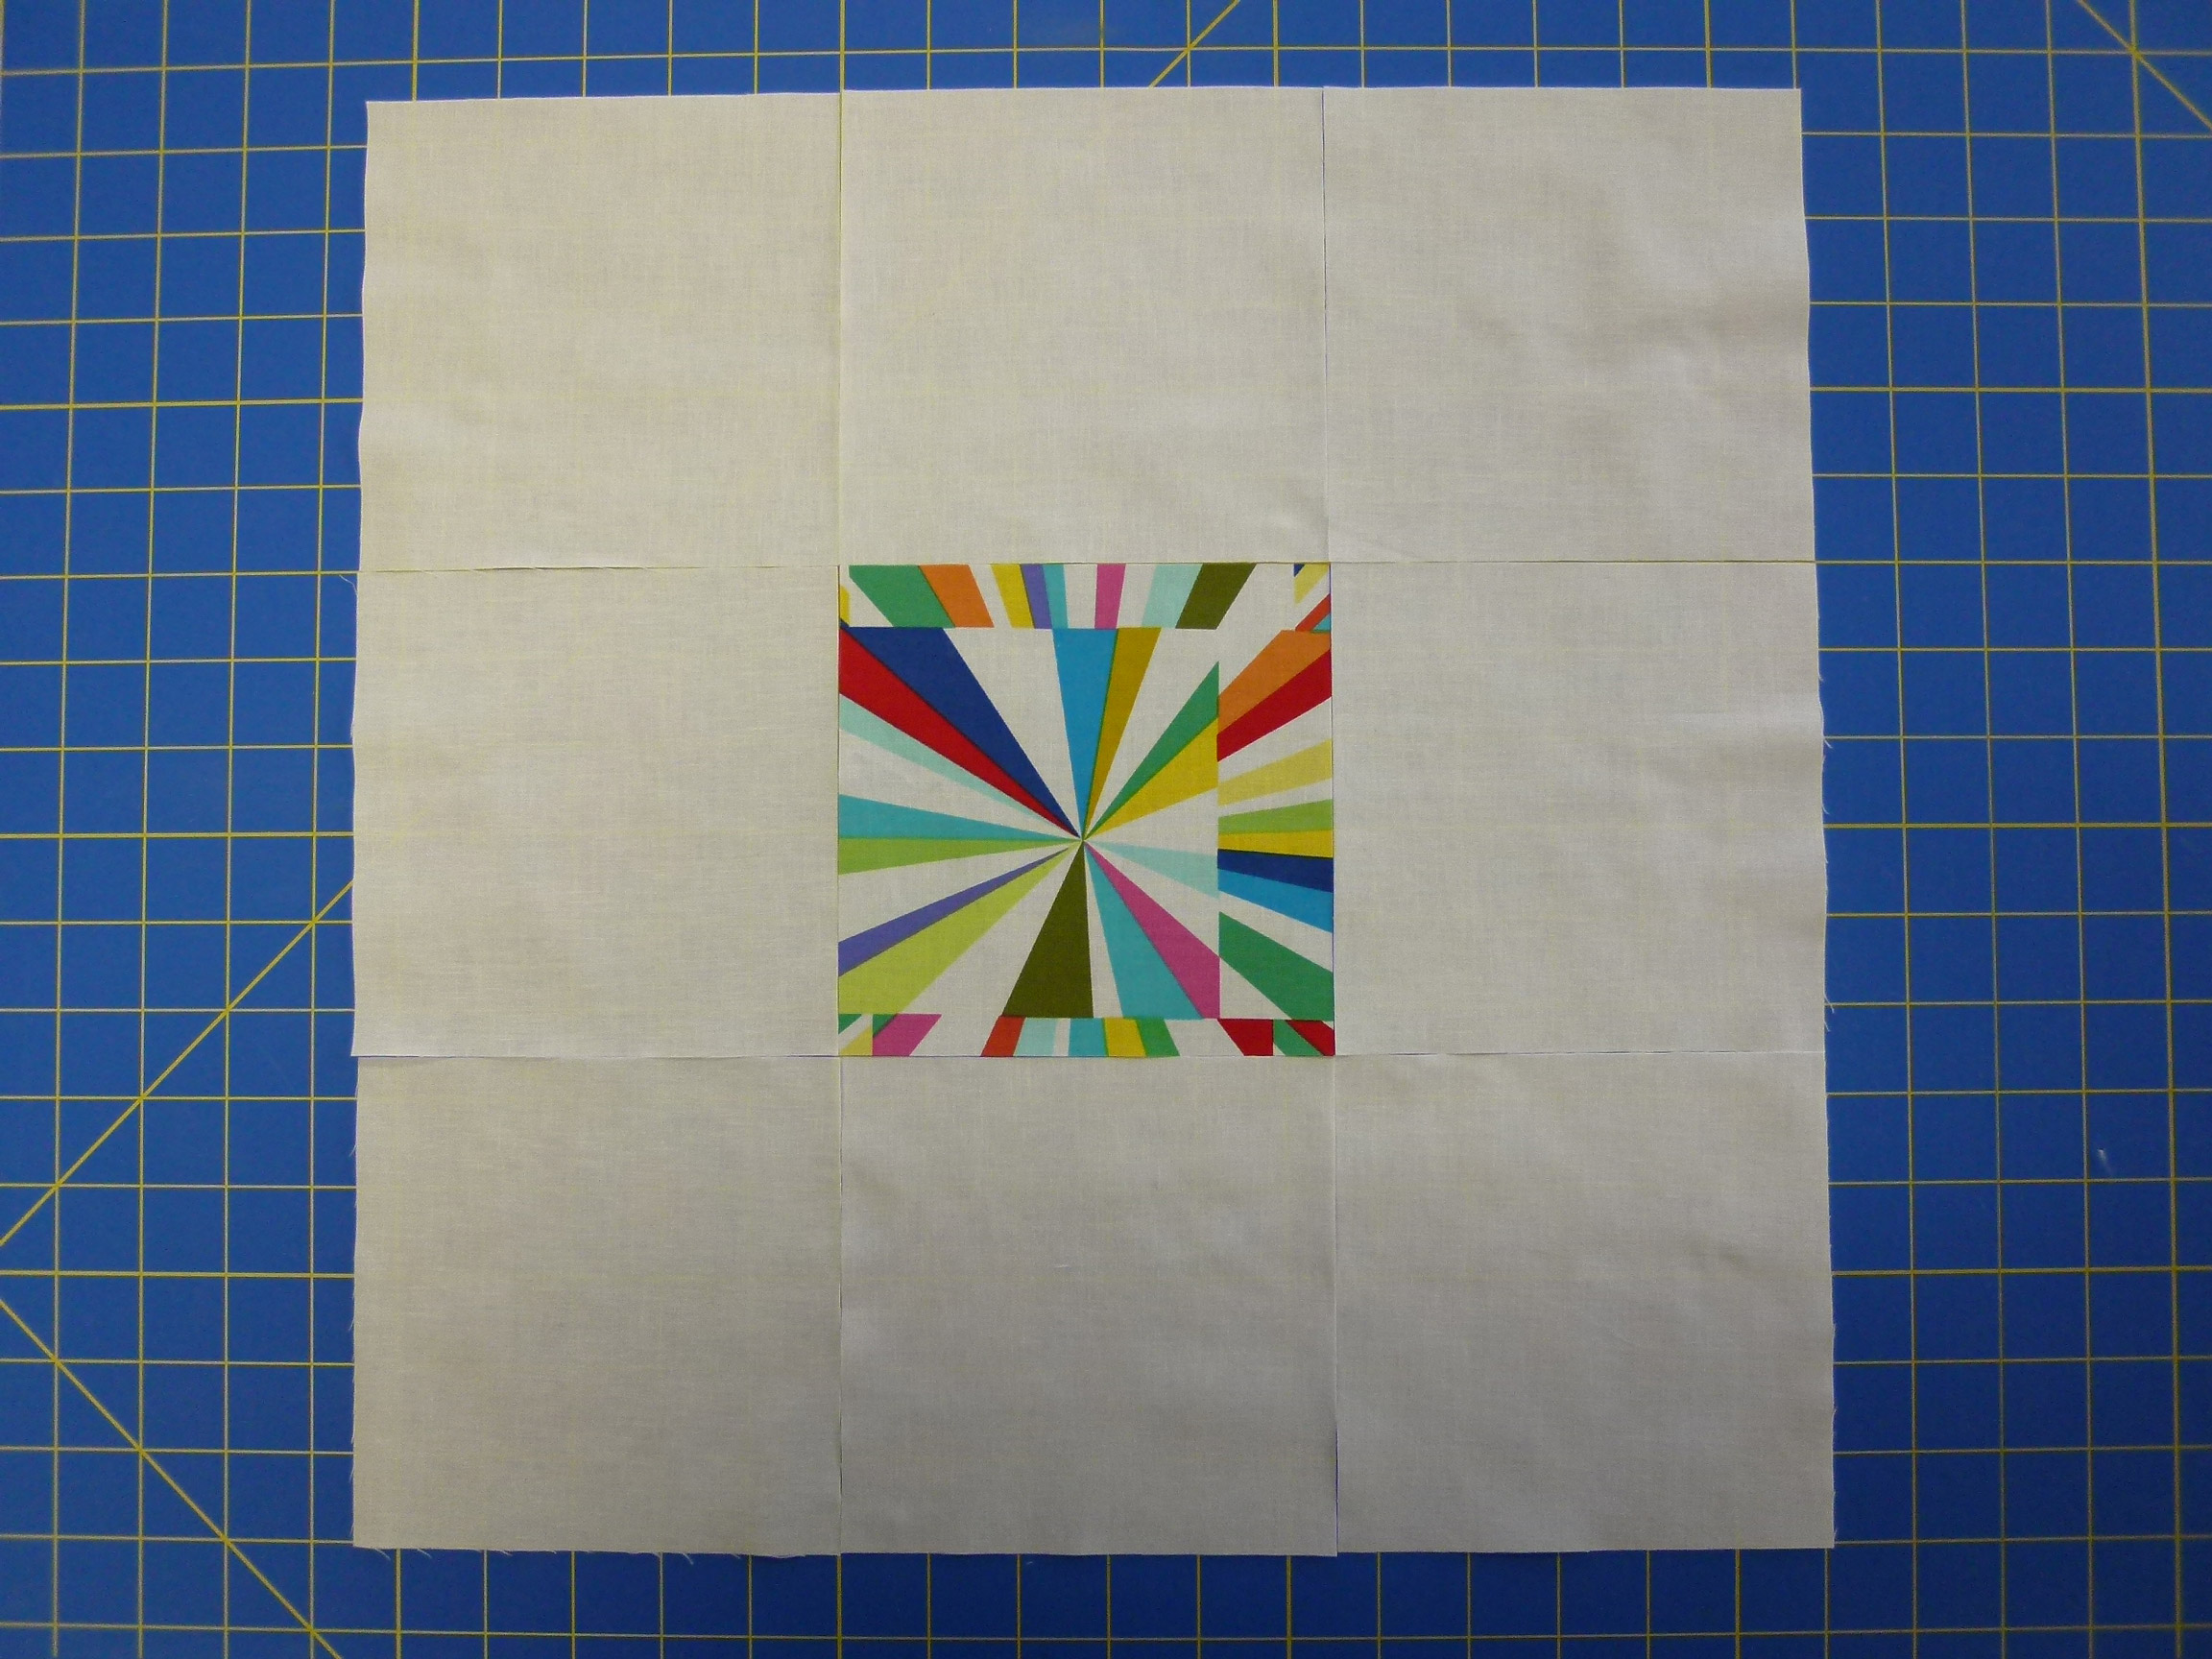
Start with a simple gridded block and create a light/dark design.  Here, I’ve started with a 3 x 3 grid.  Then re-color the same block with the lights and darks reversed

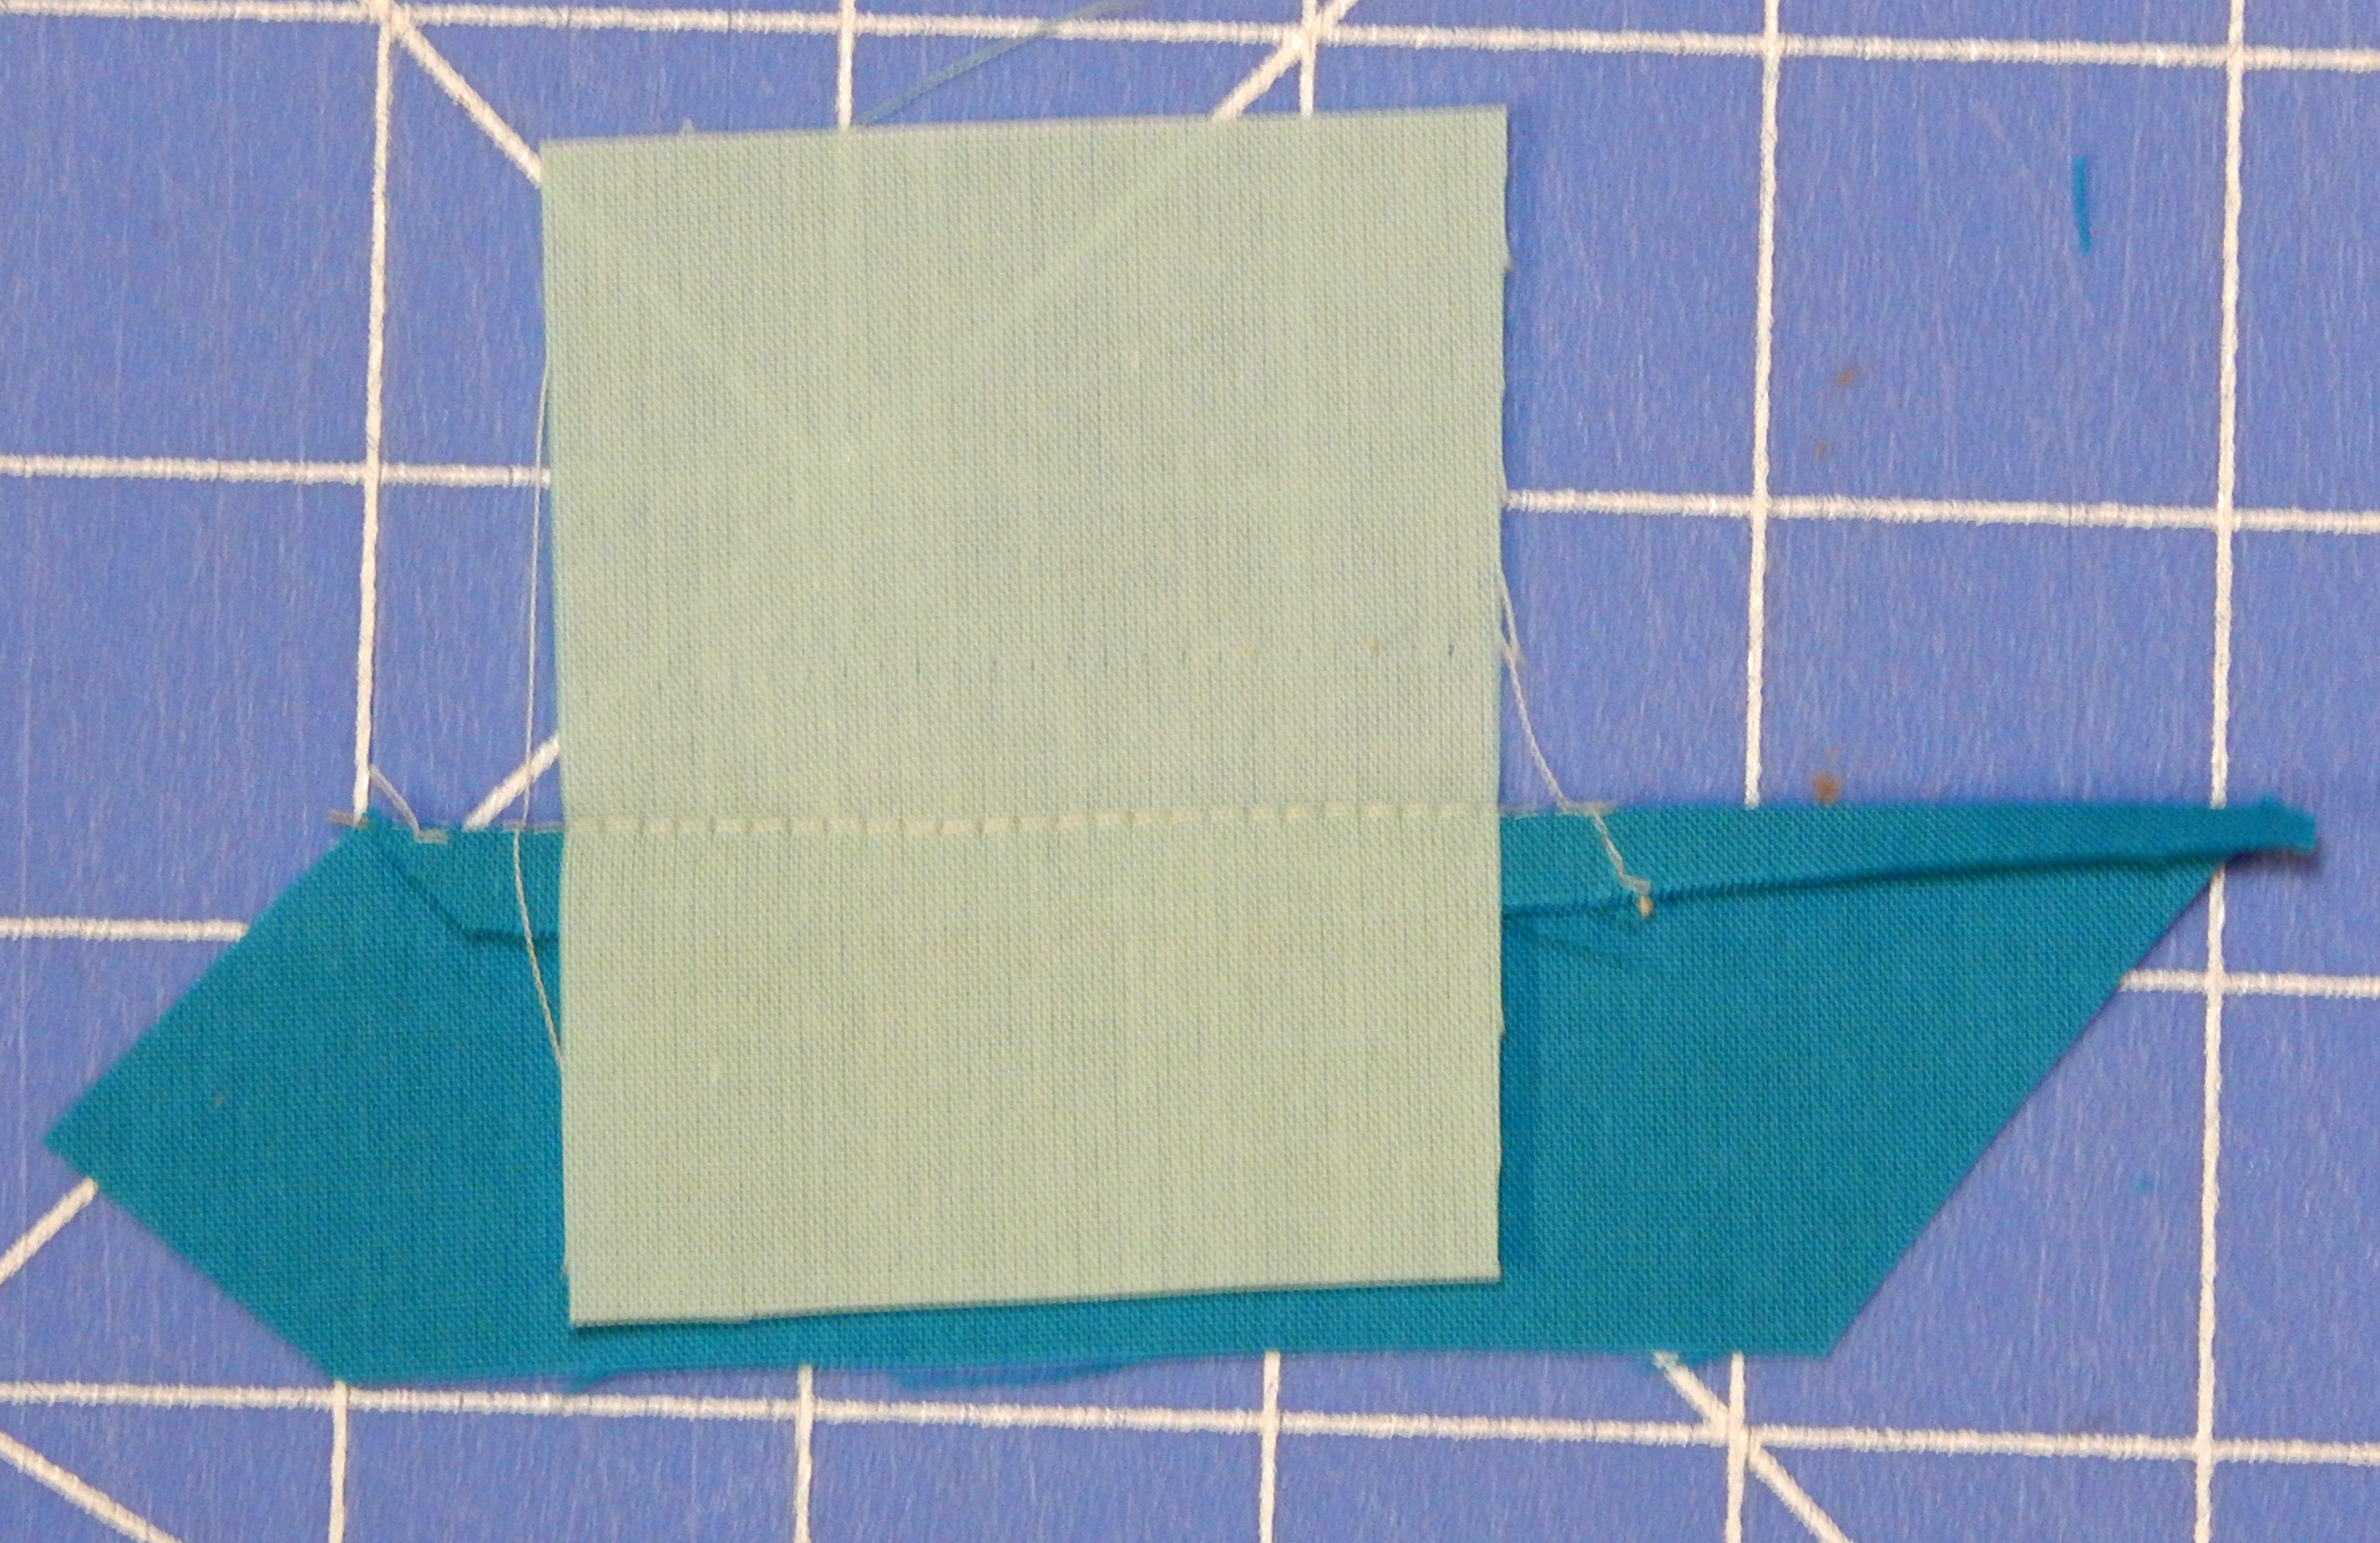
.The grid lines are only for design purposes, and each block can be constructed with a single square block with 2 corner triangles attached using any method you prefer.

Here are some design possibilities…Quilt_1A simple “cat head” quilt using only 2 colors.

Different looks can be achieved with variations in the color placement.

Blocks can be inverted and turned for even more quilt designs.

Just imagine all the possibilities with color in these!!!!!

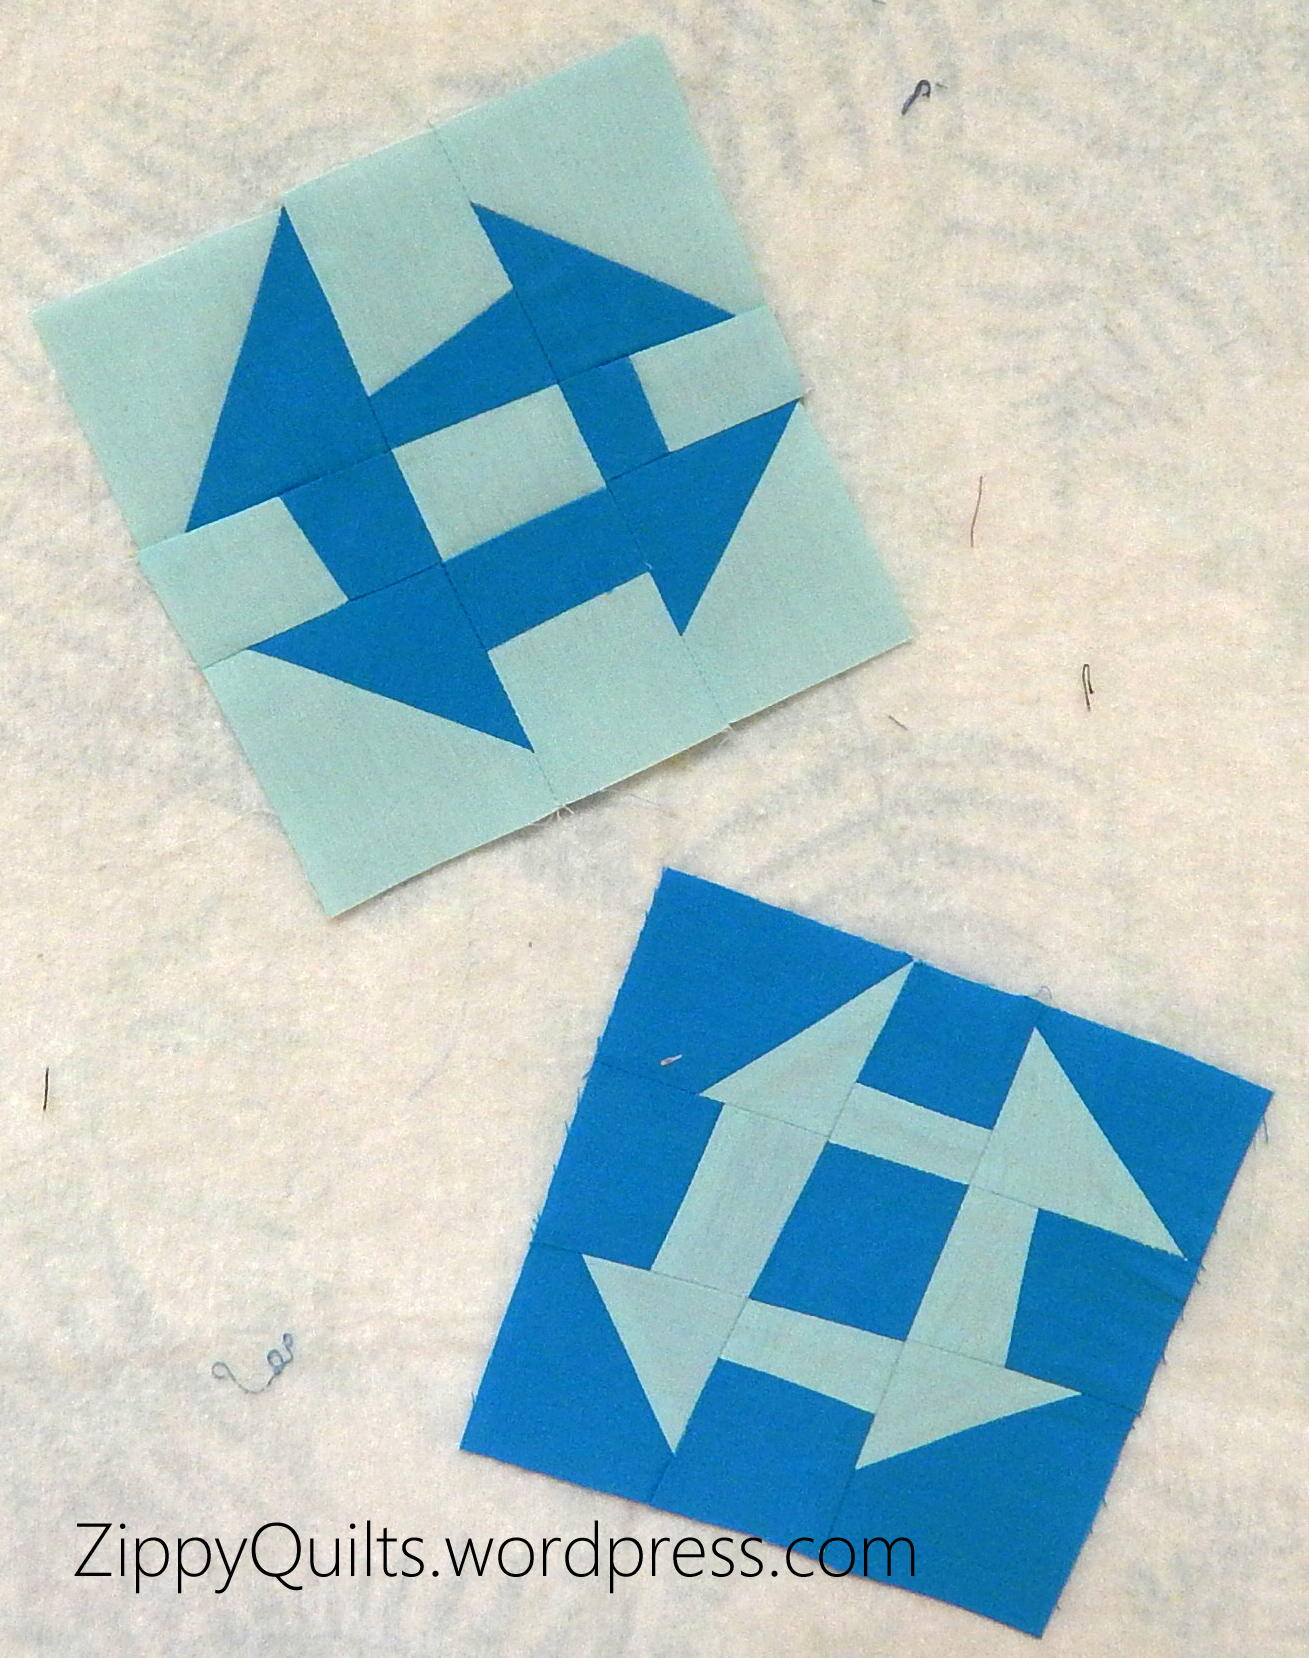
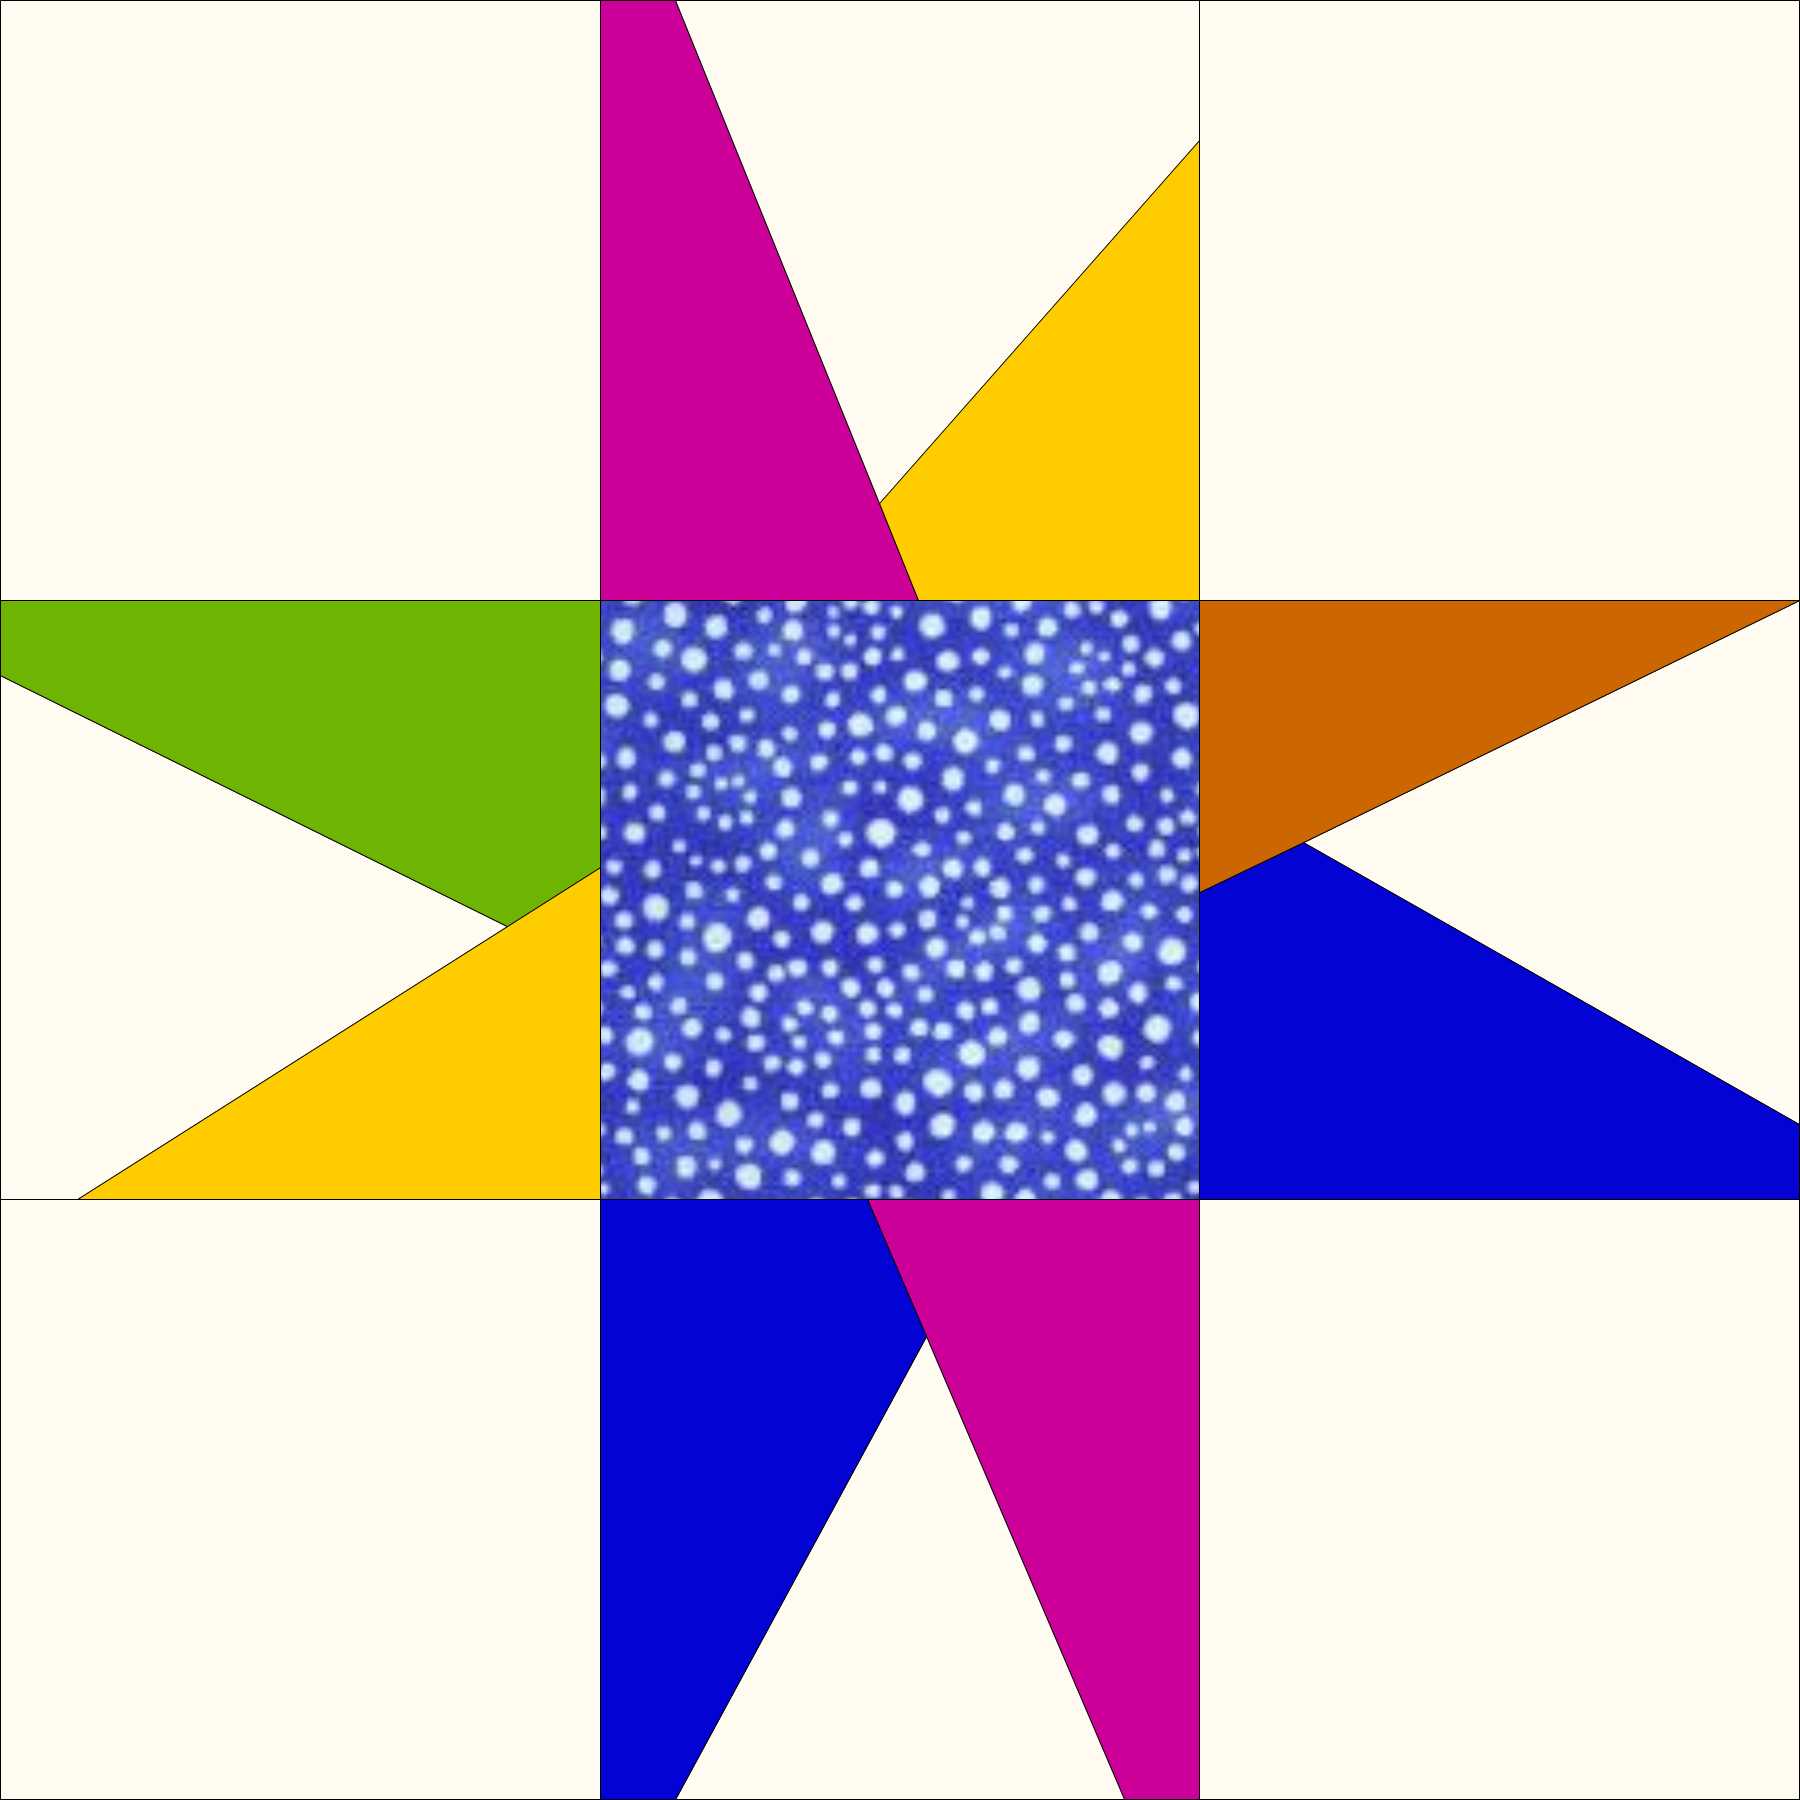
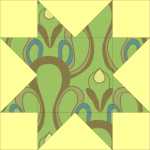
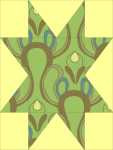
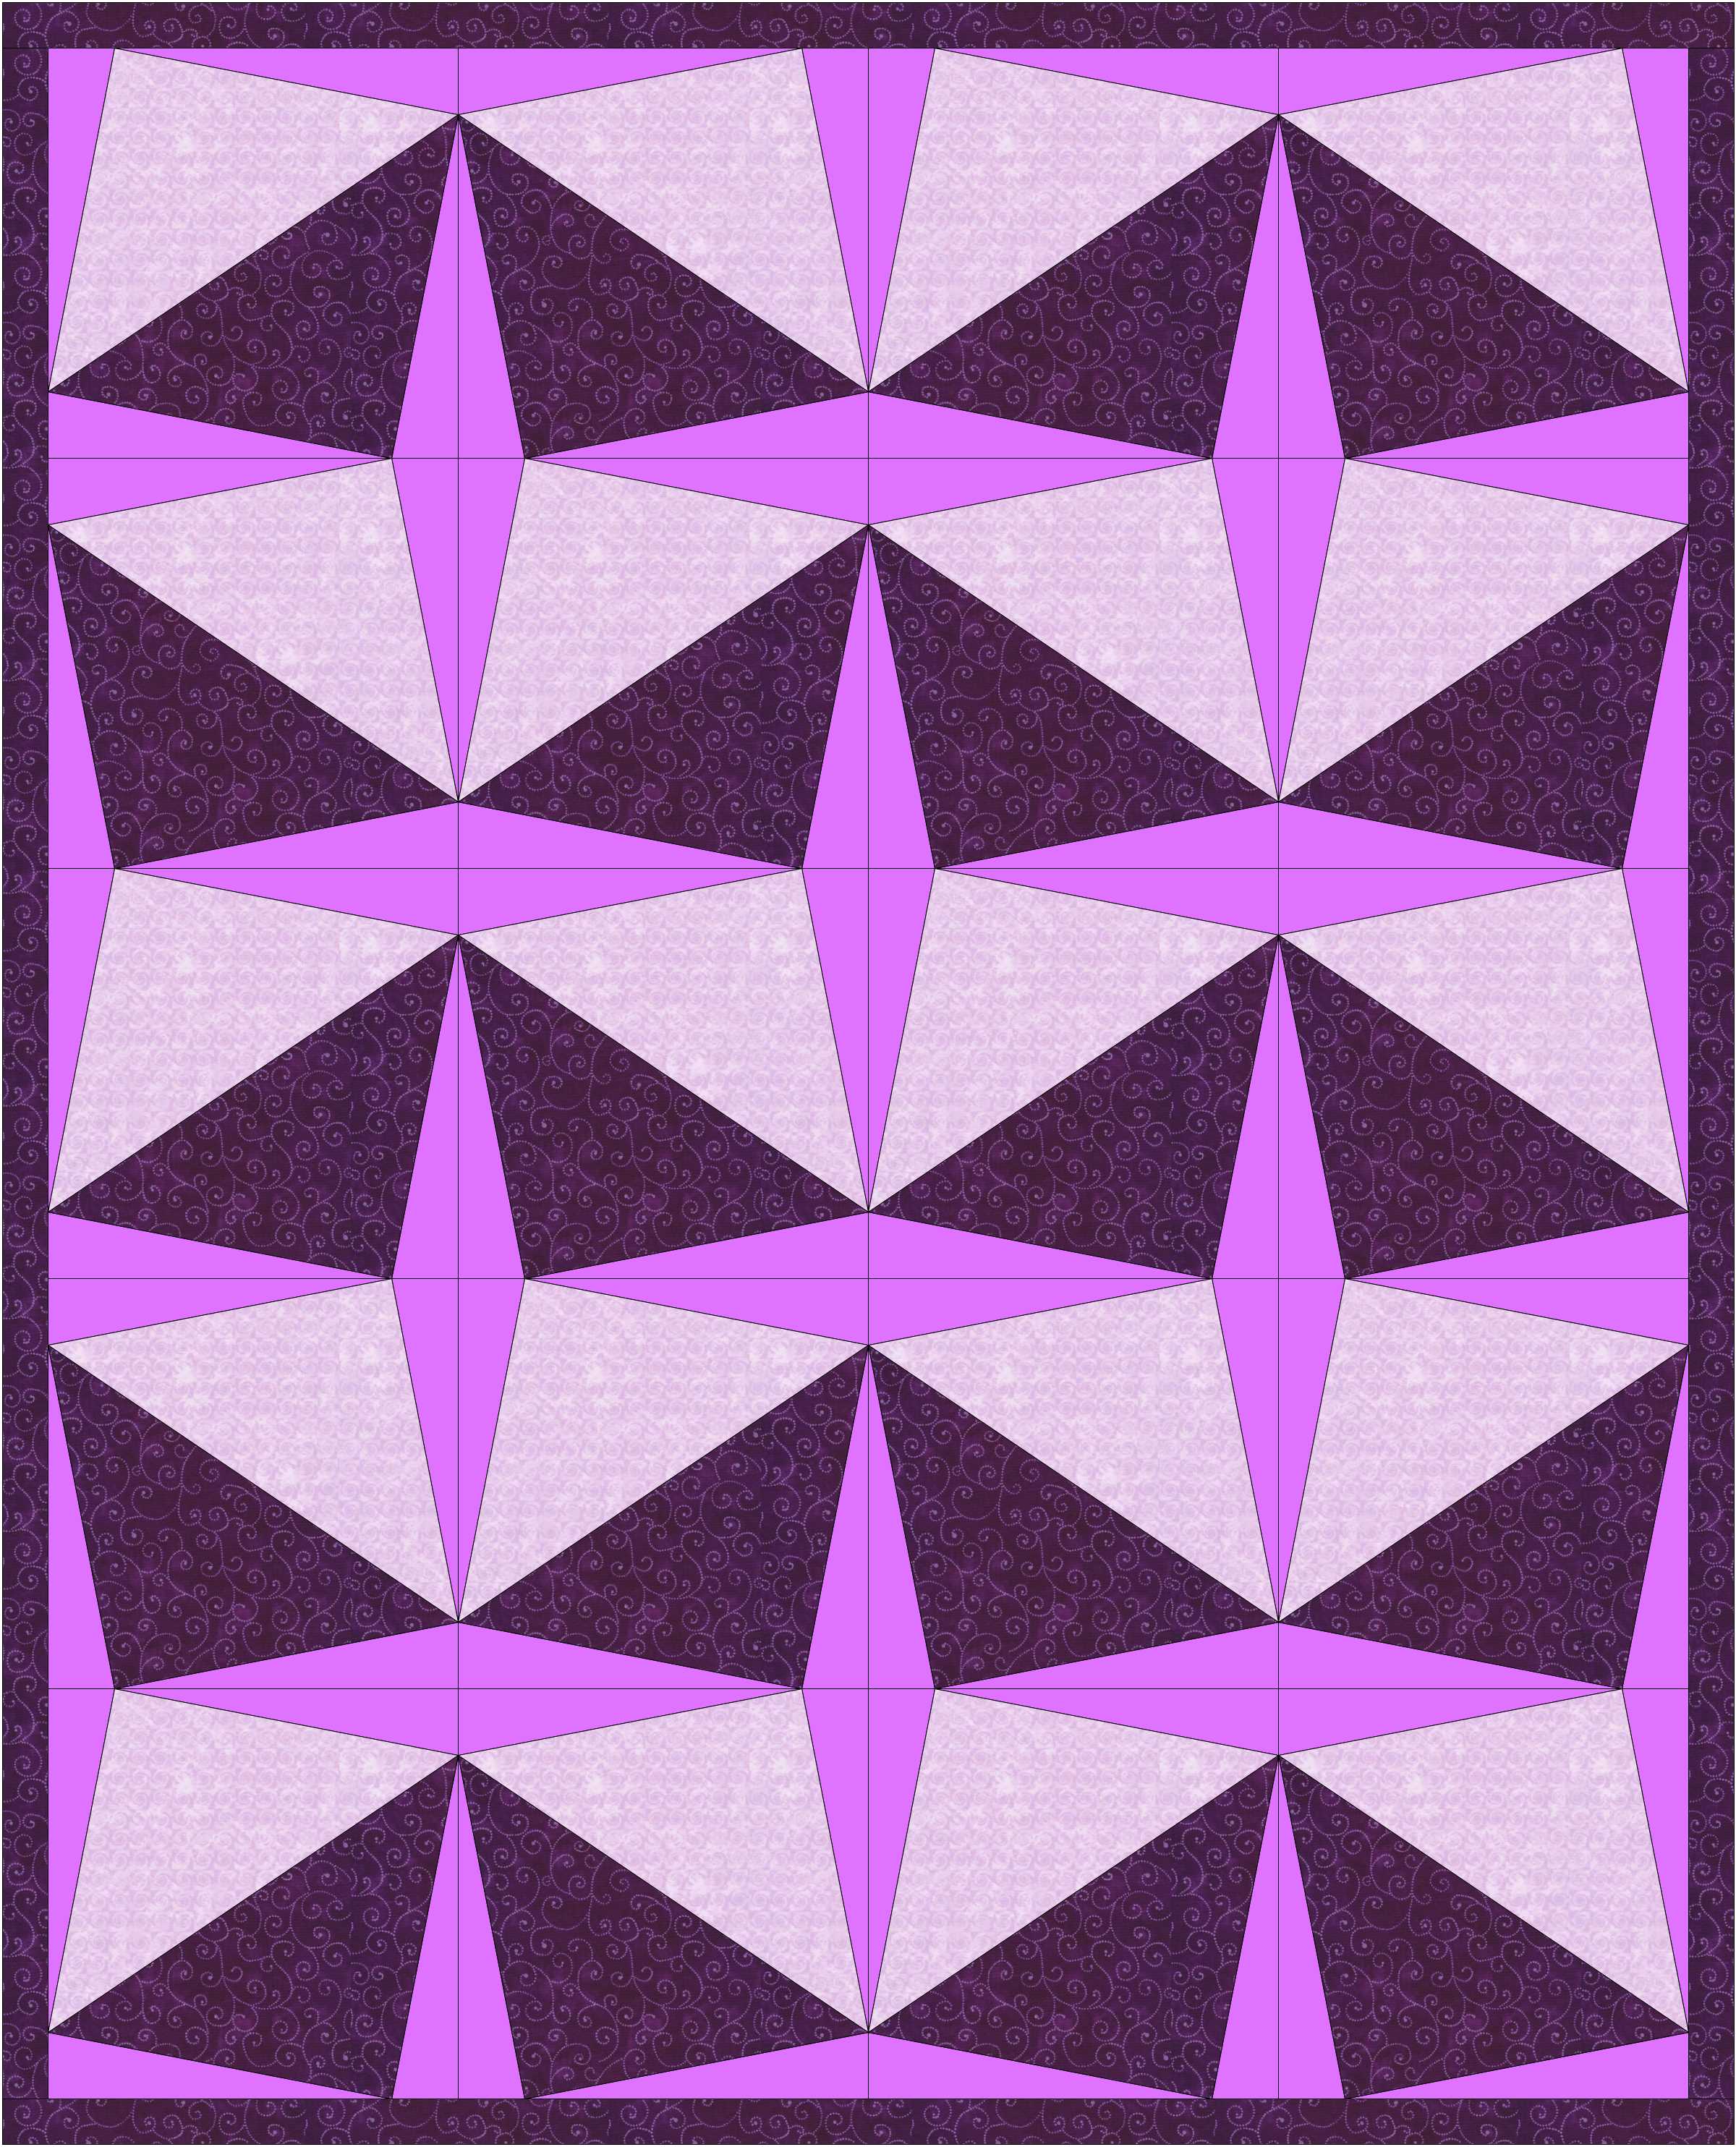
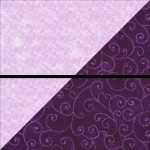
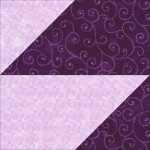
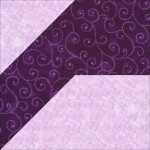
It’s even more complex when you design with a 6×6 grid.  Here are the positive and negative versions of another block.

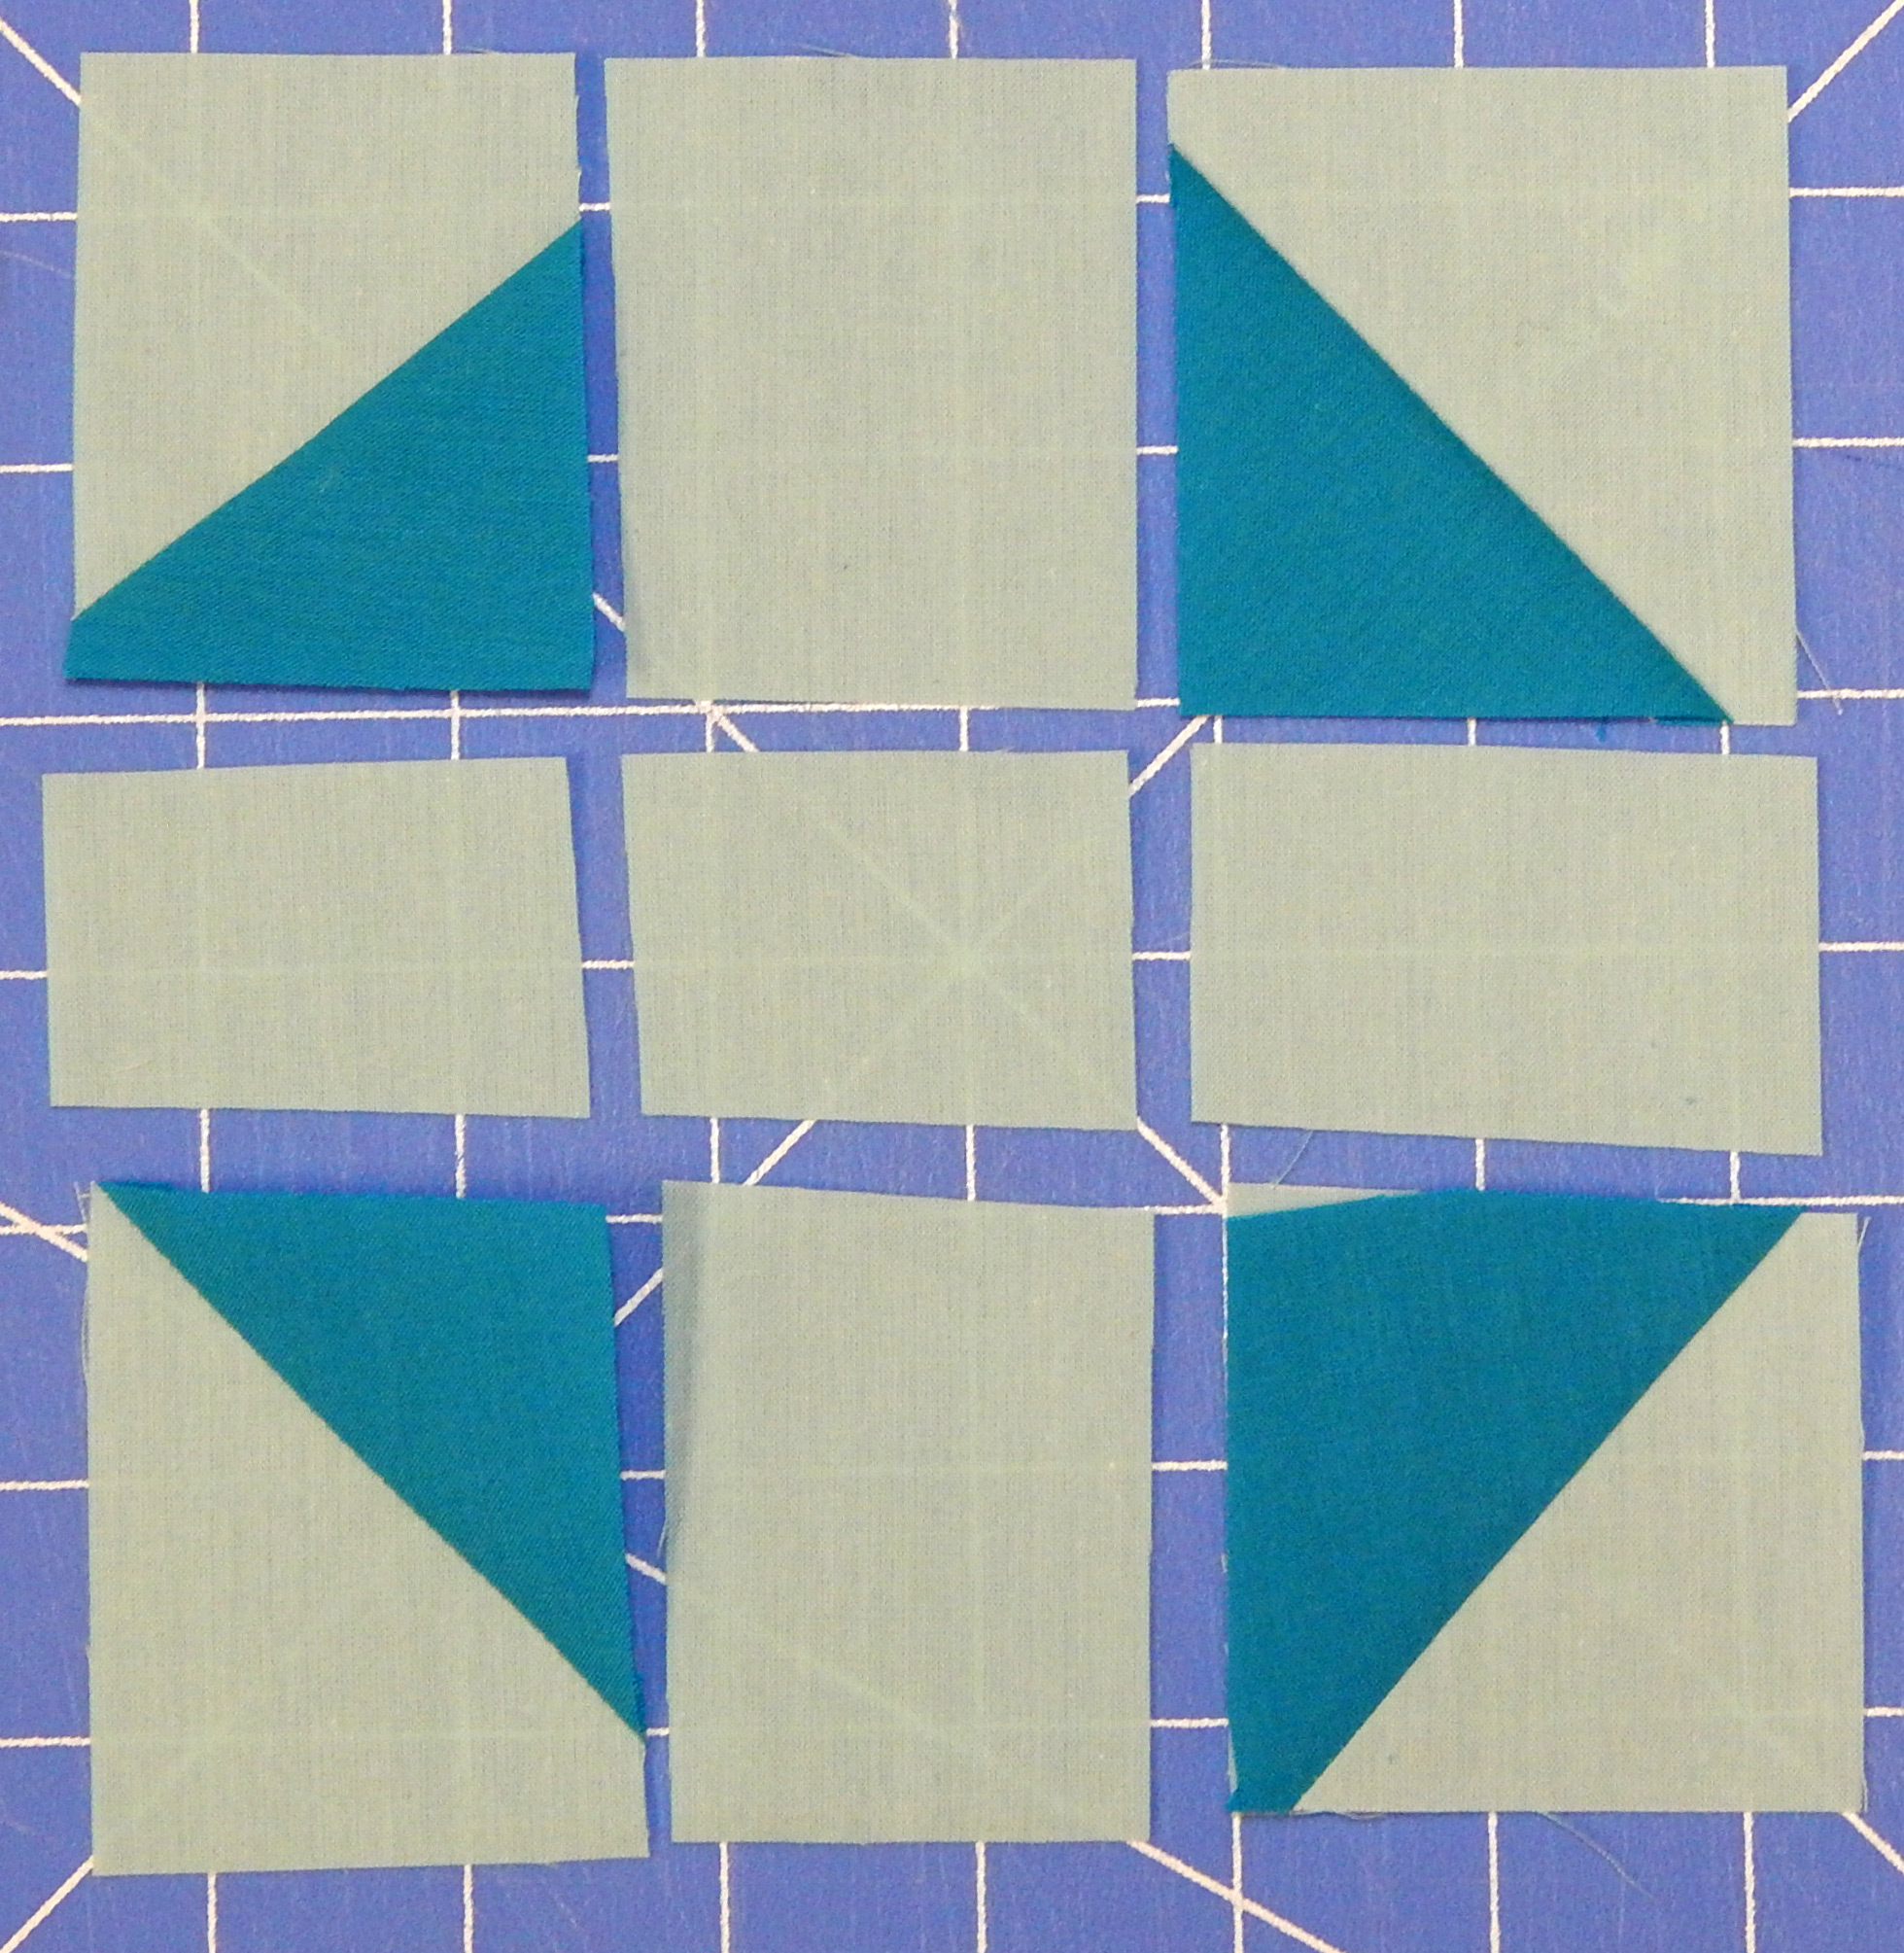
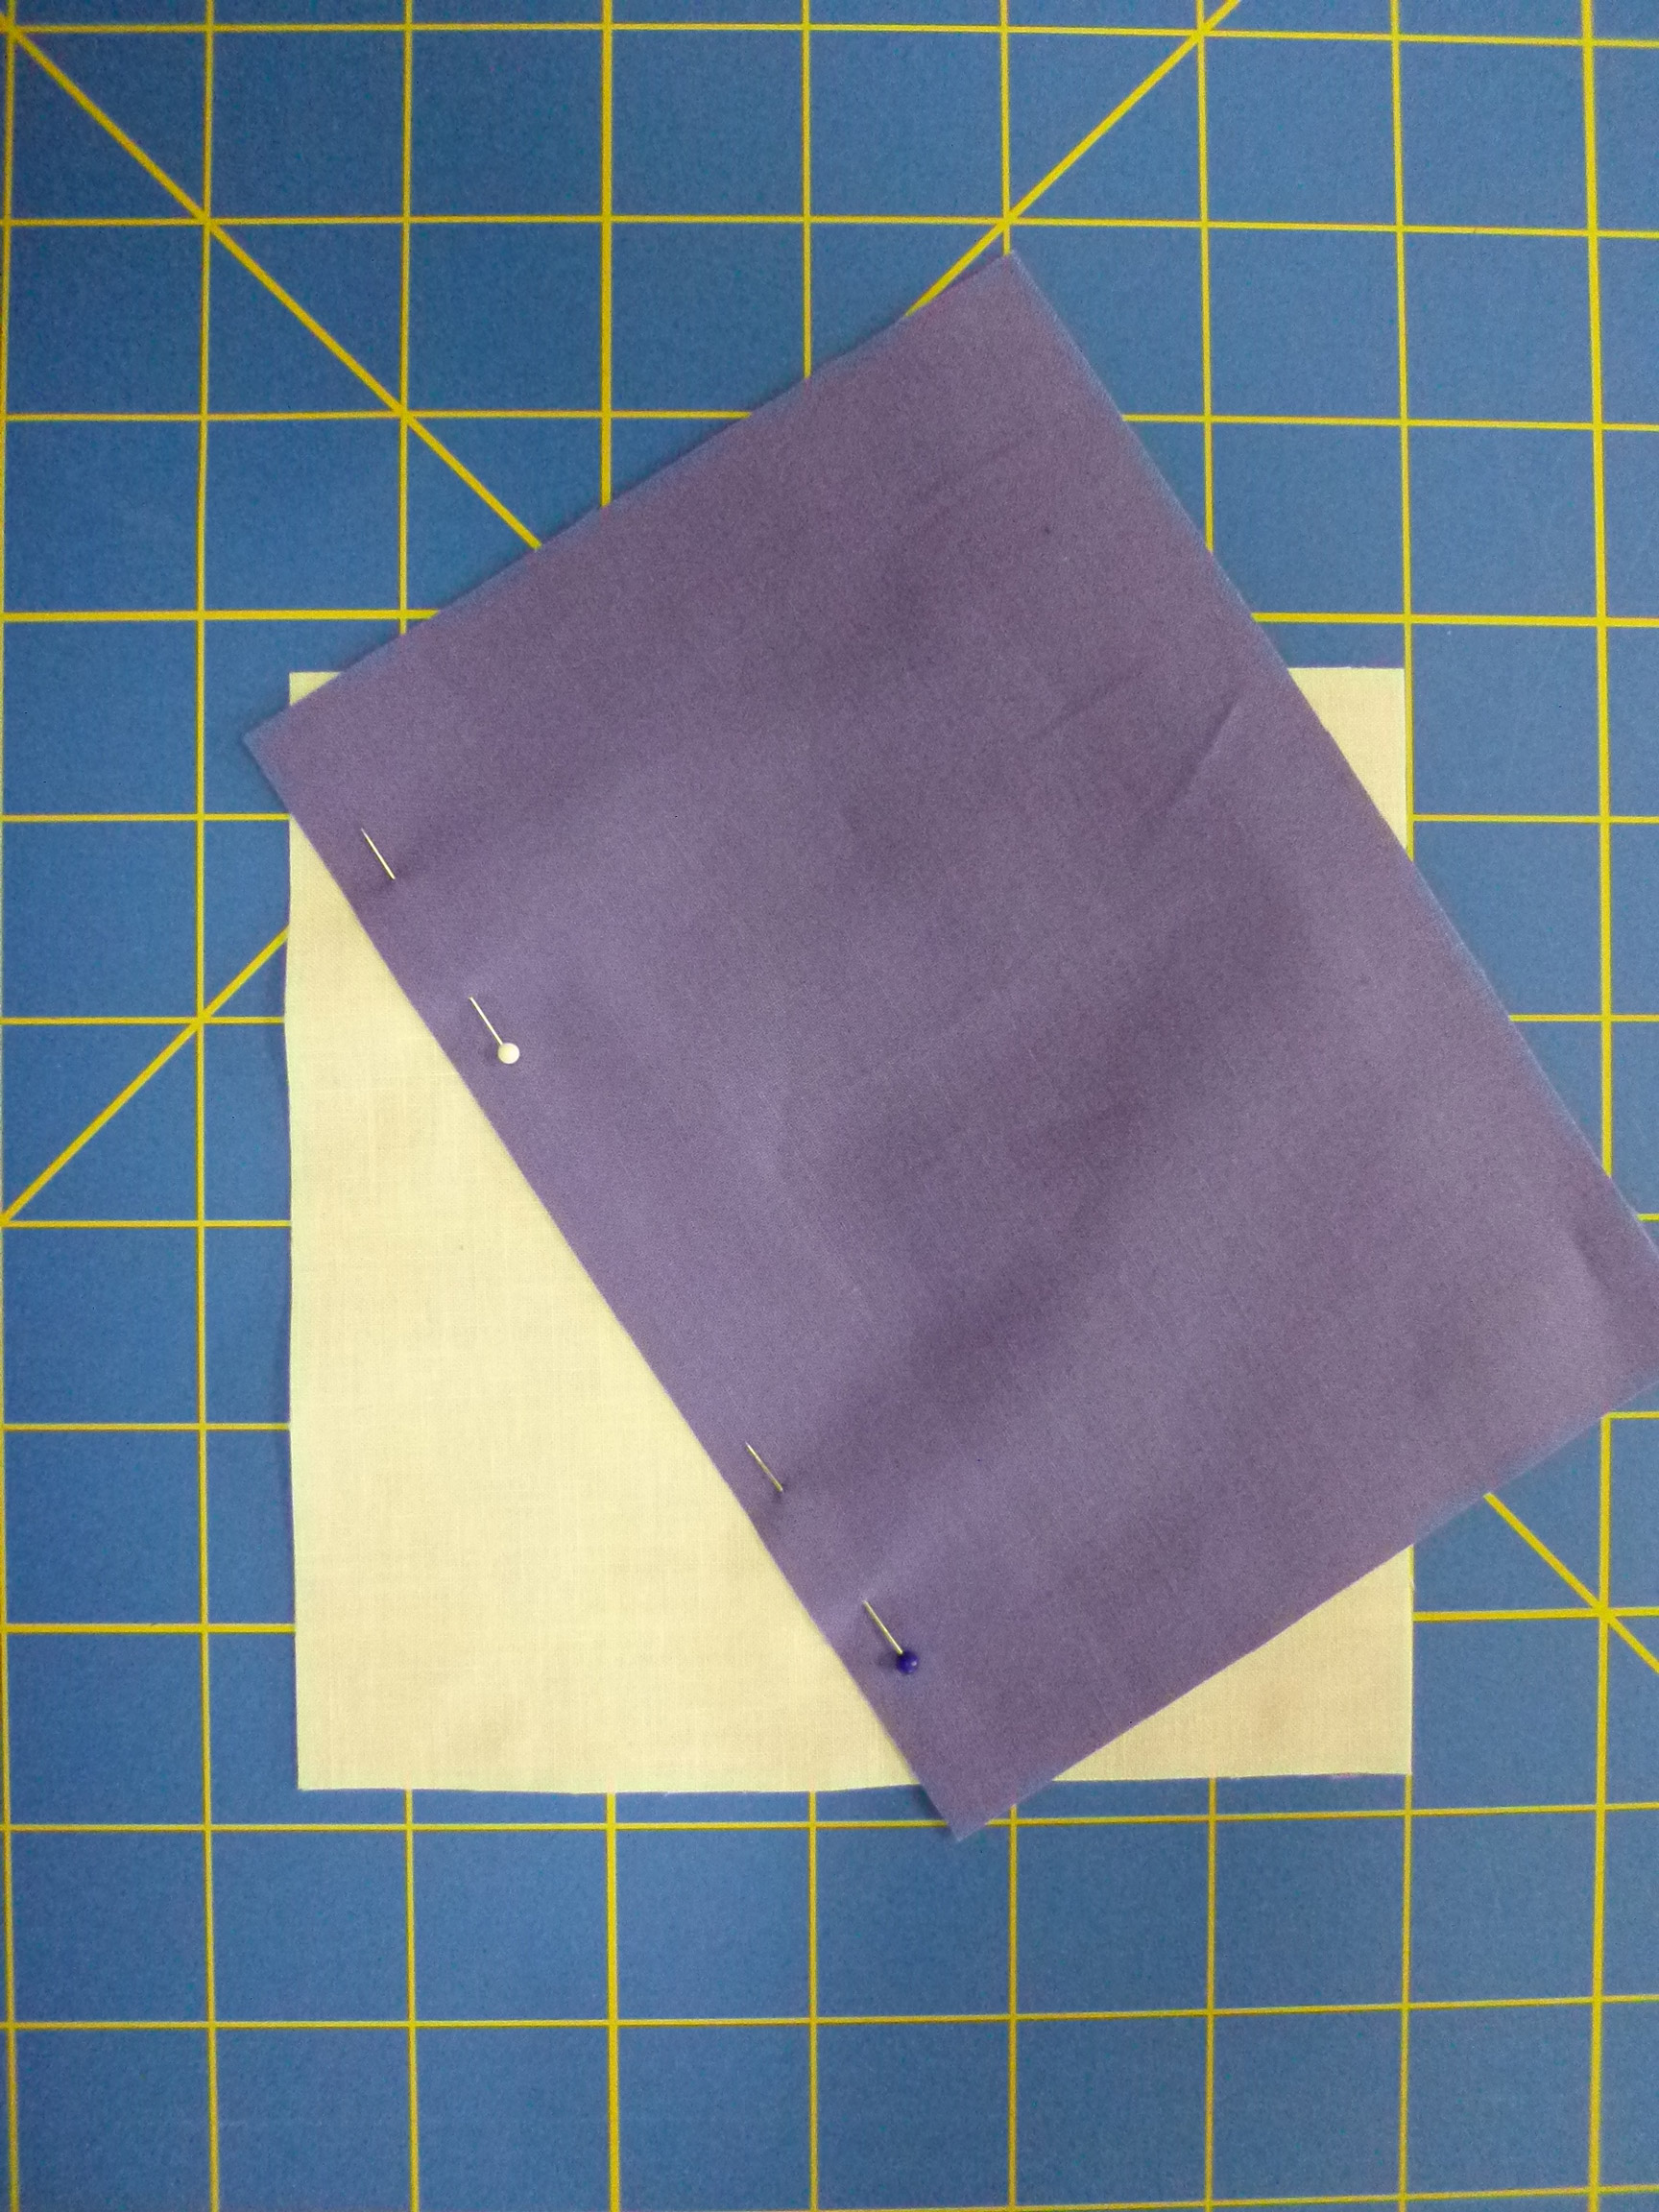
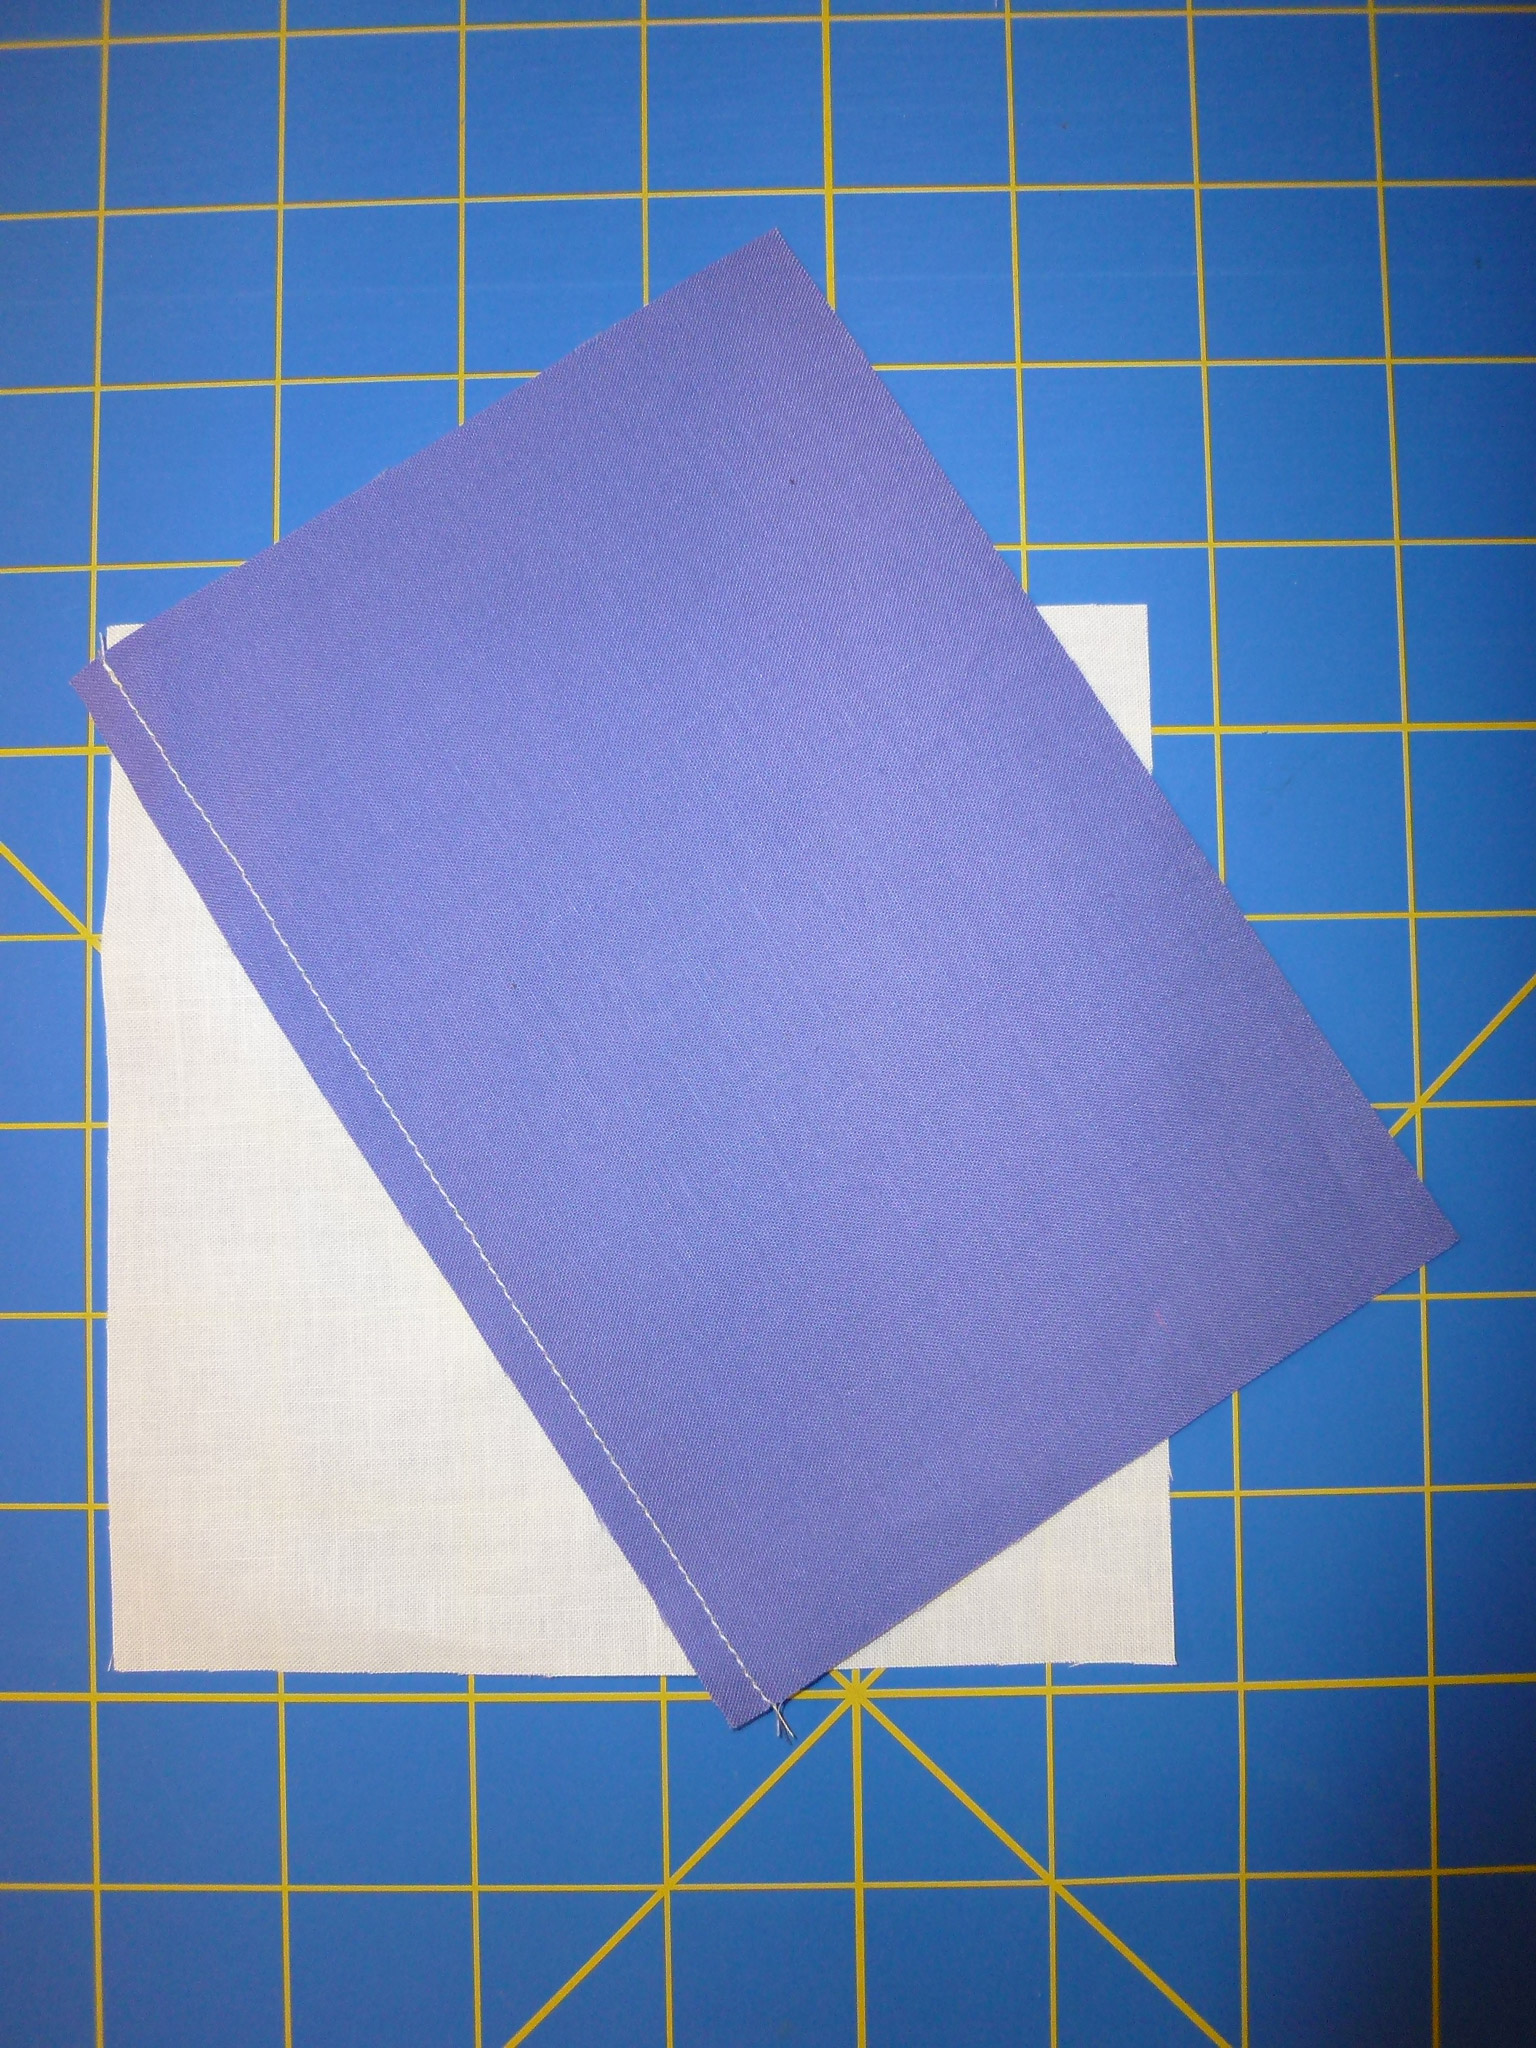
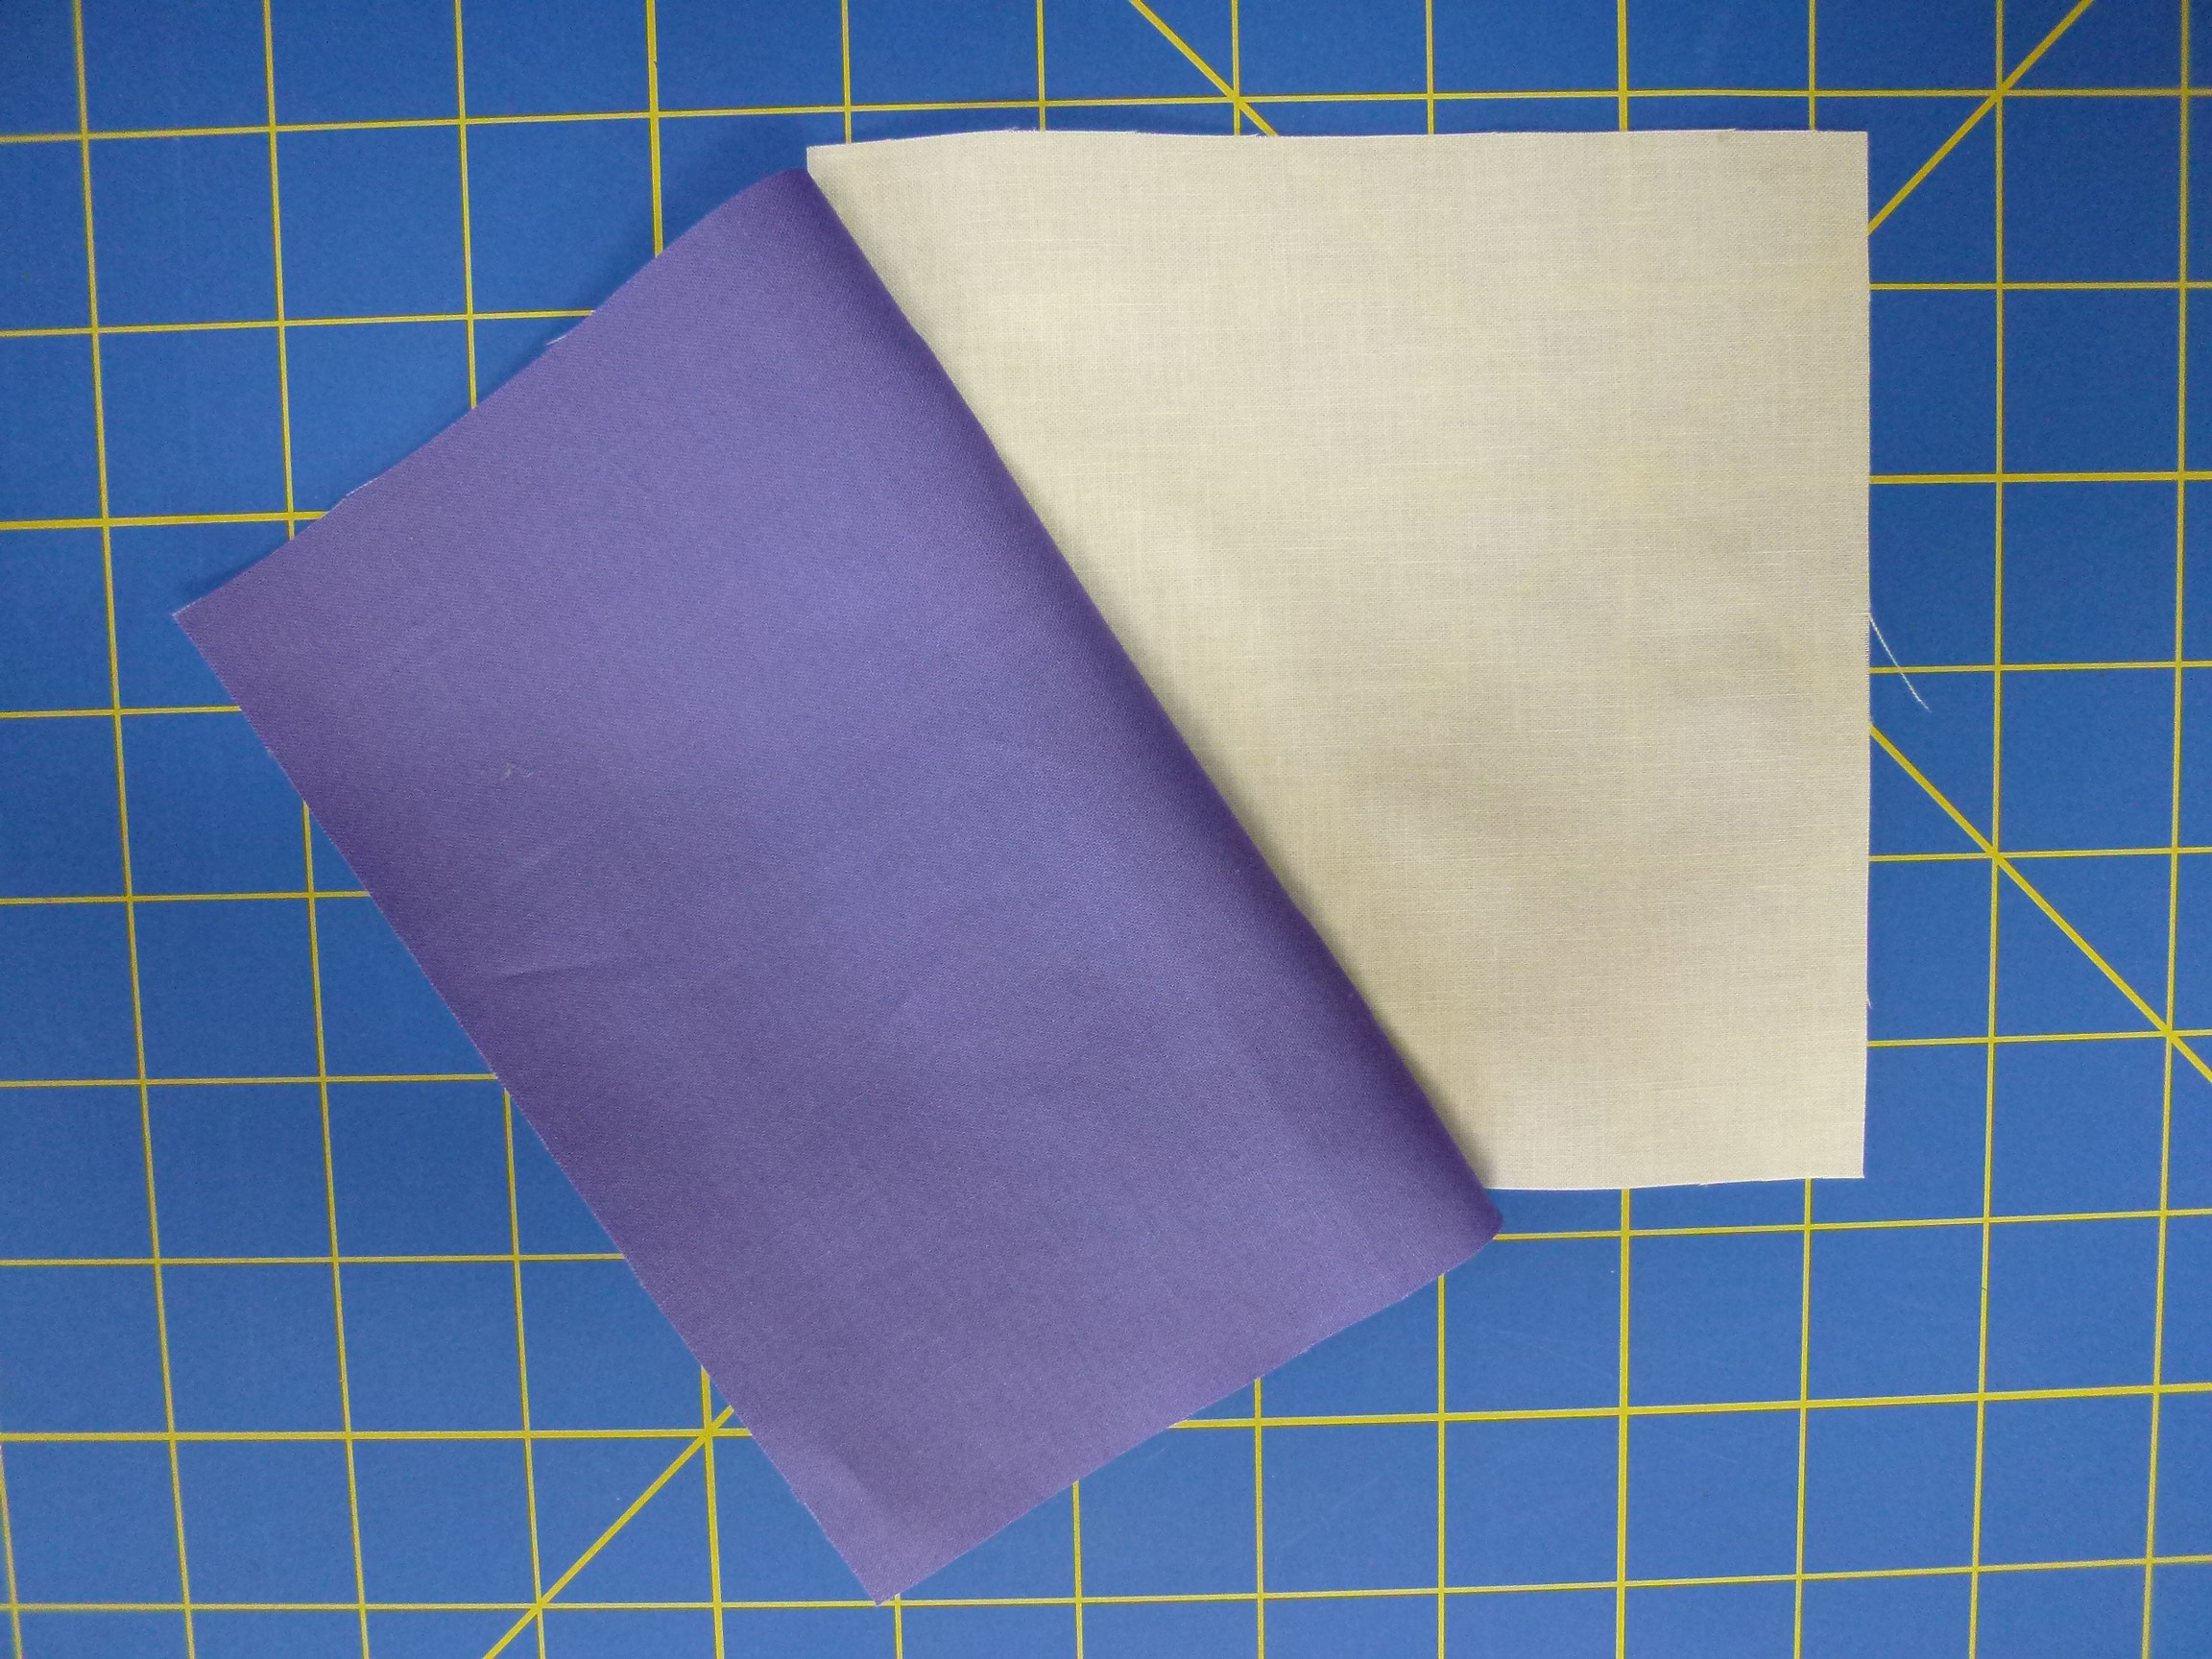
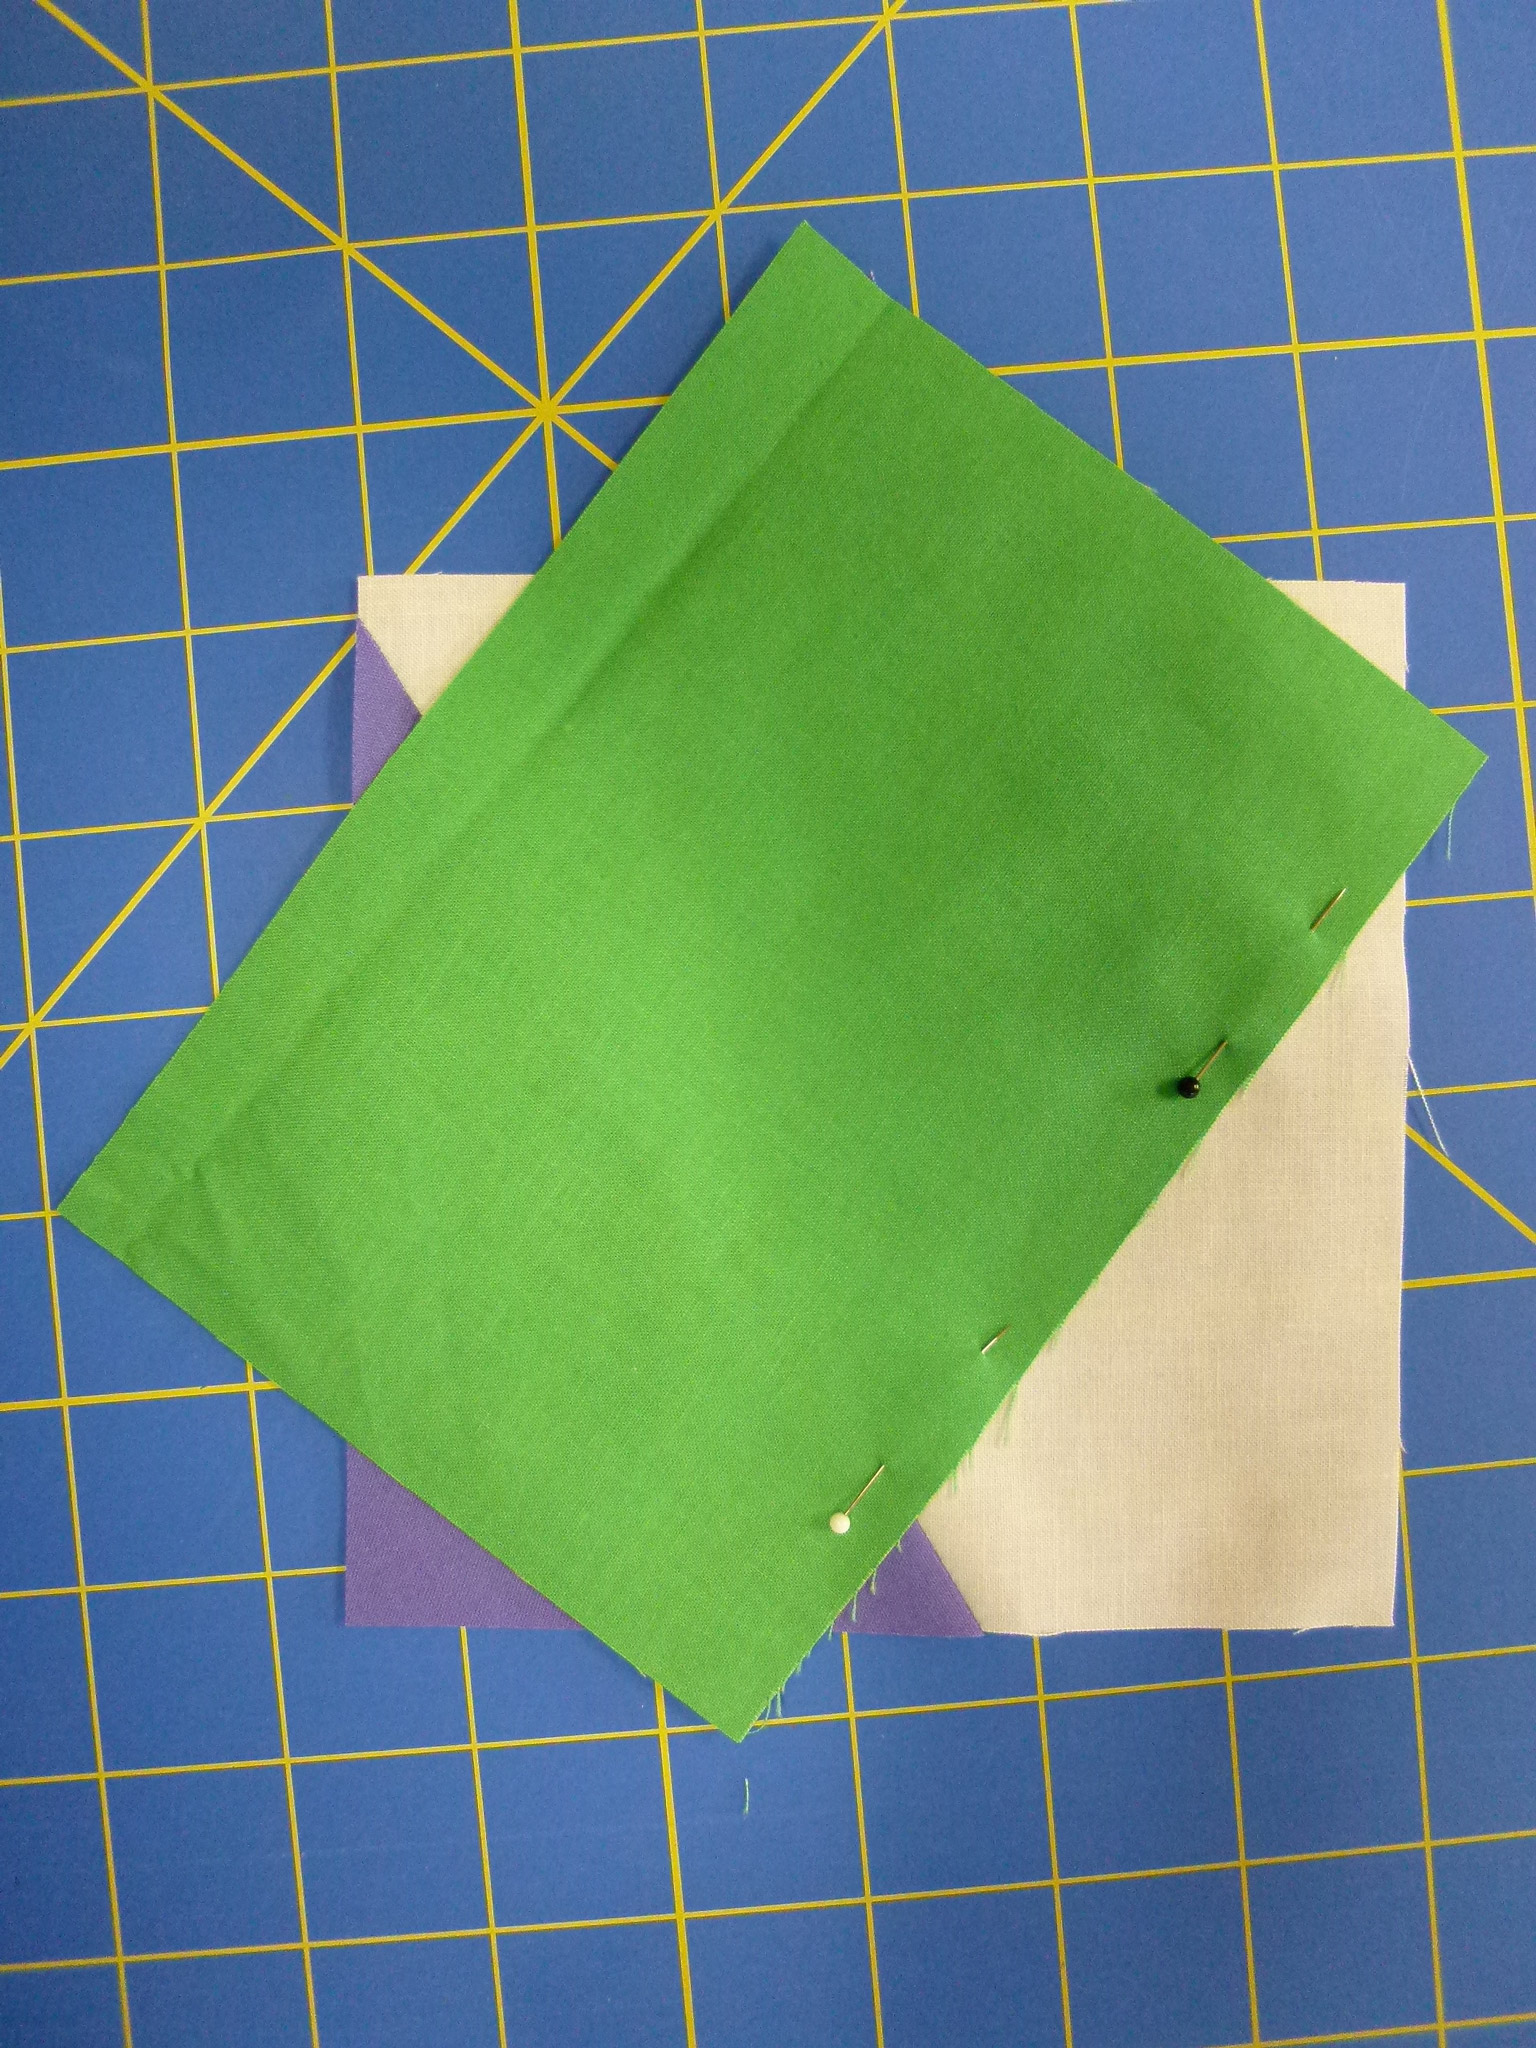
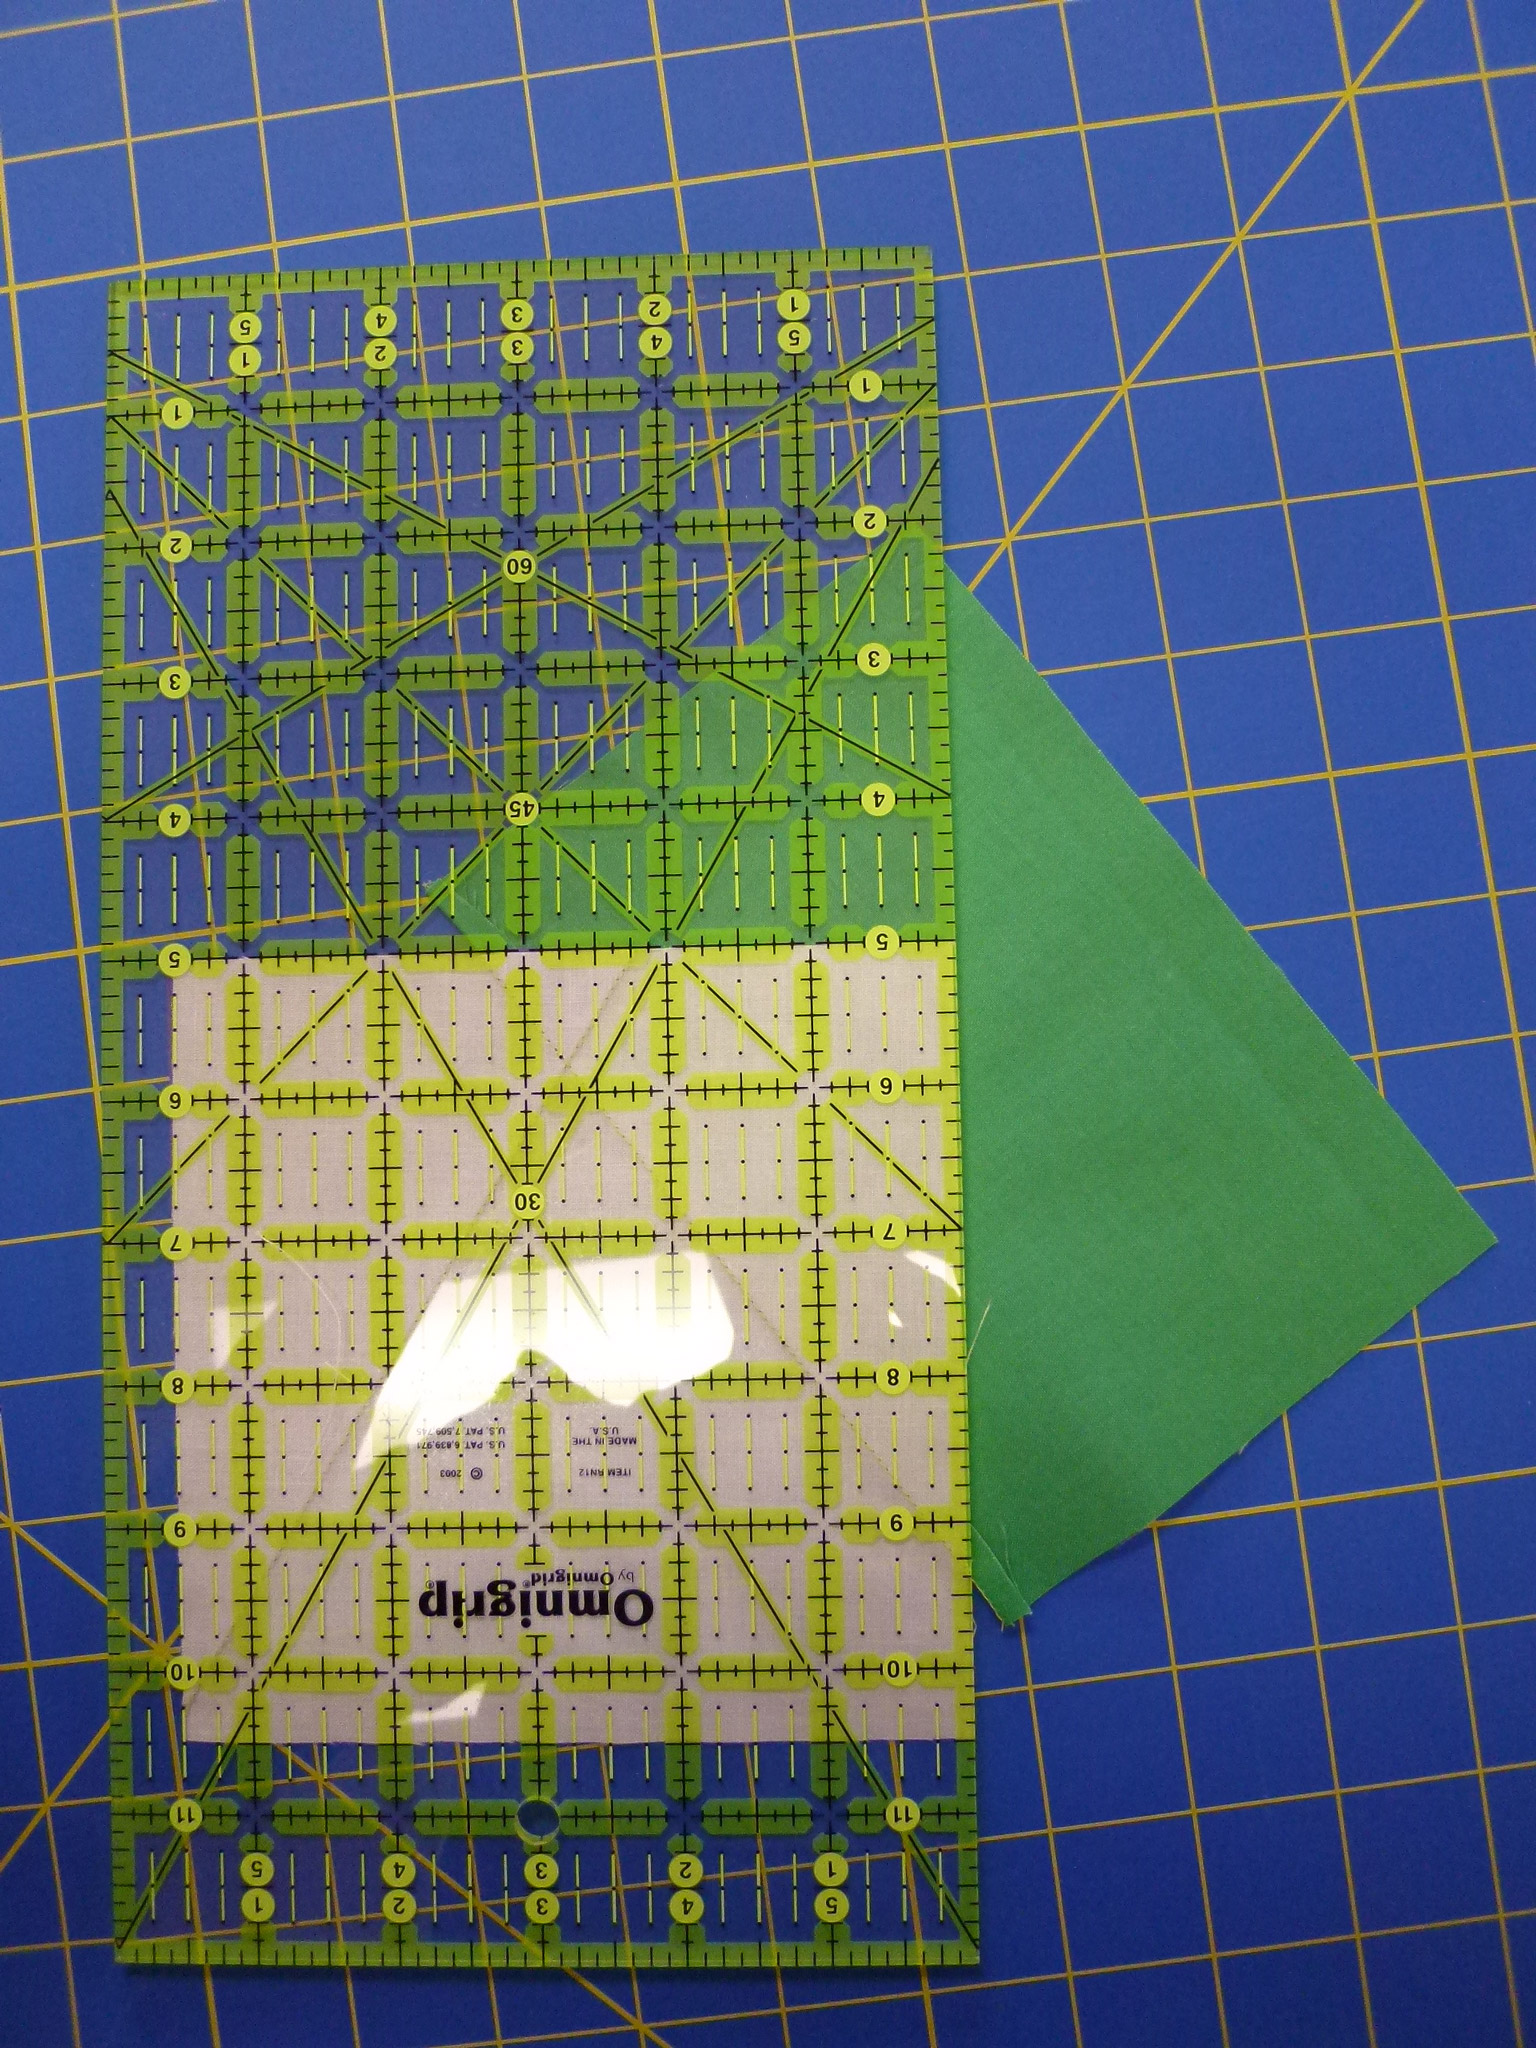
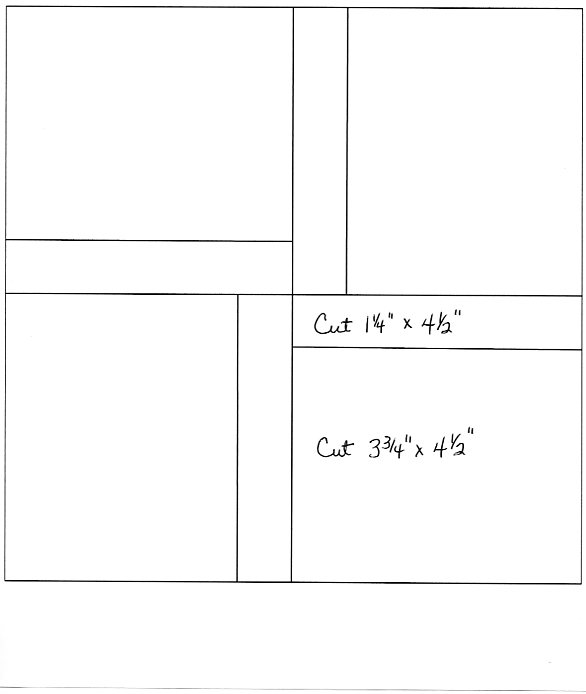
These blocks can be constructed using half-square triangles integrated with larger fabric pieces.  If these blocks were to finish at 6 inches by 6 inches.  The center column on each block would be a single 3.5 inch wide by 6.5 in long piece of fabric.  The side strips would include some half-square triangles.

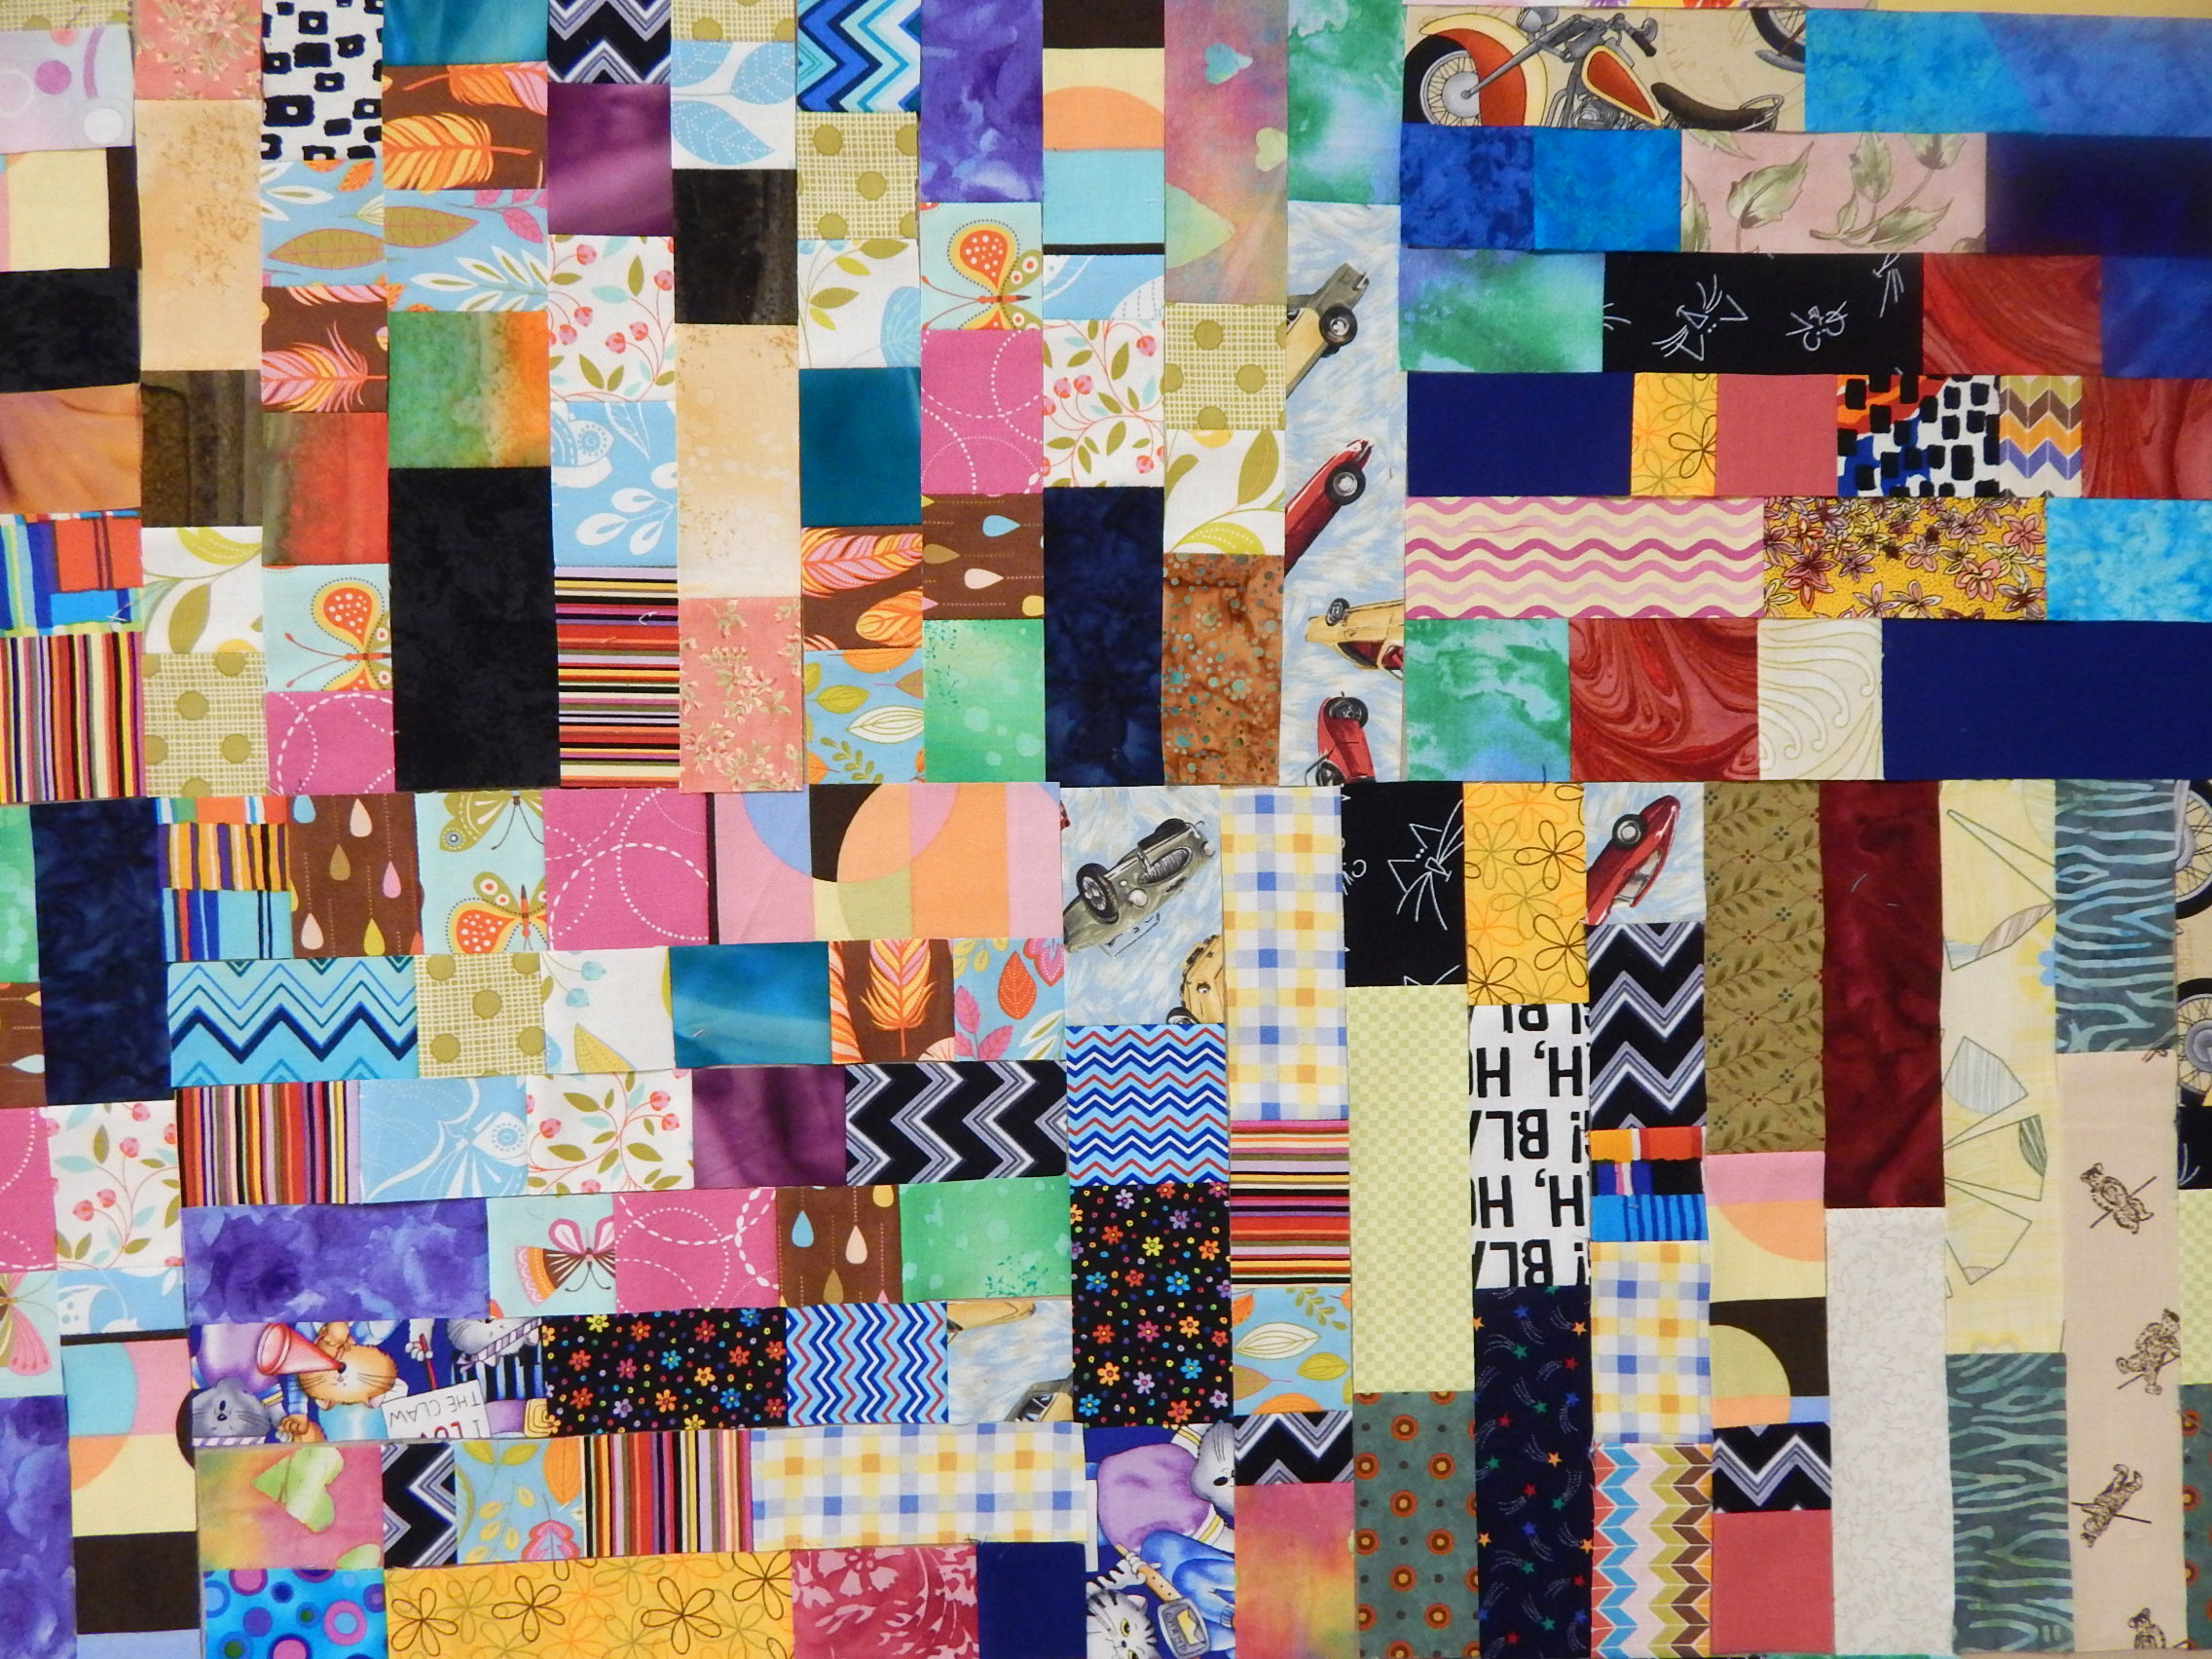
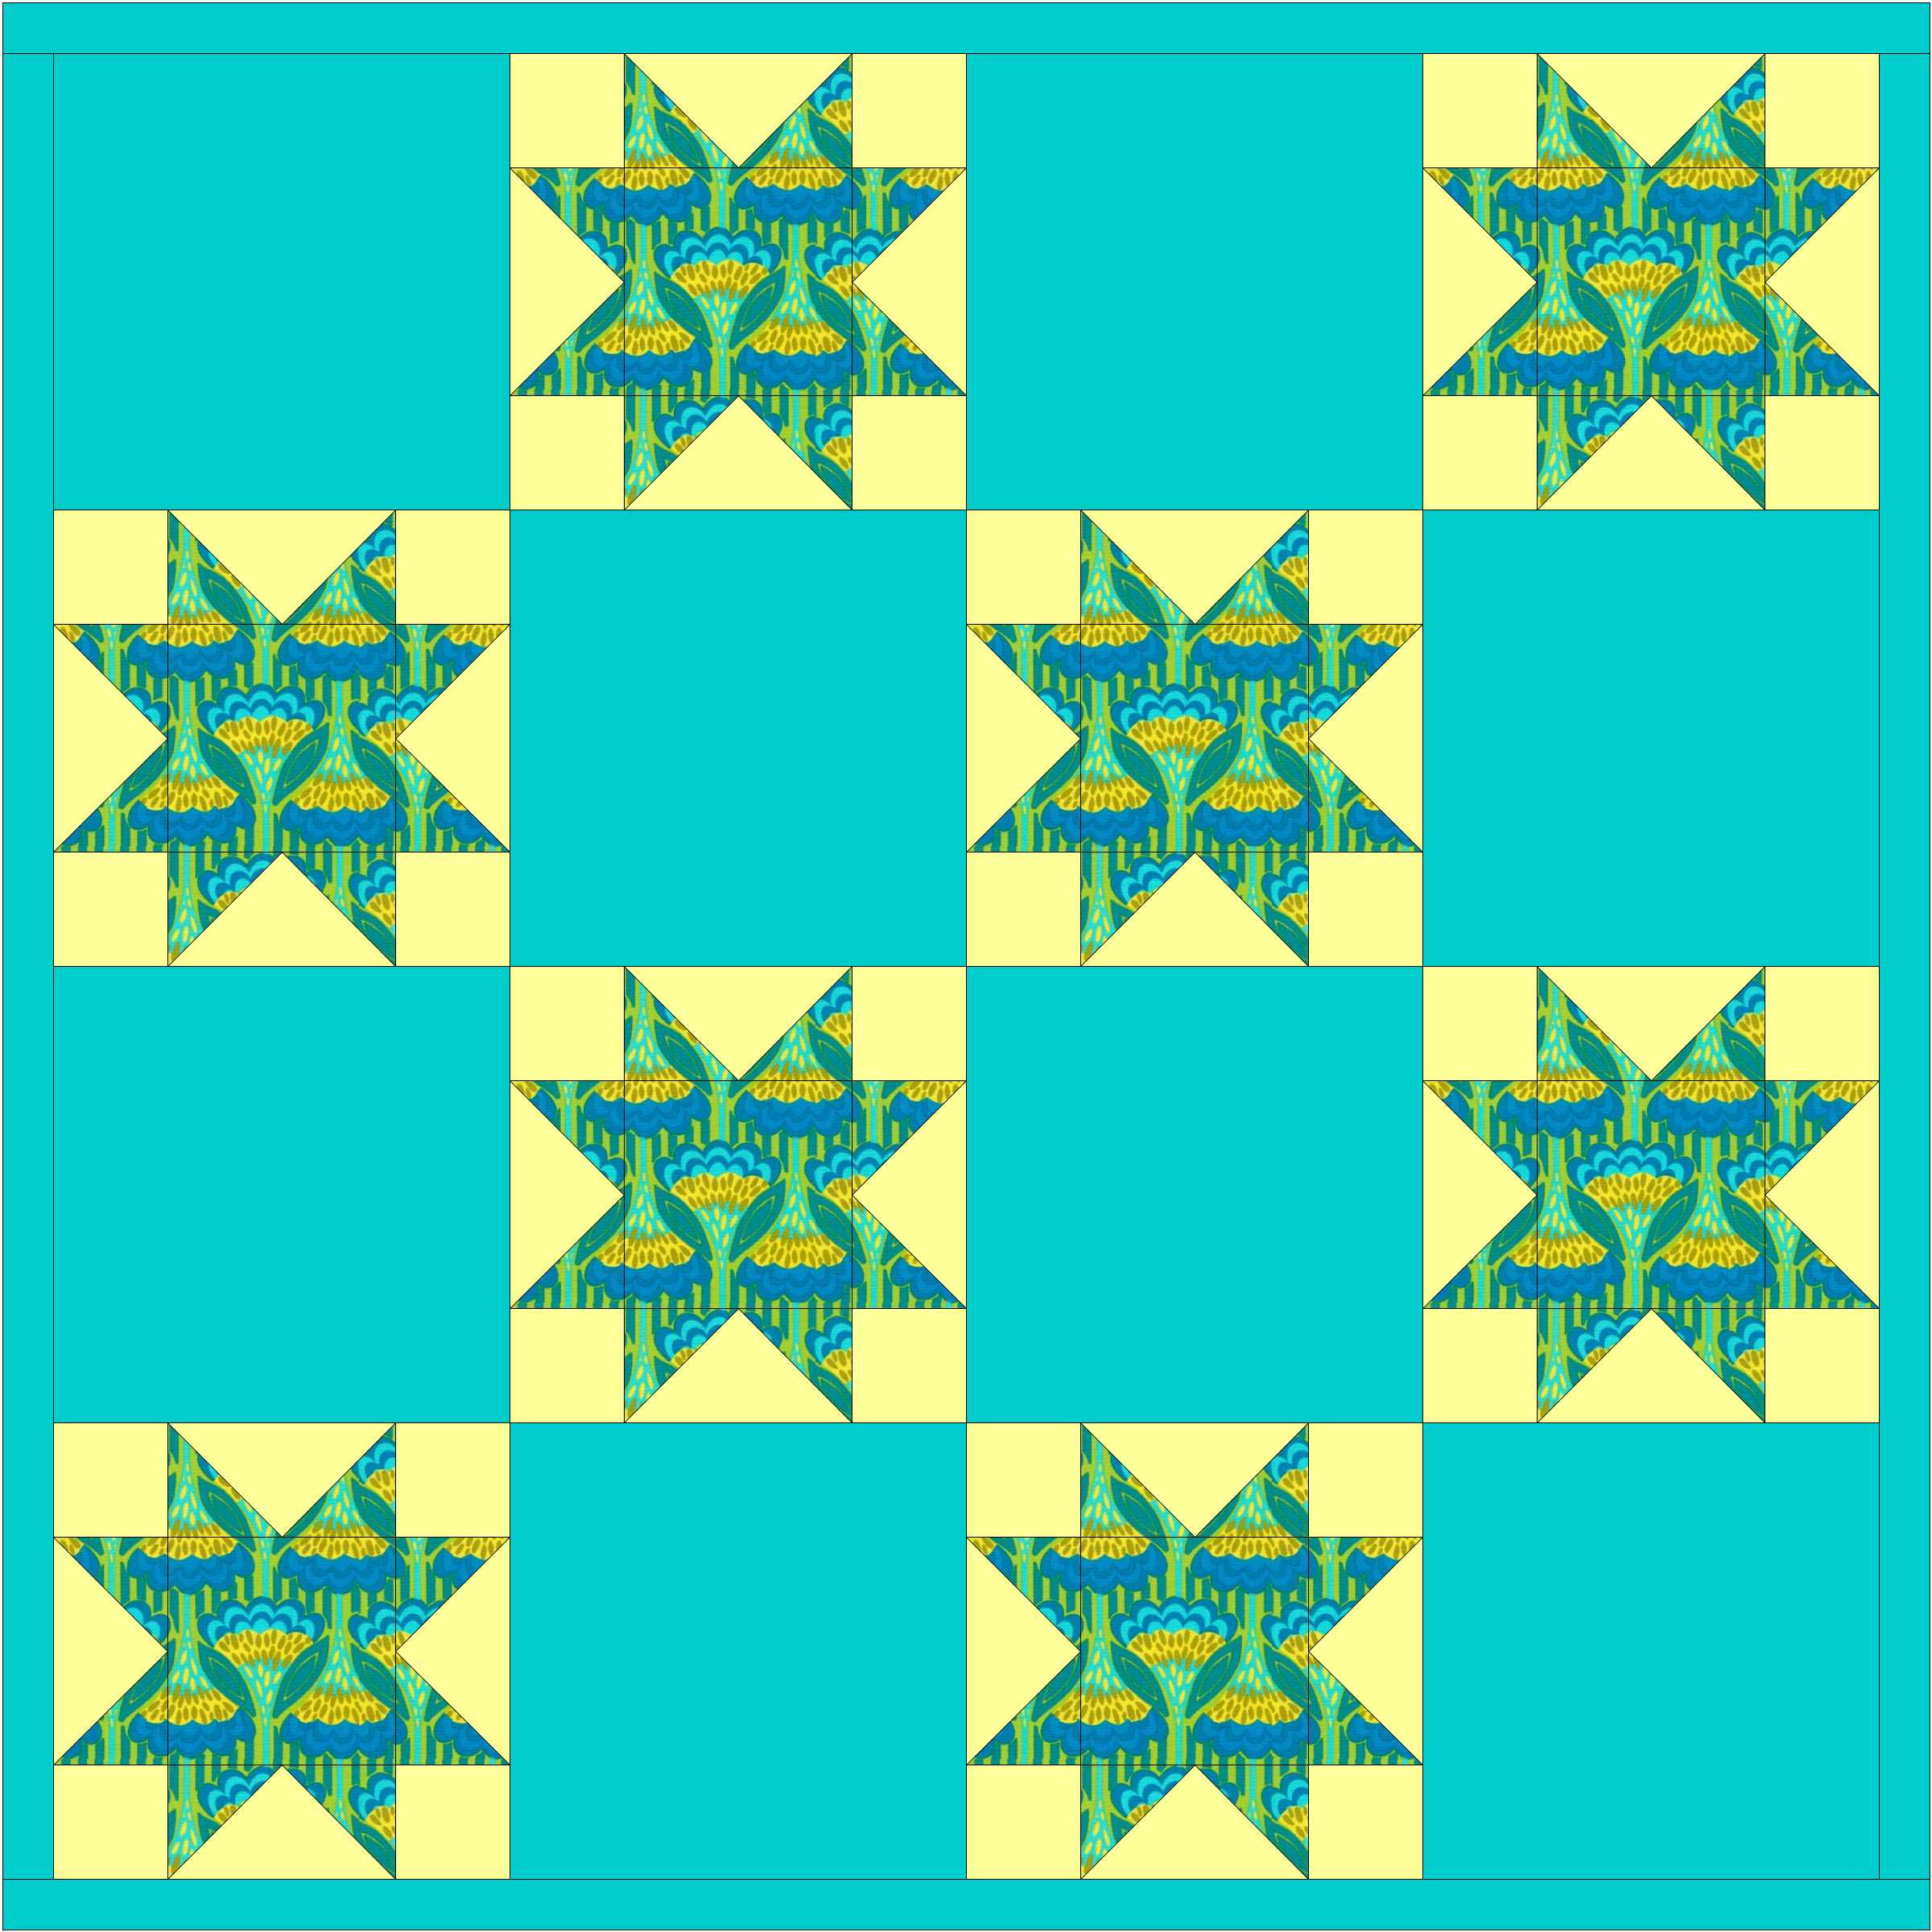
A couple of the quilts that can be made:

Looks like spools, some gray, some white, all standing up.  Same quilt with alternate blocks turned a quarter turn yields a different  clearly recognizable tessellation.  Reminds me of tessellating doggie rawhide chews 😉

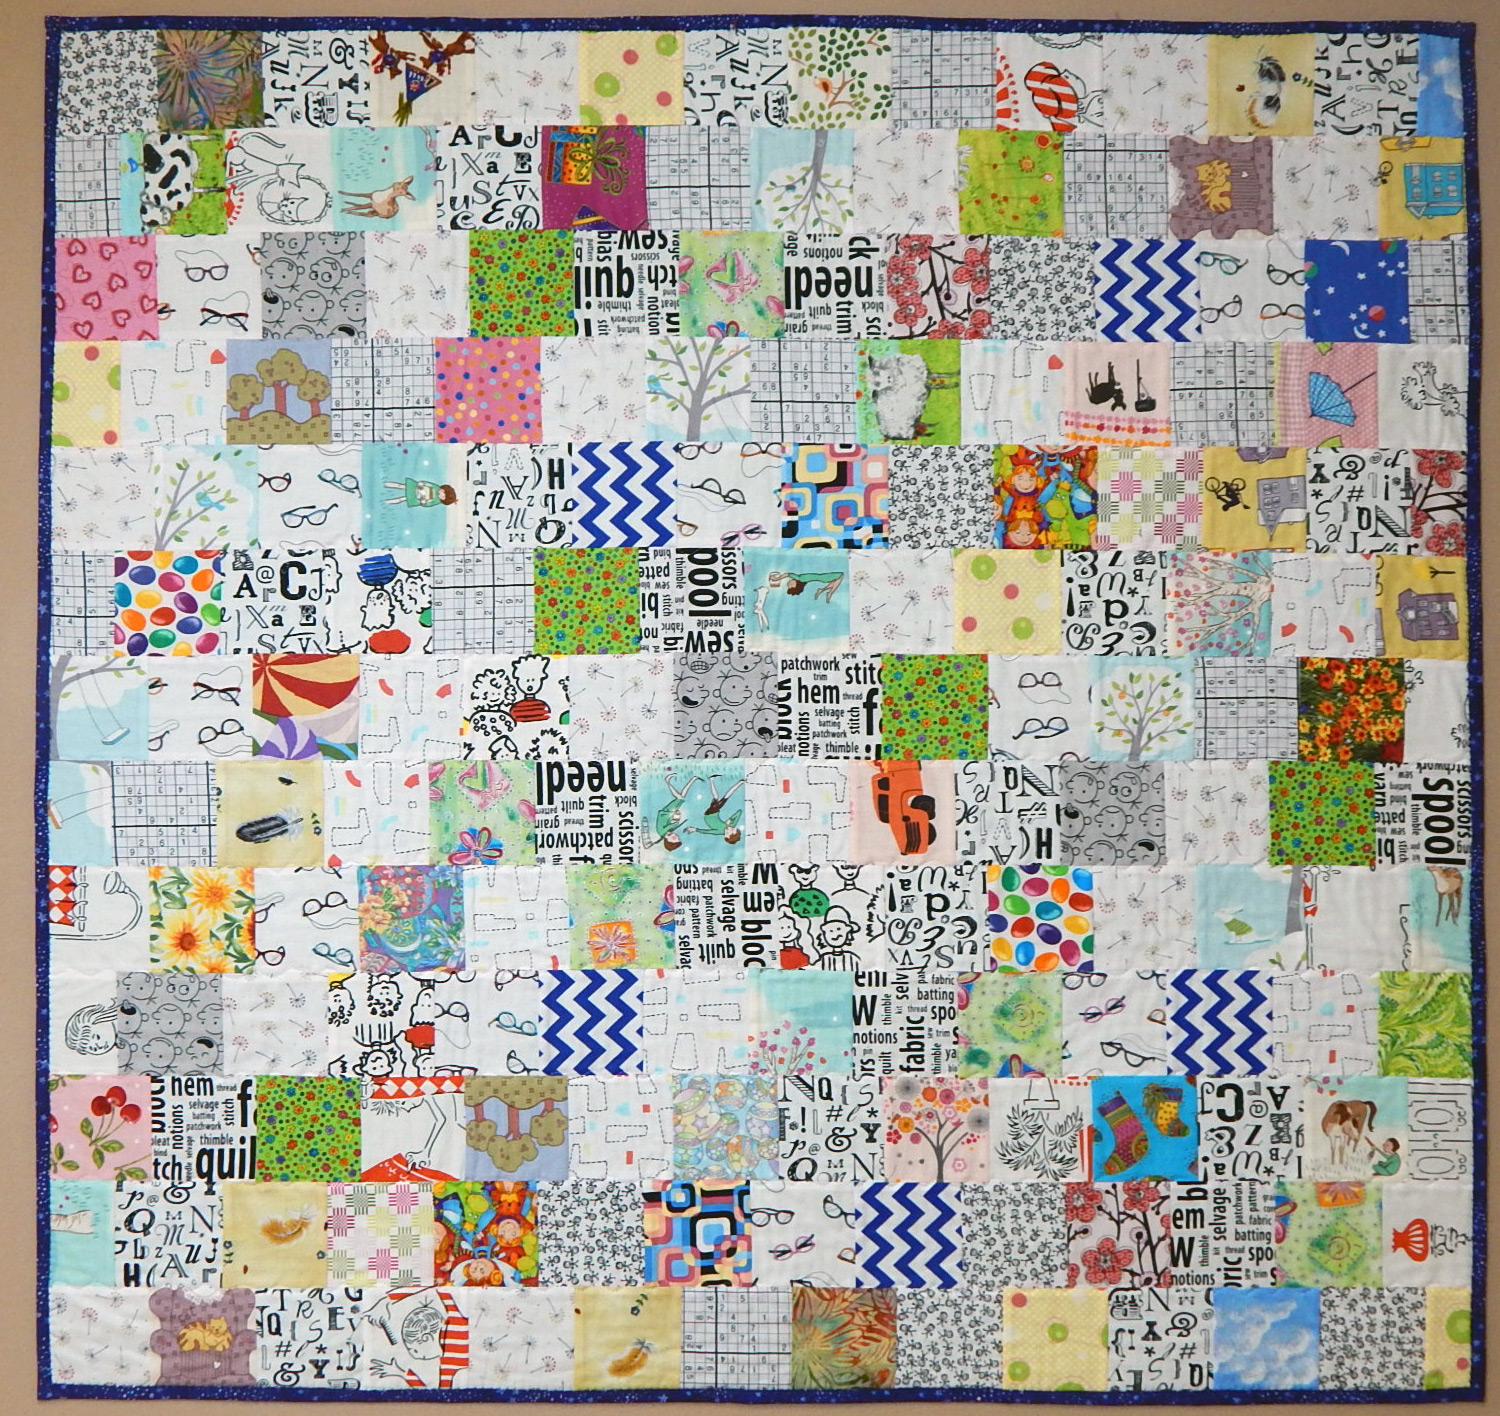
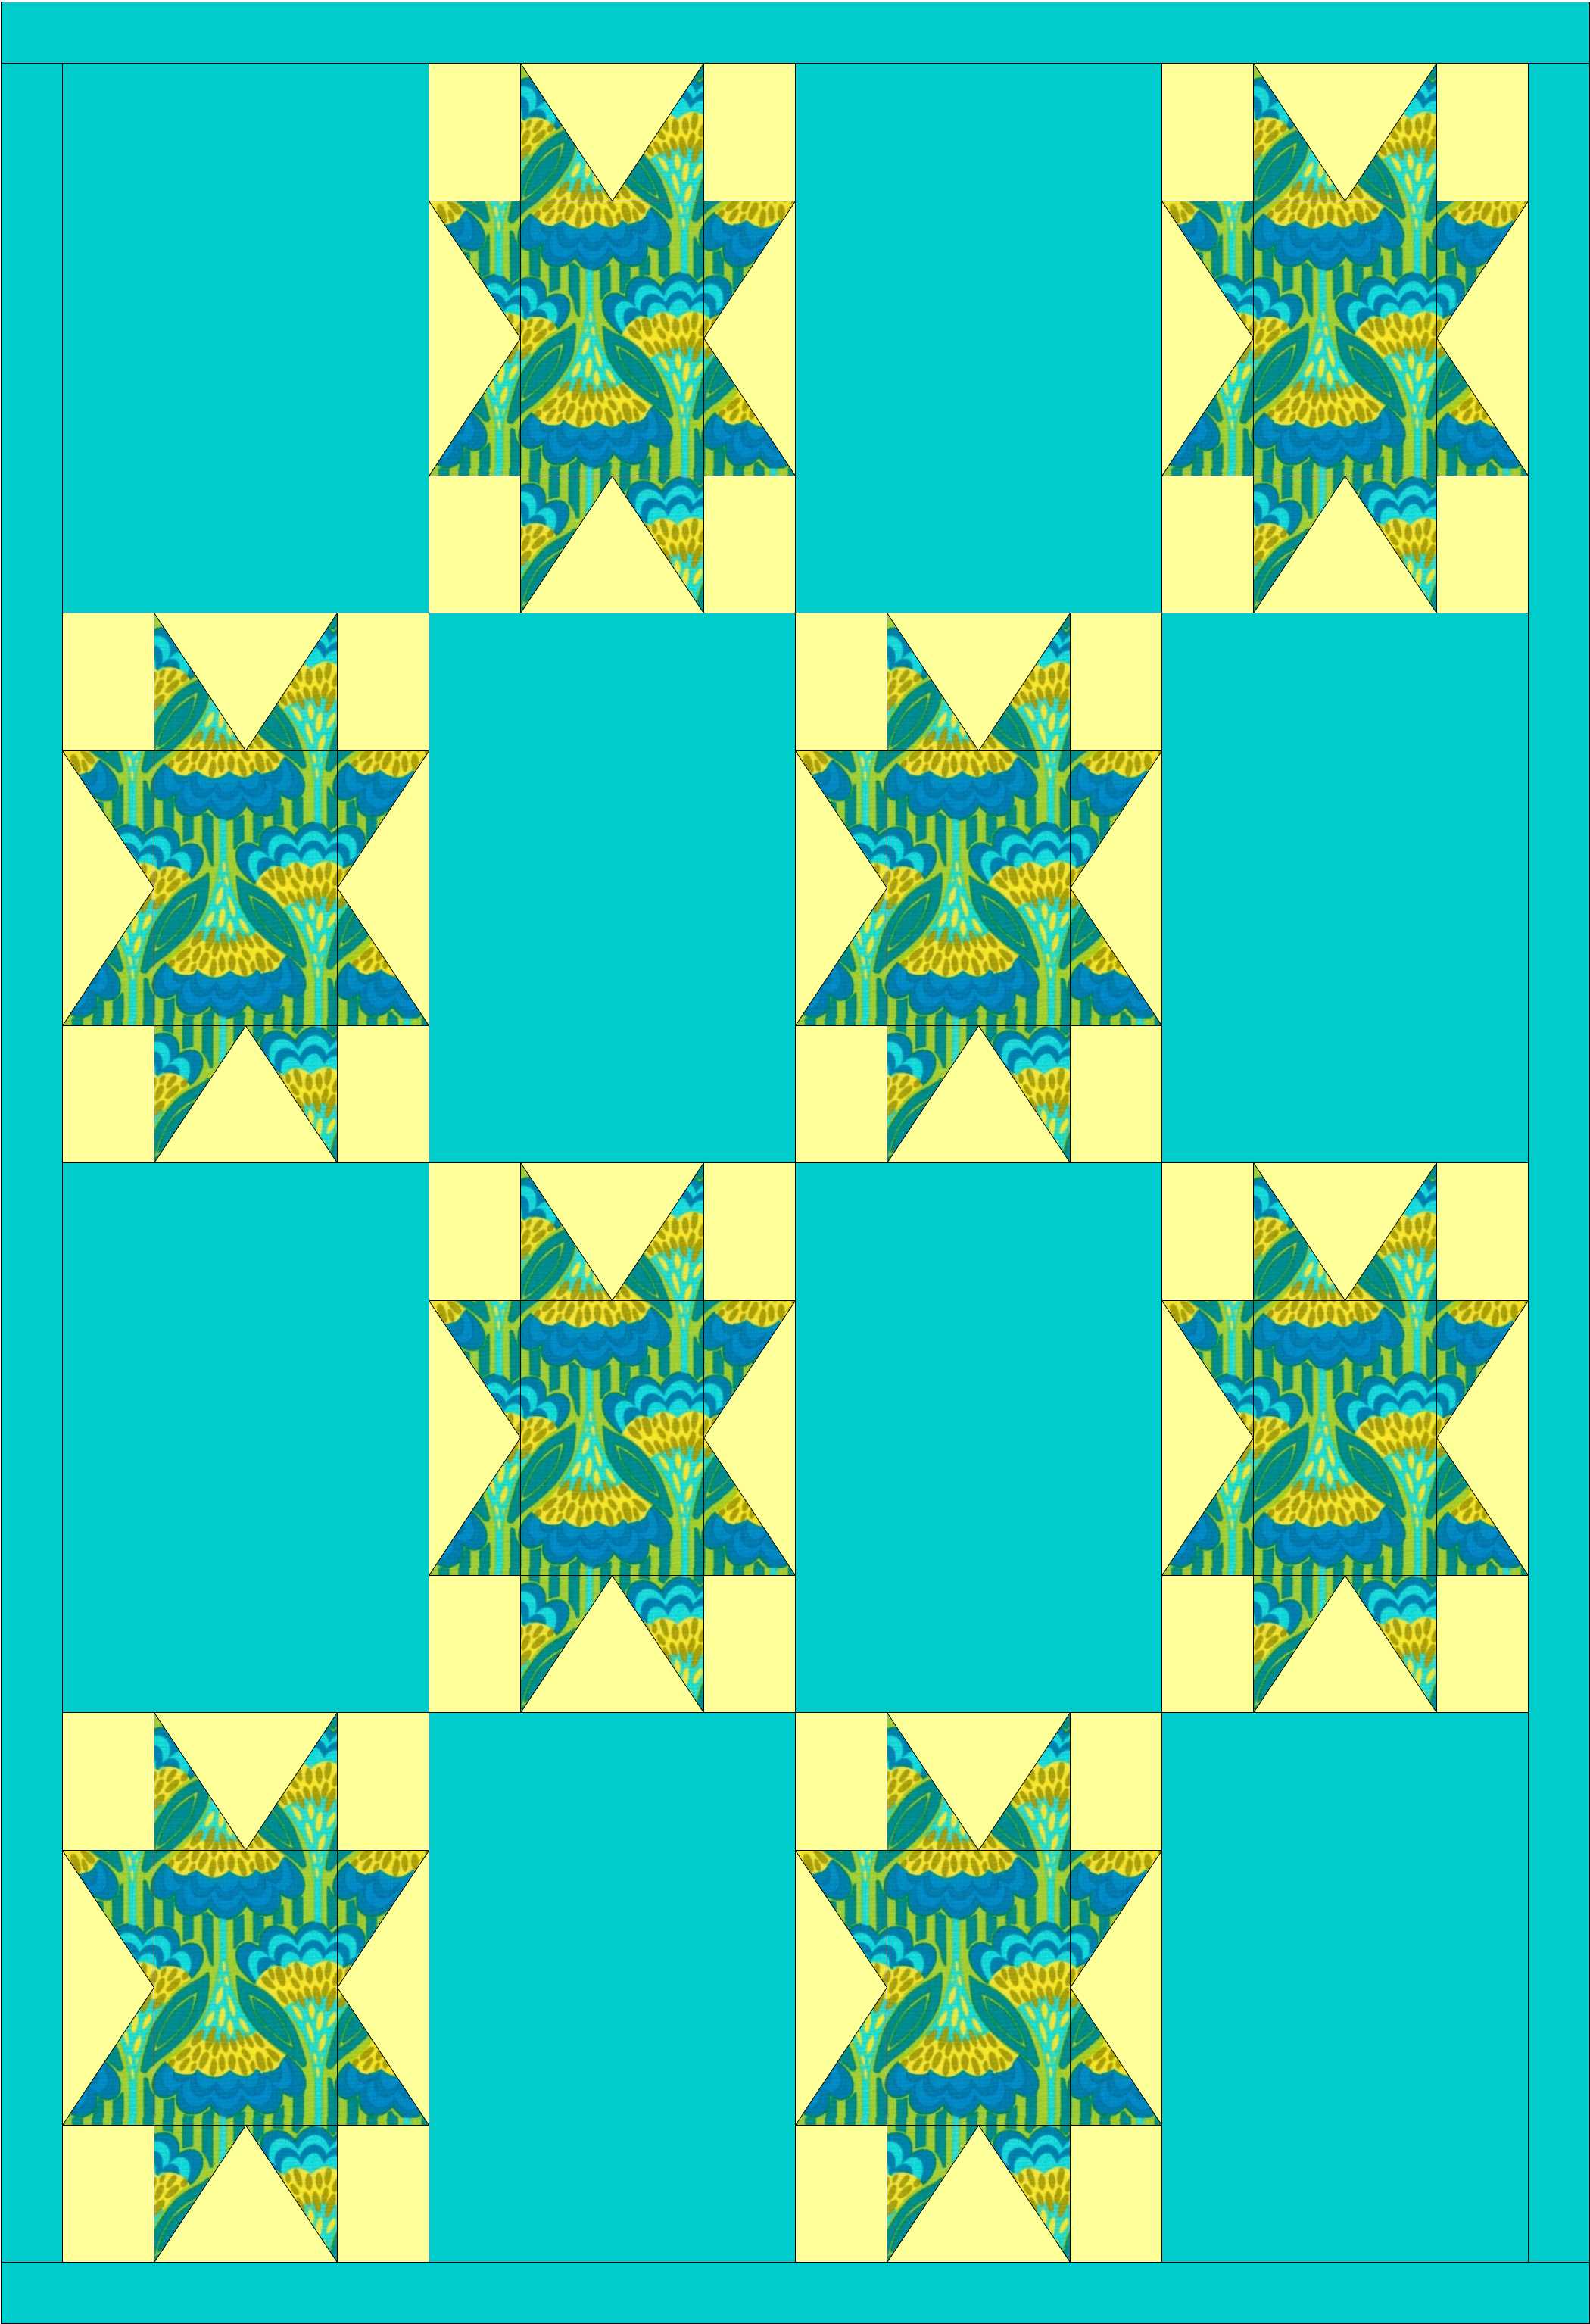
Now back to the spool quilt from above.  The “thread” areas have been colored in.  No blocks have been turned.

Jean spool 5This shows the power of color and value (lightness and darkness).   The colored part, being next to the gray and being closer in value to the gray, unites those parts of the block, and gives the illusion that we have all gray spools on a white background, some standing up, some lying down.

I hope these examples can be the seeds to sprout some design experimentation with tessellating shapes.

  1. Start with 2 square grids
  2. Create a positive design, and its negative design
  3. Alternate them in a quilt layout
  4. PLAY!
  5. And play more with color!

Happy Quilting (and Designing)!!   –Jean Larson


Your Inner Designer 3: New Blocks From Old

There is almost never anything new in design; indeed, the best designs probably are made with a sense of history.  So far we’ve modified overall quilt designs to make new ones; this time we’re going to modify blocks.  So here we go: 1.  Stretch it:

pieced star quilt

Quilt made with Block 3

pieced star quilt

Quilt made with Block 4

2.  Tilt it, or stretch and tilt it:

pieced quilt

This quilt is made from Block 1, tilted, with half the blocks tilted the other way

3.  Cut it and shuffle the pieces; rotate them if you like:

pieced quilt

This quilt is made from block 7, with the blocks rotated various ways to make the pattern

4.  Cut it and insert something.  This will distort the block and you’ll have to trim to make it even:

pieced star quilt

Quilt made from Block 10 and a plain block with strips inserted the same way

All of this fooling around might be a good use for some of those orphan blocks–what have you got to lose?  And If you find some modifications you really like, try them out in a quilt: Please make some designs and send them to me–I’d love to see what you come up with!

Scrappy Strippy Placemats

Here’s a QUICK, EASY way to use up scraps while making some gifts.  Could be gifts for you, of course 😉  I like to make them ahead of time to have as hostess gifts, housewarming surprises, etc.

A bin of scraps being made into a long strip

A bin of scraps being made into a long strip

Start by cutting scraps into strips of set widths.  (I cut and sort all my scraps, so I have bins of strips ready to go.) 1st-strip In this project, I used strips in widths of 1.5”, 2”, 2.5”, and 3”.  Sometimes I just use whatever color comes next, but for this project I selected yellow/gold, orange/red, and brown/tan scraps.  I joined the strips end-to-end to make long strips of a given width.  So, for example, a strip may be 1-1/2 inches wide and be made up of scraps of various lengths from 1-1/2 inches to about 8 inches.

add another strip, then fold them right sides together and sew the seam through all layers

add another strip, then fold them right sides together and sew the seam through all layers

After piecing my long strips, I started a placemat as follows.  I cut a piece of backing 14 x 20 inches, layered a piece of batting 13 x 19 inches on top (batting scraps, yes!), and placed a strip in the middle of the batting. [picture] I used the flip and sew method to add strips on each side, sewing through all layers as I went so that I was quilting while assembling the placemat top.

Strips can be oriented horizontally, vertically, or at any angle you choose!  You can mark your first line to be sure it’s straight if you want, but I just eyeballed it.consecutive-strips-web

I pressed after adding each strip, and every few strips I turned it over and ironed the back of the mat, too.

.

.

.

.

When the mat was finished, I trimmed it to 12 x 18 inches.  Note that it helps to make the last strip added a wide one so the mat can be trimmed to size without leaving a really skinny strip on one edge.

Last strips added are wide to allow for trimming to size

Last strips added are wide to allow for trimming to size

I bound the edges with scraps of bias binding left over from various quilts as well as scraps from my bins.  I got four mats done easily in a day, so this would work as a last minute gift—we all need those!finished-mat-web

Modern Donation Quilt

Donation quilts are a great use for scraps, but they aren’t usually very exciting to make.  I make them more interesting by trying something new with each quilt.  

Most donation quilts are smaller than bed size, which makes them a good place to try new things.  Here’s an example where I “tweaked” the usual quilt design in several ways to make it more modern while still using older fabric from my stash.

First, this is a typical donation quilt. usual donation labelled It’s made 40″ x 40″ as requested by the charity, and it used up a fair number of those 5” charm squares that seem to reproduce themselves while the fabric closet door is closed. I used it to practice some of the quilting designs I’m learning in Leah Day’s Craftsy class, so I did learn something in making it.

And here’s what I decided to do on the next donation quilt for a children’s charity to make it more modern.  Ronald Labelled

I made these changes to made this design more modern:

  1. The blocks are rectangles rather than squares.  It didn’t use up any charm squares, but it did use come cute fabric I’ve had for a while.
  2. I found a nice coordinating almost-solid in my stash.  (Solids are commonly used in modern quilts.)
  3. The rows run vertically and are offset by a half block starting alternate rows.  This breaks up the usual march of blocks across the quilt, making a diagonal zigzag pattern.  It doesn’t hurt that the quilt also is easier to construct because there are no corners to match 😉
  4. The quilt was designed without a border.

If you’d like to make a quilt like this, I’ve made a separate page with instructions; click on this link.  If you make a quilt from this, send me a picture!