Three Great Free Bag Patterns

There are so many free patterns on the internet that it can be overwhelming. Therefore, I’m here to tell you about 3 of my favorite free bag patterns.

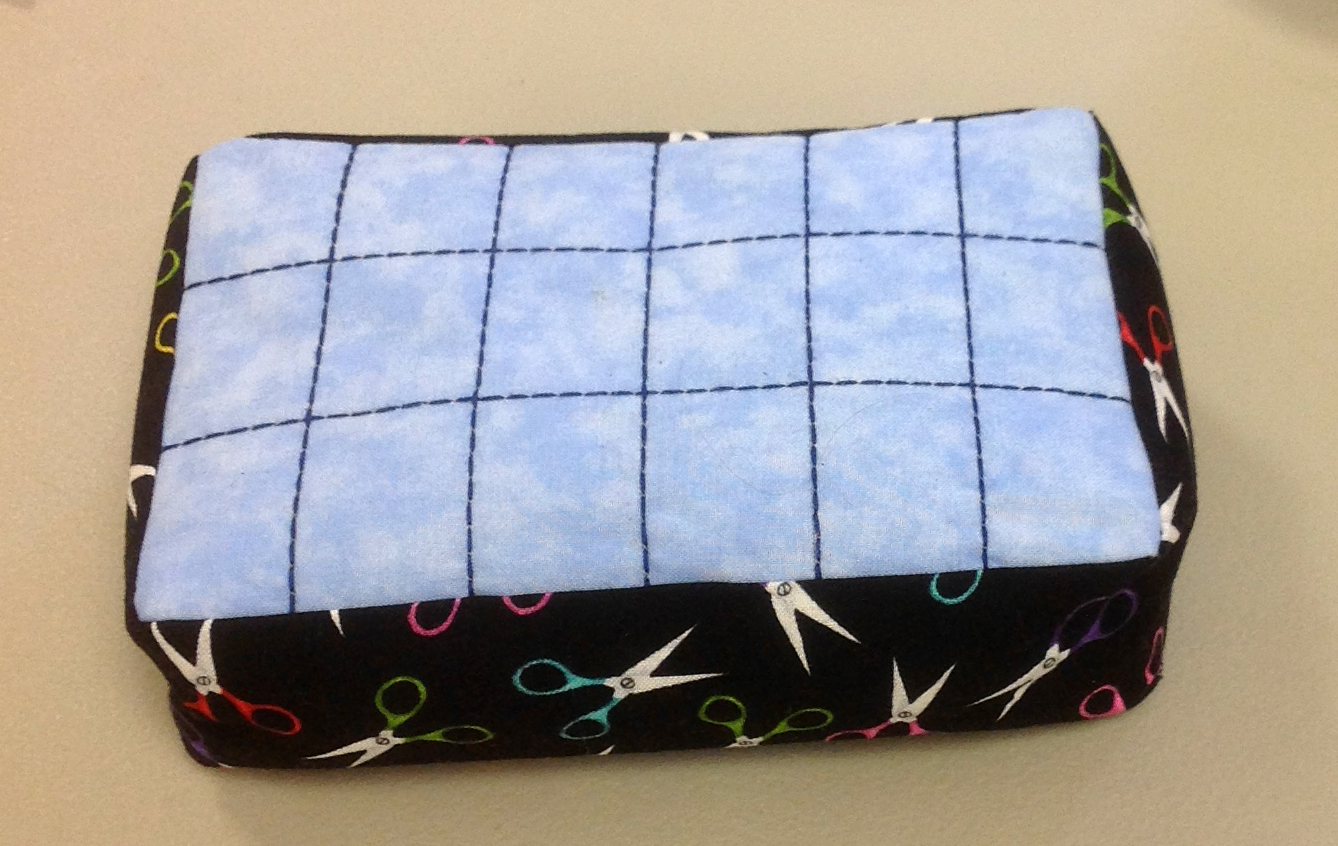
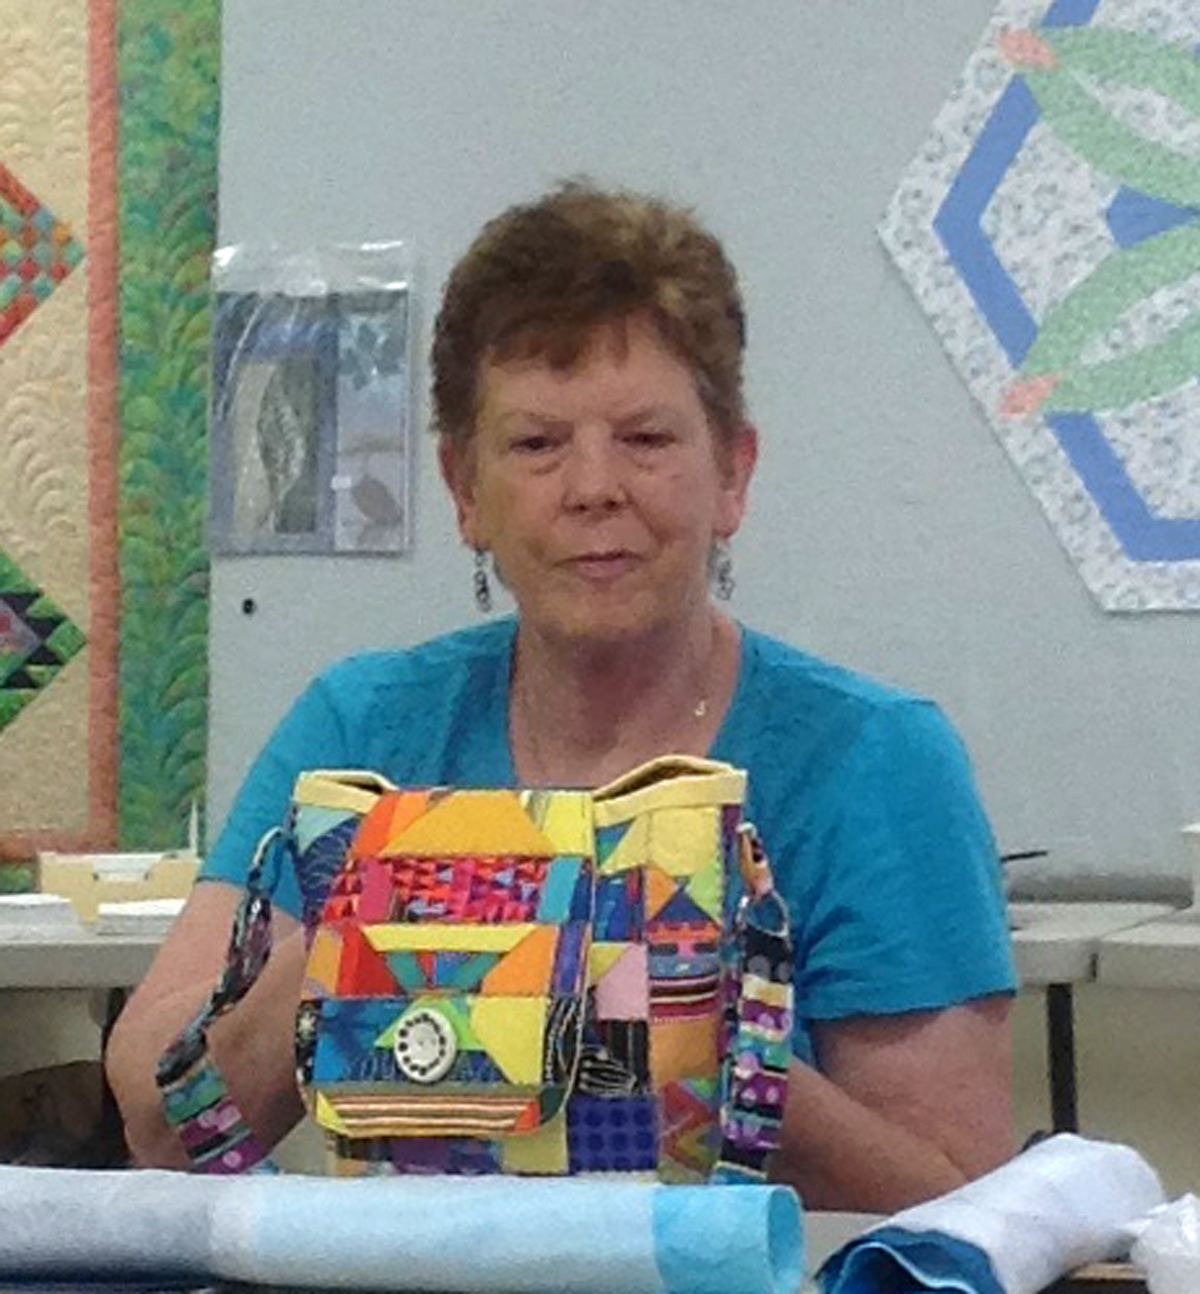
1. Pyramid bag, I adore this pattern, and it is so easy that I’ve made a few many.  Available with an excellent tutorial at Loganberry Handmade.  After you’ve made one per her instructions, experiment with different sizes.  So cute and so fun!

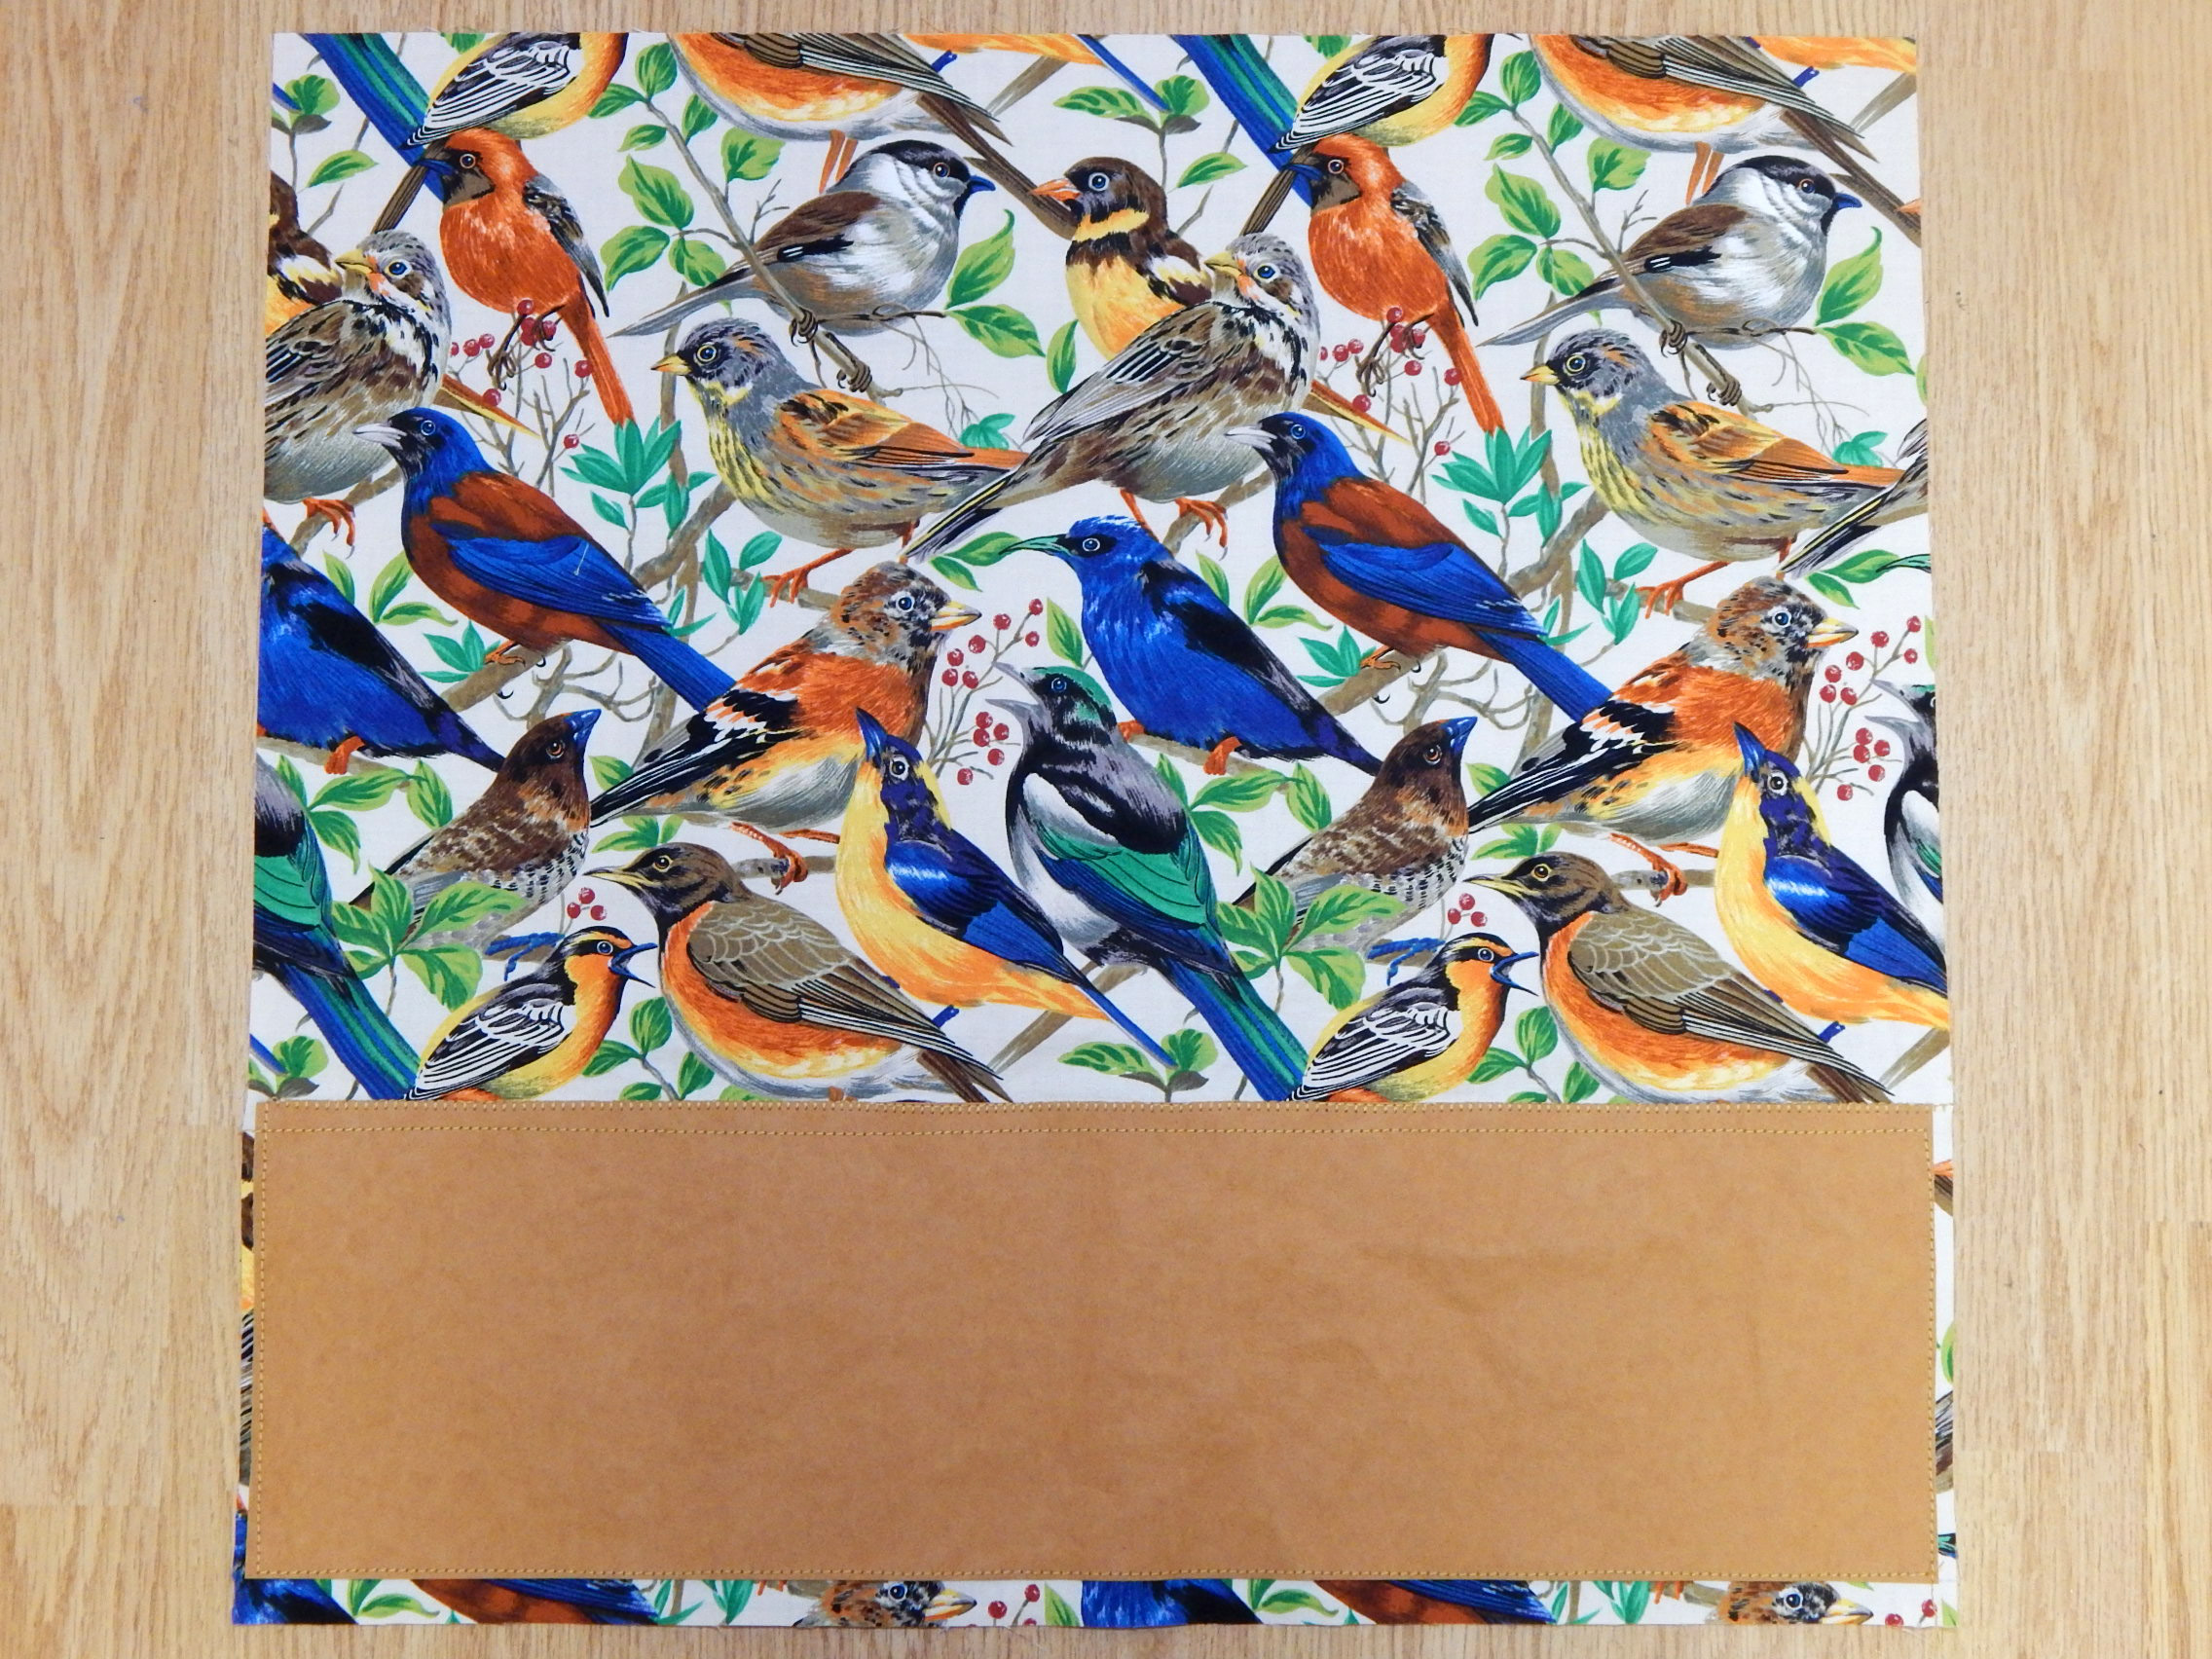
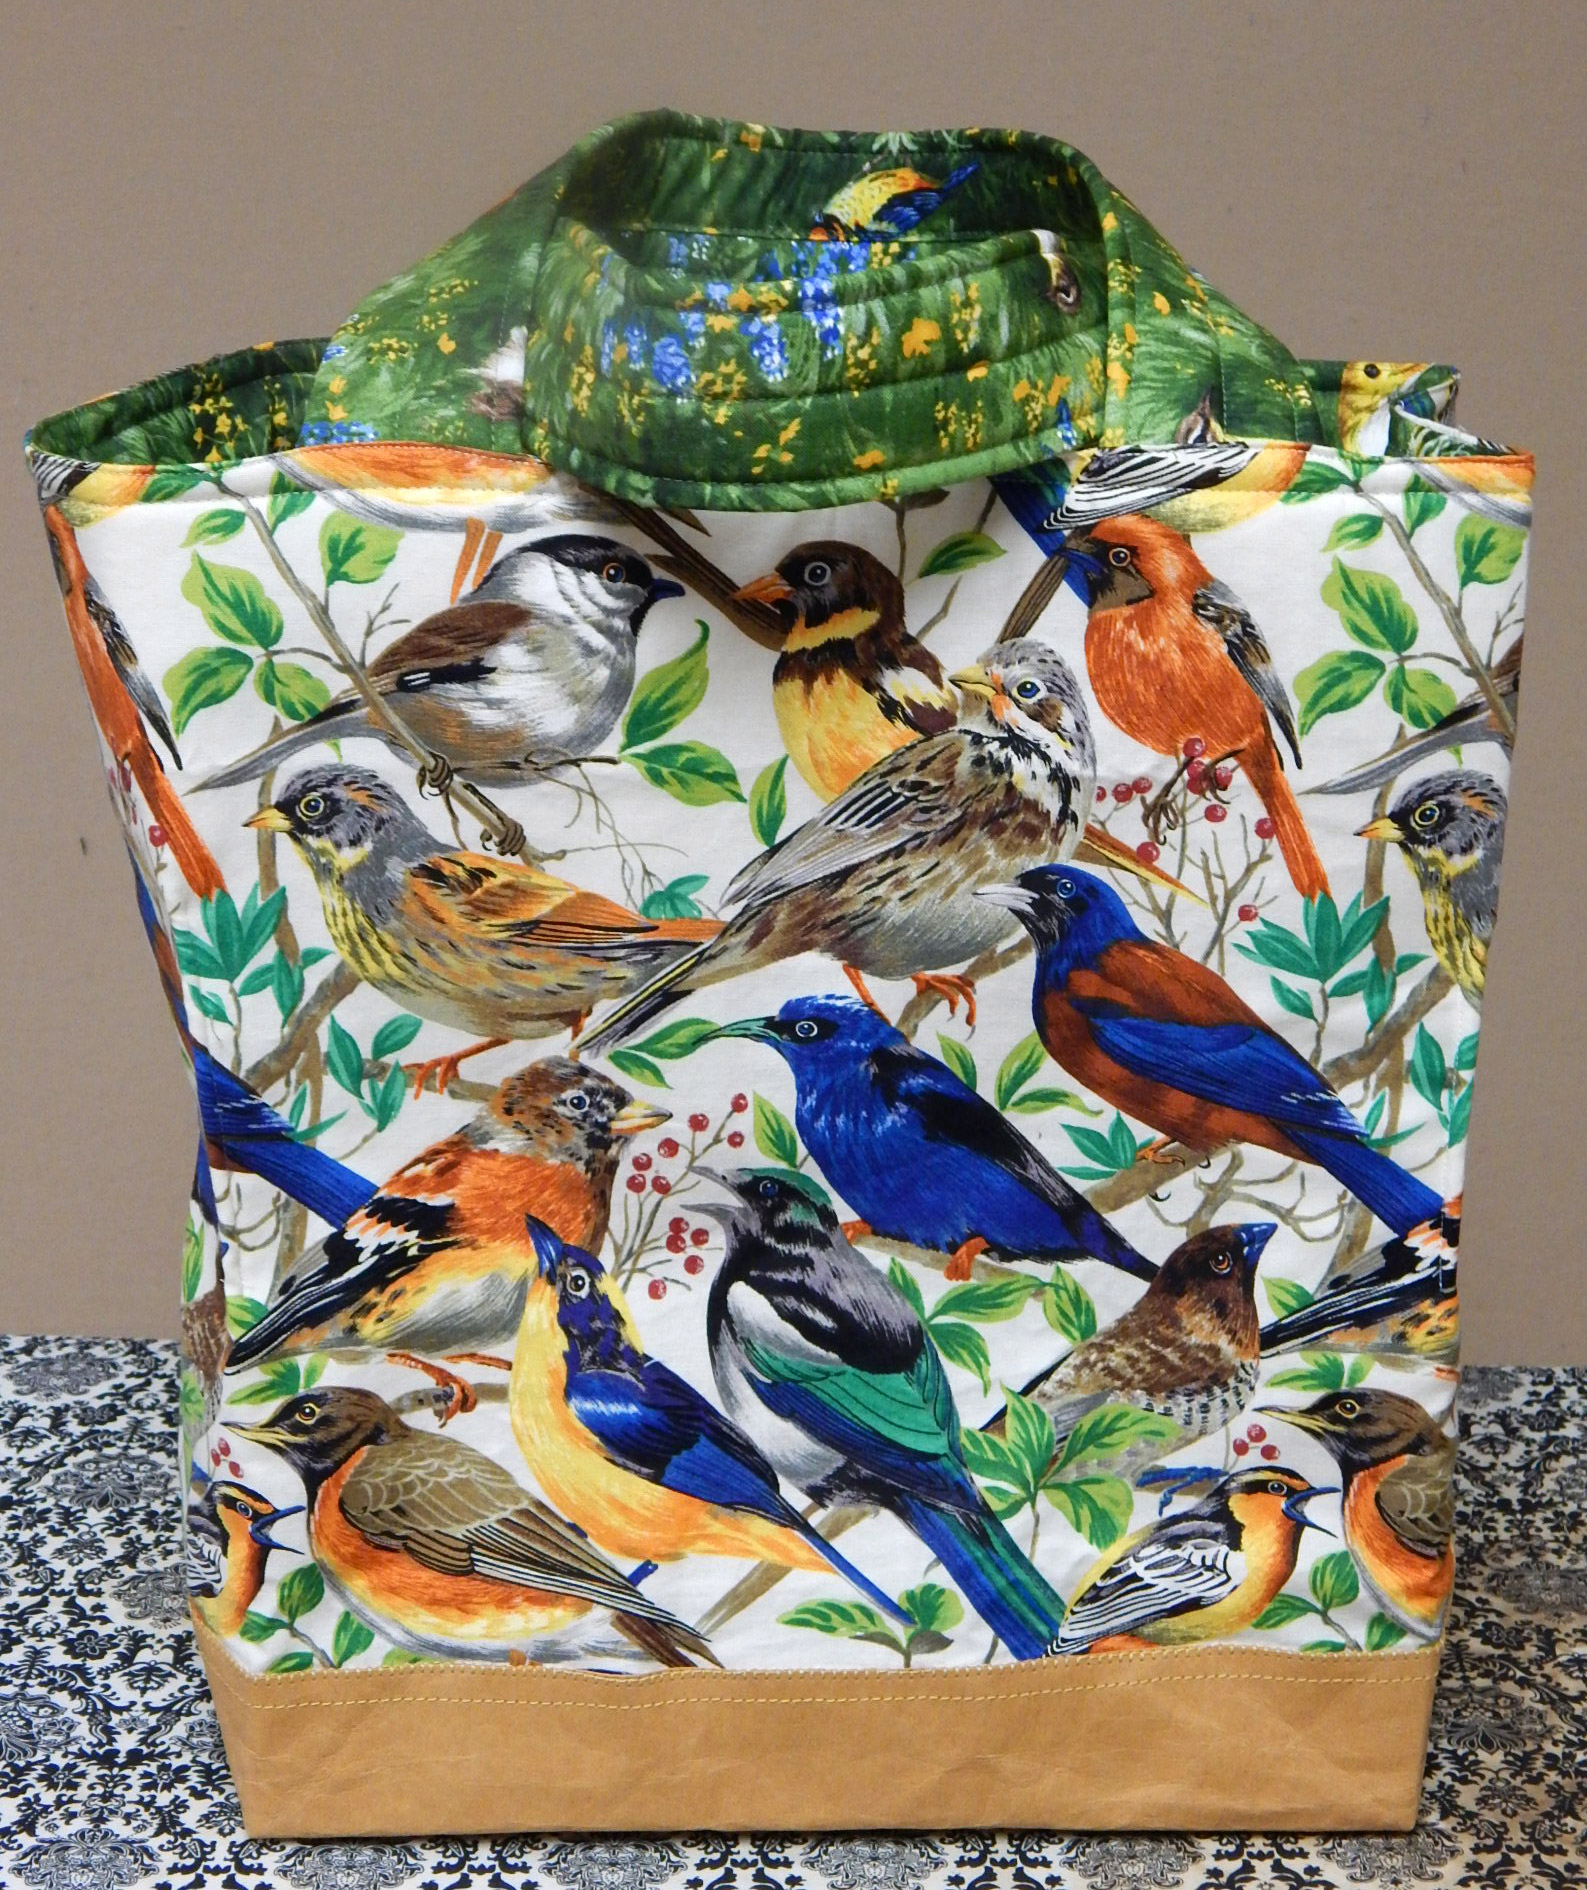
2. Tote bag.   The instructions for this “market tote bag” at Bijou Lovely are very clear, with great photos.  I’ve made several of these because they are an excellent, practical size. 
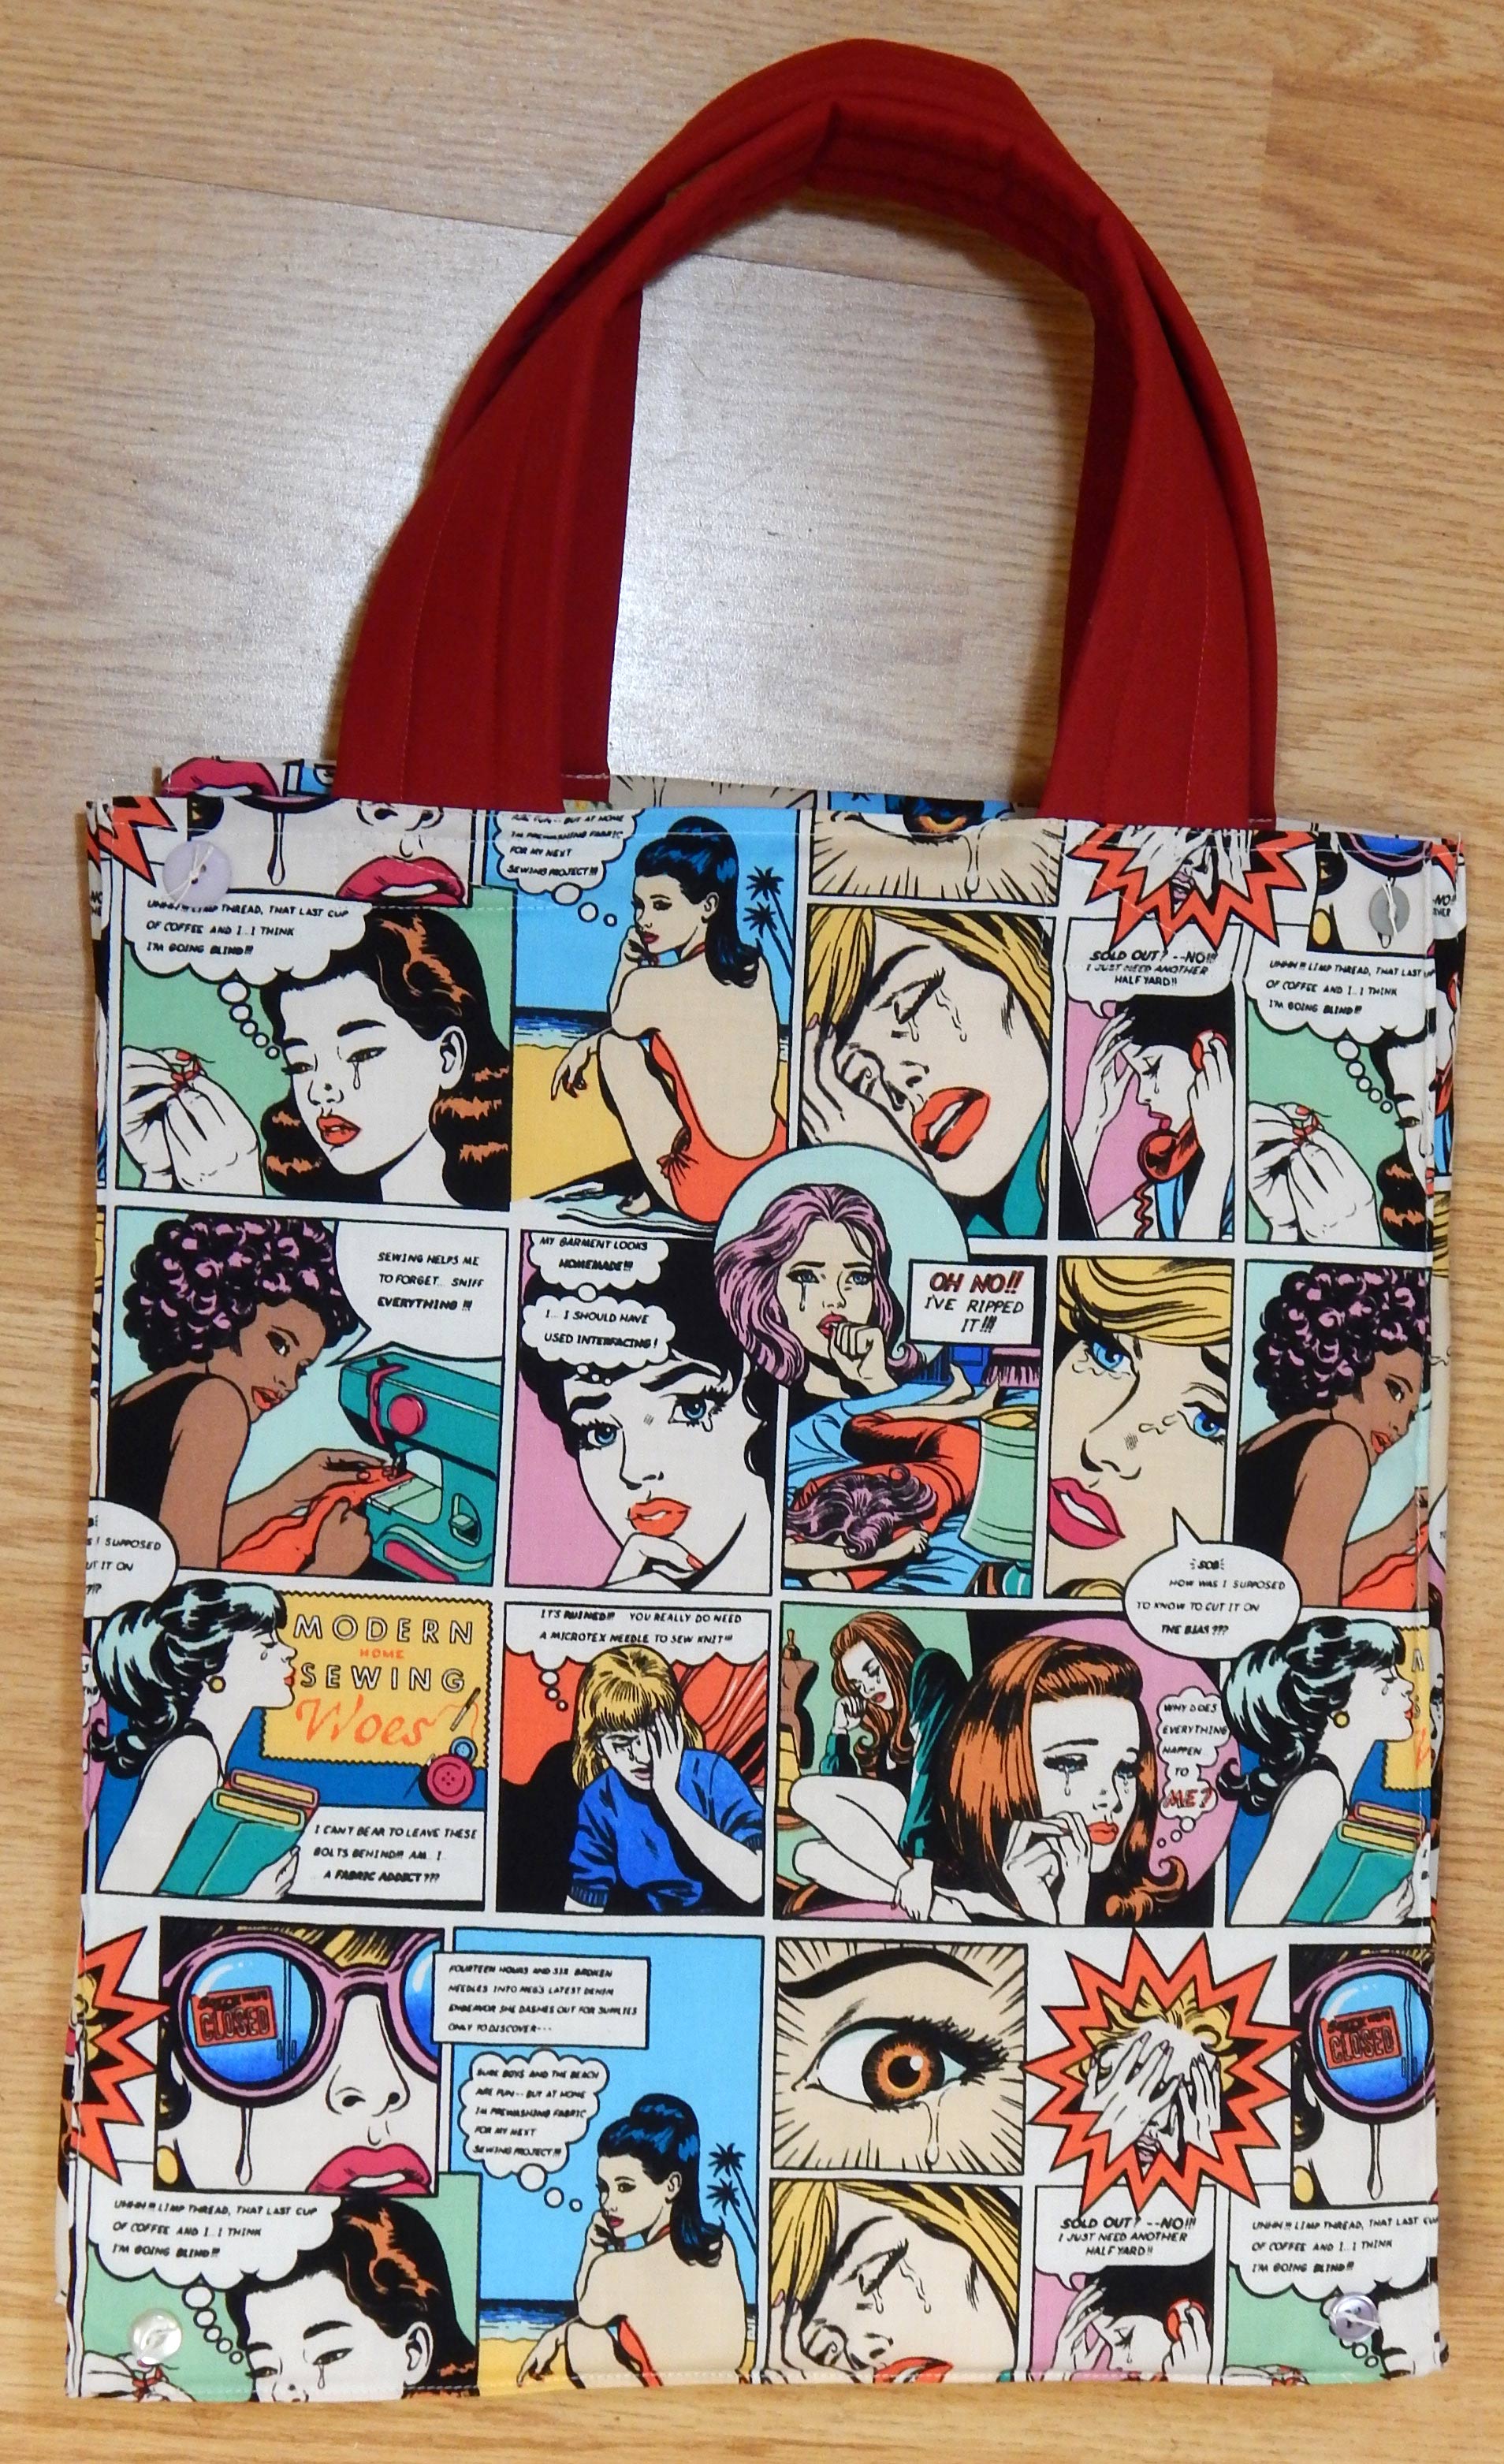
Of course, I’ve modified this pattern, but it is great just the way it is on her site.

3. Noodlehead’s Open Wide Zippered Pouch.  Anna Graham is the queen of bags of all kinds, and there are some great free tutorials on her site, Noodlehead.  Of course, she has excellent patterns for sale, and I’ve bought some of those, too.  Anyway, go try her free zippered pouch tutorial if you’ve had doubts about zippers.  Her instructions and illustrations are clear and easy, and you CAN do that zipper!

I’ve made a bunch of these in different sizes, as well.

Please tell me if there are free online patterns or tutorials that you love!

A Travel Sewing Machine

As I was carrying my sewing machine up the steps a few weeks ago, it occurred that the price of repair for my shoulder (if I hurt it, which I haven’t yet) would be a lot more than the price of a lighter sewing machine for travel. Of course, I have a wonderful rolling travel case for the heavy machine, but that case doesn’t do stairs.

I considered for quite a while, since it seems to me that my home already contains enough “things”. I decided that, since I’m planning more sewing travel in the coming year, a lighter machine was worth the investment.  (A little more self-justification: I was the only serious sewist I know who owned only one machine!)

After some research, I settled on a Bernette 33, which is made by Bernina and sold by my Bernina dealer.  It is just what I was looking for:  smaller, lighter, with no computer parts to worry about.

Bernette 33, my new travel companion!

So far it performs just fine.  I’ve mainly used it for piecing, since that is most of what I do when I go to sewing gatherings or teach.  It certainly doesn’t feel as sturdy or sew as smoothly as my Bernina, but I think it is “just right” for travel.  And the price was right, too.

Of course I made it a cover to match the bag that carries its accessories:

This fun fabric came in prints of two sizes, so I had one of each to use

How many sewing machines do you own?


Road Trip

We recently went to the Southwest to visit family, and of course that required visits to a few quilt shops! I like to visit quilt shops when I travel because I always find something new. All these shops have websites, so I’m embedding links to allow you to visit them, too.

First stop was Thread Bear in Las Vegas, New Mexico. Las Vegas is a nice little town northeast of Albuquerque.  It has interesting architecture for those of us who like to see fun buildings of different eras. We stayed in the oldest hotel in town, on the town square. It was built in the late 1800s.

fabric, thread bear, las vegas NM

Fabric from Thread Bear in Las Vegas, NM

But about the quilt shop: Thread Bear had lots of fun fabric from which to choose!  I limited myself (with some effort) to the two pieces above.

Next was Loveland, Colorado, where Stitches has opened since my last visit to the town. They had lots of lovely modern fabrics, so I had to have a few fat quarters. One of the pinks and the yellow are the same pattern as the purple fabric I got at Thread Bear–that’s always fun 🙂

Fabric from Stitches in Loveland, Colorado

After Loveland, we went on to Albuquerque, NM, which has several quilt shops.  I limited myself to purchases at two of them.  Especially notable, however, was Hip Stitch.  They had so much beautiful fabric (including what looked like the full line of Grunge) that I was in there a looong time (just ask my husband!) trying to limit my selection.  Then when I got to checkout, the clerk helpfully pointed out that they stock postal service flat rate boxes, so I could buy more than I could carry and have it mailed to me!  Oh my, what marketing!  So if you own a quilt shop, take note!  Anyway, here are my fabrics from Hip Stitch (I resisted the urge to buy more and have it shipped):

Hip Stitch albuquerque, nm

Fabric from Hip Stitch in Albuquerque. The red has a silver metallic print that I couldn’t resist.

Next is Albuquerque was Stitchology, where I selected several fat quarters from their nice variety.  They also had lots of lovely fabric for clothing construction, but I stuck to my priorities and did not get drawn back into that!

fabric, stitchology, albuquerque

Fat quarters from Stitchology in Albuquerque

I was able (with a little effort) to fit all my finds into my suitcase.  I do have a project planned for each of these fabrics!  I’m off to the studio now…hope you have a good week!

Teaching Paper Piecing and Seminole Patchwork

This next quarter I will be teaching two classes at Studio Stitch in Greensboro (NC). The last class there was a lot of fun, so I’m really looking forward to these.

The first class, on Friday, August 11, will be a modern paper piecing project using the Lombard Street Pattern from Sassafras designs.  Here is my version, which you’ve seen before.  The pattern comes in 3 sizes, so I’m going to make a smaller one as well, just for fun.

Quilt pattern review

“Amish on Lombard Street”, my quilt made from a Sassafras Lane pattern

The second class will be Friday, September 15.  We’ll be making place mats using linen (if desired) and decorative strips of Seminole patchwork.  Here’s the class sample, though I’m making another set using a variety of patchwork patterns.

Seminole Patchwork

Seminole Patchwork Place Mat using a linen blend for the main fabric

If you’re in the Greensboro area, please come join us. You can find Studio Stitch online (click the name) or come by the shop at 3215 B Battleground Ave, Greensboro, NC.

Tech Shirts in a T Shirt Quilt

I’m making a T shirt quilt for a friend, so she sent a large sack of T shirts to be used.
This friend and her future husband are both very athletic, so many of those T shirts are tech shirts–meaning they are 100% polyester knit!

I searched the internet for specific instructions for using polyester T shirts in a quilt and found NOTHING useful. So, here’s how I solved the problem, and I expect it will work for you, too.

The blocks for T shirt quilts are backed with fusible interfacing to stabilize the knit fabric. I buy lightweight interfacing so the quilt will drape well. A while back, I bought a bolt of Pellon 906F for that purpose. It is very lightweight and is intended to be used with semi-sheer fabrics, so it bonds at a relatively low temperature–very important for polyester T shirts!Polyester T shirts in a quiltAs you can see, the 906F is lightweight and thin.  It fuses just fine at a temperature between the silk and wool settings on my iron. That setting requires only a few seconds to fuse, so there is no damage to the polyester shirts! Score!

This interfacing is working fine with the 100% cotton shirts as well. All that’s needed is a backing that keeps the T shirt from stretching as it is sewn and quilted, and this does the job.Tech shirts in a T shirt quilt

Here’s a look at some of the quilt blocks, waiting for final arrangement on the design wall.  My husband came along and said, “How did you get T shirts so flat?”  The answer, of course, is the backing 🙂

I’ll have a picture of the finished quilt as well as more information about it in a few weeks. Meanwhile, be warned: another friend who requested a T shirt quilt ended up making it herself (with my help)!

Giving Kraft-Tex a (Second) Chance

I made a couple of bags using Kraft-Tex for a sturdy bottom section a while back, and wasn’t that happy with it.  My review is here, if you want to read it.

Kraft-Tex review

Tote bag made with Kraft-Tex for the bottom section

However, when I got some lovely bird fabric in a guild swap, I decided to make another tote bag and use Kraft-Tex to protect the bottom again. I pre-washed the Kraft-Tex to soften it a little, then crumpled it in my hands to soften it a little more.

Kraft-Tex for bags

Since I didn’t really want the thick Kraft-Tex in the seams, the shortage worked out OK

I had BARELY enough for a shorter-than-recommended bottom section, but it worked out fine.  I used the same pattern as before, the Market Tote which is free at Bijou Lovely.

Market Tote from Bijou LovelyAs you can see, I had some beautiful birds-in-the-grass fabric (a Moda print) for the inside.

Kraft-Tex for tote bagI used a buttonhole stitch to secure the top edge of the Kraft-Tex.  Overall, the Kraft-Tex was much easier to use this time.  It makes a sturdy bottom for the bag, is washable, and presumably will wear better than a plain fabric bottom.

As before, the Market Bag tutorial was very well done and easy to follow.  The only change I made was to revise the way the bottom was attached so that I didn’t have Kraft-Tex in the seams; that would have been quite bulky.  I laid the Kraft-Tex on the top fabric and secured the edges with buttonhole stitch just inside the seamline, so it wasn’t necessary to have Kraft-Tex in the seams to hold it in place.  That worked a lot better.

Kraft-Tex for bags

Finished Bird Bag

In other words, I am now revising my opinion of Kraft-Tex and probably will use it for this purpose again!  It still does’t really look like leather to me, but in this case that isn’t the point.

QuiltCon, Anyone?

QuiltCon, the Modern Quilt Guild’s annual gathering, will be in Savannah in February 2017, and I am going!mqg-new-logo

I recently read an interesting blog by Becca Fenstermaker about how to deal with a convention when you’re an introvert.  Believe it or not, that would be me, so I plan to use her idea.

Becca’s main suggestion was to start ahead of time and try to find people who will be attending, so you’ll have somebody to visit with when you get there.

Fortunately, there will be several people from at least two of my guilds, but of course the point is meeting new people as well as visiting with old friends.  So if you’re going, please leave me a note in the comments–I’d like to met you!

Meanwhile, I’ve made two more clusters of sweet pea pods.  The pattern is well illustrated and the directions easy to follow 🙂

Hope you have a good week!

Quilting Thanksgiving

Gratitude is always a good practice, so it’s especially nice to have a holiday specifically dedicated to thanksgiving.  Here are 10 reasons I’m thankful for quilting:

  1. Every project is a new learning experience.  Even if it is, sometimes, “another *%@!! learning experience” 🙂

    rotary cutter accident

    A learning experience!

  2. There is no failure. Projects that don’t turn out as planned can be recycled into something.  (It may take a while to figure out what.)

    This one had to be cut up and made into placemats!

    This one had to be cut up and made into placemats!

  3. Friends.  Quilting is a great way to meet interesting people and make new friends.  I love making friends online, too, even though I may never meet them in person.  It’s such fun that people from 3000 miles away follow my blog and I follow theirs.

    A new friend holding up one of my quilts at a recent guild talk

    A new friend holding up one of my quilts at a recent guild talk

  4. Quilting is a great creative outlet, whether or not I choose to be an “artist”.

    Gwen Marston iQuilt class

    Quilt made for a class with Gwen Marston

  5. Gifts.  I’ve made quilts, placemats, table runners, potholders, and bags to give to friends.

    Divided basket made from pattern by Noodlehead

    Divided basket made from pattern by Noodlehead

  6. Opportunity to give to the community.  I make quilts for Ronald McDonald house.

    One of my quilts for Ronald McDonald House

    One of my quilts for Ronald McDonald House

  7. Color!  Who doesn’t love playing with all the beautiful fabrics?

    Yummy fabrics at Studio Stitch, where I sometimes teach

    Yummy fabrics at Studio Stitch, where I sometimes teach

  8. Socializing: it’s great to get together and work on a project with friends.

    An especially quilty friend!

    An especially quilty friend at a sewing group

  9. Being alone: it’s equally great to spend a quiet day alone in my studio

    View from my home

    View from my home

  10. Problem solving: Many projects present problems that need to be solved, and I love the challenge.

    modern quilt

    I enjoyed the challenge of designing and making this quilt

What are you thankful for?

Pincushion follow-up

Here are the pincushions made by the talented members of the Franklin Modern Quilt Guild. And just so you know, any quilts you see in the background are samples hanging at A Stitch in Time, where we meet.  How great is that, to meet in a quilt shop?

Be warned:  these are really just snapshots, not my best pictures.  I tried to be as unobtrusive as possible when I took pictures, so there may be odd things in the background.

fmqg19This last one is a “needle cushion”.  Each square is to be labelled with a needle size,so partly-used machine needles can be stuck in and easily found when you need that size again:

Needle Cushion

Needle Cushion

While I’m showing some of the creativity in this group, here are the “share and inspire” offerings for this month:

quilted purse

Jane Threlkeld fused some of her orphan blocks onto backing and made this purse

Linda Harrison made these two quilts from Bonnie Christine fabrics for Art Gallery, and one of them won a prize:

And here is a bright, cheerful quilt by Lynda Doll:modern quilt

Several of our members also belong to an art quilt group, and brought an example of one of their projects.  As you can see, they each made a vase of flowers and the cut them all up and swapped quarters!  The next step will be beads and baubles.art quilt

There’s always plenty of inspiration at these meetings!

Save

Save

Pattern Review: Sweetpea Pods

Note: As always, I received NO compensation of any type for this review.

One of the many things I enjoy about attending a quilt show is the opportunity to visit the vendors. Since my nearest “local” quilt shop is about an hour away, I often see things online long before I get to examine them in person. Occasionally I do buy online, but there’s no substitute for looking something over personally before buying.

Pattern review Sweetpea PodsAt the Vermont Quilt Festival, I came across this pattern that I had been considering online because it looked so darn cute.  I talked to the vendor about it to be sure it included instructions for doing that tricky thing with the zipper and learned that it did. She also had the extra zipper pulls that are useful for this design, so I bought the pattern and the zipper pulls.

And here we go:Pods3

This pattern has VERY clear instructions.  I read a fair number of patterns (and write my own), and this is one of the best-written patterns I have seen.

The little pods are easy to make, even with taking time to learn the zipper trick.  The zipper trick actually is easy, and instructions for that are very clear as well.  The pattern is set up so that you get two pods out of each set of instructions, so I cut them out with coordinated fabrics–outside fabric for one pouch was the lining for its mate!  What fun!Sweetpea Pods pattern review

This is so fast and fun that I made several of them.  The instructions say to zig-zag finish the inside seams, but I used my serger for that, so it was even faster!

This was a great break from a rather tedious project I’ve been working on.  I’m giving these to our daughter to use as teacher gifts, but I foresee another round of them for Christmas gifts coming right up!Sweetpea Pod pattern review

You can order the pattern at several places online, or go right to the source at the Lazy Girl Designs website.