Pincushion follow-up

Here are the pincushions made by the talented members of the Franklin Modern Quilt Guild. And just so you know, any quilts you see in the background are samples hanging at A Stitch in Time, where we meet.  How great is that, to meet in a quilt shop?

Be warned:  these are really just snapshots, not my best pictures.  I tried to be as unobtrusive as possible when I took pictures, so there may be odd things in the background.

fmqg19This last one is a “needle cushion”.  Each square is to be labelled with a needle size,so partly-used machine needles can be stuck in and easily found when you need that size again:
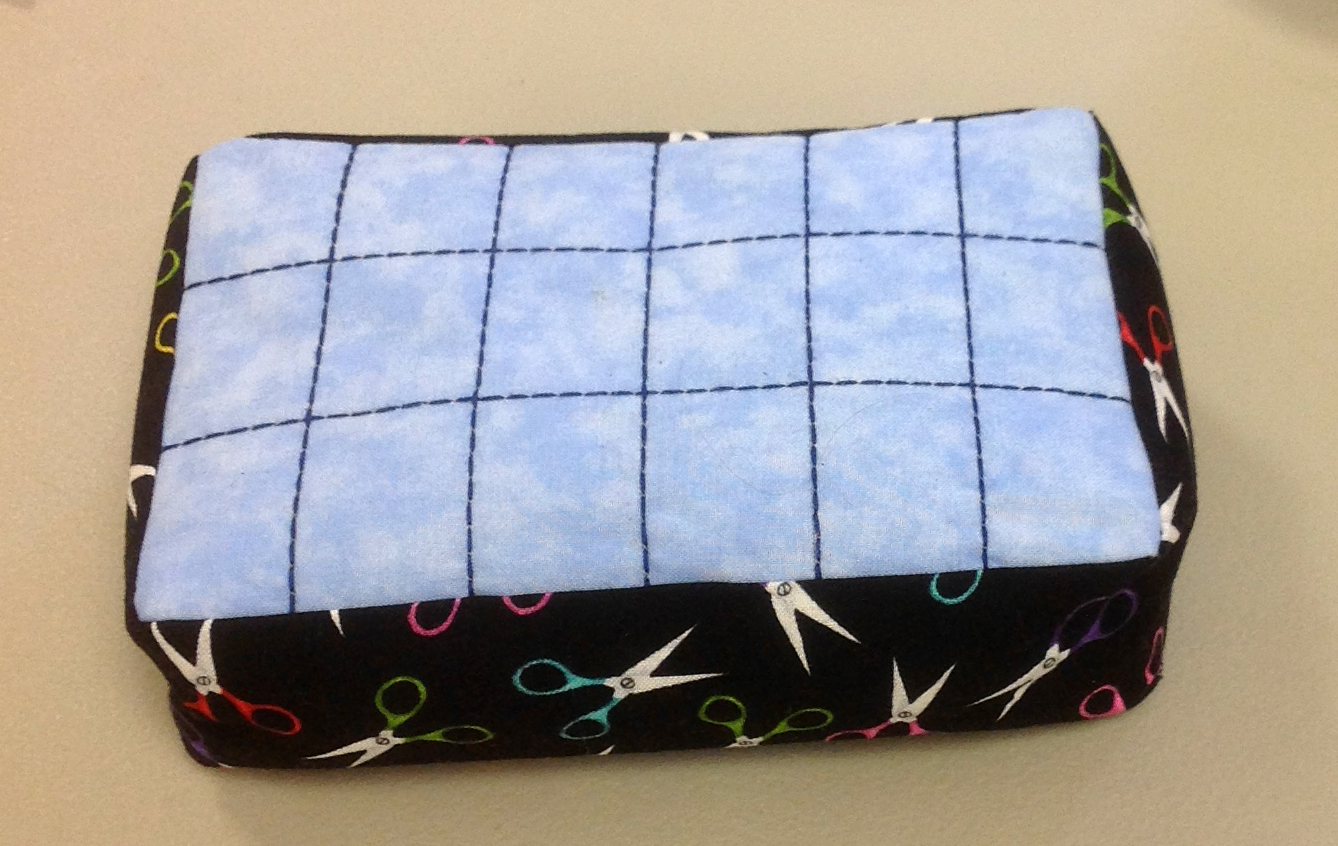
Needle Cushion

Needle Cushion

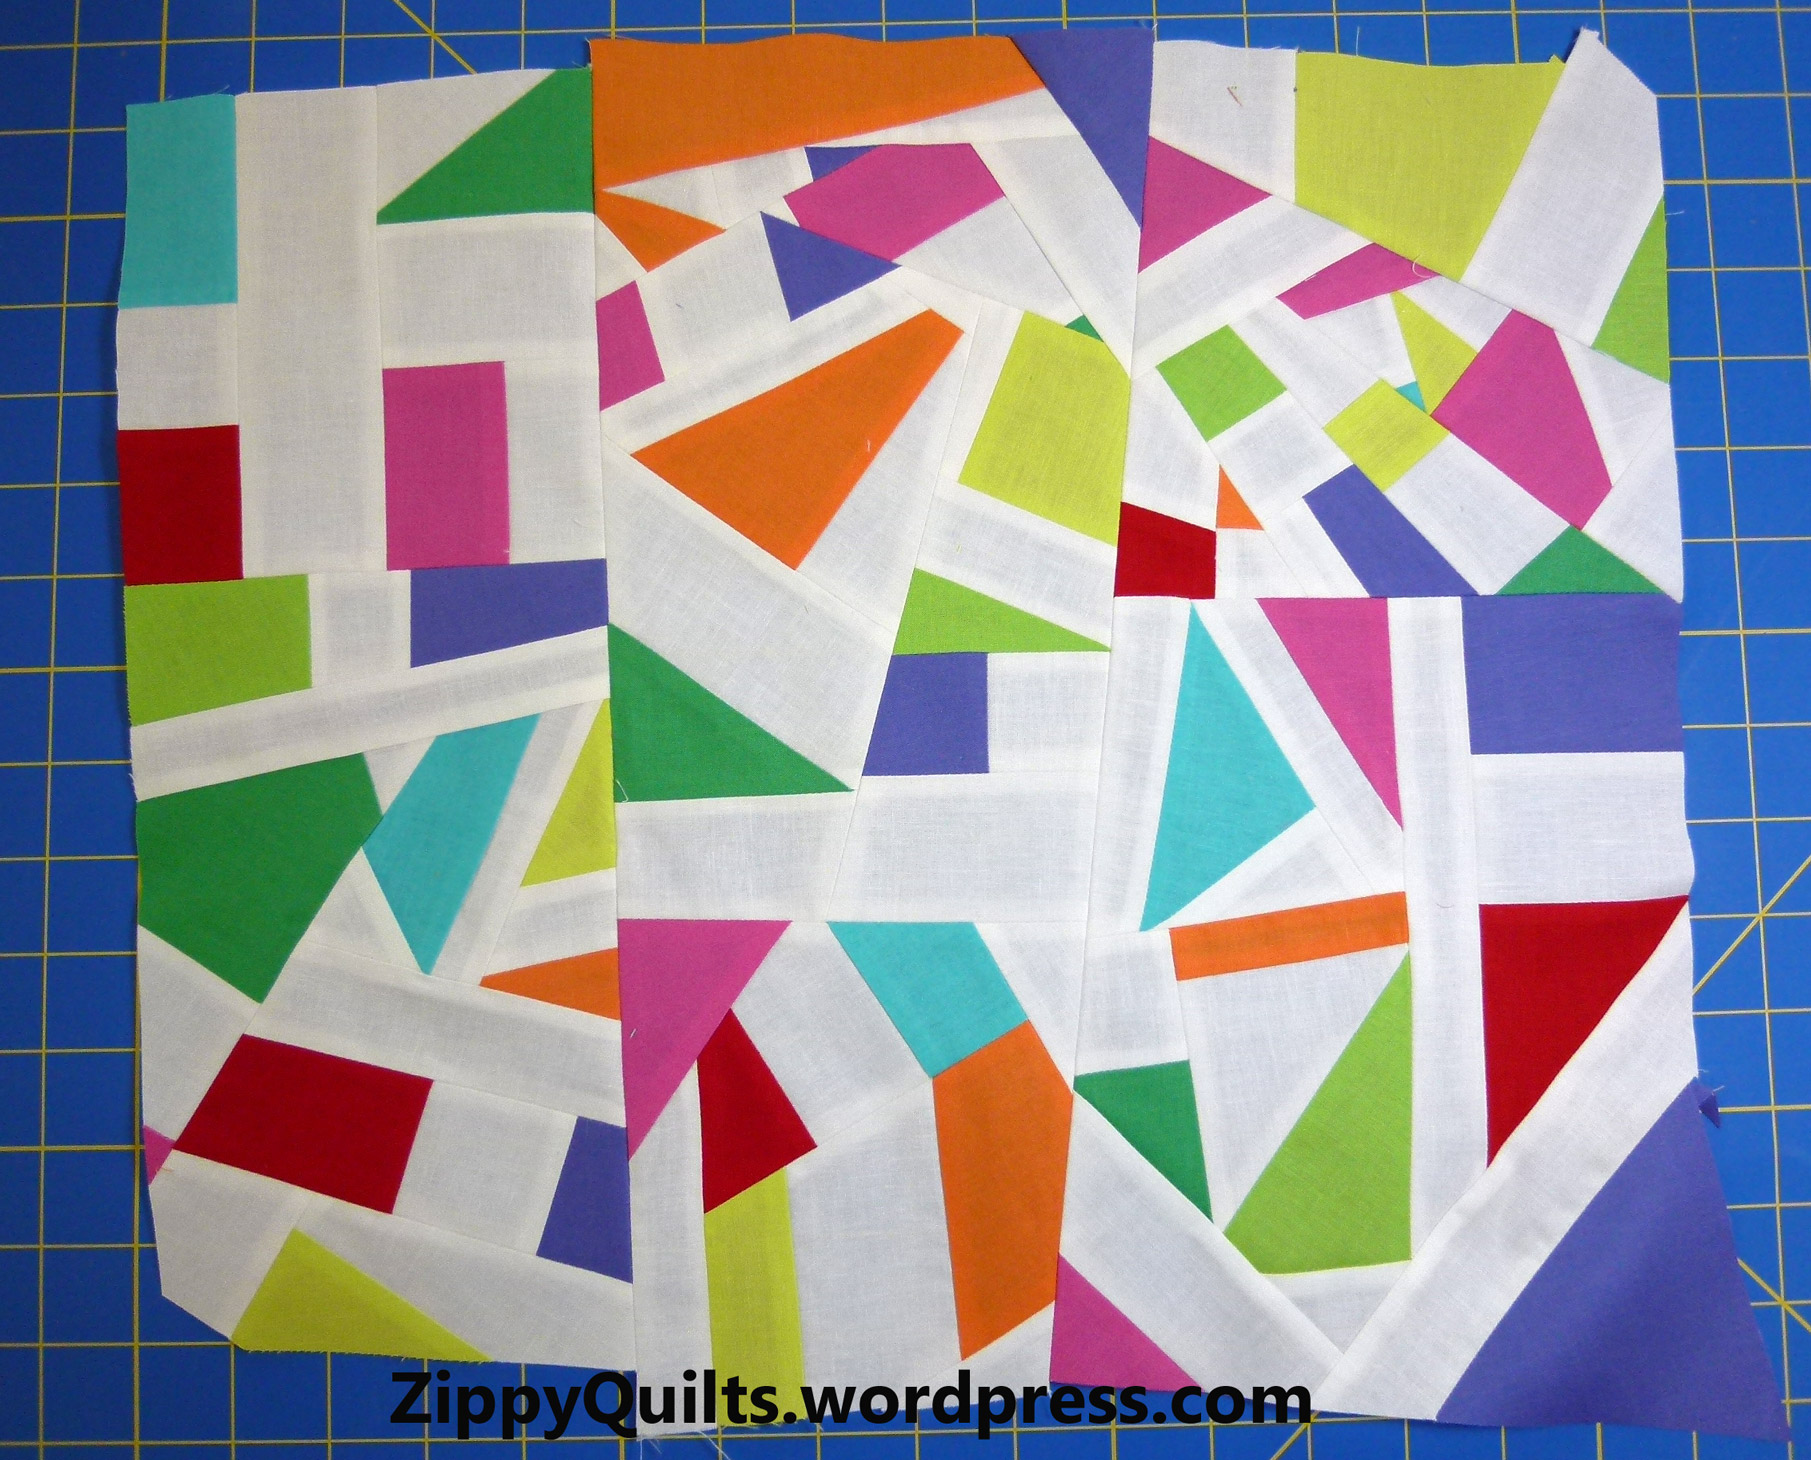
While I’m showing some of the creativity in this group, here are the “share and inspire” offerings for this month:

quilted purse

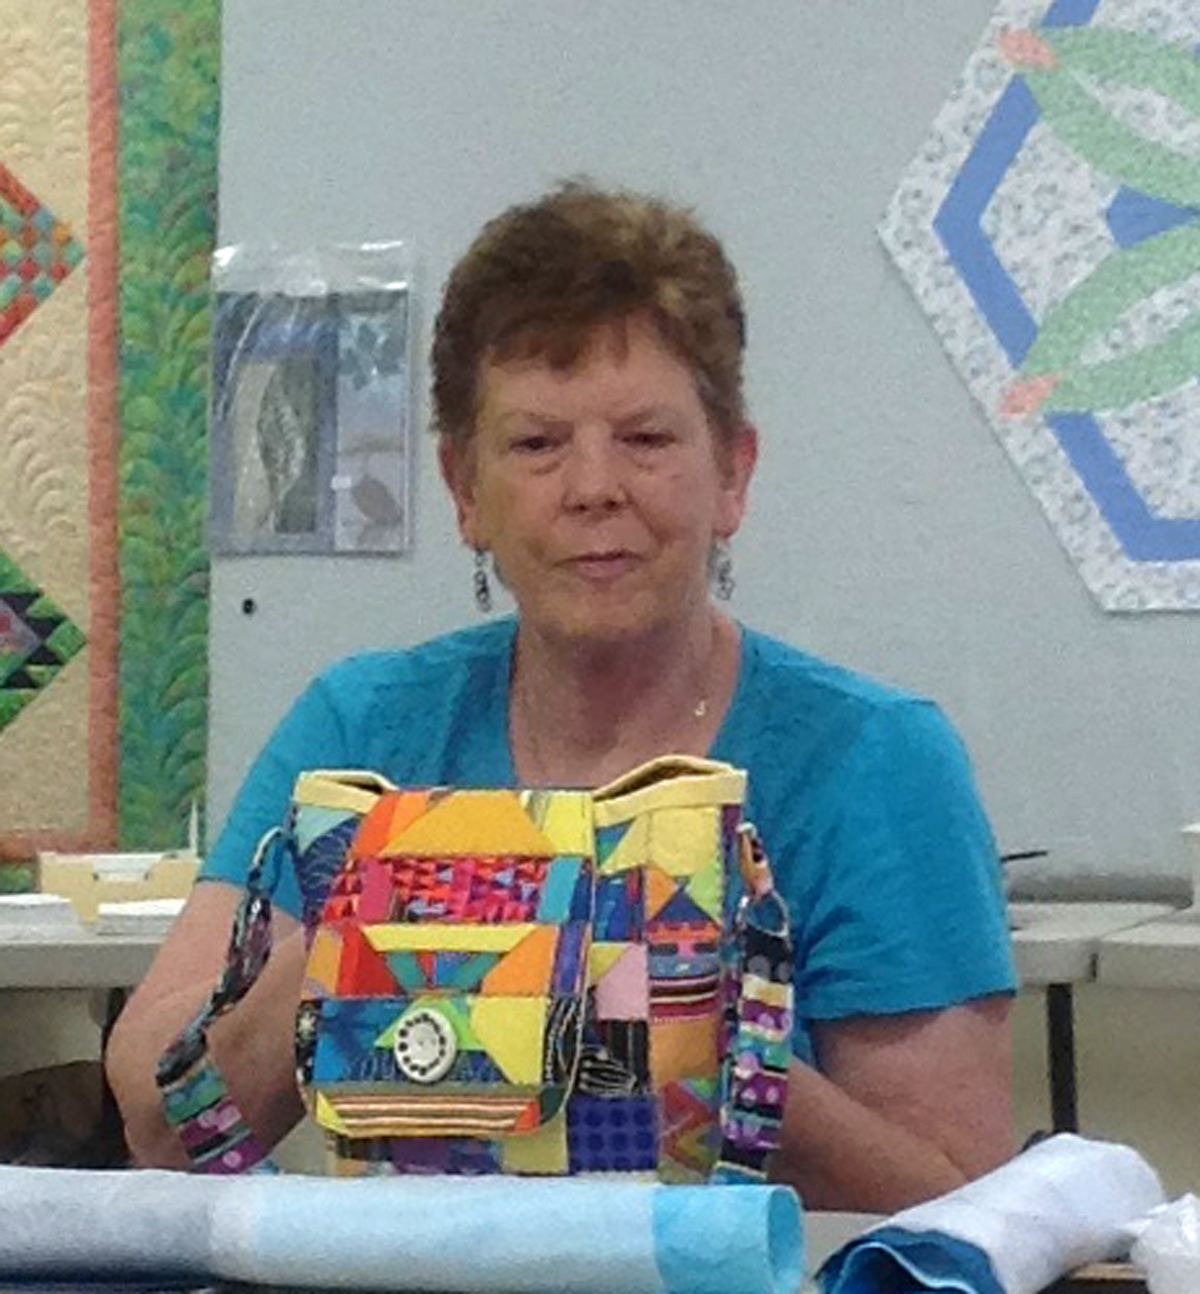
Jane Threlkeld fused some of her orphan blocks onto backing and made this purse

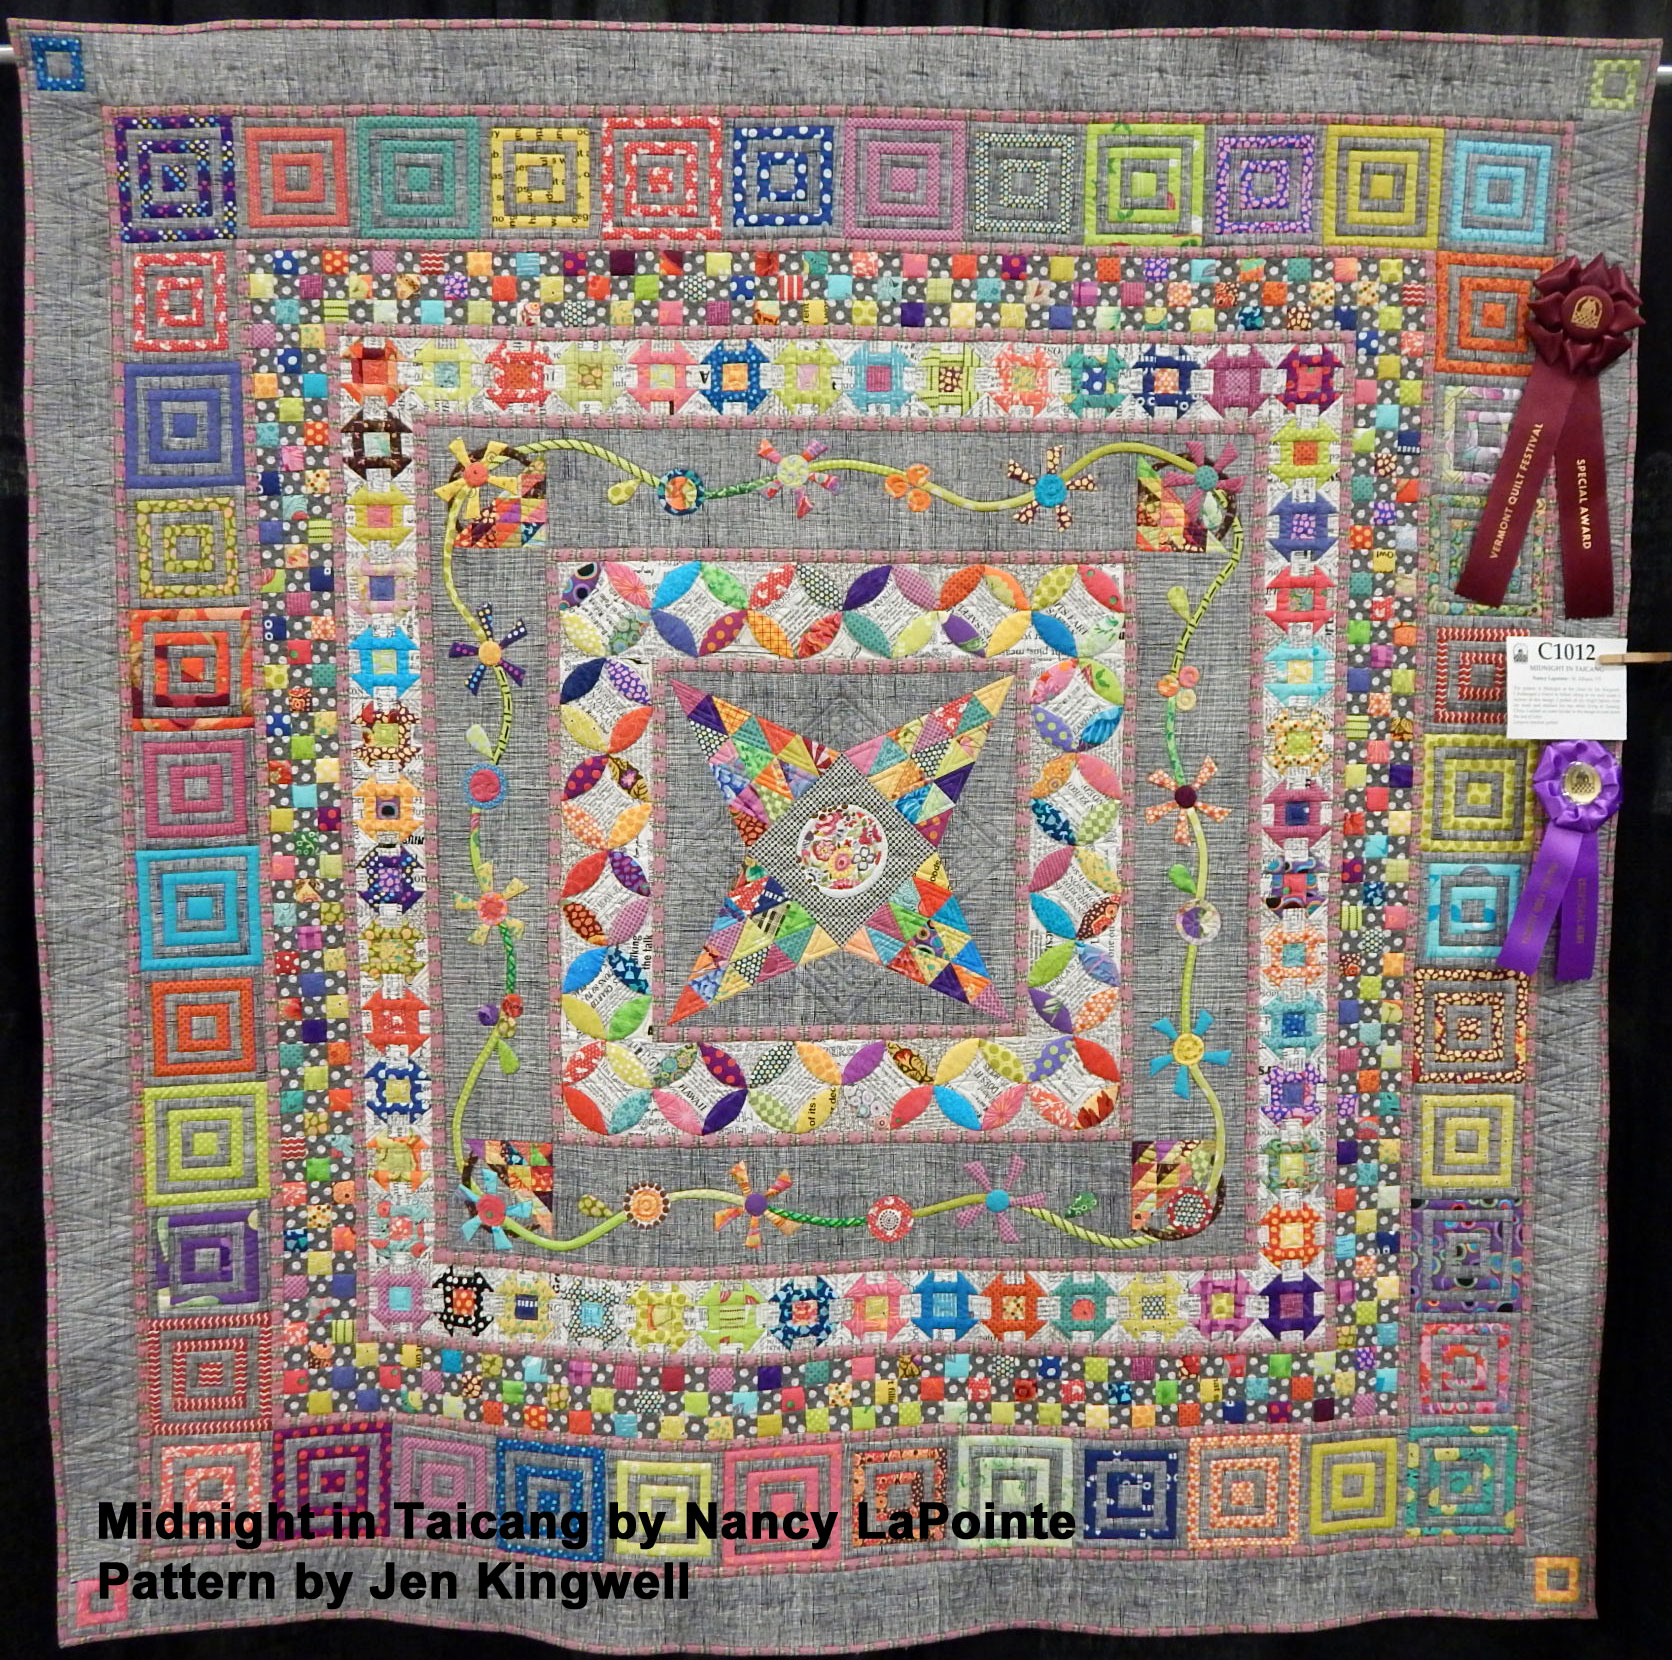
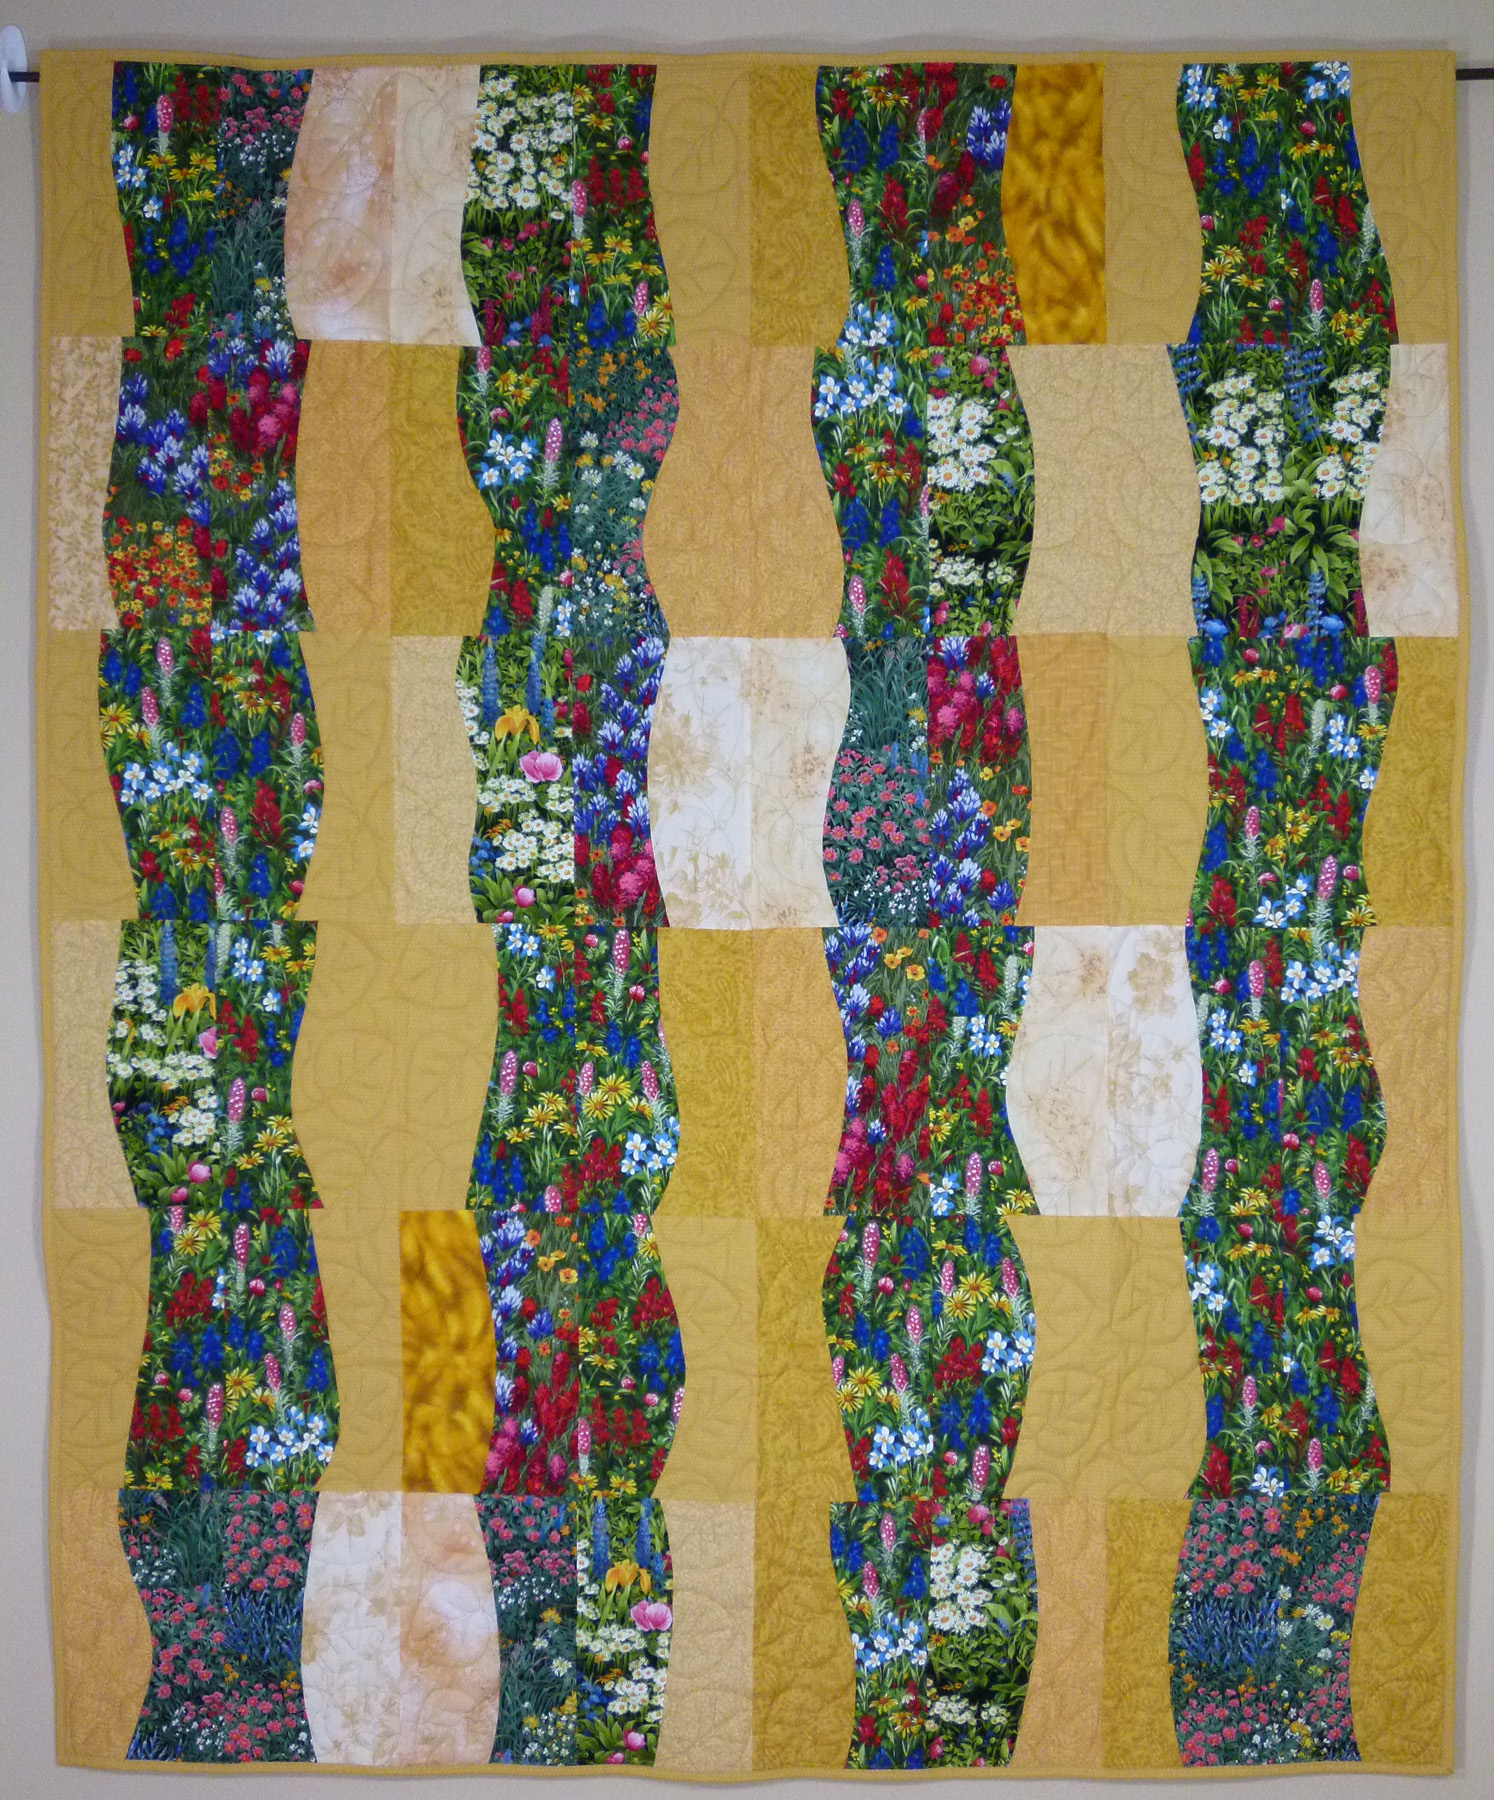
Linda Harrison made these two quilts from Bonnie Christine fabrics for Art Gallery, and one of them won a prize:

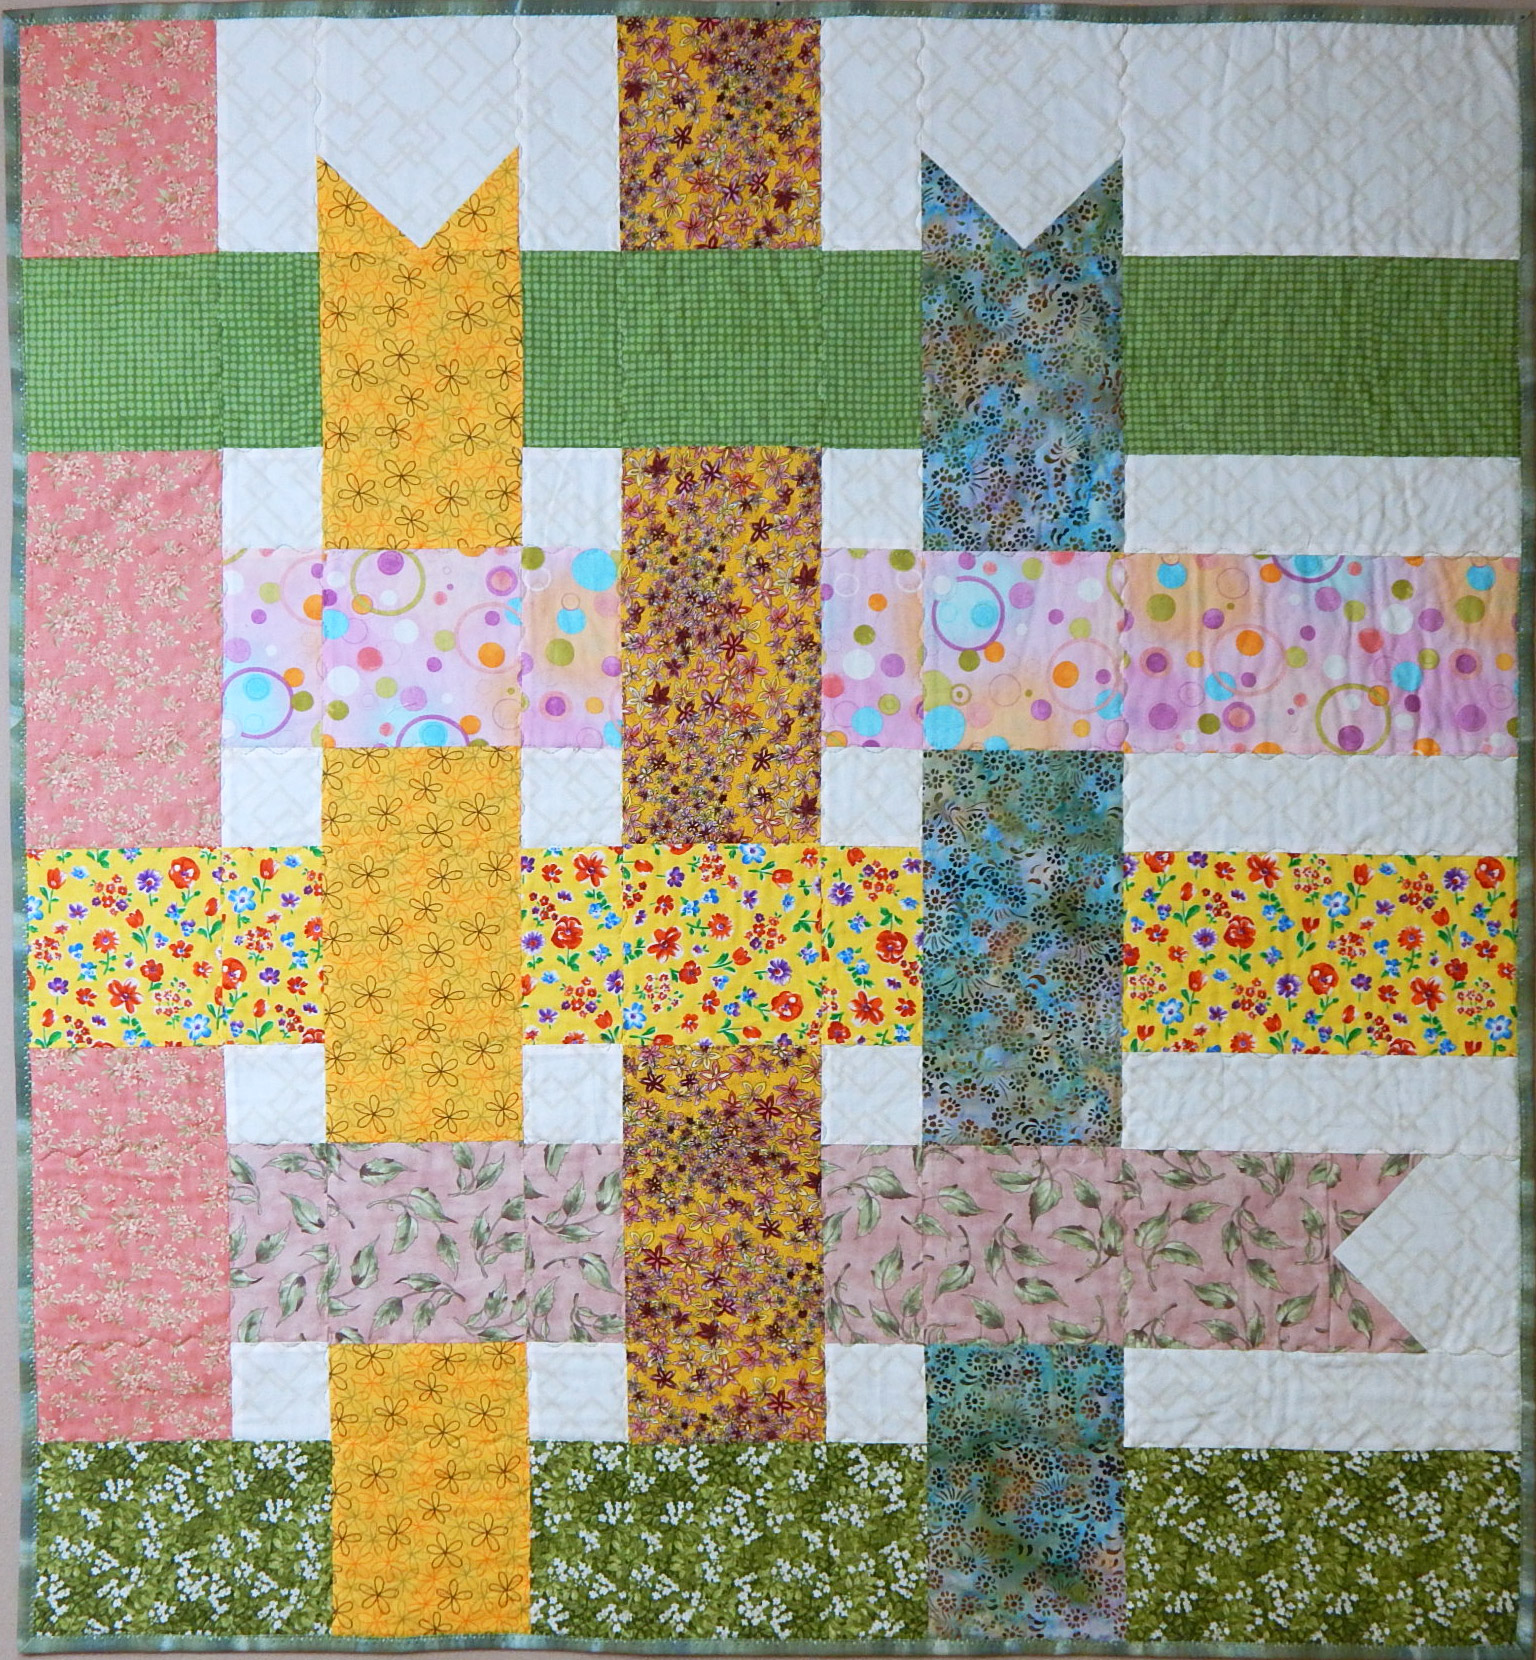
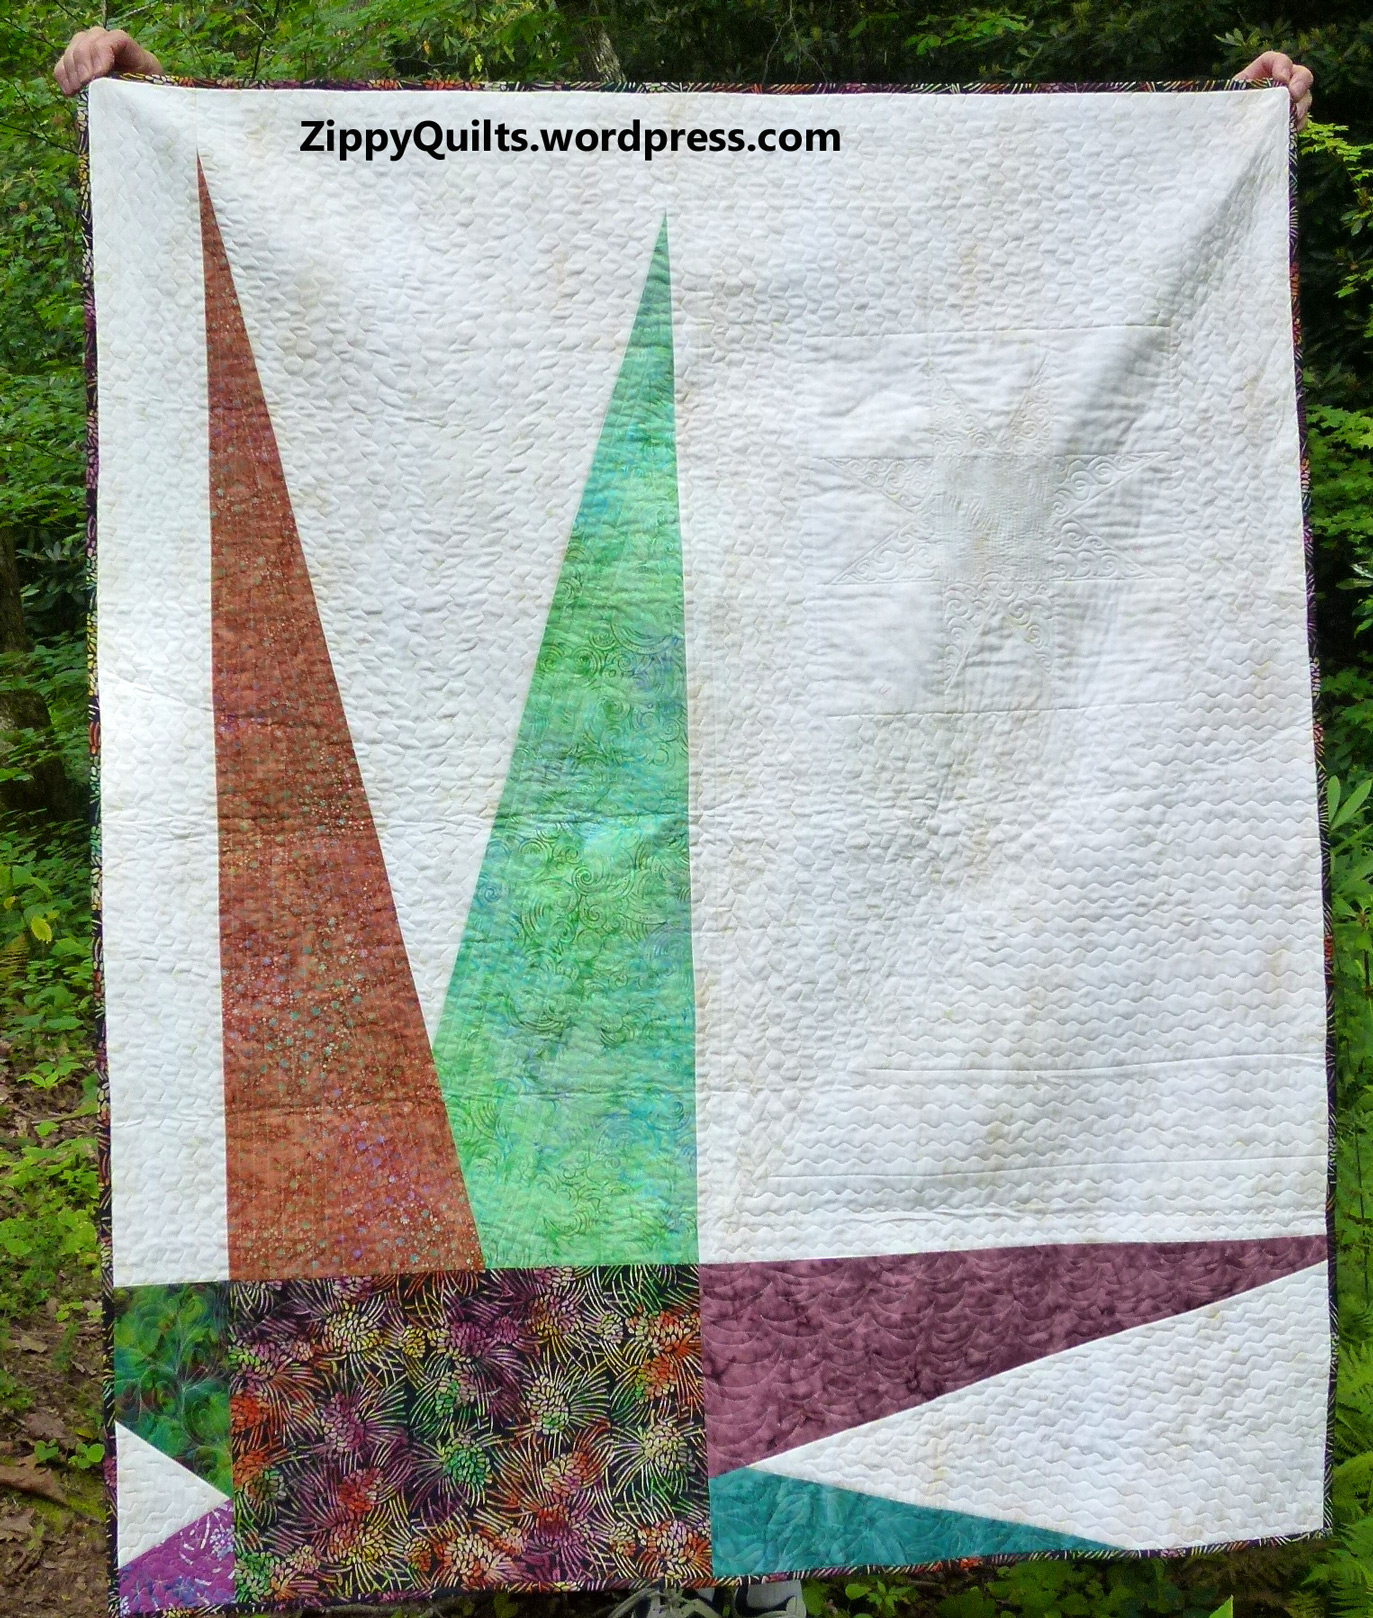
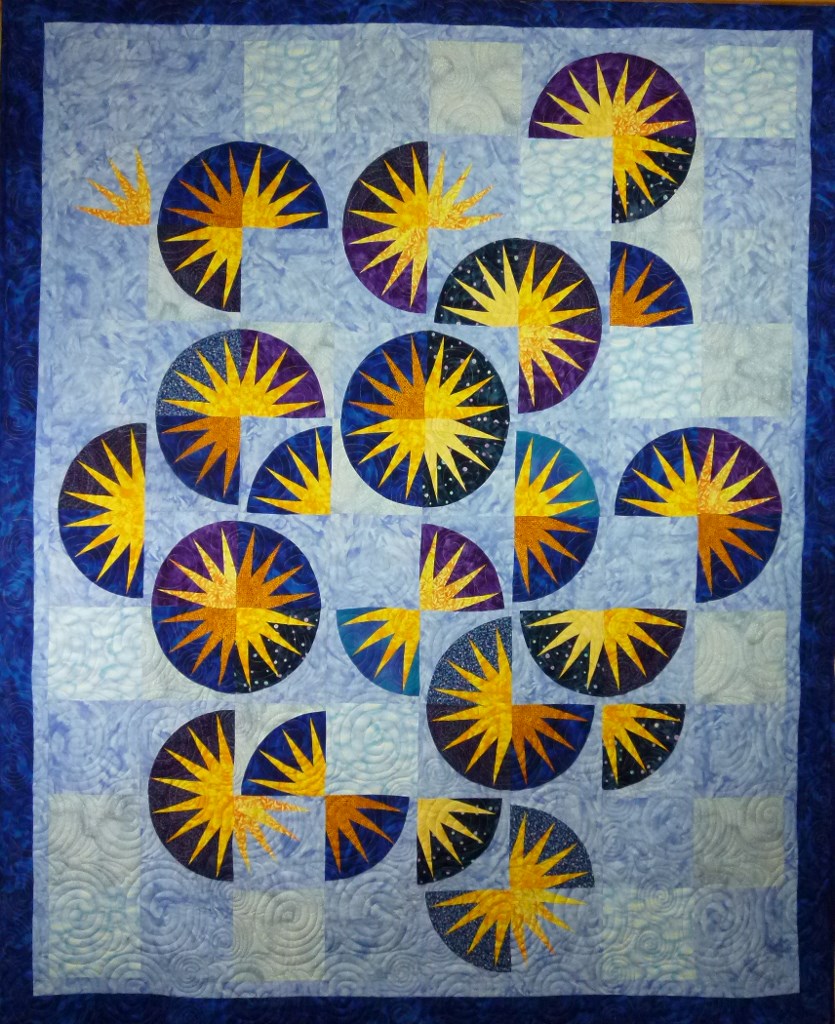
And here is a bright, cheerful quilt by Lynda Doll:modern quilt

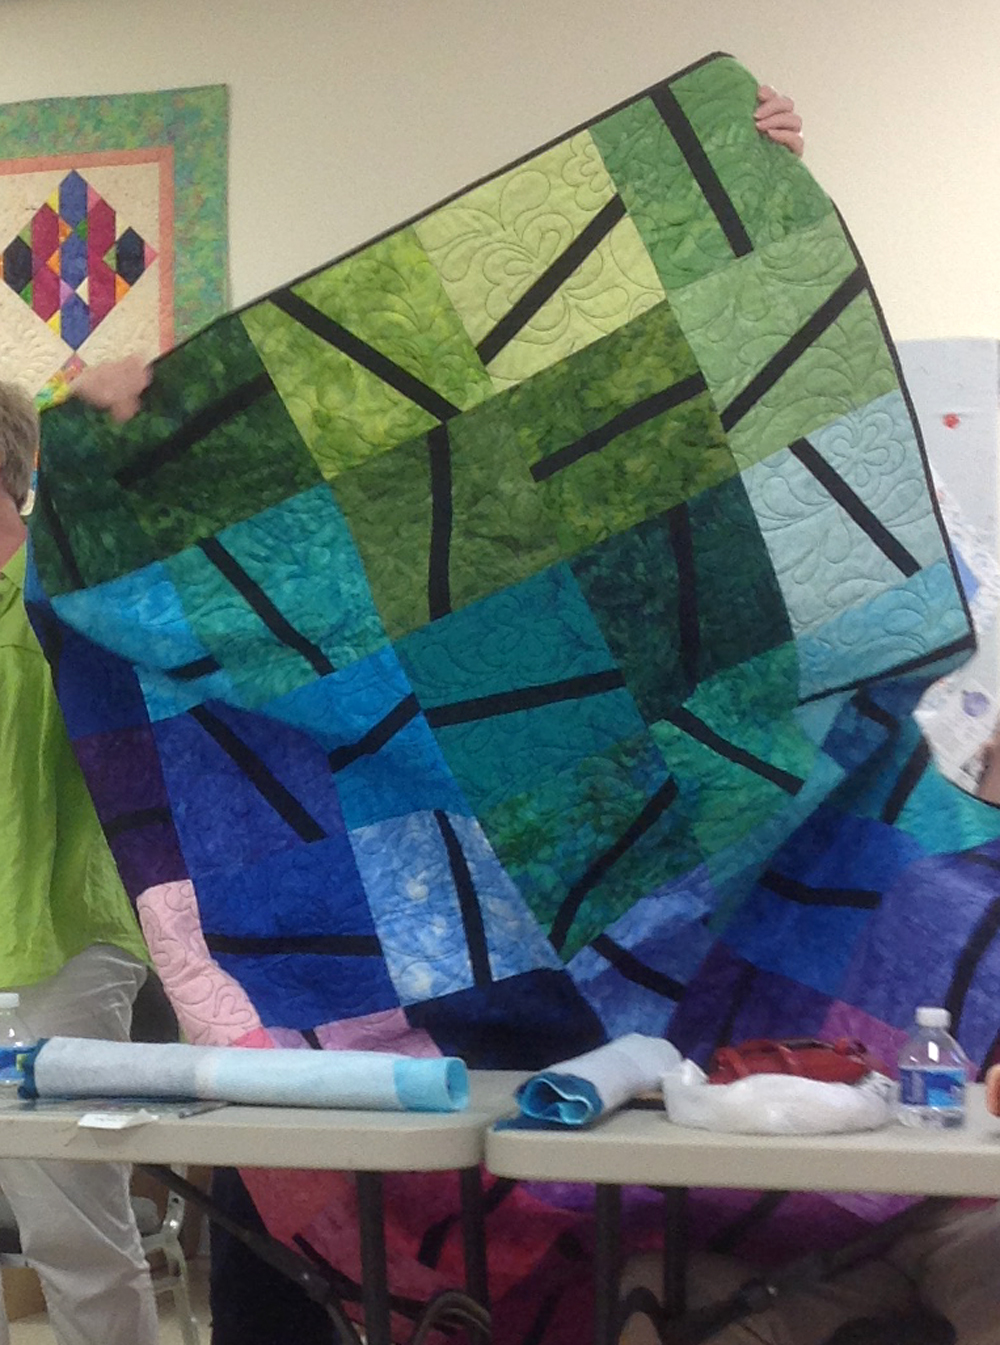
Several of our members also belong to an art quilt group, and brought an example of one of their projects.  As you can see, they each made a vase of flowers and the cut them all up and swapped quarters!  The next step will be beads and baubles.art quilt

There’s always plenty of inspiration at these meetings!

Save

Save

Tutorial: Spray Baste a Small Quilt

I’m putting this up because I will be teaching a class soon in which students will be doing some spray basting before class, and I’m hoping to make it easier for those who have never tried it.

The quilt shown here is about 40″ x 40″, an easy size to spray baste.  I have a variation for spray basting larger quilts, but I won’t cover that here.

Start by taping the quilt back to the floor, right side down.  Pull enough to get rid of wrinkles, but do not stretch the fabric.

spray basting

Backing

Next, sweep the porch 😉  If all you have is a deck, that will do, but sometimes the spaces between the boards are a bother.Baste3Lay a large clean piece of discarded fabric on the porch floor.  This is a sheet from a long-ago pre-teen room.  Baste4

Lay the batting on the clean cloth and spray baste it evenly according to the directions on your can. It’s best to do this outdoors to avoid inhaling the spray.

The batting here is Quilter’s Dream Green. It’s made out of recycled plastic bottles.  It works great, and as you will see it doesn’t look green even through this cream colored backing.Baste5

I generally use either 505 or Sullivan’s basting spray.  The only one I avoid is the one that breaks down with heat. I follow Michele Scott’s method of ironing each section of the quilt just before I quilt it, and that obviously won’t work if ironing destroys my spray basting!

Baste6Lift the batting carefully and transfer it to the backing, sticky side down.  Usually I center the backing on the batting, but this quilt is an exception because the design on the front is meant to kind of “wrap around” to the backing.  Keep reading and you’ll see it.

Next, put the quilt top on the clean cloth right side down.  Spray it with basting spray.Baste7

Transfer the quilt top to the batting, sticky side down.  I do this by grasping the top on opposite sides, about at the midpoint, and letting it fold in half (non-sticky sides together) as I lift it.  Then I place the first half on the batting and gently fold out the second half to cover the batting.

Smooth it all out and you’re done!  Remove the tape, quilt and bind.  Here are the front and back:

Questions?  Better ideas?  I’m all ears 😀


Tuesday Quilters’ Show

One of my quilt groups (which I seldom attend because it meets during the day and I work full time) is having a little show at the church where they meet, so I stopped by to take some pictures.  Most of these ladies are traditional quilters, and many are quite accomplished.

quilt show

The purple diamonds near the center feature geckos fussy-cut from a batik

One of the women has really gotten going on miniature quilts, so this next bunch are all by Maryann Budahl. They are under 12″ x 12″, and they are NOT as wonky as they seem in the pictures–some were hung too high for me to photograph them well.

miniature quilt

Look at that quilting!

You can click on any of these little quilts to see it up close.

Here are a few of the other quilts on display:

miniature quilt

This is a miniature by Susan Roper.

There were several Christmas quilts:

Christmas quiltChristmas table runnerSeveral full size quilts were draped rather than hung, so I couldn’t get a complete picture of them.

traditional quilt

traditional pieced quiltAnd here are some medium-sized quilts:

star quilt

Christmas sampler quilt

A Bird, Several Houses, and More by Maryann Budahl

And finally, a quilt that looked pretty modern to me:modern wall quilt

There is a fair amount of overlap between this group and the Smoky Mountain Quilters (of Franklin, NC) who will be having a show in September, so I look forward to seeing more quilts soon.


Cherrywood Toss

This quilt was started about 2 years ago when I bought a scrap pack of Cherrywood hand dyed fabrics. The blocks are entirely from Cherrywood scrap packs plus that cute print with the words on it, which is a Robert Kaufman fabric.

improvisational quiltThe dark sashing is made from black plus little pieces of the darkest almost-black solids I could find. All are Cotton Couture from Michael Miller.

I quilted this on my home machine, using randomly-spaced, gently curving, lines from edge to edge. I used Superior Bottom Line in the bobbin, which I always do. Top thread is a medium grey light weight polyester, Mettler Metrosene.

This is going to the Smoky Mountain Quilters show in September. This year the show is scheduled in conjunction with Western Carolina University’s Mountain Heritage Day, which I think is a great idea. Of course I’ll have pictures from that show when it happens.

Linking to Aunt Marti’s UFO Challenge. I did get one finished this month!

Save

Save

Save

Save

Save

Save

Vermont Quilt Festival–Favorite Quilts, Part 2

Here are the rest of the quilts that really caught my eye at VQF.

First, a couple of my favorites among the many fine landscape quilts:VQF5VQF3These next ones probably would be classified as art quilts.  As you can see, my camera was askew on the first one, but it also had very irregular edges.  The transparency effects were impressive.VQF6This next one had a nice sense of humor and, as you can see from the ribbons, was well executed also.VQF20The rest of these are what I would call modern, and I especially appreciated their graphic impact.VQF15VQF17VQF14VQF7There were SO MANY more great quilts, so consider attending next year to see the show in person!

Save

Save

Save

Save

Save

Vermont Quilt Festival–Favorite Quilts Part 1

Here are a few of my favorite quilts from the Vermont Quilt Festival. Please note that a few of these really are not square. Others do have straight sides with 90 degree corners, but the picture is off because I had the camera in one hand and a glass of champagne in the other 😀

First, this is one of the youth quilts, made by a 3-1/2 year old!  Entrants in this category made the quilt top themselves, but may have had help with quilting. Janome is a big sponsor of the VQF, and each youth entrant was given a sewing machine!  This tot had to get help to carry hers from the stage 🙂

youth entry VQF

As always at VQF, there was a wonderful exhibit of antique quilts.  This next one was my favorite:Antique quilt, VQFThe Instructors’ Showcase made me wish I’d taken some classes.  This first one is by Augusta Cole, whose scrappy designs I admire and have used from time to time.Vermont Quilt Festival 2016And this one by instructor Katie Pasquini Masopust was very unusual.  I would like to know more about her techniques.VQF instructors 2016There were a number of other special exhibits and I didn’t take pictures of all of them, though they would have been worth it!  This bargello quilt caught my husband’s eye:Bargello quilt at VQF 2016Here are a few more of the fairly traditional ones that I especially liked.  Note that one got a purple ribbon for a very high score on the judging criteria I showed last week.VQF11VQF18VQF16VQF12Finally, here is an absolutely spectacular applique quilt.  Everyone stood in front of it admiringly, so I had to wait my turn to take a picture:VQF4Next week I’ll show you the more modern quilts that caught my eye.


Save

Save

Save

Save

Save

Save

Save

Save

2014 Projects, Part 2

To continue a review of projects from 2014, the point of this exercise is to get together a gallery page for each year I’ve done this blog.

I made “Drunk in the Garden” both to use this beautiful floral fabric that reminded me of Texas and to practice cutting and piecing gentle curves.

Drunk in the Garden, the original quilt

Drunk in the Garden, the original quilt

Despite the beautiful fabric, the overall design never looked right to me, primarily because the gold fabrics varied too much in value.  I eventually cut this quilt up and made some place mats, which were much more successful.  You can see them here, if you like.

I designed a quilt for the Michael Miller challenge and, though it sank without a trace in the challenge, I liked it.  The design was improvised based on the little scan codes made up of triangles at my local garden center:

Michael Miller challenge quilt

Packet of Posy Seeds

Also in 2014, I designed a quilt and pillow for Modern Quilts Unlimited magazine.  Here is the picture from the magazine:

quilt photo

Zippy Star Quilt and Pillow as shown in Modern Quilts Unlimited, Summer 2014

And here is the “practice” quilt I made first to work out the details:

modern quilt

Zippy Star I, which sold at the Asheville Quilt Show in September

As if one Michael Miller challenge weren’t enough, I made this quilt for another later in the year:MM-finish1

And finally, I finished this quilt, which I had been working on for years.  Literally.

Spring Sun, a design by me, using blocks paper pieced from a totally different Judy Niemeyer pattern!

Spring Sun, a design by me, using blocks paper pieced from a totally different Judy Niemeyer pattern

And that was it for 2014!  One thing that is obvious from reviewing some of these pictures is that I have improved my photography since 2014.  For which I’m thankful.

Coming up next: a report from the 2016 Vermont Quilt Festival!


Save

Save

Save

Save

Save

Save

Projects from 2014

As part of my effort to develop galleries for this site, here is a review of my projects from the first half of 2014.

The design and tutorial for this zippered pouch came from Noodlehead.

zippered pouch

I made a series of these little zippered pouches, and they have been useful.

These next two bags were made from a book entitled Ruby Star Wrapping.  You can read my review of the book here, if you want.

I continued my interest in improvisational piecing in 2014, making this confetti block…

improv quilt block

Confetti Block, 2014

…and this entry for the Quilt Alliance annual contest:

modern art quilt

Whirlwind, my 2014 Quilt Alliance challenge quilt

I made this quilt for the Pantone Challenge.  It looks better in person than in this picture, and now is used to decorate one of the rooms at our local free clinic:

Applique quilt

Radiating Orchid, my mini-quilt for the Radiant Orchid Challenge

As always, I made a number of donation quilts for Ronald McDonald House.  I used them to try out a variety of techniques and other experiments:

I made this baby quilt because I loved the fabrics:

baby quilt

Baby Dots–Front

baby quilt

Baby Dots–back.  I may like it even more than the front!

And I participated in several swaps, including one involving these blocks.  Don’t even think about the 88 little pieces in the block on the left!!!

I’ve reached my (self-imposed) length limit for a post, so the rest of the 2014 review will be coming up next week!  Please come back 😉

Save

Save

Save

Save

The Rest of the Story

Here are the other two quilts I made while doing the Gwen Marston class on iQuilt.

This first one is my version of one of her quilts, and again I made it 12″ x 12″.  I faced it, which I don’t usually do, so that was a learning experience.  I like the way it turned out.Gwen Marston iQuilt class

This second one was made of scraps from the other quilts in the series, which makes me happy.  Marston2

This started as a liberated Roman Stripe design, with a center of 4 larger blocks and a “border” of smaller blocks.  The size of the blocks worked out fine, but the pieces got more and more “liberated” so that I’m not sure it looks much like a Roman Stripe any more.  Which is fine, actually.

I quilted it using a pattern of wandering lines, all in one direction, and I like the result. After considering several threads, I used a thin medium grey polyester.  I think it blended well so that the quilting didn’t obscure the design.  Here’s my “trial” of several threads.Marston1

How do you choose your quilting thread for a project?

More Inspiration

I bought two of Gwen Marston’s books some time ago…

and have been channeling her in my designs for over a year (you can click on the pictures below to see their captions):

Recently I saw that the (relatively) new iQuilt platform had two video classes taught by Gwen Marston.  The class I chose was quite short–a little over 2 hours–and I decided to watch the class over a weekend and make several little quilts using her techniques.

I’d already made a refrigerator quilt in Gwen’s style for an upcoming guild challenge,

art quilt, gwen marston

Refrigerator quilt inspired by Gwen Marston. Bev Manus came up with the idea for refrigerator quilts.

so I decided to make the new quilts 12″ x 12″ as well.  This is a great size for trying new things because there isn’t too much commitment of time or materials.

The first quilt was composed of half square triangle blocks, so I was able to try out the (fairly expensive) Loc Bloc ruler I recently bought to make trimming these blocks to size easier.  The ruler worked great with just a little practice, and I got to practice my machine quilting on the finished quilt.

refrigerator quilt

Quilt Front

Gwen’s instruction was to pair the triangles up into squares just as you picked them up, with the caveat that the pairs should have contrast between the fabrics.  Then the squares were to be sewn together into rows just as they were picked up.  She did allow that it would be OK to lay the rows out and look at them before sewing them together, but advised against spending a lot of time fussing over the exact layout.

Refrigerator Quilt

Quilt Back

I was pleased with this result.  The class doesn’t really cover anything that isn’t in her books, but I was happier watching a little and sewing a little than I am to just sit down and read a book.  I made a couple of other quilts, too, and I’ll show them next week.