Smoky Mountain Quilt Guild Show, Part 2

There has been so much going on (that’s good!) I haven’t had a chance to post the rest of my favorites from my local guild show.  Here are a few more of them.

Please note that this is a local show, so most of the quilts were made from patterns or workshops. I’ll list the source where I have it.

Jen Kingwell qult

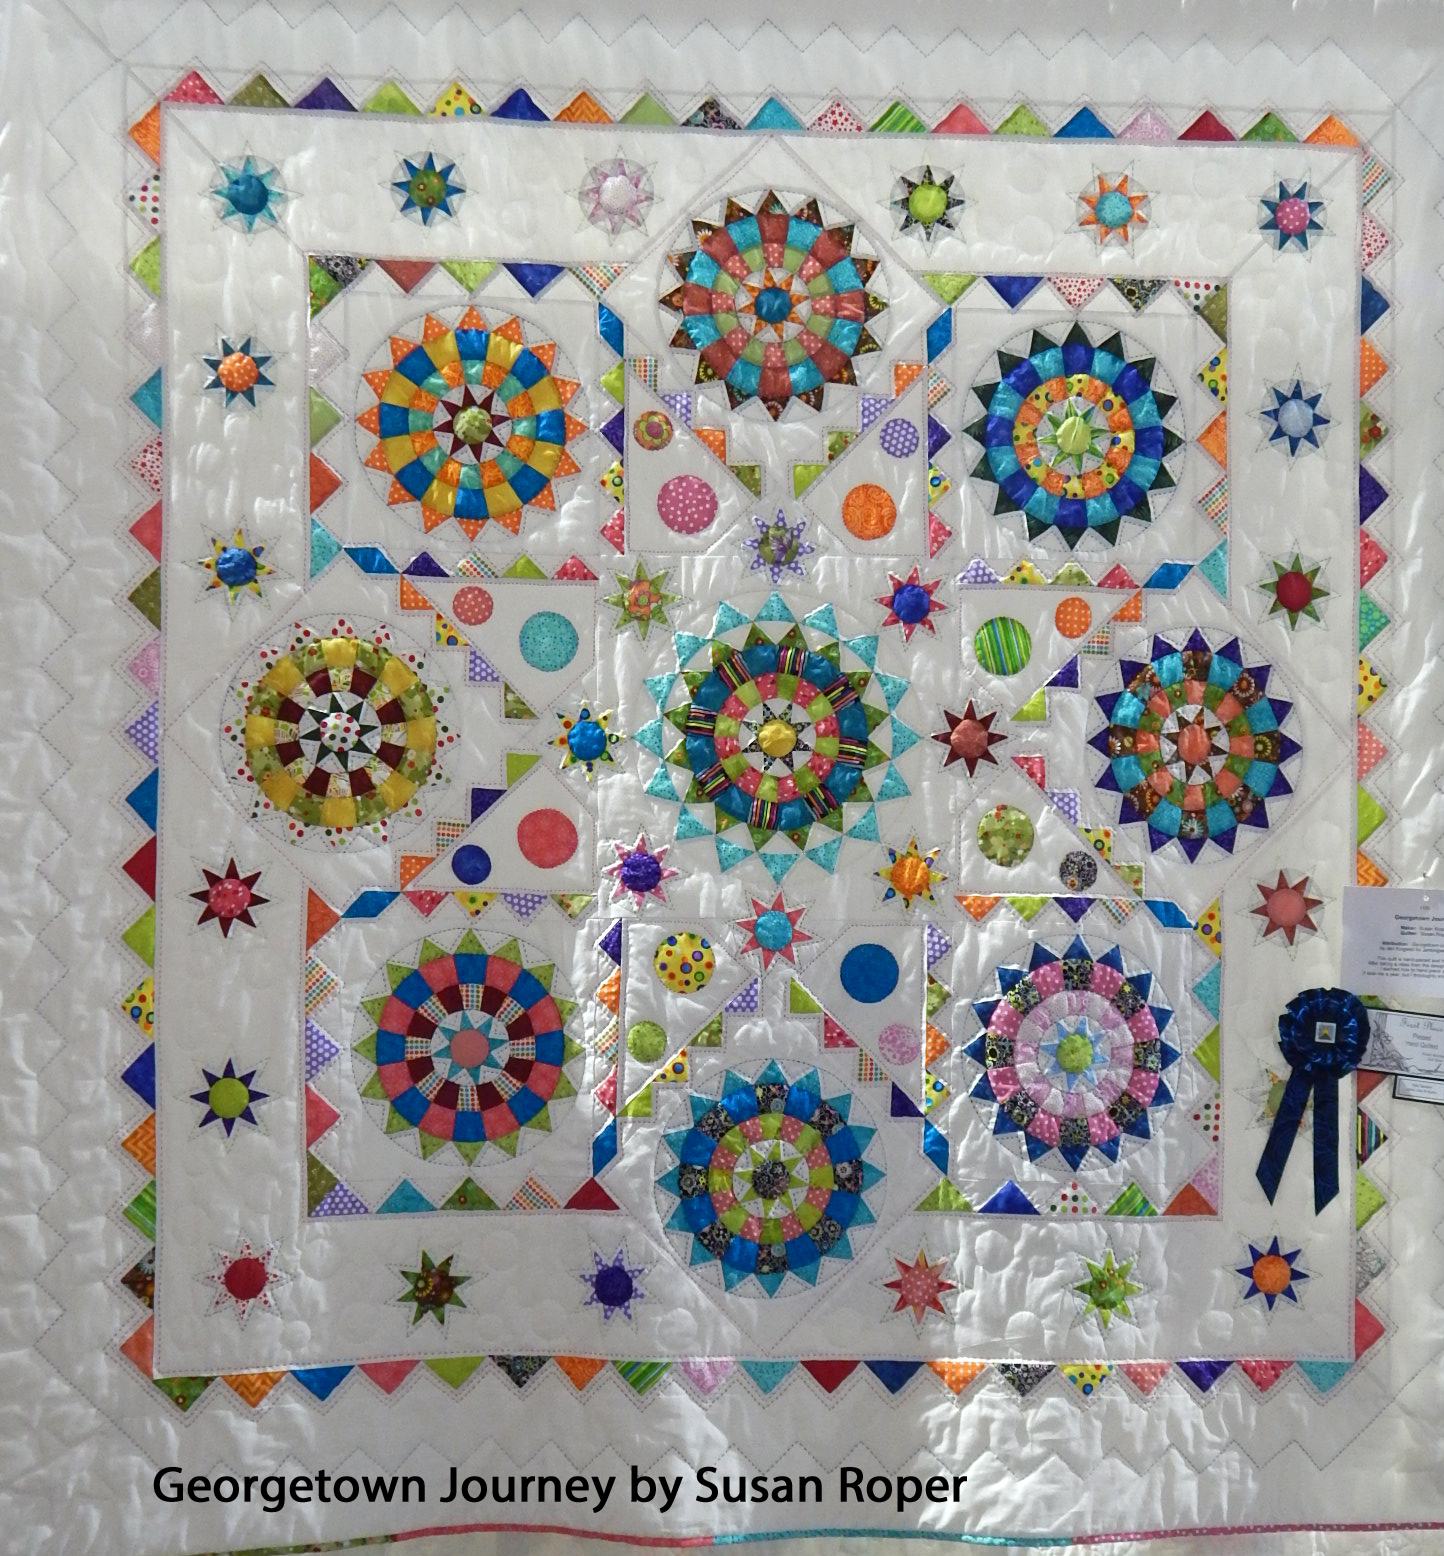
Jen Kingwell design beautifully done by Susan Roper

traditional qult

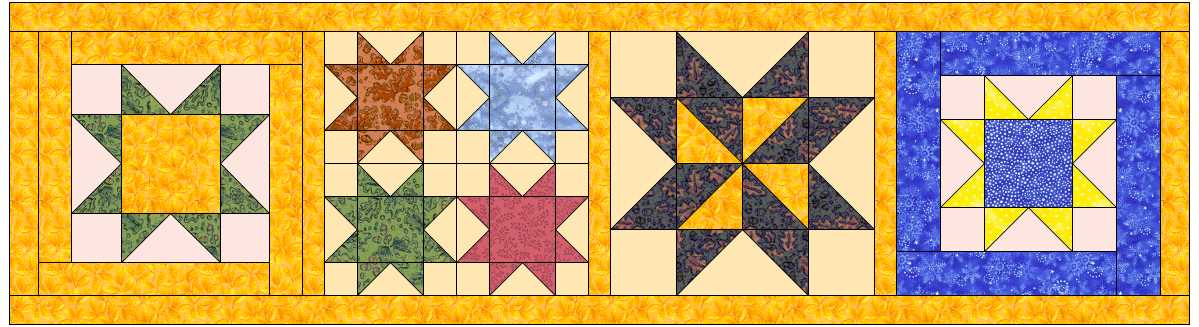
Traditional design made “to use up scraps”

Our guild has a very active group making Quilts of Valor for men and women who have served in the military. The next two were made for that program.

Quilts of Valor

Inspired by a design on the Alycia Quilts blog

Illusions quilt

Design by Jenny Doan for Missouri Star Quilt Company

modern paper piecing

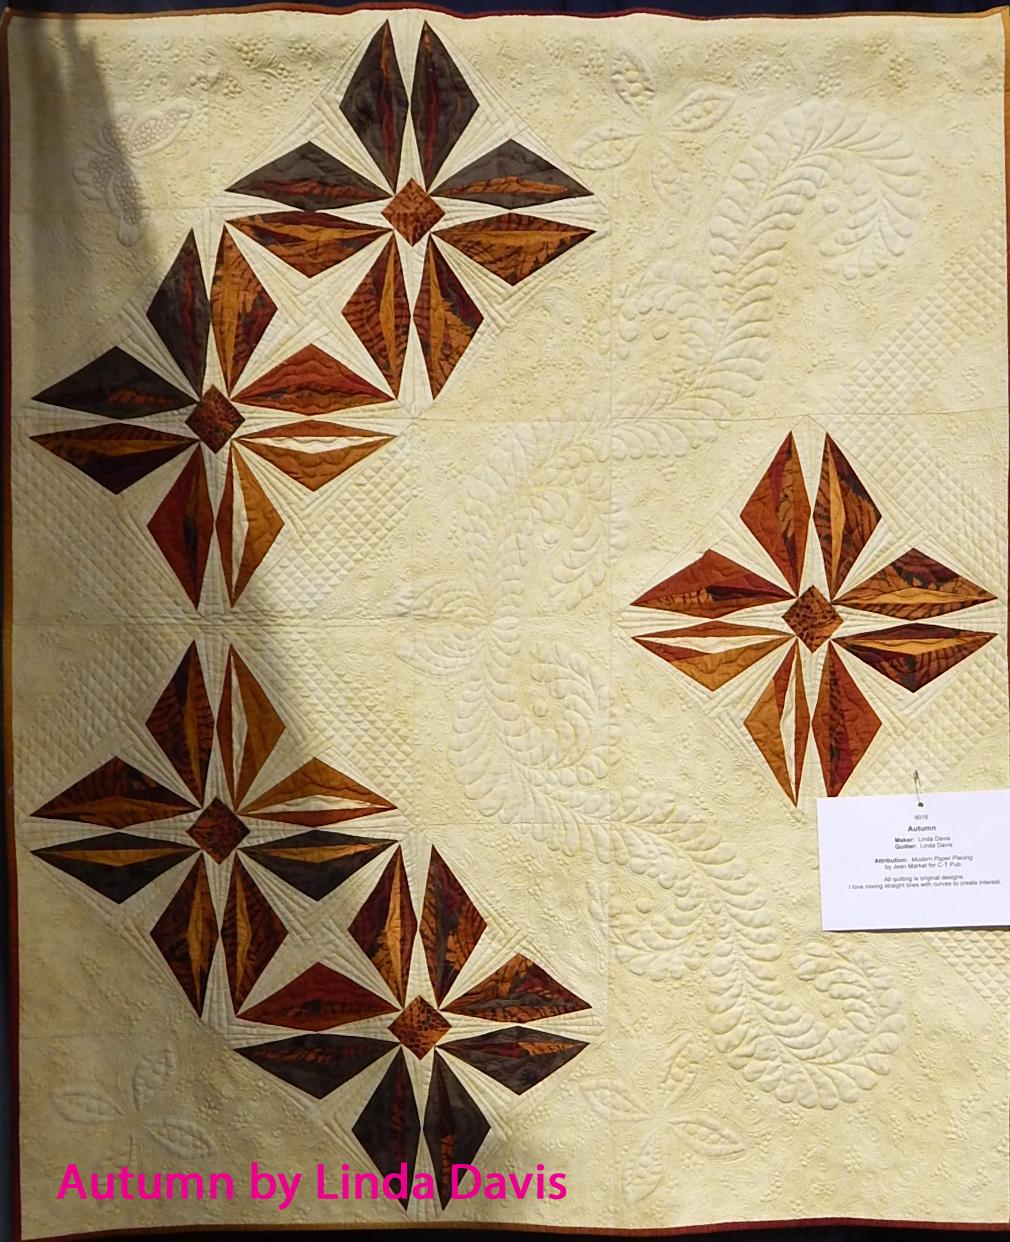
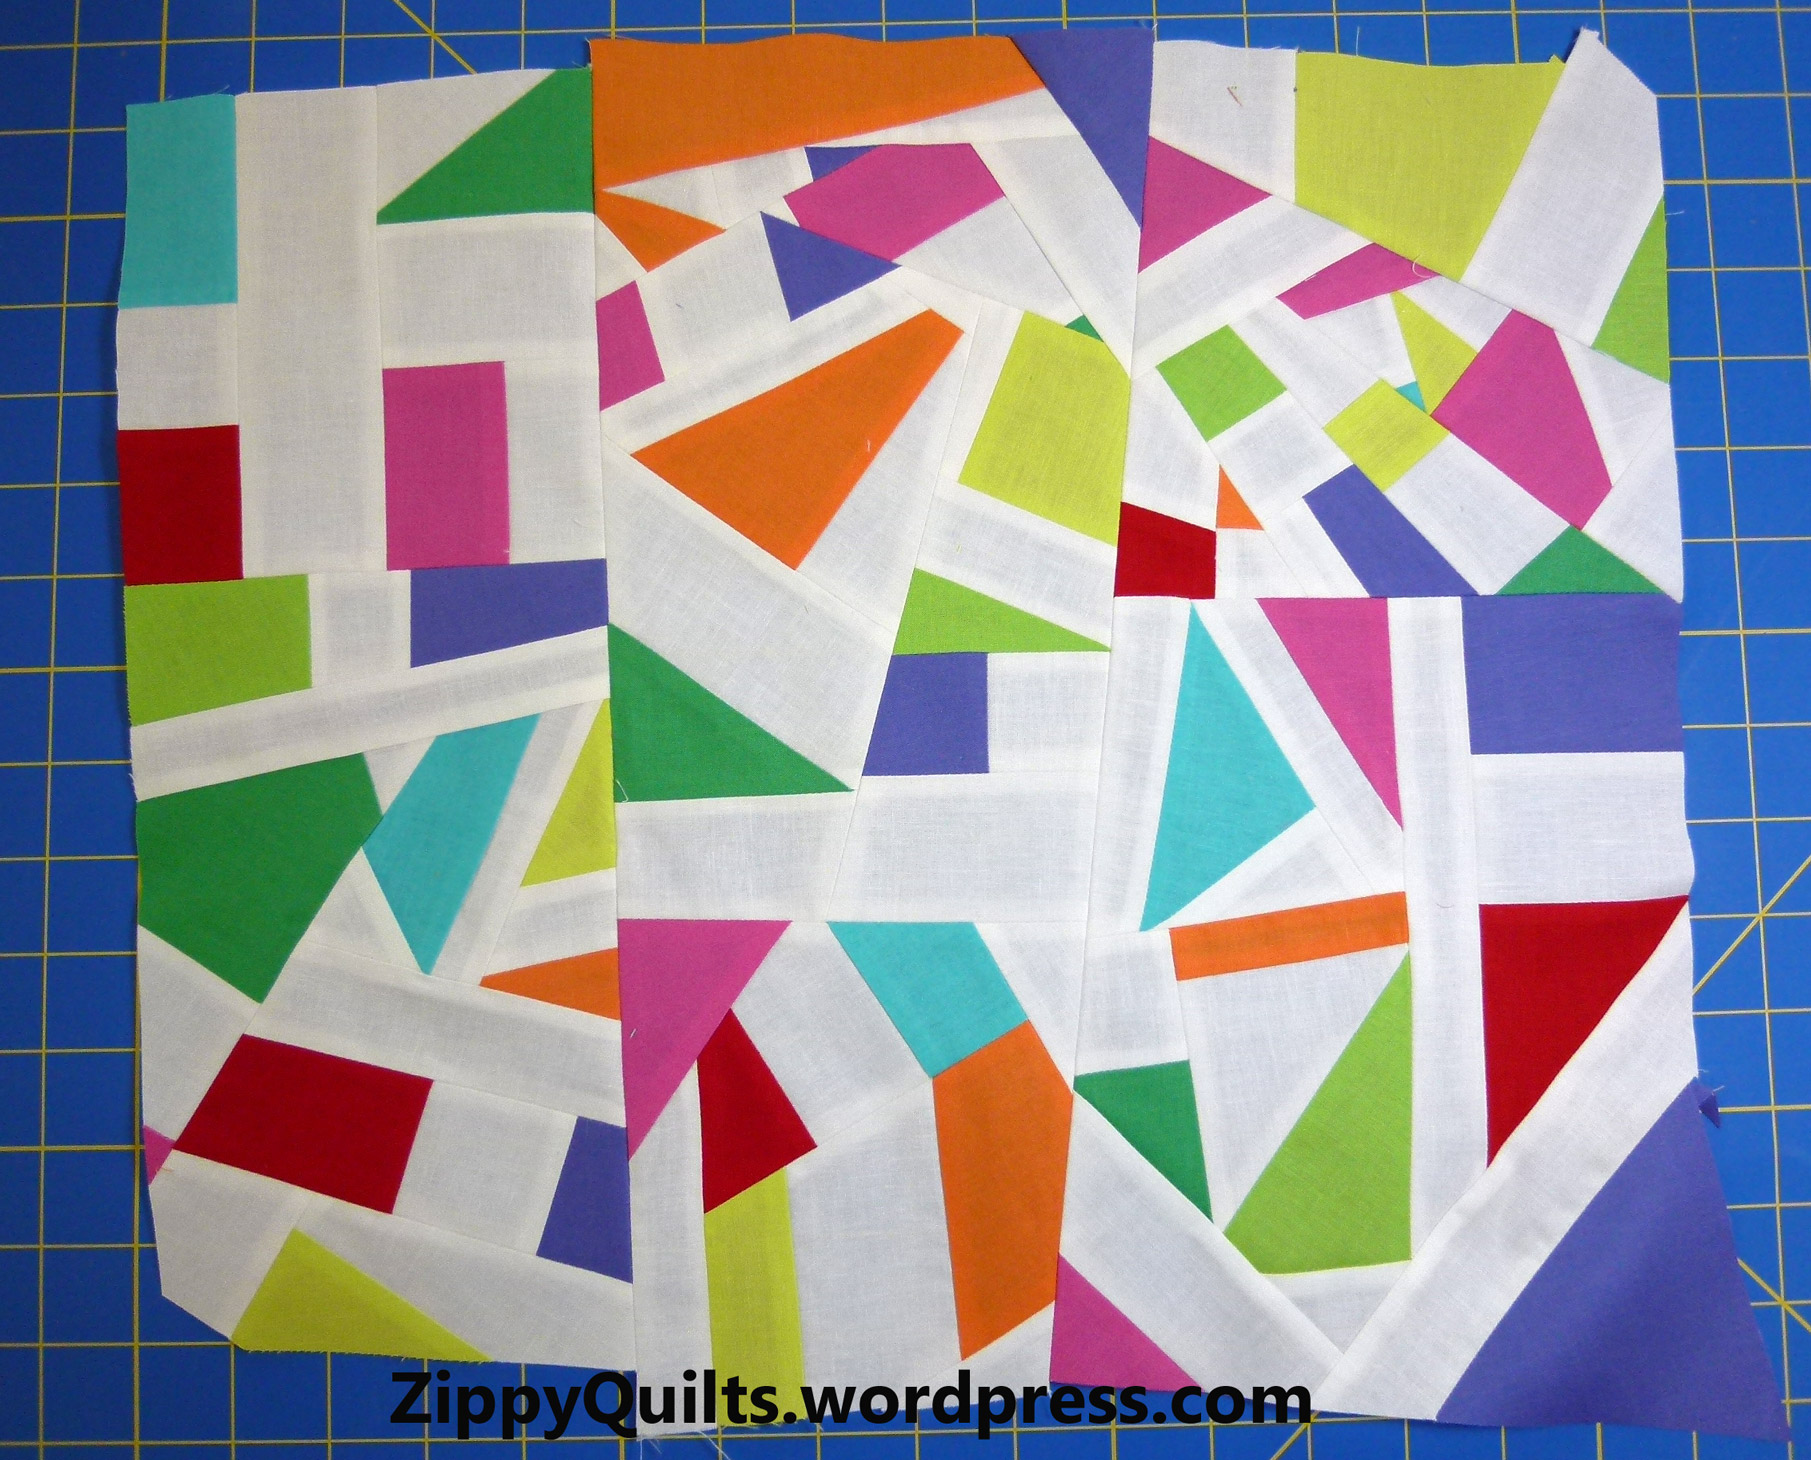
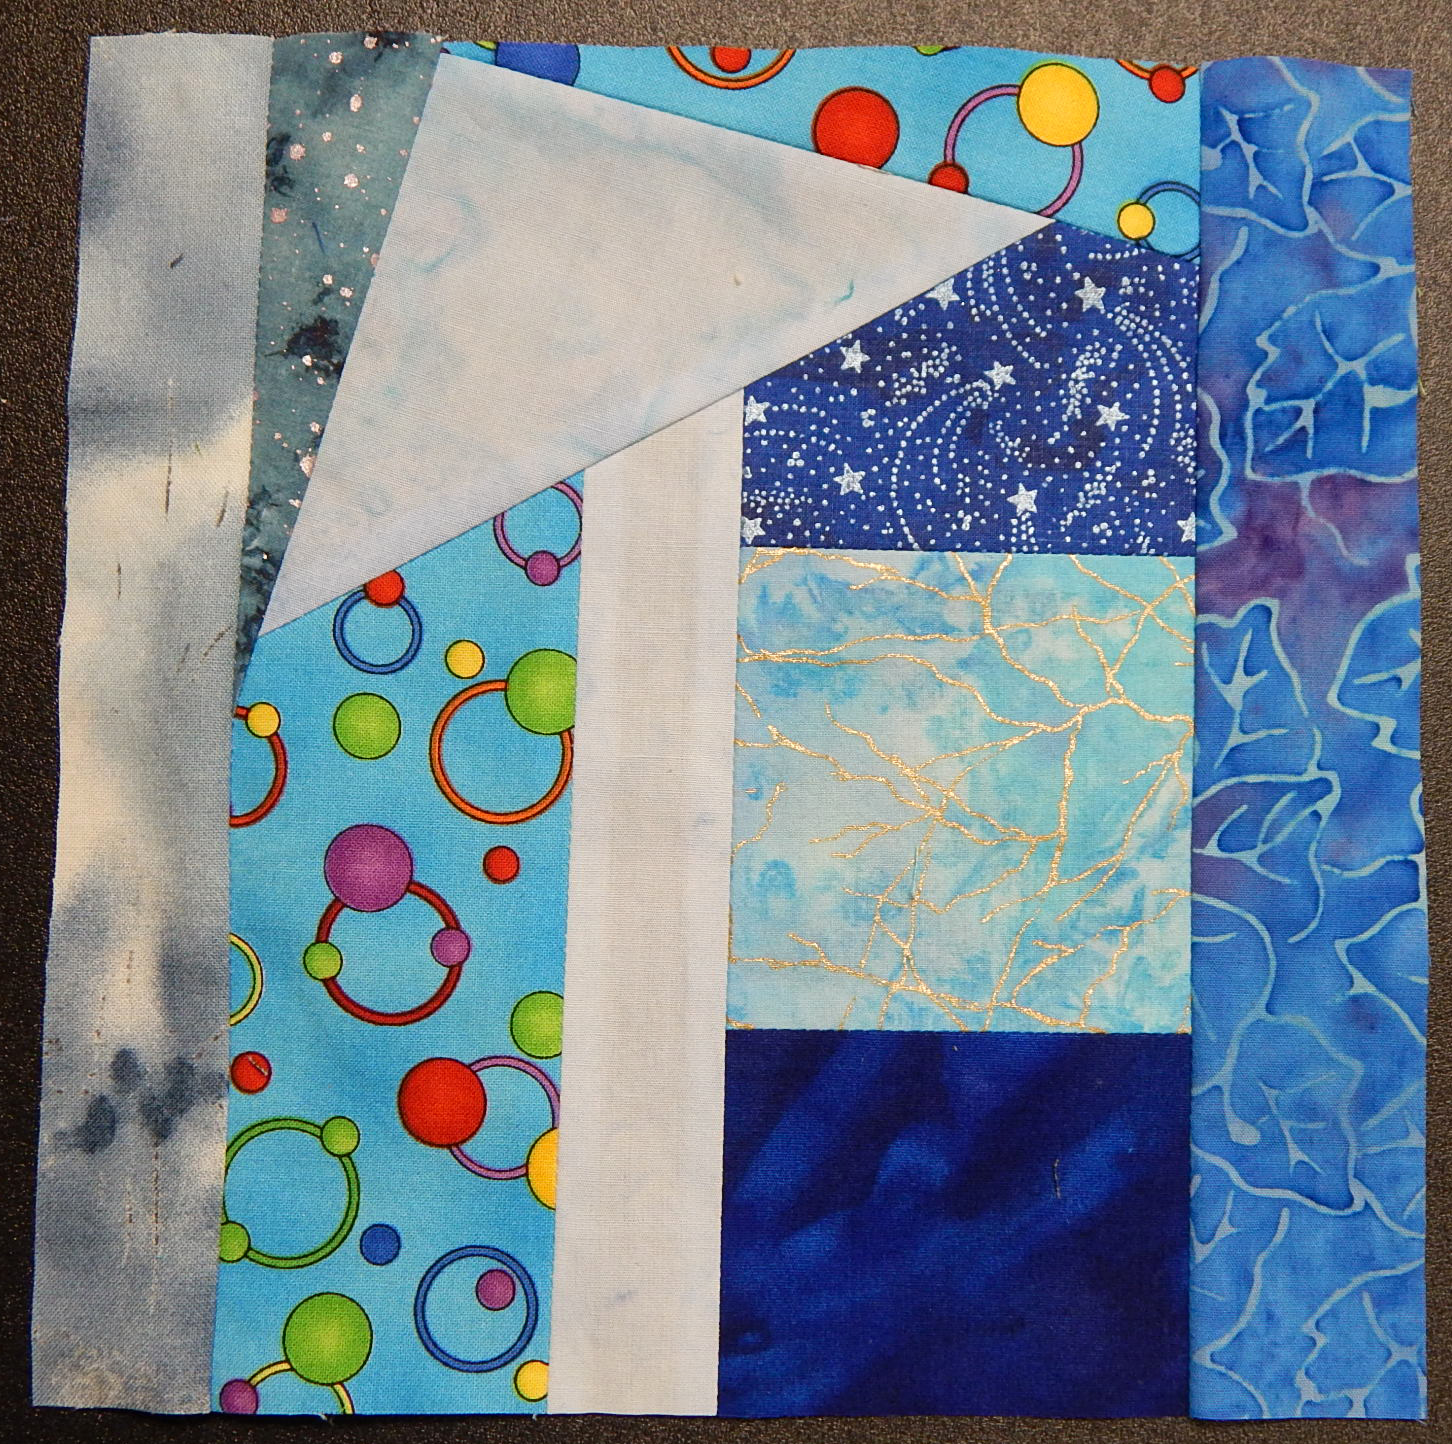
Design from the book Modern Paper Piecing was both pieced and quilted by Linda

Amish modern quilt

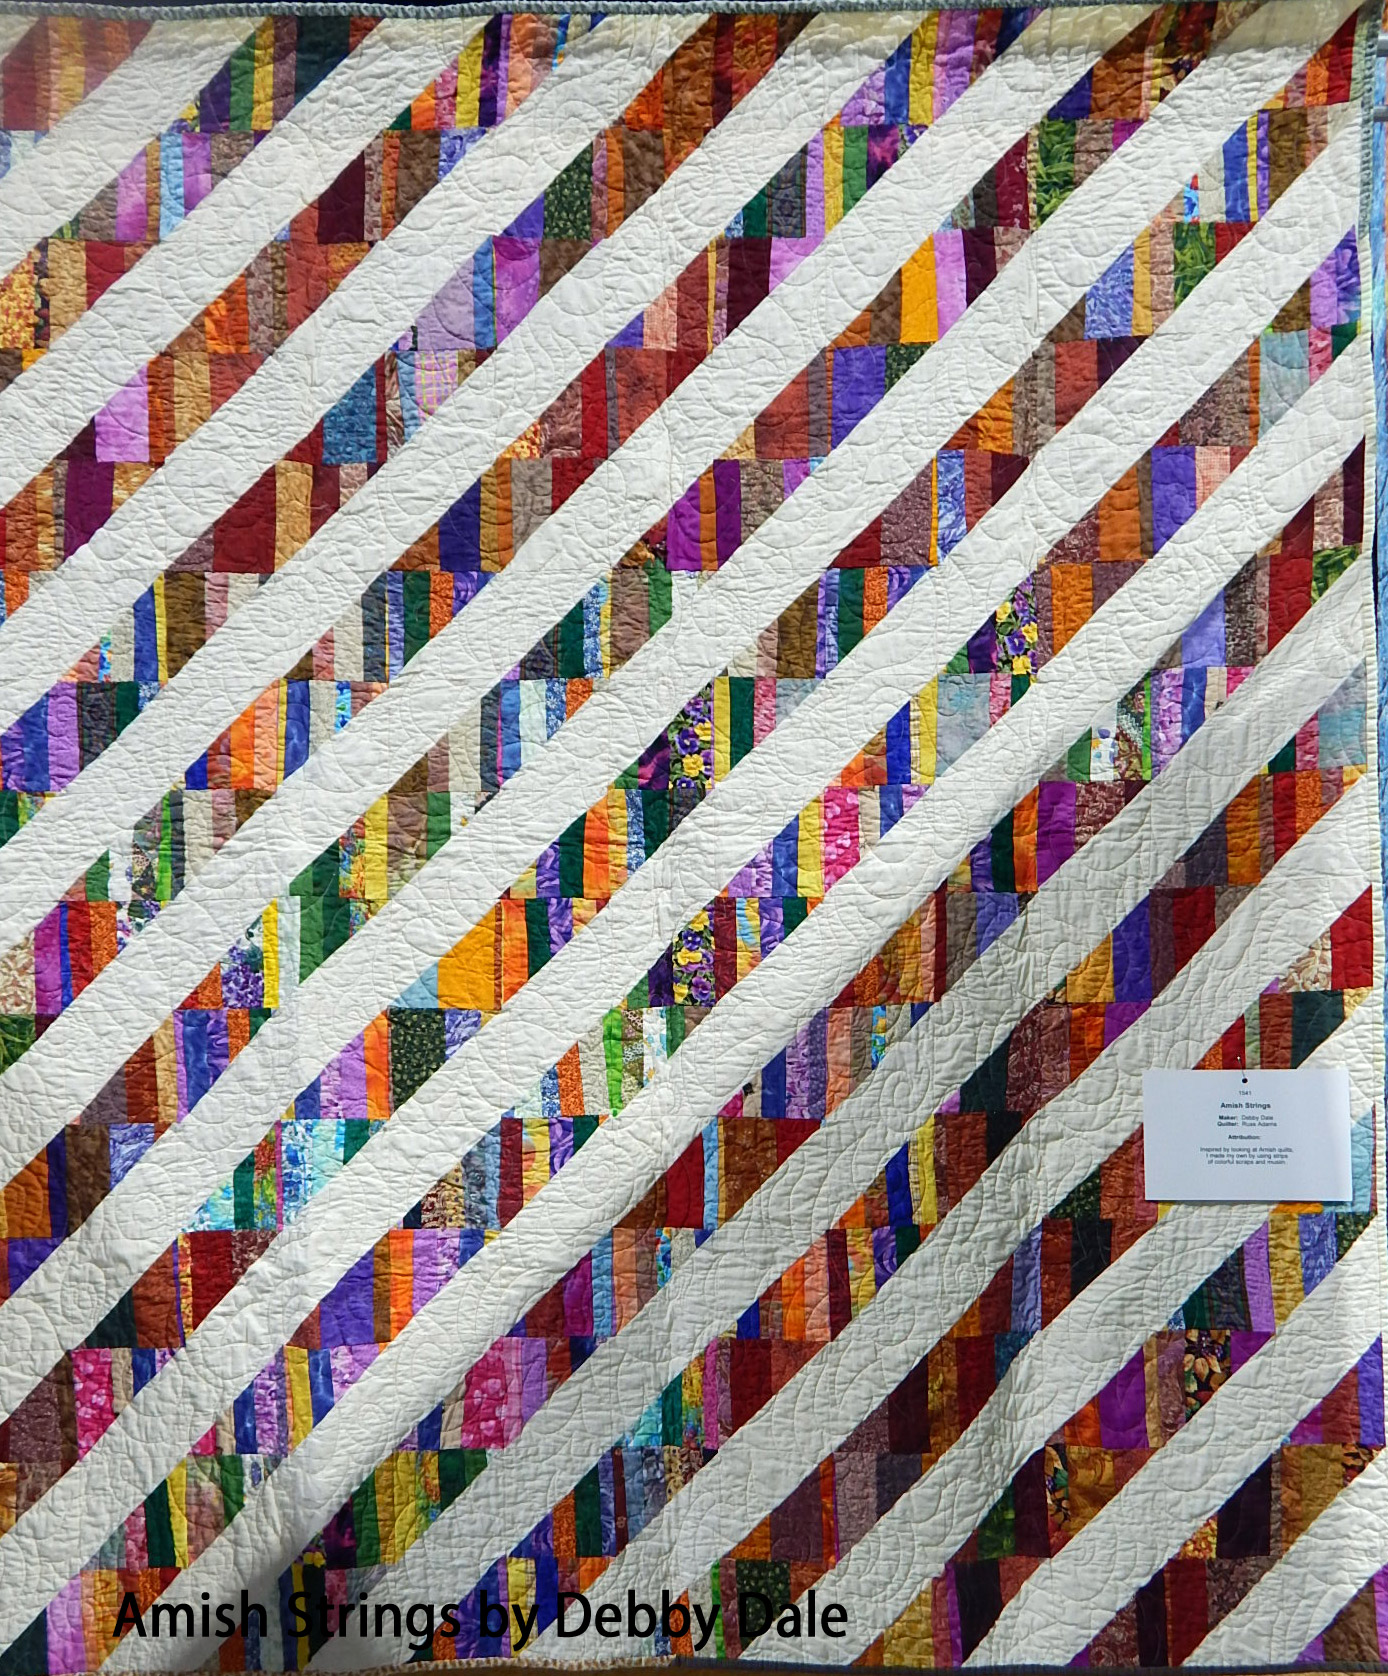
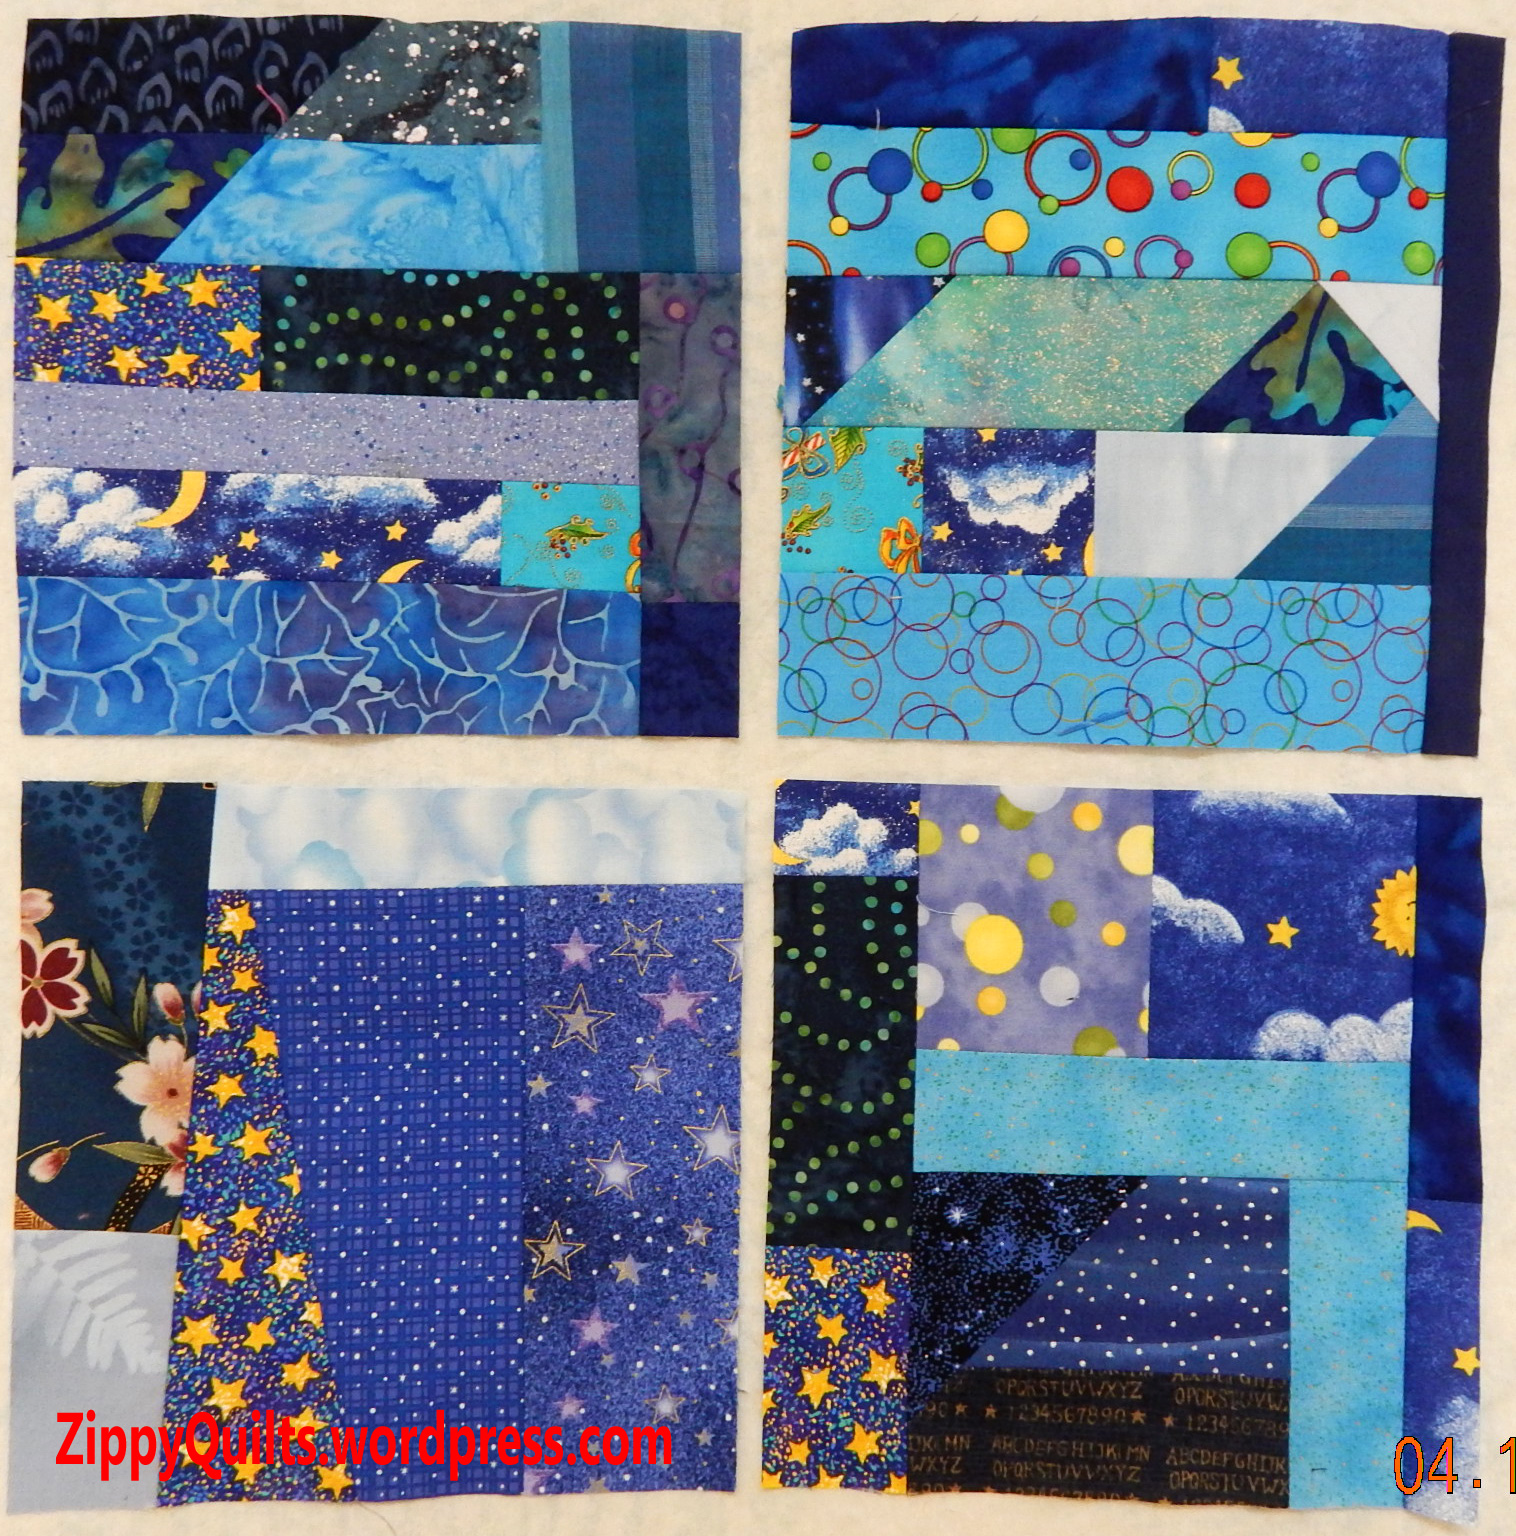
Debby designed and made this quilt after a study of Amish quilts

rainbow quilt

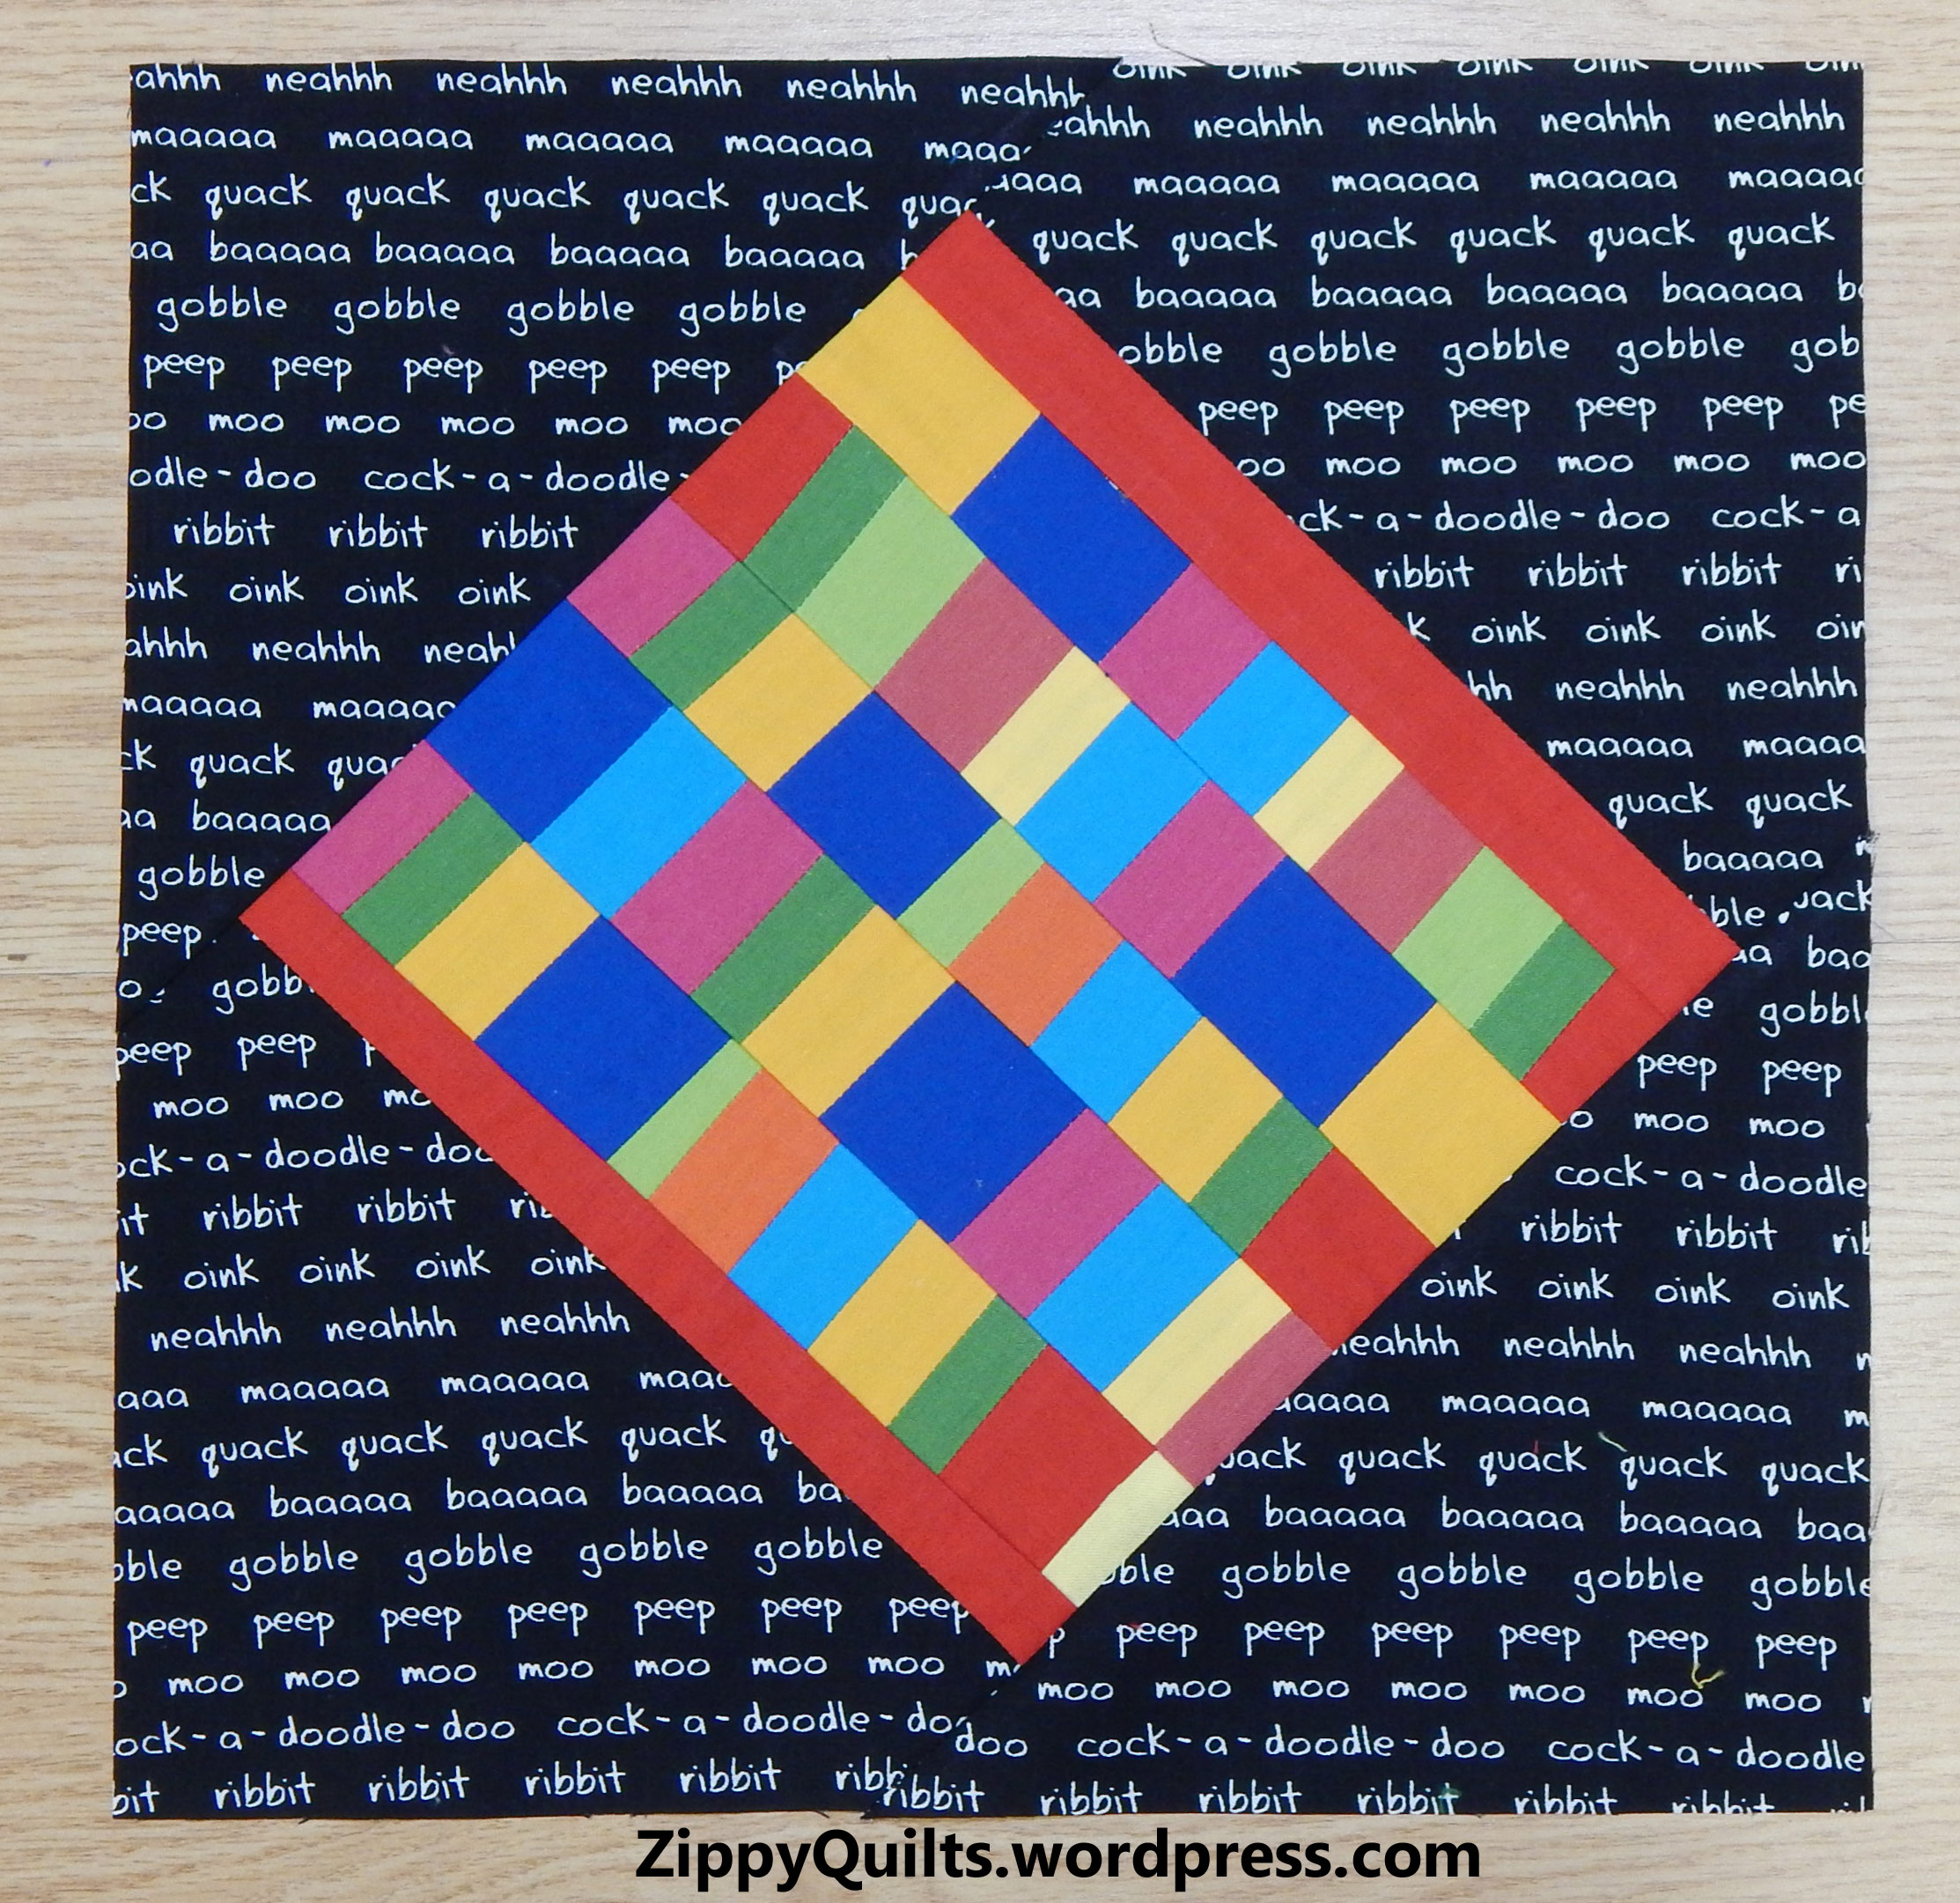
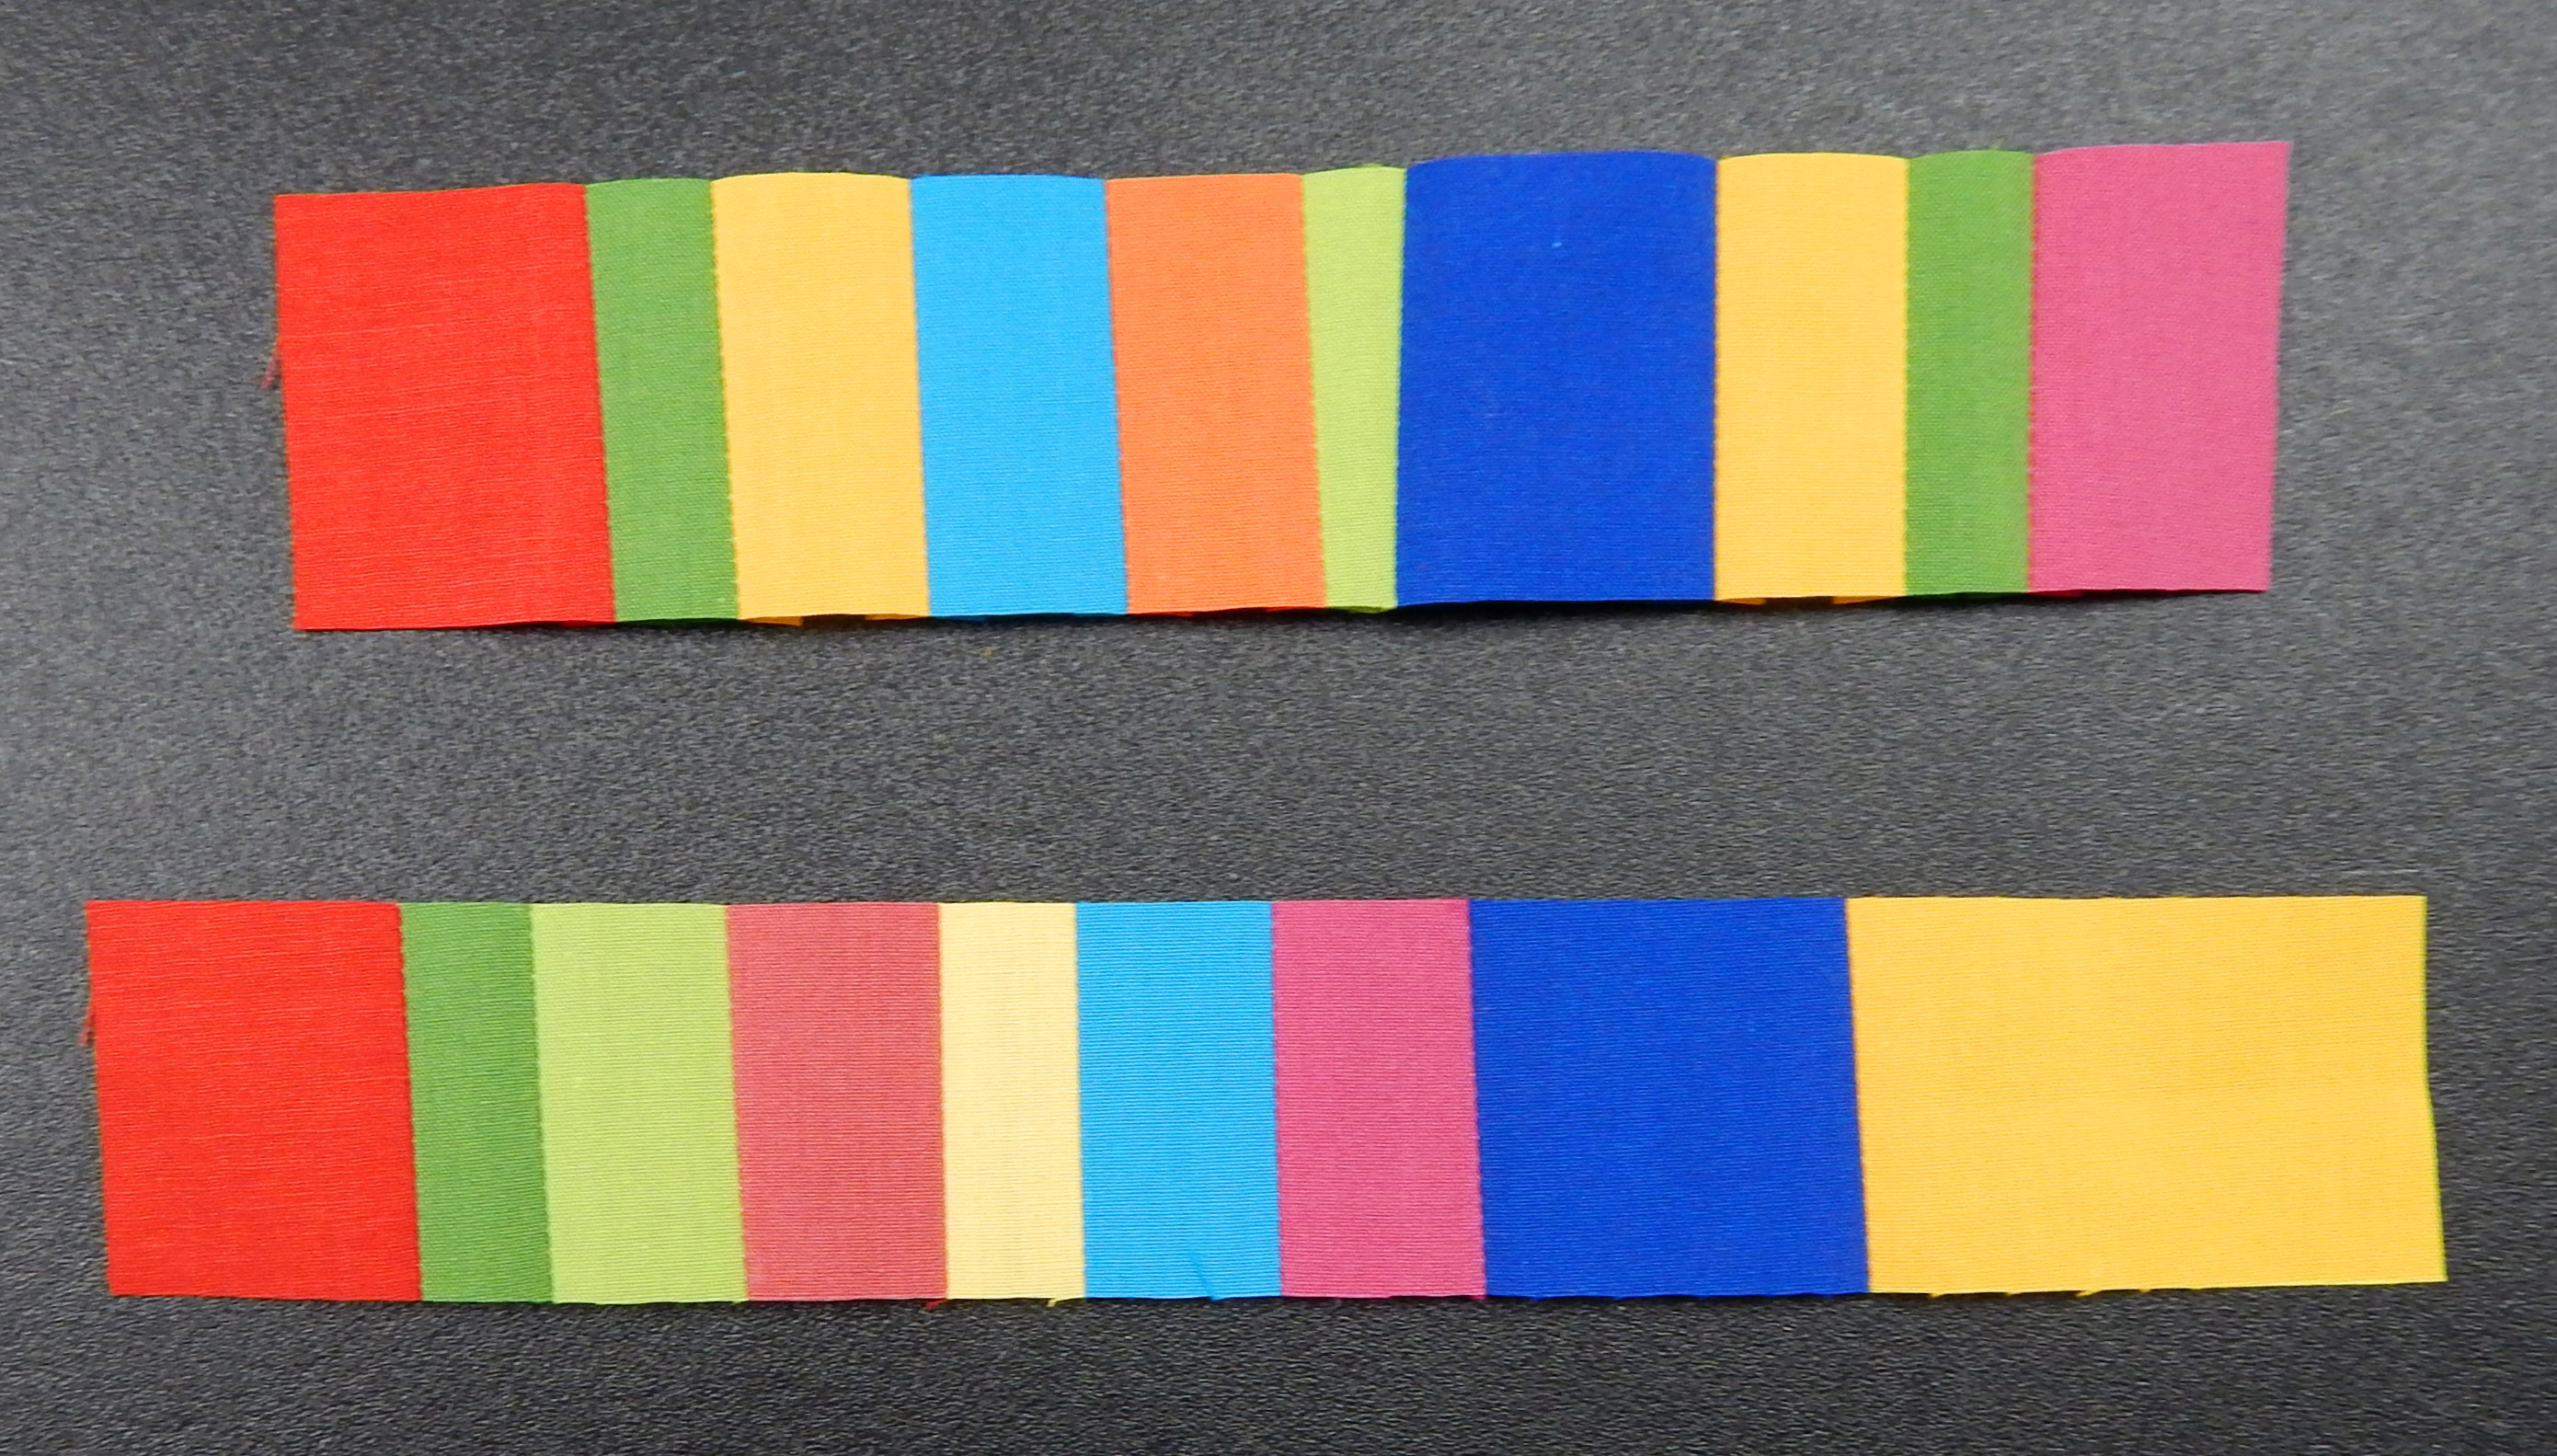
Quilt is based on a Mind the Gap design by Moda. Karen cleverly named it after her “mistake” in placing the green strips!

Gray quilt

Christeen designed this quilt herself, and I think the name should get a humor award!

Modern log cabin quilt

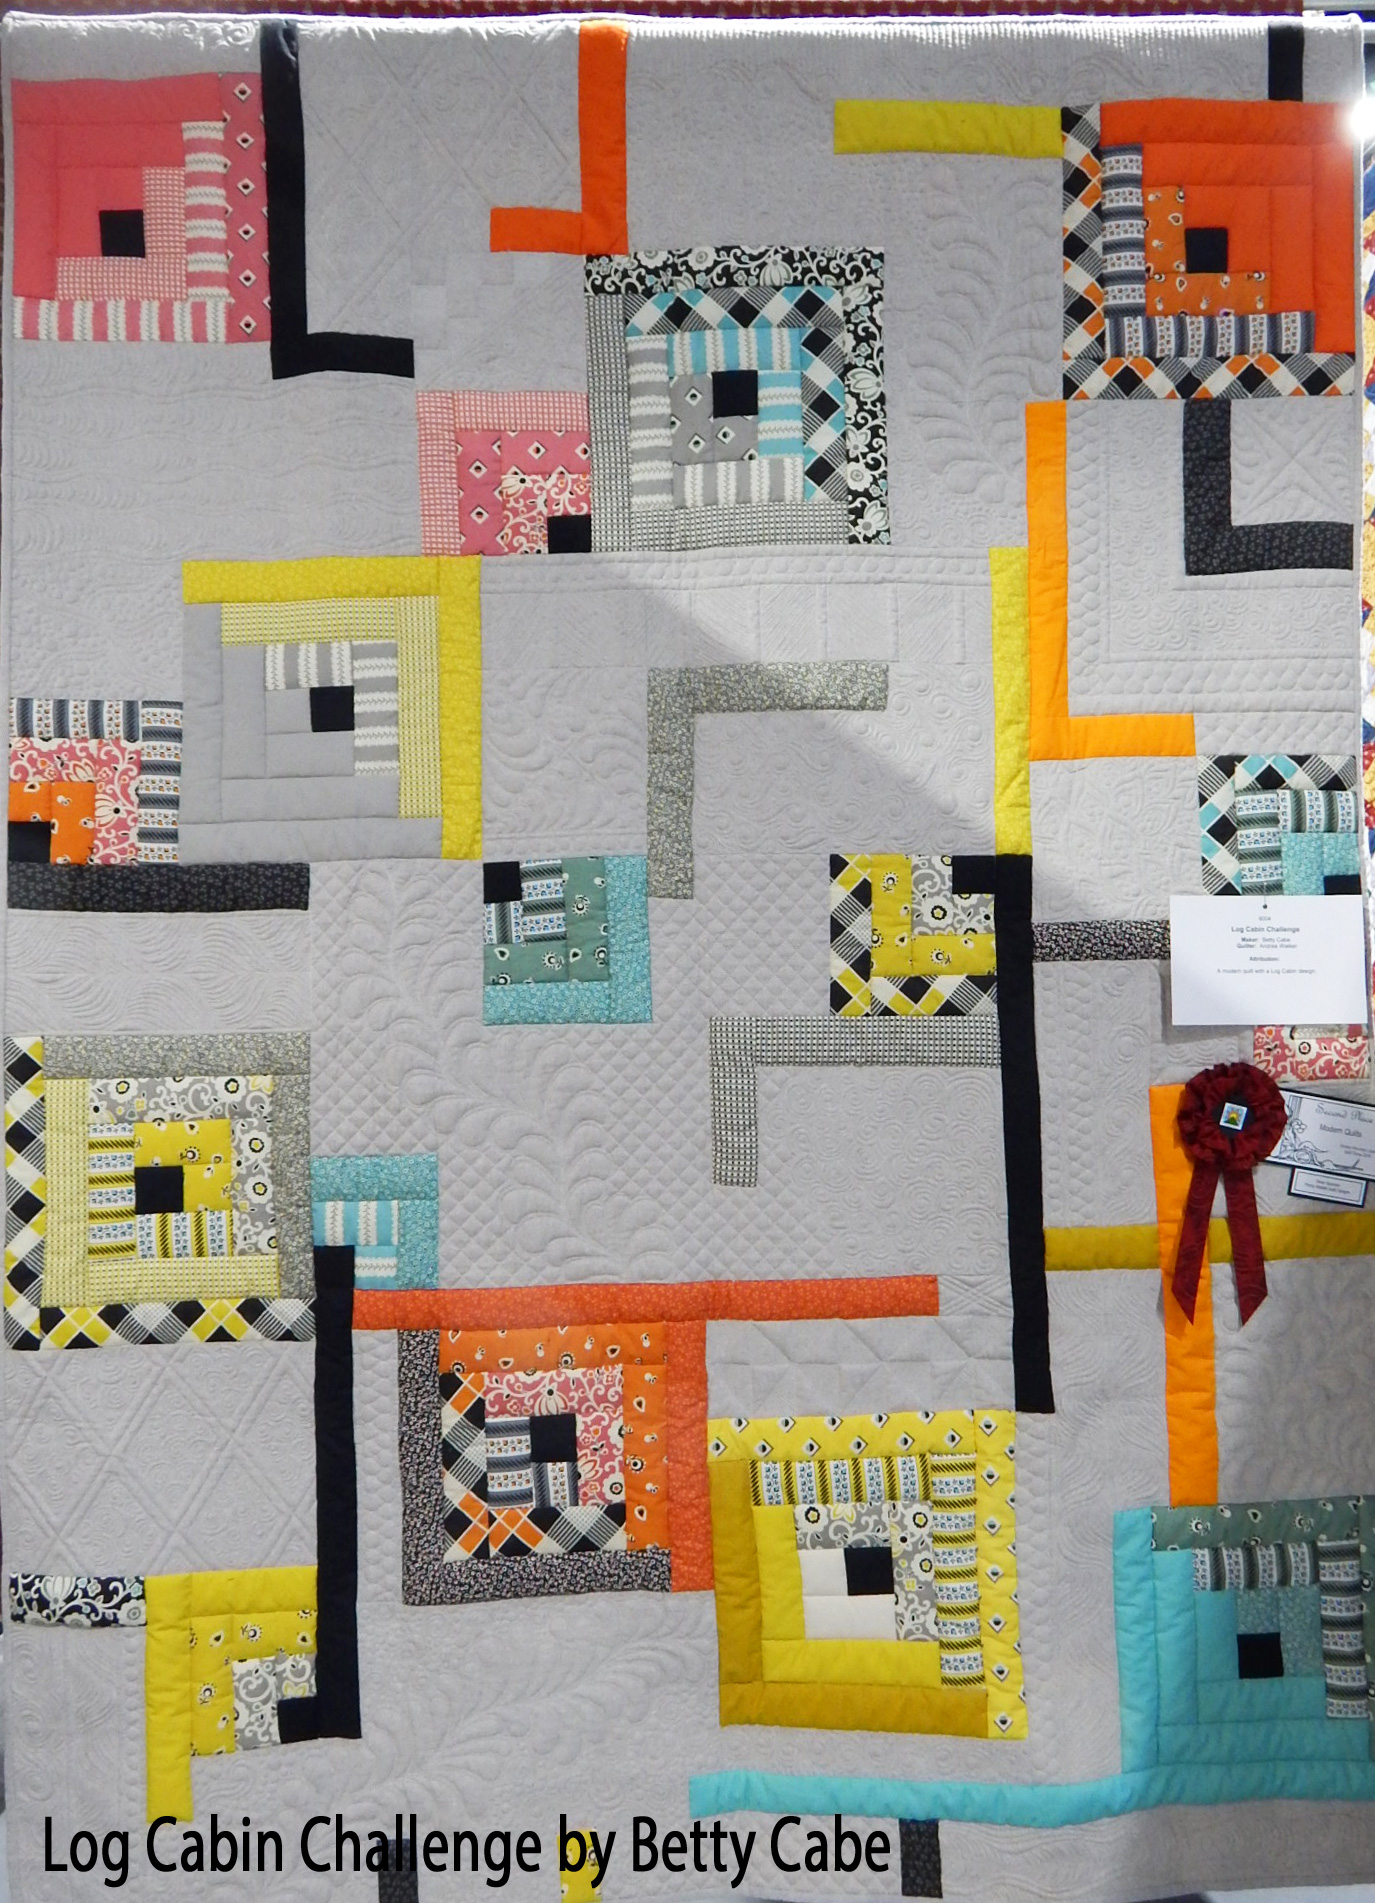
Betty designed and made this quilt for a log cabin challenge

Detail view. Pattern is by Kathy Wells.

From a pattern by Kathy Wells

I’m lucky to live near so many talented quilters!

Projects from 2014

As part of my effort to develop galleries for this site, here is a review of my projects from the first half of 2014.

The design and tutorial for this zippered pouch came from Noodlehead.

zippered pouch

I made a series of these little zippered pouches, and they have been useful.

These next two bags were made from a book entitled Ruby Star Wrapping.  You can read my review of the book here, if you want.

I continued my interest in improvisational piecing in 2014, making this confetti block…

improv quilt block

Confetti Block, 2014

…and this entry for the Quilt Alliance annual contest:

modern art quilt

Whirlwind, my 2014 Quilt Alliance challenge quilt

I made this quilt for the Pantone Challenge.  It looks better in person than in this picture, and now is used to decorate one of the rooms at our local free clinic:

Applique quilt

Radiating Orchid, my mini-quilt for the Radiant Orchid Challenge

As always, I made a number of donation quilts for Ronald McDonald House.  I used them to try out a variety of techniques and other experiments:

I made this baby quilt because I loved the fabrics:

baby quilt

Baby Dots–Front

baby quilt

Baby Dots–back.  I may like it even more than the front!

And I participated in several swaps, including one involving these blocks.  Don’t even think about the 88 little pieces in the block on the left!!!

I’ve reached my (self-imposed) length limit for a post, so the rest of the 2014 review will be coming up next week!  Please come back 😉

Save

Save

Save

Save

The Rest of the Story

Here are the other two quilts I made while doing the Gwen Marston class on iQuilt.

This first one is my version of one of her quilts, and again I made it 12″ x 12″.  I faced it, which I don’t usually do, so that was a learning experience.  I like the way it turned out.Gwen Marston iQuilt class

This second one was made of scraps from the other quilts in the series, which makes me happy.  Marston2

This started as a liberated Roman Stripe design, with a center of 4 larger blocks and a “border” of smaller blocks.  The size of the blocks worked out fine, but the pieces got more and more “liberated” so that I’m not sure it looks much like a Roman Stripe any more.  Which is fine, actually.

I quilted it using a pattern of wandering lines, all in one direction, and I like the result. After considering several threads, I used a thin medium grey polyester.  I think it blended well so that the quilting didn’t obscure the design.  Here’s my “trial” of several threads.Marston1

How do you choose your quilting thread for a project?

My Modern Sampler, Blocks 9 and 10

Channeling Gwen Marston, I made a couple of “liberated” quilt blocks for the sampler.  This means they were cut without a ruler and the pieces are deliberately “wonky”.

modern sampler, modern quilt block

Liberated Hole in the Barn Door blocks finish about 5″ square

Some current authors are making a big deal of cutting without a ruler, but Gwen Marston has been doing it for years.

I DID use a ruler to make the original background square.  Here are the steps:

modern quilt block

I cut the big square using a ruler, the subdivided it into a 9-patch freehand

modern sampler quilt

Corners done, time for the sides

modern sampler

Sides done using method similar to the corners: pin, check, then sew and trim

modern sampler

Ready to be sewn together!

For Block 10, I cut my scraps into strips.and lined them up.

modern quilt block

Scraps cut into strips and pieced with black and white background

The widths of the colored strips and the white strips between them are semi-random. The sashing between the columns finishes 2″, and the block finishes 12″ square.

A few more blocks and then I’ll have to decide how to set them!  Here are the previous posts about My Modern Sampler:

Block 8

Painter’s Tape Block

Humbug Star

Improv Block I

Pretty Blocks

My Own Modern Sampler–It May Take a Year!

My Modern Sampler, Block 8

Here’s a picture of the blocks made to date for my modern sampler. Links to the posts about each one are at the bottom of this post.  Some are designed by me, some not.

modern sampler

These are the sampler blocks I’ve made so far

It’s time to look at all the blocks together and think about what this quilt needs next.

  • So far I’ve made 7 blocks; it needs 7 or 8 more.
  • The blocks will fit together in multiples of 3″, with some solid strips to fill in spaces. The blocks are generally “busy”, so I think those solid strips will be important.
  • There are a variety of colors and a lot of white and bright.  I like the bright, but I want some more black backgrounds.
  • All of the blocks except one have some text fabric.  I need to either save the one block with no text for another purpose or make 2 more without text.  I can use some text fabric as background strips.
  • That orange and turquoise block with all the random trapezoids doesn’t fit with the others, so I either need to make more like it or modify it in some way.  I may cut it up and re-make it altogether.  Suggestions?

Meanwhile, here’s one new block to add to the sampler.

modern scrap block

The Modern Scrap Block will finish 12 inches square

And here are the steps for making it.  I just sewed together my scraps and then framed them with triangles.

modern scrap quilt

I made sets of strips left from other blocks.

These strips varied in width, and some were uneven widths.

modern scrappy block

Strips of tiny blocks cut from the strip sets.

I joined the strips of little blocks (which varied in width from 1 inch to 1-1/2 inches) and then added black triangles.  The center “square” is NOT square–it is improvised without much measuring!

There, now I have another one with a black background! Here are the links to the other quilt blocks in my sampler:

Painter’s Tape Block

Humbug Star

Improv Block I

Pretty Blocks

My Own Modern Sampler–It May Take a Year!

Leaders and Enders–Have You Heard?

One of the best things about the blogosphere is that I get tips all the time from other quilters.

I recently learned from Melissa at Happy Quilting how I can be piecing two projects at once!  What could be better?

I’ve always used scraps for starting and ending a series of chain piecing because that gives me all the pieces at once, still without having to cut off thread tails.

The scraps used to start and end sections of chain piecing end up looking like this--pretty ratty!

The scraps used to start and end sections of chain piecing end up looking like this–pretty ratty!

Here’s an explanation of chain piecing in case you aren’t familiar with it.

To piece a second top as “leaders and enders” instead of using scraps to chain piece, I figured it had to be a SIMPLE top or I’d end up confusing things for sure!  So when one of my quilt groups decided to exchange improvised blocks (sometimes called slabs if they’re all one color), it seemed like a perfect opportunity to make the slabs while working on something else.

Improvisational piecing

This is a pile of scraps..

I’m piecing slabs from scraps and they’re improvisational, so there ARE no mistakes, only opportunities for further improvisation!  Woo-hoo!

Improvised quilt block

And this is a block improvised from scraps and cut to size!

SO, while piecing the tops I wanted to consider for the Quilt Alliance challenge…

I also pieced several improvisational slabs for friends.

Improvised blocks

Blocks improvised from scraps

Win-win!  And most importantly, it was FUN 🙂

Orphan Block Table Runner

When I looked at my (er, large!) collection of orphan blocks, I found not only single blocks, but groups of blocks all from the same quilt, and several strips of blocks that looked like they had been almost included in a quilt.  The first such strip I came to was from an improvised batik quilt made with Bold Over Batiks and assorted others.  It was almost 24 inches long and 4 inches wide.

I cut the strip into a length of 12 inches and one of a few inches less, then added fabric to the shorter one so both were 12 inches.  I then joined them lengthwise with a black strip down the center:

table runner

Table runner made from a strip of leftovers

I made a backing by piecing together scraps from my current quilt, which happens to be batiks also.  I just put them together semi-randomly.  (You can see the current quilt at the end of this post.)

quilted table runner

The back was pieced from the scraps that happened to be on the top of the scrap bin!

I quilted the whole thing in the ditch and bound it in black.  I think I like the back almost as well as the front!

Of course, if you have individual orphan blocks instead of a strip, you can make a table runner by joining them, either with or without sashing.  I find that sashing is a good idea because it allows for the use of blocks of different sizes just by varying the size of the sashing.  (I made the mistake once of putting together a “group quilt” and it DEFINITELY required sashing individualized to each block, since apparently everybody in the group had a different idea of the size of a 9″ block.)  Sashing can save your bacon (or table runner) in a case like that.  So here’s a quilt design with blocks of 4 different sizes.  The blocks at the ends had extra sashing added.Table Runner

Finally, here’s a peek at the current quilt-in-progress.  It’s made from the FQs that jumped on me at Quiltfest in July and were shown at the end of an earlier post here. The quilt is up on my sticky wall with a label on each piece so I don’t get confused as I sew it together! Scraps from this were on top of the scrap pile, so I used them for the back of the table runner shown above.

Bermuda Sunrise quilt pattern

This pattern is Bermuda Sunrise

Hope everyone has a good week!