I was lucky enough to attend the AQS show in Chattanooga last week, so I’m sharing some of my favorites with you. These are not meant to be representative of the show and they certainly do not represent the award-winners much. They are my personal choices.
But first, I must tell you that before I even went to the show I stopped at Spool, a great quilt shop in Chattanooga, to get my “Where’s the Penis?” button to wear to the show. This is to protest recent AQS censorship. I won’t repeat the ridiculous tale; if you don’t know about it you can read about it here, and read an even better analysis of the situation here.
The show was in the Chattanooga Trade Center, a nice facility with a carpet that would have been a good quilt design. Click on the photos to see bigger images.
In the show itself, I was struck by the dearth of truly traditional quilts. This traditional design was one of my favorites, but it is a small art quilt done as part of a challenge to make something in the spirit of the artist Grandma Moses.

Quilt by Yuko Miyashita of Japan, in response to a challenge to represent the work of Grandma Moses
The great majority of the quilts were what I would classify as “art quilts” in that they had almost no possible function beyond the decorative. Sure, you COULD use that 18 inch square quilt as a table topper, but it seems unlikely.
The SAQA (Studio Art Quilt Association) had an exhibit, as usual, and I admired many of their quilts, including this one:

Towers of Babble, by Pam RuBert
Another exhibit of art quilts included this one by Laura Wasilowski, whose work I admire:

Lacking Gravity, by Laura Wasilowski
This quilt, from the same display of art quilts, also caught my eye:

Hot Flash 2 by Nancy Woods
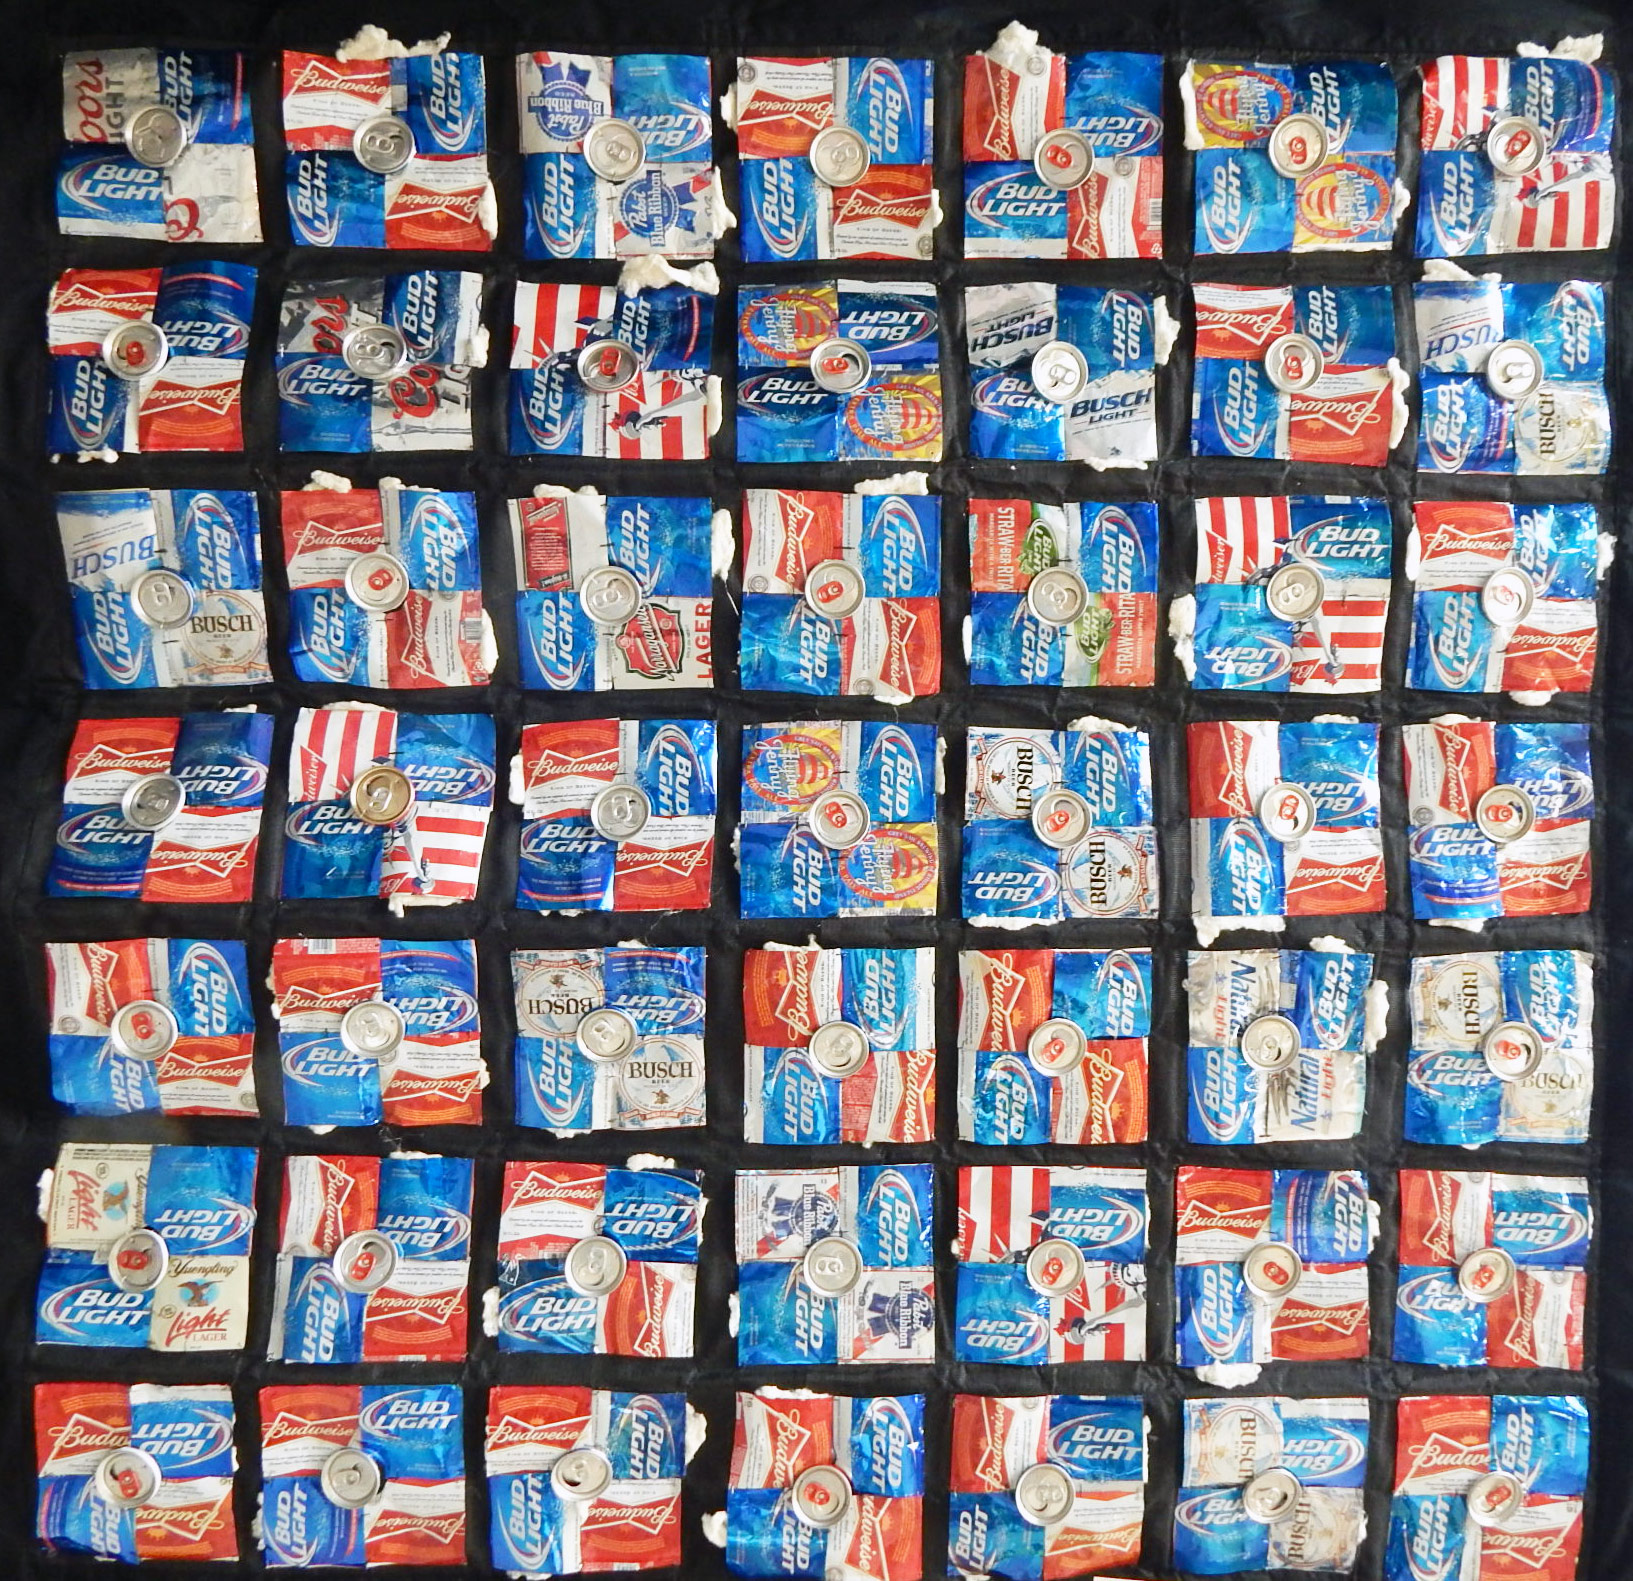
There were a number of fun quilts displayed as the result of a challenge to use nontraditional materials, but this was my favorite.

Not your Grandmother’s Drunkard’s Path, by Barbara Barber
Note how she has used tufts of batting to represent foam:

Detail of Not Your Grandmother’s Drunkard’s Path by Barbara Barber
Here are some of my favorites from various categories in the main contest.

Between the Lines by Wilma Moss

Detail of Between the Lines by Wilma Moss

Modern Wedding Rings by Gabrielle Paquin (of France)

Mid-Century Modern by Jerriann Massey

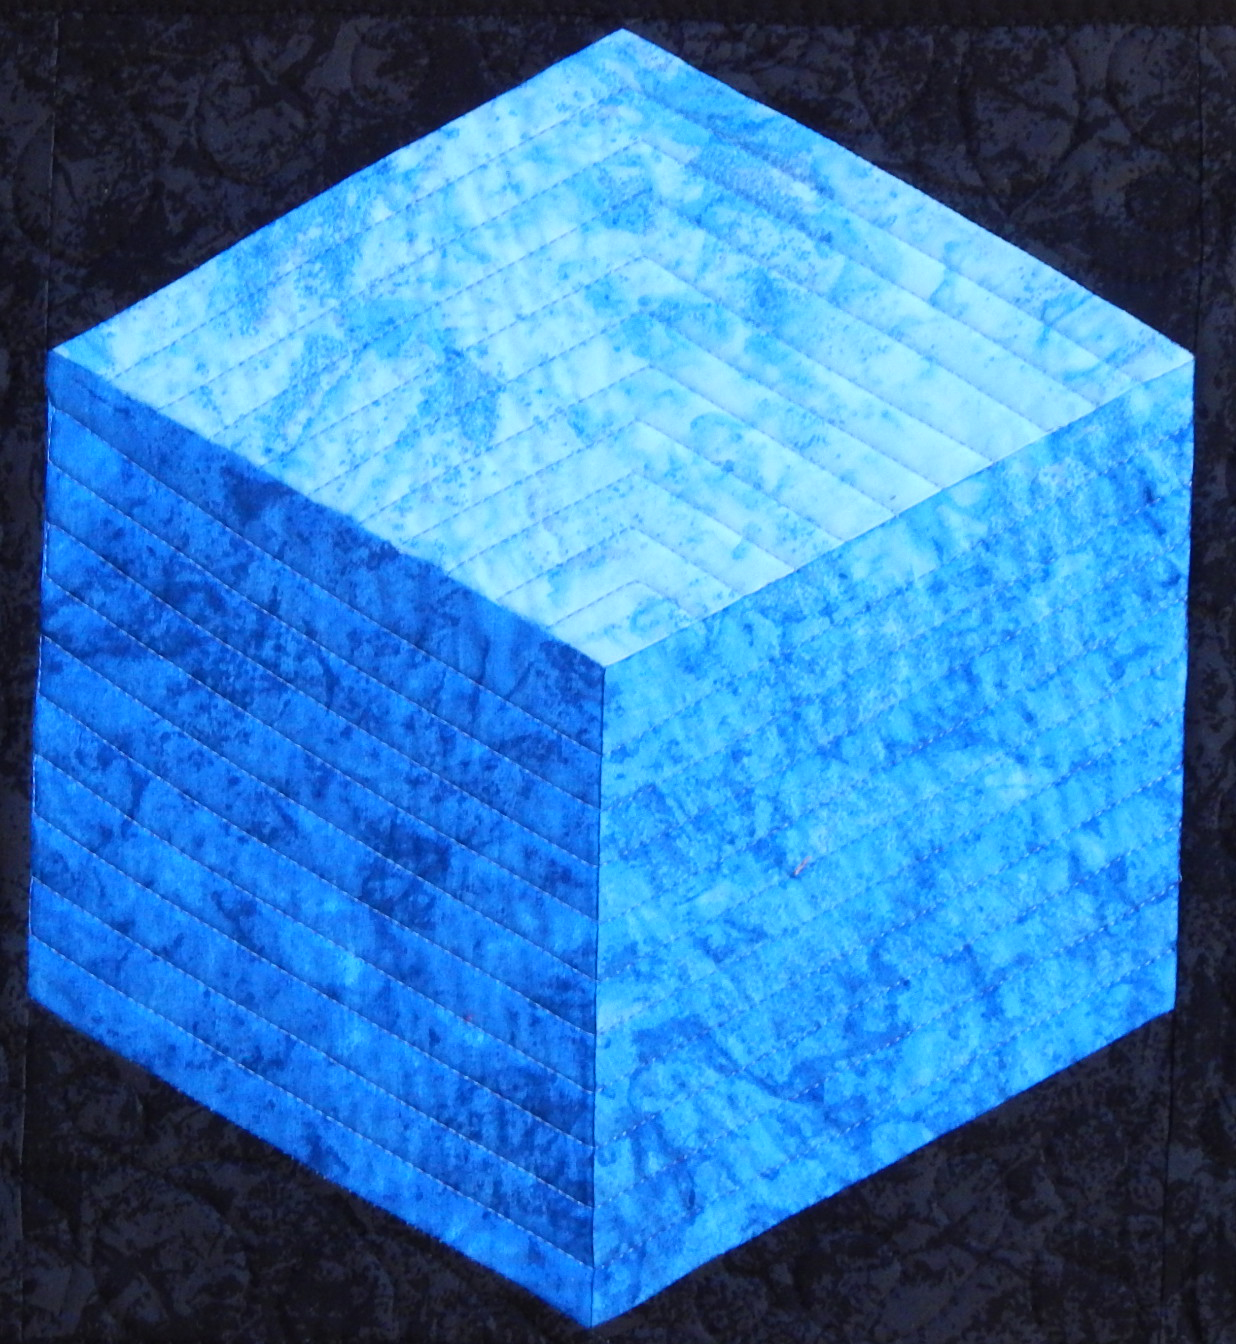
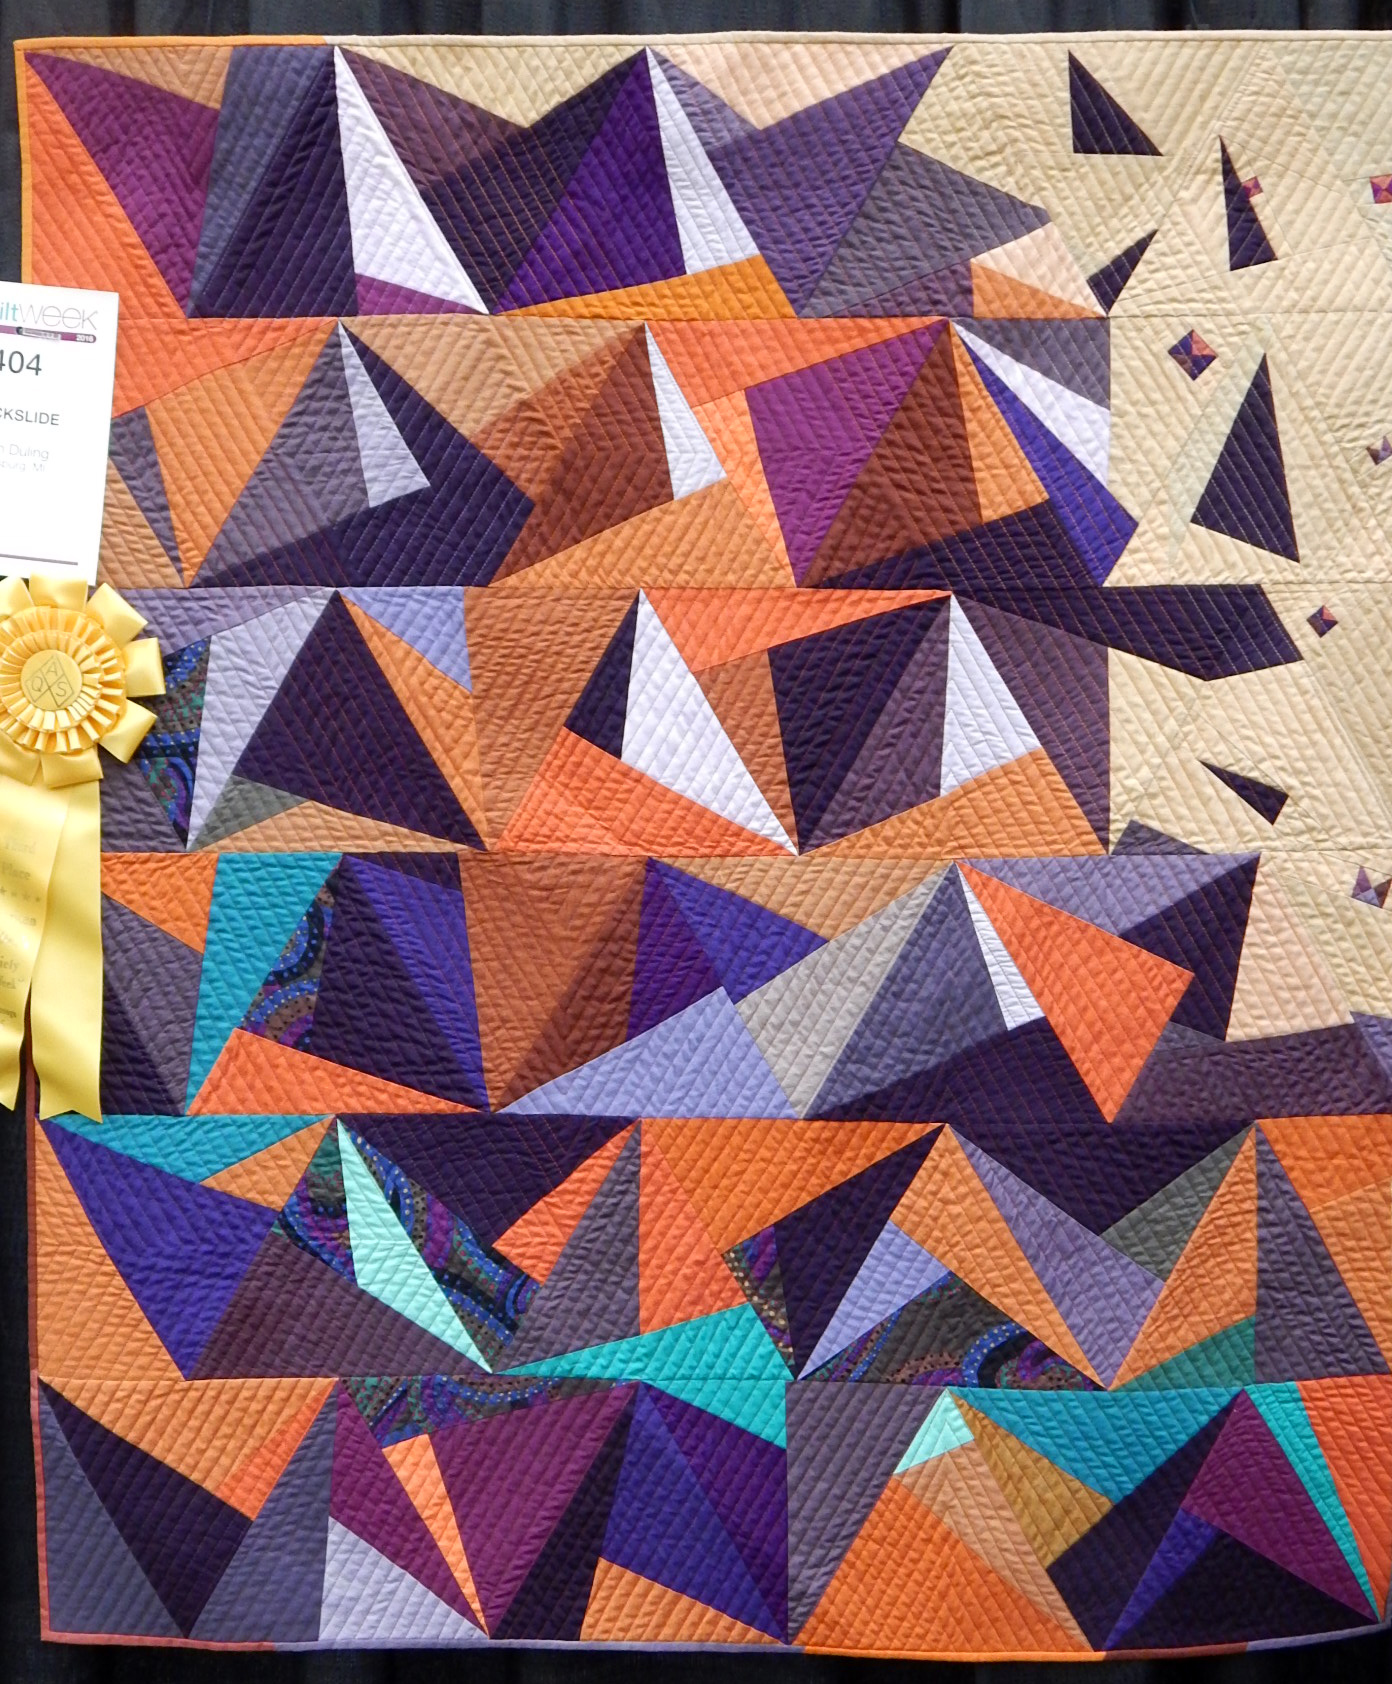
Rockslide by Karen Duling

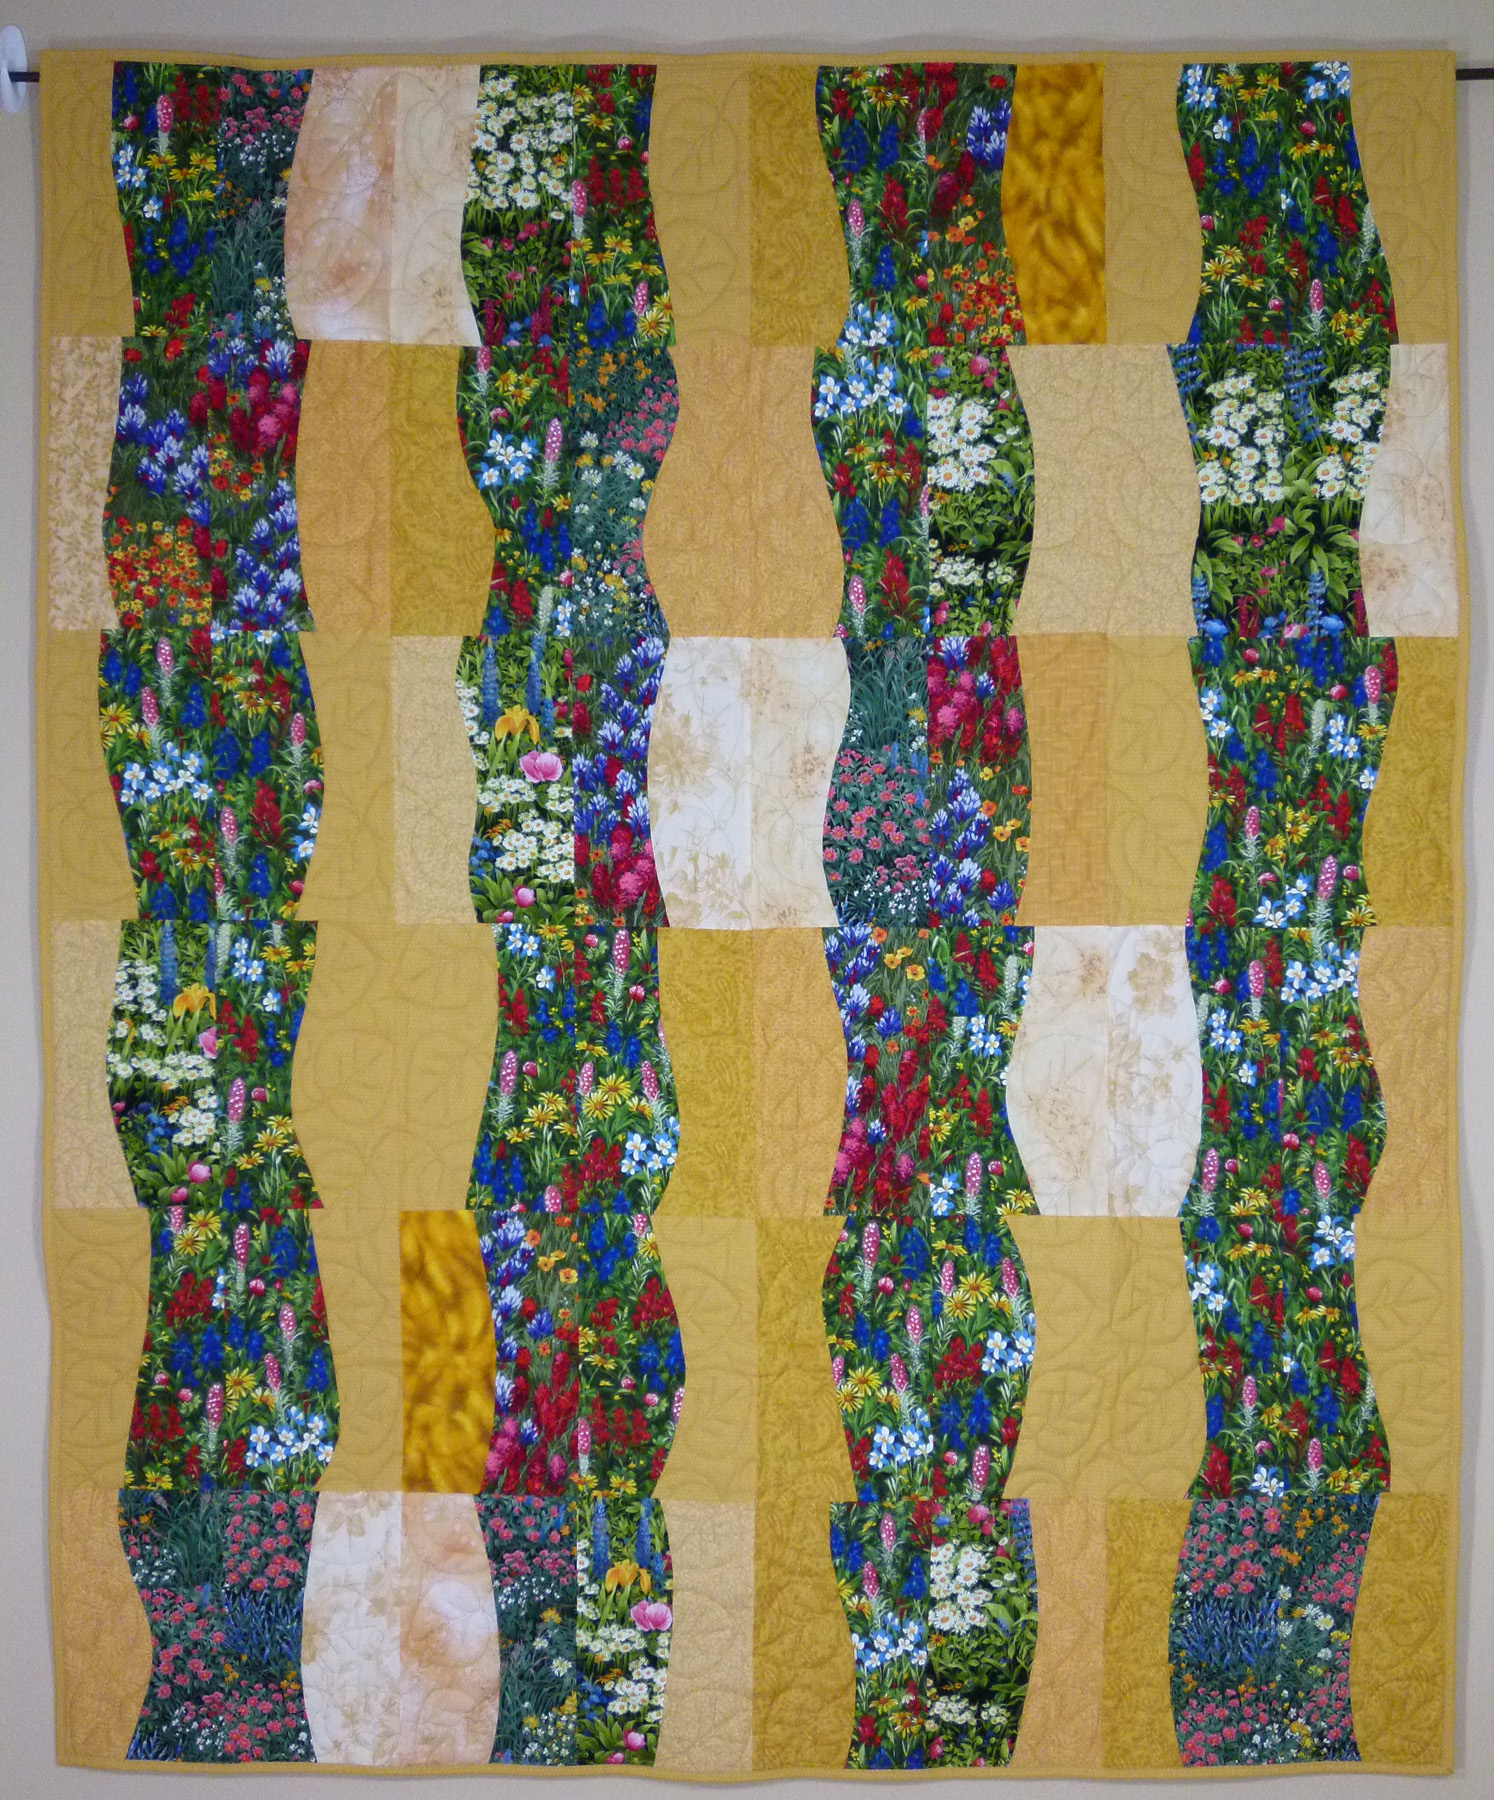
Autumn Gold by Lori Schloesser

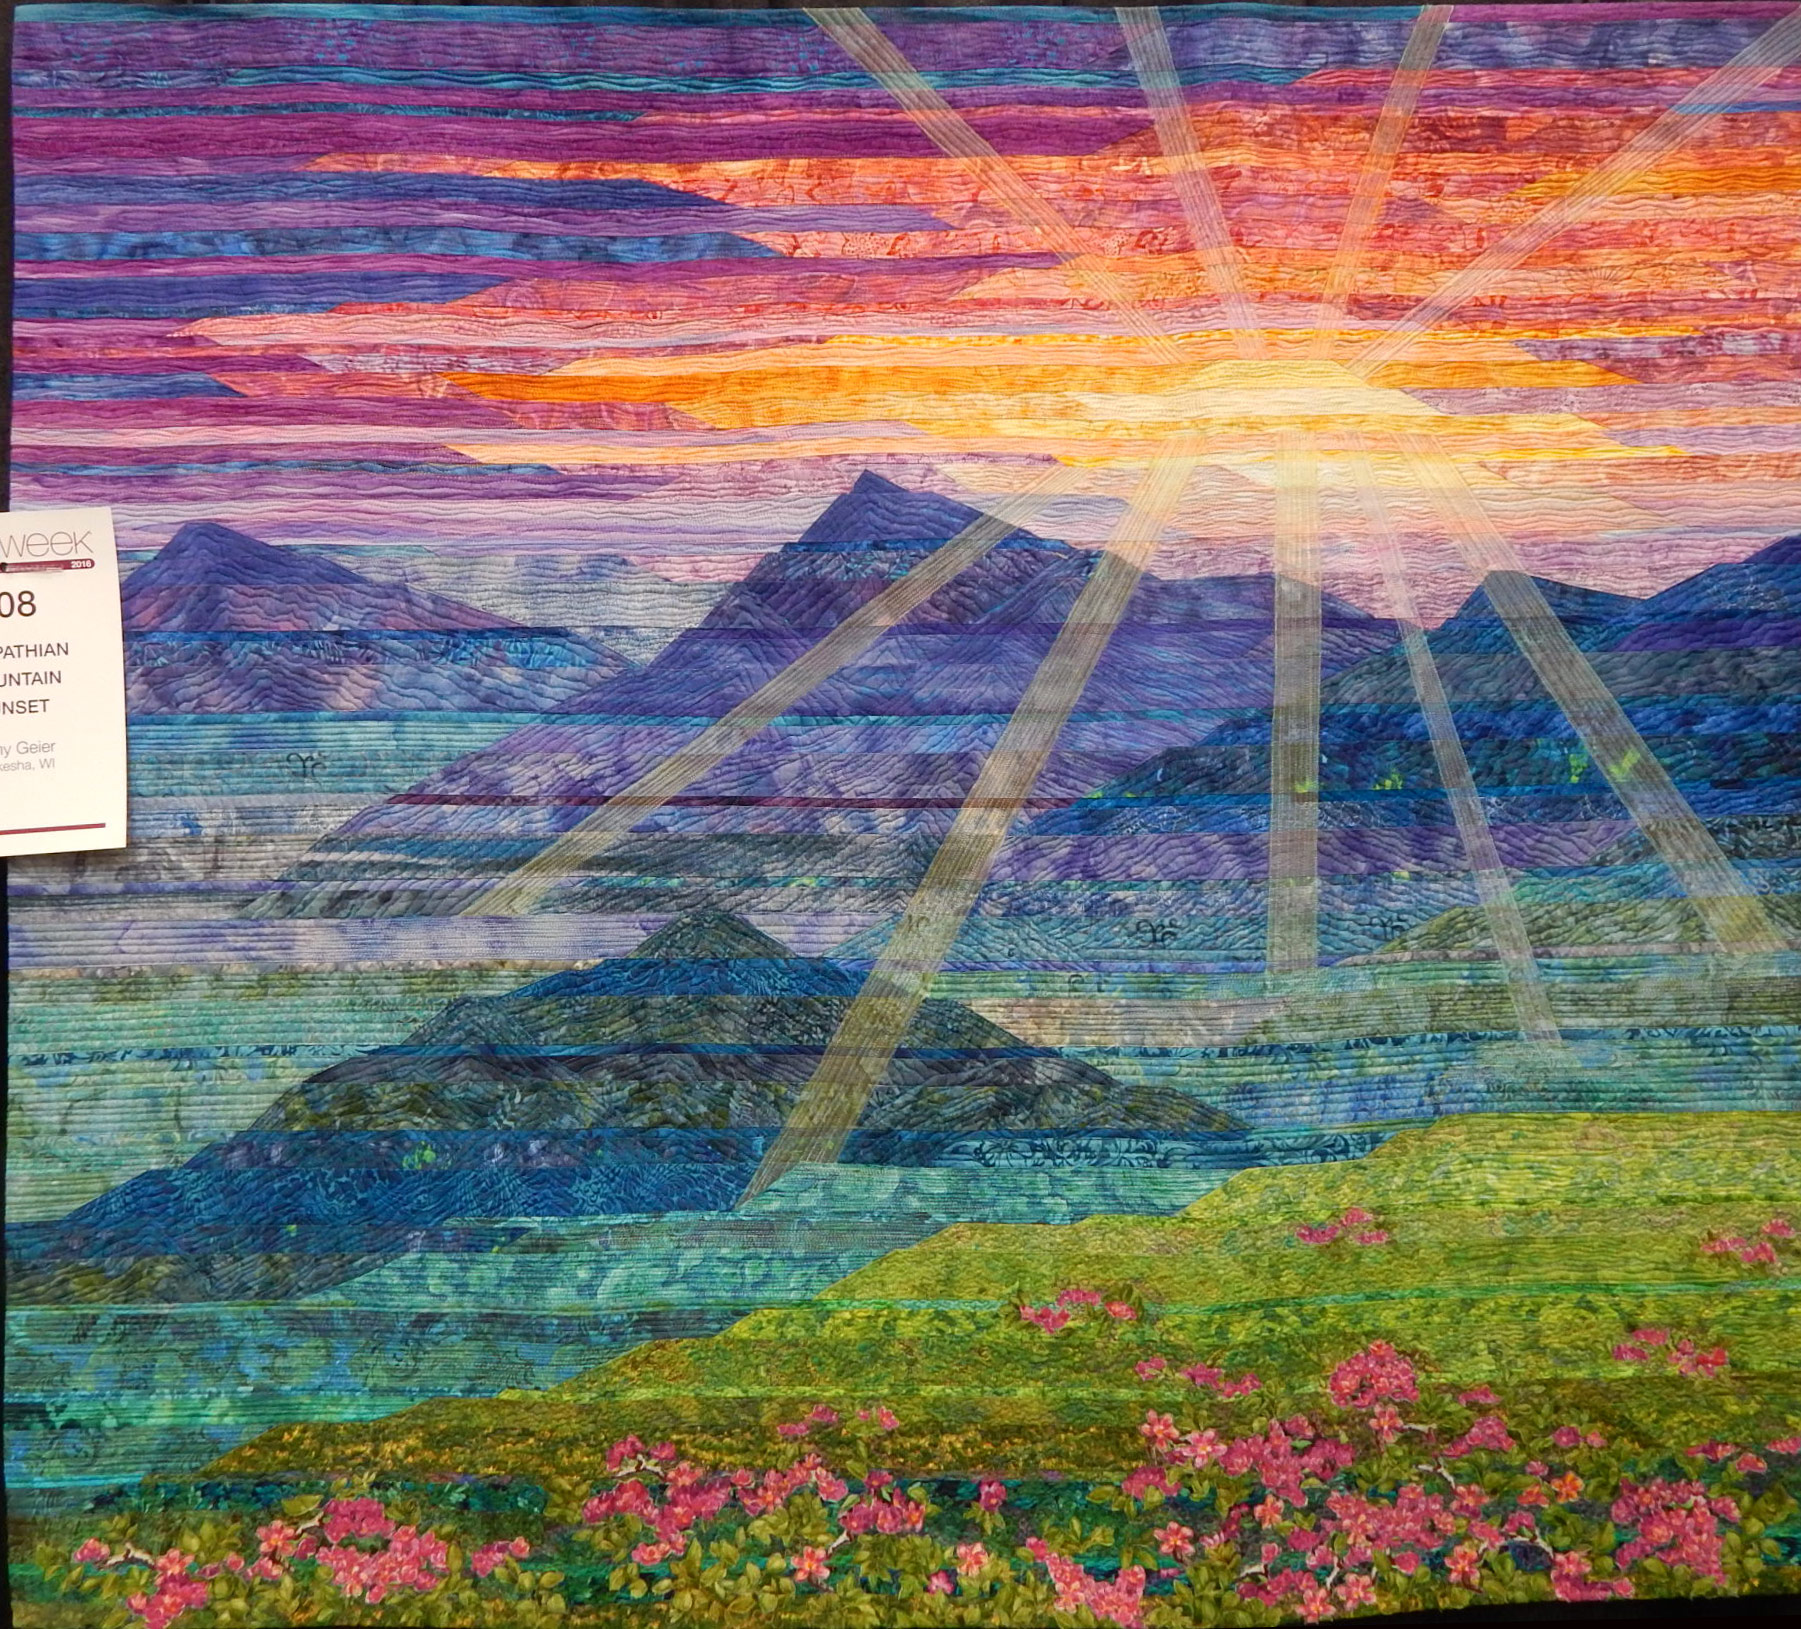
Carpathian Mountain Sunset by Cathy Geier
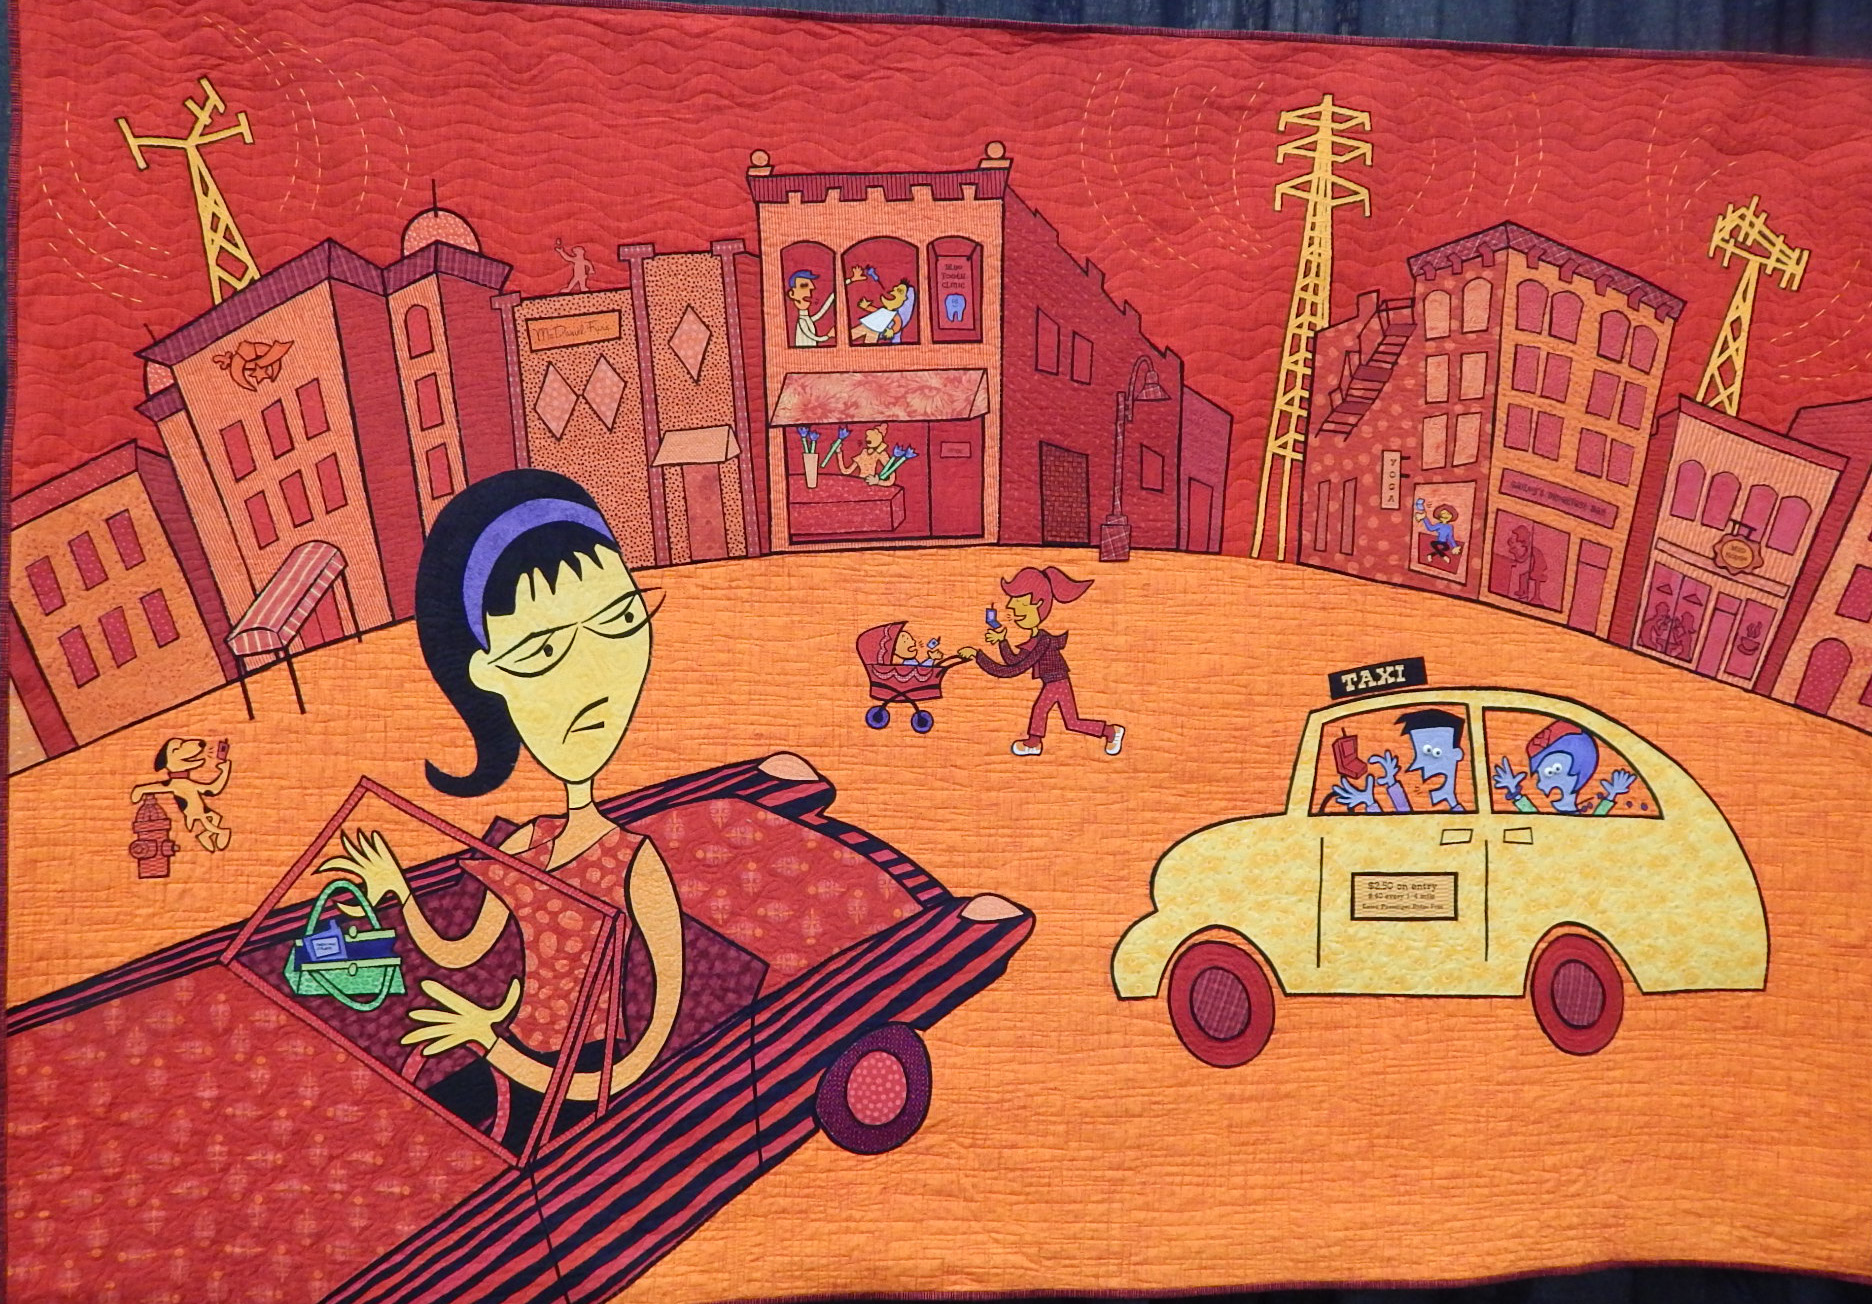
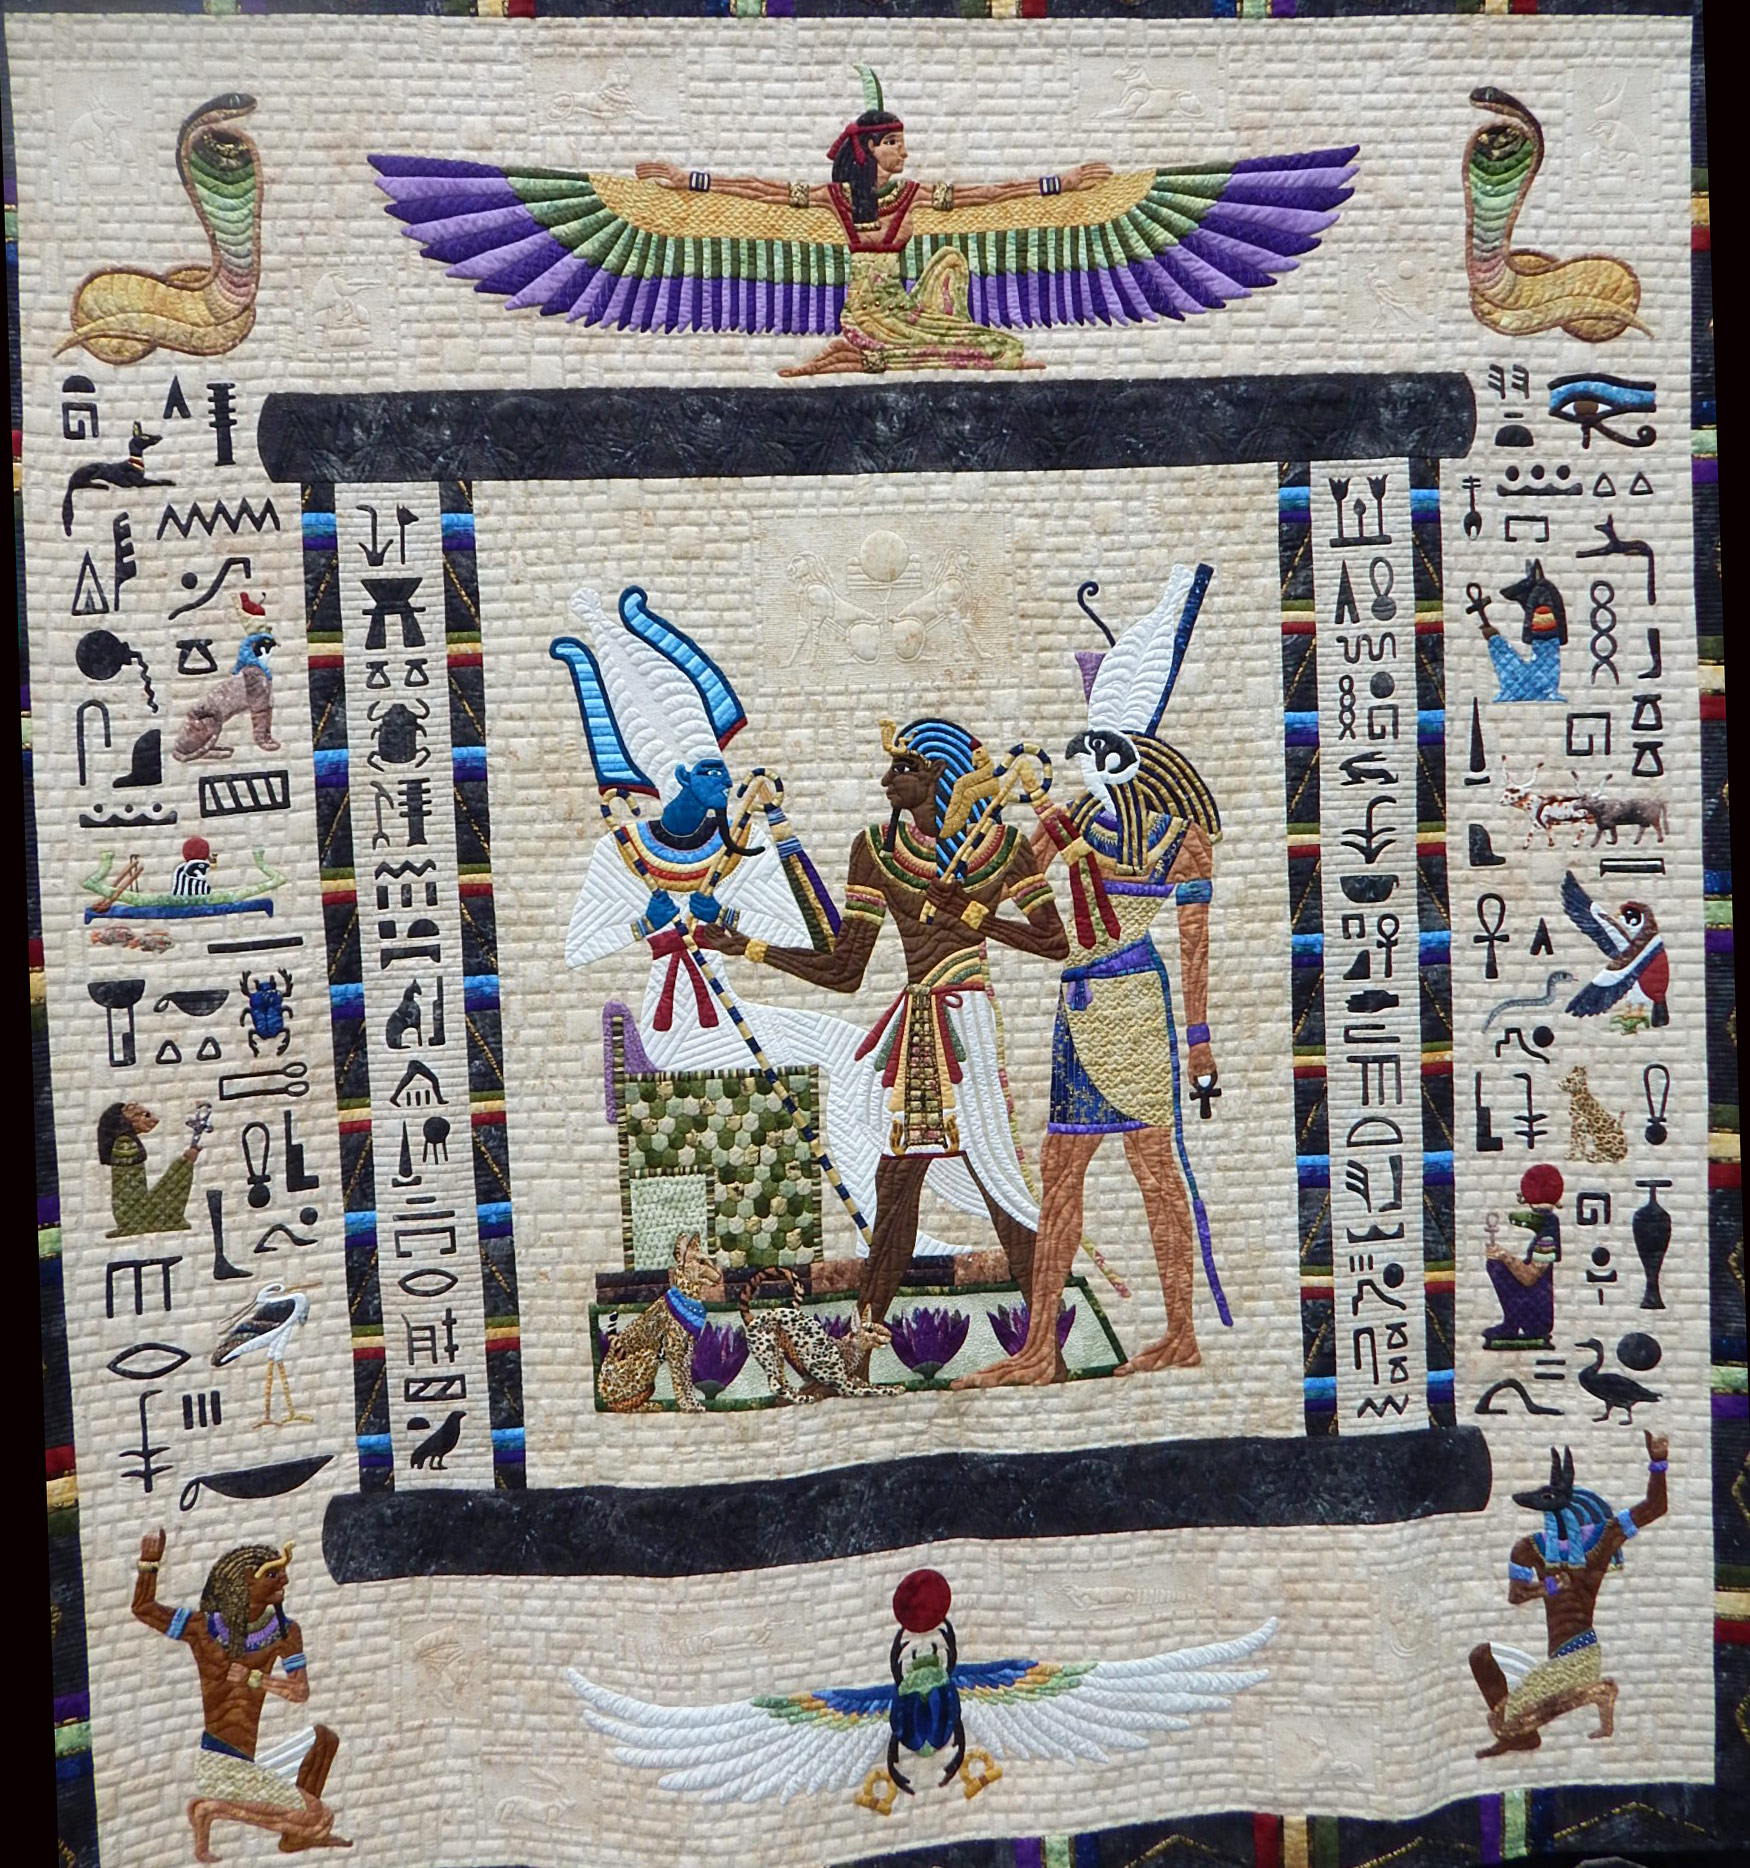
And finally, a quilt that was so popular at the Vermont Quilt Festival that I had trouble getting a picture of it. It is still spectacular, but didn’t even get an Honorable Mention in Chattanooga.

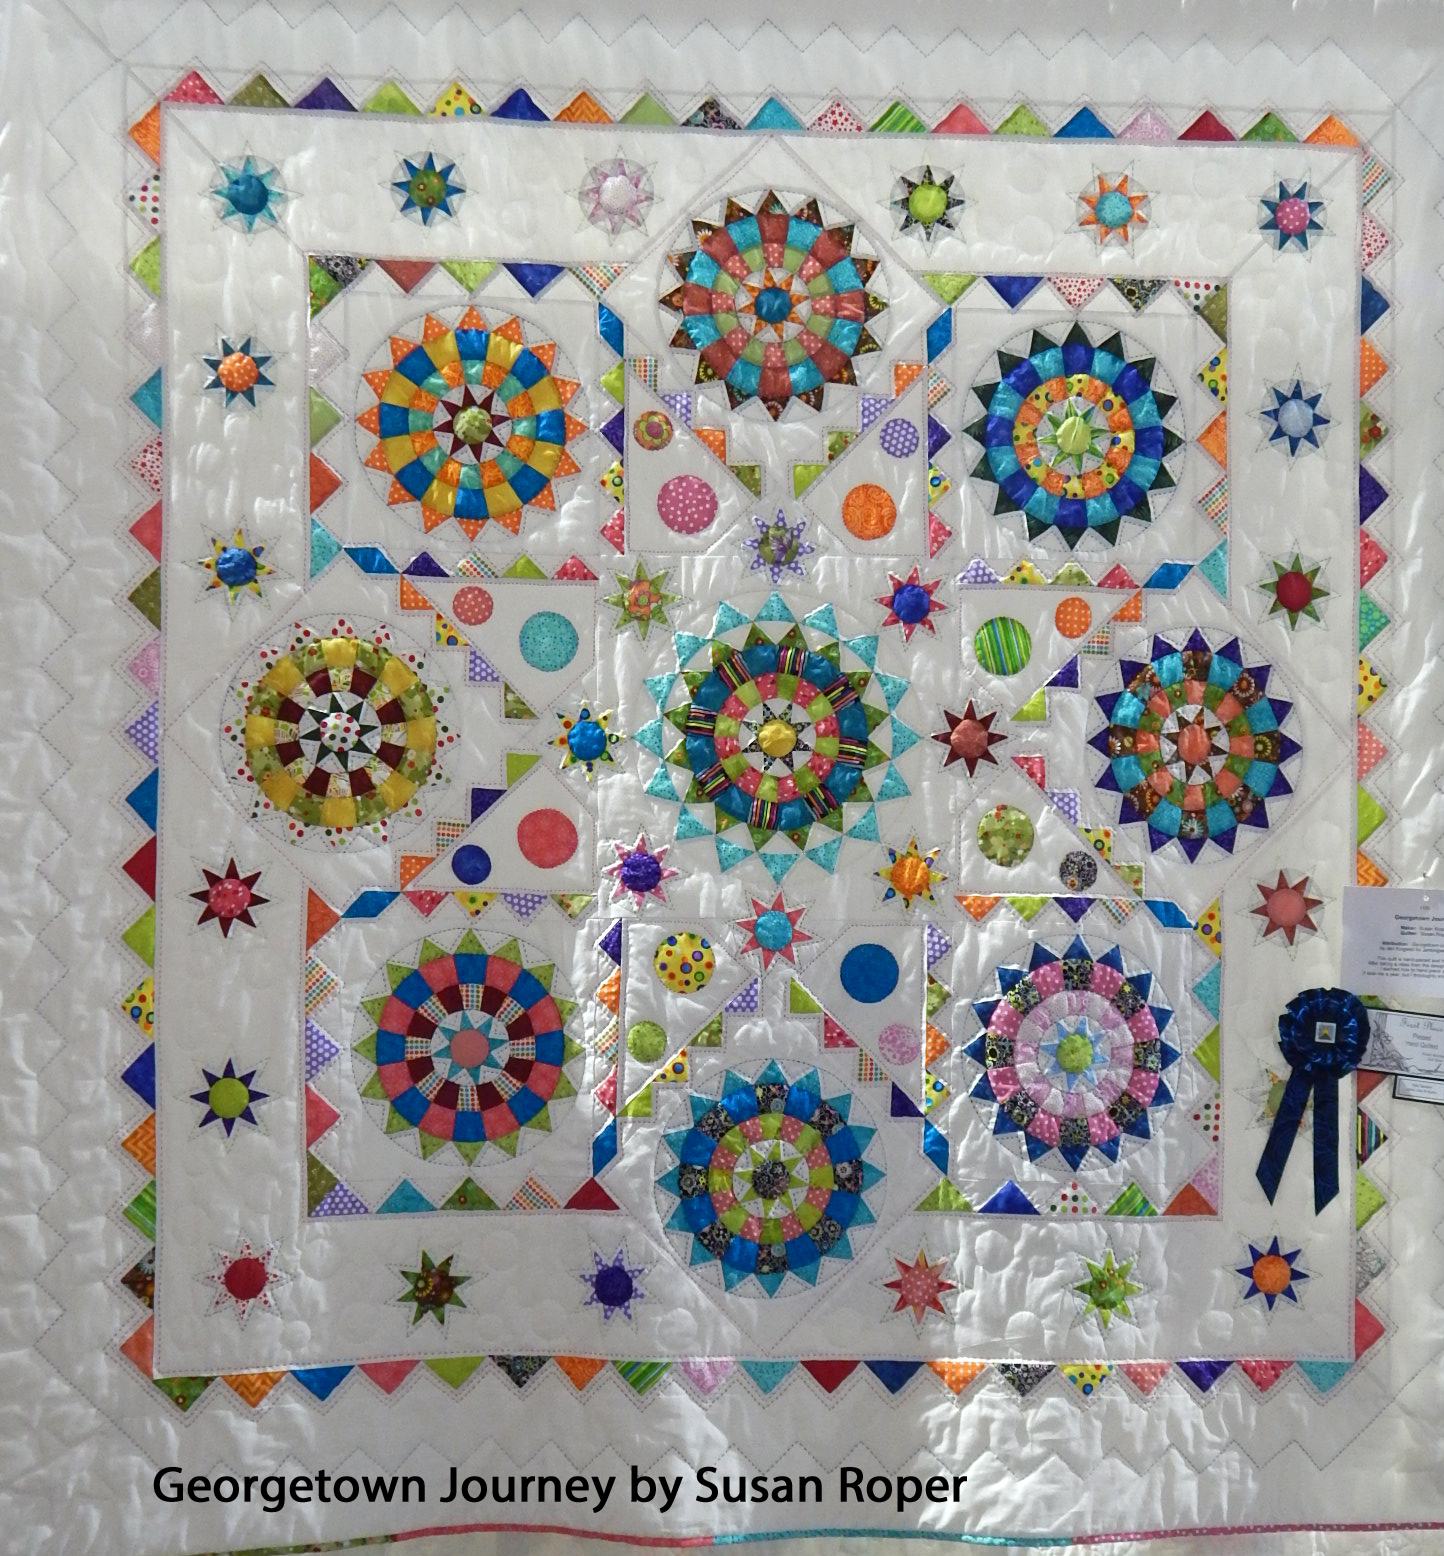
Judgment of Osiris by Georgia Spalding Pierce
This last quilt is bed size, though not especially traditional. So where were the traditional quilts?
There were a few beautifully done whole cloth quilts, but otherwise I though even the bed-sized quilts often showed the influence of the modern aesthetic. I know very well that there are many fine traditional quilters still working, but I suspect they have given up on AQS shows. What do you think? Do you ever enter AQS shows?
Save


 Now I have 420 strips, enough to make my 42 blocks (finishing 10″ each) for a 60″ x 70″ quilt. This will be my next leaders-and-enders project. Here are all the strips laid out ready to go!
  Stay tuned! I think it will be fun to see it come together!