We’ve been doing recyclable wraps for many of our gifts for years now, so I decided it was time for the gift cards to have their own recyclable presentation case as well. Here’s the first one. I am a Kraft-Tex Ambassador, so I cut this from one of the free rolls of Kraft-Tex the folks at C&T sent to me for use in projects for my blog.
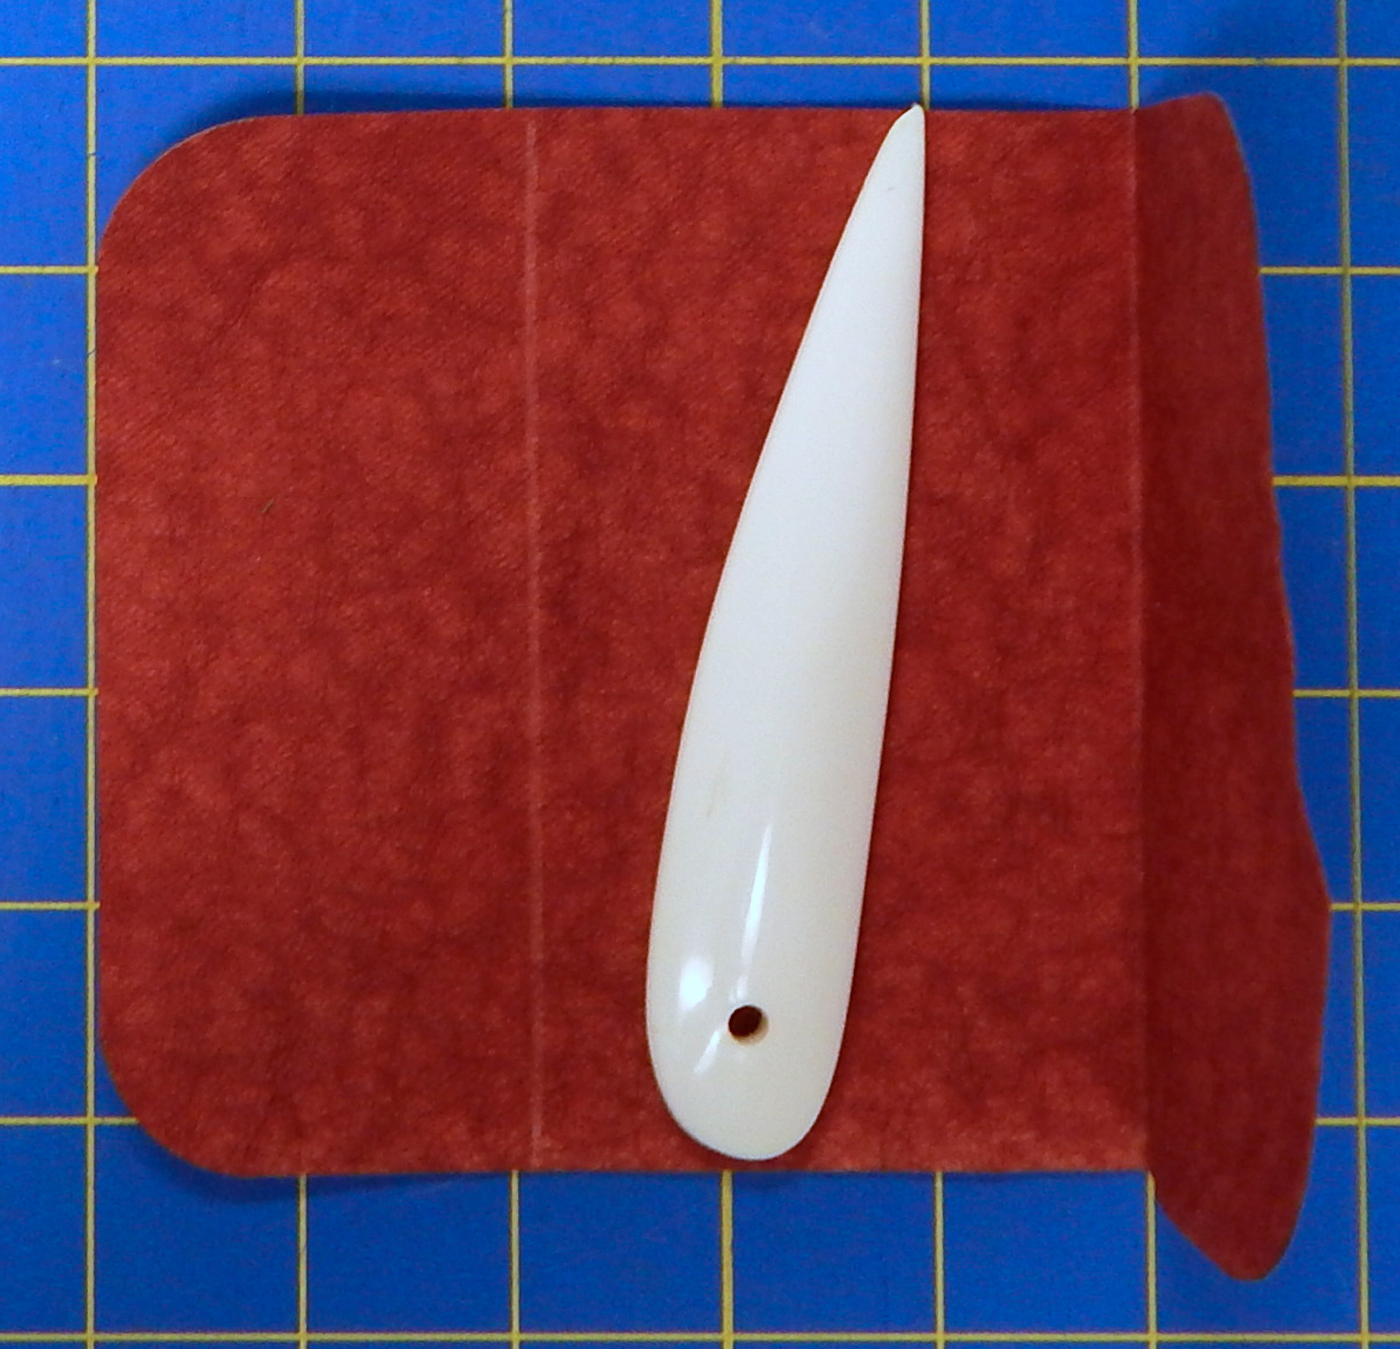
I took out a gift card and checked the size, then made a paper pattern 5″ x 7.5″. I used a spool to round the corners and tested where I wanted the pocket to fold up and the flap to fold down.
I then cut a 5″ x 7.5″ rectangle from some yummy pre-washed Kraft-Tex. (The color is Madeira.) This is the first time I’ve used the Kraft-Tex that comes pre-washed, and it has a very pleasing visual and tactile texture. I cut the Kraft-Tex with my rotary cutter as I would fabric, and it worked well.
I used the same spool and a pencil to mark rounded corners on the Kraft-Tex, then cut the corners with my good paper scissors. Even though it sews like cloth, Kraft-Tex is a paper product, so it’s better to use good quality paper scissors to avoid dulling your fabric scissors.
To be sure the Kraft-Tex would fold evenly, I first scored it with my Hera marker then folded it along the score mark and pressed the fold by running the marker over the outside as well. Note that the sharp point of the marker did make a mark in the material, so be careful. The mark went into the fold, so it was no problem here.
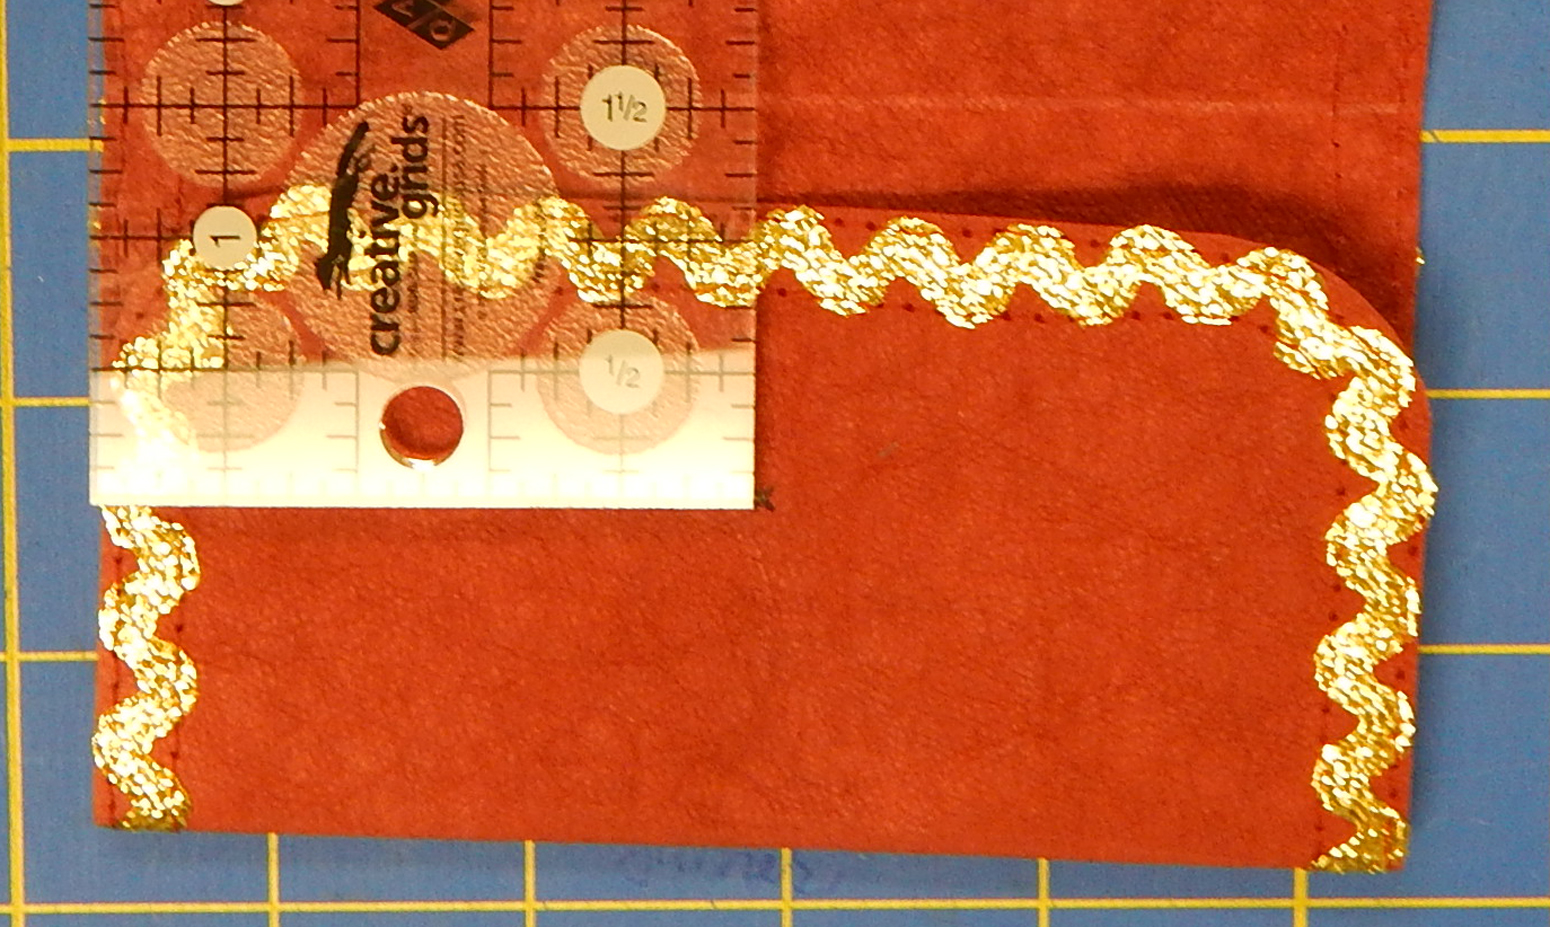
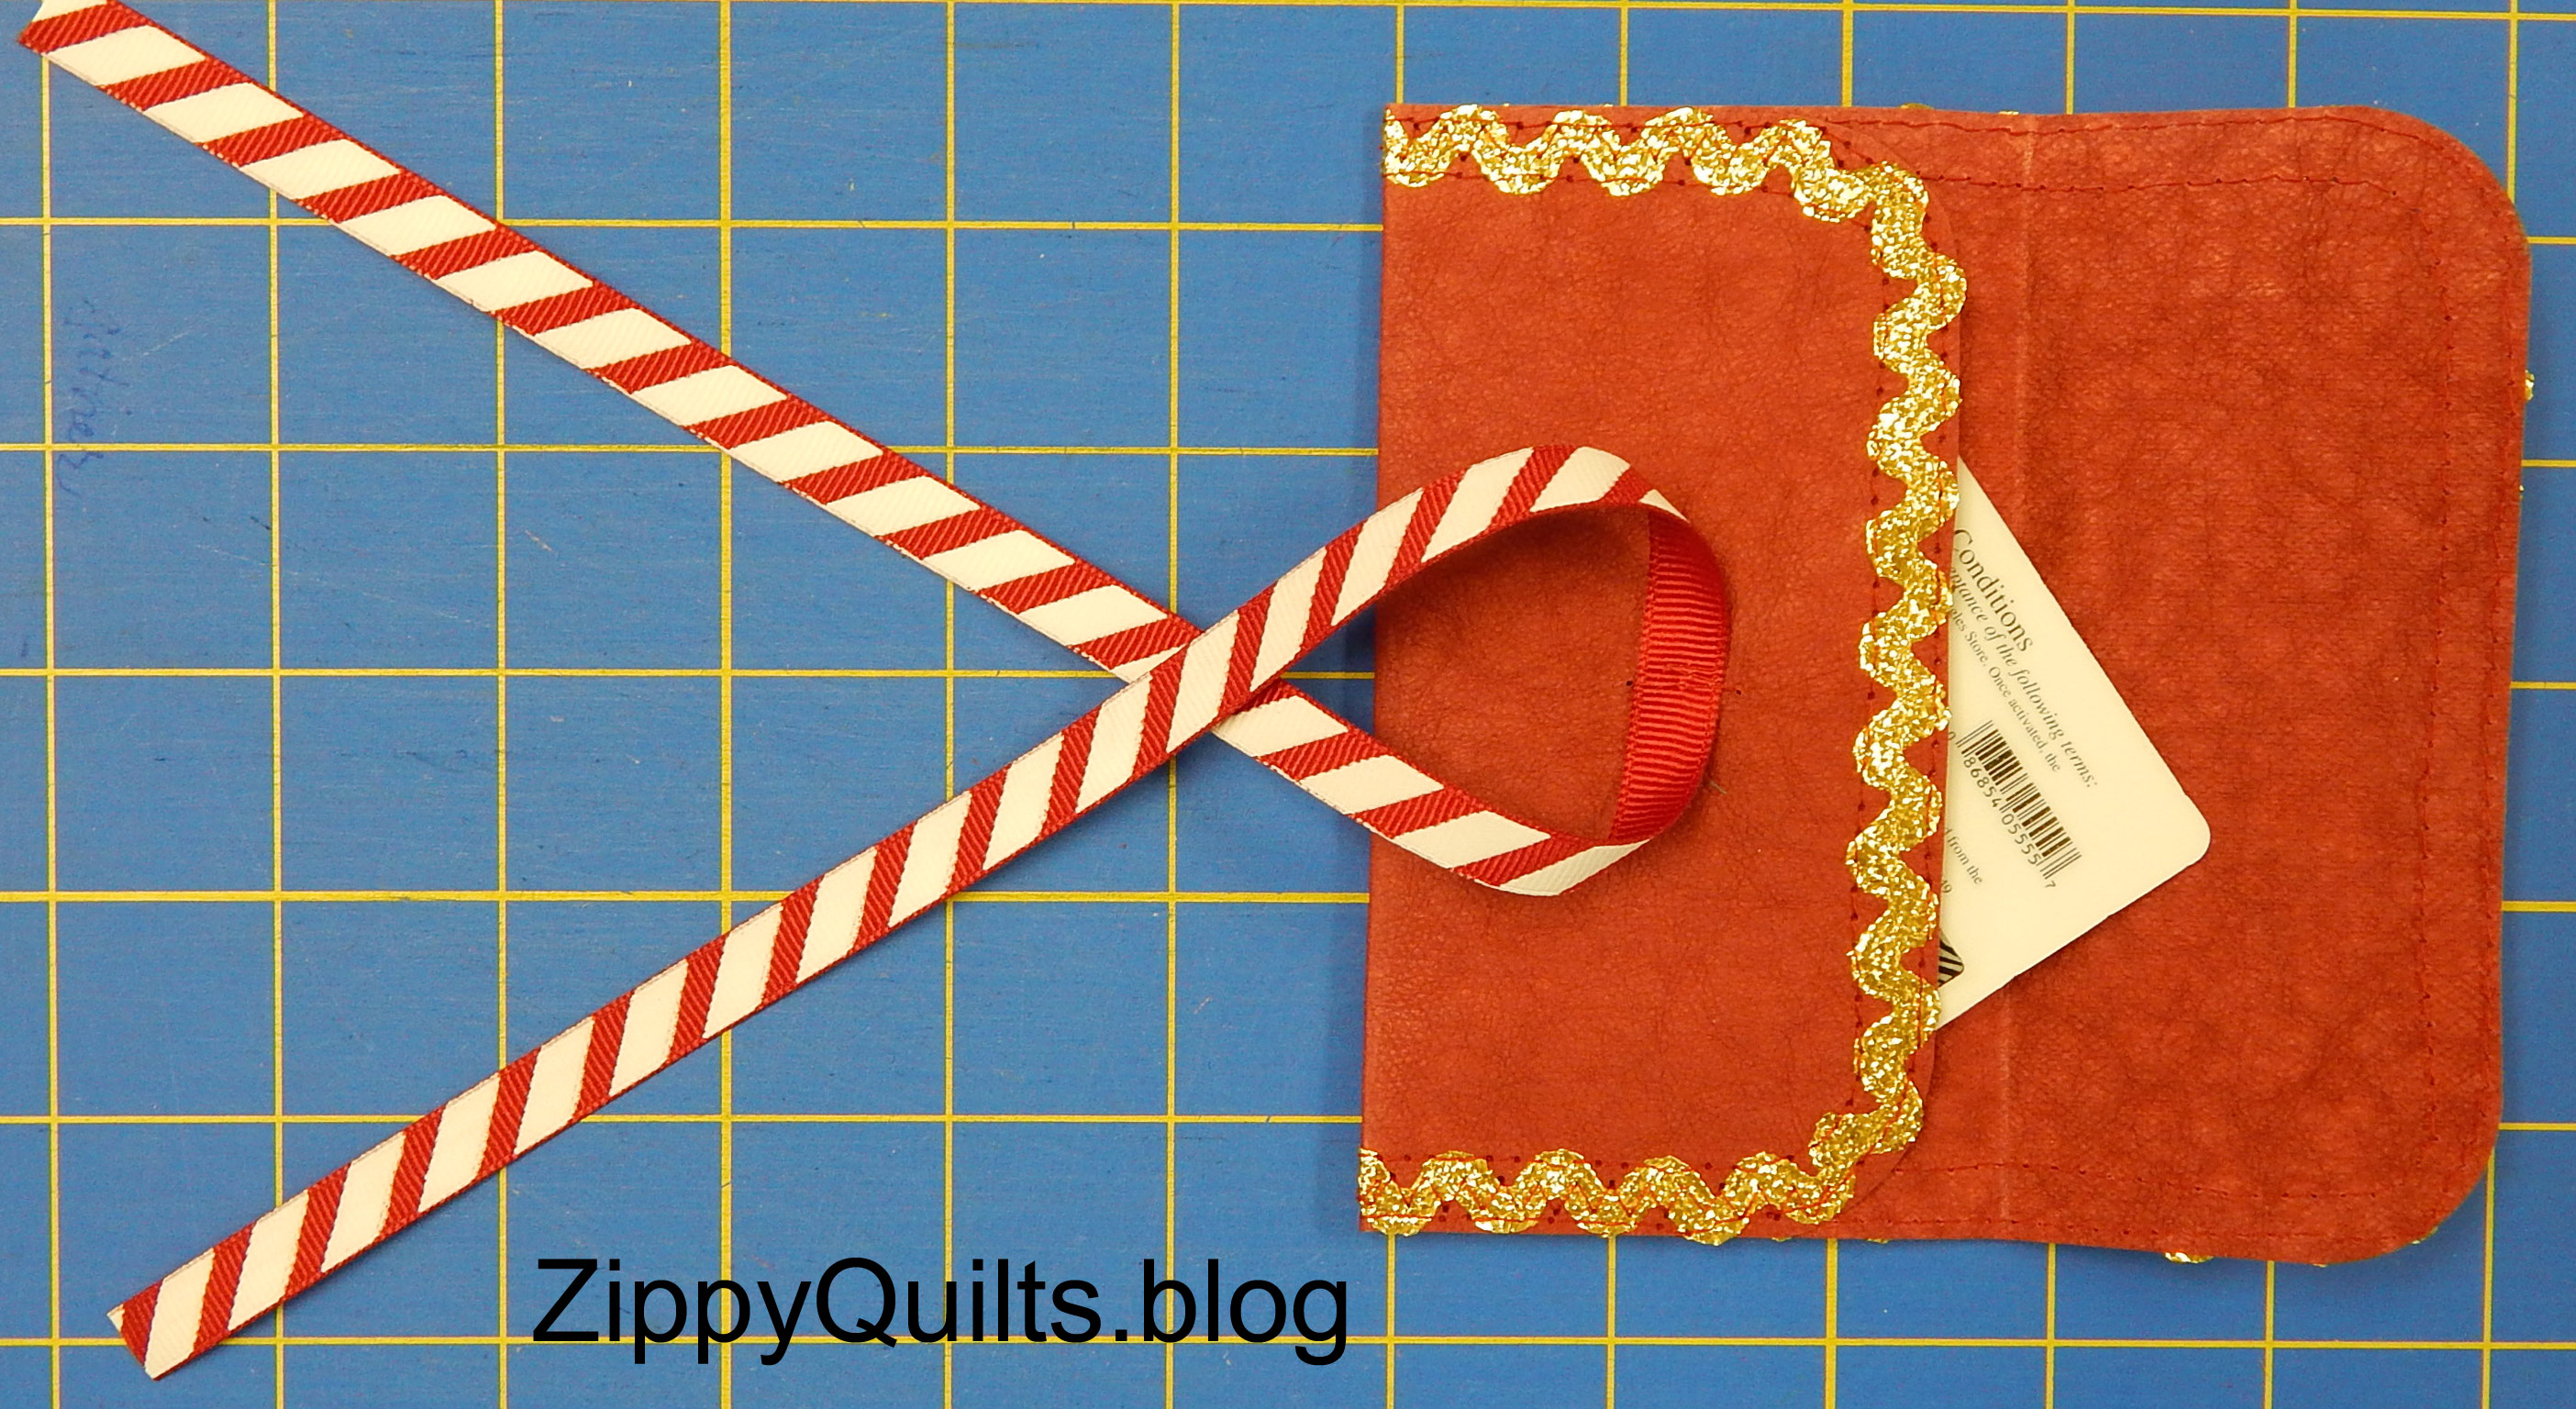
I then sewed this gold metallic rick-rack (from a yard sale!) around the outside edge. To do this, I lengthened the stitch on my machine to 3 (on Bernina) and sewed with a straight stitch along both edges, catching the points of the rick-rack. It’s not a good idea to back-stitch on Kraft-Tex, so I just sewed a couple of stitches over at the finish so the start and finish overlapped. I did treat the ends of the rick-rack, as well as the ends of the ribbon for the tie, with Fray Check, which dries clear and doesn’t show. Here are pictures of both sides.
After the rick-rack was attached, I again folded along the lines I had scored previously and marked a spot on the middle of the lower flap that would form the pocket. So, I made a tiny mark 2.5″ from each side of the piece and 1.5″ below the upper fold as a placement mark for the ribbon.
I cut an 18″ piece of 3/8″ wide ribbon and sewed it to the place where I’d put the dot. To avoid making too many holes in the Kraft-Tex, I sewed it on with a little Z. I then pulled the threads to the back where I tied them together to avoid having to back stitch.
Note that the ribbon has to be attached before the pocket is sewn to the back along the sides! At that point, I checked to be sure the pouch would be the right size for the card when I eventually sewed the pocket up. Yep, so far, so good. 
After attaching the ribbon, I folded the carrier shut along both fold lines and pulled the ribbon out straight to the sides so I could see where to put the holes for the ribbon to come through. (It may help to clip the flaps down with paper clips to hold it shut for this step.) I made a little dot 2″ in from each outer edge so that I could punch holes 1″ apart for the ribbon to come through. I made the holes with an ordinary hole punch.
Then it was time to sew up the sides of the pocket so it would hold the card. I folded up the pocket and zig-zagged over the rick-rack to stitch the pocket down to the back of the carrier.
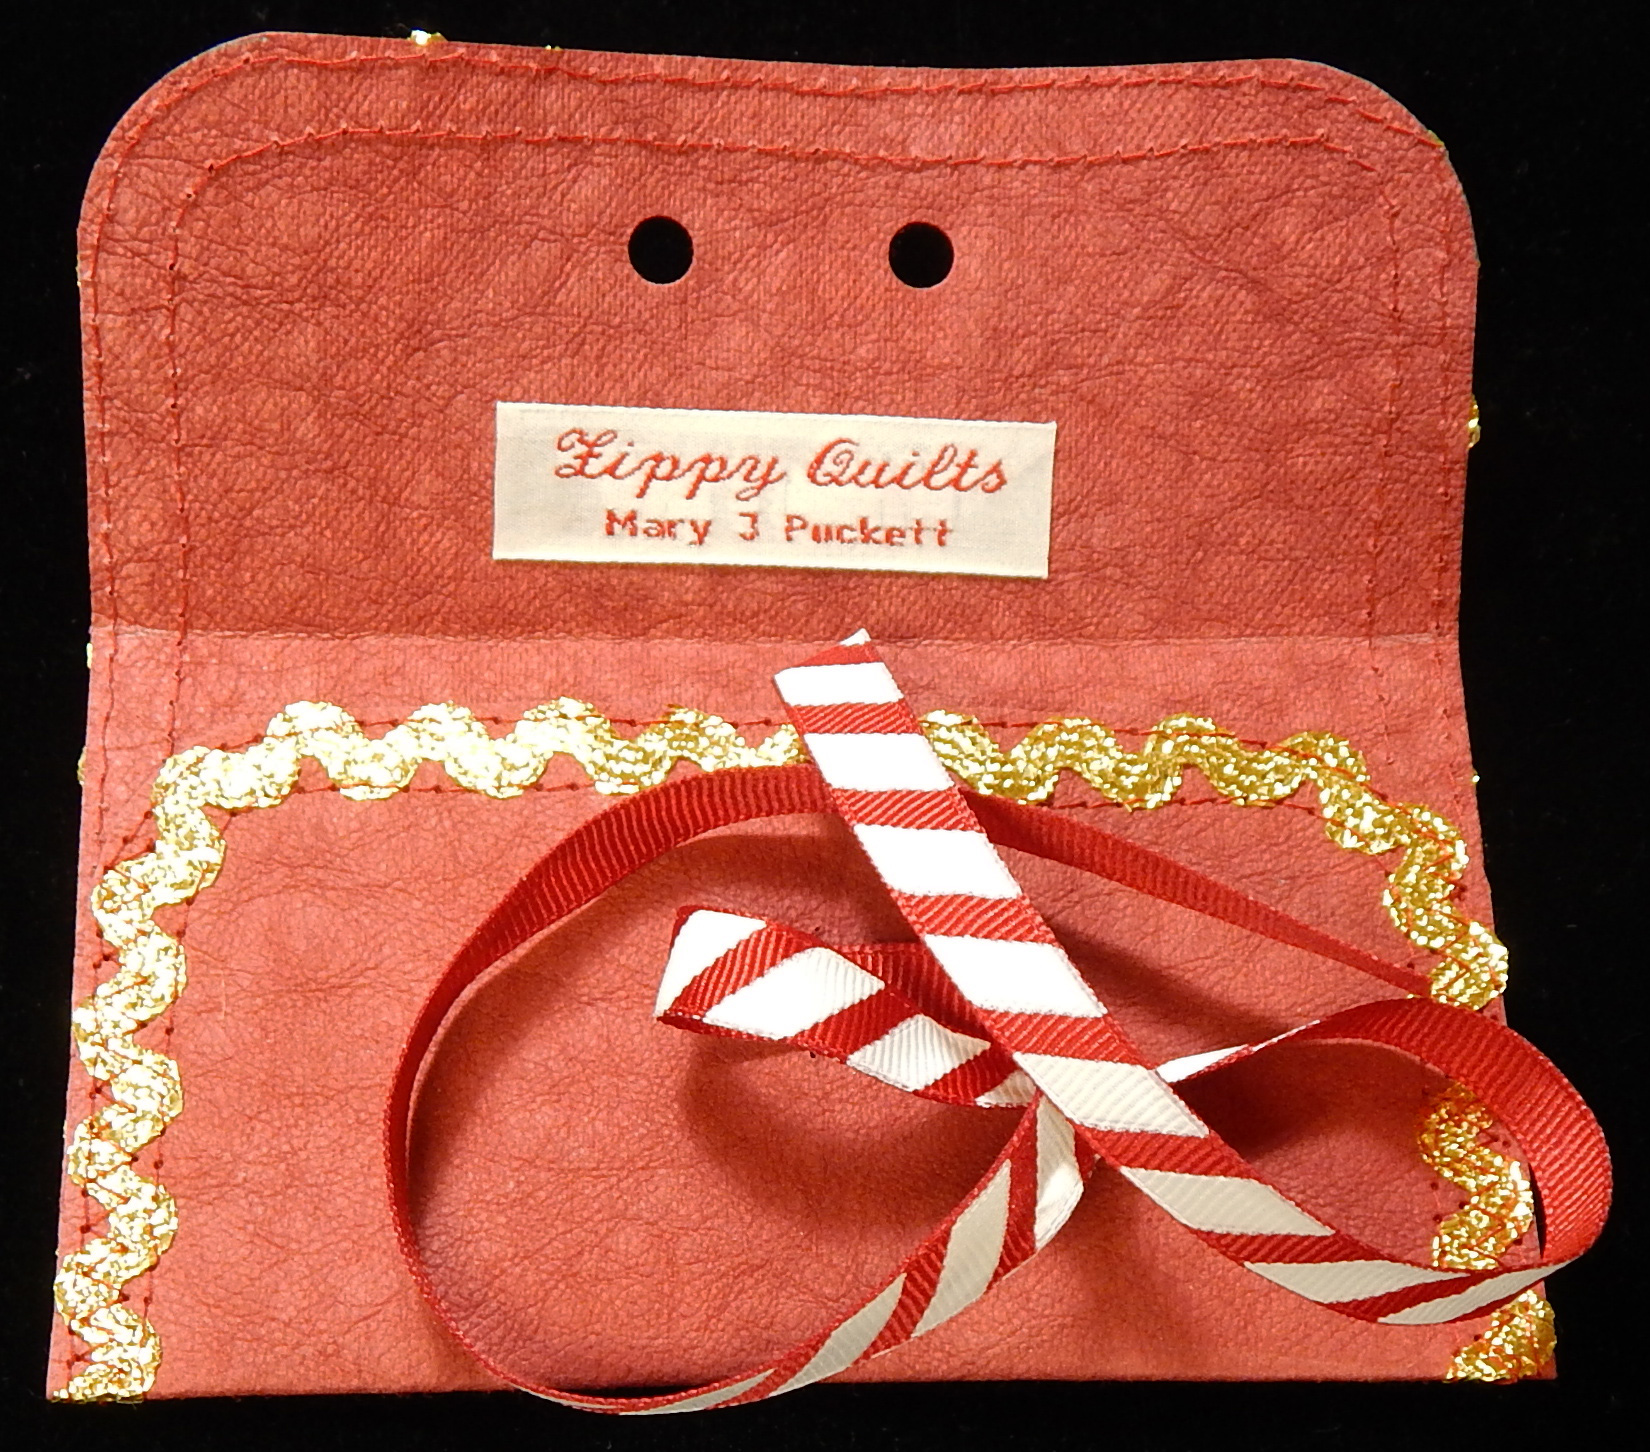
Done! I threaded the ribbon through the holes and tied it in a bow!
And don’t forget to sign your work!