Quilt for Jill

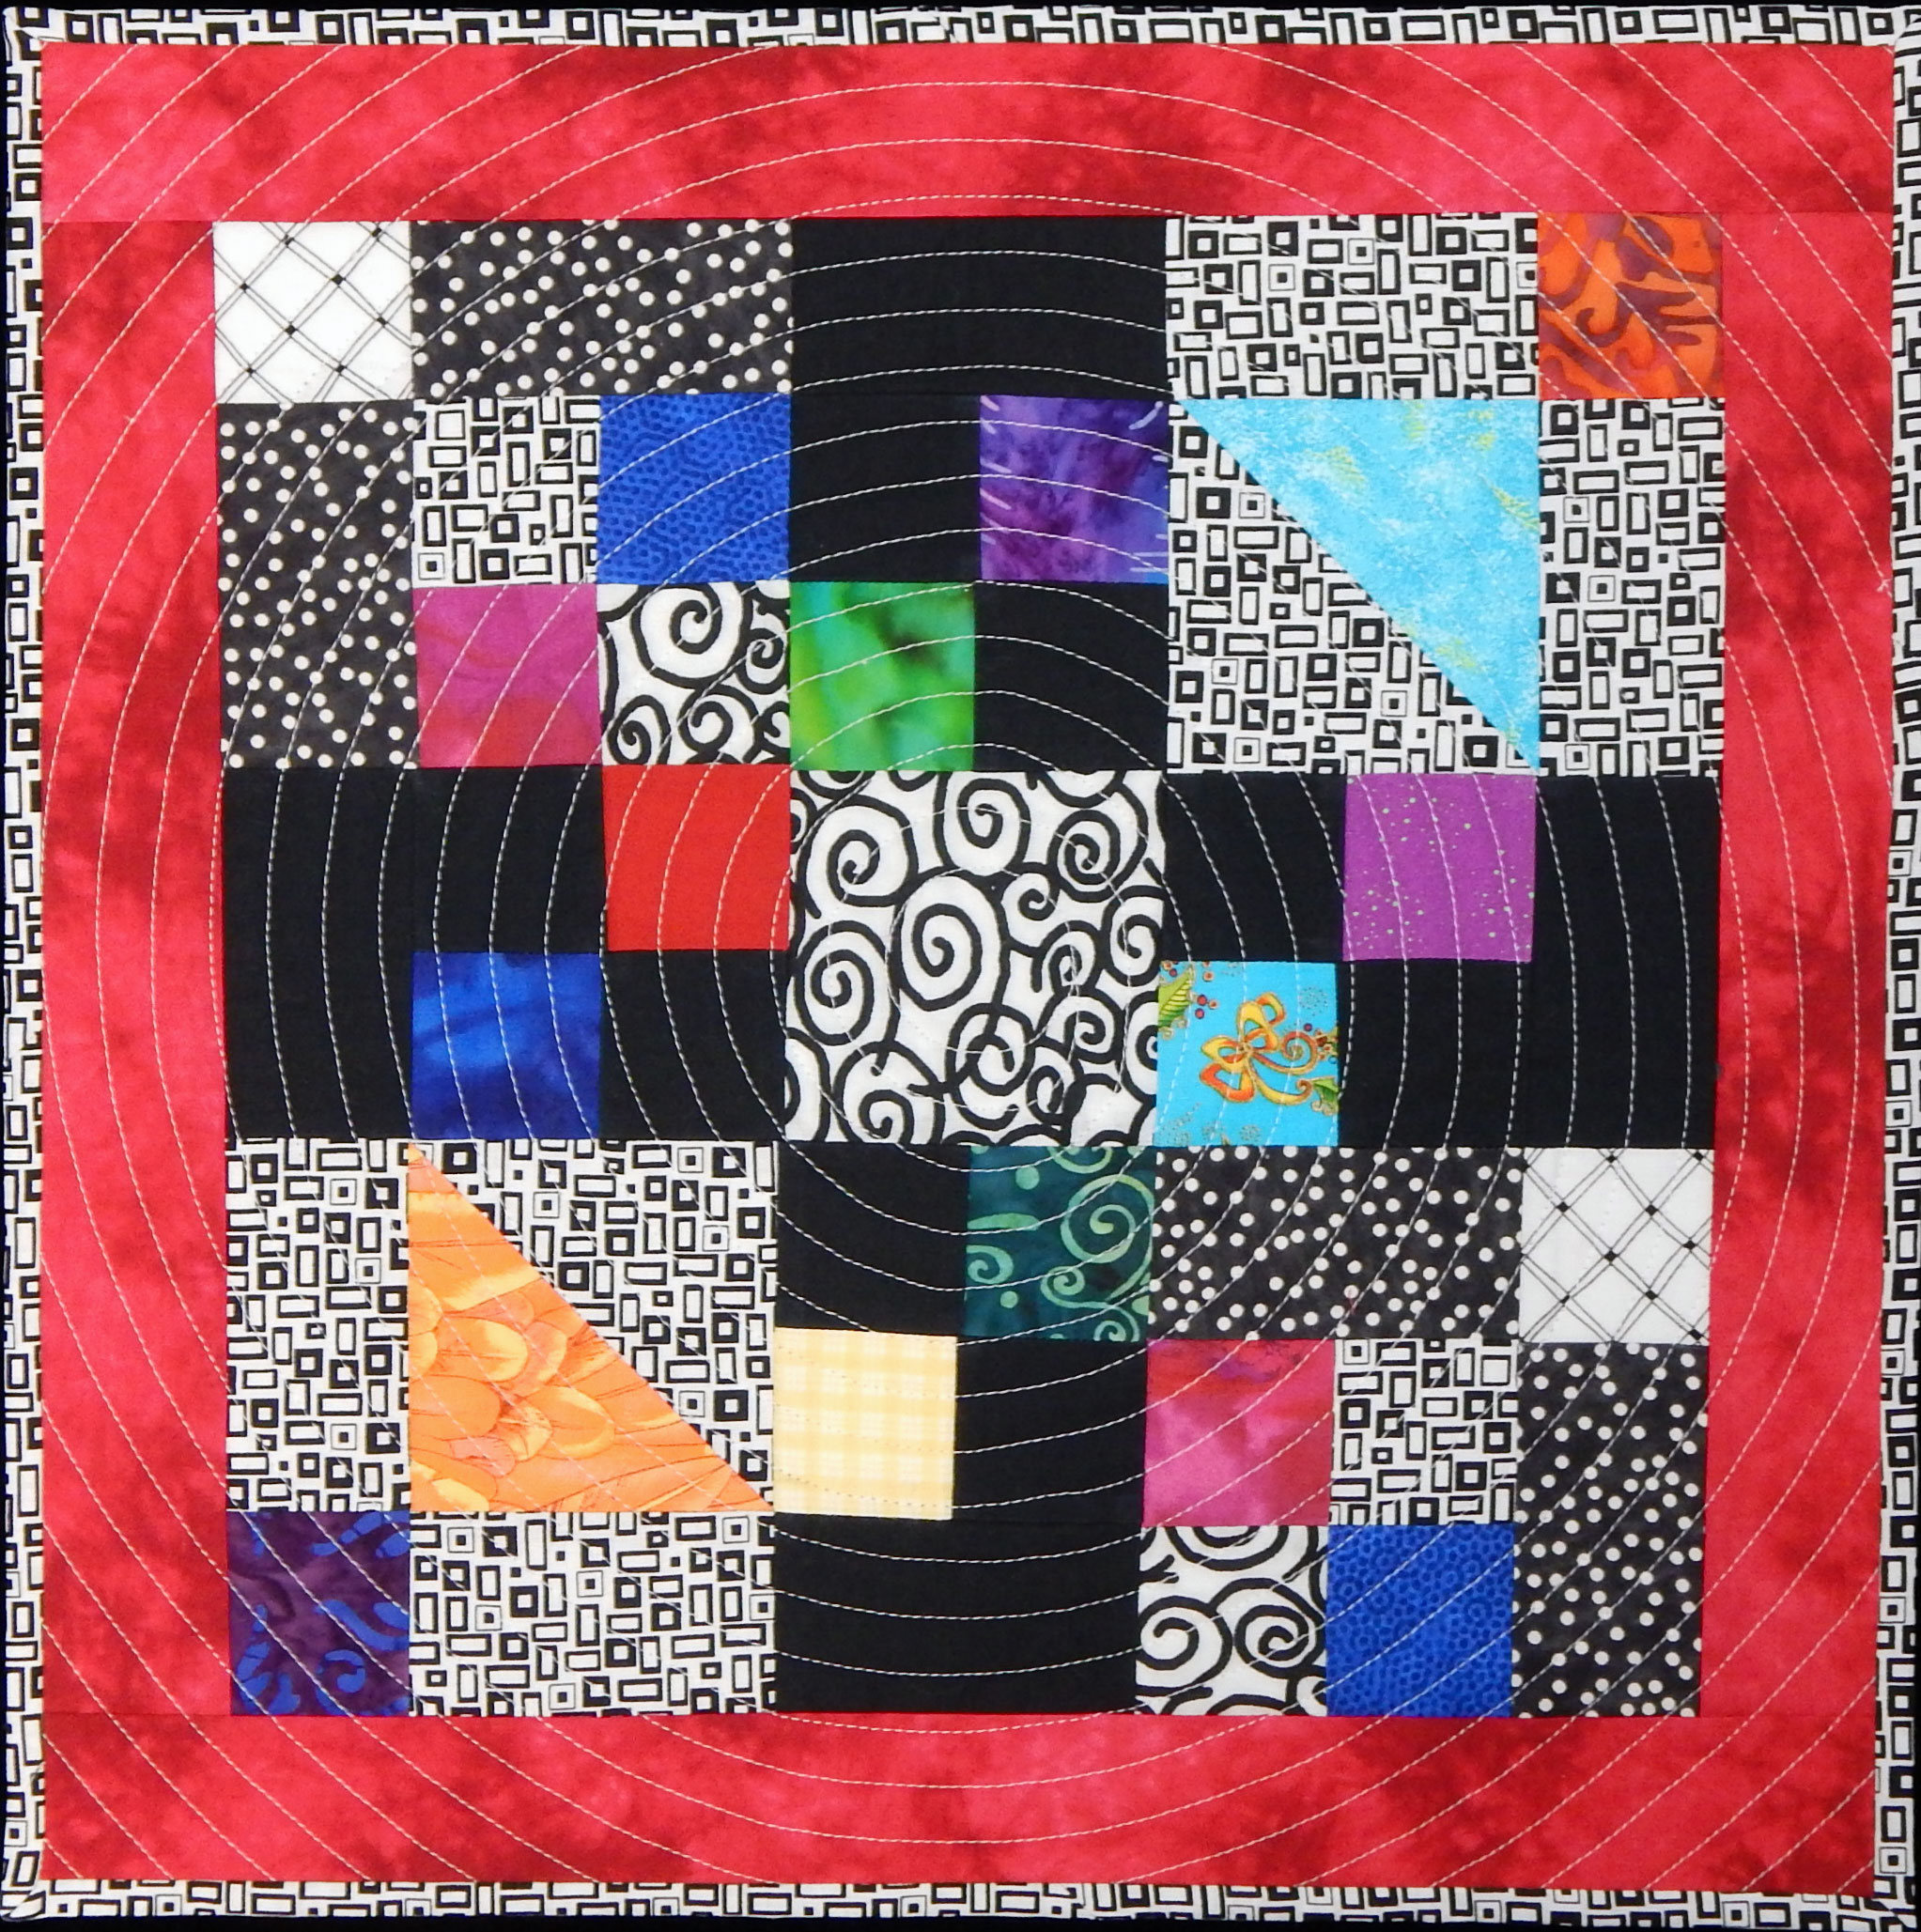
This little quilt was made for a woman who has volunteered at our clinic for years, providing physical therapy services to many of our patients who have hard physical jobs. She has accepted a position at another university and will be leaving us next month.orphan block quilt

It started out years ago as a single block.  I’m sorry to say I have no idea where the pattern came from.  After making one block I decided it was entirely too tedious to make a series of them for a quilt, so it went in the orphan block pile.  When I was asked for a quilt block to give to Jill, this one immediately came to mind.mini quilt

I added a border and was lucky enough to have EXACTLY enough fabric left from one of the prints to make the binding.  I used a grid-print backing so it will be easy for people to sign on the back.  The quilting in a spiral did slightly distort the overall quilt into a shallow bowl shape, but that steamed right out before I put on the binding.

Quilt Stats

Name:  for Jill

Size: 15” x 15”

Materials:  Quilting cottons

 Quilter’s Dream Request Loft cotton batting

 Superior So Fine thread used for piecing and quilting

Quilted by: me

Block designer unknown–please contact me if you know so I can give credit

A Few Pictures…

…from a recent very productive quilt retreat!

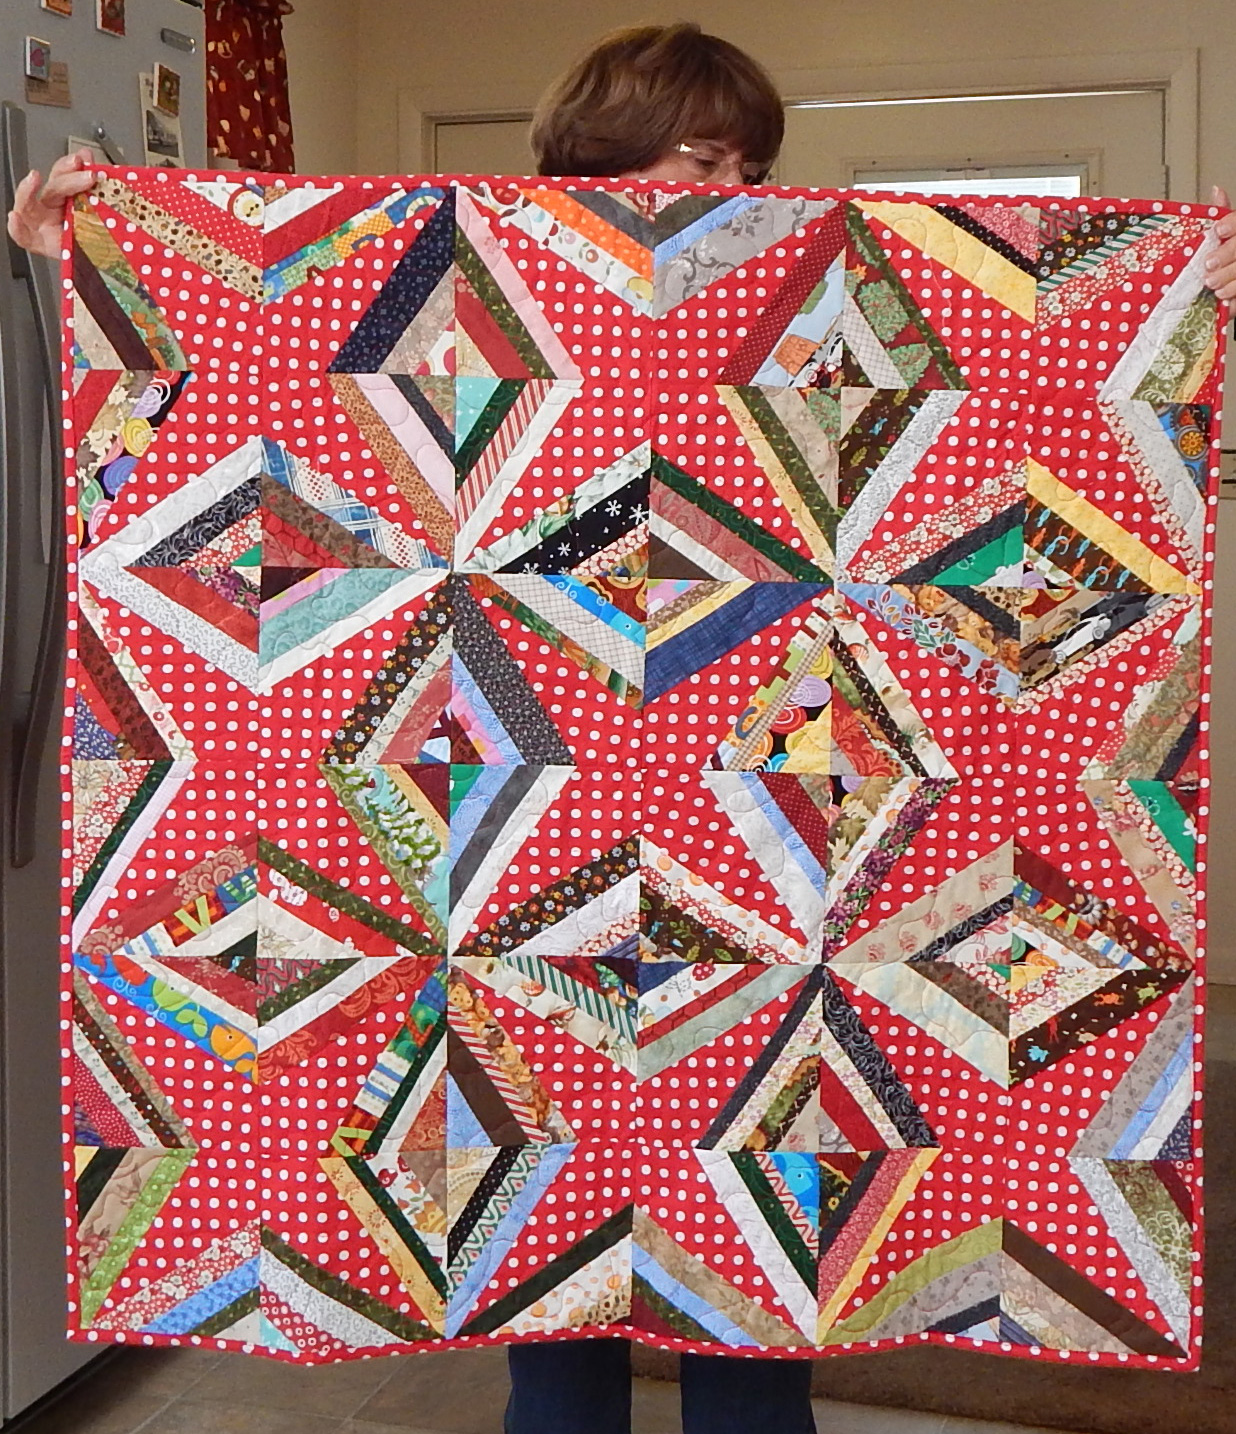
This string quilt by Rena was a very successful design, I thought:string quilt

Here’s the back of the string quilt, and she also made this cute Halloween quilt top:

Mary made a string quilt, too, this one all in purple:string quilt

And Jerri finished a large Bonnie Hunter quilt with a zillion pieces:Bonnie Hunter quilt

I worked on half rectangle triangles, which turned out to be a lot more work than half square triangles:Half rectangle triangles

And a good time was had by all!

What have you been up to?

Blue Ridge

My modern guild is having a challenge to produce quilts for display when the traditional guild has its next show in the fall.  The guidelines are: no more than 36″ on any side, and using some Riley Blake solids whose colors were extracted from a landscape photo chosen by the guild.  The quilts aren’t due for several months yet, but I had a brainstorm and produced mine already.  Here we go:

art quilt

The quilt is faced rather than bound

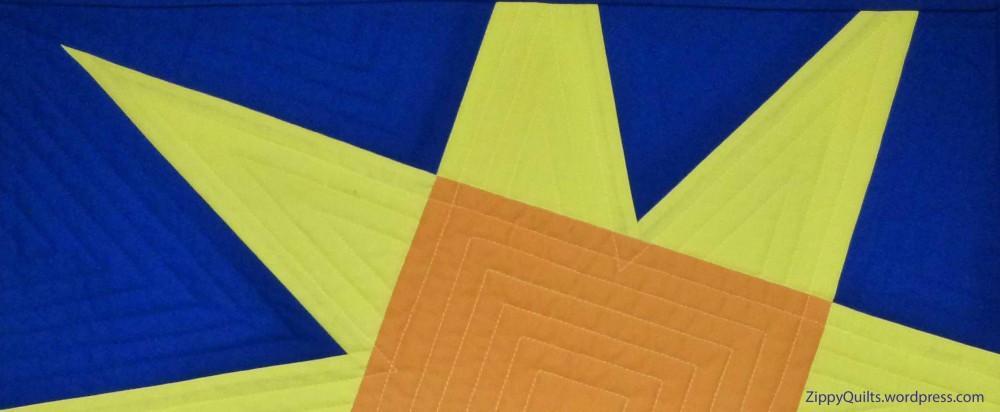
And here is a detail.  In case you haven’t caught on, this is the one that was stained by basting spray.  However, that came out just fine with dry cleaning.art quilt

Name: Blue Ridge

March 2018

Finished size: 30″ x 17″

Fabrics: Riley Blake solids

Quilted by: me

Fun with Rickrack

Or ricrac, or rick rack, whatever. I found a lot of spellings when I was trying to decide!

This fun way to piece curves was part of a class I taught this past weekend, and it was so cute in the blocks the students made that I just had to do a tutorial.

We were piecing quarter circles as part of my quilt YOW, which you’ve already seen:

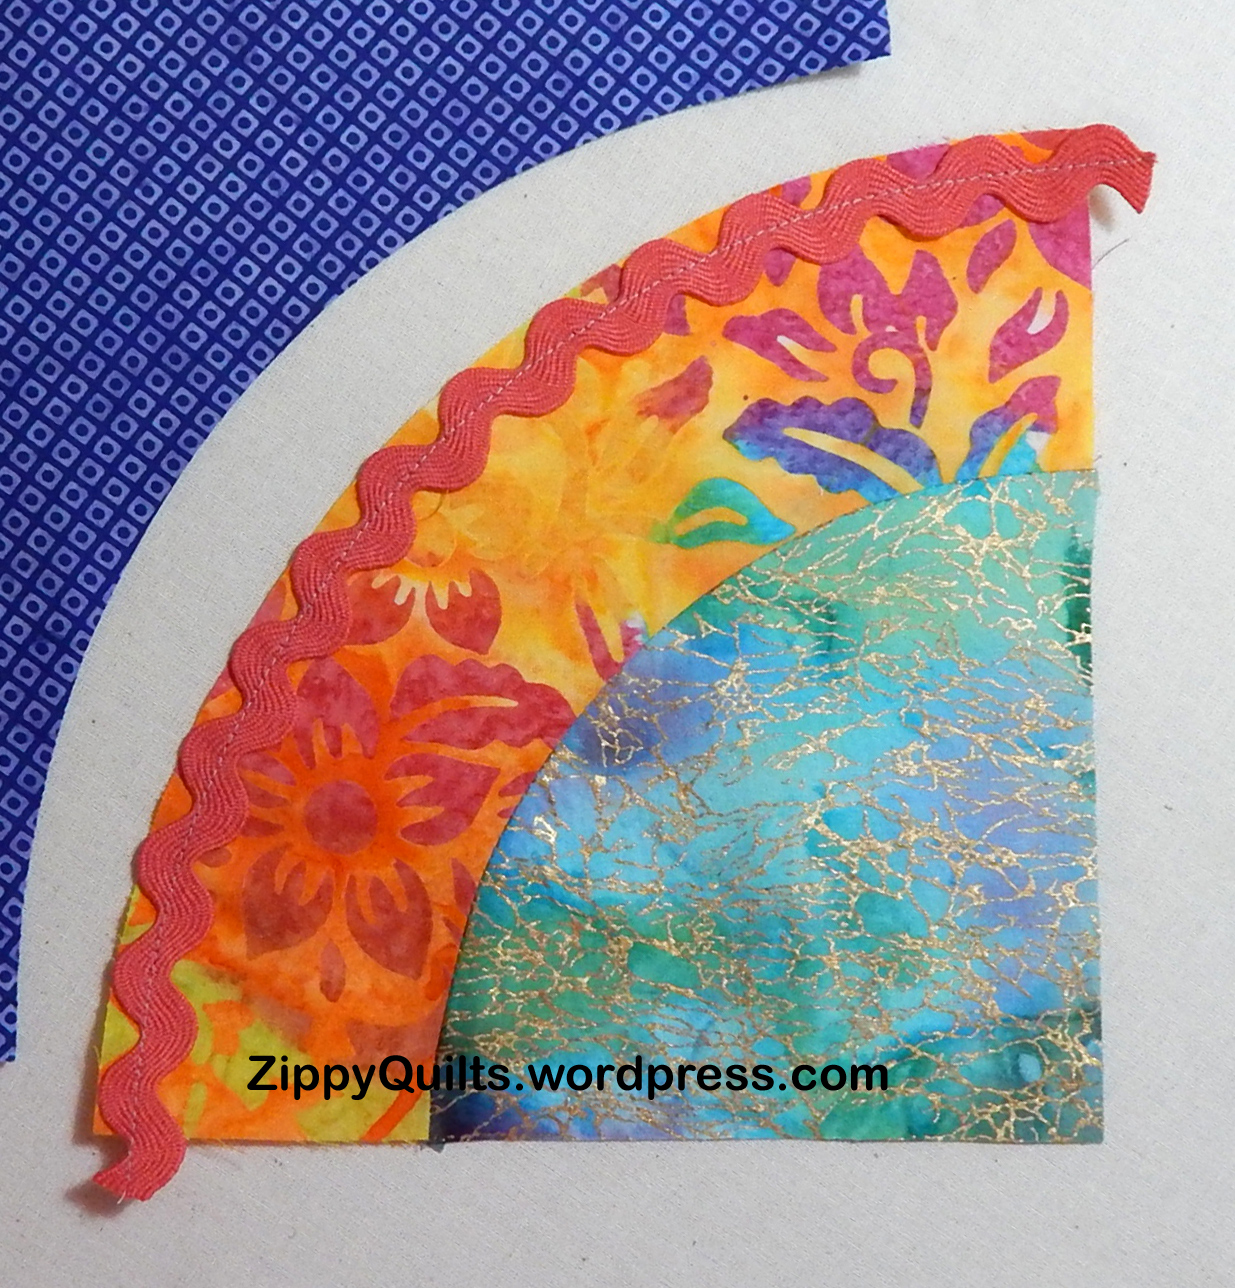
So here is a partially assembled block with one curved seam left to go:curved piecing tutorial

Select rickrack and lay it along the edge of the convex piece.  Probably would work with the concave piece, too, but I haven’t tried that:rickrack curved piecingSew the rickrack down with the usual 1/4 inch seam

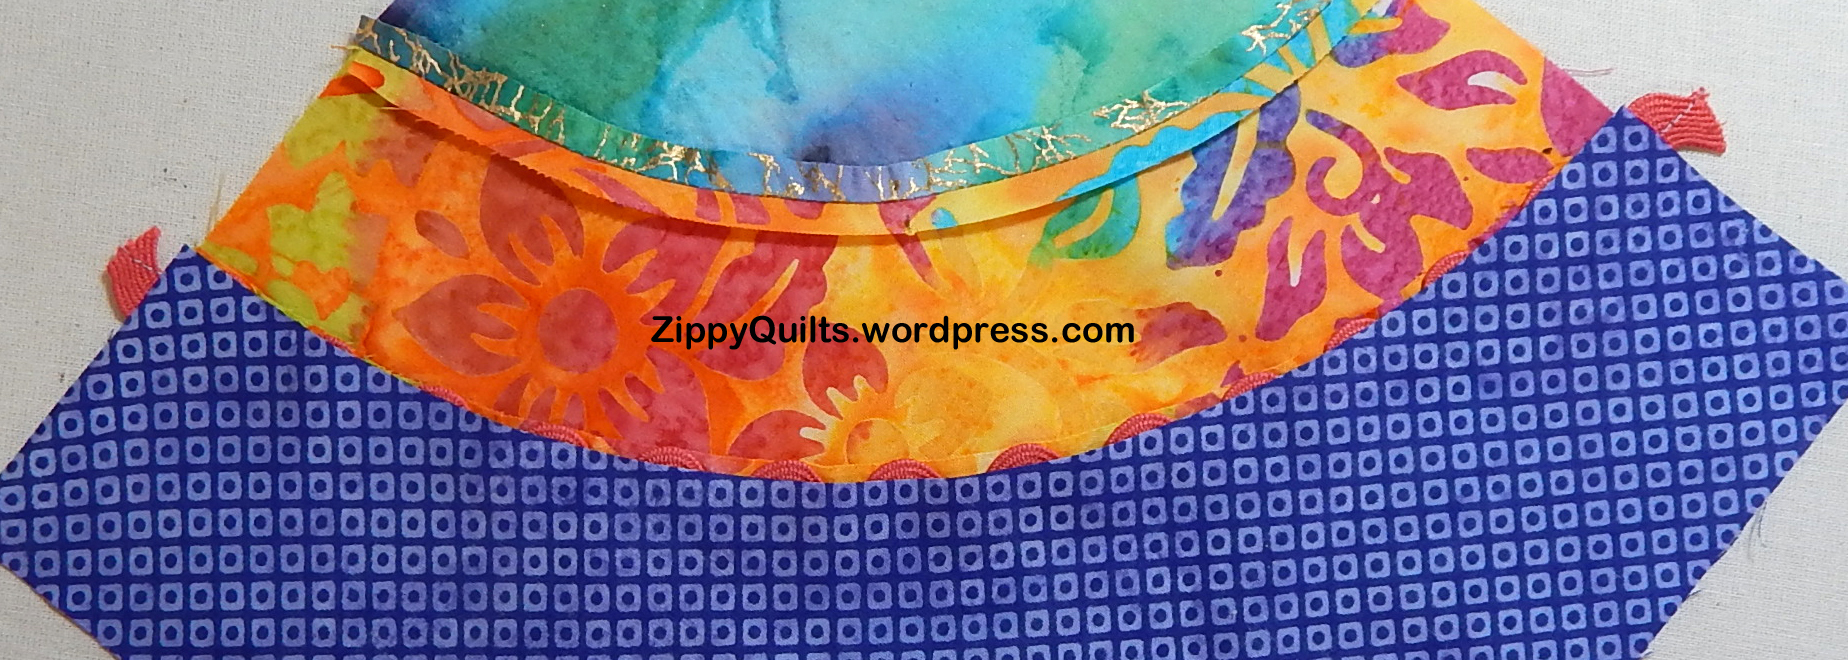
Now turn the raw edge and attached rickrack to the back along the 1/4 inch seam and press.  Here’s the front:tutorial use rickrack in quilts

And here’s the back:curved piecing tutorial

Lay the convex piece on top of the concave piece and line up the edges.

Flip over and try to line up the raw edges all along the seam on the back.applique curved blocks

Applique the convex piece to the concave piece by stitching in the ditch.  I used silver metallic thread just for fun, but matching thread works well, of course.  And here’s the finished block.applicurve

Sort of modern-retro.  Go try it!

Some Fine Discoveries Online

I’m always looking for better ways to quilt, and recently I learned several things online that I think you may like, too.

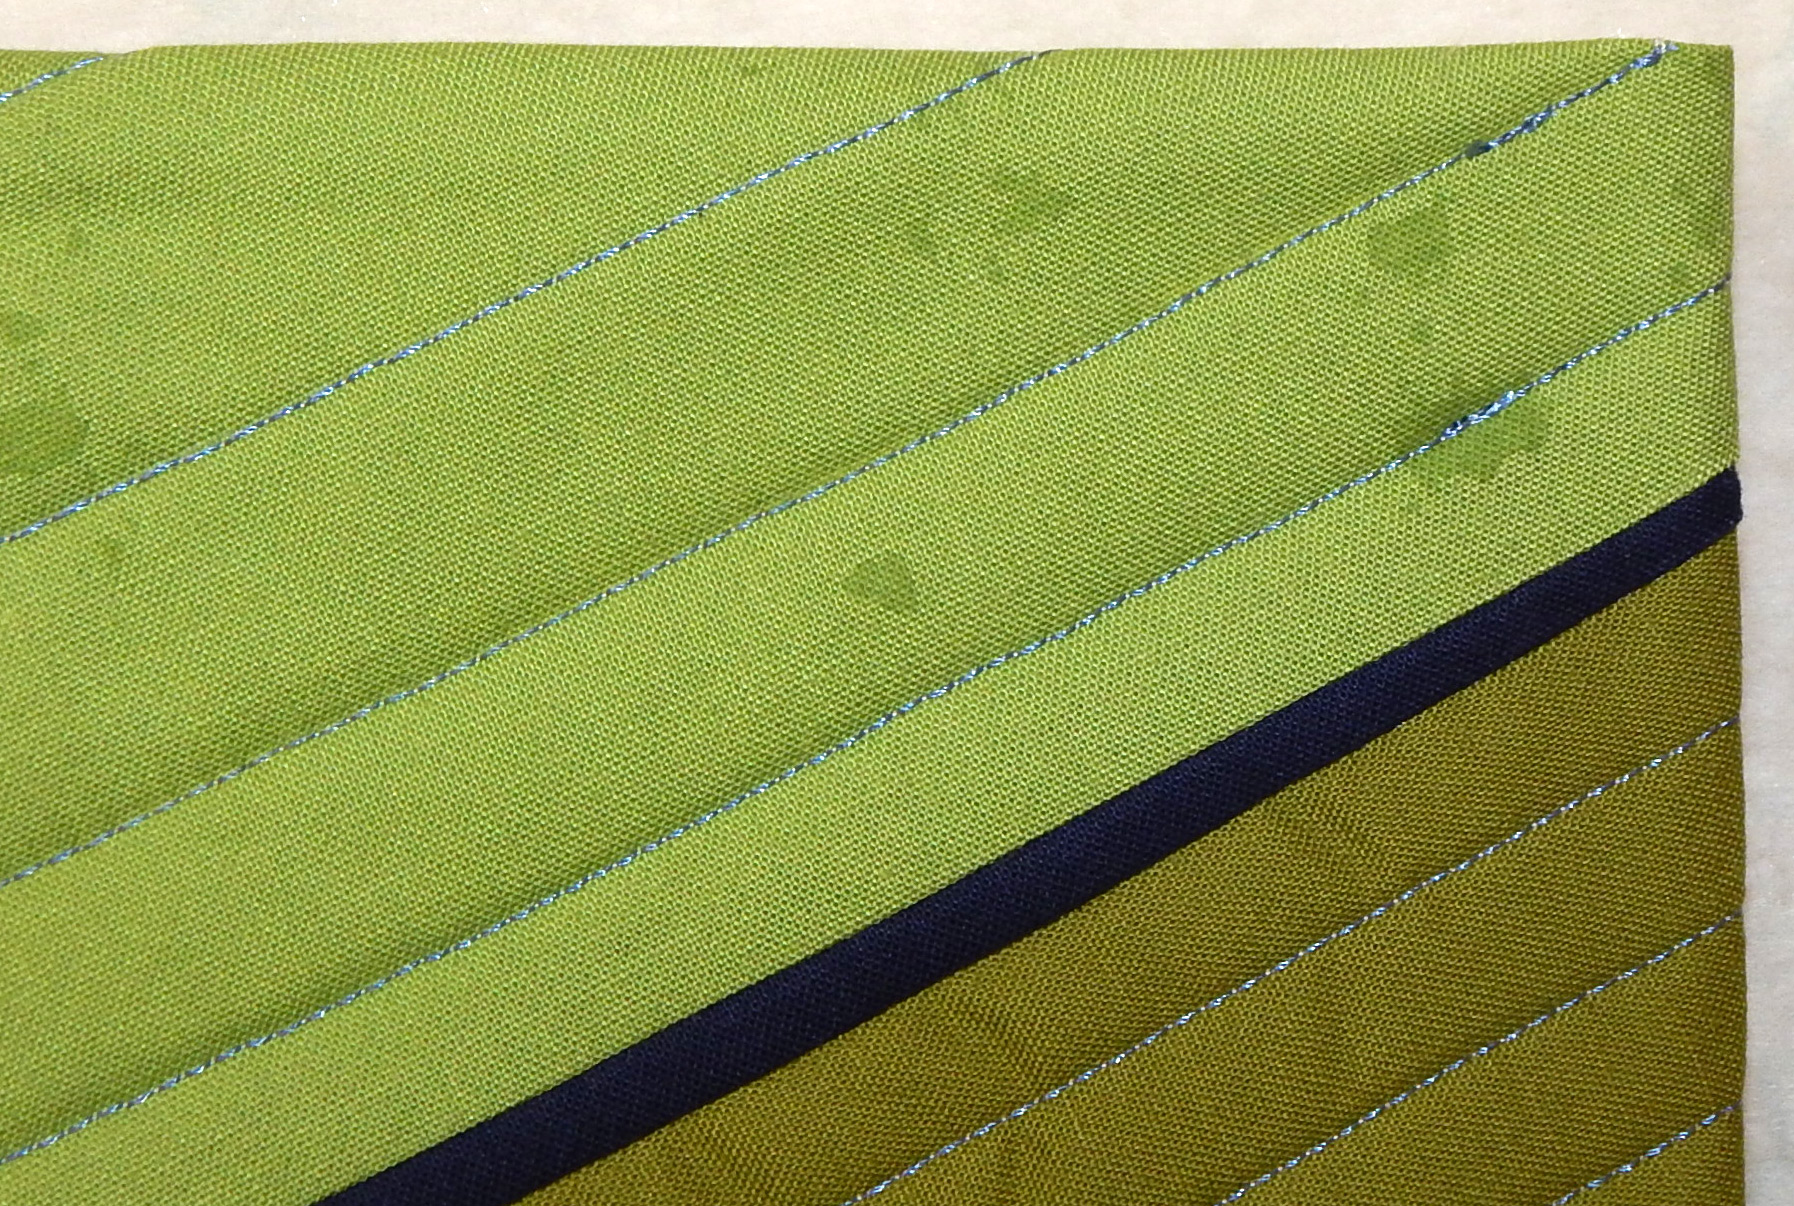
First, I just finished an art quilt that I wanted to face rather than bind.  I’ve faced quilts before with variable success, but I wanted a refresher on just how to do it, so of course I did an internet search.  I found this great tutorial by Terry Aske and followed it.  The quilt came out MUCH better than my previous attempts!  The secret is in NOT sewing around the corner and then trying to turn it.  Here’s one of my corners.

facing a quilt

Look at that nice, sharp corner!

But wait!  Aren’t those spots on my new art quilt?  Why yes, they are!  For the first time in many years of using it, 505 basting spray made spots on the front of my quilt!  UGH!  After failing to find a satisfactory remedy in a web search, I wrote to the manufacturer of 505 and got a prompt reply:  Try Dawn dish liquid, and if that doesn’t work have it dry cleaned.  I’ll let you know…

Sandy and Cindy at Gray Barn Designs mentioned putting scraps in a “starters and enders bowl”.  I call those little scraps “bridges”, but the idea is the same:  we need scraps to sew onto and off of when we chain piece in order to save time and avoid having the machine “eat” the thread when starting a new seam at an edge.  I thought it was a great idea and I’m putting a bowl for such scraps in my studio right now!  No more digging through the trash when I need a scrap to start or end a seam (yes, I know why they call bridges “starters and enders”).

scrap bowl

I made this bowl myself in a previous life, so I especially enjoy having it in my studio

Finally, I ran across this article, by a quilter in Romania, suggesting that quilts be washed and blocked BEFORE they are bound!  I had never heard of this idea, but in a lot of ways it makes sense.  I have not tried this, but if I ever decide to make a show quilt that needs to hang smoothly, I probably will do so.  The only thing I can’t figure out is how/where I would lay it out to block it.  Somebody must have more open floor space than I do, or make smaller quilts!

So I simply must know: Has anyone reading this tried washing and blocking a quilt before binding?  I can see how it might make sense, but eeeek!  The extra work!

So Many Plans!

I’ve been working on a project to be published in Modern Quilts Unlimited in late summer, so there have been no pictures of current sewing lately. However, that is now finished and I’m focusing on several other projects coming right up.

First, I’m going to be teaching a very un-modern quilt at Studio Stitch in Greensboro in May.

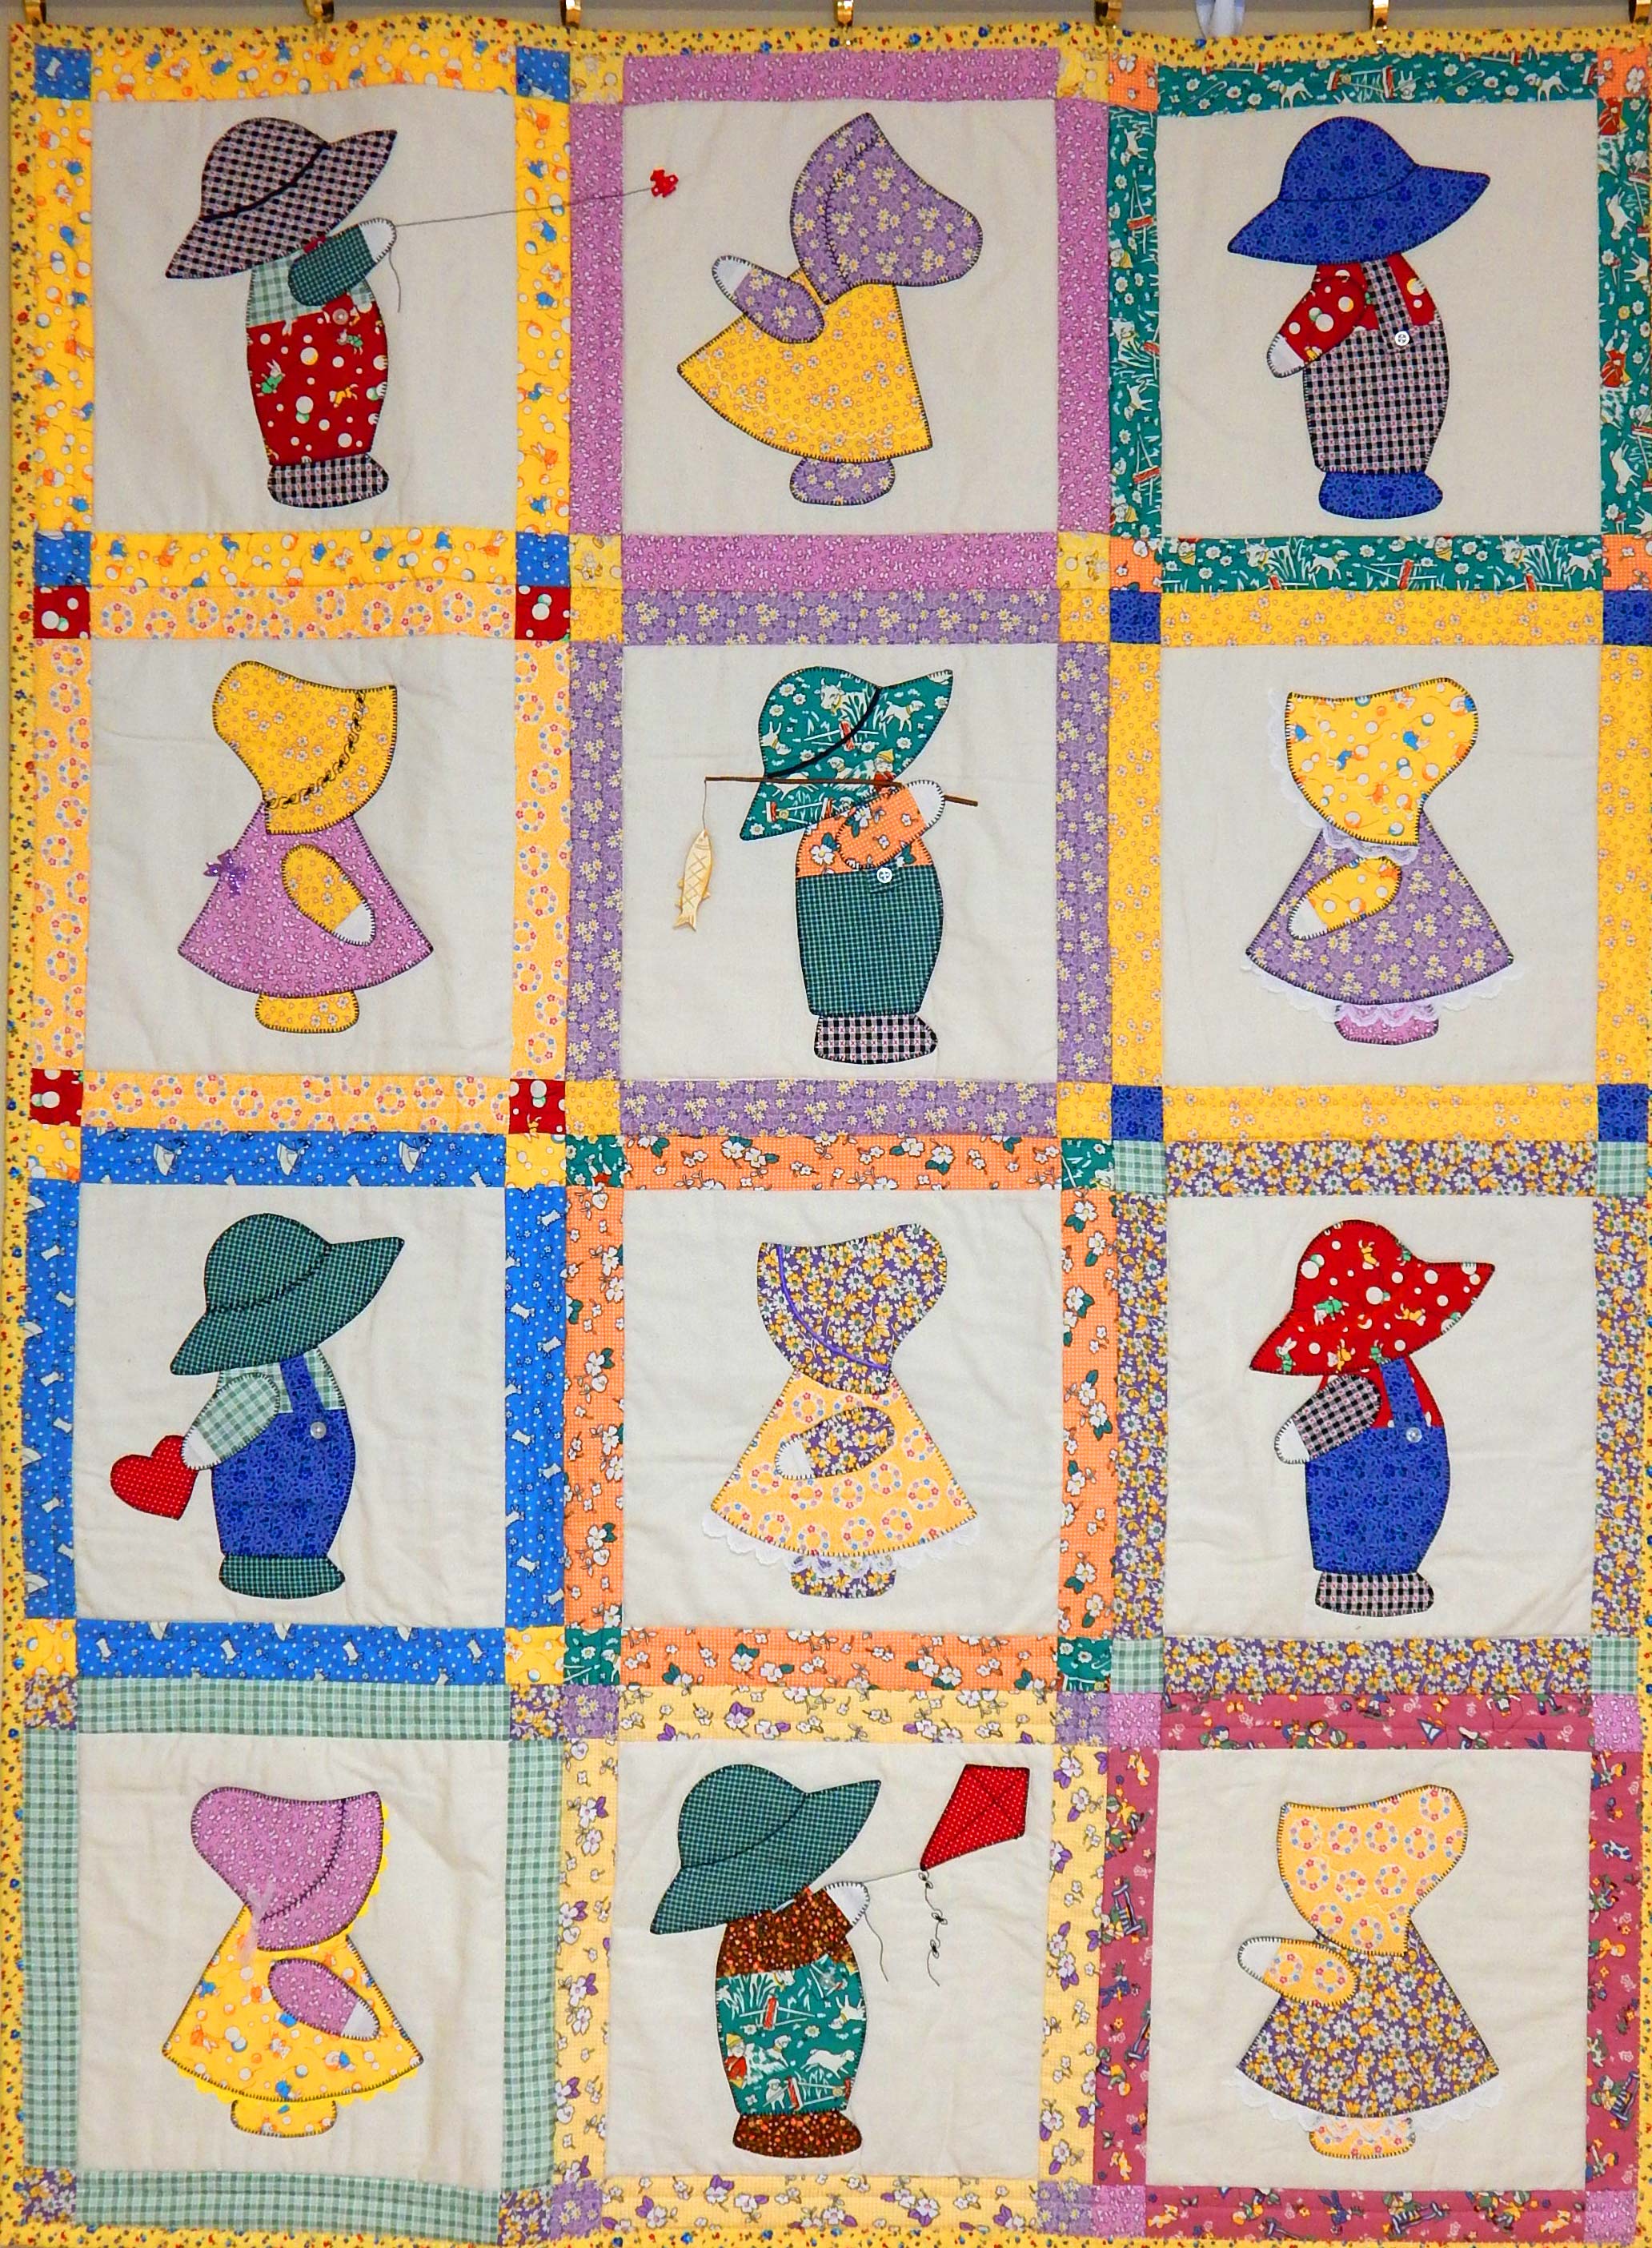
Sunbonnet Sue

Sunbonnet Sue Visits Quilt in a Day

This is an old, old Eleanor Burns version of Sunbonnet Sue but the pattern is still available.  It’s the easiest way I know to do perfect applique!  And it’s fun to add trinkets, like this fish bead hanging from Overall Sam’s fishing rod:

Also, I’ve signed up for Quiltfest.  Luckily, it’s in July when I’ll have some vacation time available again.  I’m going to be making a boxy tote with Carrie Licatovich and a star quilt with Renny Jaeger.  Then I’m signed up for “shibori resist with indigo dying”, taught by Debbir Maddy.  Which reminds me, I haven’t used the fabrics I made in my last dying class…  I always enjoy Quiltfest because it’s just the right size: There are well-known teachers, but not a crush of thousands of participants.  And of course there are sales at Tennessee Quilts, too!  Oops!

Finally, I’ve finished a donation quilt.  I’ve gotten far, far behind on my donation quilts, so those will be floating to the top of the to-do list soon.  Here’s the first one, finally quilted and bound:

donation quilt

The concentric squares are pieced; the other pieces are a print from Michael Miller

Do you have any fun quilt events coming up?


Another Fun Guild Program

This is part of my occasional series on guild programs, with the hope that it will help others who need to come up with program ideas.

Our modern guild has no money to hire speakers, so we are taking turns sharing our talents. One of our members recently volunteered to teach us block printing on fabric, and she furnished all the materials herself!

block printing quilt fabric

Suzanne brought a beautiful print she had made as an example

A few of us had done block printing in the past, but these blocks were much easier to carve. Apparently the block medium is now made of soft rubber rather than linoleum–a big improvement for the hands and wrists.

block printing

Some people carved abstract designs, using the whole block

Everyone got a square of rubber to carve. Some people carved a design on the square using the entire thing. Some carved an object and then cut out around the object so that it could be glued to a board backing for easier handling.

It was fun to see what everyone did.


Then we were given ink and encouraged to mix the colors, either to produce a variegated print or to produce a secondary color.

The prints were amazing and fun.

I didn’t get a picture of the block used for these fish, but they were very successful.

block printing fabricOur challenge for next month is to use the printed fabric in a project.  Can’t wait to see what everyone does!

Inspiration from Nature

One of my online friends, Chela, reminded me that nature is a great inspiration for quilts (as well as other art).  So here are some of my favorite nature pix.

I love plants and flowers of (almost) all kinds, so they are a frequent subject:

inspiration for quilts

Can you see the bee?

It’s a Jack-in-the-Pulpit right beside my back steps!

Kenilworth Ivy is a favorite, and I like the pattern against the rock wall

The forest floor on one of our hikes

Any nature picture is improved by adding a grandchild!

Like most folks, I take pictures when we travel, some for the colors, some for the general scenery.

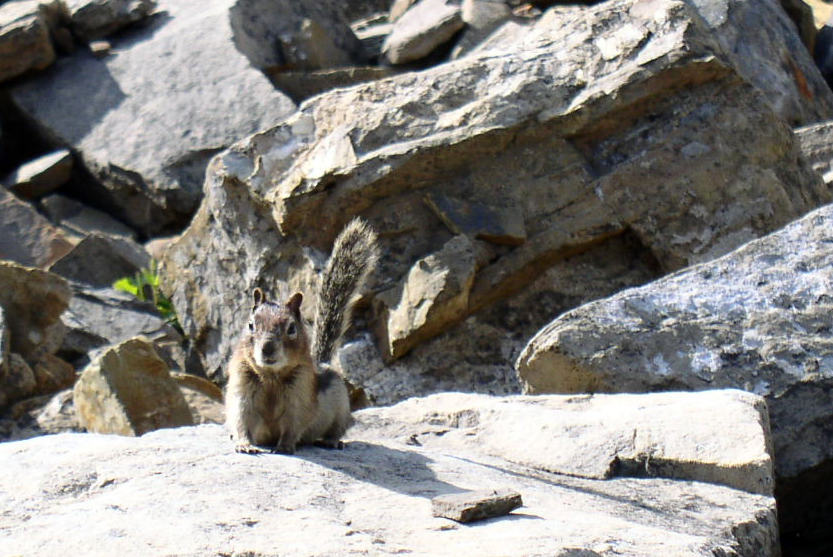
The colors are monochromatic, indicating how this little guy survives in the Canadian Rockies (when he isn’t begging from tourists)

One of these days I’ll use this picture, made on the Blue Ridge Parkway, as inspiration for a landscape quilt

The colors in New Mexico are always fascinating, and the sky so big

The one thing I don’t do, and don’t intend to do, is print my photos on fabric and put them in quilts that way.  I use them for shapes, colors, arrangement of forms…but for the purpose of interpretation, not direct copies.

How do you use your photos in your quilts?

The Condom Quilt Goes Home

In case you haven’t been reading my blog long enough to know about the condom quilt, here is a brief summary:

  • A couple of years ago I wanted to make a quilt from a QR code in such a way that the entire quilt top could be scanned to open the target website. Since I was going to be putting in a lot of effort, I wanted a QR code that had some meaning for me.
  • At that time I was working in public health, spending much of each day helping patients cope with various problems that might have been prevented by appropriate use of condoms.
  • When I looked for a condom-related QR code, I found that Planned Parenthood of the Great Northwest and Hawaiian Islands (PPGNW) had developed a QR code to be placed on their condom packages. Scanning the code linked to PPGNW’s “Where Did You Wear It?” site.  The goal was to encourage safer sex through condom use.

PPGNW graciously agreed to let me use their QR code in my design.  I colorized their code and made my quilt, checking after construction of each section to be sure the whole thing still scanned correctly.

Asheville Quilt Show

This is the finished quilt. That tiny embedded QR code leads to my blog.

I showed the quilt anywhere I could.  (It isn’t just younger people who need safer sex.)  That included guilds, quilt shows, and the folks in my office.  After a year of showing it to anybody who would listen, I donated the quilt to PPGNW to be used in any way they wish.

I was very pleased recently to receive this picture of the PPGNW management staff with the quilt.  That funny looking guy is their condom mascot.

The folks at PPGNW report that the quilt has sparked discussion, especially about the interaction of traditional crafts and technology.  I enjoyed this quilt from start to finish and I’m glad it is now in its home.

With a little help from my friends…

One of the things I love about blogging is hearing from people who comment and share their ideas.  Here are a couple of ideas that I thought you might enjoy, too.

When I blogged about some household items that are useful for quilting, Peggy commented that she cuts up her old calendars and uses the numbers to label her blocks and rows.

It was the perfect time of year for that handy hint, so I promptly cut up an old calendar. The numbers worked great for labeling pieces for a complex project. I clipped them to groups of fabric for the various sections of the quilt using binder clips–an idea I got from Judy Niemeyer’s class years ago.

Another friend, Claire, responded to my post on making single-color slabs by asking what I do with fabric that is a mixture such that no one color predominates.  I had been cutting out sections based on the predominant color, and that seemed to work.  But…

When I came to this piece, I realized I had NO desire to cut out chunks small enough to be mainly one color.  Then I started looking and saw that I had a number of prints from which I would NEVER be able to cut single-color pieces of any size.quilt slab, slab block, quilt block, modern block

So I made a block of multi-color pieces.  It is pretty wild, but so were some of the fabrics that went into it.  I’ll see how it looks with the single-color blocks when I assemble a quilt.  What do you think?  Make more of these or give up on the truly multicolored fabrics for slabs?