2020 Quilt Review, Part I

Every problem being an opportunity, I think we’ll review the projects completed in 2020 because of the opportunity to spend much more time at home 😀  In fact, I got so much done that I’m splitting it into two posts so my head doesn’t spin.  Here’s part I:

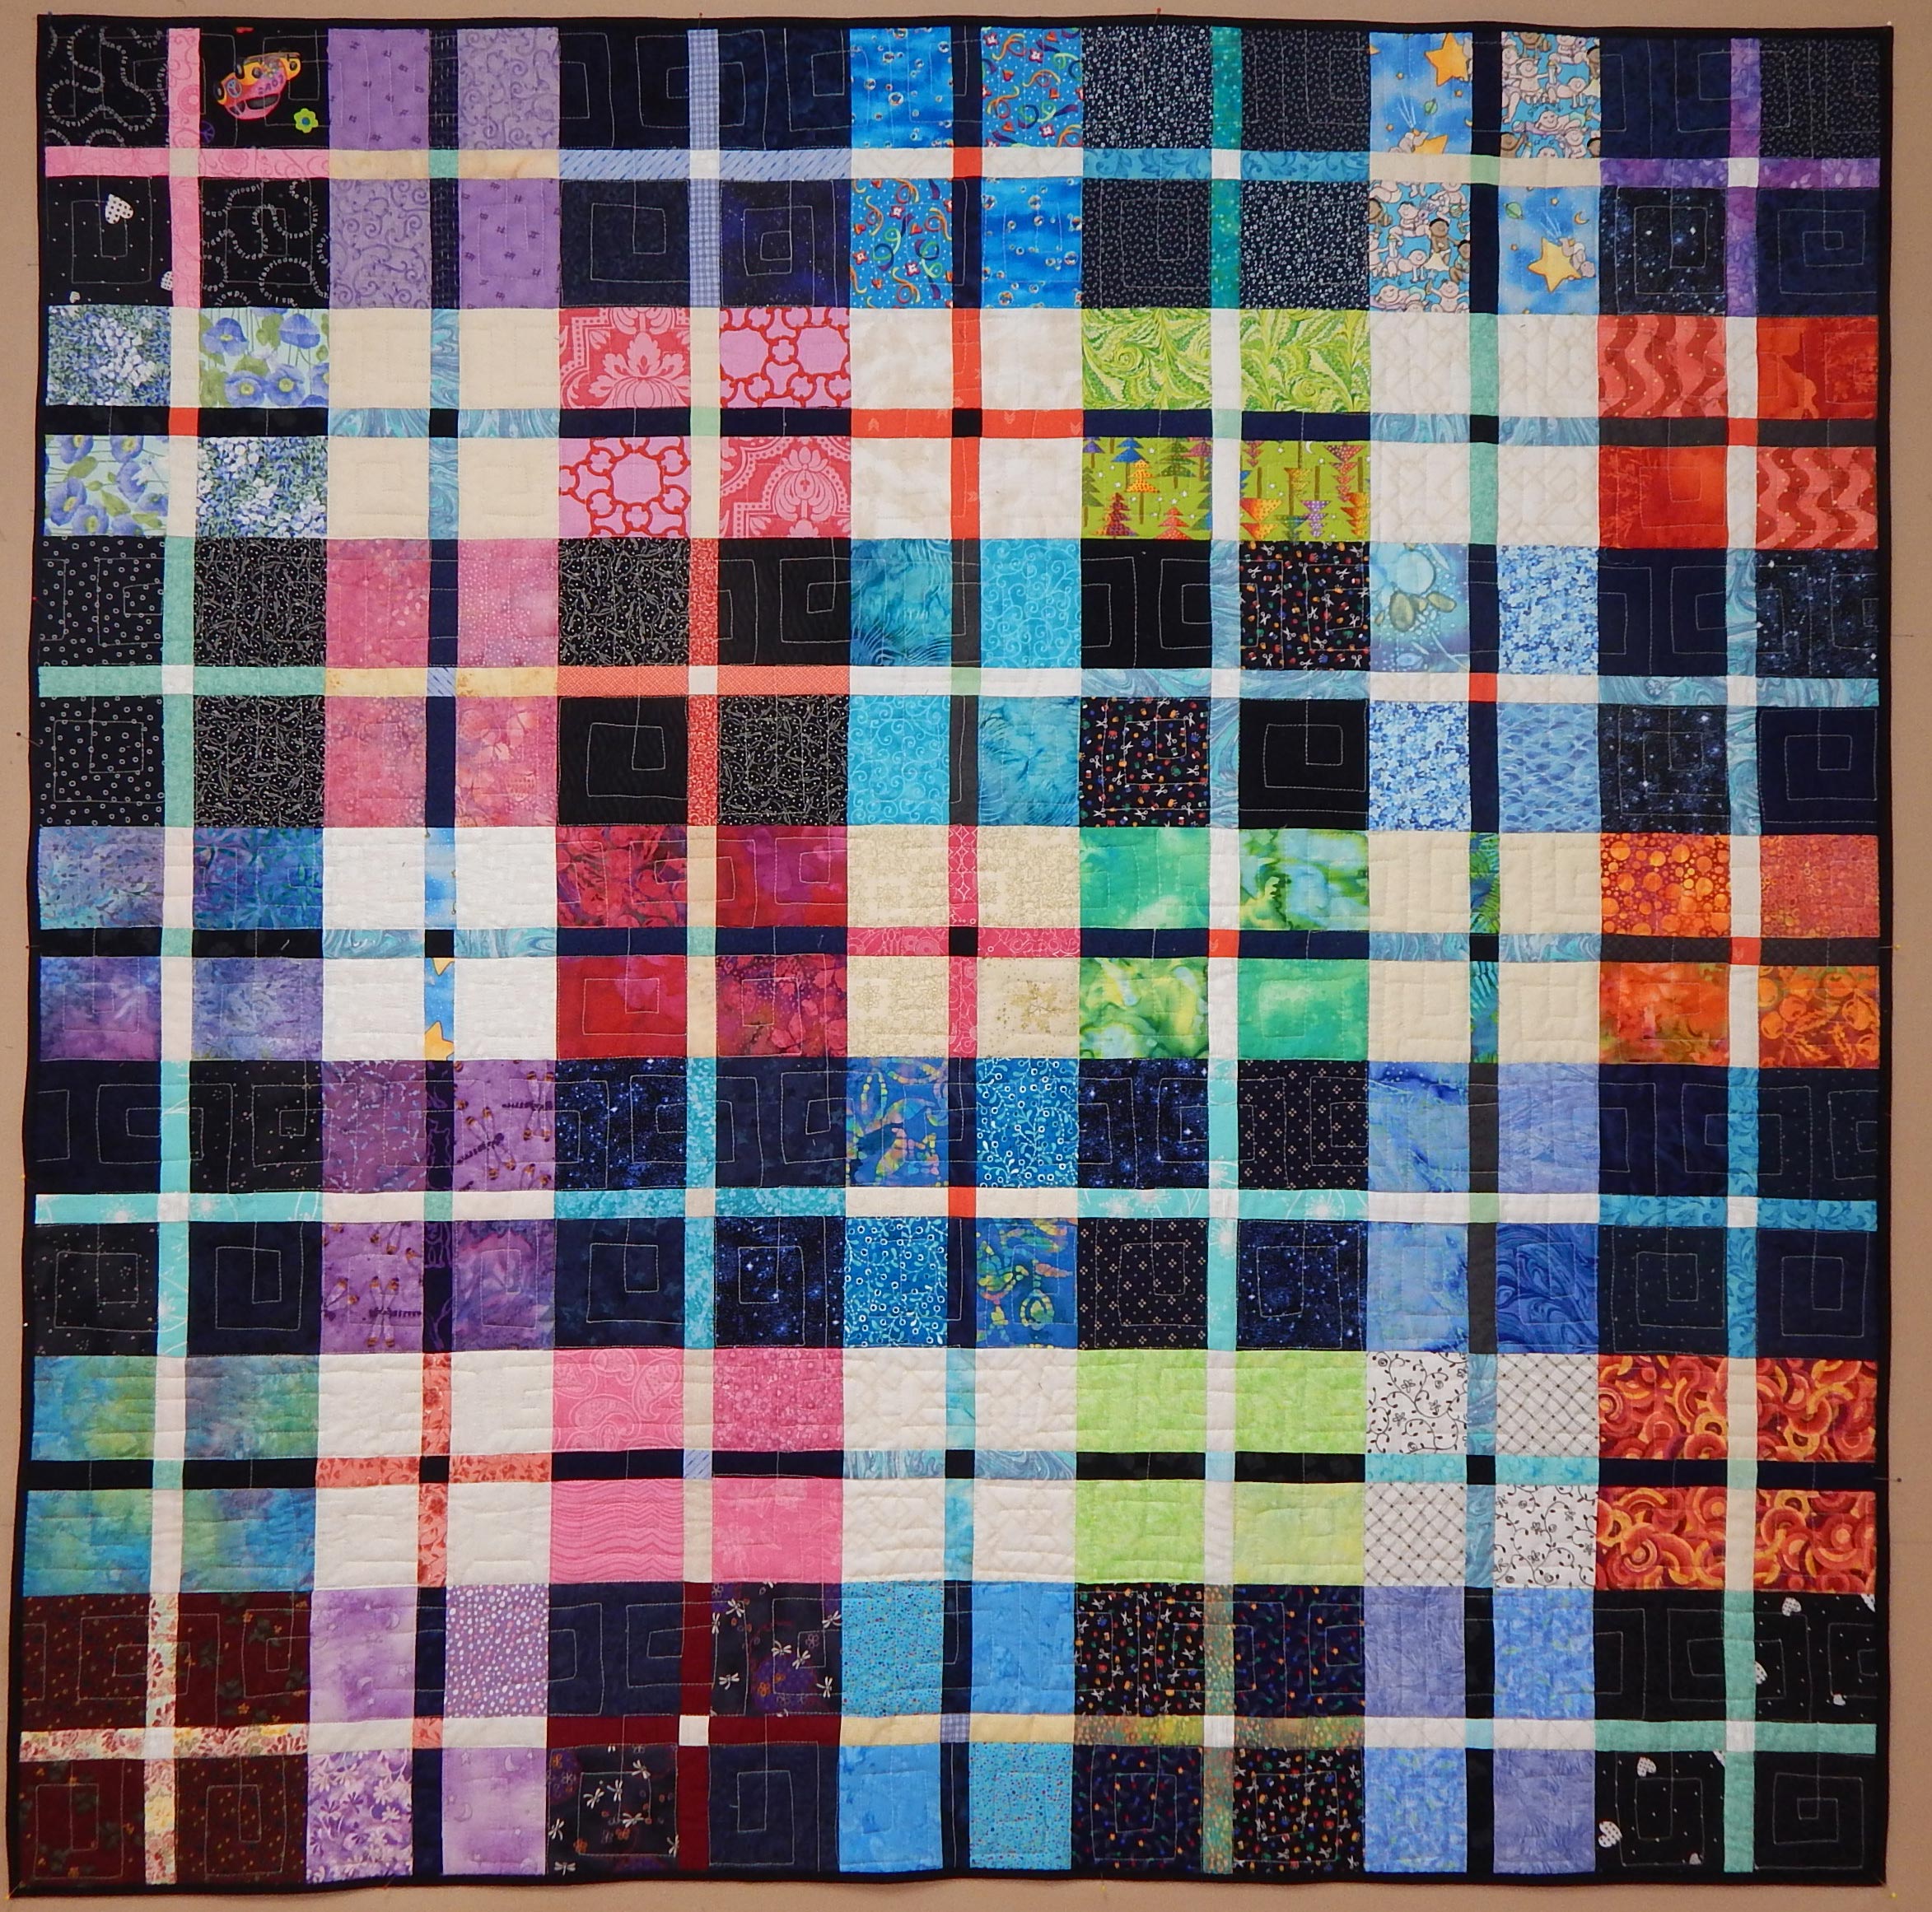
Plaidish was made from a free pattern available from Kitchen Table Quilts

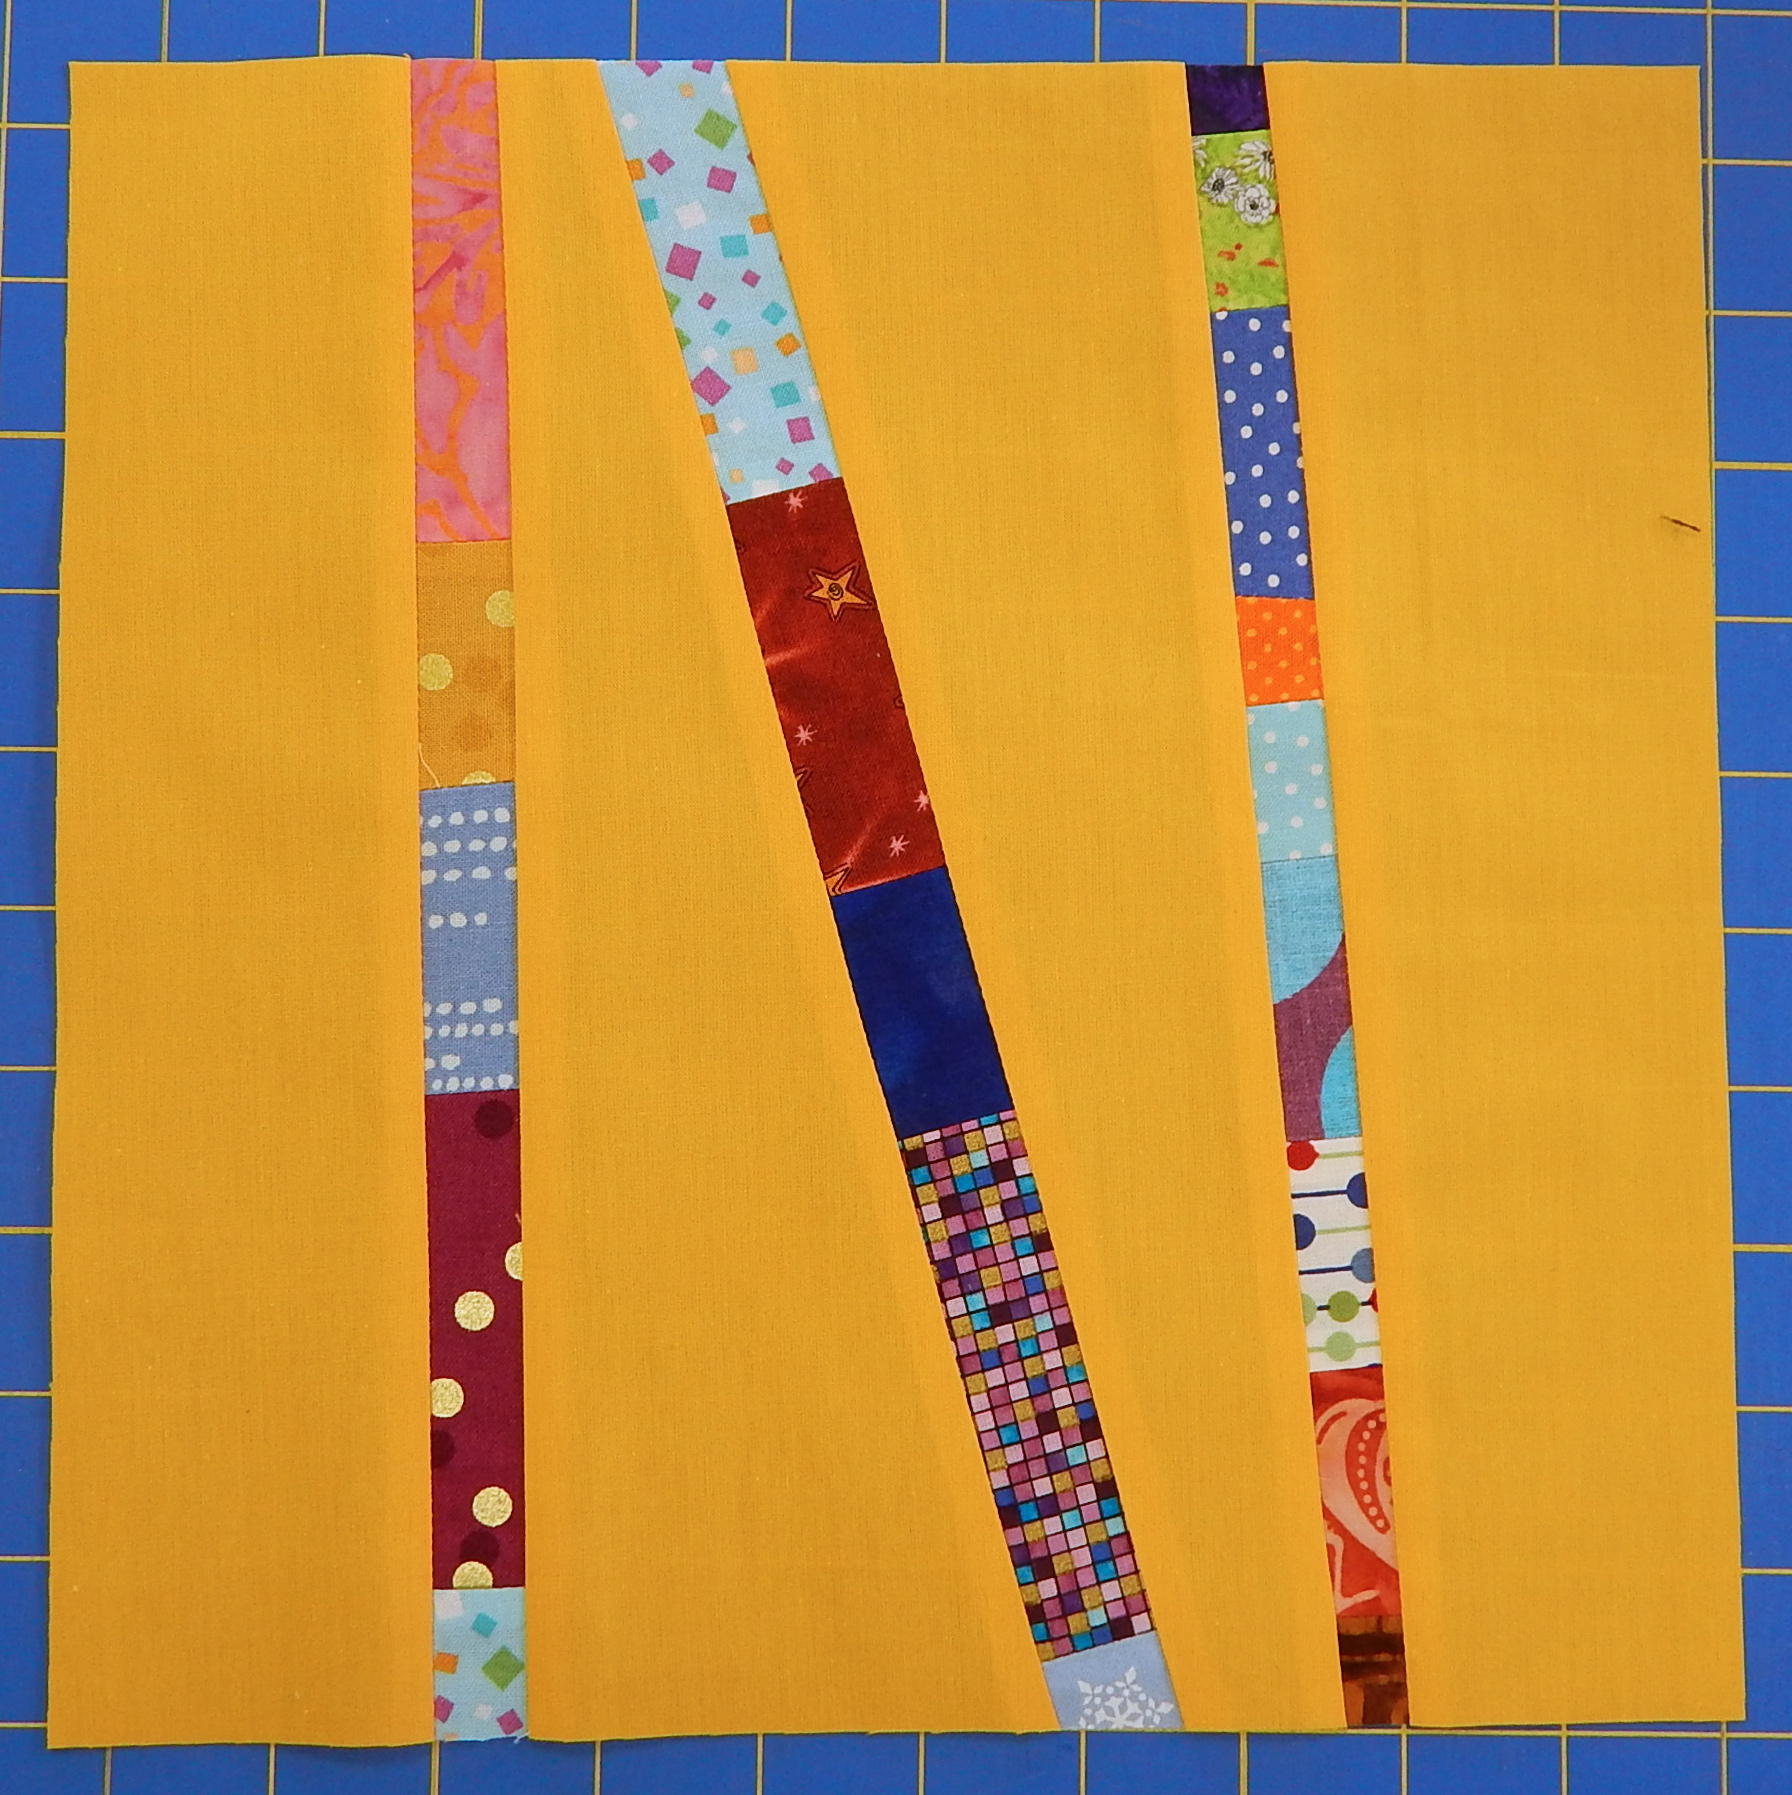
I designed the quilt above based on a barn quilt I saw every time I drove to town.  The design was created in EQ8 and Eileen Fowler at McCall’s Quilting transformed it into a design of her own, giving me credit for inspiration.

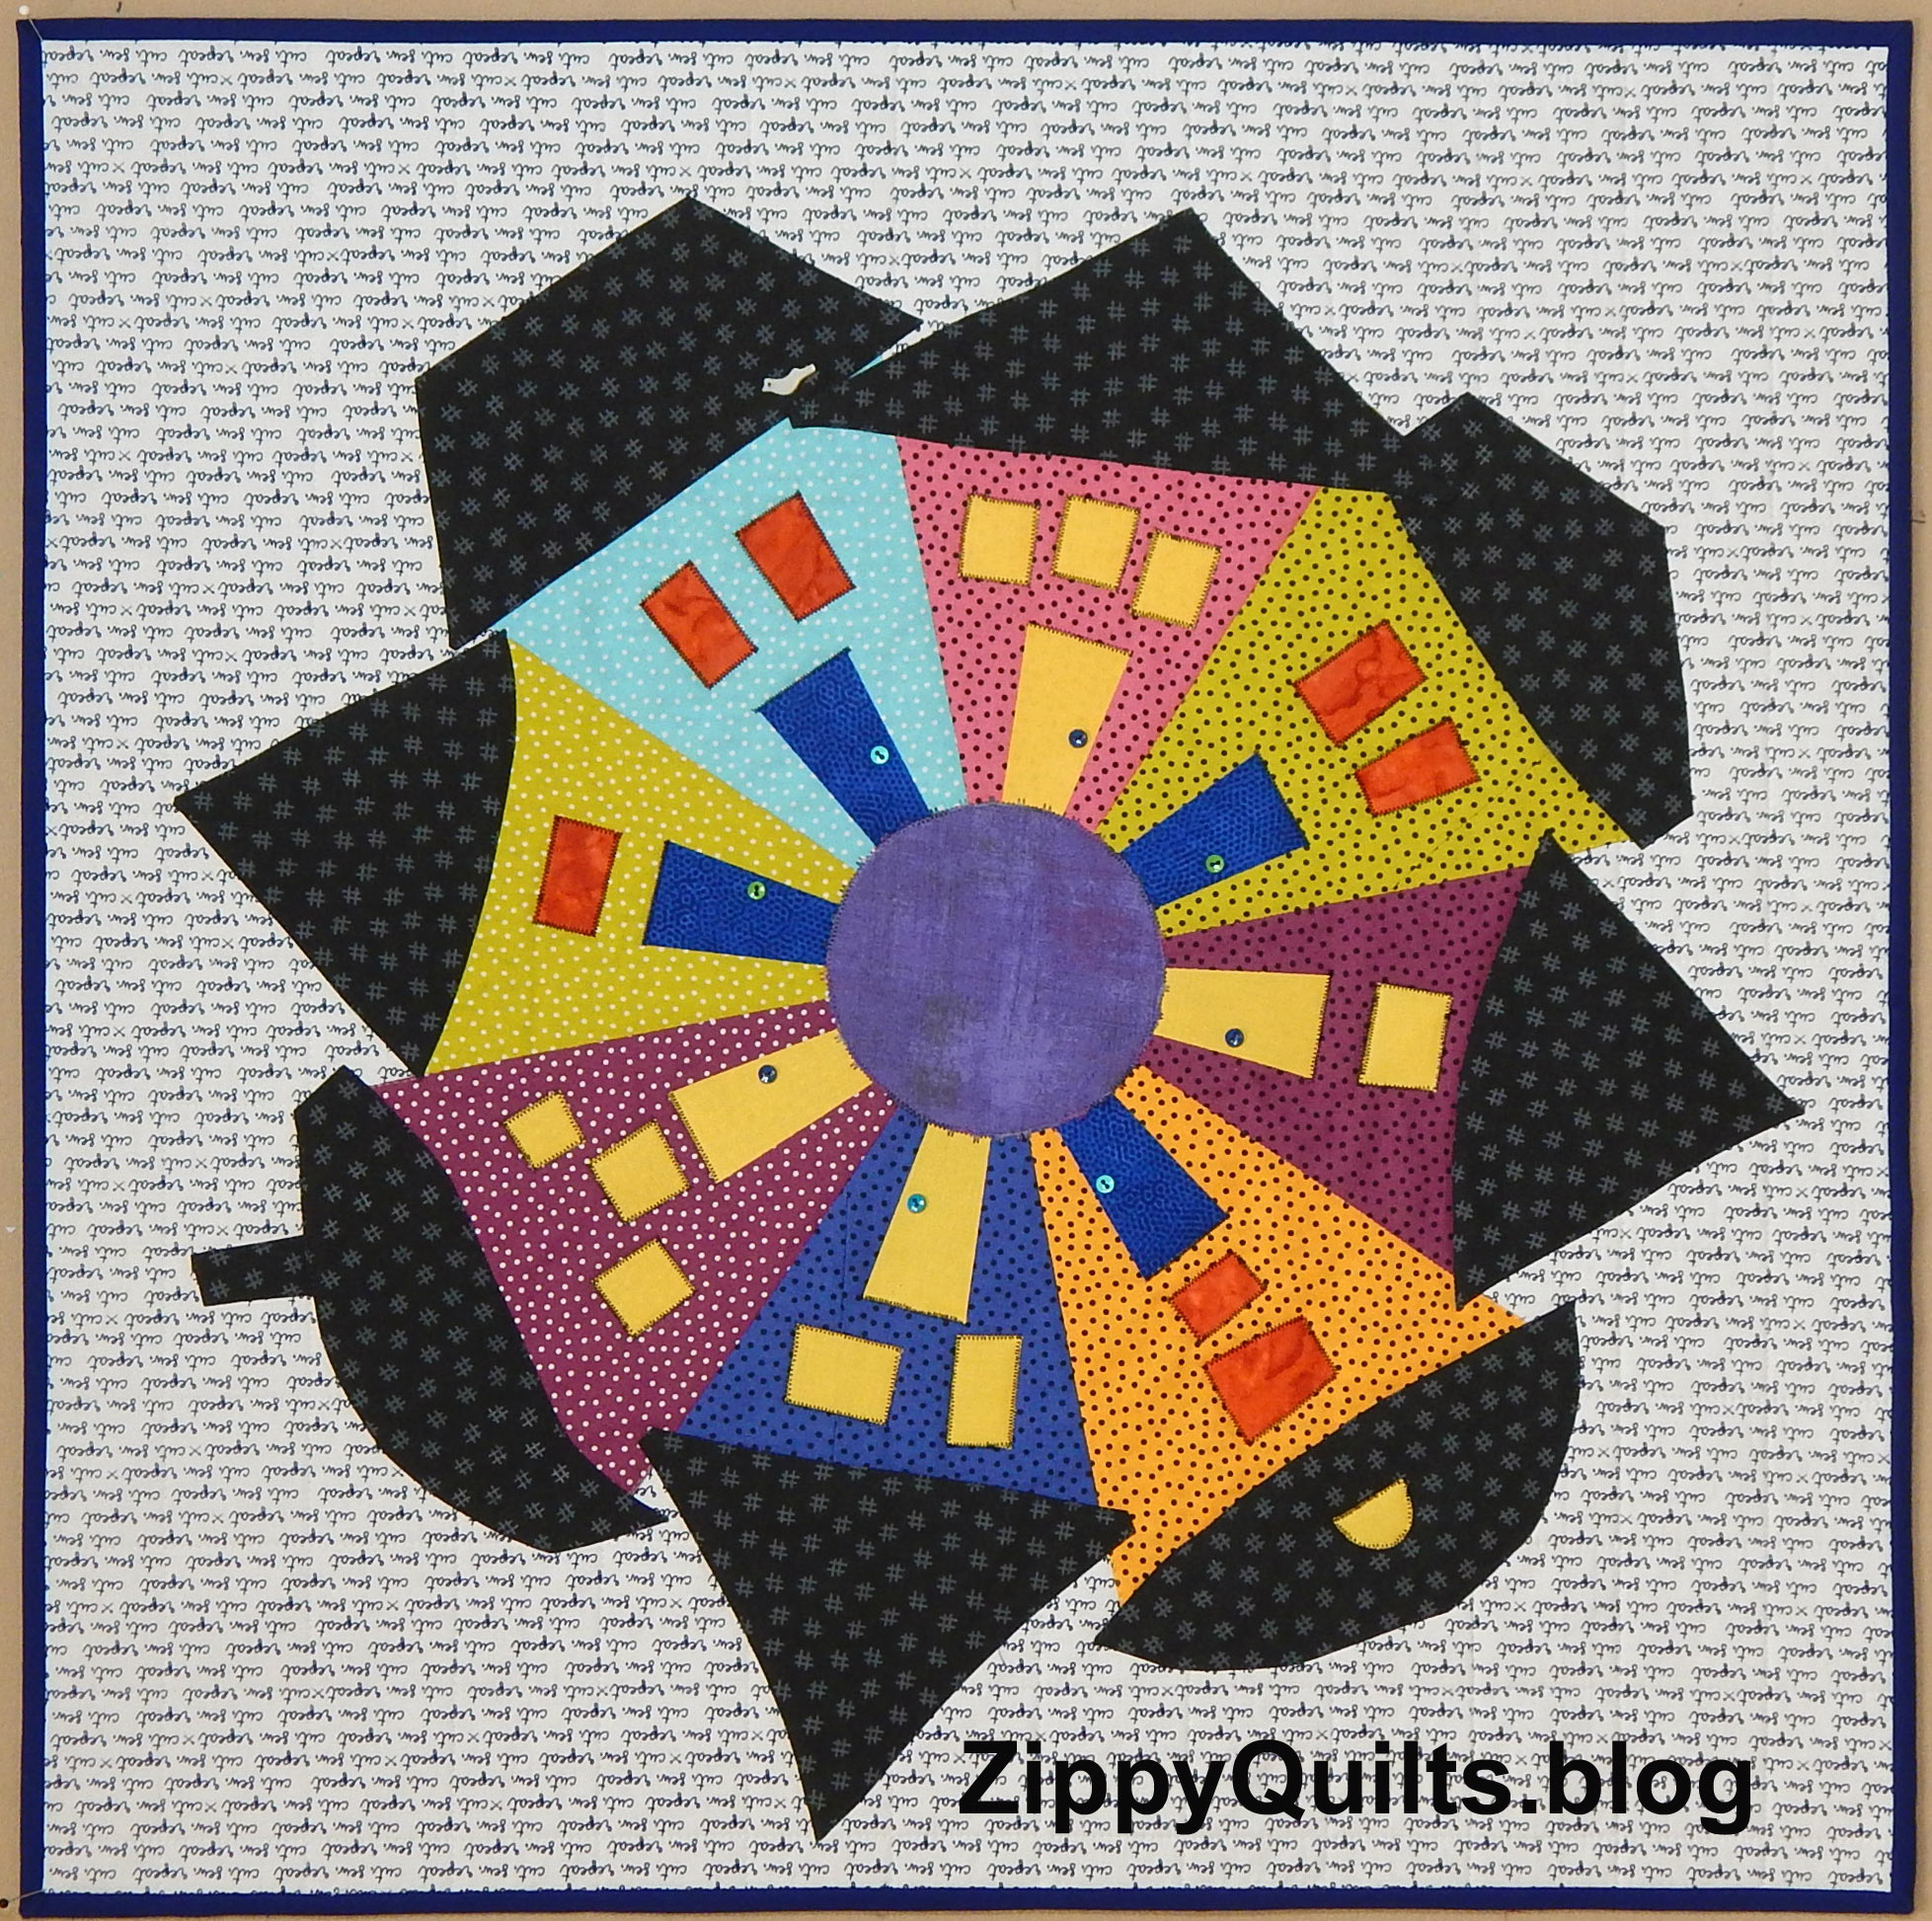
The above quilt was designed in EQ8 and made with scraps.  Studio Stitch offered the pattern free with purchase.  I loved using all my colorful scrap strips.

I made a bunch of postcard-sized art quilts as samples for a class I plan to teach on making landscape quilts.  COVID happened, so the class hasn’t been offered yet.

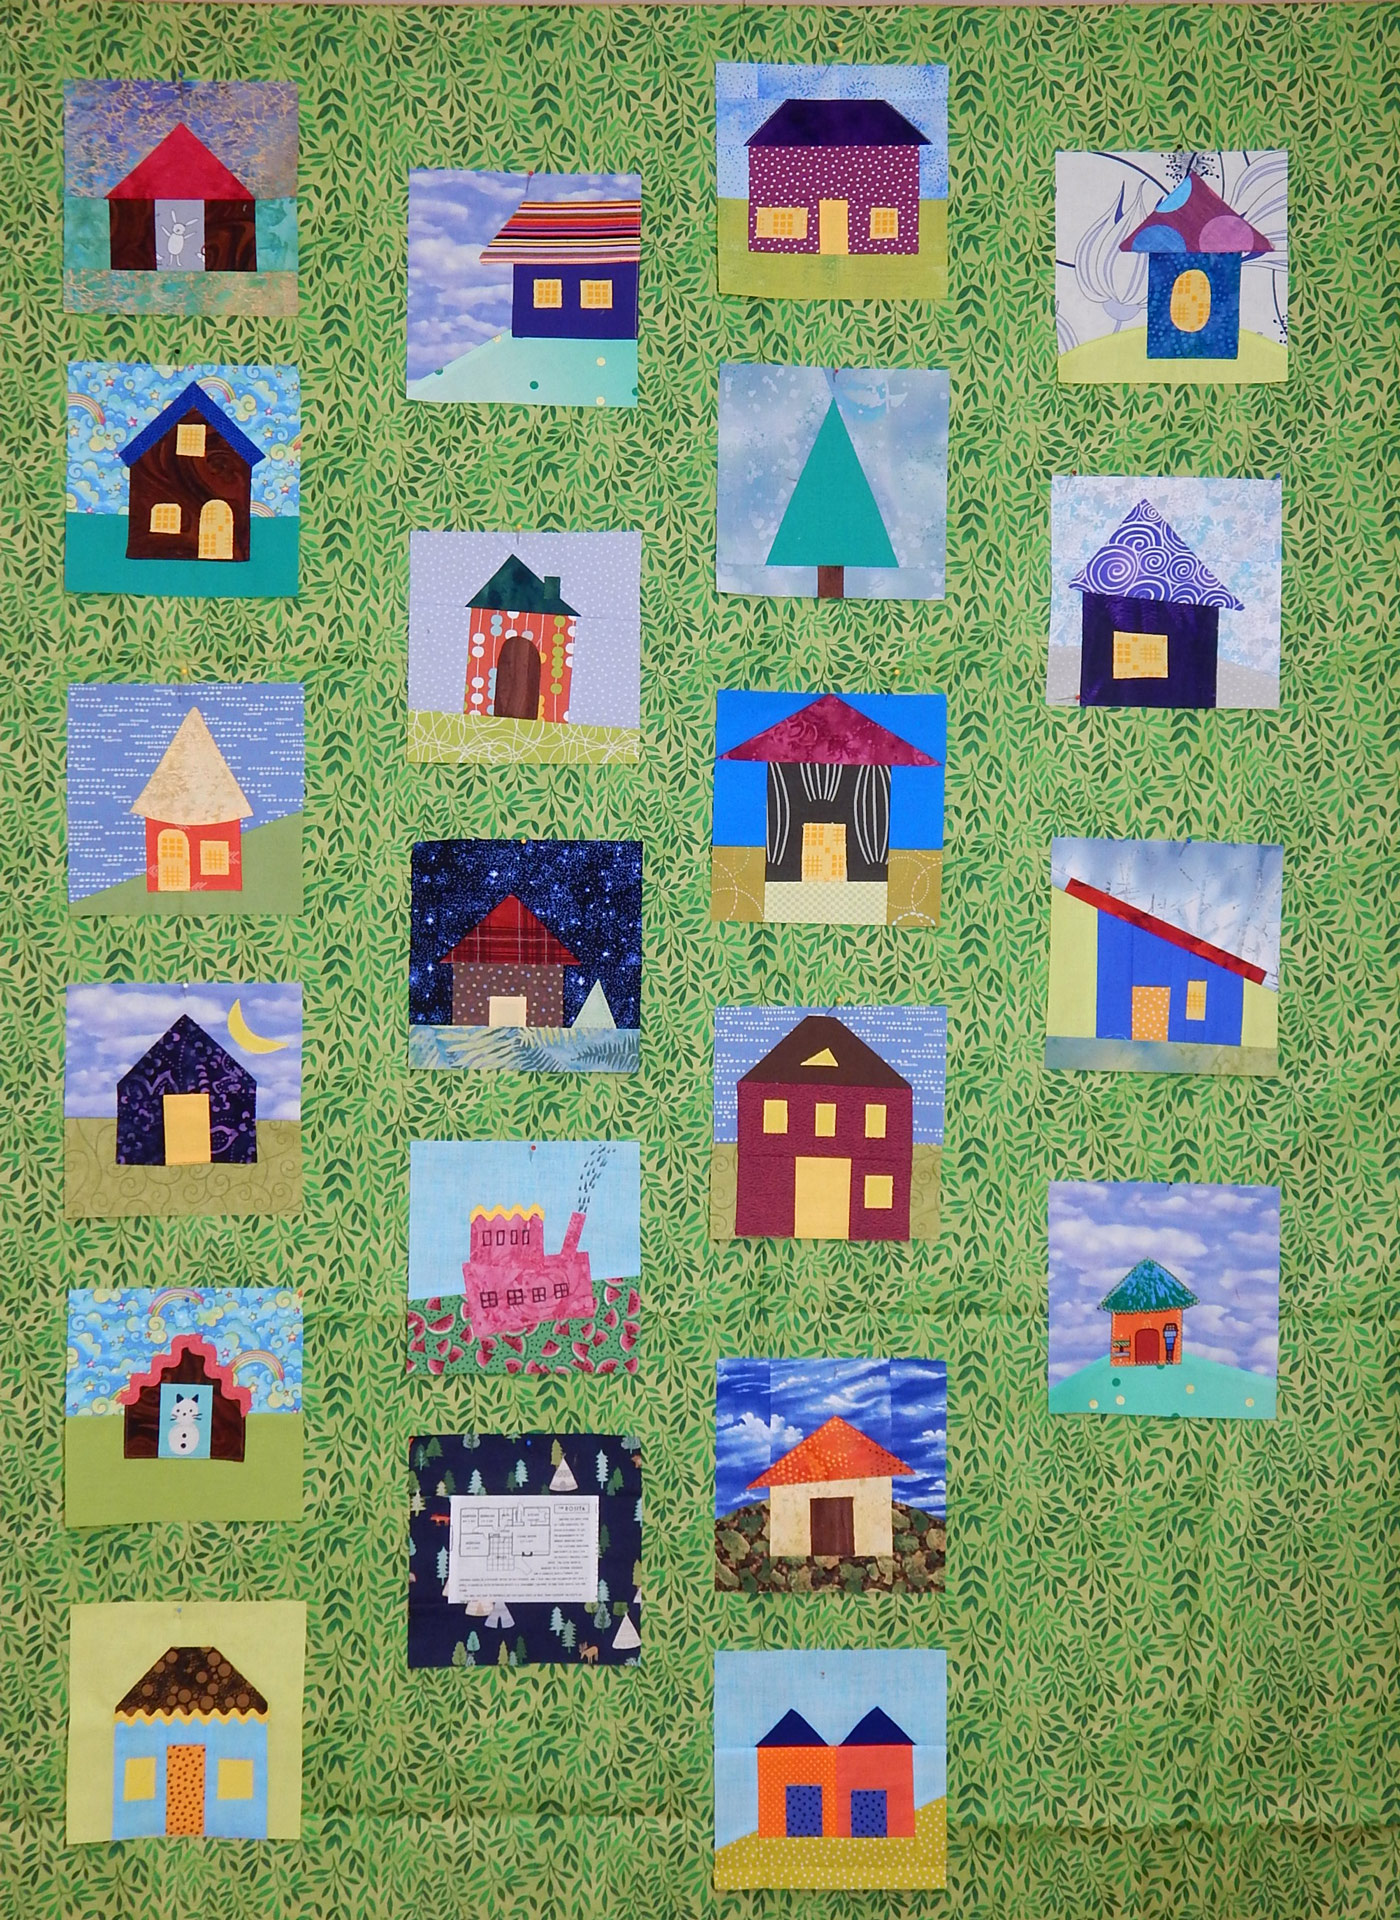
I designed and made this little neighborhood after seeing similar projects online. Isn’t the internet a great source of inspiration?

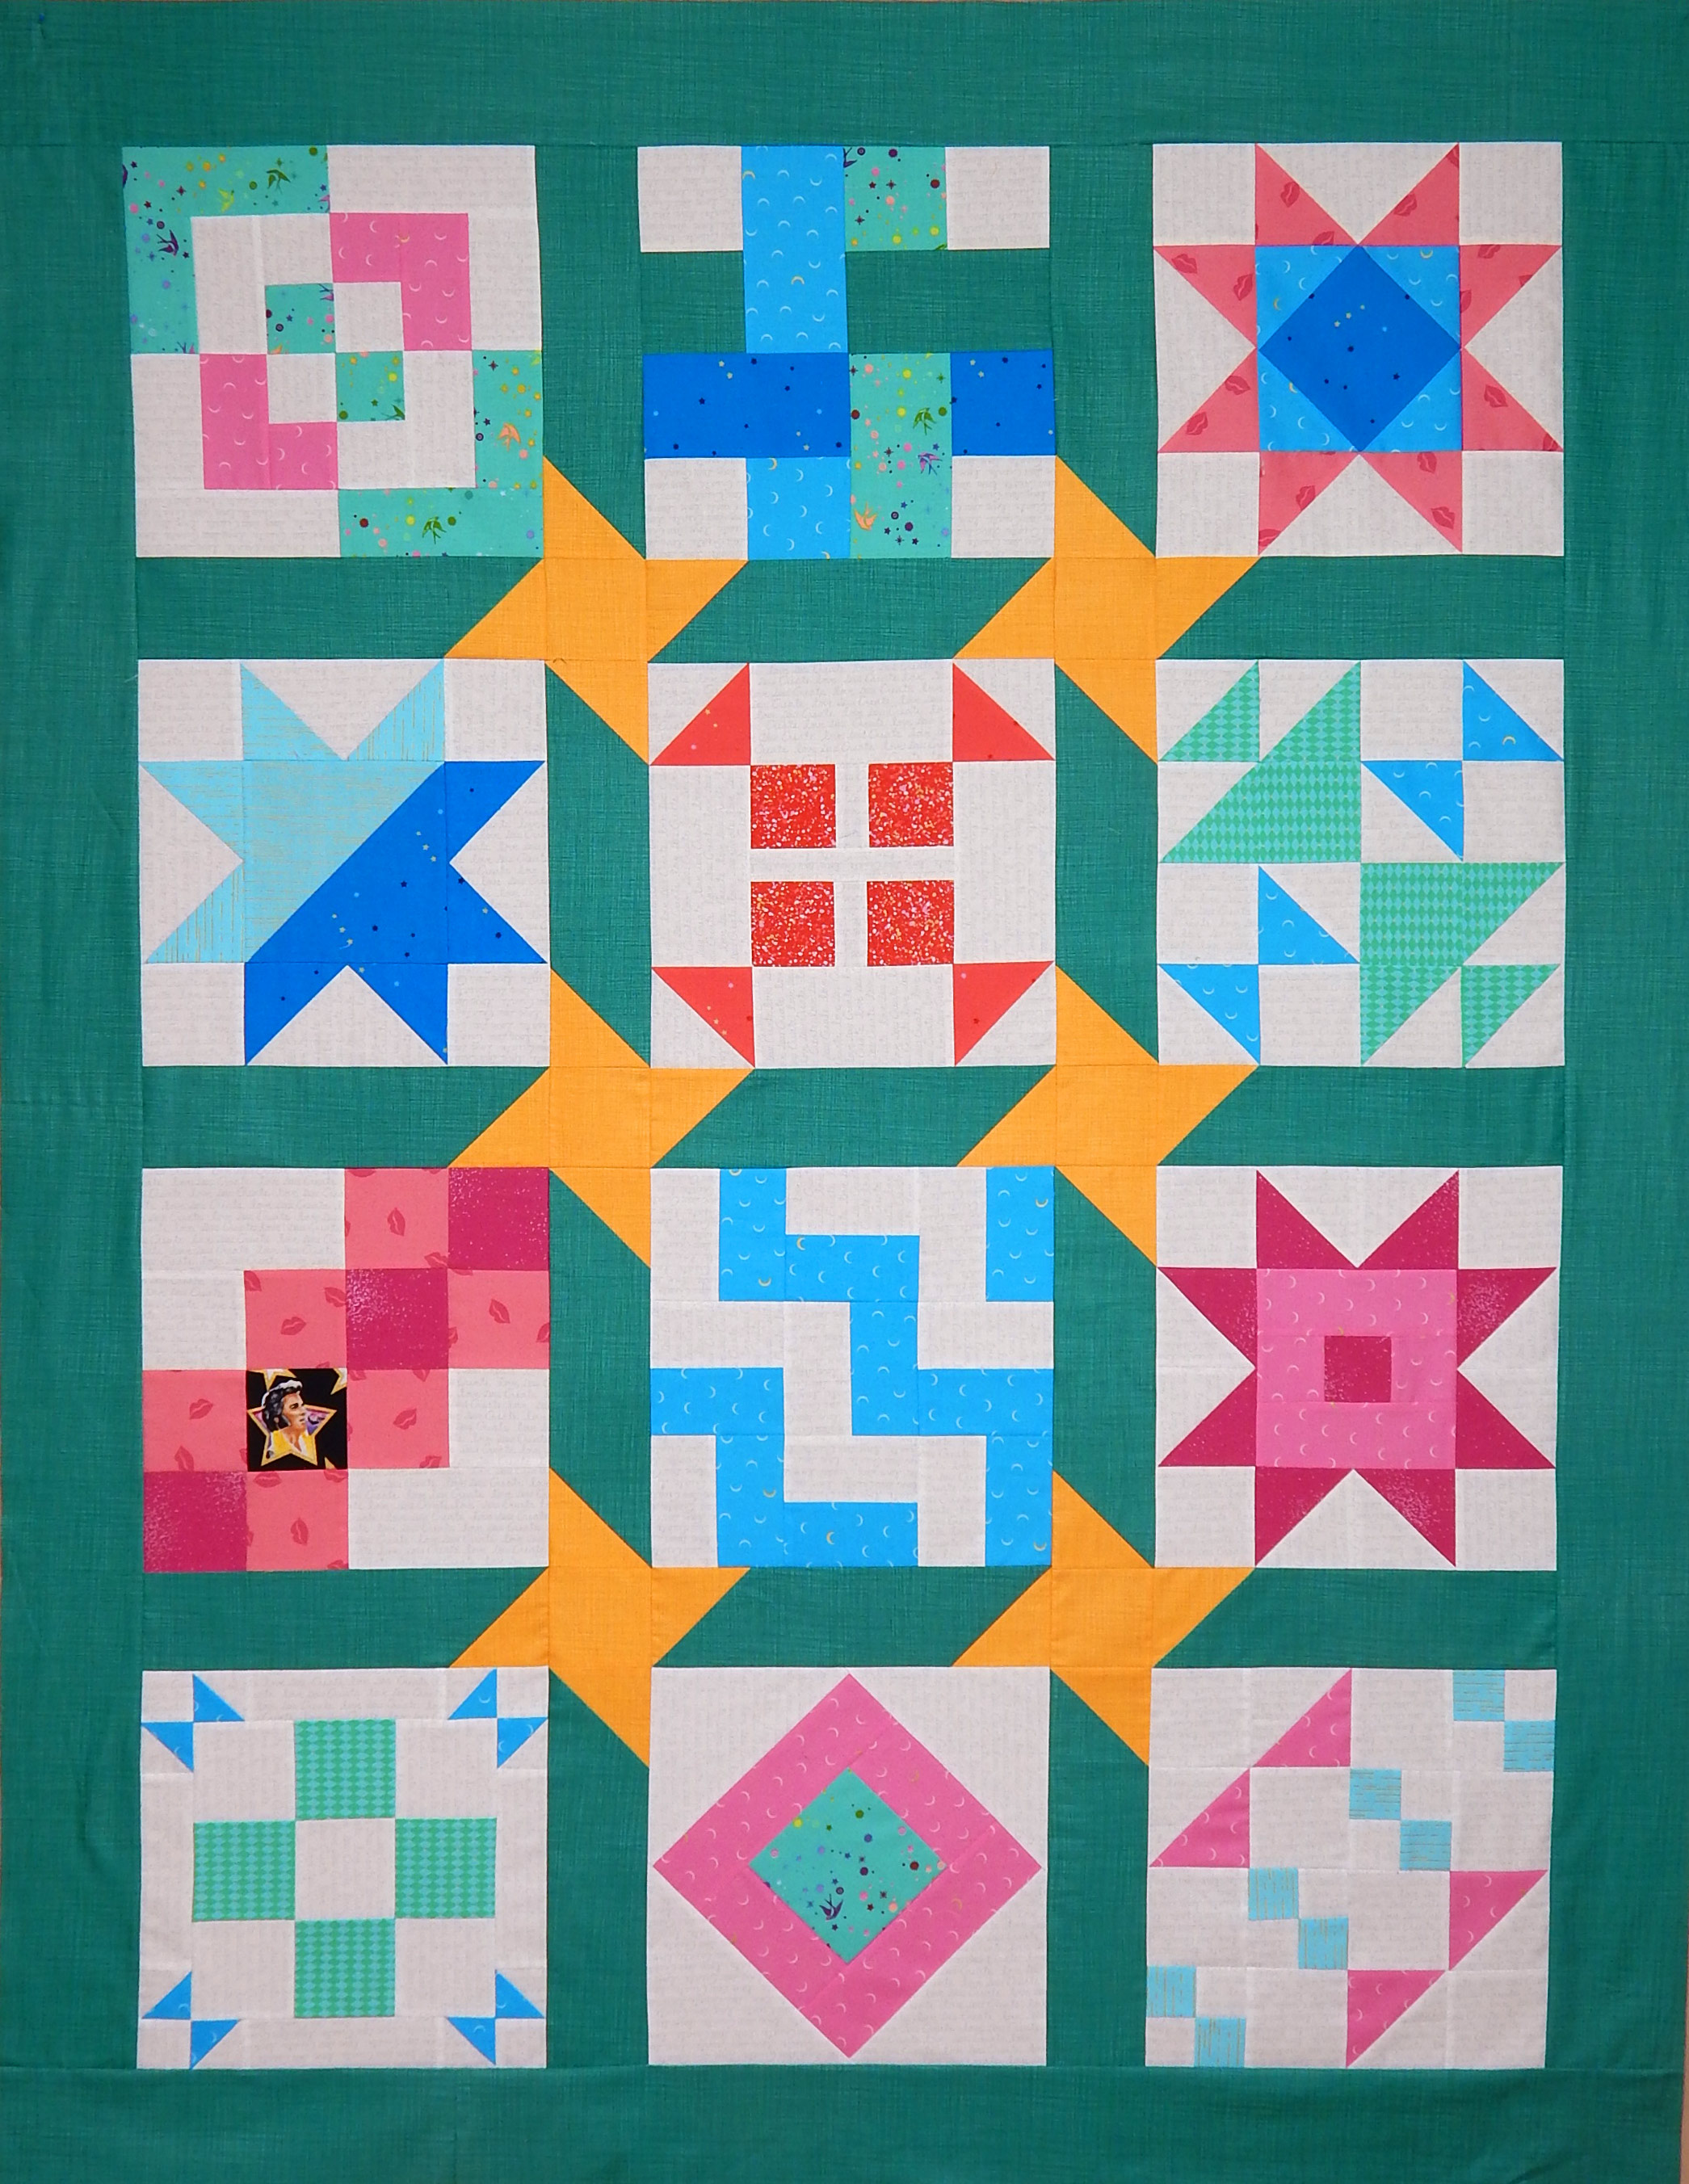
I made a bunch of donation quilts, including the two above constructed from orphan blocks.  Several quilts went to a local at-risk infant project, and there’s another pile waiting to go to Ronald McDonald House.

I took a class with friends at A Stitch in Time and made this fall quilt.  They still have the pattern if you want to make one, too.

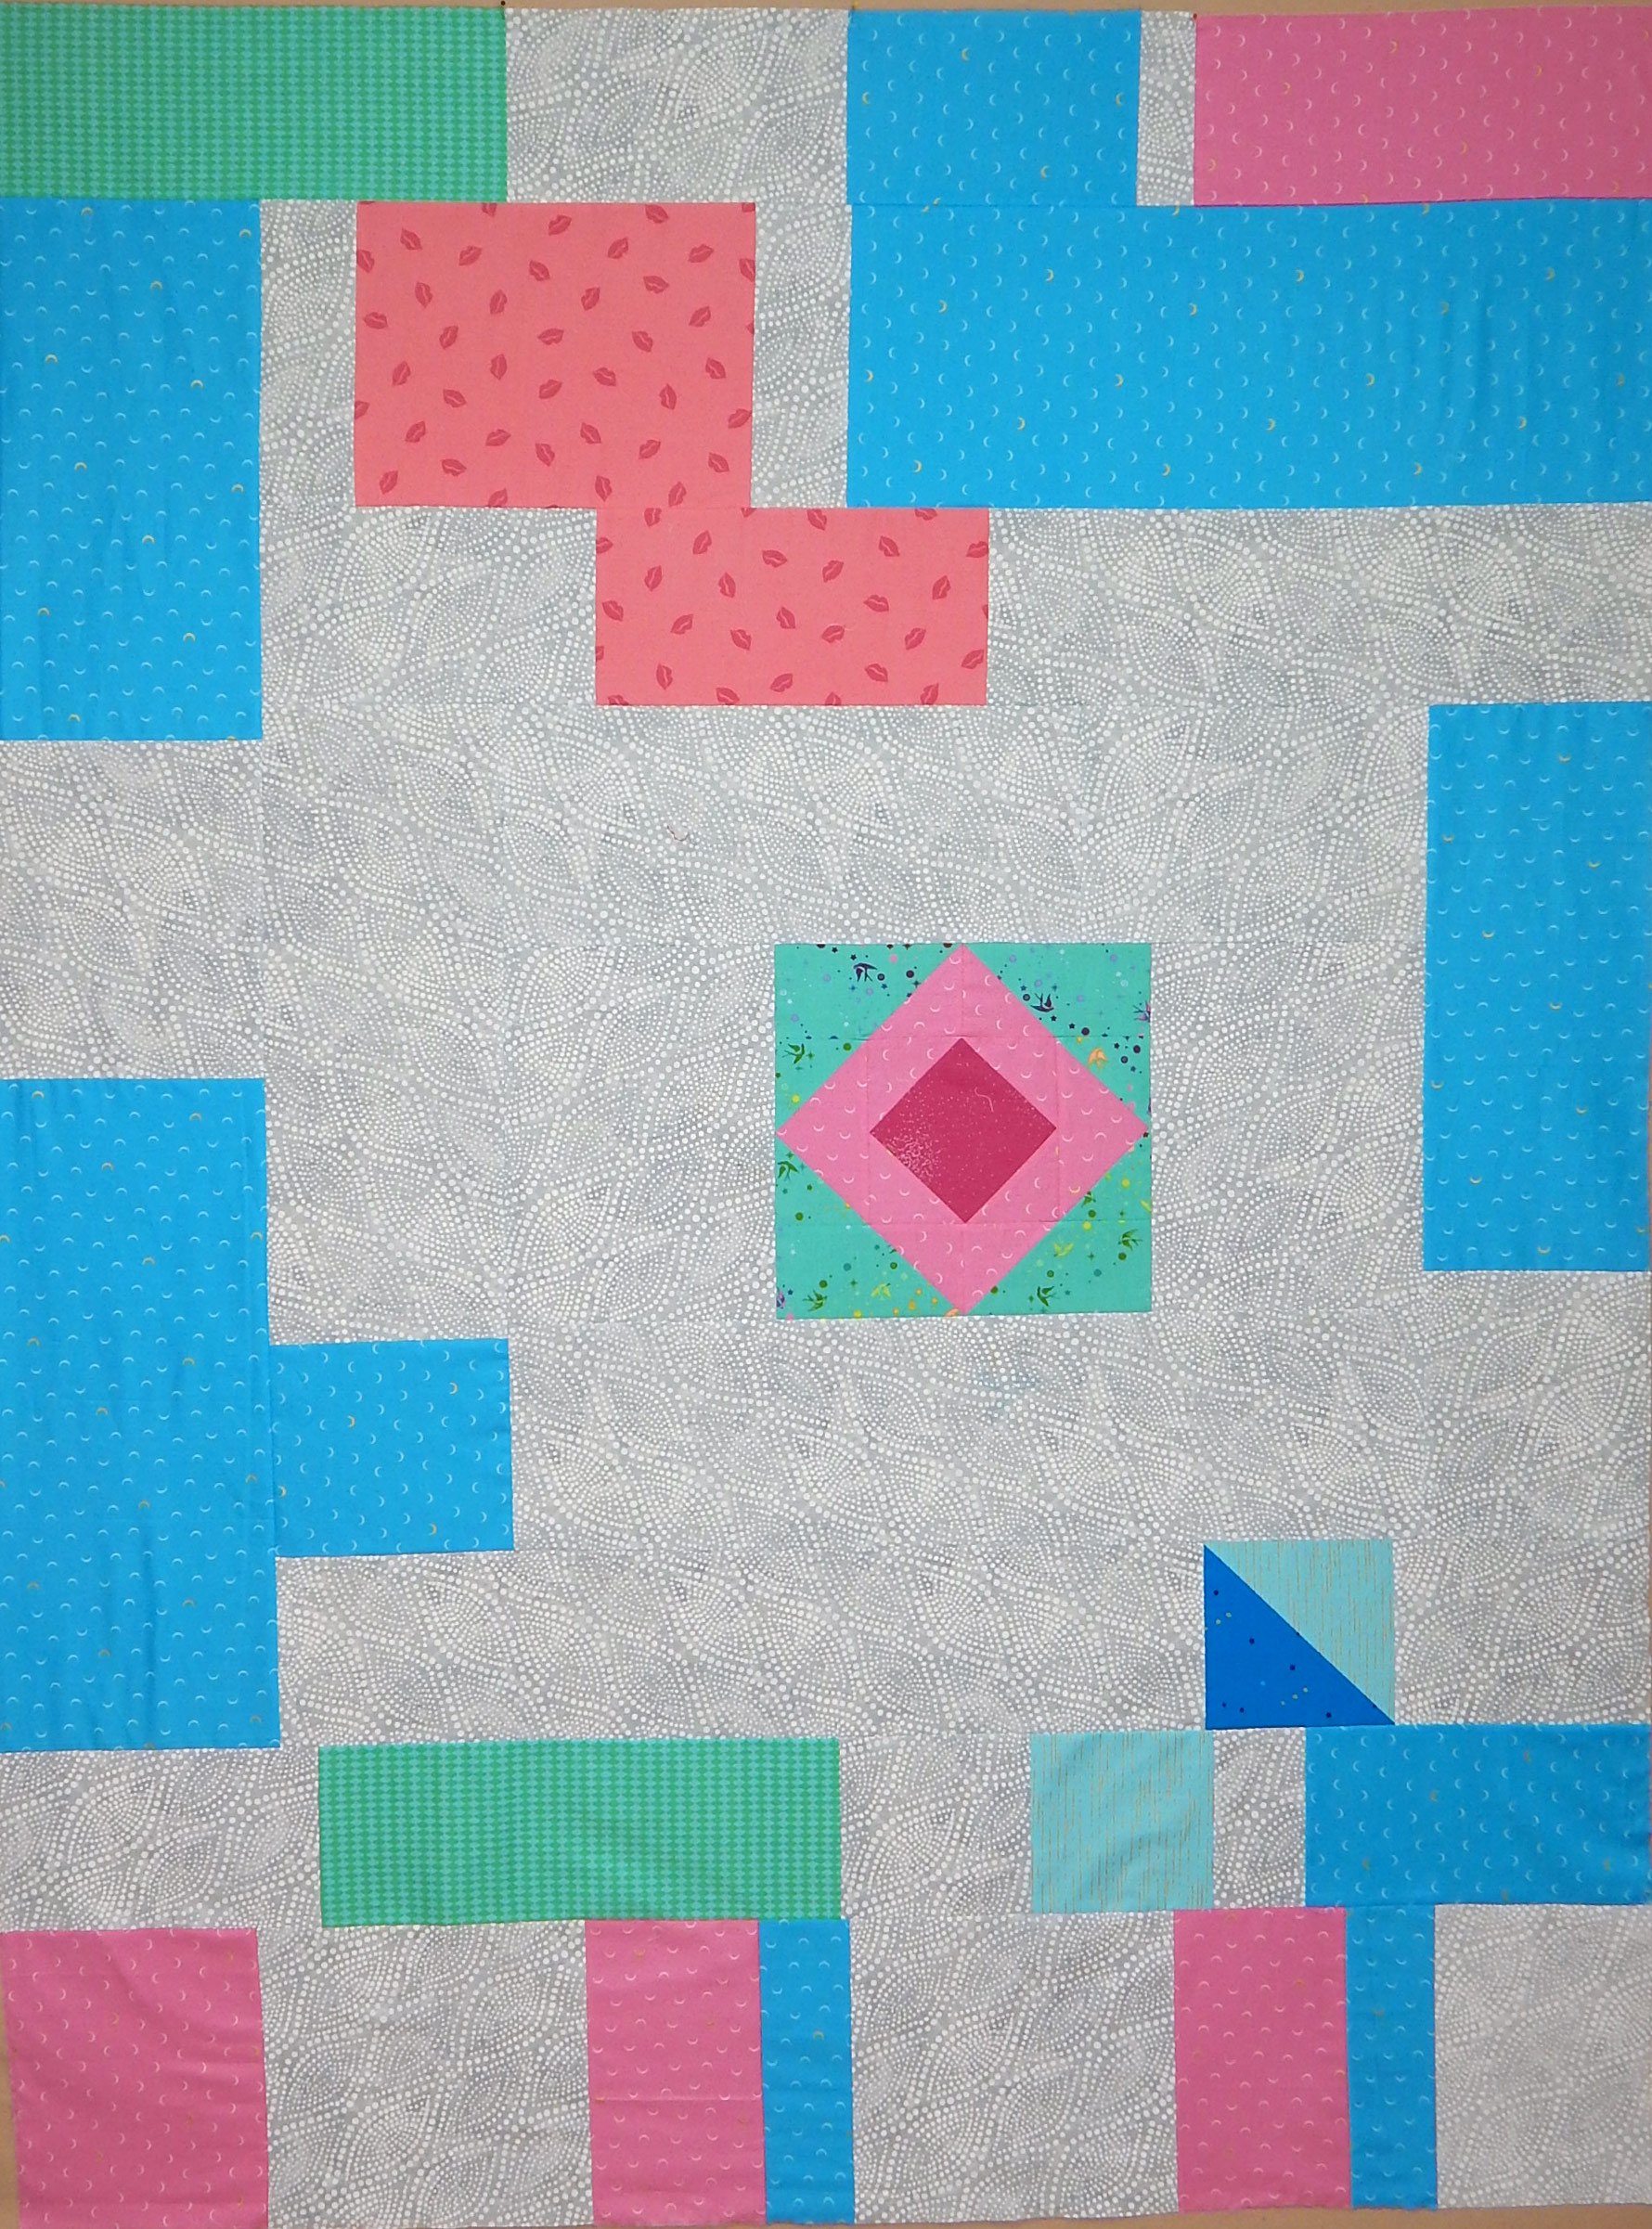
I made this orphan block up into a little quilt for the SAQA auction.

Like everyone else, I made a zillion of these. At least my model is cute 🙂

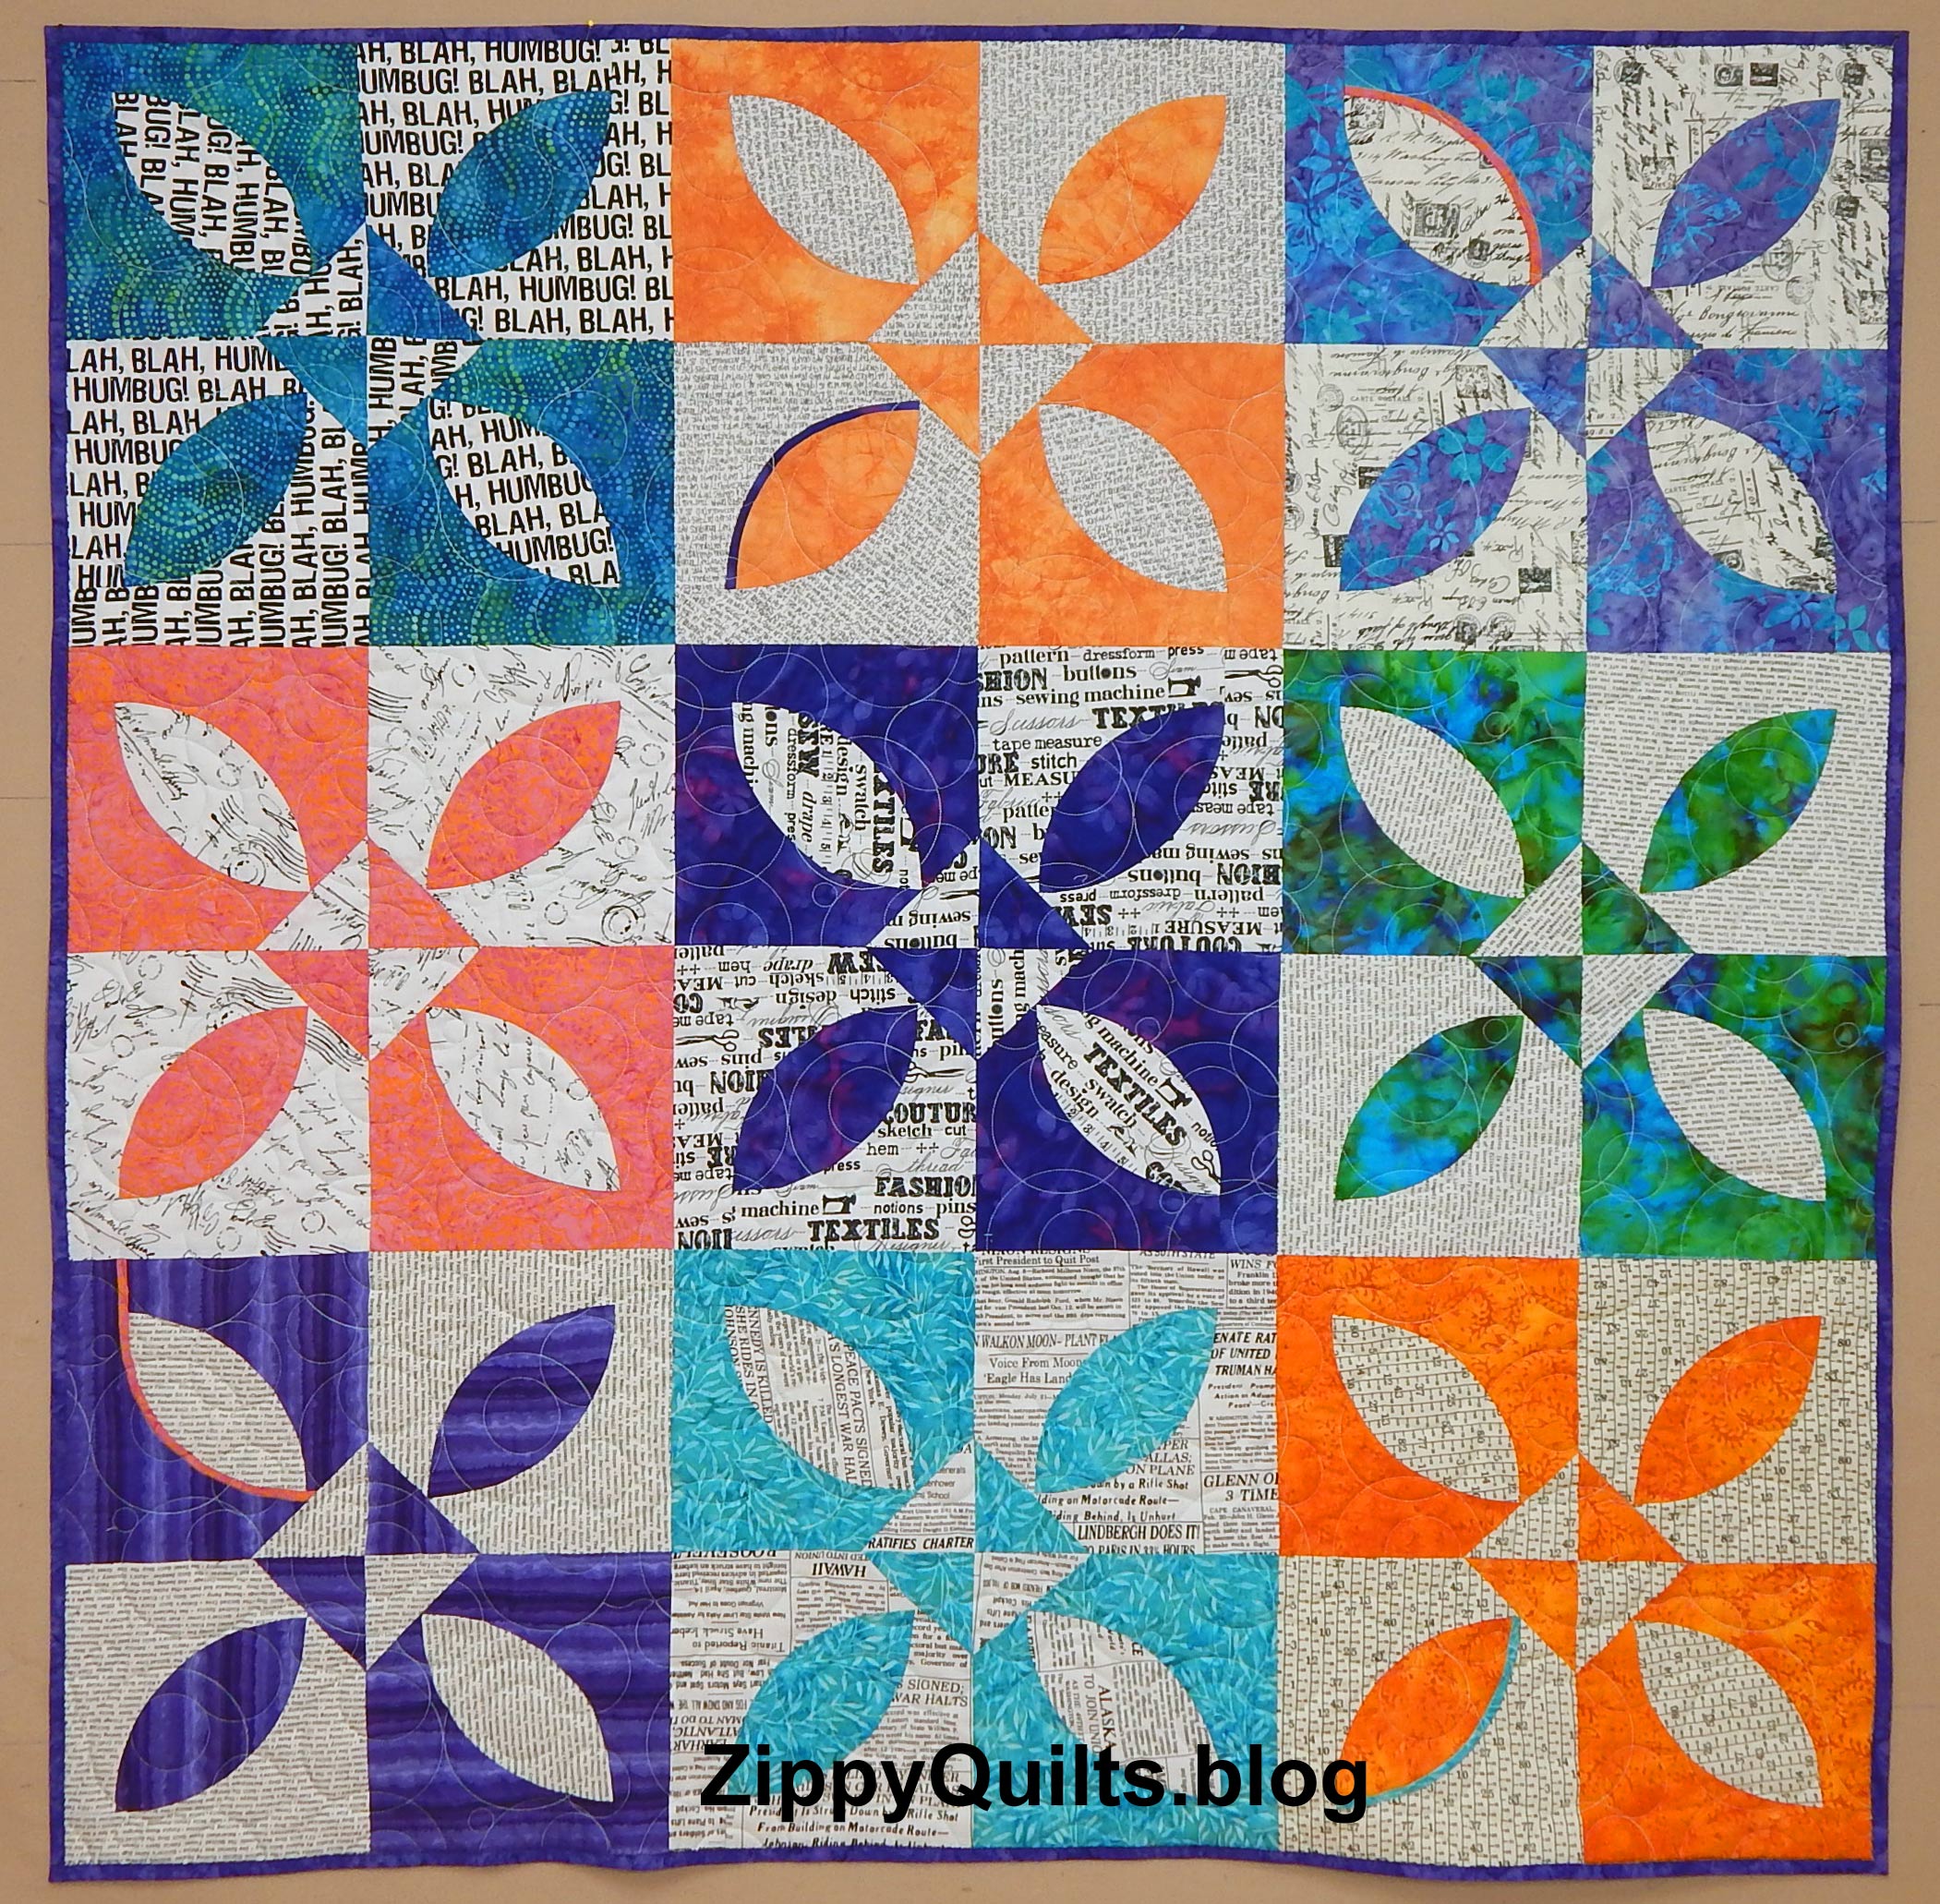
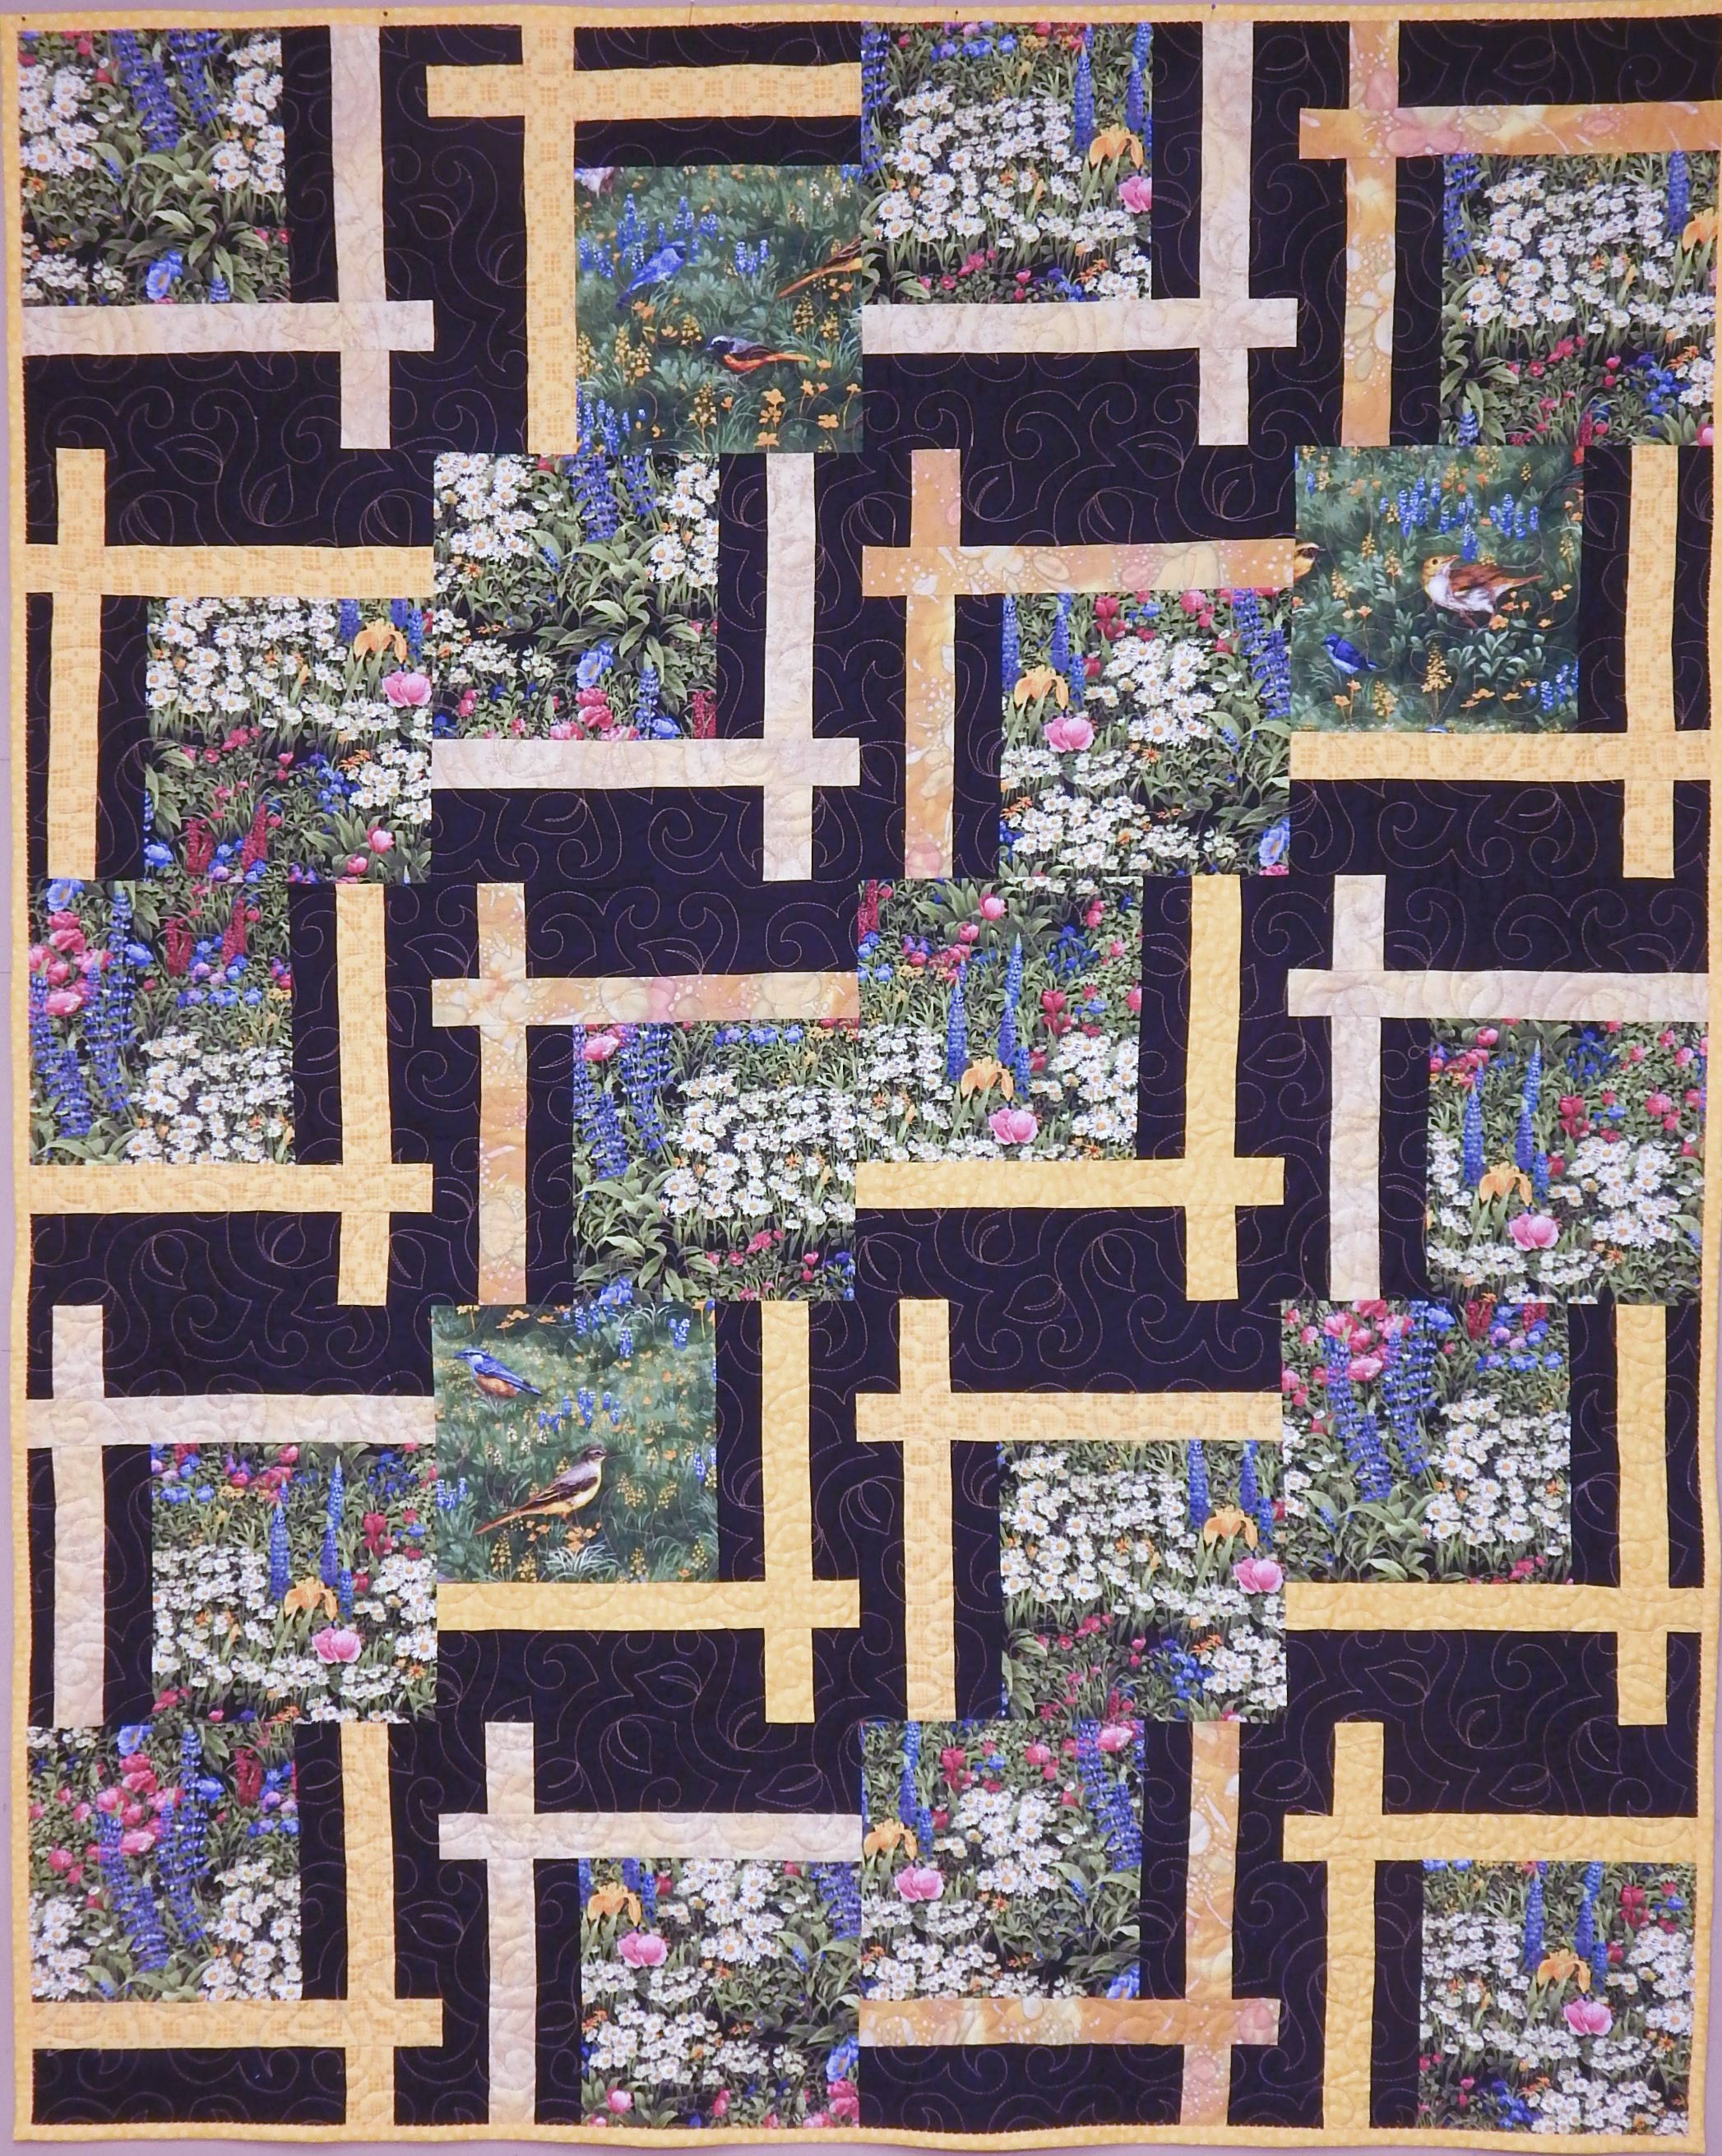
I enjoyed making this quilt and the templates from Elisa’s Backporch made it easy.

That is surely enough for one post!  To be continued…

Catching Up

Catching up on a few things that happened over the holidays:

First, Julie contacted me about an error in a pattern I did for McCall’s Quick Quilts back in 2006.  It was nice to know somebody was still using the pattern!  The magazine probably published a correction in the next issue, but I was out of town so didn’t have access to either my original article or the magazine.  Julie figured it out on her own, however, and I think she did a great job.  She was kind enough to send me pictures of her finished placemats:

Second, I got 3 quilts bound.  Oh yes, I blogged about the first two before the binding was complete, taking care to hide the edges!  Here they are:

Little Jewels, from a pattern by The Quilt Police

Quilt from Pat Sloan’s “Going on a Picnic” quilt along

I finally bound this quilt, which was a practice piece for a pattern I developed last fall

Third, Studio Stitch is now offering the pattern I developed to make this quilt:

The pattern is free with purchase of enough FQs to make the smallest size, but you don’t have to buy the same fabrics I used.  Since I’m always looking for an excuse to buy more FQs, this seems perfect to me 😀

On to 2021!

Designing to Avoid Intersecting Seams

My friend Chela asked about designing to avoid intersecting seams.  The goal is to make a quilt less “fussy” to construct. Here are 3 ways to do that. Thanks for the idea, Chela!

One of the easiest ways to avoid intersecting seams is to move alternate rows over 1/2 block. This can create interesting designs that you wouldn’t have suspected if you hadn’t tried it!

My most recent example is a quilt I designed for Studio Stitch:

Lightening. Read about it in last week’s post if you like.

Of course, many traditional patterns depend on the blocks lining up exactly to create visual interest.  They might not benefit from shifting half a block!  Just look at this:

Another favorite way to avoid obvious intersections is to partially frame blocks so that they appear offset. The intersections get lost in the background and the design is much more interesting. One of my favorite examples of this is the BQ2 pattern by Maple Island Quilts. 

I taught a class with this pattern and called it “Easier Than It Looks” because it is! The design looks complex but in reality it is just a matter of framing and rotating blocks. Here’s the quilt I made as a sample for the class:

Another example of partially framed blocks is my recent “Little Jewels” quilt:

And good news!  I tracked down the origin of this design and you can find instructions for it free on this website.

Here is an example of one block.

The “trick” is that each block is framed on two sides, making it asymmetrical.  Then alternate blocks are rotated 180 degrees so that any sense of quilt rows is lost!  Make a couple of scrap blocks and try it–it’s magic!  In truth, there are the usual intersections between blocks but the corners are almost impossible to see 😀

Finally, making blocks of different sizes certainly can be used to avoid intersecting seams. I consider this a design-as-you-go process and it does take both time and confidence, but it works well.  Here is one I made ages ago:

art quilt, gwen marston

Refrigerator quilt inspired by Gwen Marston. Bev Manus came up with the idea for refrigerator quilts.  Finished size 12″ x 12″

And here are some recent blocks up on the design wall to test a potential background fabric:

These blocks are all the same size (will finish 6″) but the sashing will be variable.  I’m setting them in vertical rows with variable distances between the rows, and variable distances between the blocks within each row!  No way will there be anything to line up 😀

Have a good week and share any tricks you have to avoid fussy intersections!

A Quilt for A Man (or anyone)

It’s sometimes difficult to think of a quilt design to make for a man, and can be even more difficult to find fabrics that don’t seem too “girly” or cute. Leaving aside the options of fabrics featuring beer labels or half naked women, I thought muted blue and brown would be a good option.

And of course, Studio Stitch had the perfect fabric collection! Here’s the quilt:

And here’s a secret:  I used flannel (the 108″ wide backing flannel) for both the batting and the backing!  As you can see, it drapes beautifully.  An added advantage was that flannel sticks to itself pretty well, so there was no trouble with layers shifting when I quilted it.

Having made it, I wrote up the pattern for Studio Stitch. They will be offering it free with purchase. I don’t know details, so if you’re interested, go to  their website  and sign up for the newsletter and they’ll let you know.  (Newsletter signup is just below the big picture on the front page).

Have a good Thanksgiving and STAY SAFE!

It Happened This Way…

A friend and I made Pat Sloan’s weekly blocks for her Going on a Picnic quilt. It gave us something to look forward to when the blocks came out each Wednesday and we enjoyed exchanging pictures of our blocks. Here’s my finished quilt top, though some of the blocks are NOT what Pat designed. If I didn’t like hers, I just made my own.

Meanwhile, my husband and I decided to lease a house for part-time use near where our grandchildren live. It’s a long story and not about quilting, so I’m not elaborating here. However, it came to mind that the house might not have window coverings. So all my quilt backs got packed to move in case we need temporary “curtains”.

And then I finished the quilt top, now known as “The Elvis Quilt”.

Elvis on The Elvis Quilt

There was no quilt back available, and I wanted to get it to the quilter before the moving van arrived. Therefore, I took all the leftover fabric from the quilt top and combined it with leftover pieces from a gray quilt back, and here it is.

It took all day to do this, with time out for packing, laundry, etc. Now I know why I buy the wide quilt backs. Anyway, a good quilt back is a done quilt back!

Hope you have a good week!

Two Finishes with Kaffe Fabrics

As sometimes happens, I bought a fat quarter bundle of Kaffe fabrics for something else entirely but changed my mind.

If you’ve ever tried making a quilt with fabrics designed by Kaffe Fassett, you know that you have to choose the pattern verrrry carefully if you don’t want a hot mess.  The fabrics are beautiful in their own way, but they don’t play very well with traditional patterns or patterns requiring good contrast between pieces. Therefore, I found a pattern written specifically for Kaffe fabrics.

The pattern made a larger quilt than I wanted, so I sorted the blocks into Kaffe 1 and Kaffe 2.  Here’s the larger one:

Quilt Name:  Kaffe 1

Pattern Source:  Free Spirit Fabrics (see link at bottom of post)

Finished Size:  58″ x 70″

Quilted by: Julia Madison

And here’s the smaller one made with “leftovers”:

Quilt name: Kaffe 2

Pattern source:  Free Spirit Fabrics (see link below)

Finished size:  48″ x 60″

Quilted by: Julia Madison

It was fun working with those wild fabrics, and the pattern was fairly easy.  Here’s the source for the free pattern if you’re interested: Carnival of Color


New Quilt for Studio Stitch! OMG!

OMG is One Monthly Goal,and I’m linking up.  My goal was to make a quilt from the lovely fabrics shown below, and there’s a picture of the finished quilt below as well!

It happened again!  I fell in love with these fabrics, so I’ve written another pattern exclusively for Studio Stitch.

These fabrics are from Studio Stitch

Here’s my shop sample in crib size:

The pattern is written to make it easy to set blocks on point, so if you’ve never done that, now is the time.  There’s even a little “cheat” to be sure the points don’t get cut off when you add the coping strip.

The quilt shown above is crib size, but the pattern includes four different sizes from crib to queen.  It can be made with one or more charm packs, or Studio Stitch will make you up a kit with the same fabrics used in the sample.  And yes, they can make you a kit even if you want to make a different size from the sample!

The pattern is free with a purchase from Studio Stitch; Here are the links to the kit and the fabrics used. 

Kit: click here to view

Fabrics: click here to view the fabrics used in the quilt, including more options and the charm pack that would give the quilt more variety if you prefer that.

Of course, this also would be great in seasonal fabrics for certain little people… just saying!  Hope you have a great week!


For a Good Time…and OMG

For a good time, see if you can visit your local quilt shop! I was able to visit Studio Stitch last week because they are observing strict social distancing and mask guidelines, including limiting the number of people in the shop at a time. It was SO MUCH FUN to get to shop for fabric after being quarantined for 6 months!  I appreciate the care the staff are taking to try to keep everyone safe.

I should mention that I also checked the public health report and noted that COVID was trending down in Greensboro before going there.

Here’s the haul from one visit to the shop:Yes, the gray and white fabrics are metallic! And the fat quarter at the far right just jumped into my basket while my other fabric was being cut.  (Not my fault!!)

Which leads me to the OMG part.  For the first time, I am joining the One Monthly Goal challenge.  I’ve seen several blogging friends doing this for quite some time but haven’t joined up.  So, here is my OMG for September:

In September my goal is to make a quilt from these fabrics and write a pattern for that quilt.

These lovelies are from Studio Stitch, too

The pattern will be available through Studio Stitch when I finish it.  If you subscribe to their free newsletter (subscription form is about half way down their home page) you will see a picture and information on getting the pattern when the time comes. And of course I’ll show the quilt here when it’s finished!

That’s all the excitement for now.  Has anybody else been able to visit a shop in person with precautions in place?  Thanks for reading, and stay safe!

Fiddlesticks!

I finished this quilt last month, but I’ve been doing a lot of quilting due to quarantine, so I’m behind on showing my work.  This is a scrap quilt, of course.  I’ve been seeing lots of quilts with little strips inserted on Pinterest, and finally got around to developing my own.

First, I got out all my solids, including the Grunge, and cut a 12″ square from each for background.  I planned to trim the blocks to 10.5″ after I finished inserting strips, since I have a 10.5″ square ruler 😀  No point making things difficult; let’s plan for easy!

Then I got out all my scraps and cut them into strips ranging from about 1″ to 2.5″ in width.  I made strip sets and cut them crosswise into strips for the quilt.   The inserted strips were cut in widths varying from 1″ to 2″, which of course means they finished 0.5″ to 1.5″ wide in the blocks.  I made more skinny ones than wide ones.

I just slashed the blocks at random angles.  I did slash and insert only one strip at a time. 

After I’d inserted enough strips to suit me, I trimmed each block to 10.5″ square.

Just look at the fun flower design my quilter used!

And yes, I left 3 blocks unpieced to add interest.

Quilt stats:  Fiddlesticks

Finished size: 49″ x 69″

Designed by me, based on multiple inspirations from Pinterest

Technique: Improvisation

Quilted by Julia Madison

An Easy Donation Project

Pineapple Fabrics recently sent an email requesting blocks to be made into quilts for Brenner Children’s Hospital.  Some days I feel completely overwhelmed with making donation quilts, but this looked easy and fun.  They asked for applique pineapple blocks, using a template they provided.

Here are mine:

A couple of my quilting buddies made even more, and Chela even used Dr. Seuss fabric for hers!

Here is the link to the Pineapple Pieces Project if you are interested.  Full disclosure: these blocks were as fun and easy as they looked, I also appreciated not having to make a whole top and quilt it!

And I have donated this little art quilt of to the Studio Art Quilt Association’s annual auction.

Quarantine has provided a lot of good quilting time, though I miss getting together with my quilting buddies!  I hope you are finding benefits to enforced time at home, too.