The Rest of the Story

Here are the other two quilts I made while doing the Gwen Marston class on iQuilt.

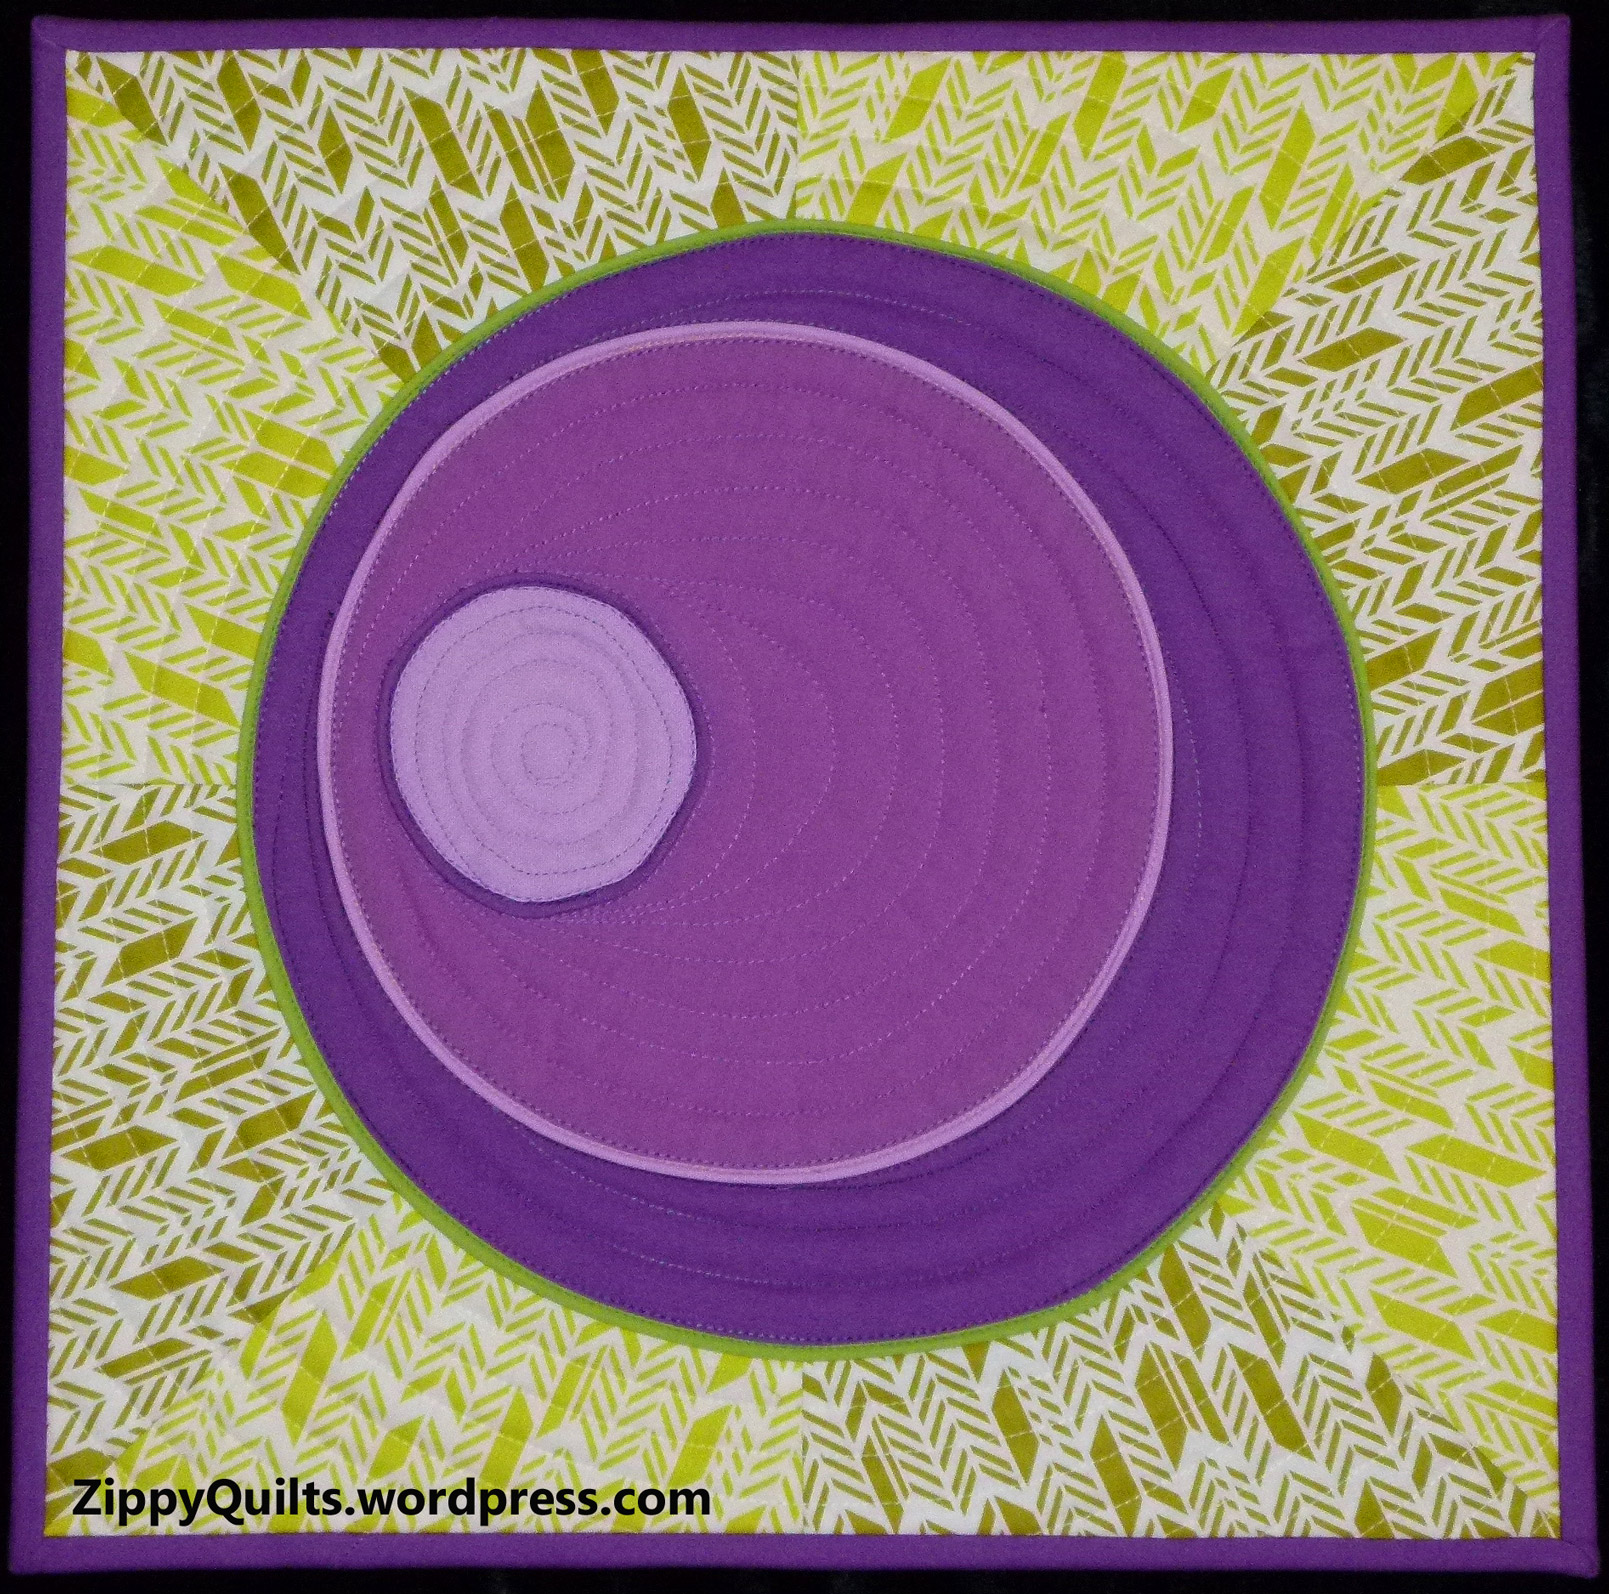
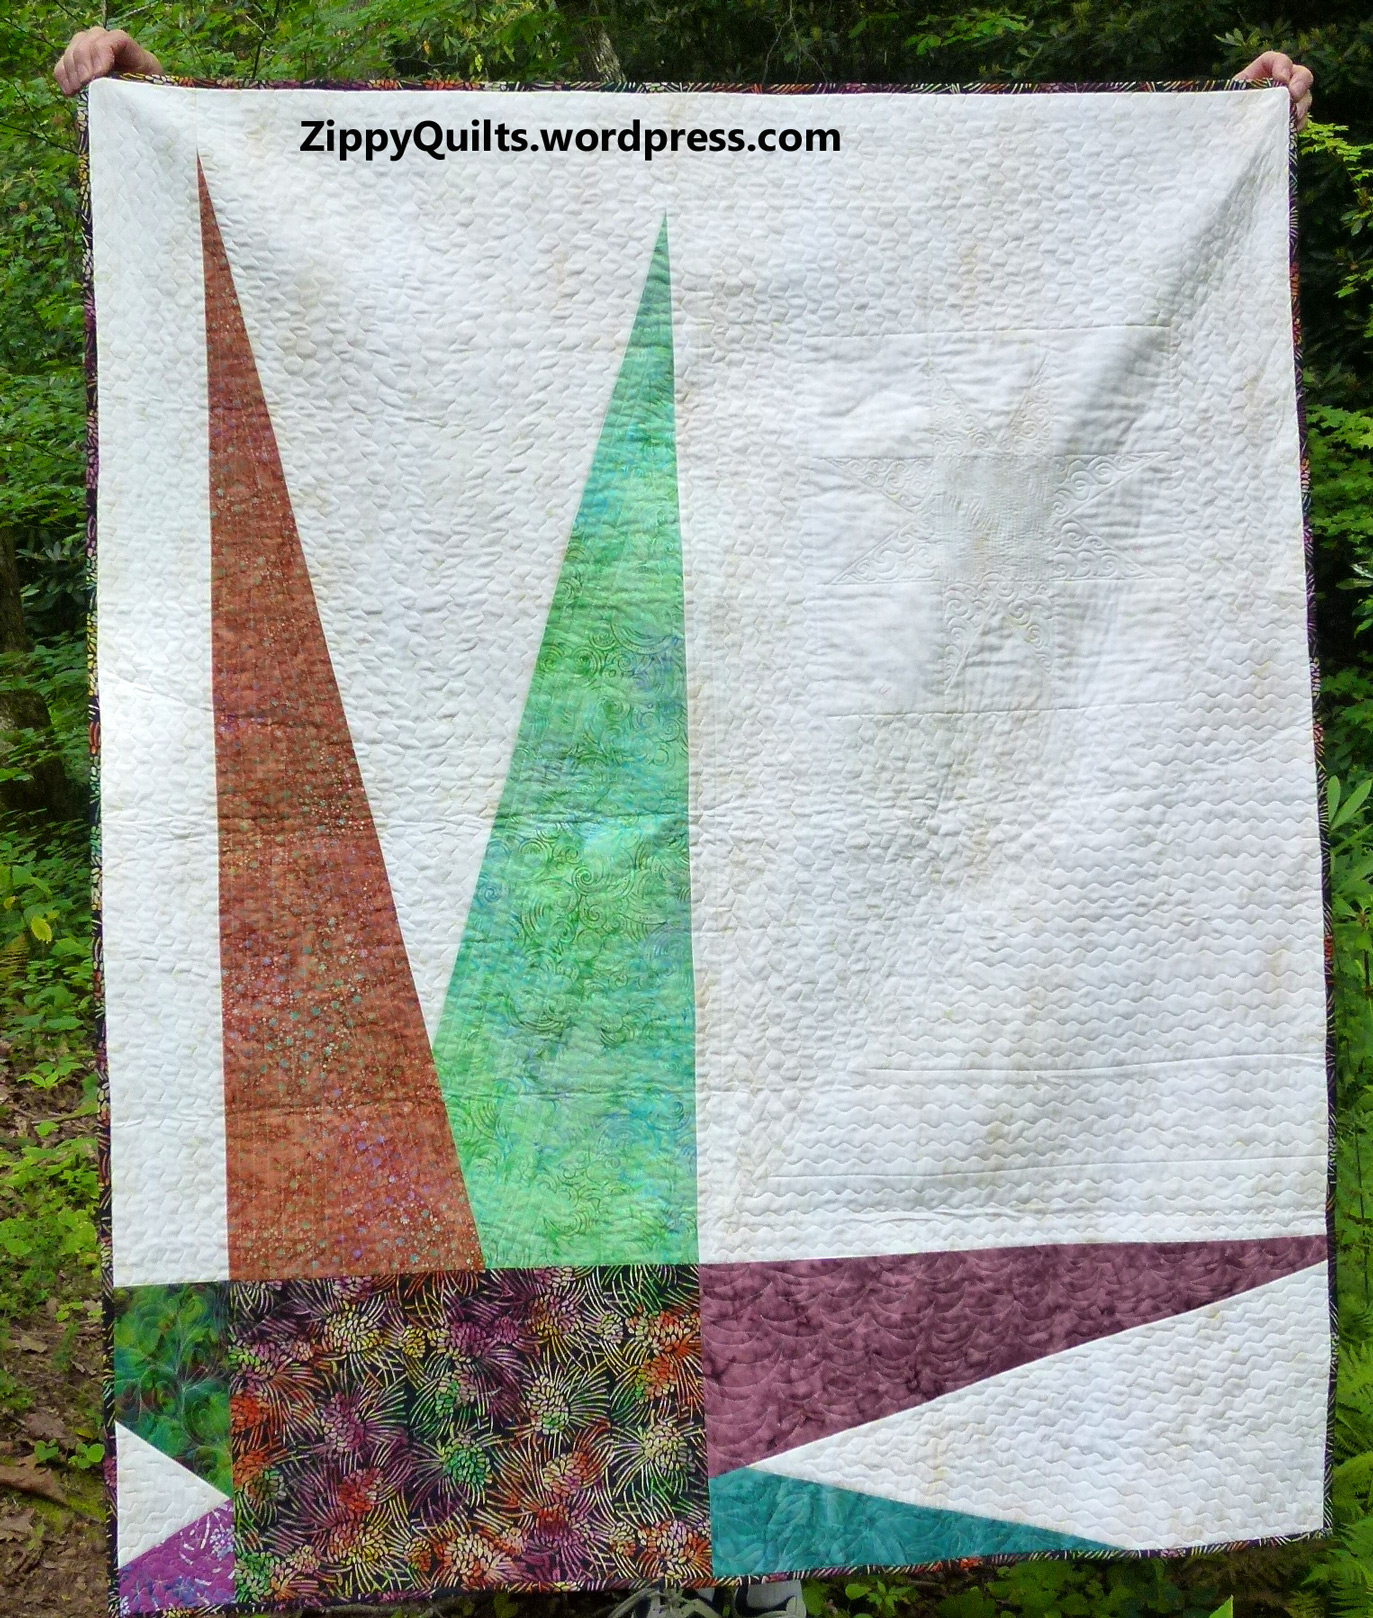
This first one is my version of one of her quilts, and again I made it 12″ x 12″.  I faced it, which I don’t usually do, so that was a learning experience.  I like the way it turned out.Gwen Marston iQuilt class

This second one was made of scraps from the other quilts in the series, which makes me happy.  Marston2

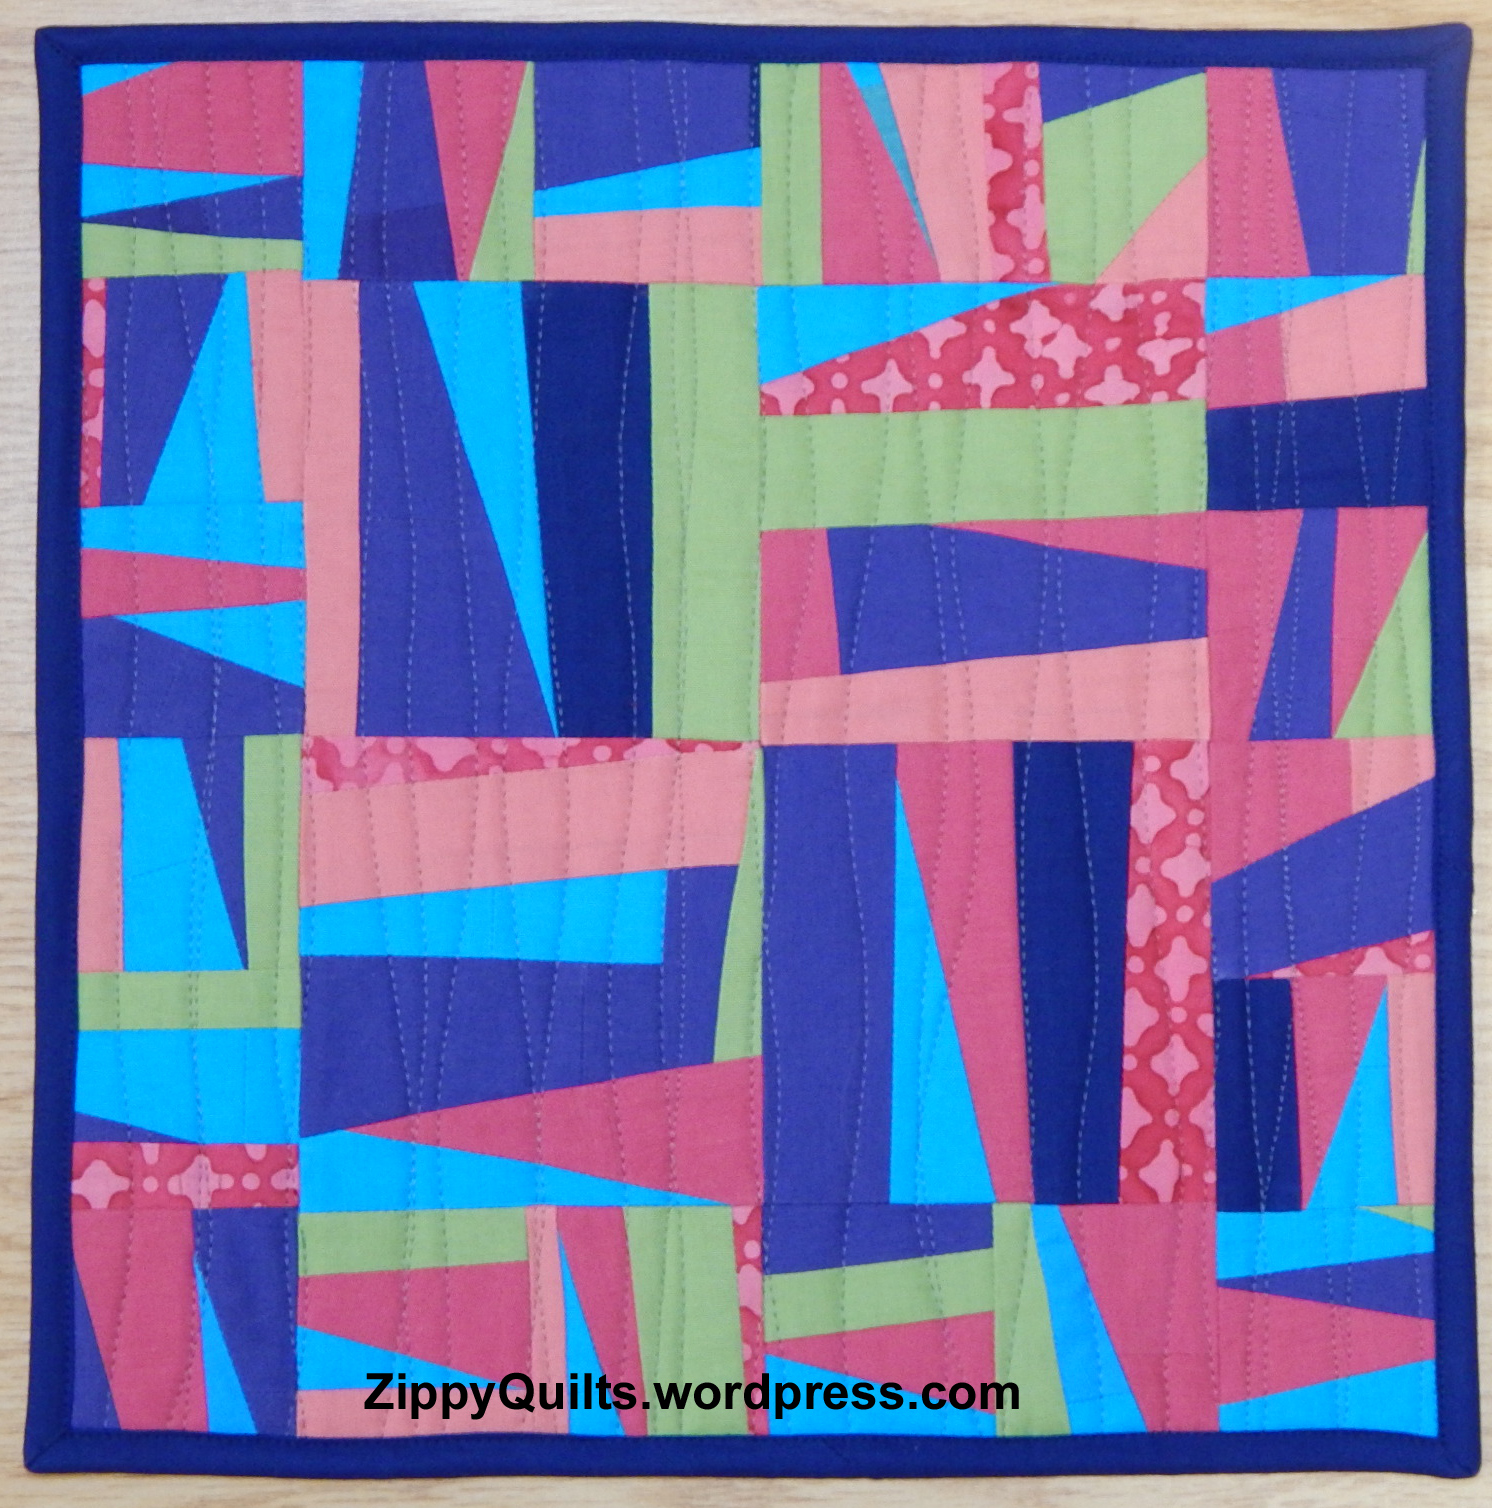
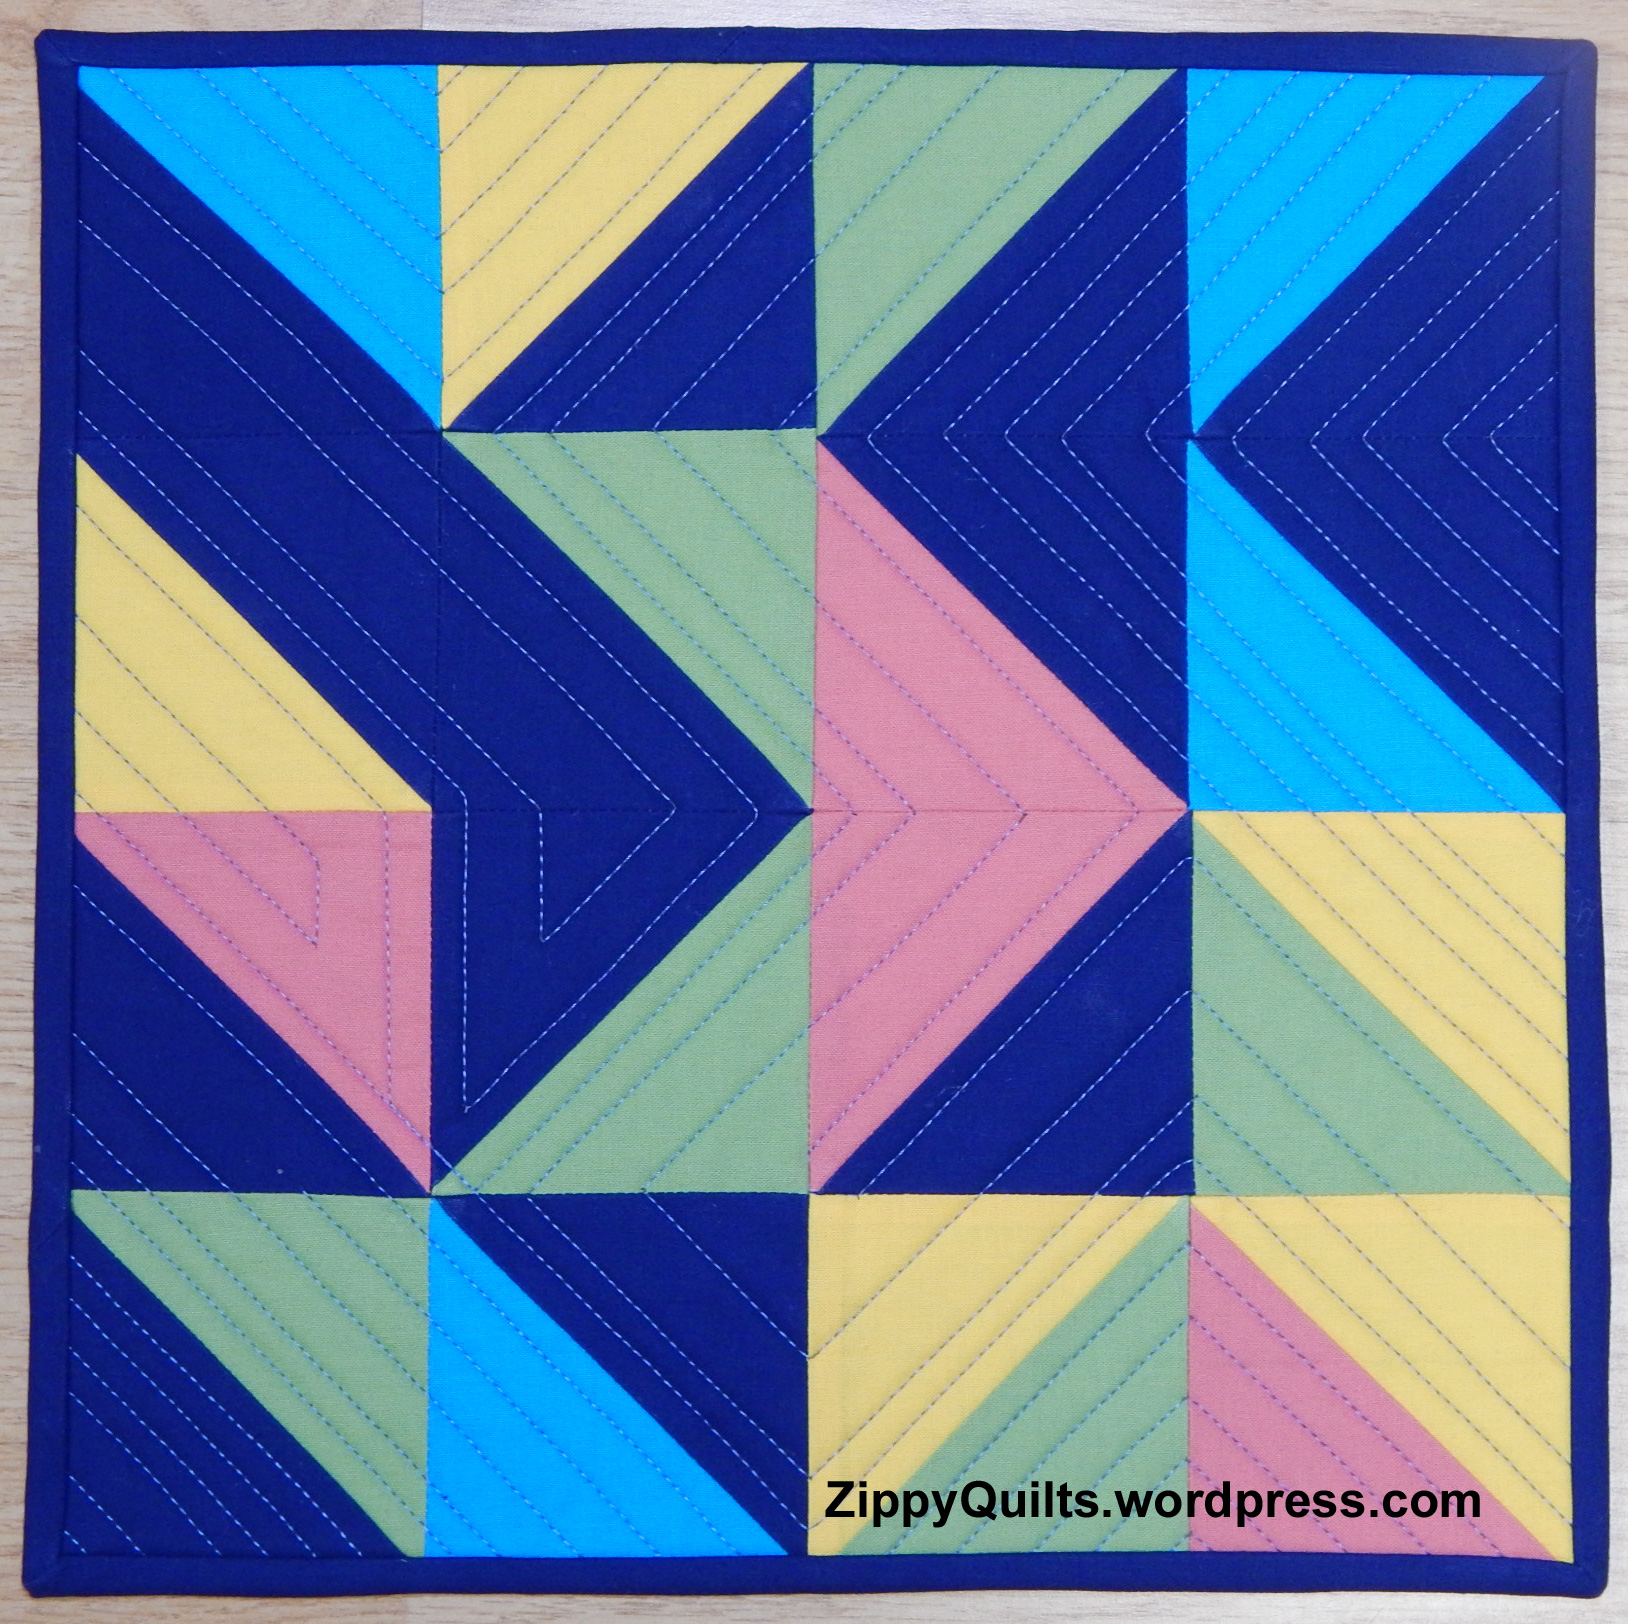
This started as a liberated Roman Stripe design, with a center of 4 larger blocks and a “border” of smaller blocks.  The size of the blocks worked out fine, but the pieces got more and more “liberated” so that I’m not sure it looks much like a Roman Stripe any more.  Which is fine, actually.

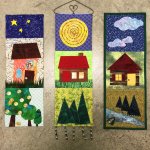
I quilted it using a pattern of wandering lines, all in one direction, and I like the result. After considering several threads, I used a thin medium grey polyester.  I think it blended well so that the quilting didn’t obscure the design.  Here’s my “trial” of several threads.Marston1

How do you choose your quilting thread for a project?

More Inspiration

I bought two of Gwen Marston’s books some time ago…

and have been channeling her in my designs for over a year (you can click on the pictures below to see their captions):

Recently I saw that the (relatively) new iQuilt platform had two video classes taught by Gwen Marston.  The class I chose was quite short–a little over 2 hours–and I decided to watch the class over a weekend and make several little quilts using her techniques.

I’d already made a refrigerator quilt in Gwen’s style for an upcoming guild challenge,

art quilt, gwen marston

Refrigerator quilt inspired by Gwen Marston. Bev Manus came up with the idea for refrigerator quilts.

so I decided to make the new quilts 12″ x 12″ as well.  This is a great size for trying new things because there isn’t too much commitment of time or materials.

The first quilt was composed of half square triangle blocks, so I was able to try out the (fairly expensive) Loc Bloc ruler I recently bought to make trimming these blocks to size easier.  The ruler worked great with just a little practice, and I got to practice my machine quilting on the finished quilt.

refrigerator quilt

Quilt Front

Gwen’s instruction was to pair the triangles up into squares just as you picked them up, with the caveat that the pairs should have contrast between the fabrics.  Then the squares were to be sewn together into rows just as they were picked up.  She did allow that it would be OK to lay the rows out and look at them before sewing them together, but advised against spending a lot of time fussing over the exact layout.

Refrigerator Quilt

Quilt Back

I was pleased with this result.  The class doesn’t really cover anything that isn’t in her books, but I was happier watching a little and sewing a little than I am to just sit down and read a book.  I made a couple of other quilts, too, and I’ll show them next week.


Good News, Bad News!

First, the bad news: I sliced a good-sized hunk out of my finger with the (nice, sharp) rotary cutter. When I couldn’t get the bleeding stopped after an hour, I went to Urgent Care. A nice Physician Assistant there got it all fixed up.rotary cutter accident

Quilting with 9 fingers is a challenge 😉  Another learning experience…

In better news, I made Lora Douglas’s Roxie bag this week, and it is as cute as expected! This project is part of Quilted Adventure, an online retreat I’m taking part in throughout 2016.  As always, I learned several things from making this bag.  And unlike the learning experience mentioned above, this was fun:

Roxie Bag, Quilted Adventure

Roxie Bag, Designed by Lora Douglas

Lora’s instructions requested foam batting, a product I had never heard of!  Luckily, my “local” quilt shop had it. It did give the bag really nice structure without making it stiff, and I probably will use foam batting for future bags.  A nice find!

I purchased the hardware for the bag from Lora’s Etsy shop,  I had no idea a flex frame could be so sturdy.  Most bags I’ve seen were made with lengths of metal measuring tape as the closure.  That works just fine (if your husband isn’t very vigilant about his tools) but the closure isn’t very tight.  The flex frame that came with the kit holds that bag closed with certainty!  And unlike the measuring tape closure, this one can hold itself open when needed.

Lora Douglas

Roxie Bag with the top snapped open

Lora’s instructions also called for glue-basting the binding, which I had never done.  It actually worked great!  I’ll probably do that again.

If you’re interested in the year-long Quilted Adventure, all classes are online for the whole year, so you can sign up any time.  Just use the link above to go to Lora’s site and click the button in her margin.  If your main interest is the bag rather than the whole retreat, she’ll release the single pattern some time in 2017.

So the good learning experiences certainly outweighed the bad this week!


Projects 2013–Part I

For some time I’ve been meaning to add to my blog with a gallery of projects for each of the past several years.  I’ve been held up in part by the variable quality of my photography over the years, but I’ve decided to just start anyway.  Here are some projects from 2013.

I entered several national contests in 2013, the year I also started this blog.  Here is the quilt I made for the Quilt Alliance TWENTY challenge and chose as the header for my blog:

Rising star art quilt

Rising Star, made for the Quilt Alliance TWENTY contest in 2013

I made this quilt for the Michael Miller challenge in 2013:

Michael Miller Challenge 2013

Packet of Posey Seeds

And I made this little quilt for the Pantone Challenge:

Applique quilt

Radiating Orchid mini-quilt for the Radiant Orchid Challenge

I attended some wonderful classes with Laura Wasilowski in 2013, and made this little art quilt:

applique art quilt

Leaf, made in class with Laura Wasilowski

I did some “crafty” things in 2013, including chambray shirts decorated with orphan blocks and matching T shirts for a special baby and his special Dad:

Here are a set of placemats and two table runners from 2013:quilted placemats

leaf runner

table runner

Table runner made from a strip of leftovers

Also in 2013, I made an apron for a special friend and a caddy for carrying my iron to classes and retreats:

2013 was also a good year to make pillows for friends and to use up orphan blocks:

Well!  That’s it for special projects from 2013.  The actual quilts from 2013 are up next–more to come!

Little House Class at Studio Stitch

I’ll be teaching my fusible applique class, called Little House on the Wall (with no

Studio Stitch

Samples for the Little House workshop

apologies to Laura Ingles Wilder) at Studio Stitch in Greensboro (NC) on January 30.

I visited the shop recently to talk with the staff about materials for the class, and of course I HAD to look at EVERYTHING.  Well, I needed to look so I could discuss what would be appropriate for the class, but it’s OK to just drool on the fabric a little, right?

They had landscape fabrics and plenty of batiks that will be great for the class.

There was even a bundle that seemed just made for creating my little houses!Studio-Stitch-8

I even found 28 weight thread for embellishment in a variety of yummy colors.


28 weight thread can be hard to find, but Studio Stitch has plenty!

28 weight thread can be hard to find, but Studio Stitch has plenty!

Of course I wandered a little…they had gorgeous batiks made specifically for use with the Jacqueline De Jonge patterns.  They even had one as a kit, with a more restful background fabric than this sample I took from Jacqueline’s site.

The ladies at the shop were all friendly and helpful, and I’m looking forward to teaching there.  You can find out more about the shop and my class on the Studio Stitch website. 


Winner! Online Quilt Retreat

I won a year-long online quilt retreat!  What the heck is that?

Lora Douglas of Dragonfly Quiltworks

Lora Douglas of Dragonfly Quiltworks

Here’s Lora Douglas, one of the teachers from the retreat, to explain.

This year-long on-line, quilt retreat is sponsored by “Adventure Art Retreats”, which was started by Ilysa Ginsburg and Kira Slye. They launched “Polymer Clay Adventure” as an online experience in 2015 and got about 1000 subscribers! They’re adding a quilt adventure for 2016.

There are 12 projects, one each month of the retreat. There will be classes for quilts, placemats, totes, hexies, fabric dyeing, laminating fabric and polymer clay buttons

Roxie bags made by Lara for her Quilt Adventure class

Roxie bags made by Lora for her Quilt Adventure class

.I designed the Roxie Bag as one of the monthly projects for the retreat, and I’ll be teaching it by online video. When I couldn’t find a pattern using flex frame hardware that was easy to make and looked great, I designed my own. It is perfect as a cross-body bag for carrying a cell phone and other small items.

“Quilted Adventure” is the online equivalent of a traditional quilt retreat where you meet other quilters while learning new things.  “Retreaters” can take a new class each month; participate in live-stream events with our host, Vanessa Vargas Wilson of The Crafty Gemini; receive monthly clues for a mystery quilt; and take part in swaps. There will be a newsletter to keep participants informed of upcoming events. The instructors will be available to answer questions throughout the retreat. It’s going to be fun!

Another Roxie bag--how many samples did she make???

Another Roxie bag–how many samples did she make???

I’m gathering my supplies, and I’m sure you’ll be seeing some of my projects here as I participate in the retreat.  For now, If you want to know more about Lora or the Quilt Adventure online retreat, here’s the link for her site. There’s a button there to click for finding out more about the retreat.  (Or, if you just want to buy a Roxie bag after seeing it here, her site has a link to her Etsy shop as well. I won’t tell if you want to buy it instead of making it yourself 😉

Year End Review

For better or worse, I published goals at the beginning of the year, so here’s the review of my progress:
I met all the goals! (Does that mean I didn’t set them high enough?) I retreated with my buddies THREE times instead of just two! I attended 3 big national shows as well as 2 local ones (all were excellent). I took a couple of fun and useful classes, one of which I still need to write up here so you’ll know about it. I submitted several quilts to shows/contests and 3 were accepted. The one I donated to the Quilt Alliance even won something, and sold for $300 to benefit the Quilt Alliance!  And I had lots of fun, which was really the point of it all.

Here are pictures of a few of my projects from the second half of the year. The pix of projects from the first half of the year are in this post.

Spring Sun, a design by me, using blocks paper pieced from a totally different Judy Niemeyer pattern!

Spring Sun, a design by me, using blocks paper pieced from a totally different Judy Niemeyer pattern!  It took about 2 years, but it’s now DONE.

quilt photo

Zippy Star Quilt and Pillow as shown in Modern Quilts Unlimited, Summer 2014

Michael Miller challenge quilt

Packet of Posy Seeds, done for the Michael Miller spring challenge

modern quilt

Zippy Star I, which sold at the Asheville Quilt Show in September.  This was my “practice piece” for the MQU quilt shown above.

Improvisational quilt

Donation quilt for Ronald McDonald House.  I’m going to work more on using up orphan blocks next year.

And, despite the risk, here’s what I plan for the coming year:

1.  I’ll retreat with my buddies at least twice, probably 3 times again!

2.  I’ll attend one big national quilt show, maybe two.  I’ll attend at least one local show.

3.  I will limit much more strictly the shows and challenges I enter.  It takes too much time and effort that could be spent on making what I want to make 🙂

4.  I’ll continue to make donation quilts, including one for the Quilt Alliance.  Please consider making one for the Quilt Alliance yourself.  You can read about their mission here.  Click on “2015 Quilt Contest” to learn about this year’s challenge.

5.  I’ll continue my blog, and I think I’ll put up instructions for a few easy donation quilts just in case somebody is looking for ideas.

What’s coming up for you?

10 Quilty Secrets

Several of the blogs I read have recently revealed “10 Quilty Secrets” and I thought it sounded like fun, so I’m playing along. If you would like to see some other bloggers’ secrets, here are the links: The original post seems to have been at 13Spools.com, and the idea has been picked up by several blogs I follow, including Catbird quiltswombat quilts, and Christa quilts.

And so, here are my 10 Quilty Secrets:

1. Although I’m participating in Marti’s UFO (unfinished object) finish-a-month this year, I had FAR MORE than 12 UFOs at the beginning of the year. Oops, still do! Here’s the August finish, a quilt for Ronald McDonald House made from orphan blocks:August-finish

2. My nearest LQS (Local Quilt Shop) is an hour away, which I take as an excuse to have a good stash at all times 😉

3. If I start a quilt and don’t like it for some reason, I abandon the plan and turn it into something else–another quilt design, a table runner, whatever.

4. And sometimes those I-don’t-like-this projects just become long term UFOs 😦

5. In my world, a good quilt is a fast quilt.  I’m not patient enough for the zillions of little hand-pieced hexies, for example.cartoon hexie

6.  For that matter, I DON’T EVEN LIKE hexies!  Yikes!

7. I value good design in quilts and in other useful objects.

8.  I LOVE to learn new techniques and try new things, so I take lots of classes  Even if they seem like stuff I could do easily without a class I always learn something.

9. We’ve moved a lot, and one of the best ways I’ve found to make new friends is to join a local quilt group.

10. I think every quilt needs a little purple!

So, what are some of YOUR quilty secrets?