First Finish

Metro Hoops Quilt

Metro Hoops quilt made by Allison at Cluck, Cluck, Sew

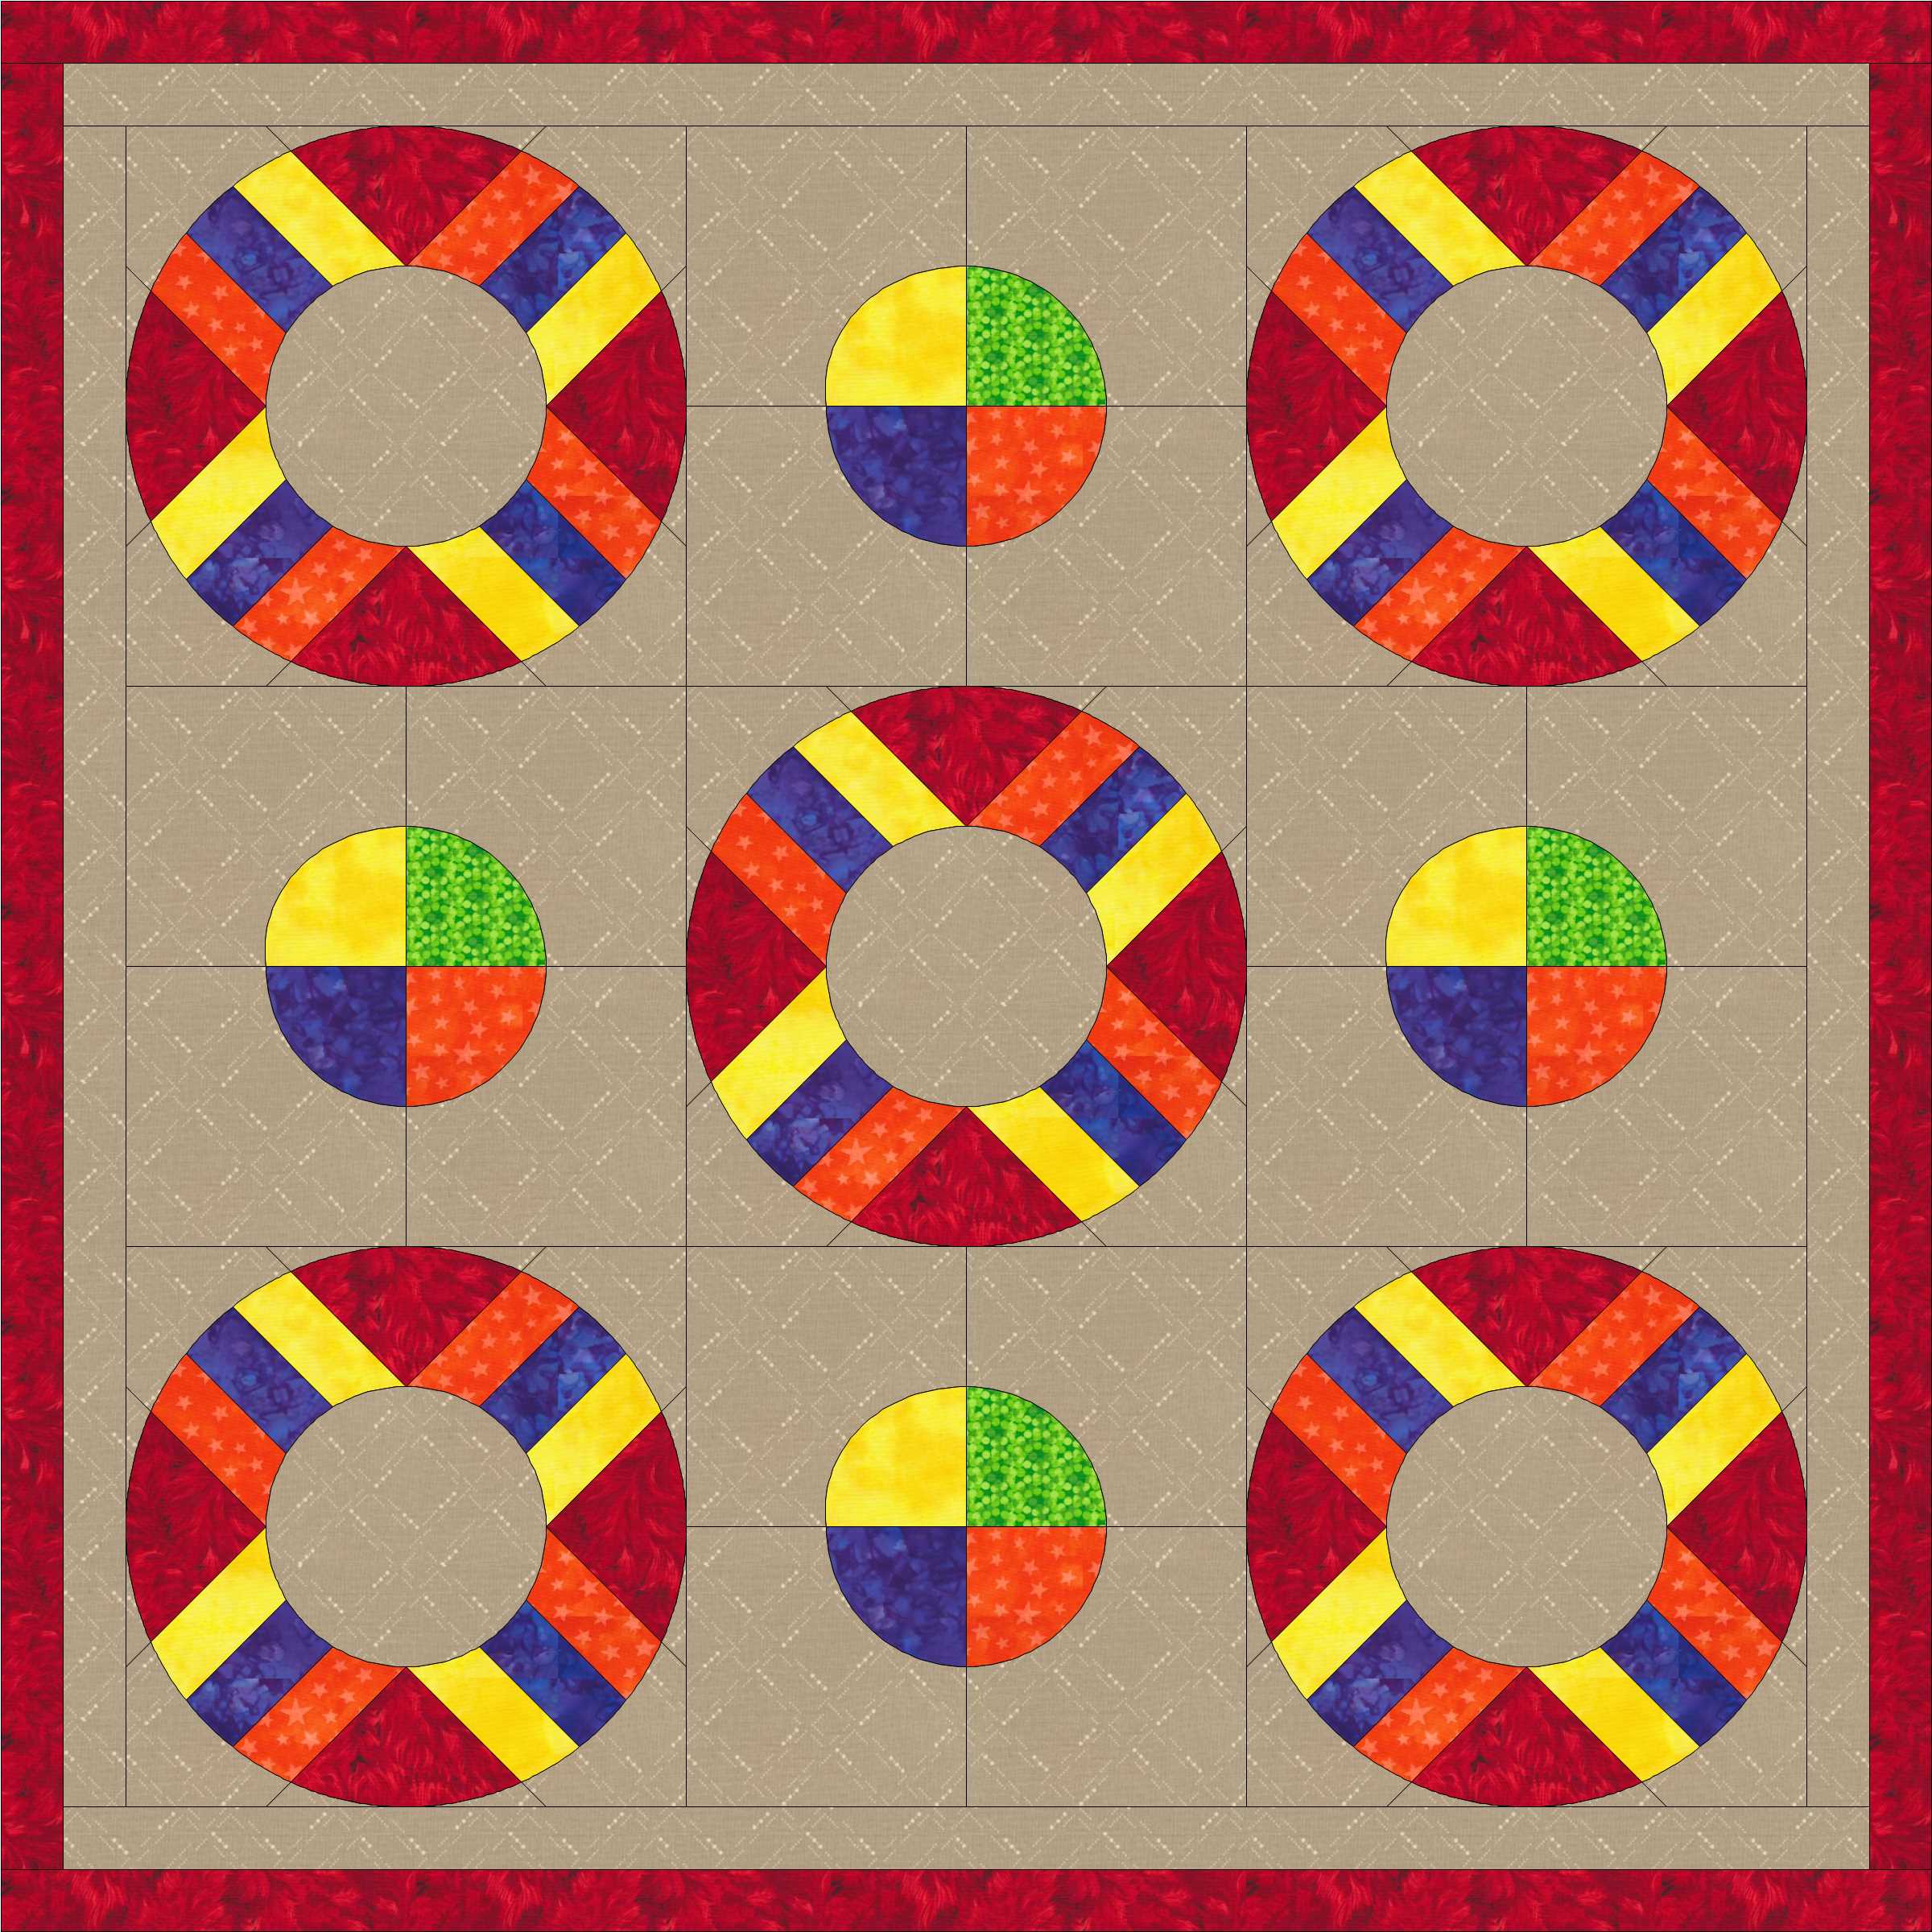
Inspired by the beautiful Metro Hoops quilt Allison showed over at Cluck, Cluck, Sew, I mentioned the Quick Curve Ruler as something I wanted to try in a recent post.  Here’s a picture of her quilt so you can see what inspired me.

My clever son-in-law gave me the ruler for Christmas, and as soon as we got home I tried it out.  As always, I learned a lot. Certainly the Metro Hoops pattern is a nice modern alternative to the traditional wedding ring quilt.  What I wasn’t prepared for was the fudge factor required to make it work.

modern quilt block

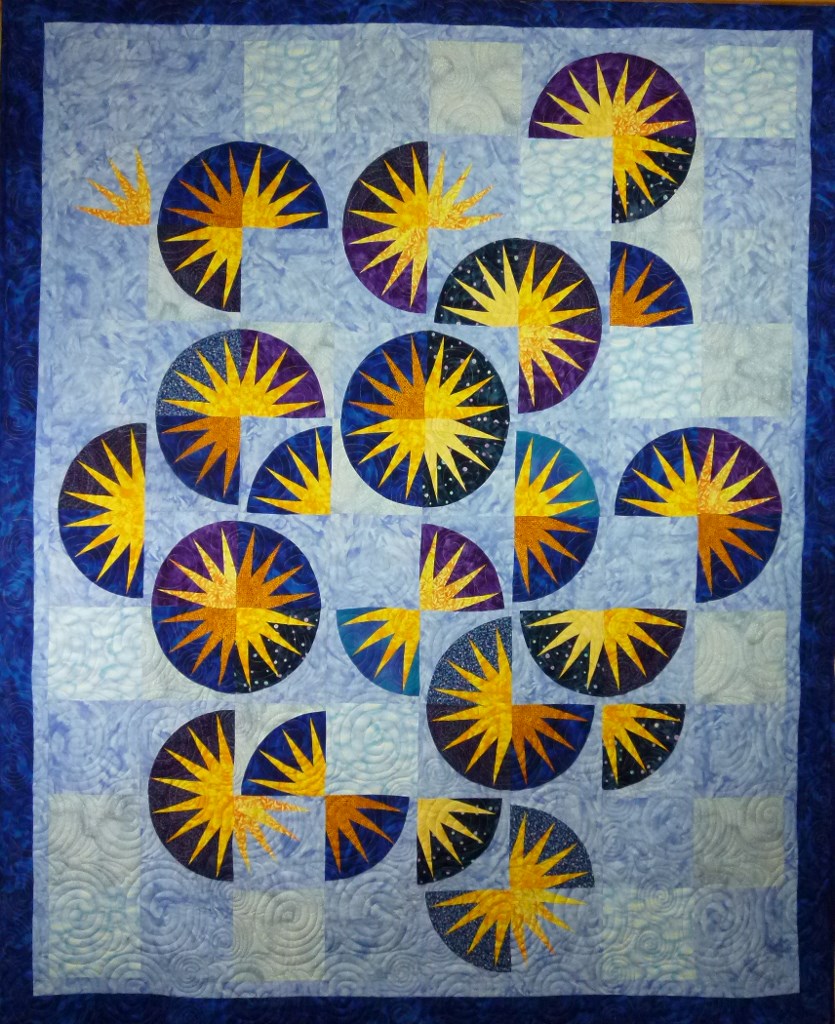
My first Metro Hoops block

It made a really cute block, but then my inner perfectionist kicked in 😦   The block required a lot of “easing in” along the seams to make the points match up. *(You can skip to the reason why at the end of this post, if you like.)

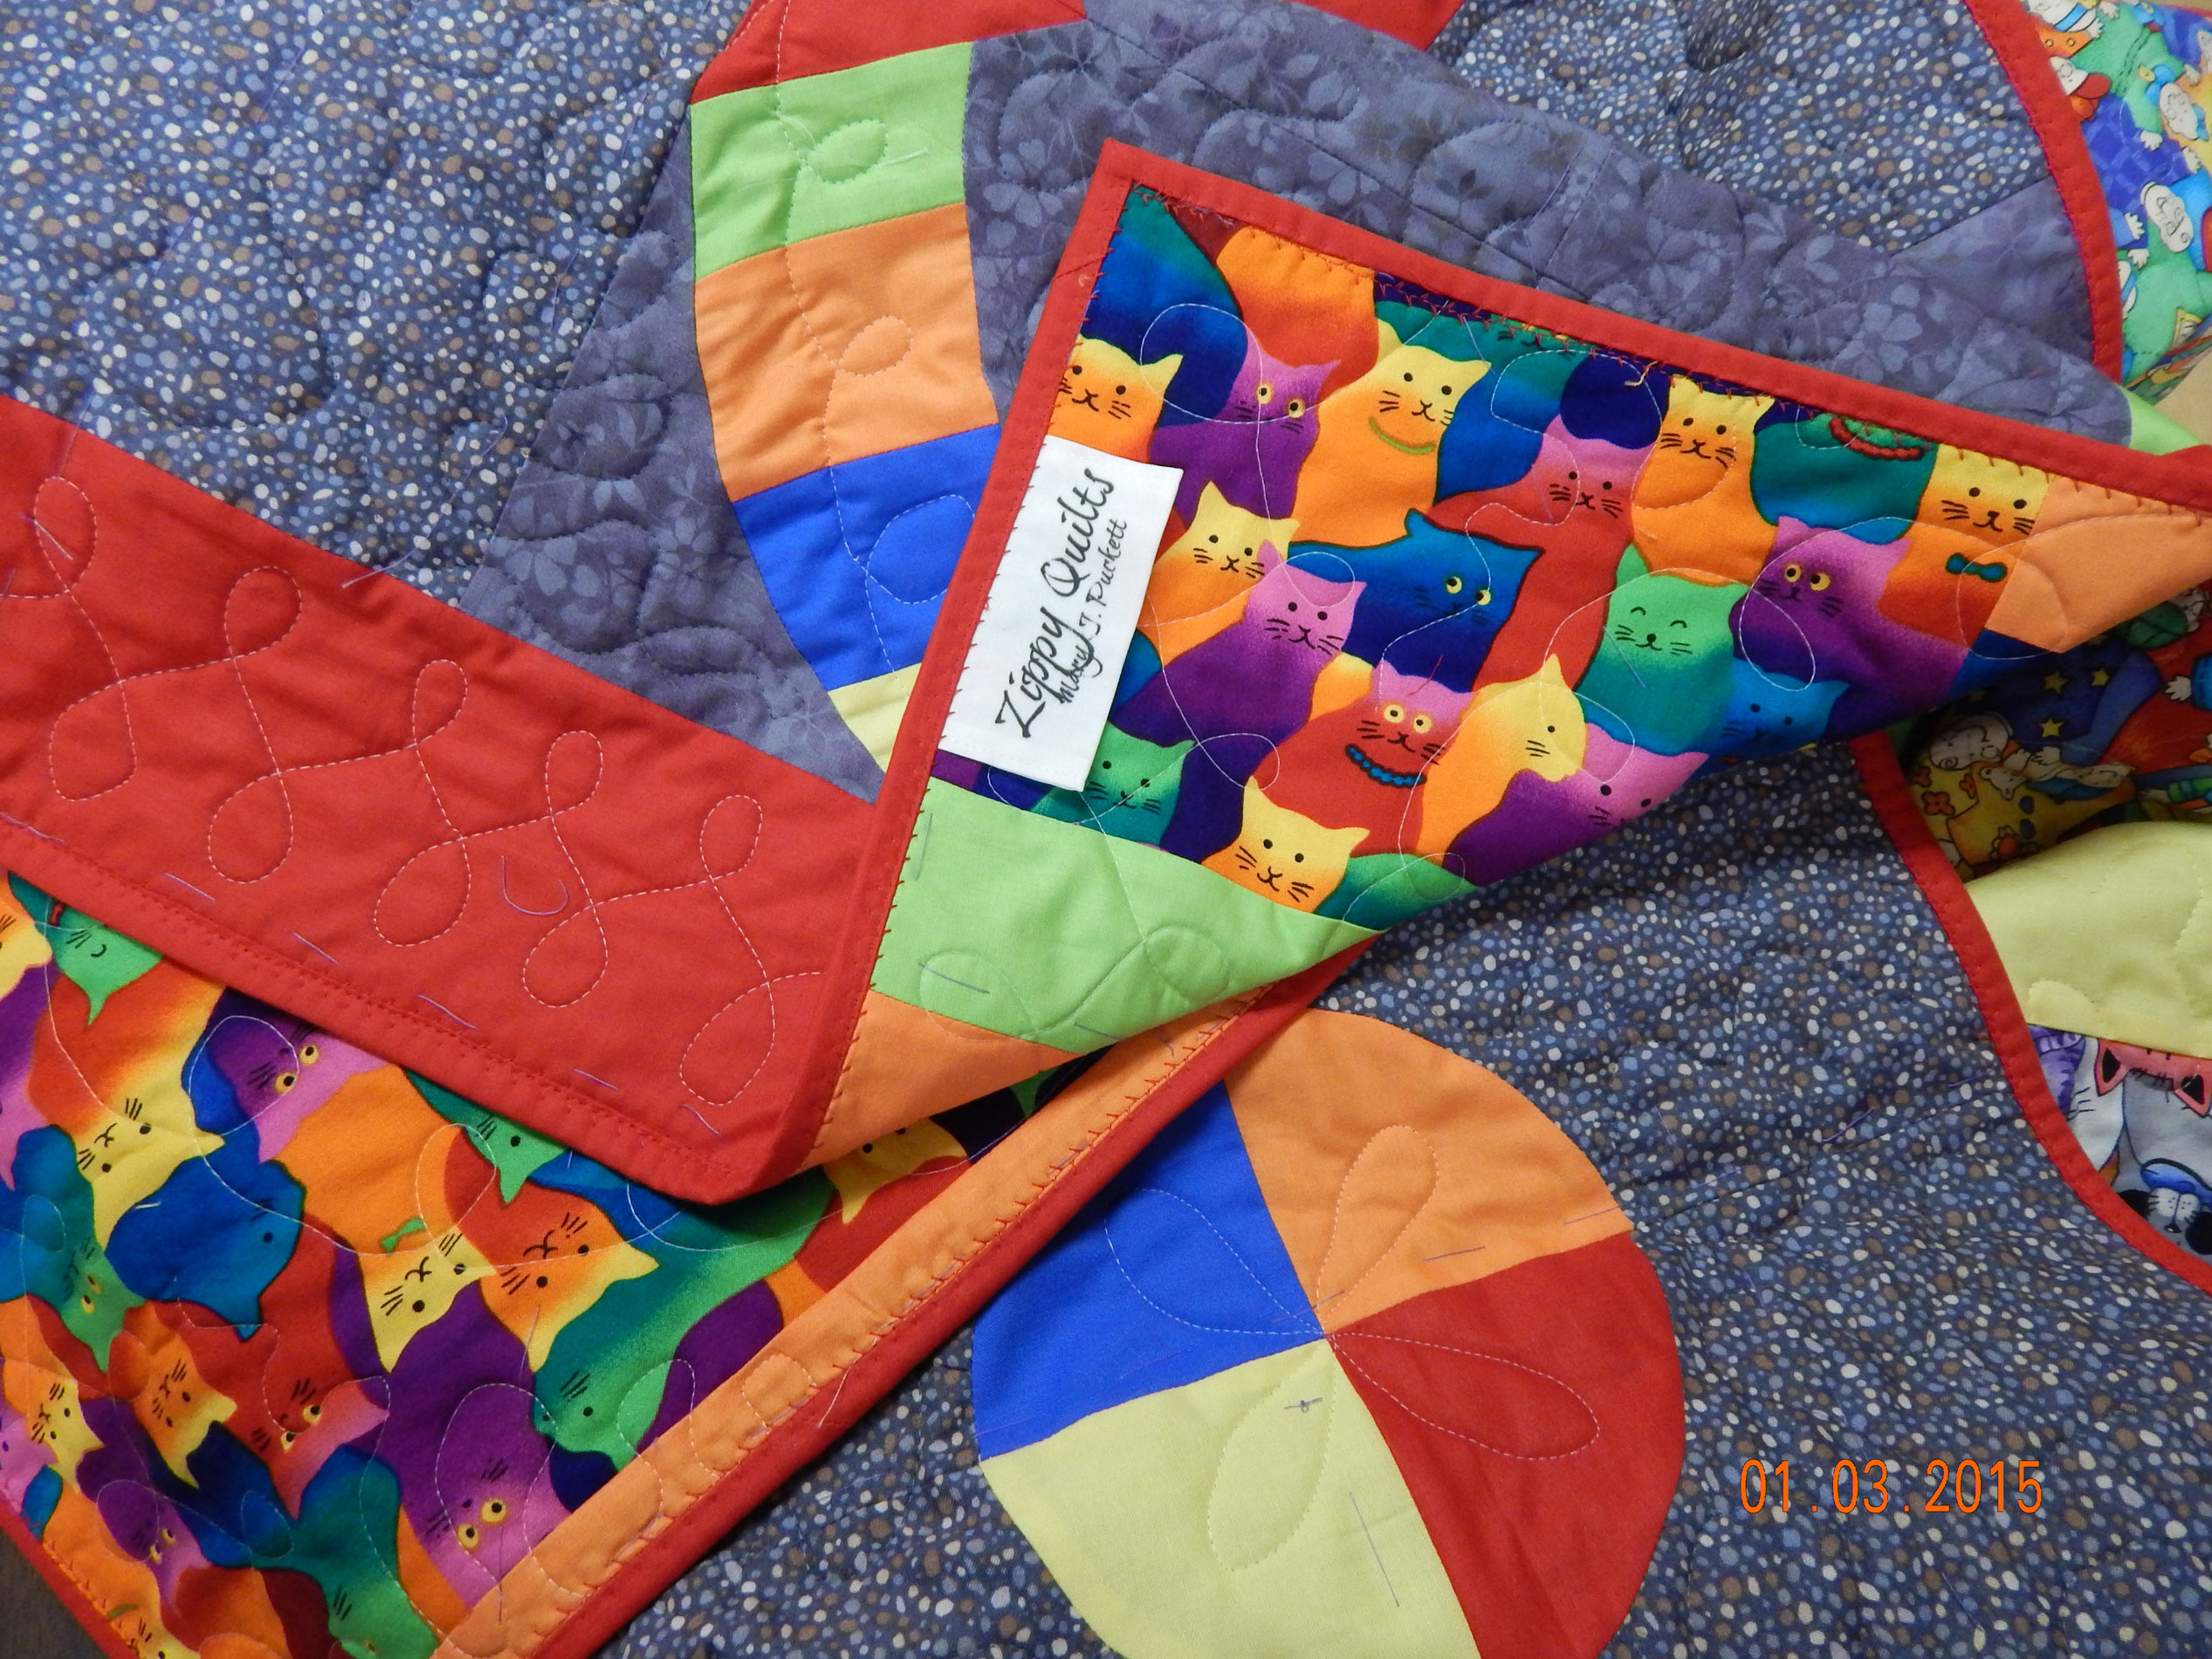
Luckily, I almost never cut out a new quilt completely before making a test block.  After making one block for this quilt, I decided 5 hoop blocks was my limit.  The blocks really are quicker and easier to make than they look, so I got the 5 done in a few hours. They are nice big blocks (finish 15″) so I had a good start on a baby quilt.

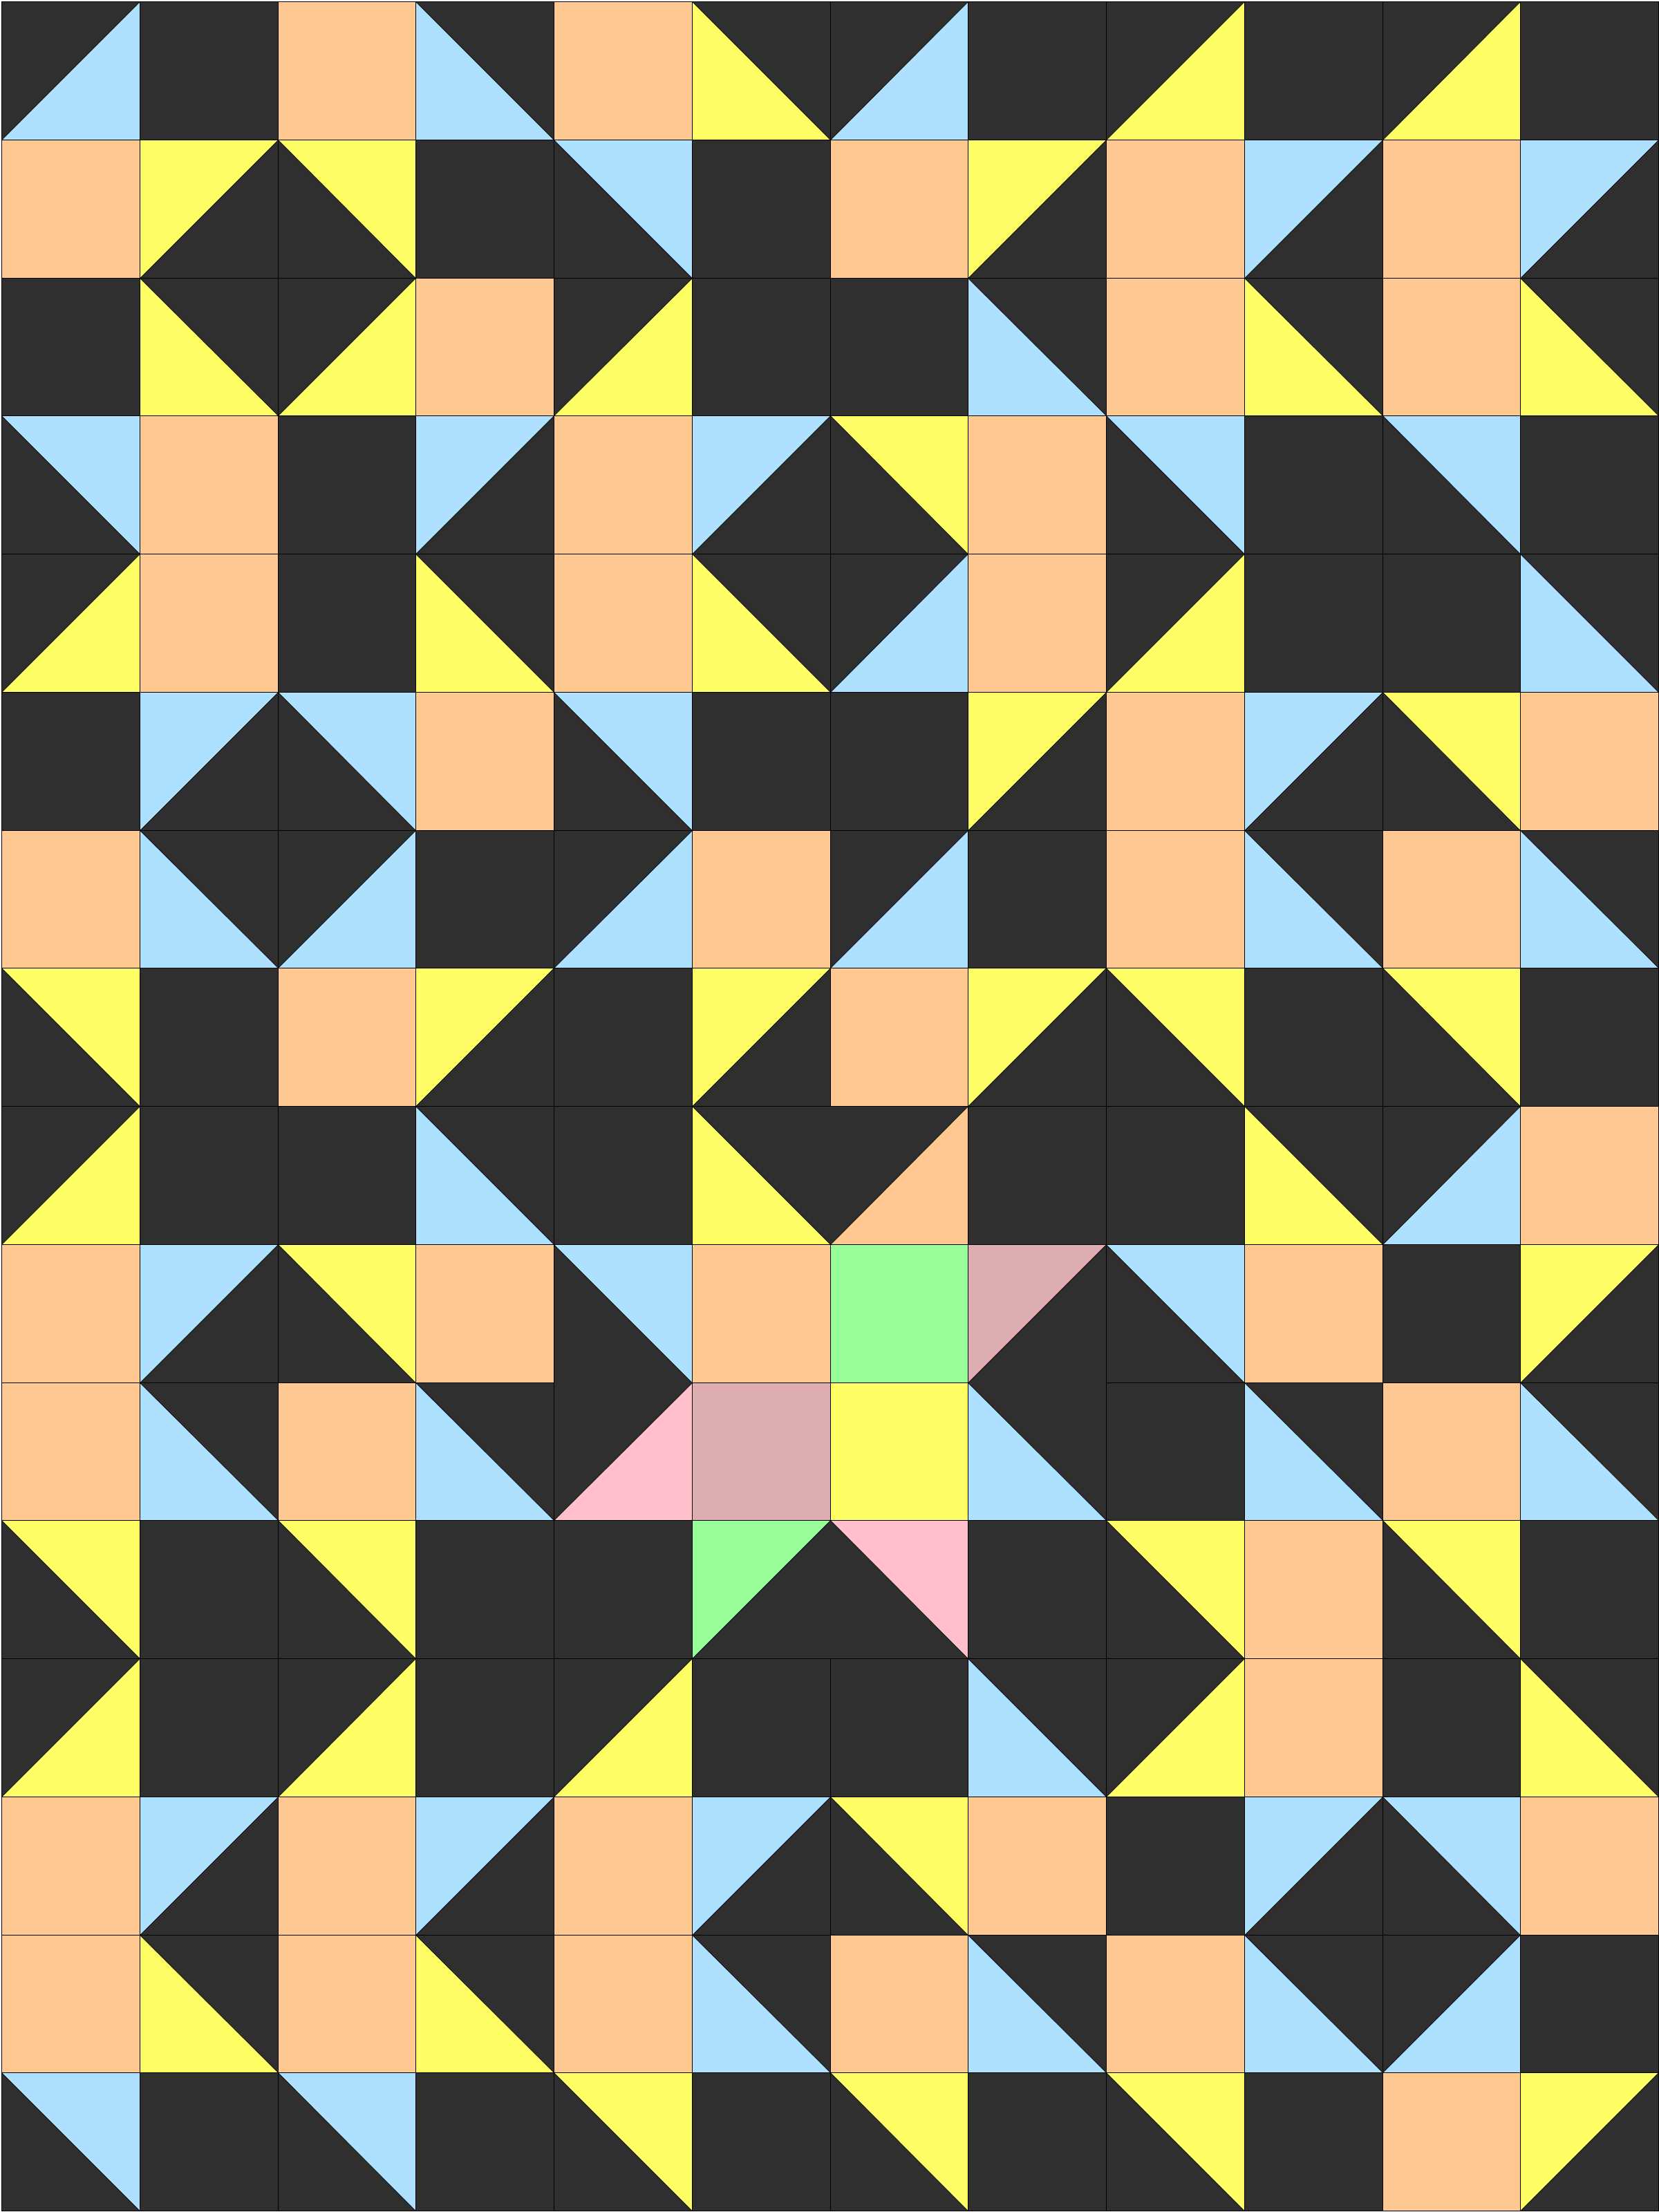
I drew an approximation of the block with my EQ7 program and came up with this layout:

My EQ7 layout for the Metro Hoops blocks

My EQ7 layout for the Metro Hoops blocks

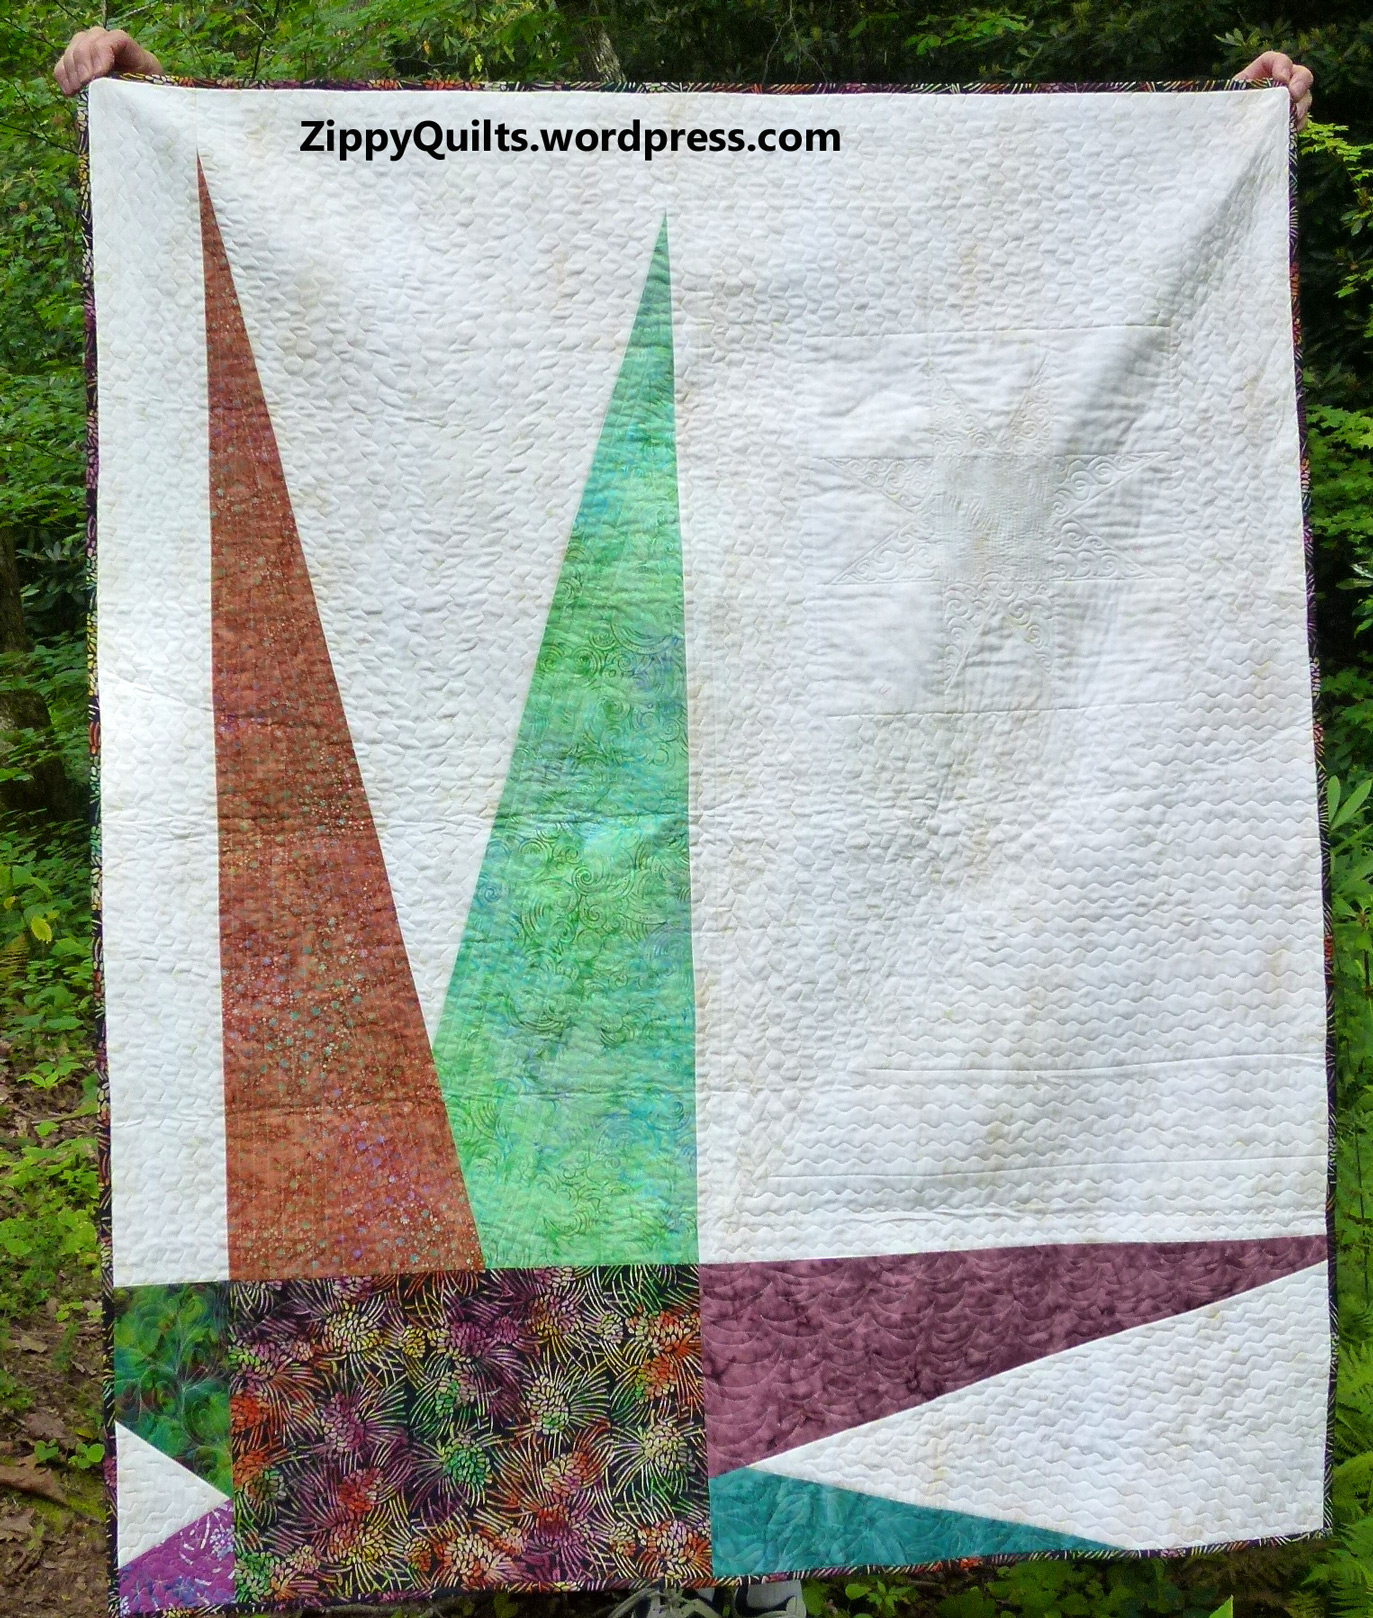
Another half day to make the alternate blocks, then a day to put it together, make a back, and quilt it–and voila!  The first finish of 2015!Metrol Hoops baby quilt

About the Quick Curve ruler:  the women who designed it have lots of cute quilt patterns on their site, so it’s worth checking out.

*BUT, if I make metro hoops again, I’ll modify the directions to make it more to my liking.  I think the basic issue here is that the single curve provided by this ruler is used for both the concave and convex curves in the quilt.  That means there is no seam allowance to make the curves match nicely.  The project is “saved” by the fact that the curve is less than a quarter circle, so it’s possible to fudge the sewing to make it go together without adding seam allowances.  It does work, but don’t think it’s going to fit the way pieces cut from most curved templates do.  If you decide to do it, be forewarned to relax and get rid of the inner perfectionist!

Quick Curve Ruler quilt

Happy new year!


Year End Review

For better or worse, I published goals at the beginning of the year, so here’s the review of my progress:
I met all the goals! (Does that mean I didn’t set them high enough?) I retreated with my buddies THREE times instead of just two! I attended 3 big national shows as well as 2 local ones (all were excellent). I took a couple of fun and useful classes, one of which I still need to write up here so you’ll know about it. I submitted several quilts to shows/contests and 3 were accepted. The one I donated to the Quilt Alliance even won something, and sold for $300 to benefit the Quilt Alliance!  And I had lots of fun, which was really the point of it all.

Here are pictures of a few of my projects from the second half of the year. The pix of projects from the first half of the year are in this post.

Spring Sun, a design by me, using blocks paper pieced from a totally different Judy Niemeyer pattern!

Spring Sun, a design by me, using blocks paper pieced from a totally different Judy Niemeyer pattern!  It took about 2 years, but it’s now DONE.

quilt photo

Zippy Star Quilt and Pillow as shown in Modern Quilts Unlimited, Summer 2014

Michael Miller challenge quilt

Packet of Posy Seeds, done for the Michael Miller spring challenge

modern quilt

Zippy Star I, which sold at the Asheville Quilt Show in September.  This was my “practice piece” for the MQU quilt shown above.

Improvisational quilt

Donation quilt for Ronald McDonald House.  I’m going to work more on using up orphan blocks next year.

And, despite the risk, here’s what I plan for the coming year:

1.  I’ll retreat with my buddies at least twice, probably 3 times again!

2.  I’ll attend one big national quilt show, maybe two.  I’ll attend at least one local show.

3.  I will limit much more strictly the shows and challenges I enter.  It takes too much time and effort that could be spent on making what I want to make 🙂

4.  I’ll continue to make donation quilts, including one for the Quilt Alliance.  Please consider making one for the Quilt Alliance yourself.  You can read about their mission here.  Click on “2015 Quilt Contest” to learn about this year’s challenge.

5.  I’ll continue my blog, and I think I’ll put up instructions for a few easy donation quilts just in case somebody is looking for ideas.

What’s coming up for you?

5 Favorites of 2014

1. Favorite quilt show I attended: Vermont Quilt Festival.  You can see some quilts from it here and here.  And here again is a detail of one of my favorites:

big stitch quilting

Detail of Fill the Void by Cinzia Allocca, at Vermont Quilt Festival 2014

2. Favorite thing about blogging: Meeting new friends, both in person and online.  Read about a couple of them here and here, if you like.
3. Favorite modern quilt trend: some textures and low-volume prints (those that show more background, having the prints smaller and farther apart)  to get us away from all solids, all the time.  Some of my favorites include these from Carolyn Friedlander:

and these from Alison Glass:Alison

4. Favorite new (to me) quilt tool: Frixion pen.  It comes in lots of colors and erases when you iron over the markings.  Only drawback I’ve found is that you can’t see the mark on dark fabric.  For that I still love my chaco liner with yellow chalk.  Show below:  chaco liners on left, frixion pens on right.

5.  Favorite lesson learned:  I’d rather see my designs in print than at quilt shows.  Yes, I entered several shows and contests, and I won something.  But my favorite quilt of the year (from those I made) was the one that was published in Modern Quilts Unlimited.  So here is a picture of it again.Zippy Star 2

And what were your favorites of the year?

Eye Candy x 10

I’ve been saving this treat, and today is the day.  For those of us who want to escape for a few minutes from holiday-themed anything, here are 10 of my favorite art quilts from this year’s Vermont Quilt Festival.

art quilt

Coves & Islands by Carol Anne Grotian

art quilt

Torrid Dwelling by Molly Upton

Art quilt

Suntreader III by Michael James

Art quilt

Aspens Reaching for Bluebird Skies by Ann Schubert Turner

Art quilt

The Getty by Katie Pasquini Masopust

Art quilt

Remembered Vistas by Jo Diggs

Art quiilt

The Wall, by Pamela Druhen

art quilt

Double Wedding Ring #2 by Mike McNamara

art quilt

Color Waves by Pamela Druhen

art quilt

Detail from Leaves on Klee, by Mabry Benson

Now, get back to work on those holiday gifts 🙂

Beads on Quilts

I was waaaay into beads before I got waaaay into quilts, so there are lots of beads in the studio.  Thank goodness they take up less room than fabric 😉

beads for quilts

A few of the bead drawers

I’ve read a bit about using beads in quilts, and I took a class with Mary Stori a few years ago.books about beads in quilts

Here are a few of my uses of beads so far.  Most recently, I added a row of tiny silver-lined glass beads around the edge of a star in my quilt for the Michael Miller challenge.  It took most of a day to get this done!  YIKES!

beads on quilt

I outlined the focal point of my Michael Miller challenge quilt with beads

A while back I made this little wall hanging as a shop sample for a friend, and put beads both on it and hanging from it.Wall-hanging

There are beads on the sun, and that’s how I learned that sewing on beads can distort the quilt!  I used techniques from jewelry making to create a beaded fringe for the bottom of the piece with larger beads.

And beads were used to give Overall Sam a fish in one block and a toy airplane to fly in another block when I made this wall hanging from a few years ago.  The blocks are based on a pattern from Eleanor Burns.Sam

SueFinally, I used beads to make fancy zipper pulls for some of my pouches.Whale-pouch

Give beads a try!  And if you don’t have enough beads, let me know…

A Puzzling Legacy

My Grandmother’s quilts are among my treasured possessions.  I remember her sitting by the window and piecing them by hand.  I remember the quilt frame hanging from the ceiling in the “front room”.  My sister and I played under it while she quilted.

sunbonnet sue

Sunbonnet Sue quilt by my Grandmother, Mary Lee Ownbey Kimsey

And then there are the unfinished bits and pieces I inherited.  Granny had a series of little strokes and gradually lost the ability to sit still and concentrate on her quilts.  I have some pieced sections that I’ve been carrying around for years. My Mother wasn’t a quilter, so she carried them around for years before leaving them to me. 

They’re old.  And they’re lonely, because somewhere along the way somebody threw out the uncut fabric that must have gone with them.

vintage quilt

Some of the pieces I inherited

What should I do with these?  I’ve come up with a variety of ideas for making them into a finished quilt, but I haven’t quite found one I like.  Because there are several pieced strips that appear to be done for diagonal set, I wonder if she was doing something similar to this:

Another of Granny's quilts

Another of Granny’s quilts

This piece may have been intended as one side of a square set on point?

This piece may have been intended as one side of a square set on point?

And then there’s the question of the seams!  She pieced all this by hand with seams that are barely 1/16″!!!  Will that hold up?  Or should I re-work it all???Granny6

I’ve about decided the solution to the seams is to press as best I can (Granny finger-pressed!) and the back the pieces I have with batiste.  From there I can add strips of muslin, which she always used for “background”, and see what I can come up with.

Any other ideas?  Anybody dealt with a similar situation?  All suggestions welcome!


Michael Miller CHALLENGE

I like a good challenge as much as the next woman. In fact, I’m happiest if I learn something new from each project.  So I was happy to accept the current Michael Miller/Modern Quilt Guild challenge using Michael Miller’s (MM’s) spring pastel solids.

Michael Miller challenge

Michael Miller sent this package of Cotton Couture solids to all contestants.

Like a lot of modern quilters, I don’t use pastels much.  That’s the first reason this was a challenge.  I decided that, since black is a great background color for brights, something dark but not black would be a good background for pastels.  So I ordered cotton couture in indigo, eggplant, grey, and charcoal to give me a choice.  After trying out each one with the fabrics provided by the MM people, I chose charcoal–always a favorite color for me!

The next challenge was trying to find somewhere I could buy additional yardage of these particular fabrics.  Most places that carry Cotton Couture were out of them!  So I decided I needed to design something using just what came in the package, plus my charcoal background 🙂

I designed the quilt with Electric Quilt 7 (EQ7) as usual, so I had an easy way to try out lots of different ideas.

I’m a big fan of star blocks, so I experimented with the 16-patch star often called Ohio Star, and finally settled on this version, in which the block is divided into four quarters that are rotated and combined in various ways.  Here’s the EQ drawing:MM4

And here’s a picture of the almost-finished quilt.  Binding it is an additional challenge, since I don’t want the binding to show but I want the corners to be square (which is difficult if I do a pillowcase binding).  I’m counting this as my November finish 😉

My quilt for the Michael Miller/Modern Quilt Guild challenge

My quilt for the Michael Miller/Modern Quilt Guild challenge

And please check out my Quilt Alliance donation quilt on Ebay.  Here‘s the link.  I’m so happy that it’s doing well!  If you don’t know about the Quilt Alliance, check them out through this link.


Holiday Hints–Just a few!

If you’re thinking of gifts for quilters, or for yourself, here are a few hints based on either things I’ve found useful or would like to try. (Please note: these are my personal opinions for which I received no compensation of any kind.)

1. Very large square ruler. A friend recommended this, especially for Large squaresquaring up quilts. It’s great! You can buy it here or here, and you can see a tutorial on how to square up a quilt here.  The big square ruler is a great help.  The largest I’ve found is 20-1/2″ square.

2. Curved ruler. I don’t have one of these yet, but I’m intrigued by Allison’s post showing a ring quilt made using this ruler. Looks like lots more fun than the usual way of making ring quilts! And of course there are many other possibilities for new designs with these curves.

Quick Curves ruler

The Quick Curve ruler is available at Connecting Threads, among other places.

And here’s a picture of Allison’s quilt.

Metro Hoops Quilt

This quilt was made by Allison at Cluck Cluck Sew

The pattern is Metro Hoops, by Sew Kind of Wonderful, the company that also makes the Quick Curve Ruler.  Allison’s review of the quilt pattern and ruler is here.

3. Batting tape. I use this stuff a lot to join scraps of batting. Sometimes I have the piece I need for a quilt, IF ONLY it were a few inches longer. Just use this to add a few inches and you’re good to go. I’ve also joined two fair-sized scraps near the center to make a piece big enough for a quilt. I’ve had absolutely no trouble quilting through this stuff, and it doesn’t feel or look different once the quilt is finished. You can find it here or in many local stores.

4. Finally, no quilt can be made without CHOCOLATE!  So be sure to ask for chocolate for the holidays to keep your quilting efforts fueled 😉

P.S.:  Here are a couple of things I’ve tried that didn’t work for me.  Maybe you’ll have better luck, but I say borrow from somebody else and try before you buy:

This looked like a good idea but it was no better than just holding the rulers together while I cut.

This looked like a good idea but it was no better than just holding the rulers together while I cut.

Kwik Klip

This does help with pin basting, but probably is no better than the spoon I used for years

Out With the Plaid!

Several of the blogs I read have been focused lately on purging unwanted fabrics from the stash.  It sounds like a good idea. Mind you, I still think it’s important to have a good stash. But at this point it should be a little more curated than it is!

fabric stash

Lots of stash–how much fits my current needs?

We’ve all got fabric we don’t want. Maybe it was a gift, maybe we’ve just moved past the aesthetic phase in which we bought it, maybe we ordered online and it wasn’t quite what we expected. Whatever. It’s taking up space and heaping on guilt: maybe we’ll need it some day: waste not, want not and all that 😦

There are several things to do with unwanted fabric, including:

  • Donate the fabric
  • Make donation quilts
  • Cut it up small enough to use for its color only
  • Add some fabrics you like better to make another quilt
  • Make something like wrapped clothesline bowls where the fabric will look different
  • Use it for quilt backs
  • One woman even tore her unwanted fabric into strips and made rag rugs.  Yikes!

So here’s my first de-stash: Fabrics that don’t have a nice “hand”, or feel. Maybe they’re cheaply made, but maybe not. Anyway they don’t feel good so I don’t want to work with them.

fabric

My first de-stash pile

And here’s my second de-stash: Plaids. I’ve made multiple plaid quilts and enjoyed them, but enough is enough already!  The plaids will go to my sewing buddies if they want them; otherwise I’ll donate them.

fabric

These plaids have to GO!

So now I’ve put the fabric that doesn’t feel good, and some of the plaids, into my “bad fabric” box to use for tearing strips to tie up my tomatoes, cut into “bridges” for continuous piecing, etc

The discard bin

The discard bin

And what about you? Any plans to de-stash? How?