Modern Curves and Stripes

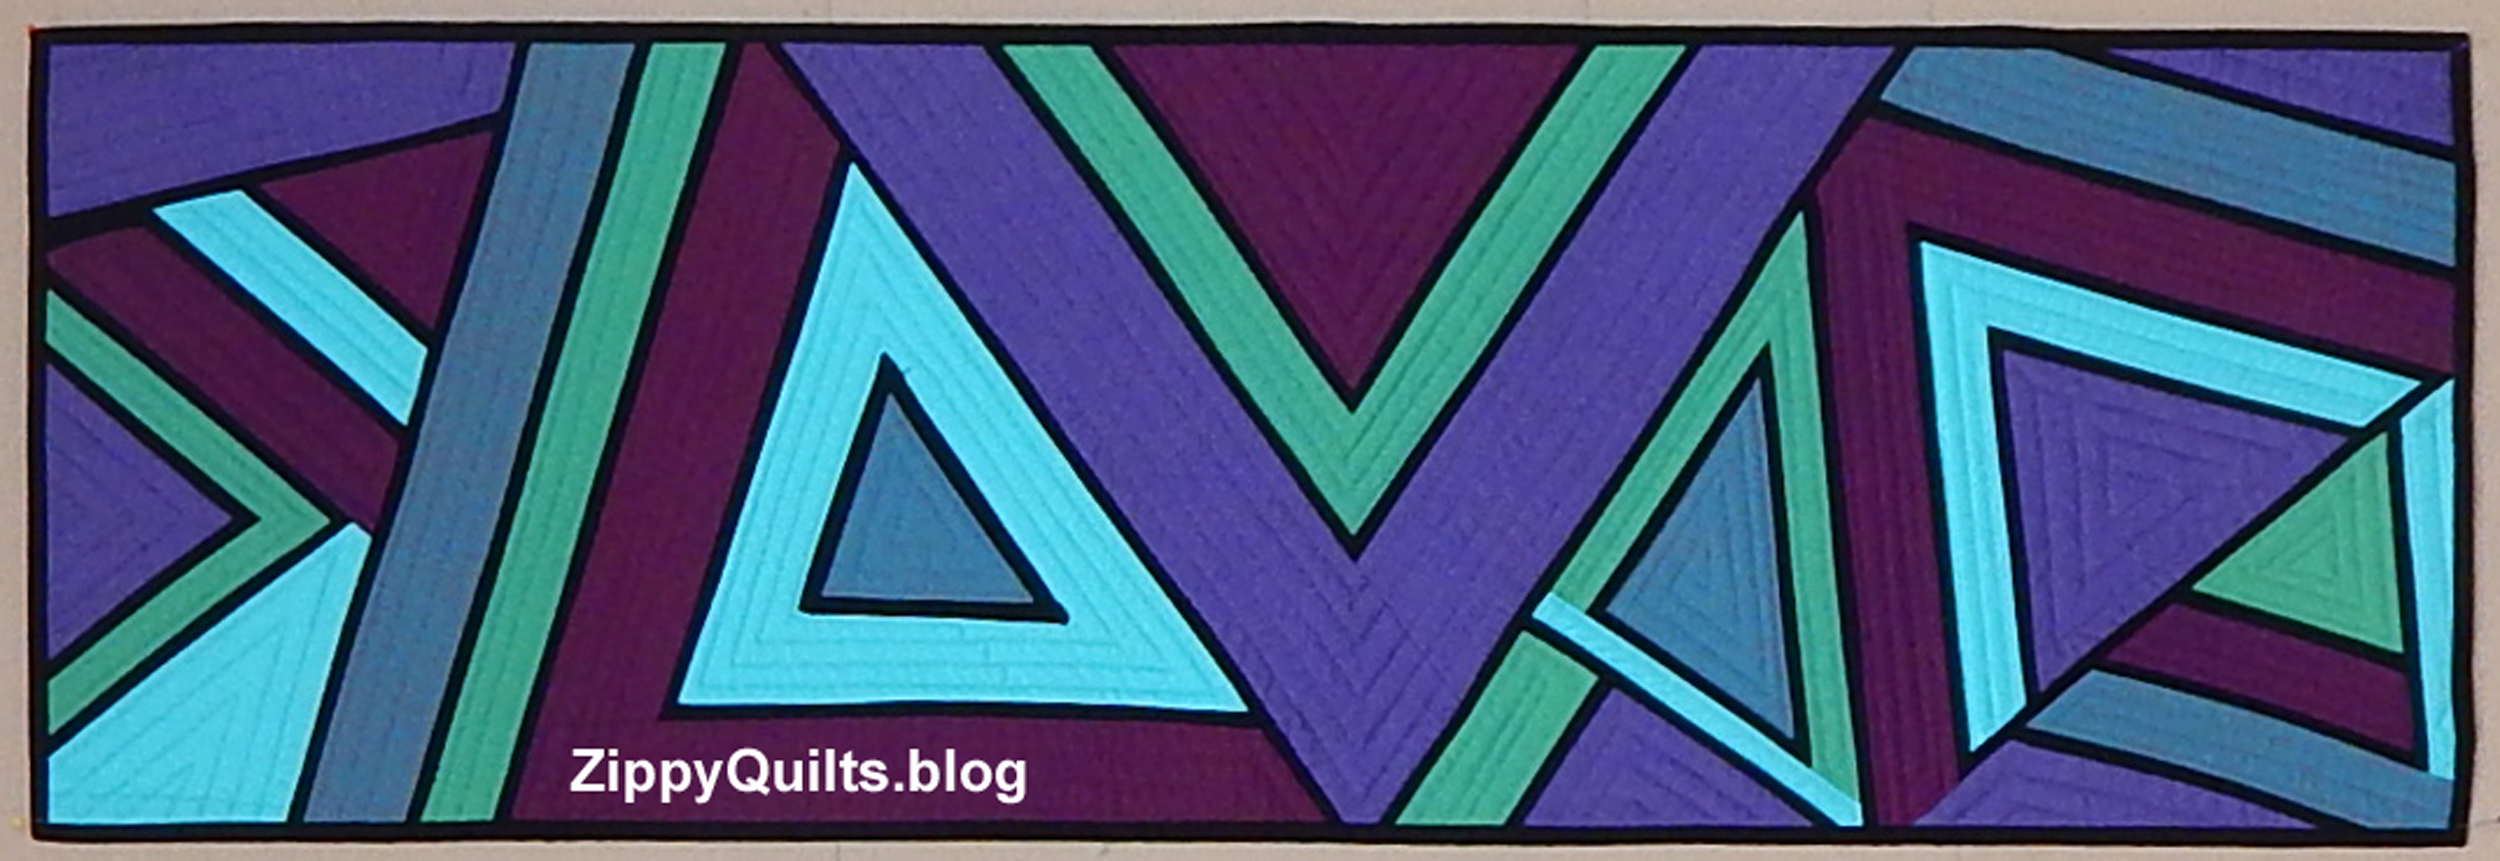
One of the books C&T sent to me recently is Quilt Modern Curves & Bold Stripes, by Heather Black and Daisy Aschenhoug.   I found the quilts in this book to be new and interesting, not just a repeat of what I’ve seen elsewhere..

Photo courtesy of C&T

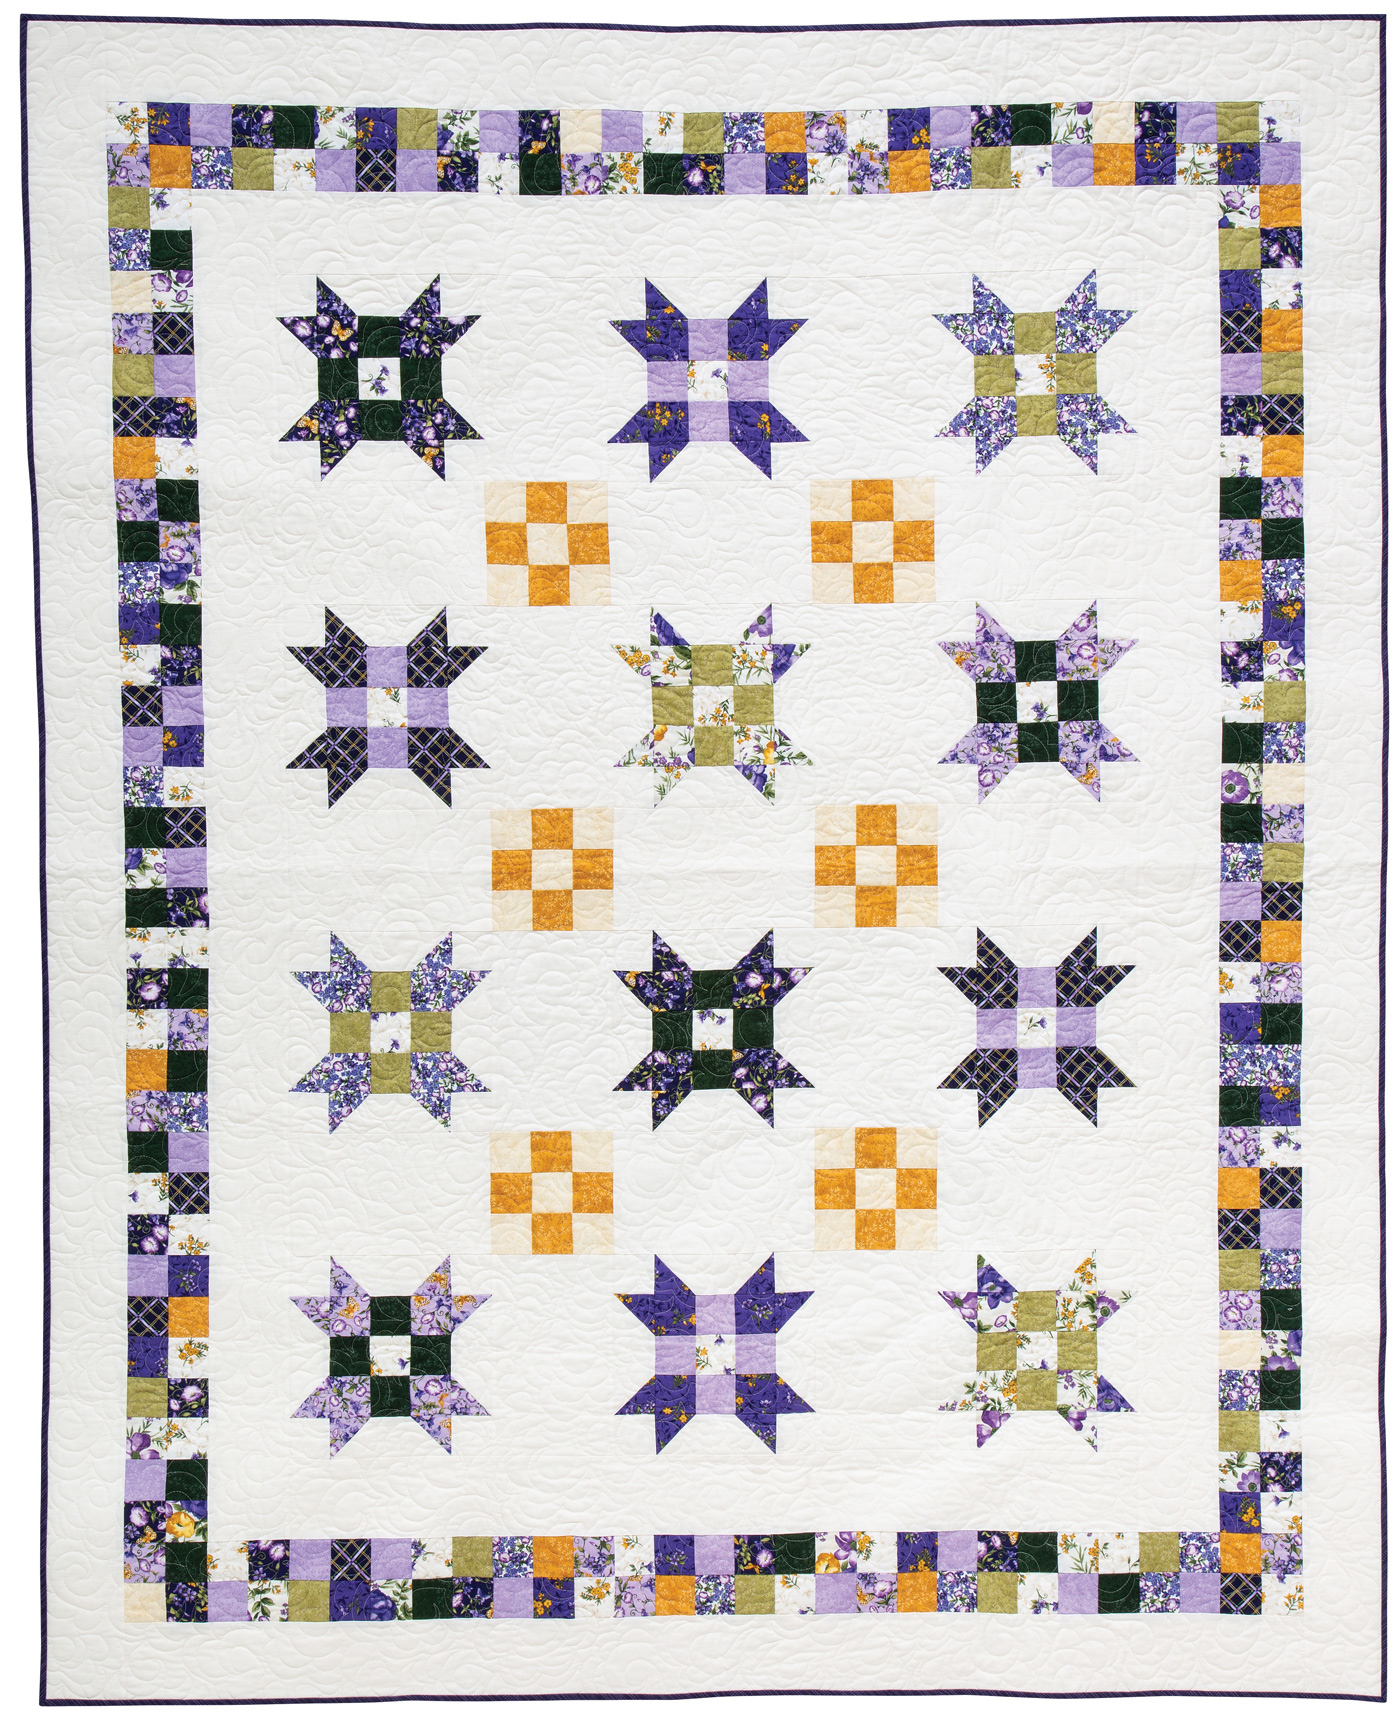
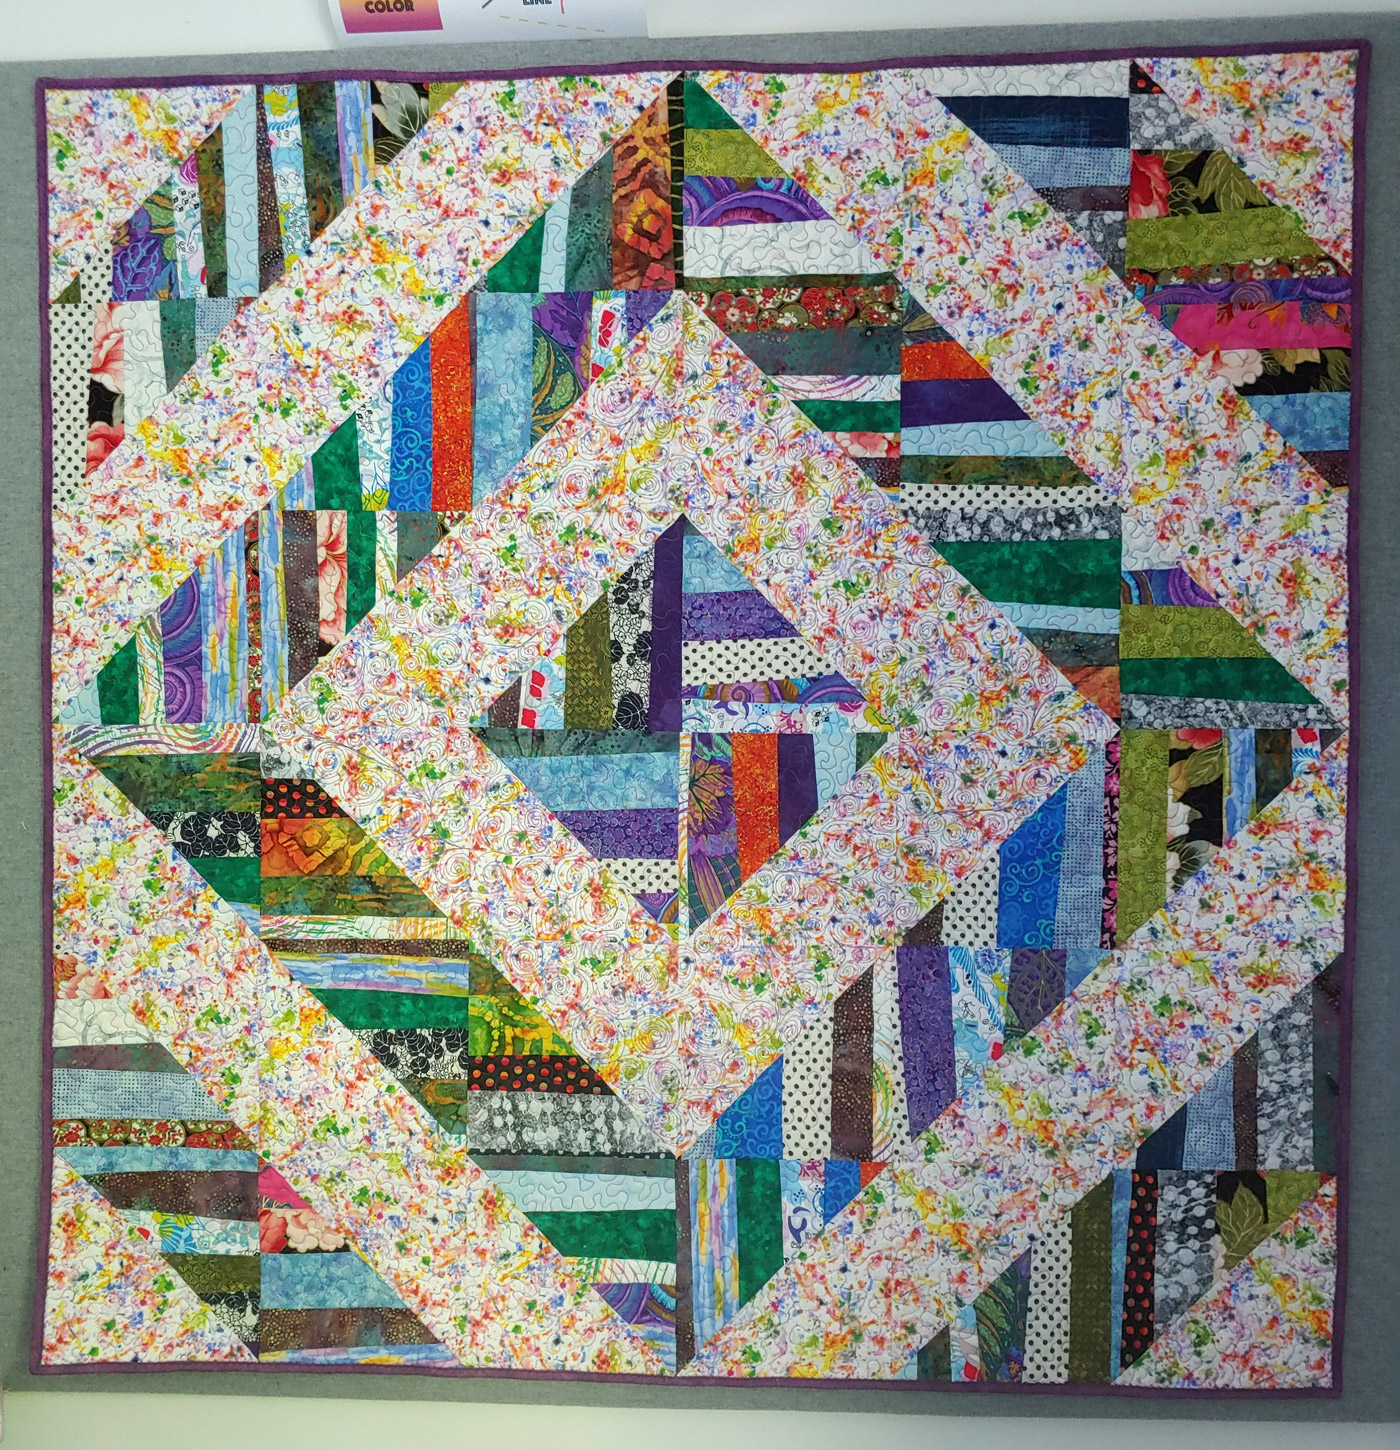
There are 15 projects in the book, all including curves and stripes, and I would be happy to make all of them!  The one I just HAD to make first, however, is called “Tidbits”:

Tidbits quilt, Photo courtesy of C&T

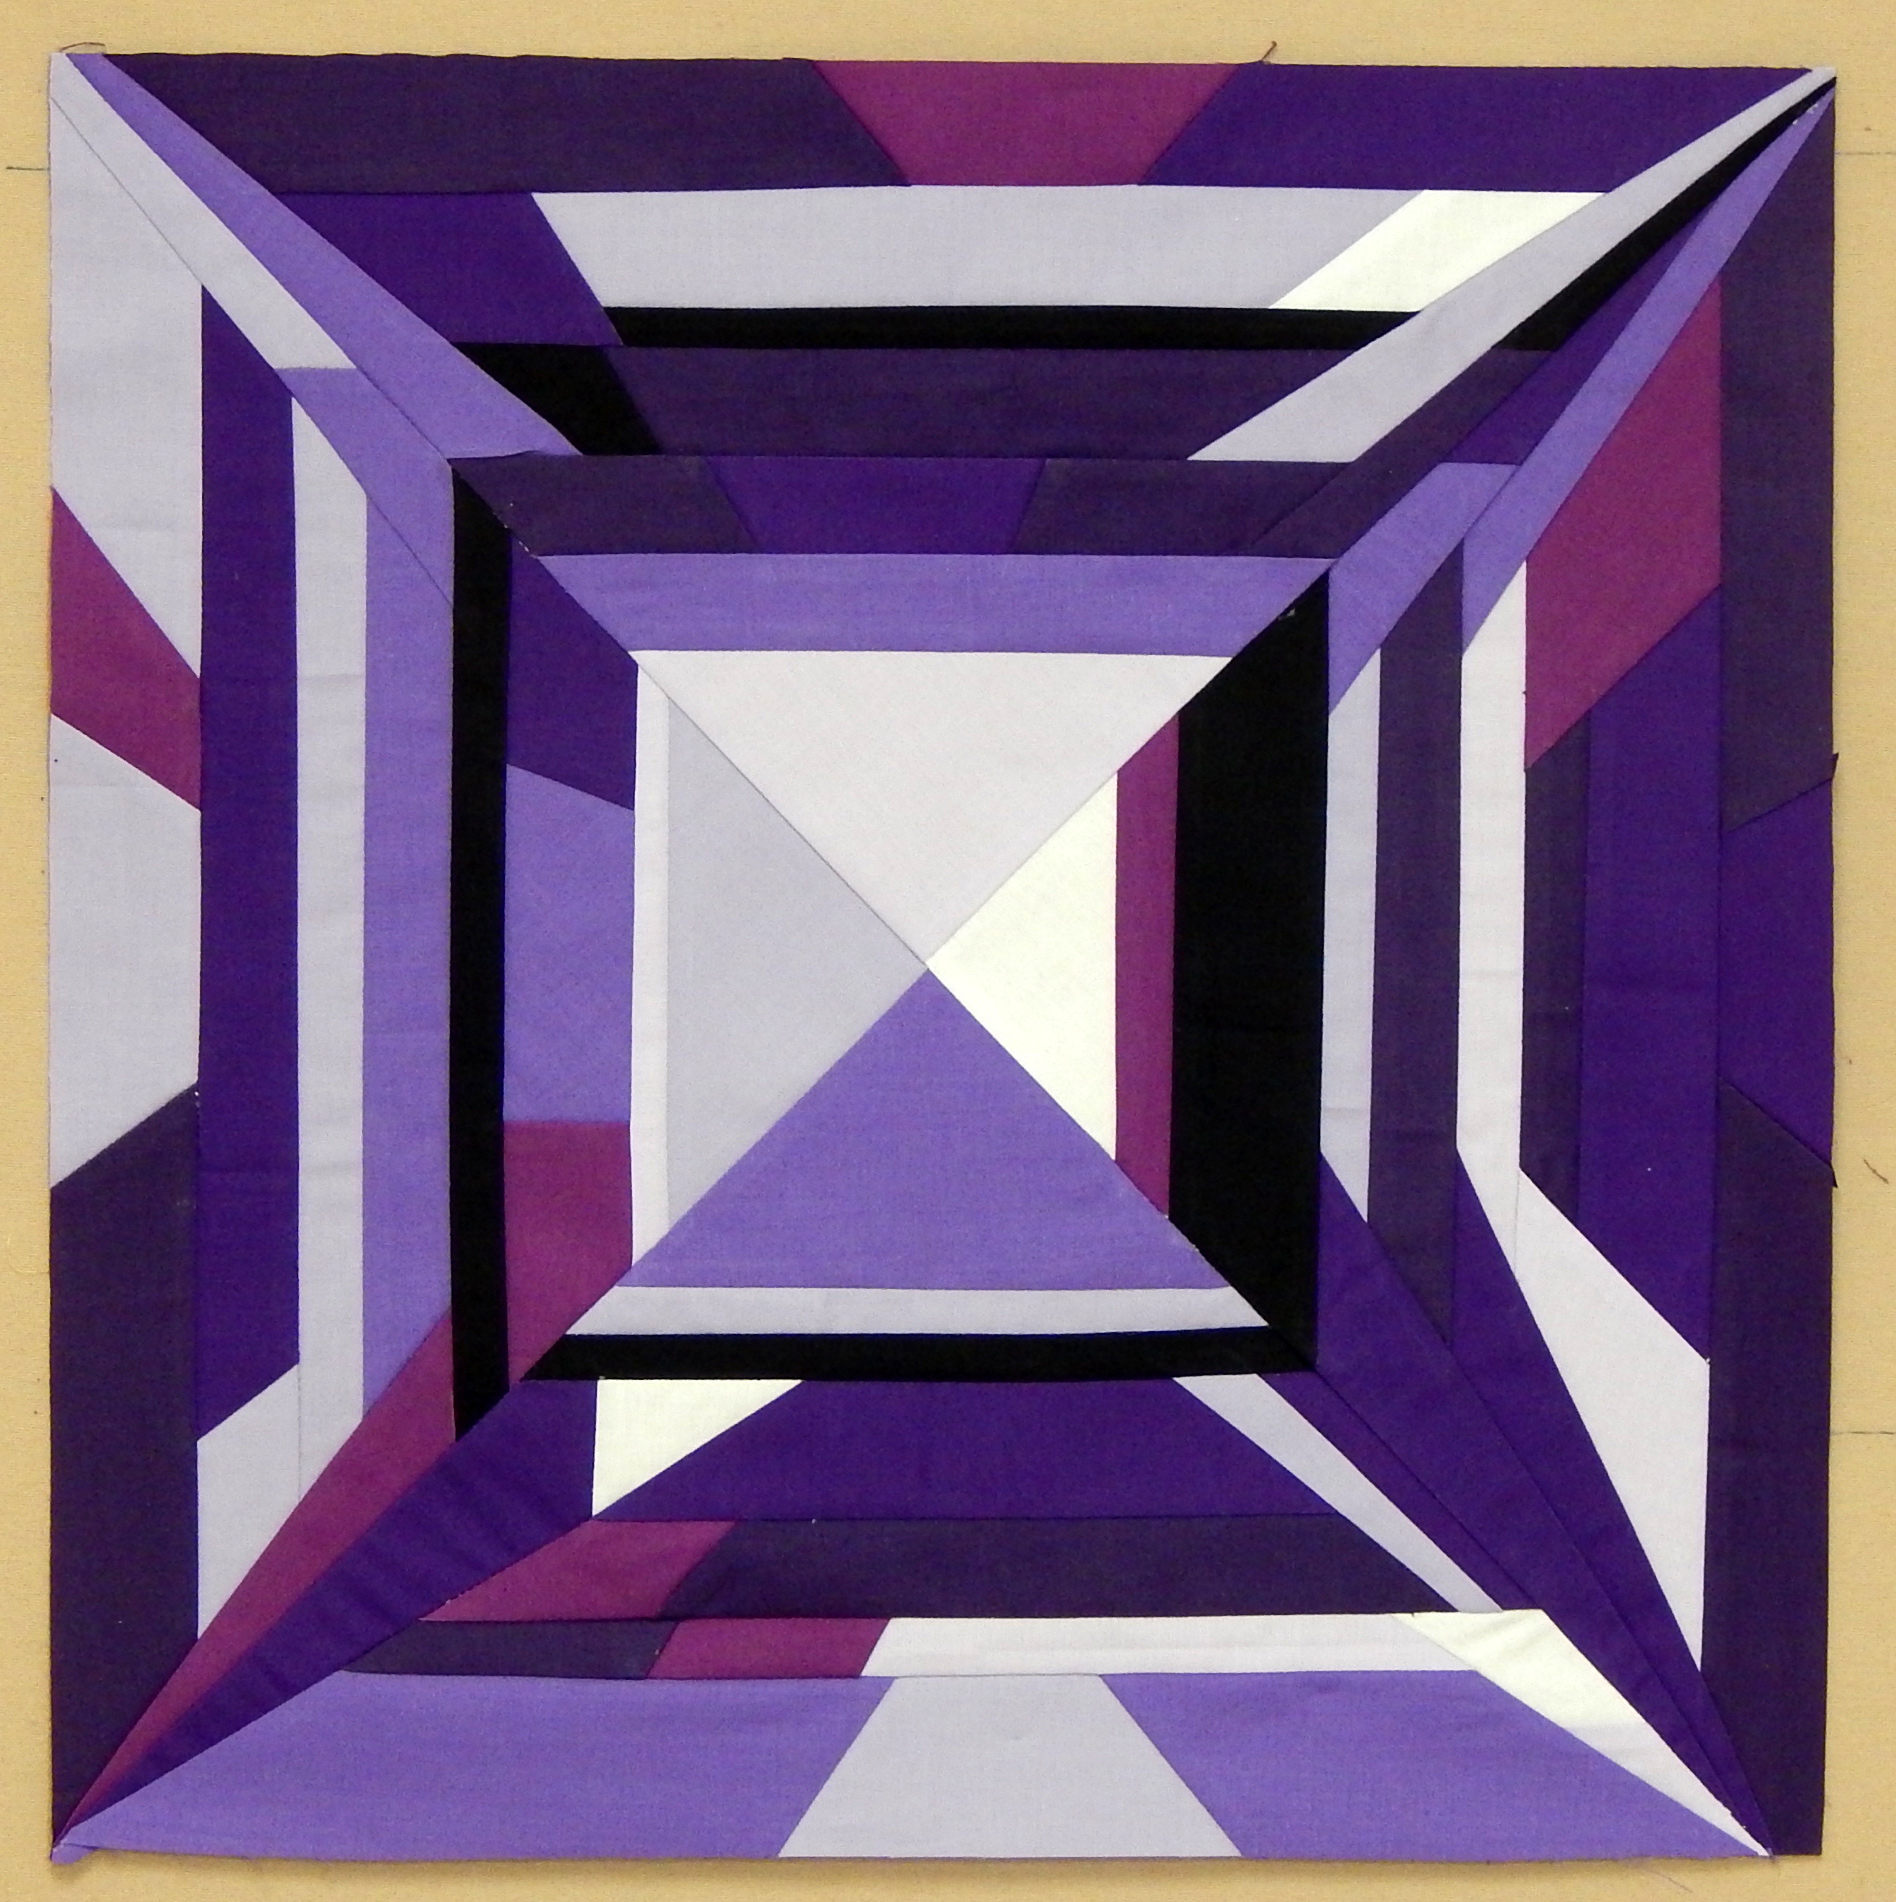
I’ve got to tell you, I’m in love with this block–it is just the cutest!  I’m thinking I might want to turn it on point to make a raindrop.  Here’s my first block:

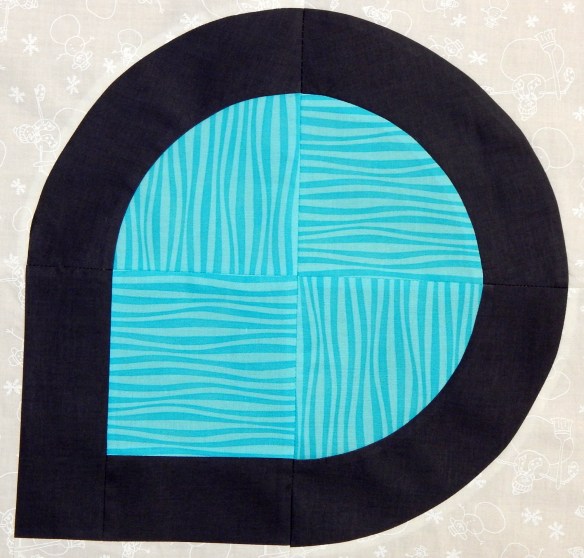
The directions for the quilts offer the option of making your own strip sets or using striped fabric..  I used some fun striped fabric I had in stash.

As was the case with the last C&T book I used, the instructions were clear and complete.  For the Tidbits block it is important to keep track of the way stripes are oriented, and there are tips on how to do that.

The book includes templates to trace for each of the quilts, though it would be possible to use curved templates you have on hand if you don’t mind modifying the designs slightly.

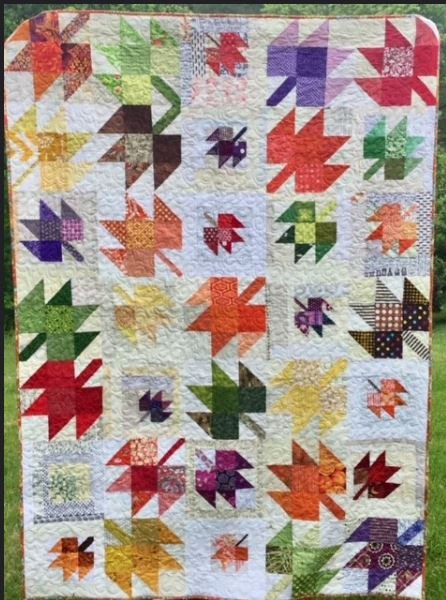
I want to make this one next:

Sunset Horizons quilt, Photo courtesy of C&T

BTW, go to the C&T website and sign up for their newsletter  That way you’ll know when they’re having a SALE!  Click this link, scroll all the way to the bottom of the page, and find the box to sign up in the bottom right corner.  They also have a blog you may want to check out. (As always, this is not an affiliate link; it is provided for your convenience and I do not get paid if you click)

OK, more eye candy from the book.:

“Lys” quilt, Photo courtesy of C&T

Festoons quilt, Photo courtesy of C&T

I just love these fresh, modern designs! Which one do you want to make?


A Couple of Little Quilts

When I was going through my orphan blocks recently, I came across two blocks I wanted to finish as little art quilts.  Both were made for a contest some years ago and has since languished in the orphan bin. I’m not sure how many 12″ square quilts the world needs, but I have always liked these blocks, so I decided to finish them as little art quitls.

Obviously this first one was inspired by Piet Mondrian and mid-century modern.  I’ve since seen other quilts made with the same idea.

This second one I have turned into multiple quilts and blocks.  It was inspired by a college design class I took years ago.  At the time one of the “best” things to do in creating a design was to get a serious close-up showing only part of an object.  I still like that idea and use it a lot, along with other things I learned in that class. (Thanks, Mark!)

Do you have orphan blocks that could become little art quilts on their own?

I’m planning a couple more blogs on things to do with orphan blocks, so please stay tuned 🙂

And when making masks for friends and family, don’t forget the children.  They need to wear masks, too, if they must go in public.

Before and After

First, just to say I’m making masks like everybody else. I did verify where they are actually needed locally before I started. Enough said.
Now, back BEFORE everything was turned on its ear, we had this fun “Easier Than It Looks” class at Studio Stitch. It was fun to see the fabric choices!

And best of all, Betti sent me a picture of her finished top!  I think it’s spectacular!

One of these days the pandemic will be contained and we’ll have classes again.  See you then!  I will continue to post about quilts weekly; you can just take it on faith that I’m washing my hands and leaving home only to deliver the masks I’ve made 🙂  Take care!

Summertime Quilt

This quilt was inspired by all the fun text prints I have collected and also by the desire to make something new as a sample for teaching curved piecing.

I used batiks from stash for the colors and I love the combination.  BUT combining batik fabrics, which are lighter weight, with the printed fabrics was a bear!  I do not recommend it.  Ordinarily this block is fairly easy to piece, but this combination made it difficult.  Another doggone learning experience 😀

I did put in a few of my trademark tiny strips of color:

The templates I used are from Back Porch Designs.  I’ve been pleased with them  and think they are reasonably priced.  This is not an affiliate link, but you can find them here if you’re interested. The quilt block used here is a slight modification of a pattern that came with the template.

And here is the back!  Notice the cute “bubble” quilting pattern 🙂

Quilt StatsSummertime

Finished size: 47″ square

Fabric: batiks and text prints, all from stash; backing is a Windham print

Made by: me

Quilted by:  Walker Quilt Co.

An Exciting New Book!

I agreed to review new quilt books for C&T this year, and here’s the deal.  They send me books they think might interest me and I tell you about the ones I especially like.  (If a book isn’t to my taste, I just don’t mention it.  That way you know that if I endorse a book, I really do like it.)

That being said, I am excited about several of the books they sent recently.  The first is  New Patchwork and Quilting Basics, by Jo Avery.

Photo Courtesy of C&T

This is a fresh, modern book with a whole range of projects.  It starts with three quilts for the true beginner and progresses to projects involving special skills such as applique, curved piecing, and even paper piecing.  It’s a nearly-complete set of quilting lessons all in one book!

I would LOVE to work with a local shop to develop classes from this book.  I’ve started on one of the earlier quilts that I hope to use as a class sample eventually.  Here’s the picture from the book:Photo Courtesy of C&T

And here’s my quilt so far 😀

I think the projects in this book will appeal to quilters of all ages.  I found the instructions and illustrations clear (and even more important, accurate) for the blocks I have made so far.  Although I wouldn’t recommend someone learning to quilt with only a book, I think it could be done with this one.

Here are a few more of my favorite projects from the book.

As you can see, this one demands some skill with HSTs, but the blocks are fairly large:

Photo courtesy of C&T

This artsy one appeals to me because it is a little whimsical.  It also looks as if it would be pretty easy to get an impressive result:Photo courtesy of C&T

Finally, I think I may try this one just for the challenge.  It’s pretty spectacular:

Photo courtesy of C&T

You can find the book at C&T, here.  (FYI, this is NOT an affiliate link.)

You can go to Jo Avery’s website here.

Let me know if you have used this book or decide to try it.  I’d like to hear someone else’s opinion–and that’s whether you agree with me or not!  

Now, I’m going to wash my hands and go make a quilt 🙂


Sewing Circle

My Mother used to have a group of friends called her “sewing circle” who met in each other’s homes to do hand work on a regular basis.  That was in the days when she didn’t work outside the home and neither did the other ladies–times have changed!  However, I still have a group of friends with whom I quilt regularly.  This little art quilt is in honor of that tradition.

I’d been seeing cute little quilts made with a narrow wedge ruler and wanted to do something similar.  I don’t have a narrow wedge ruler and wasn’t sure I wanted to make anything with pieces that small anyway, so I used my narrowest triangle ruler, a 45 degree wedge.

I cut the wedges with the ruler and just estimated the angle for the trapezoidal doors.  I cut the windows and roofs freehand.  The houses are made from some Jen Kingwell fabric left over from another project.  The background fabric says “cut, sew, repeat”.  I decorated the doors with tiny buttons for knobs and put a bird bead on one of the houses.

Quilt stats:  Sewing Circle

Finished size: 25-3/4″ x 25-3/4″

Designed, made, and quilted by me

More Rabbits!

After showing the Rabbits! quilt made from Debbie Maddy’s “Usagi” pattern, I lent the quilt itself to a local shop that carries the commercial version of Debbie’s Shibori-dyed fabric.  Then I decided to teach the quilt at Studio Stitch in Greensboro, so I made a second quilt using bright Grunge.

I don’t know if you can see it in the close-up below, but I did Quilt As You Go, using Marianne Haak’s method.  She has nice video tutorials on her website if you want to learn.  I found this method easier than some of the older ones, and neater than the “modern”  QAYG method recently publicized elsewhere.  As a bonus, the quilt came out nice and square!

Quilt stats: More Rabbits!

Finished size: 45″ x 45″

Pattern: “Usagi” by Debbie Maddy

Fabric: Grunge for the rabbits; fabric from stash for the sashing, border, and binding

Help from: Jerri on fabric selection

Quilted by me, using QAYG technique

Batting:  Quilter’s Dream,  Dream Green Request Loft

Teaching Landscape Techniques

I’ll be teaching a one-day class on techniques for making landscape quilts at Studio Stitch in Greensboro (NC) on Friday, March 20, so I thought I’d show some more of my samples.  We’ll be making “tiny landscapes” so everybody can try several techniques.

Somebody asked me what I do with these little quilts, which are postcard size.  First, I use them to practice art quilt techniques.  Then I send them to friends who need a get well card or other pick-me-up.  I do put them in an envelope rather than sending them as postcards so that they arrive in good shape!


I made this after reading Happy Villages by Karen Eckmeier

This wonky house was inspired by a class I took with Laura Wasilowski several years ago; I used both hand and machine stitching

I have no idea why this rose is floating in a pond, but it gave me the opportunity to use little beads as dew on the rose

And this one gave me a chance to use one of my little antelope charms and some fabric markers; the binding is satin cord

This dragonfly has sparkly wings with Angelina Fibers as well as a rhinestone

This pine tree has green flannel for and lots of free motion quilting for texture

Finally, I couldn’t help making a card with this cow, who has been in my stash for some time!

Please join us for this fun class if you live near enough!

Leaf Pounding and Lattice Making, By My Friends

I love to hear from people who have used something from my blog to make something of their own, so here are a couple of examples.

My long-time friend Katy read my blog on leaf pounding and decided to do some of her own.  She was kind enough to send pictures of her first batch.  Each picture shows both the original leaf and the print.  Click on any picture for an enlarged image.

Laura, a blogging friend, made a lattice quilt using instructions from my blog to design it herself.  She made the blocks a little more rectangular than mine, and I like it. The fabric used was brought by her daughter from a visit to Cote d’Ivoire. The vendor who sold the fabric gave her the lime green to go with it.  This certainly makes a lively wall hanging, which Laura plans to give to the daughter who brought her the fabric.

Here’s the finished top:

Please let me know what you’ve done lately, even if it isn’t something from my blog!  I love seeing other people’s ideas 🙂

A Little Help From My Friends

As in, “I get by with…”  Anyway, my blogging friend Chela asked for tips on how I matched the doggone intersections in “Plaid-ish”, and several other people commented that intersections are a challenge.

Yes! There were a lot of little intersections to match–good practice!

I’m always glad to have somebody suggest a blog topic, so here we go:

It’s important to note that I learned all these techniques from other quilters, so it’s good to pass them on.

First, a little editorial comment from me.  YOU are the only judge of how exact your seams need to be.  I’ve made several quilts for the cat.  I matched my seams as well as my skills allowed, but I did NOT take any out and re-do them.

  1. Practice helps the most.  I DID say a few bad words while piecing this quilt with orange squares that finished 3/4″, but it was a learning experience (eek!).

    You can find the original pattern for this quilt by going to AllPeopleQuilt.com and searching for the “trail mix” pattern

  2.  That consistent 1/4″ seam is as important as you’ve always been told.  (Yada, yada.)   I like any of the devices out there to help sew an accurate quarter inch seam, including the foot with the little guide on it and a variety of things you can stick to the surface of the machine bed.  Most of us have this one mastered.

    My tool to help with 1/4″ seam has been around so long the plastic is yellowed!

  3. With regard to cutting accurately, I’ve been told several times not to use the lines on my cutting mat because they are less accurate (being wider) than those on the ruler.  Sometimes I do, sometimes I don’t.  If I ever get SO accomplished that the little difference in using the cutting mat to measure is what’s throwing me off, I’ll change 🙂
  4. When I’m going to have a 4-point intersection, I press seams to the side whenever possible so that they can be nested.  This makes a big difference in aligning the intersection precisely, at least for me.

    Here are the pieces laid side by side as they will be sewn, so you can see the seams pressed in opposite directions.

  5. I learned somewhere to put the pin to the side of the intersection that will be sewn second so that the foot is pushing the intersection together.  It is the opposite of what I was doing, and it seems to work.
  6. Even more important, Cindy Williams told me to always sew in the direction shown by the arrow (above) so that the seams are pushed together rather than apart as you sew.  That one really does help (thanks, Cindy!).  If the piece is small enough, I’ll even use the opposite side of the foot when necessary to be able to sew in this direction
  7. And now the picky part, but it saves time and frustration.  If I have any doubts, I set my stitch length as long as possible and machine baste through the intersection and about 1″ on each side. Then I look.  If it matches, great; just set the stitch length back to normal and sew the entire seam. Sew right on top of the basting.  If the intersection doesn’t match, it’s quick and easy to pull that basting thread out and try again.
  8. If the problem with matching seams is that the two pieces being joined are not quite the same size, here are a few options.
    1. Take out a couple of inches of one of the seams and make it either bigger or smaller, depending, and then taper your stitching back into the original seam line an inch or two down from the end where you started.
    2. If the difference isn’t too much, pin well and then sew with the longer piece on the bottom.  The feed dogs sometimes can “ease in” a section that is a bit too big.
  9. Finally, I choose my limits.  Sure these points match, but I really don’t plan on making another quilt that requires bringing 6 seams together any time soon!

Please feel free to email me with questions. And thanks to Chela and others for the idea for a post!