9 Quilts from AQS Paducah

Many quilters consider the AQS (American Quilters Society) annual show in Paducah, Kentucky the top of the heap among quilt shows.  So, I just had to go see for myself this year.

AQS Paducah

For Tanya, by Emily and Miriam Coffey, won first place in the Modern Wall Quilt category

Here are some of my favorite quilts from the show.  If some of them look a little wonky, it’s because they hang the quilts in 3-sided booths and then don’t let you into the booth!  The result is that, unless the quilt you want to photograph is directly at the back of the booth, you can’t get a straight shot of it.  Enjoy the pictures anyway!

modern quilts AQS Paducah

Flowers and Gears, by Robbi Joy Eklow, won a ribbon in the Longarm Quilted Small Wall Quilt category

I had a great time in Paducah, because I had a friend with me and we found COOKIES!  Luckily my friend knew where to find good food and a good place to stay 🙂

AQS Paducah modern quilts

It Takes the Case, by Karlyn Bue Lohrenz, won a ribbon in the category of Large Wall Quilts–Pictorial

I have pictures of a few of my favorite quilts here, but on the whole this show had fewer quilts that I really loved than any show I’ve attended in the past year.  Probably because of the emphasis on “show quilts”.

AQS Paducah

In the Marsh #2, by Carol Bryer Fallert-Gentry

However, there were some outstanding quilts like the ones above and below.  I suppose they are “show quilts” too, but they are not so heavily quilted that they appear 3-dimensional, and they don’t have rhinestones!

AQS Paducah

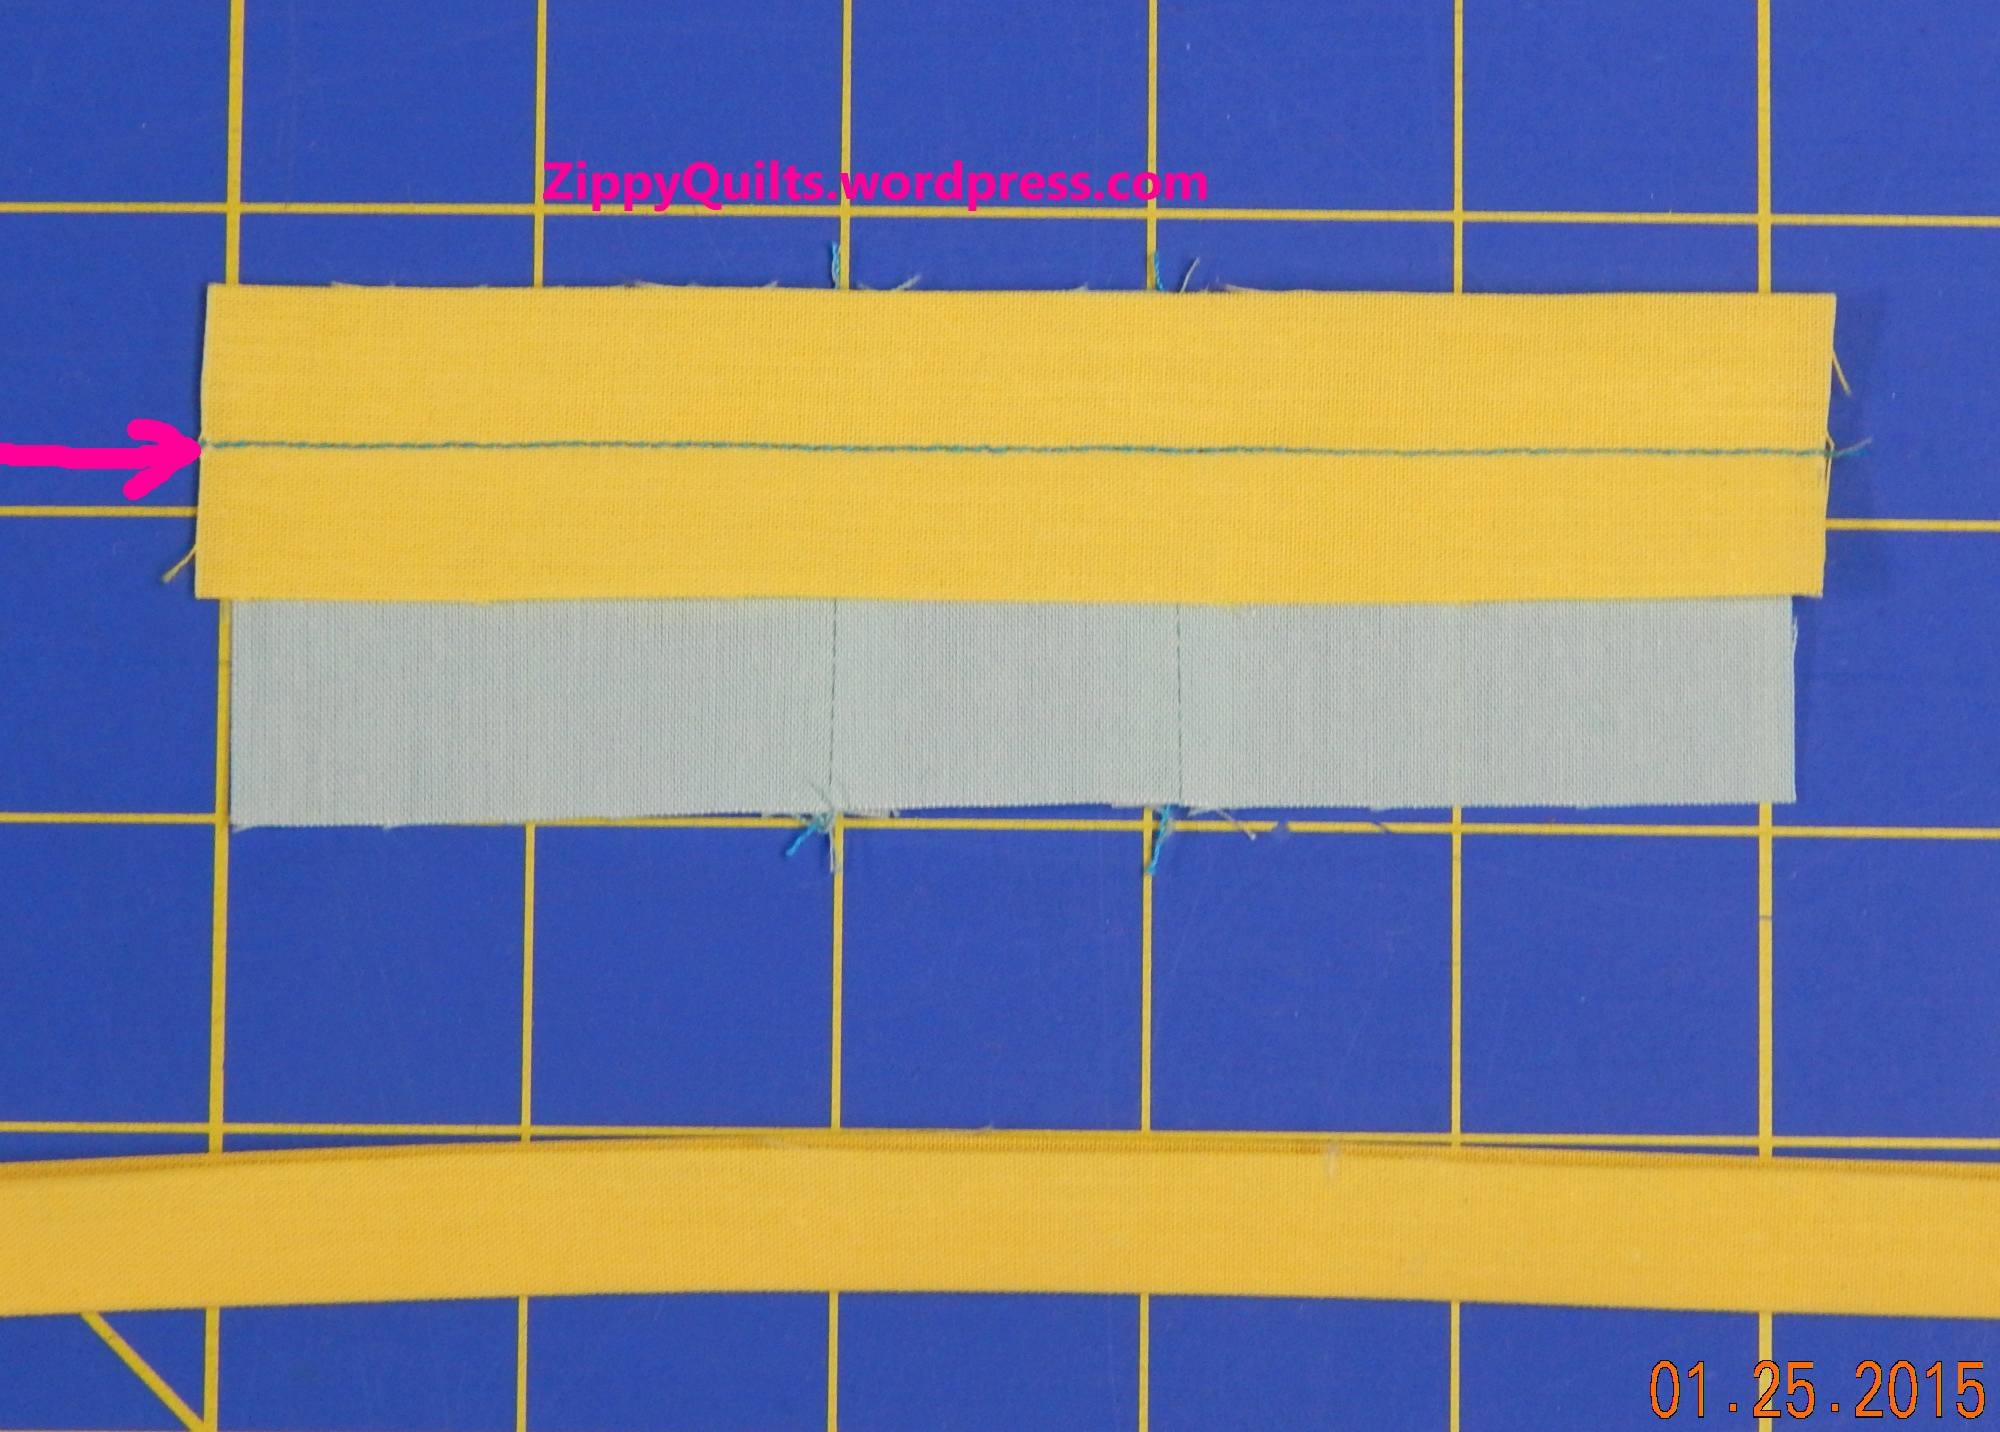
Canola Fields, by Leah Gravells, was made of 199 strips 3/4 inch wide–and she got them all straight!

One of the reasons I go to shows is to be inspired, and these quilts certainly were inspiring!

AQS Paducah improvisational quilt

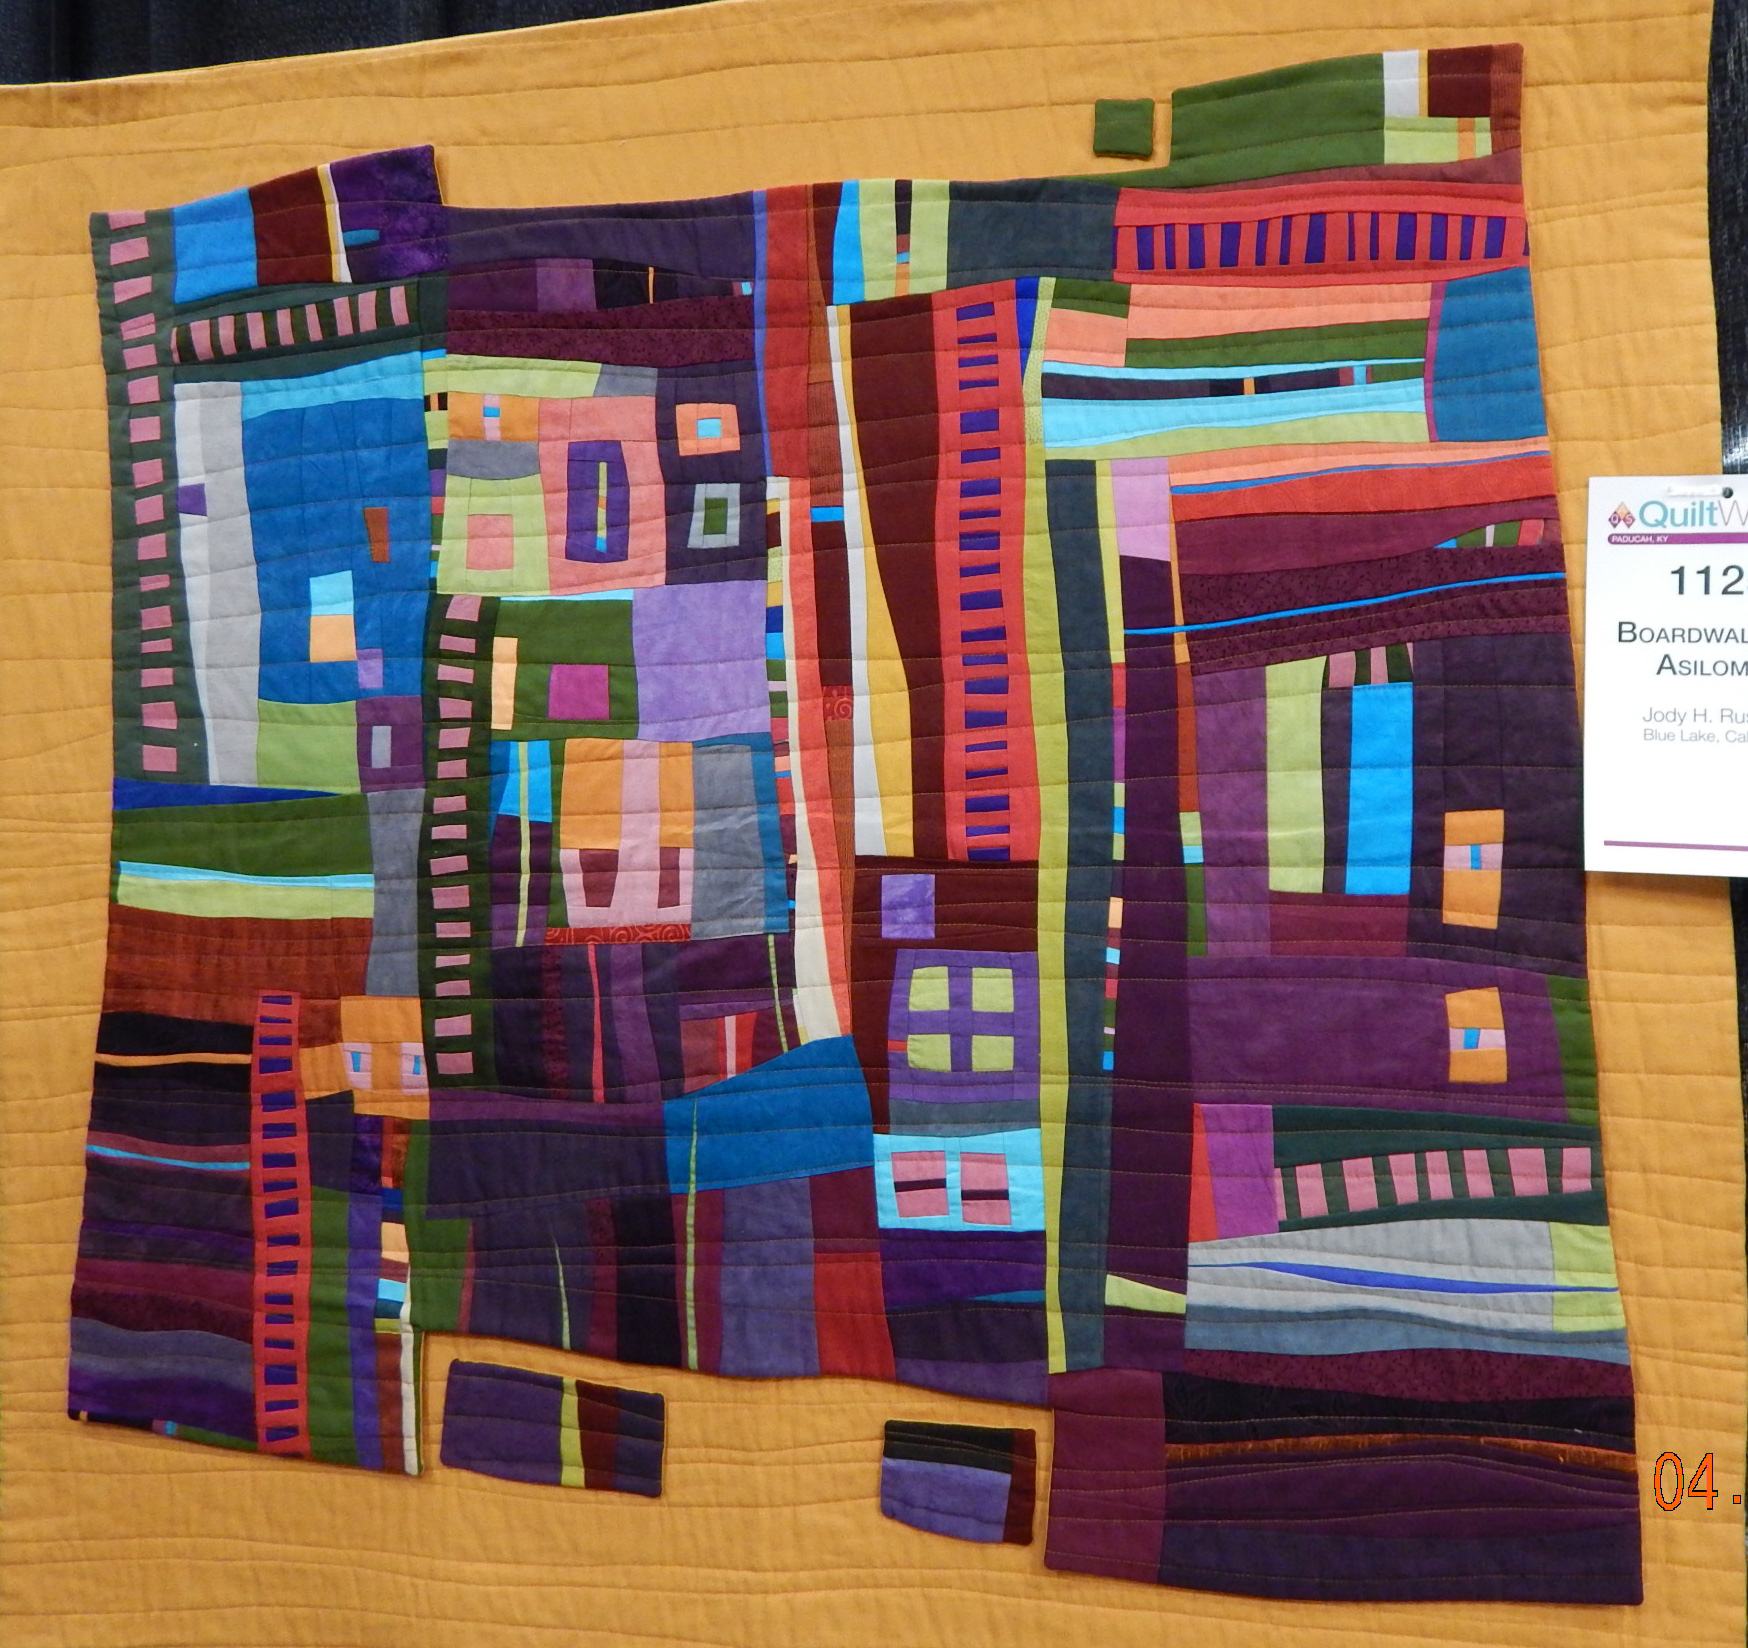
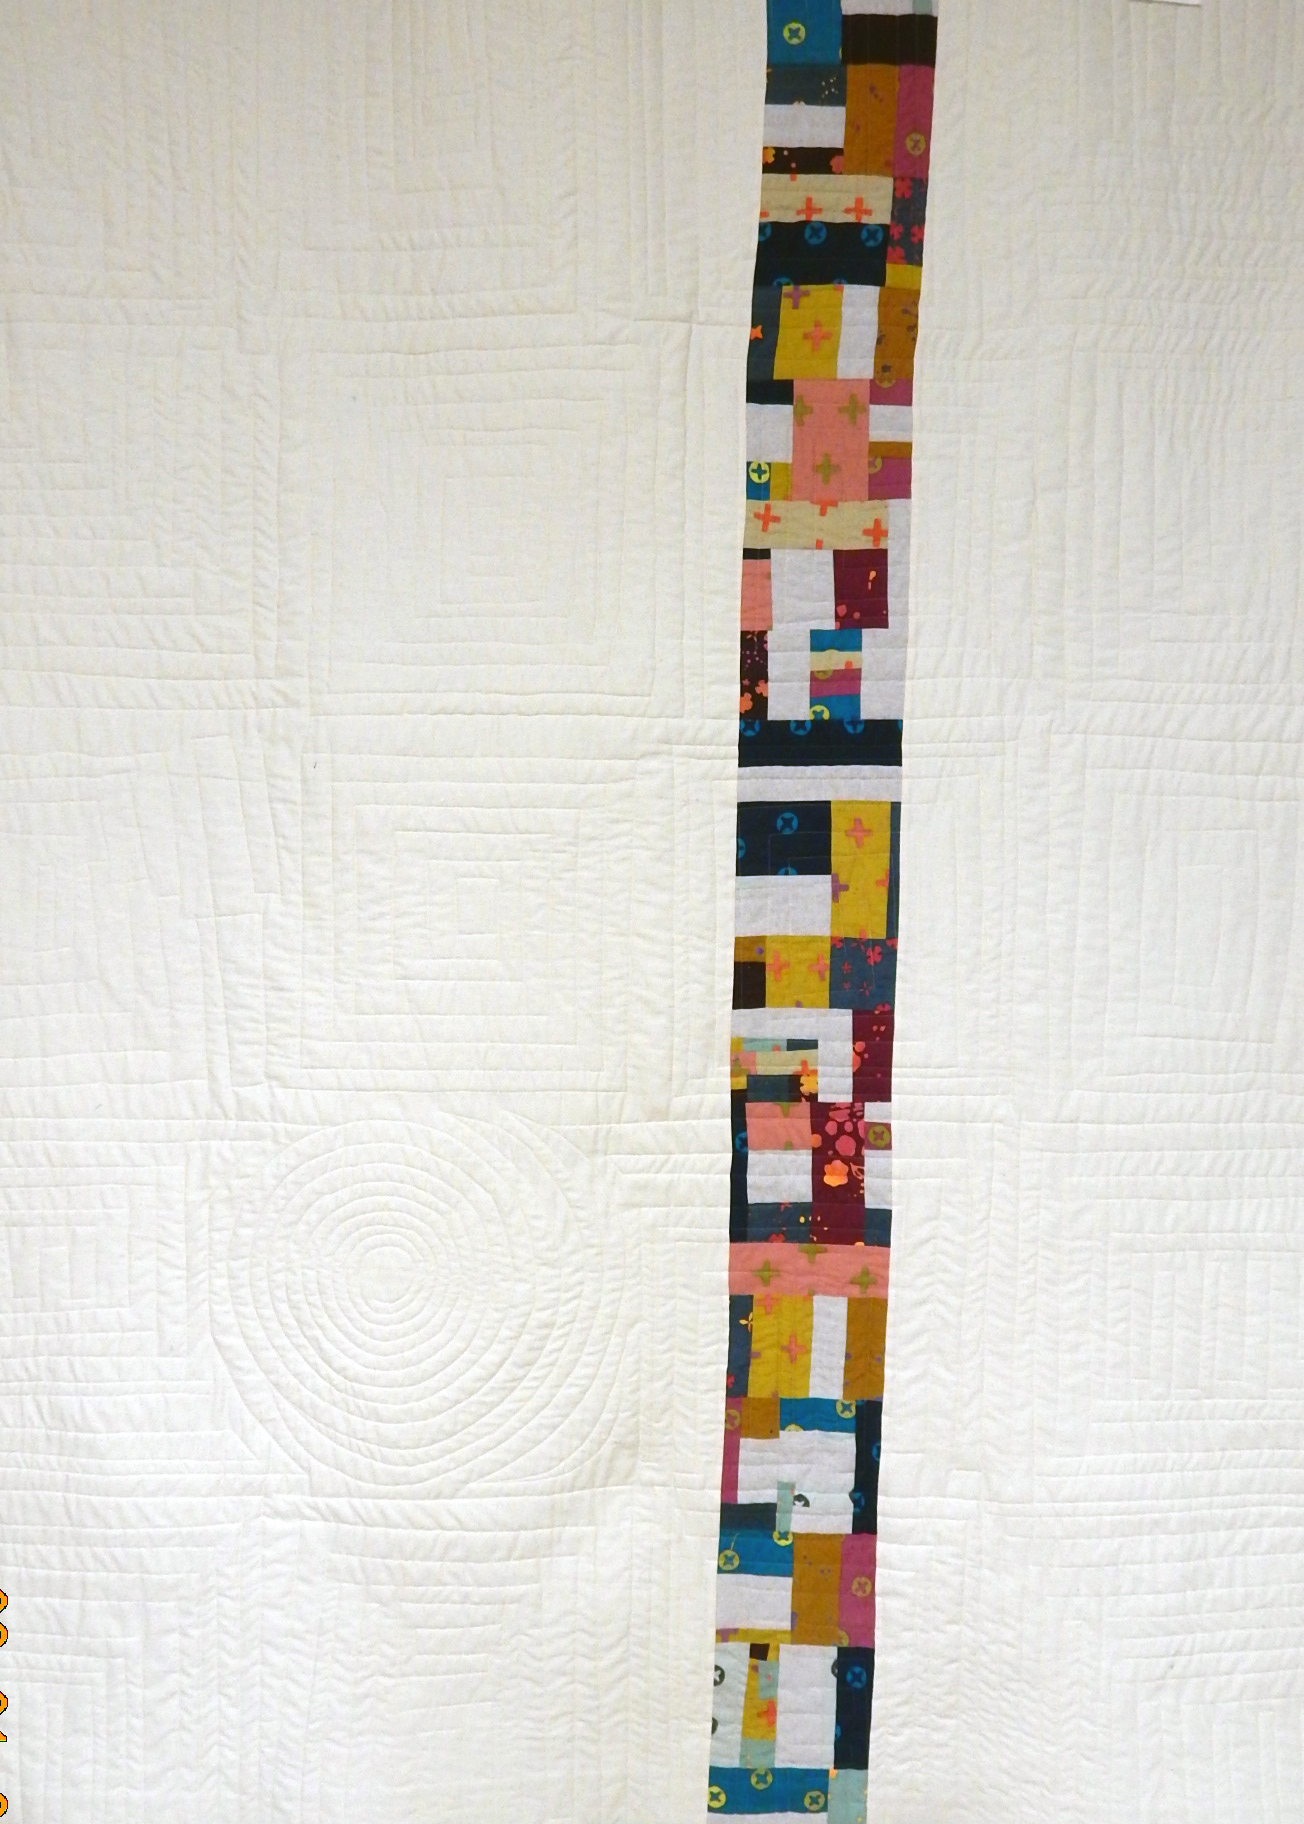
Boardwalks of Asilomar, byt Jody H. Rusconi, was one of the few improvisational quilts in the show

improv quilt AQS Paducah

Playing It, by Pam Beal, was another nice improvisational quilt

quilt photo AQS Paducah

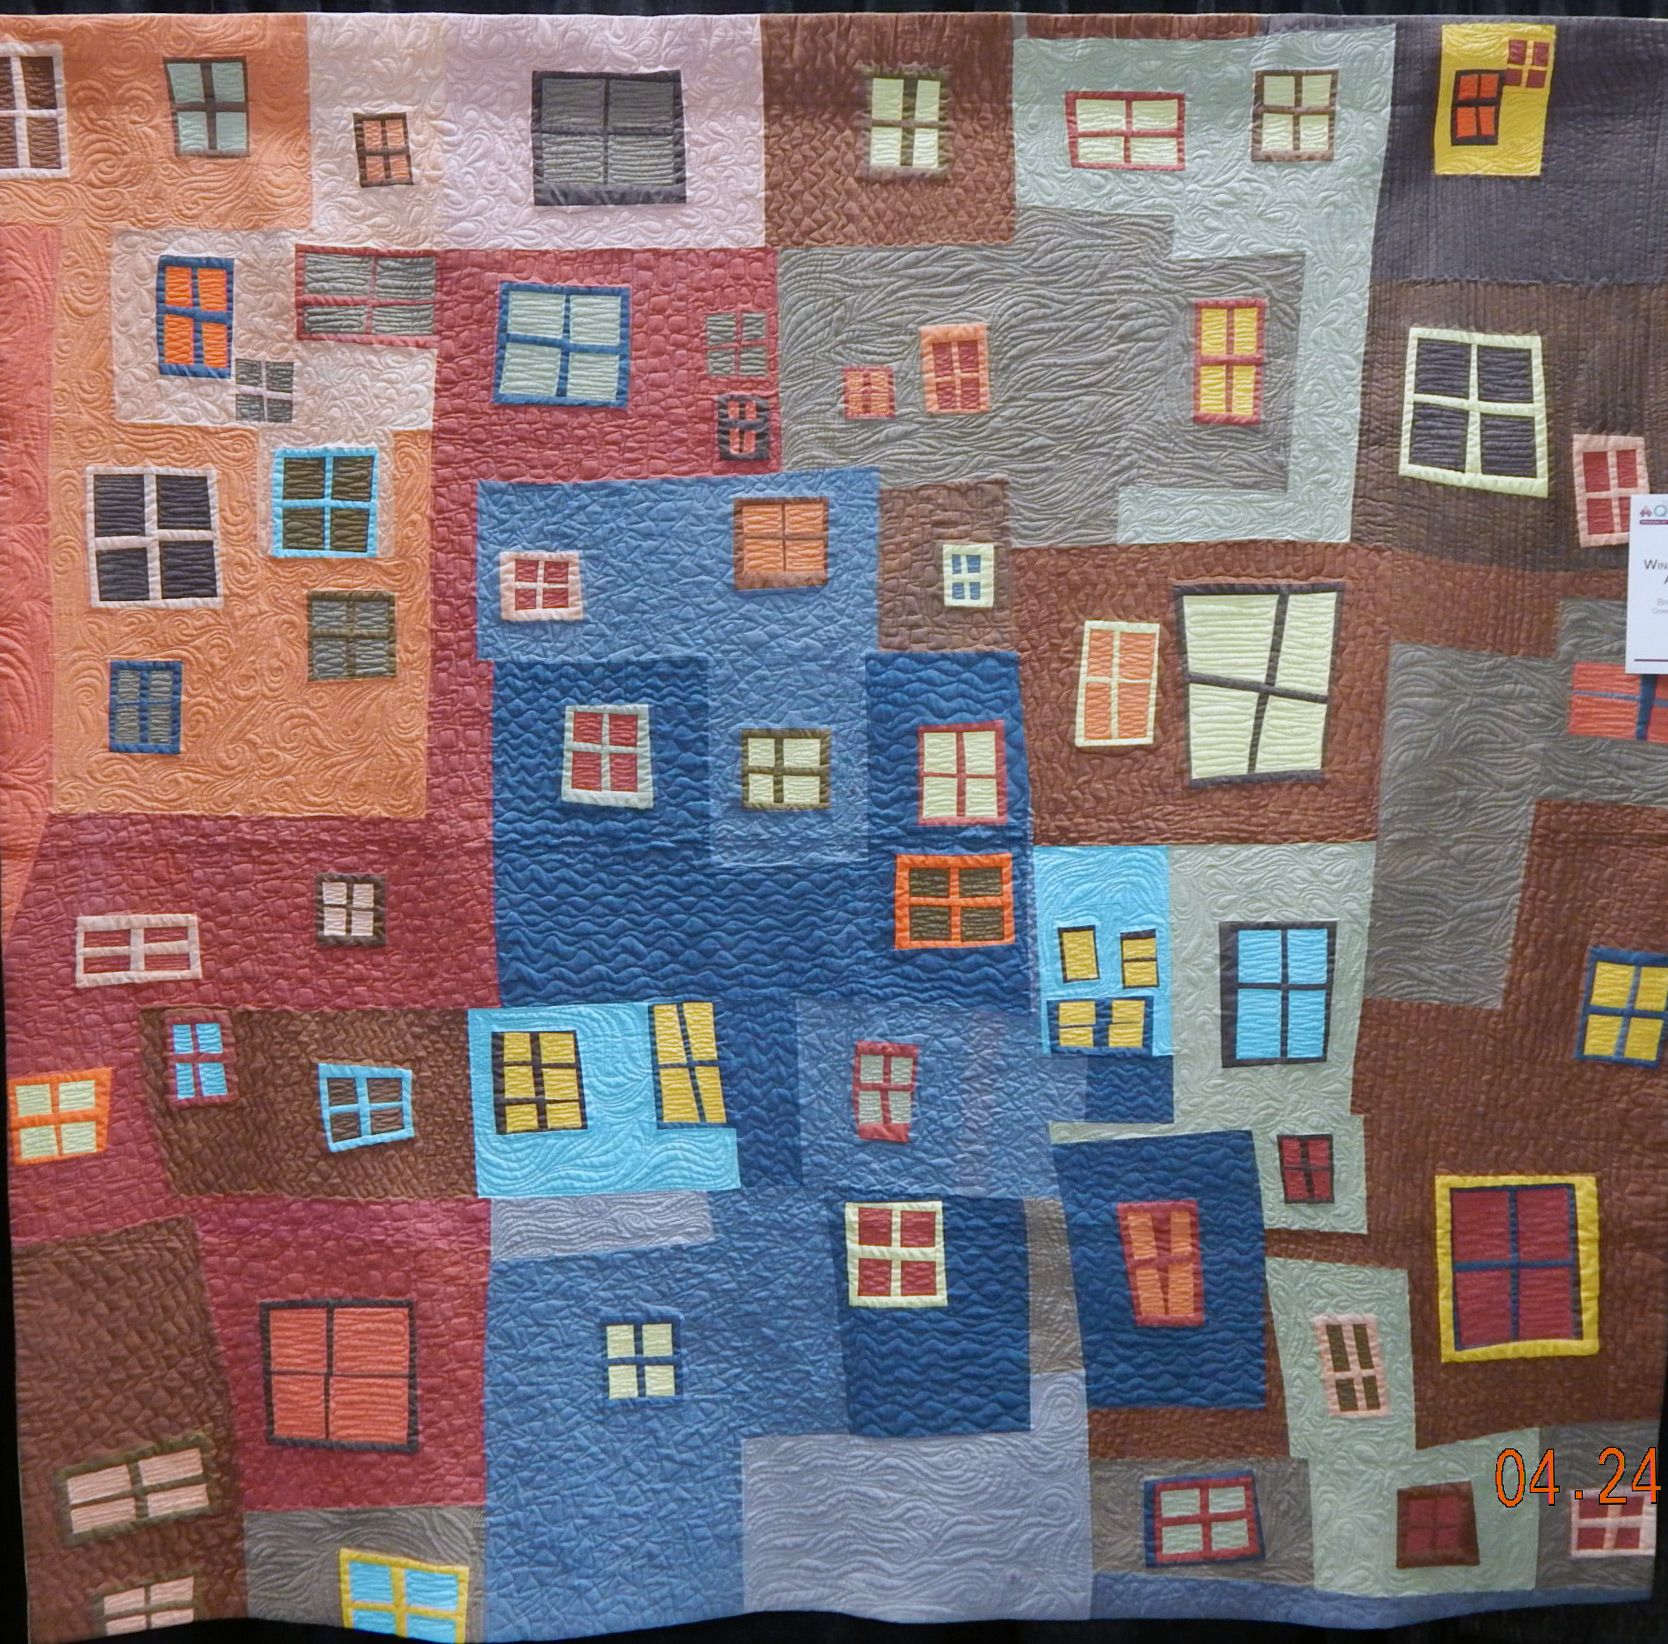
Windows #1-Antigua, by Brenda S. Wall

AQS Paducah

Rainbow Play by Brenda S. Roach

AQS Paducah

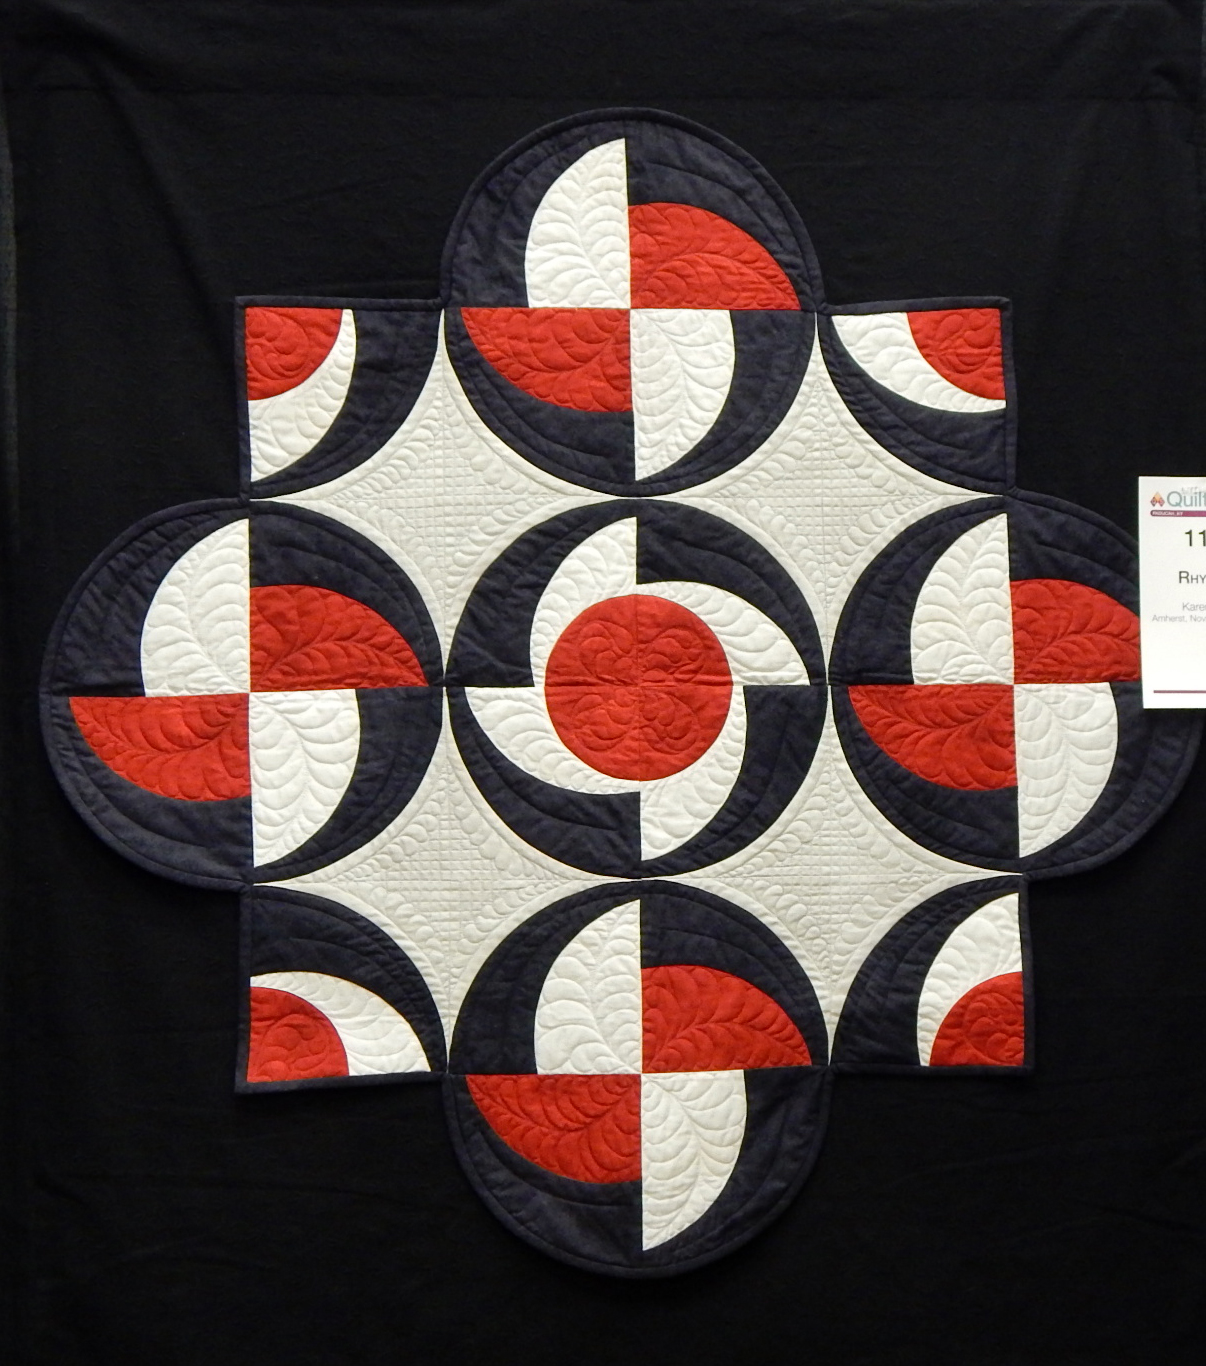
Rhythmic, by Karen Neary

2 Quilts, 1 Set of Instructions

It’s here! The latest issue of Modern Quilts Unlimited, containing a quilt designed and made by me!Modern Quilts Unlimited magazine
The editors did a great job of providing clear diagrams for my instructions, and of photographing the quilt.  It is made from Michael Miller batiks, supplied by the company for this project.  I love MM fabrics, and was happy to use batiks for a little change from the “oh-so-solid” solids that are currently popularModern Quilts Unlimited.And here’s a second quilt made with the same feature blocks, arranged differently. (The solids are Michael Miller Cotton Couture left over from another project.)  You can get the templates from the magazine and make your own blocks, arranging them to suit yourself.

Quilt Pattern

Alternate colorway and block arrangement from the same pattern

modern quilt

Look at this fun quilting done by Joyce Miller!

So go make it your own way!


One Quilt, Two Lessons

Check out these fabrics!

Fat quarter bundle

Alison Glass Handprint fabric and neutral linen

A friend gave me the FQ (fat quarter) bundle of lovely Alison Glass handprint fabric and I combined it with a neutral linen fabric I’d been saving for something special. I started with Karla Alexander’s instructions for a quilt, but (as my friends all know) I never really follow instructions so it diverged…improvised modern quilt blocks

The blocks were lots of fun to make.  I followed the instructions for a while, then started cutting the blocks up and inserting strips.  Then decided NOT to trim all the blocks to one size.  I adjusted the sizes of the linen sashing so that all the rows came out the same length, and made the rows of different heights to allow for the different block sizes.

And I slashed the sashing and inserted some strips in that, too.

When I had the top all made, I basted it with spray basting as usual.  BUT I didn’t have enough of the first can.  Then the SECOND can was a different brand and almost empty as well!

Determined to get the doggone thing basted, I resorted to some spray-on stuff that was supposed to bond the fabric to the batting when I ironed it.  This last stuff left SPOTS on the handprint fabric, which is light weight (almost like voile).  YIKES!

Lesson 1:  Be patient until you can get to the store for a can of basting spray.

Finally (after buying basting spray) it was basted and I started quilting.  Enter Lesson 2: this linen is a loose weave of large fibers and doesn’t play well with a tight weave of small fibers. YIKES AGAIN!  No matter how I changed the pressure on the quilting foot or otherwise fiddled with it, the quilting distorted the top and the backing.

improvised modern quilt

The finished quilt

Now it’s finished and I like it.  I appreciate the texture of the linen, but I’m not sure I’ll use it again.  I took this to my last modern guild meeting and people were positive about it, but one of the more experience sewists told me linen is usually stretchy, so at least it’s not just me!

improvisational quilting

Here’s the quilt back–that column was straight when I started!

Well, I try to learn something new every day, so I’m calling this a SUCCESS! 😉


The Modern Sampler Continues

These next two blocks were made from inspirations I found on Pinterest (yes, I love Pinterest!)  The first I simply copied because I loved the colors and their arrangement in the original artwork by Richard Paul Lohse.

Modern Quilt Block

Quilt block based on the work of artist Richard Paul Lohse

Here’s a drawing of how I constructed this block, with measurements, if you want to copy him, too.  There are 4 units, each 4″ finished (4-1/2 inches for each unit before joining) so that the entire block is 8″ finished.  I’ve marked the size to cut each piece on one of the 4 units, assuming you can take it from there 🙂

modern quilt block

Layout for block based on art of Richard Paul Lohse

If you look up the artist Richard Paul Lohse, you’ll see that a lot of his designs would make terrific blocks or whole quilts.  Great sense of color!

The second block was made from a tutorial I found at a website called Piece By Number and you can find the free pattern on her site here.

modern paper pieced block

Circle of Geese block made from a pattern at PieceByNumber

This block was easier than it looks thanks to paper piecing.  I enjoyed making it, though I feel no need to make another right away!

I think these two blocks have a lot of ZIP for the relatively little amount of effort they required.  The Lohse block depends very much on choice of color, so be sure to lay out the fabrics and look at them a while before cutting.  Have fun!

2015 Donation Quilt #1

A couple of my quilty friends try to make a quilt a month for various charities, so I thought I’d try that this year.  The group with which I make donation quilts sends them to a Ronald McDonald House to be given to sick children.  The House wants all quilts to be 40″ x 40″, which doesn’t seem too big to do one a month.  Here goes….

For January I took some of my orphan blocks and related fabrics and made this quilt.  The blocks also happen to be on my UFO list for 2015, so there’s TWO projects accomplished at once 🙂

Donation quilt

February finish and January donation quilt

The blocks finish 12″ square, which means that with a 2″ border the quilt comes out 40″ x 40″ as planned. The 9-patch blocks were made using the stack and shuffle method I learned years ago from Karla Alexander’s books.  It’s easy and fun.  To end up with blocks this size, I started with 15″ x 15″ squares of fabric (since they’re cut wonky on purpose it takes a bigger starting square than you might think).

The center block has little inset strips using a technique I modified from one of Judy Niemeyer’s ideas.  To make a quarter inch inset that doesn’t “wobble”, do this:

block tutorial

Block pieces, including yellow insert

Cut a 1″ strip of fabric and lay one edge along the raw edge of the piece where you want a narrow inset. Stitch through both the strip and the quilt piece 1/2″ away from the edge, either by using the 1/2″ mark on your machine’s throat plate or by marking the center of the strip.

Quilt tutorial

The center pieces of the block have been jointed and the insert laid along the side

Fold and press along the seam-line so that you now have 3 raw edges, all lined up.

quilt tutorial

Strips have been added to all sides of the center pieces and pressed along the seam

I don’t usually trim away the extra fabric because I like the stability, but it DOES make for some weighty intersections if you choose not to trim away the bottom 1 or 2 layers.  Then assemble the block as you normally would, using 1/4″ seams.  The strip you added will show up as a 1/4″ inset.

Let me know if you try either of these blocks.  I thought they were fun!


Tessellations! By Jean Larson

As promised, my friend Jean Larson has written a tutorial on tessellation quilts.  I hope you enjoy it as much as I did!  –MJP

Tessellating designs make me happy.  Tweaking those designs is even more fun.   I want to share the joy of starting with a very, very simple design and watching it blossom.  My inspiration comes from this web site:  http://gwydir.demon.co.uk/jo/tess/

Start with a simple gridded block and create a light/dark design.  Here, I’ve started with a 3 x 3 grid.  Then re-color the same block with the lights and darks reversed

.The grid lines are only for design purposes, and each block can be constructed with a single square block with 2 corner triangles attached using any method you prefer.

Here are some design possibilities…Quilt_1A simple “cat head” quilt using only 2 colors.

Different looks can be achieved with variations in the color placement.

Blocks can be inverted and turned for even more quilt designs.

Just imagine all the possibilities with color in these!!!!!

It’s even more complex when you design with a 6×6 grid.  Here are the positive and negative versions of another block.

These blocks can be constructed using half-square triangles integrated with larger fabric pieces.  If these blocks were to finish at 6 inches by 6 inches.  The center column on each block would be a single 3.5 inch wide by 6.5 in long piece of fabric.  The side strips would include some half-square triangles.

A couple of the quilts that can be made:

Looks like spools, some gray, some white, all standing up.  Same quilt with alternate blocks turned a quarter turn yields a different  clearly recognizable tessellation.  Reminds me of tessellating doggie rawhide chews 😉

Now back to the spool quilt from above.  The “thread” areas have been colored in.  No blocks have been turned.

Jean spool 5This shows the power of color and value (lightness and darkness).   The colored part, being next to the gray and being closer in value to the gray, unites those parts of the block, and gives the illusion that we have all gray spools on a white background, some standing up, some lying down.

I hope these examples can be the seeds to sprout some design experimentation with tessellating shapes.

  1. Start with 2 square grids
  2. Create a positive design, and its negative design
  3. Alternate them in a quilt layout
  4. PLAY!
  5. And play more with color!

Happy Quilting (and Designing)!!   –Jean Larson


Meet Lee Monroe of May Chappell Patterns

Images for this post are the property of Lee Chappell Monroe, May Chappell and used with permission.

Lee Monroe

Lee Chappell Monroe

Lee is a North Carolina quilter, designer, and teacher who came to my attention through her blog, which is titled May Chappell. Like a lot of other people, I initially thought May Chappell must be her name. Here’s her explanation of where the name of the blog actually came from:

Why May Chappell? There are always loads of questions about why the company is May Chappell and not Lee Chappell Monroe. You can read all about it here. The short version is that it is named for an awesome lady, my great grandmother.
Lee designs quilt patterns and sells them through quilt shops.  She went to quilt market for the first time last year, hoping to give her patterns a wider audience.  In addition to quilts, she designs pouches and “loves all things fabric”.  Like many modern quilt designers, she is trained as a graphic artist.  Here’s one of her quilt patterns:

May Chappell quilt

All Strung Up, a May Chappell design

And here are a few questions Lee was kind enough to answer for me, as well as pictures of more of her patterns:
tote bag pattern

Here’s a tote bag Lee designed to use mini-charm squares

Q:  Where do you think the quilting field is going?

A: This is a toughie. I usually see trends in the questions that I get from my students. I’ve had a lot of students lately that are self taught and they’re interested in learning more about precision. I’m a big believer that there is more than one right way to do things in quilting, but there sure are some wrong ways!
Q: What about your personal quilting future?
A: I have new patterns coming for Spring Market that I’m really excited about. I’m a terrible secret keeper so I usually want to put out the design right as I draw it!
Q: I know you took your patterns to quilt market, but where could I buy them?  I don’t see them on your website [Note: They ARE on her website, at least now.  Silly me 😉 ]

Eye Candy quilt

Eye Candy, one of Lee’s quilt patterns

Designer star quilt

Lee’s Designer Star Quilt. If you go to her website/shop you can see a picture of the whole thing.

A:  I love designing patterns and the printed patterns are available through local quilt shops. Because I also teach quilting at local shops, I’m a huge advocate for supporting local! Quilt shops are a huge resource for the sewing and quilting community. If your shop doesn’t have my patterns, they’re available through the distributors. You can also purchase PDF patterns through my website here. I teach all over North Carolina and I’m starting to expand out across the country. Teaching is my favorite part of my job; I’m passionate about quilting and I love sharing that. You can see my teaching schedule on my website, too.

Q: Show us something pretty you’ve made lately!
A: This is a table runner I made for my brother using my Blue Ridge pattern.
table runner quilt

Table runner by Lee Monroe

This post ran longer than usual, but that’s because I just HAD to explain a little about why Lee Monroe has a blog named May Chappell 🙂

2015 UFO Challenge

Last year I participated in Aunt Marti’s UFO (Unfinished Object) challenge over at 52 Quilts and found it helpful. I did NOT succeed in finishing a UFO every month, but there were several months when I wouldn’t have gotten even one done if it weren’t for the challenge.
So this year I’m not only taking the challenge, I’m (gasp!) publishing my list here so it’s public! And I’ll post about the finishes as I do them. Here’s the list, some of it in picture form:  If you hover over the picture you can see its caption.


There are two more to be done, but no pictures yet:

11.  Rework the Under the Sea top

12.  Quilt a practice piece I made for a magazine project.

Aunt Marti’s UFO challenge goes like this:  You gather up 12 of your (many) UFOs and number them. Then, each month Aunt Marti posts the number of the UFO to be done for that month.  (By the way, the project for January is #2).

I’ll keep you posted on how it goes. If you want to play along, here’s the link to the “rules” at Aunt Marti’s site.

Hope you have a good week at get at least one UFO finished even if you aren’t doing the challenge!

First Finish

Metro Hoops Quilt

Metro Hoops quilt made by Allison at Cluck, Cluck, Sew

Inspired by the beautiful Metro Hoops quilt Allison showed over at Cluck, Cluck, Sew, I mentioned the Quick Curve Ruler as something I wanted to try in a recent post.  Here’s a picture of her quilt so you can see what inspired me.

My clever son-in-law gave me the ruler for Christmas, and as soon as we got home I tried it out.  As always, I learned a lot. Certainly the Metro Hoops pattern is a nice modern alternative to the traditional wedding ring quilt.  What I wasn’t prepared for was the fudge factor required to make it work.

modern quilt block

My first Metro Hoops block

It made a really cute block, but then my inner perfectionist kicked in 😦   The block required a lot of “easing in” along the seams to make the points match up. *(You can skip to the reason why at the end of this post, if you like.)

Luckily, I almost never cut out a new quilt completely before making a test block.  After making one block for this quilt, I decided 5 hoop blocks was my limit.  The blocks really are quicker and easier to make than they look, so I got the 5 done in a few hours. They are nice big blocks (finish 15″) so I had a good start on a baby quilt.

I drew an approximation of the block with my EQ7 program and came up with this layout:

My EQ7 layout for the Metro Hoops blocks

My EQ7 layout for the Metro Hoops blocks

Another half day to make the alternate blocks, then a day to put it together, make a back, and quilt it–and voila!  The first finish of 2015!Metrol Hoops baby quilt

About the Quick Curve ruler:  the women who designed it have lots of cute quilt patterns on their site, so it’s worth checking out.

*BUT, if I make metro hoops again, I’ll modify the directions to make it more to my liking.  I think the basic issue here is that the single curve provided by this ruler is used for both the concave and convex curves in the quilt.  That means there is no seam allowance to make the curves match nicely.  The project is “saved” by the fact that the curve is less than a quarter circle, so it’s possible to fudge the sewing to make it go together without adding seam allowances.  It does work, but don’t think it’s going to fit the way pieces cut from most curved templates do.  If you decide to do it, be forewarned to relax and get rid of the inner perfectionist!

Quick Curve Ruler quilt

Happy new year!


Year End Review

For better or worse, I published goals at the beginning of the year, so here’s the review of my progress:
I met all the goals! (Does that mean I didn’t set them high enough?) I retreated with my buddies THREE times instead of just two! I attended 3 big national shows as well as 2 local ones (all were excellent). I took a couple of fun and useful classes, one of which I still need to write up here so you’ll know about it. I submitted several quilts to shows/contests and 3 were accepted. The one I donated to the Quilt Alliance even won something, and sold for $300 to benefit the Quilt Alliance!  And I had lots of fun, which was really the point of it all.

Here are pictures of a few of my projects from the second half of the year. The pix of projects from the first half of the year are in this post.

Spring Sun, a design by me, using blocks paper pieced from a totally different Judy Niemeyer pattern!

Spring Sun, a design by me, using blocks paper pieced from a totally different Judy Niemeyer pattern!  It took about 2 years, but it’s now DONE.

quilt photo

Zippy Star Quilt and Pillow as shown in Modern Quilts Unlimited, Summer 2014

Michael Miller challenge quilt

Packet of Posy Seeds, done for the Michael Miller spring challenge

modern quilt

Zippy Star I, which sold at the Asheville Quilt Show in September.  This was my “practice piece” for the MQU quilt shown above.

Improvisational quilt

Donation quilt for Ronald McDonald House.  I’m going to work more on using up orphan blocks next year.

And, despite the risk, here’s what I plan for the coming year:

1.  I’ll retreat with my buddies at least twice, probably 3 times again!

2.  I’ll attend one big national quilt show, maybe two.  I’ll attend at least one local show.

3.  I will limit much more strictly the shows and challenges I enter.  It takes too much time and effort that could be spent on making what I want to make 🙂

4.  I’ll continue to make donation quilts, including one for the Quilt Alliance.  Please consider making one for the Quilt Alliance yourself.  You can read about their mission here.  Click on “2015 Quilt Contest” to learn about this year’s challenge.

5.  I’ll continue my blog, and I think I’ll put up instructions for a few easy donation quilts just in case somebody is looking for ideas.

What’s coming up for you?