I have made my quilt labels a variety of ways and generally have felt that the result looked amateurish. However, I’ve now developed a method that I like, so here’s how.

First, I compose my labels in my word processing program and print them onto those fabric sheets prepared for a computer printer. These sheets are fairly expensive, so I wait until I have enough to fill a page. Gives me an excuse to procrastinate on labeling my quilts 😉
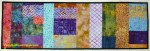
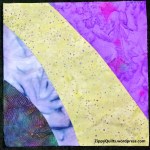
I like to frame each label with leftover binding from the quilt because I like the way it looks. That printer-ready fabric is very stiff, so the border makes the whole thing easier to sew to the quilt back.


There’s almost always enough left-over binding to frame the label.  I start by ironing the binding open (yes, after having worked earlier to get it ironed into a nice fold). I then sew it to all 4 sides of the trimmed label with a 1/4 inch seam. I sew the binding to opposite sides of the label the press it out, away from the label. I then sew to the two remaining sides and press them out.
Note that it’s easiest to sew to the two (opposite) longer sides first, then to the two shorter sides, which are now longer because the border has extended them.
After framing the label with the binding, I attach it as I would have done without the frame. That is, I turn under 1/4 inch on each side of the frame and sew the label to the back of the quilt by hand. I think having the label framed with the same fabric used to bind the quilt gives it a nice finishing touch.
Give it a try and let me know what you think!