Scraps Happen, Part I

When I mentioned recently that I was making a basket to hold scraps as I work on a project, my blogging friend Elizabeth asked how I decide what to do with the scraps.  This first post will be about how I design scrap quilts; the second in the series will be about how I use inspiration from other quilters; the third will be about how I modify published patterns for scrap quilts.

My first improvised scrap quilt was made close to 20 years ago.  I absolutely just starting sewing scraps together and kept it up until I had a collection of blocks.  The scraps were all from an Amish-style quilt I had made, which kept the blocks cohesive.

improvisational blocks

I then added 2 shades of yellow for sashing.

improvisational quilt

Nothing Is Wasted, my first improvisational quilt, 2001-2002

Using scraps from a single project is one way to be sure the scraps all play well together, assuming the fabrics were well coordinated in the original project.  After making the quilt below for Modern Quilts Unlimited with some yummy Cotton Couture fabrics provided by Michael Miller…

quilt photo

My Zippy Star Quilt and Pillow as shown in Modern Quilts Unlimited, Summer 2014

I started sewing all my tiny scraps together and added a tiny paper-pieced star to make a donation quilt for the Quilt Alliance annual contest:

scrap quilt

Confetti Star, 20″ x 20″, 2014.  Some of these pieces finish less than 1/4″ square

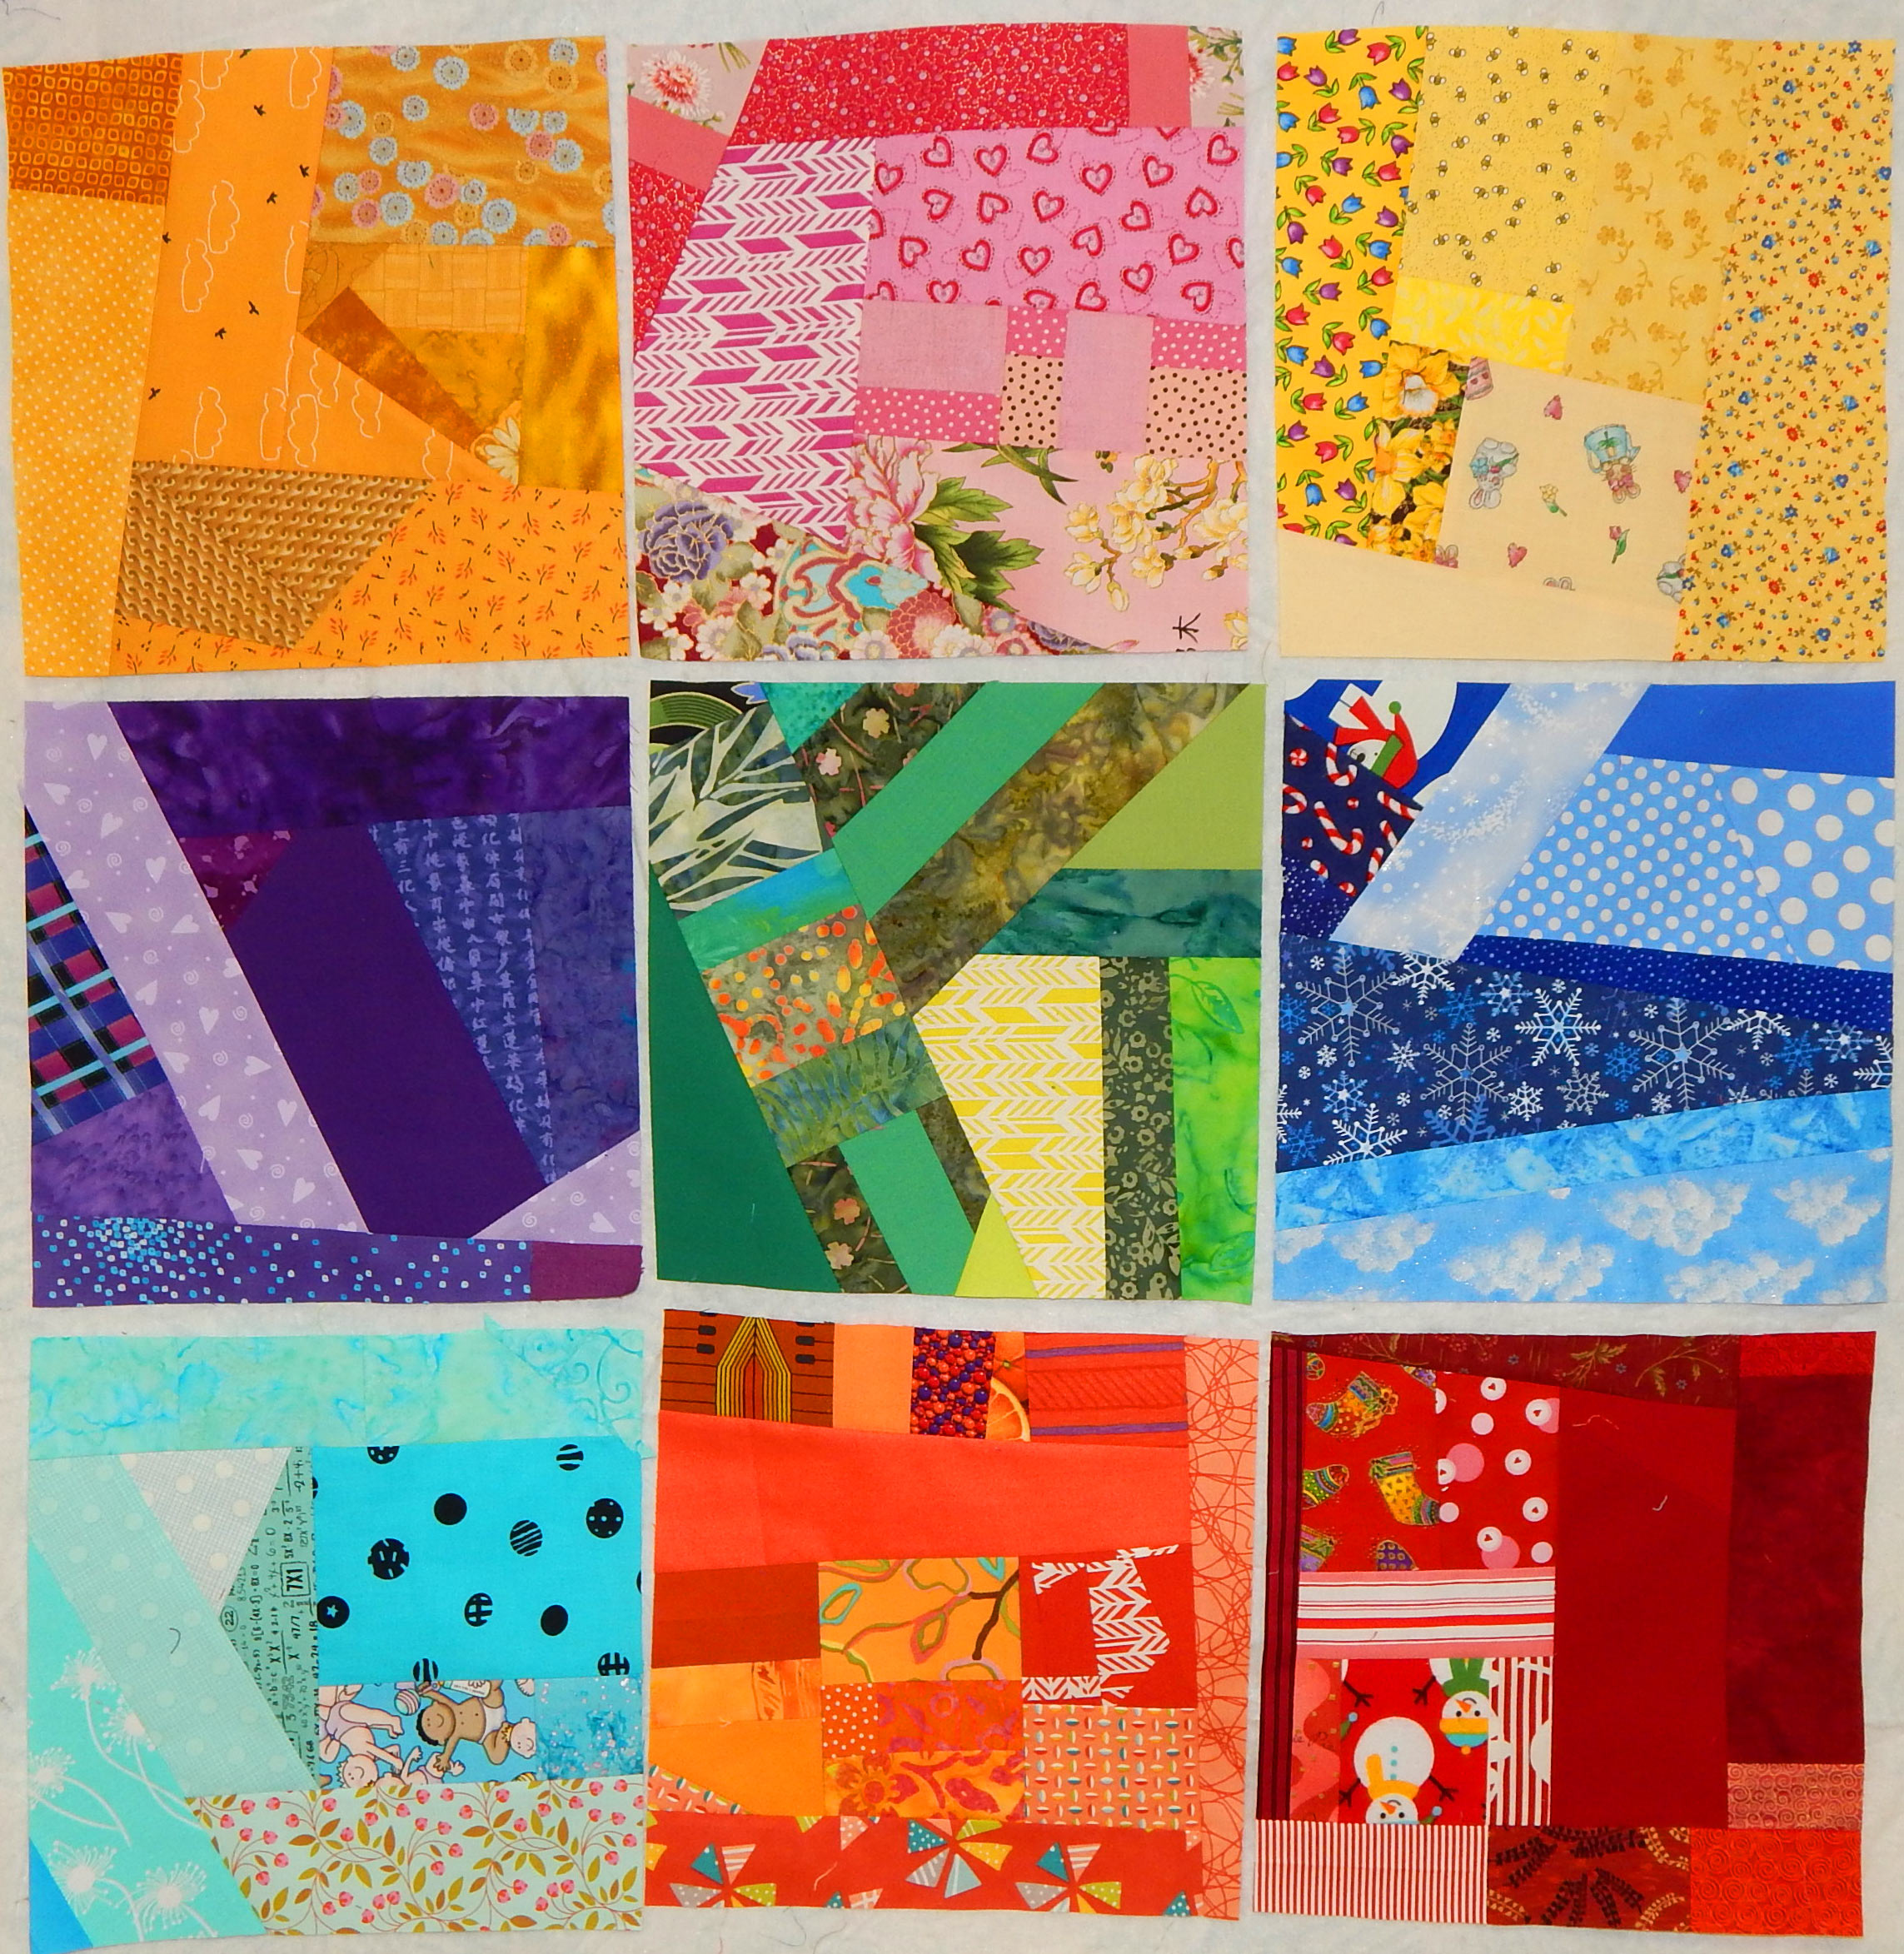
I then started combining scraps of a single color to make blocks.  I called them “slabs”, since the idea of making single-color scrap blocks came from Cheryl Arkison (though hers are much more orderly than mine).  Here is one example of a quilt made from these single-color blocks:

On at least one occasion I decided a collection of yellow and orange scrap blocks were booooring, so I cut them up and inserted some bright blue before combining them in a quilt:Improvisational quilt, orange and blue quilt

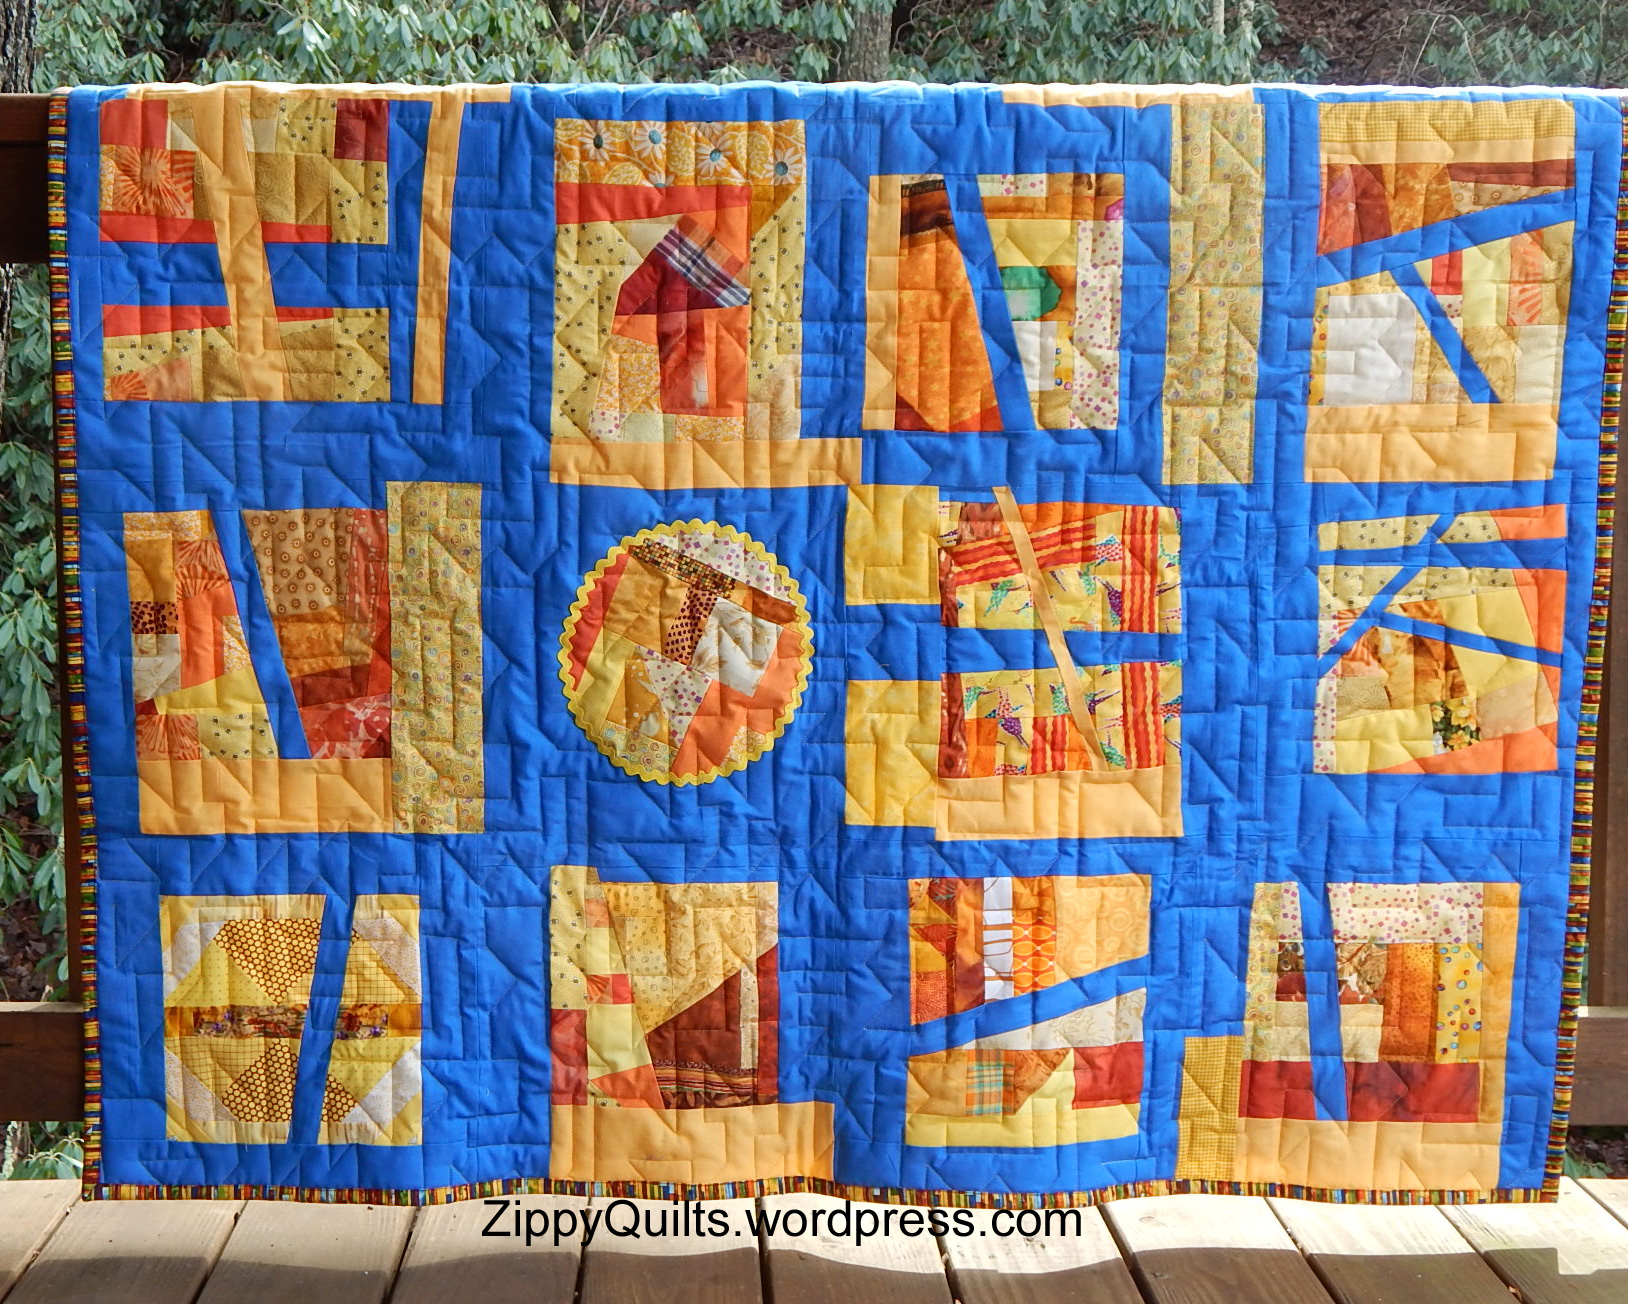
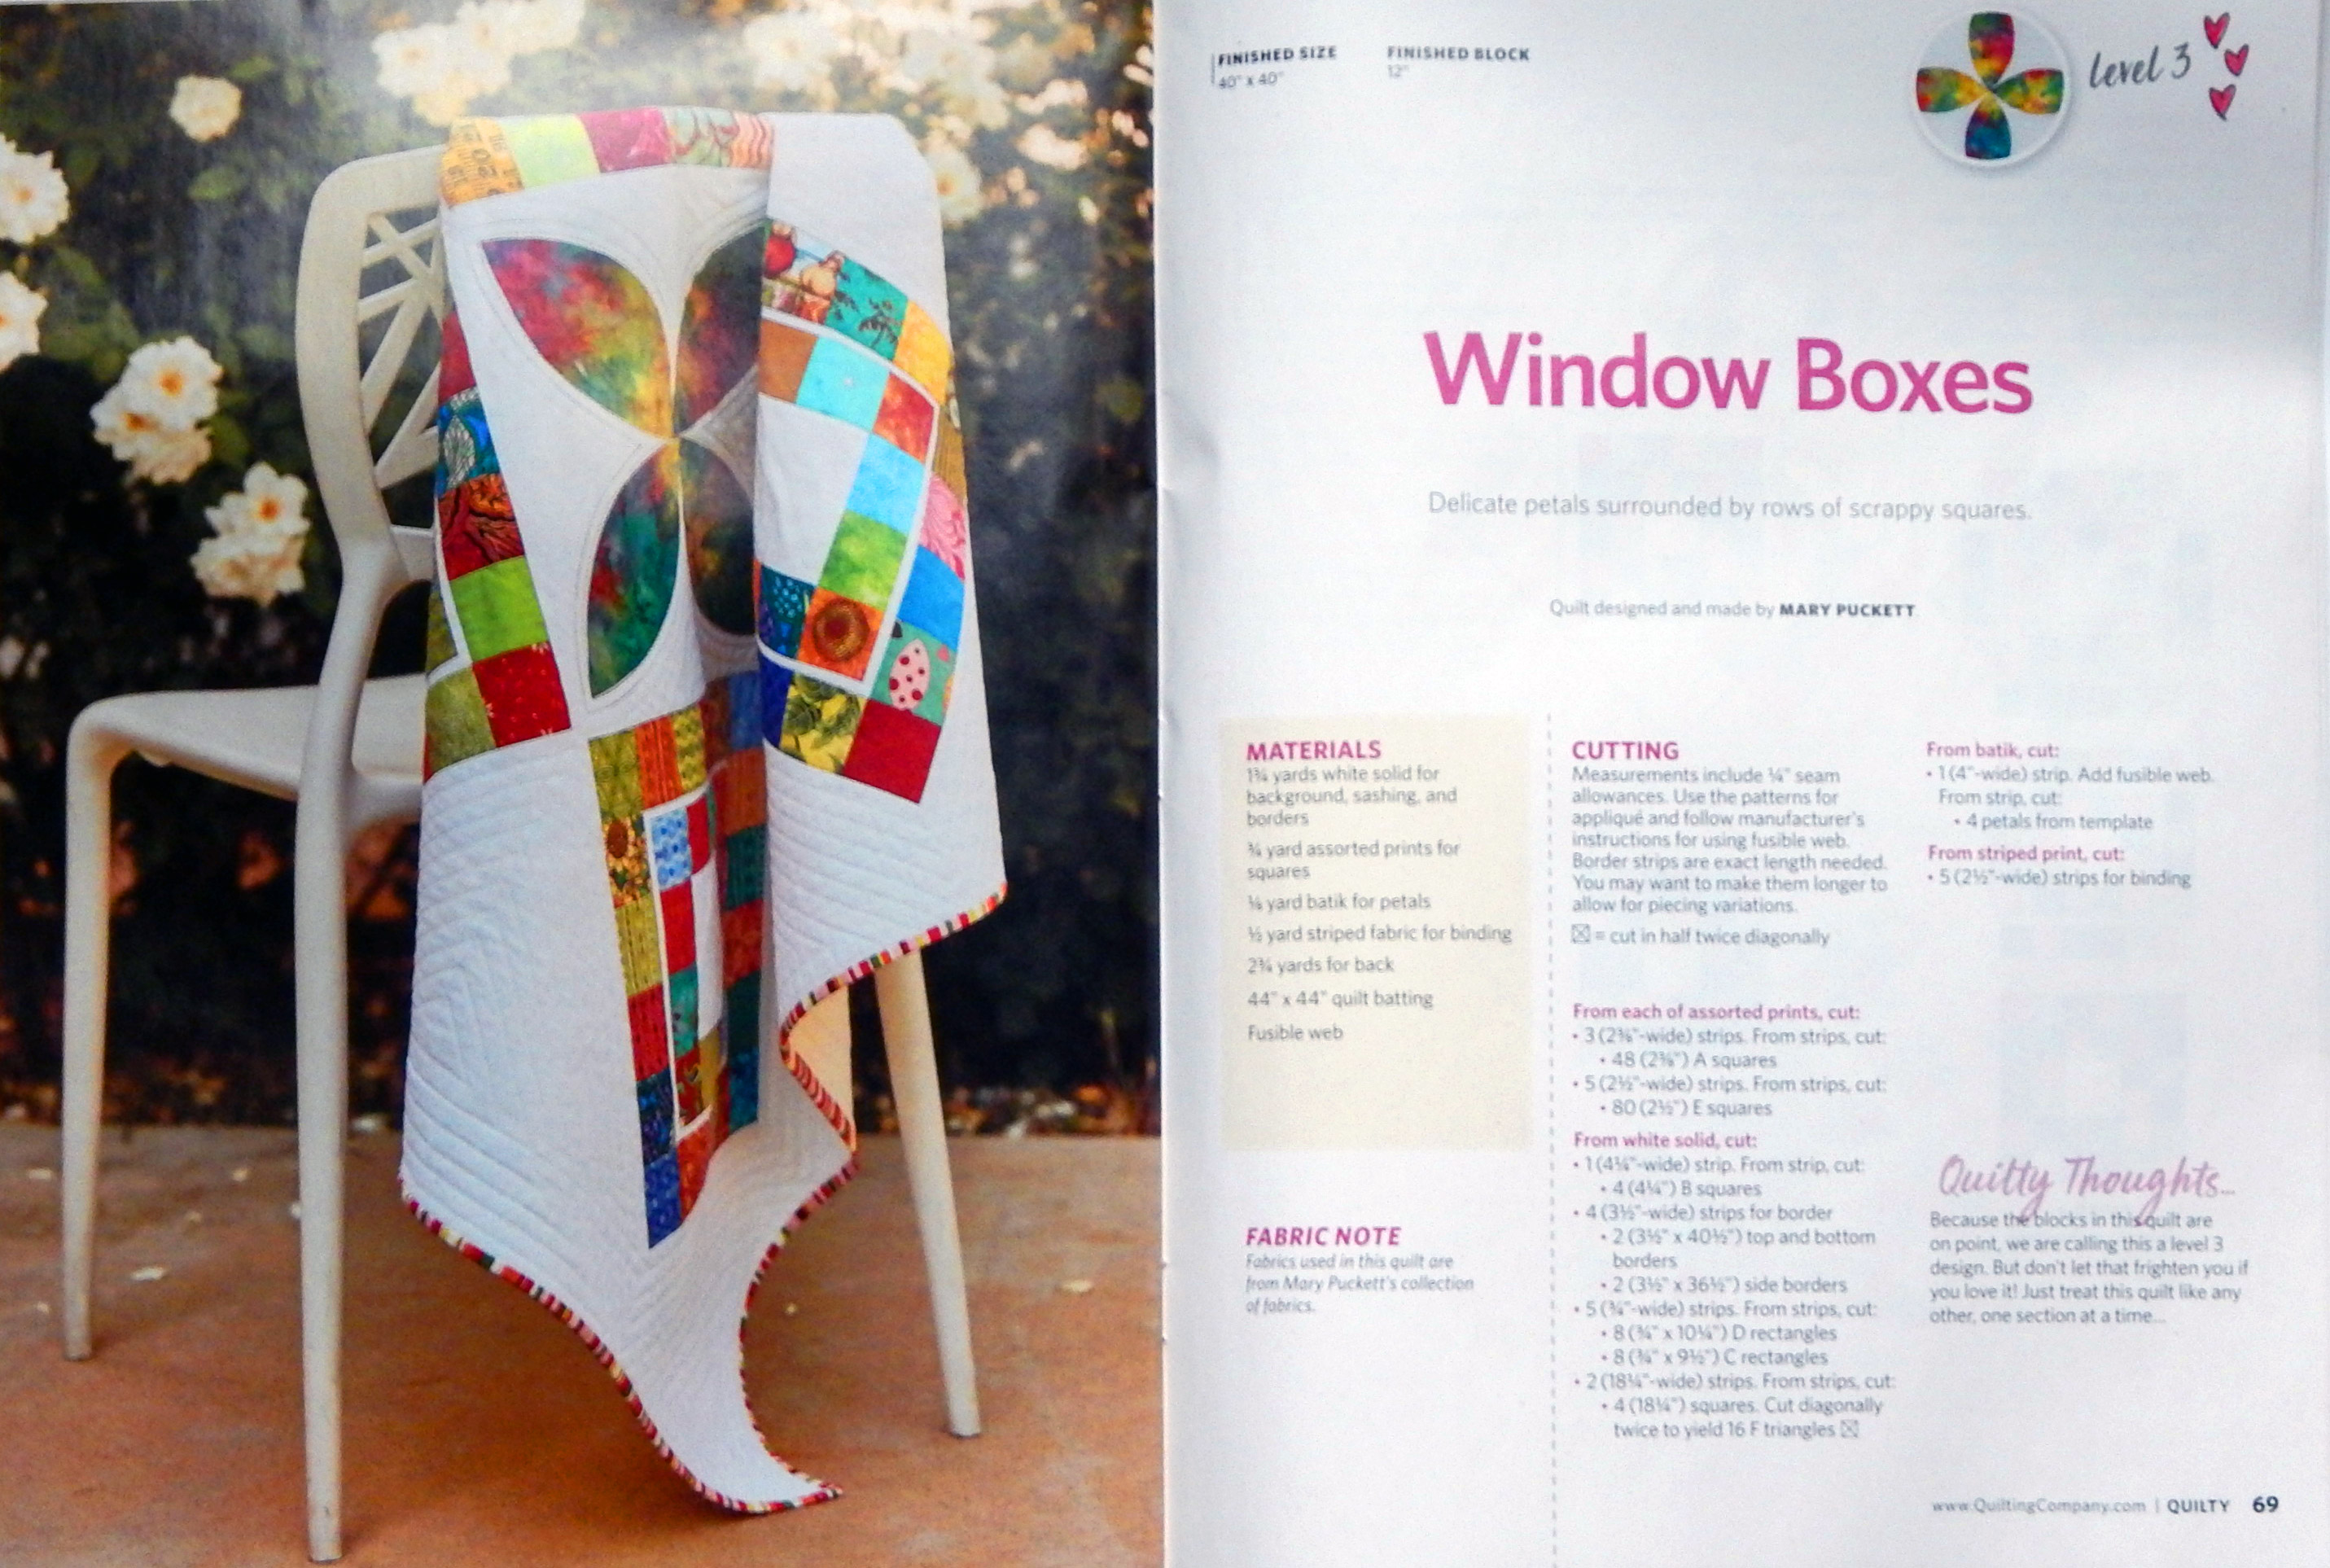
Sometimes I am “forced” to design a new quilt because the scrap bins are overflowing.  When the strip bins got out of hand last spring, I designed this quilt.  The idea of putting a circle in the alternate blocks came from my friend Jerri.  The triangle blocks were because I have a 60 degree triangle ruler 🙂

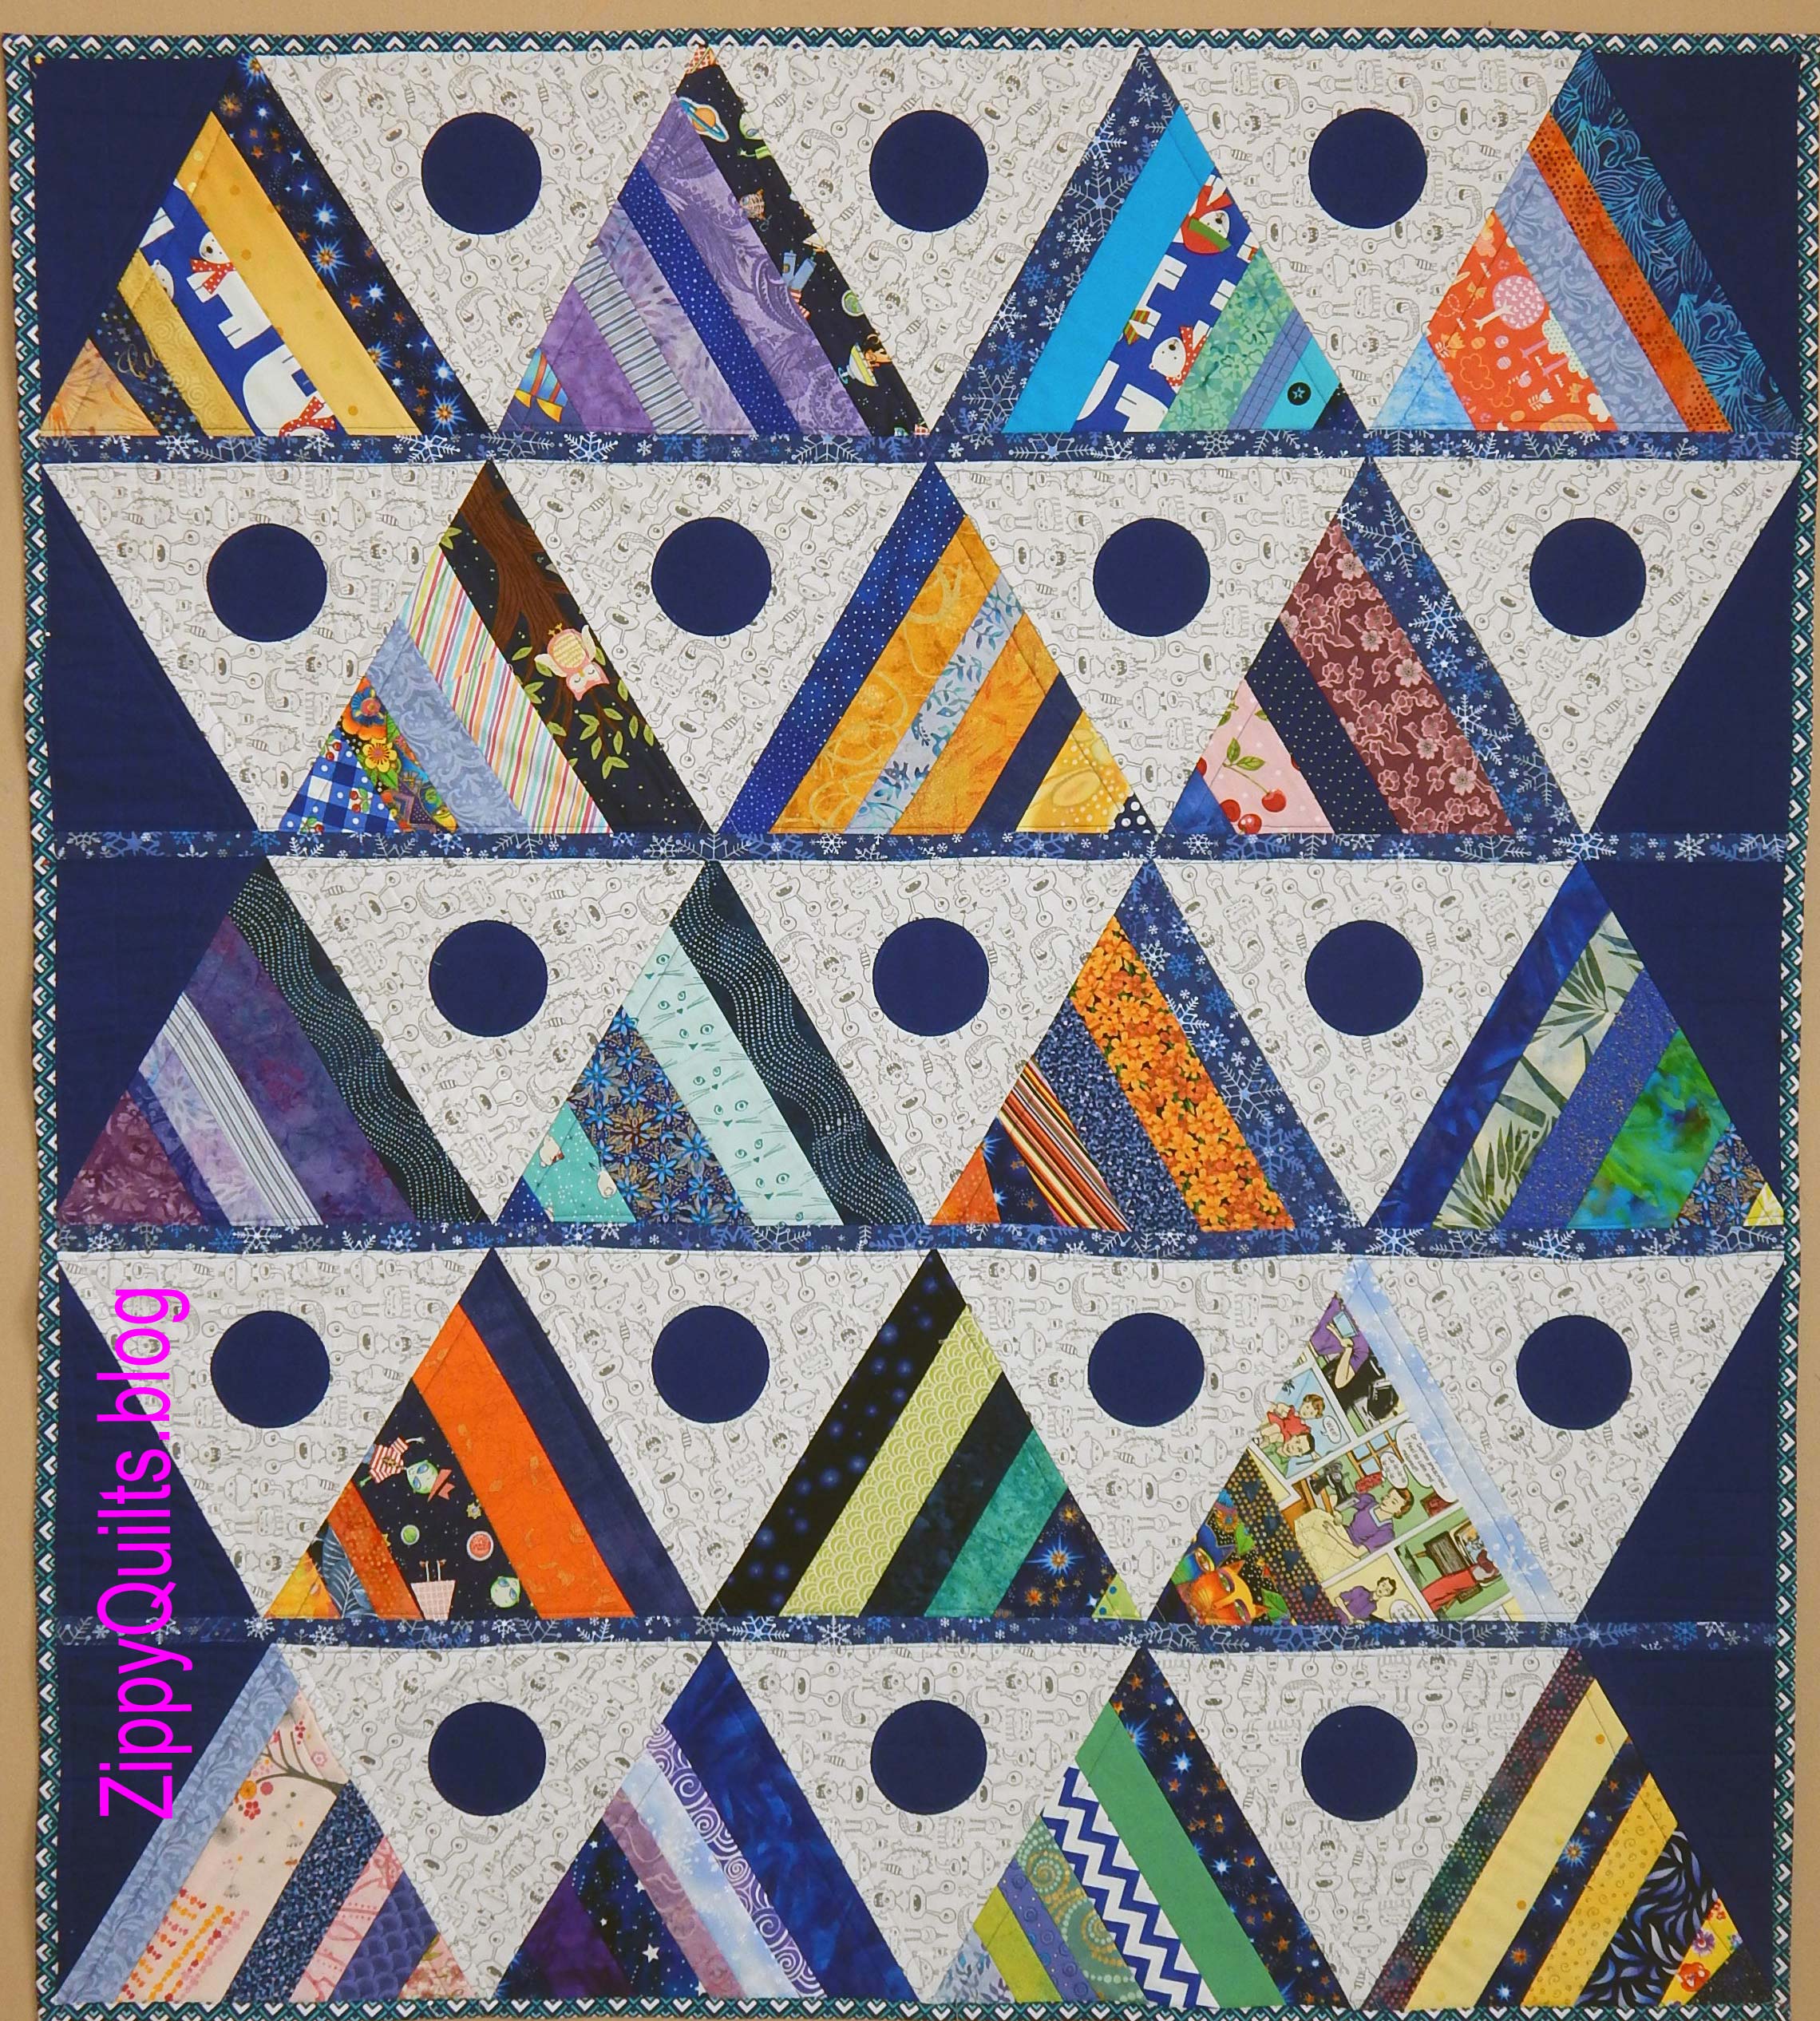
Machine applique of these circles was done after the quilting, so there was no need for further stabilizer

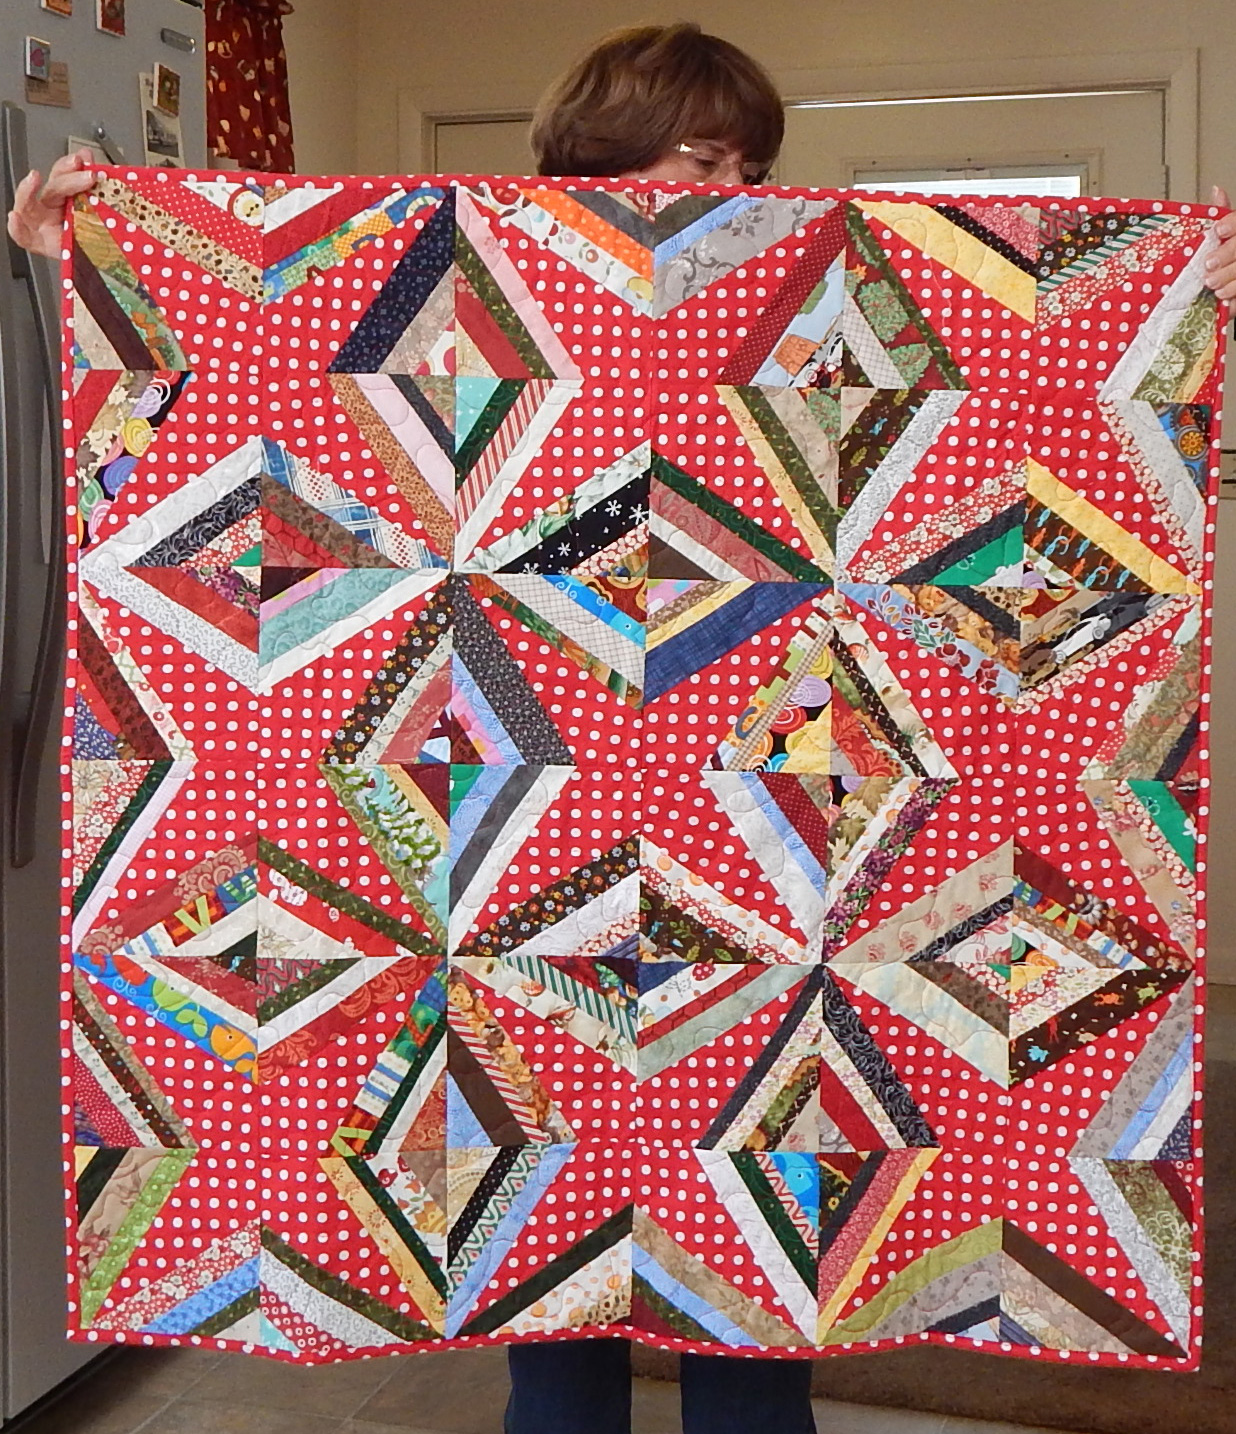
On another occasion, some friends and I had way too many 2.5″ blocks, so we developed these blocks and set them on point.  That quilt hung around for a long time “needing something”.  Eventually I added a central motif, and here it is:

The petals were fused on with Heat’n’Bond, and then I buttonhole stitched around them

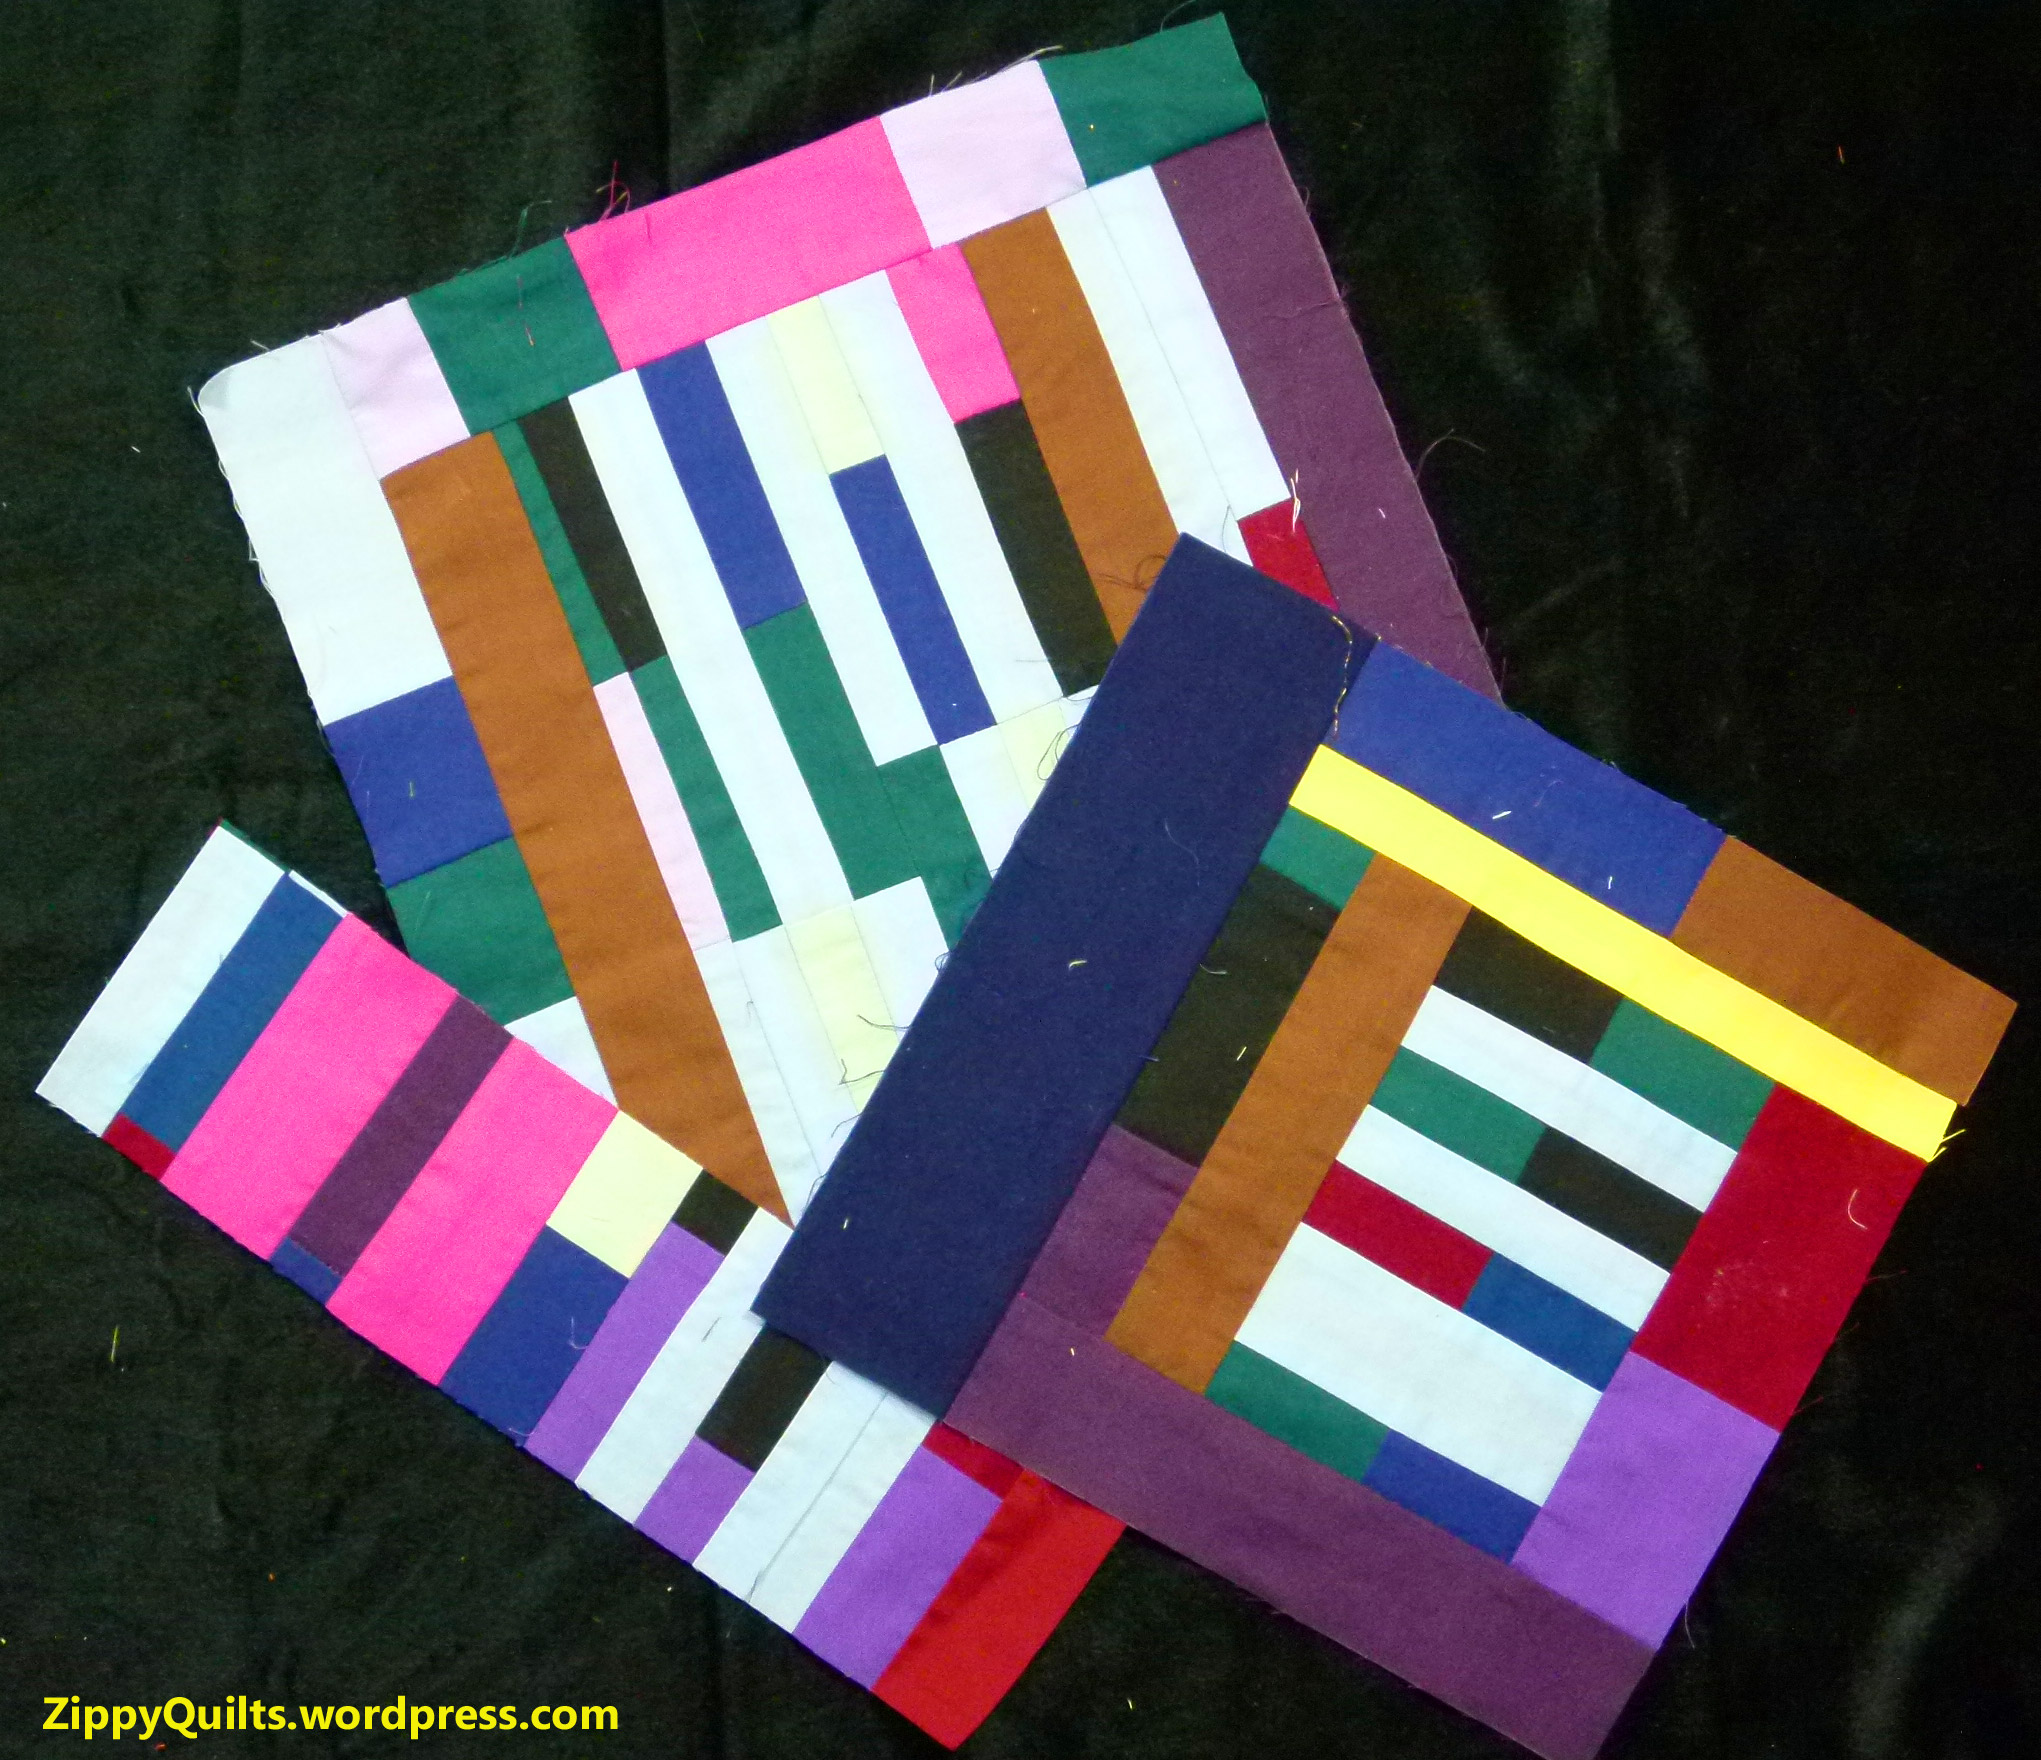
Another design process I like to use is to simply fill a piece of batting with scraps.  For the table runners shown below, I selected a group of fabrics for the top and a piece of backing fabric about 6″ longer and wider than the finished runner.  I spray basted the batting to the backing, then started filling the space on the batting with pieces of fabric from my collection. I didn’t sew them down until I had a whole section done, since this type of designing involves cutting off bits here and there to keep edges even.

modern table runner

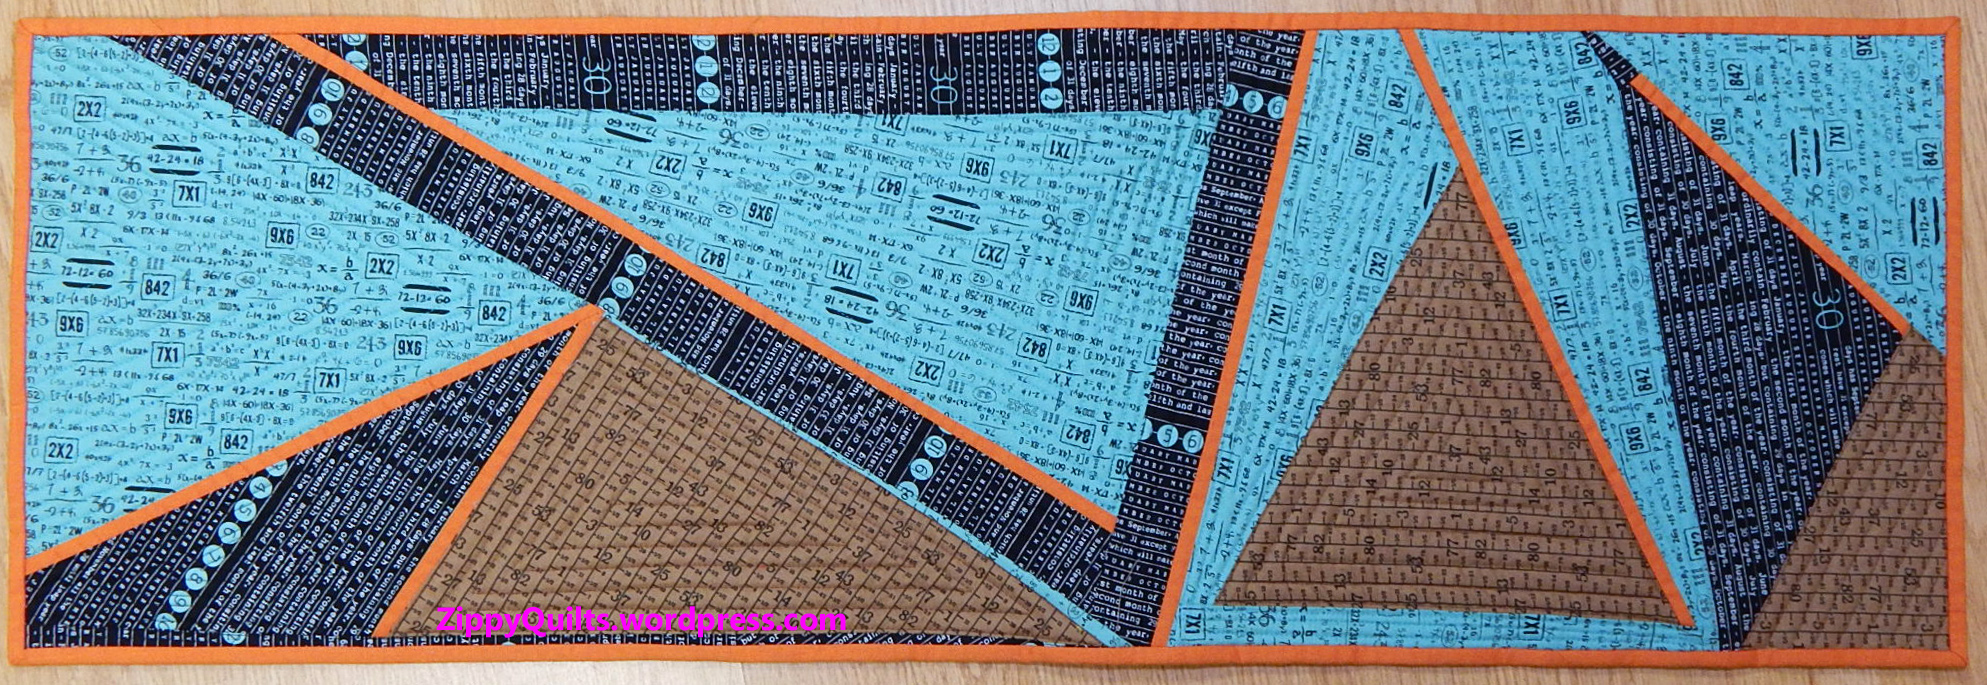
Here is one of the samples for my improvised table runner class

improvisational quilt

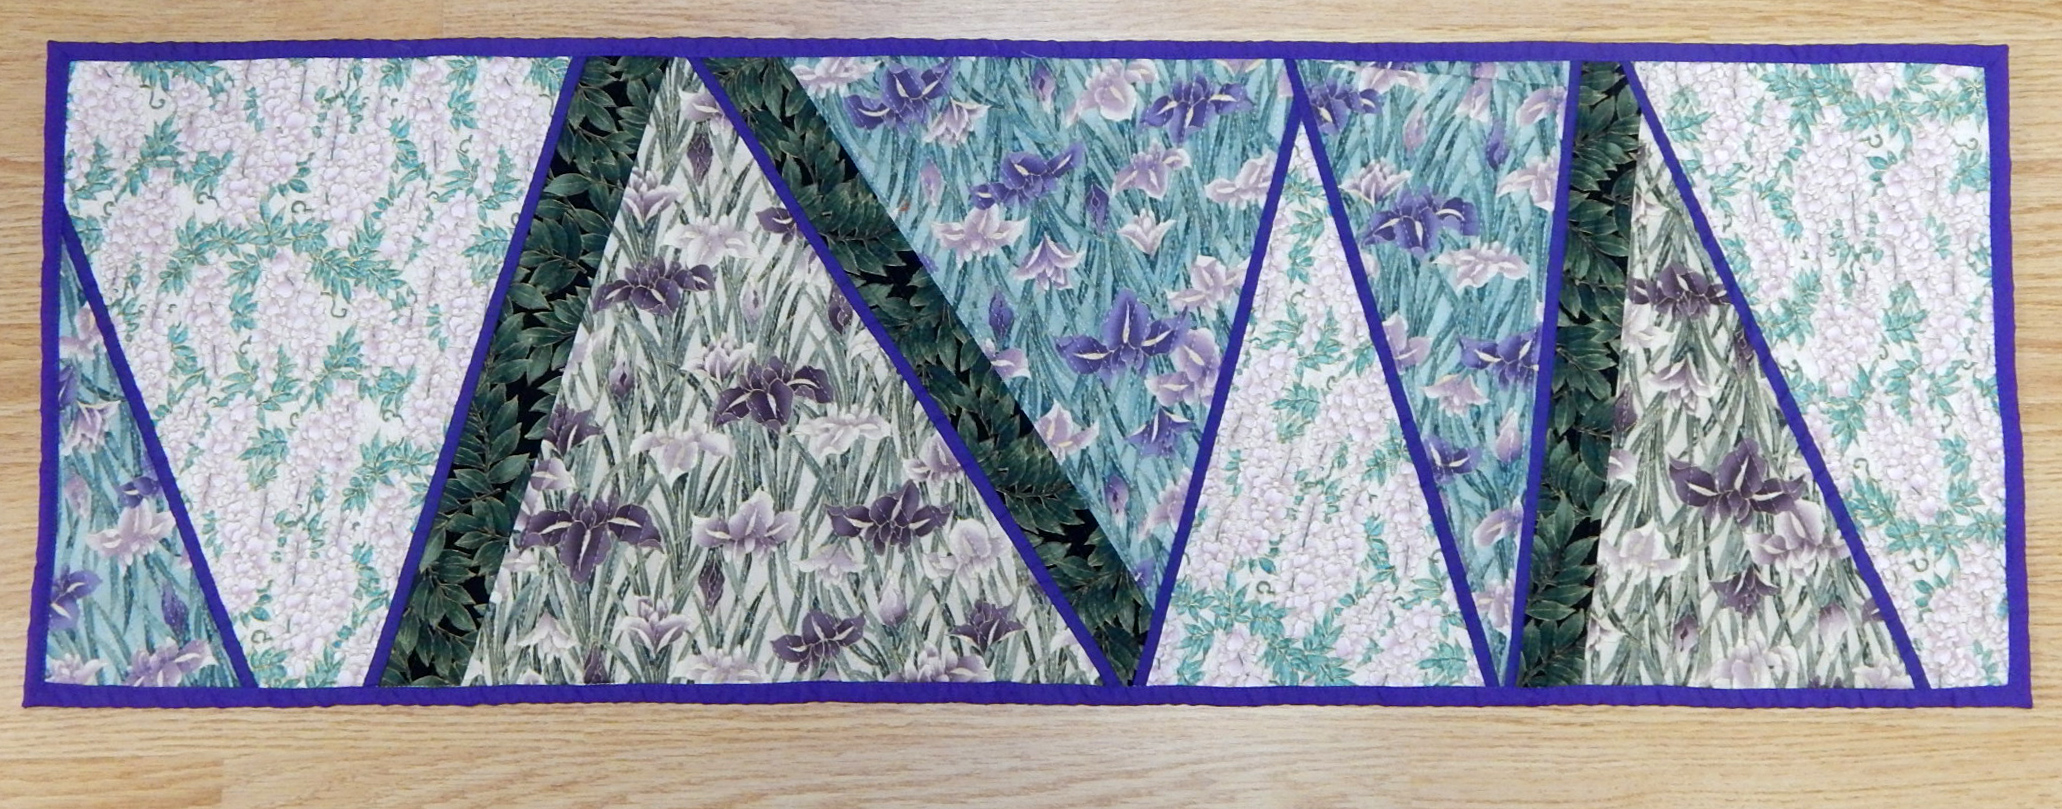
I have taught this method as a class, but it proved to be too unstructured for some people, who really just wanted to make my runner.  I continue to use the method for myself but have not attempted to teach it to others again!

So, in response to the question of my process for designing scrap quilts, it’s really just “by the seat of my pants”.  I do start with a collection of fabrics I like together, but otherwise it’s sew first, plan later.  What I’m not showing, of course, is all the “fizzles” that got thrown out along the way!

Please stay tuned for Part II, scrap quilts inspired by other quilters.  And go visit Elizabeth, who inspired this post!

Serendipity Quilt

I love this quilt because it gets rid of both a UFO and some scraps!

I had this great backing fabric with all the color names you can imagine written on it, and I had just finished backing a quilt with it. Did NOT want to put the scraps in a scrap drawer if I could help it–those are overflowing!

Blocks finish 6″, so this is an 18″ square section to show fabrics

At the same time, I had these great little sew-and-flip stars from a block swap and needed to do something with them. Serendipity!

Here is a single block showing the quilting:Here is the finished quilt:

QUILT DETAILS

Name: Serendipity

Finished size: 42” x 42”

Alternate blocks are Windham Fabrics Modern Hand fabric

Sew and flip stars from a group swap

Designed, made, and quilted by me

Augusta Cole: Variety is the Spice of Life

Augusta Cole’s motto is “Variety is the spice of life” and she travels with a lovely quilted wall hanging bearing that motto.  You can see the wall hanging and a good picture of her on the front page of her website.

Augusta designs and teaches beautiful scrap quilts that I’ve admired for years, and certainly scrap quilts have plenty of variety!.  She was one of the instructors at the North Carolina Quilt Symposium, so I took the opportunity to interview her.  I’ve been following her online ever since I found her Snappy, Scrappy Stars quilt pattern many years ago.  Here is one of the multiple versions I’ve made of that quilt (her version has a much fancier border):

I was unable to lift pictures from her site–which usually is how people want me to get pictures to go with my interviews–due to the format. These pictures of some of her quilts are those I took at the quilt symposium. 

Augusta says she has a lifelong history of crafting and keeping her hands busy.  She took up quilting after her second child was born, and “it came very naturally.”  A class with Karen Pervier was especially influential, and Karen remains a good friend.

After living in New York state and North Carolina, Augusta now lives in the Richmond (Virginia) area.  Since retiring from her career as a physical education teacher, she travels to teach quilting.  Her husband is supportive and even keeps the books for her!

I was unable to fit in a class with Augusta, but a friend who took her class really enjoyed it.  She reports Augusta is a lively and engaging teacher.  Augusta’s patterns are  available on her website.  (Go look at her pretty quilts even if you don’t need a pattern!).  I continue to be inspired by her many variations on scrap quilts.

Addendum: Here is a picture from Augusta’s Cutting Bee class, kindly provided by Chris Crouch:


Clothesline Basket Fun

It’s been over a year since I purchased the Indygo Junction pattern for a basket made of covered clothesline, so I expect everybody else in America has tried this already. Anyway, it was fun.

The pattern gives basic instructions for starting the basket, shaping the bottom, and then shaping the sides.  Instructions are given for two types of handles, and for making the lining.  The basket itself was easier than I expected, then the lining was a little tricky.  Probably my fault because I changed the instructions 😀

My husband sometimes asks, “What is this one for?”  The answer is, “For making something I’ve never made before.”  Which means I have no idea of a use for this basket, but I do want to make at least one of (almost) everything just for the experience!  (Bonus: this used a lot of scraps!)

What about you?  Do you have a plan for everything you make?

Another Scrap Class

Here are some pictures from the recent scrap quilt class.  The block is directional, so it is considerably more difficult to get right than it looks!  Nevertheless, everybody got it right by the end of the day.  Here are a few of the blocks with their makers:

Gail chose the more challenging smaller size and still was the first to finish a block!

Here are a few of the larger blocks:

Sorry I got the glare on the glasses, but the block is beautiful!

This woman made a small block, too!

Love those bright colors!

My next class at Studio Stitch in Greensboro is Twinkle on Thursday, February 21:

I looove this quilt!  Join us if you can!

My Quilt is in Quilty Magazine!

This quilt was designed with friends at a retreat and remained unfinished for a year while I contemplated what should go in the big.white.center.  

Eventually I decided on petals, finished the quilt, and submitted it to F&W, where it was accepted for the January 2019 issue of Quilty.  I love Quilty, so I was thrilled.  And now the January issue, including my quilt, is available at Barnes & Noble.

This is Quilty’s “glamour shot” of my quilt

Once I got going on what to put in the center, I made another version with a ring in the center and the addition of a floral border:

If you pick up the magazine but want to make the quilt with the center ring instead of the petals, e-mail me and I’ll tell you the measurements.  Alternatively, just trace a dessert plate from your collection, which is what I did 😀

Classes Coming

I recently started teaching at A Stitch in Time in Franklin, NC. It’s as “local” as quilt shops get for me in this rural area, so I’m very happy to be able to teach there. It’s an excellent shop and I sort of have to work to avoid drooling on the fabric…well, you know what I mean 😉

So here is the quilt I will be teaching in July…

scrap quilt

Scrap quilt made with strips that finish 1″ wide

August…

“Red Pepper” is made from a quilt pattern entitled “Yellow Pepper”

And September…

modern quilt

Happy Squares, one of my original designs

Of course, while I was in the shop I got a little fabric!  This is a specially-printed piece from Hoffman California that has 8 coordinating fat quarters in a 2 yard cut!

There were other nice prints in the series, but I’m a fool for dots.  If you need some, too, you can order from A Stitch in Time (and no, I do not make any money from it; this site is non-commercial).

Have a great week!


A Few Pictures…

…from a recent very productive quilt retreat!

This string quilt by Rena was a very successful design, I thought:string quilt

Here’s the back of the string quilt, and she also made this cute Halloween quilt top:

Mary made a string quilt, too, this one all in purple:string quilt

And Jerri finished a large Bonnie Hunter quilt with a zillion pieces:Bonnie Hunter quilt

I worked on half rectangle triangles, which turned out to be a lot more work than half square triangles:Half rectangle triangles

And a good time was had by all!

What have you been up to?

A Little Break for Fun

After finishing a big project and preparing classes for the next quarter, I took a little break and used some of the scraps from the unsorted pile.  This is where scraps go before I cut them into the standard sizes I use for storage.scrap block, slabs, scrap quilt

Cheryl Arkison, who blogs at Dining Room Empire, calls this type of block a slab. Of course the idea of joining scraps as you find them has been used by many people in various ways.  I really enjoy making them in a single color, so I made a few when I had a minute.slabs, scrap blocks, scrap quilt

Of course, this didn’t make a dent in the scrap pile, but it was fun!  Has anybody out there found a way to make a real dent in the scrap pile?  It seems to me to grow and grow, with no decrease in size no matter how many scrap quilts I make!

Classes Coming Up

I’ll be teaching two classes at Studio Stitch in Greensboro, NC, this coming quarter.

First is a “Secret Message Pillow”. Go by the shop to see the sample and sign up!  That class will be the morning of Saturday, January 27, which means the pillow will be finished in time for Valentine’s Day.

scrap quilt

Scrap quilt made with strips that finish 1″ wide

Second, I’m teaching a scrap management class that will show several ways to use even small scraps to make beautiful quilts. I call it scrap management because that’s what most of us need: management of the scraps. One option is shown above.  That class will be March 24 and we will have all day to play with our scraps.

All you need to bring is the basket (dump truck load?) of scraps that have been accumulating in your studio.  Sign up at the shop and come have fun!