The Mountain Thread Company

While at the quilt show in Hickory I came across a new company and product I’d like to share with you.

I’ve made some of those rope baskets that have been popular off-and-on for several years now.

I used clothesline as advised in the instructions and lined the baskets, also as instructed.

However, The Mountain Thread Company folks have developed a new type of cord for this process and they have it manufactured right here in North Carolina. Katherine Lile, the owner, explained to me that the rope is 100% cotton and is a solid braid rather than the wrapped cord of clothesline. She emphasized that, because the new braided cord is sturdy, it’s important to use a denim needle with it.

Katherine holding her book. The headband in her hair is made with the company’s cord.

Indeed, I could feel the difference both in the cord and in the baskets made from it. The cord is about the size of clothesline, but both the cord and the baskets made from it are sturdier.

Katherine has written a book with projects using the cord. The surface of the cord is nicer than the clothesline I was using, so the baskets don’t need to be lined (thank you!).

A variety of small baskets made with the special cord. Notice that only part of the cord is wrapped. The spools in the background are a way to buy the cord in bulk.

Photo credit: The Mountain Thread Company

The cord also takes dye well. Look at the basket on the front of Katherine’s book, shown above. It appears that half the basket was dipped in dye! I love that idea since it reminds me of the way we used to glaze pots (in a former lifetime, I guess).

And look at this interesting basket made with a wide zigzag and no cloth wrap for the cord.

Naturally I had to buy some of Katherine’s cord to try. I came right home and made this little bowl.

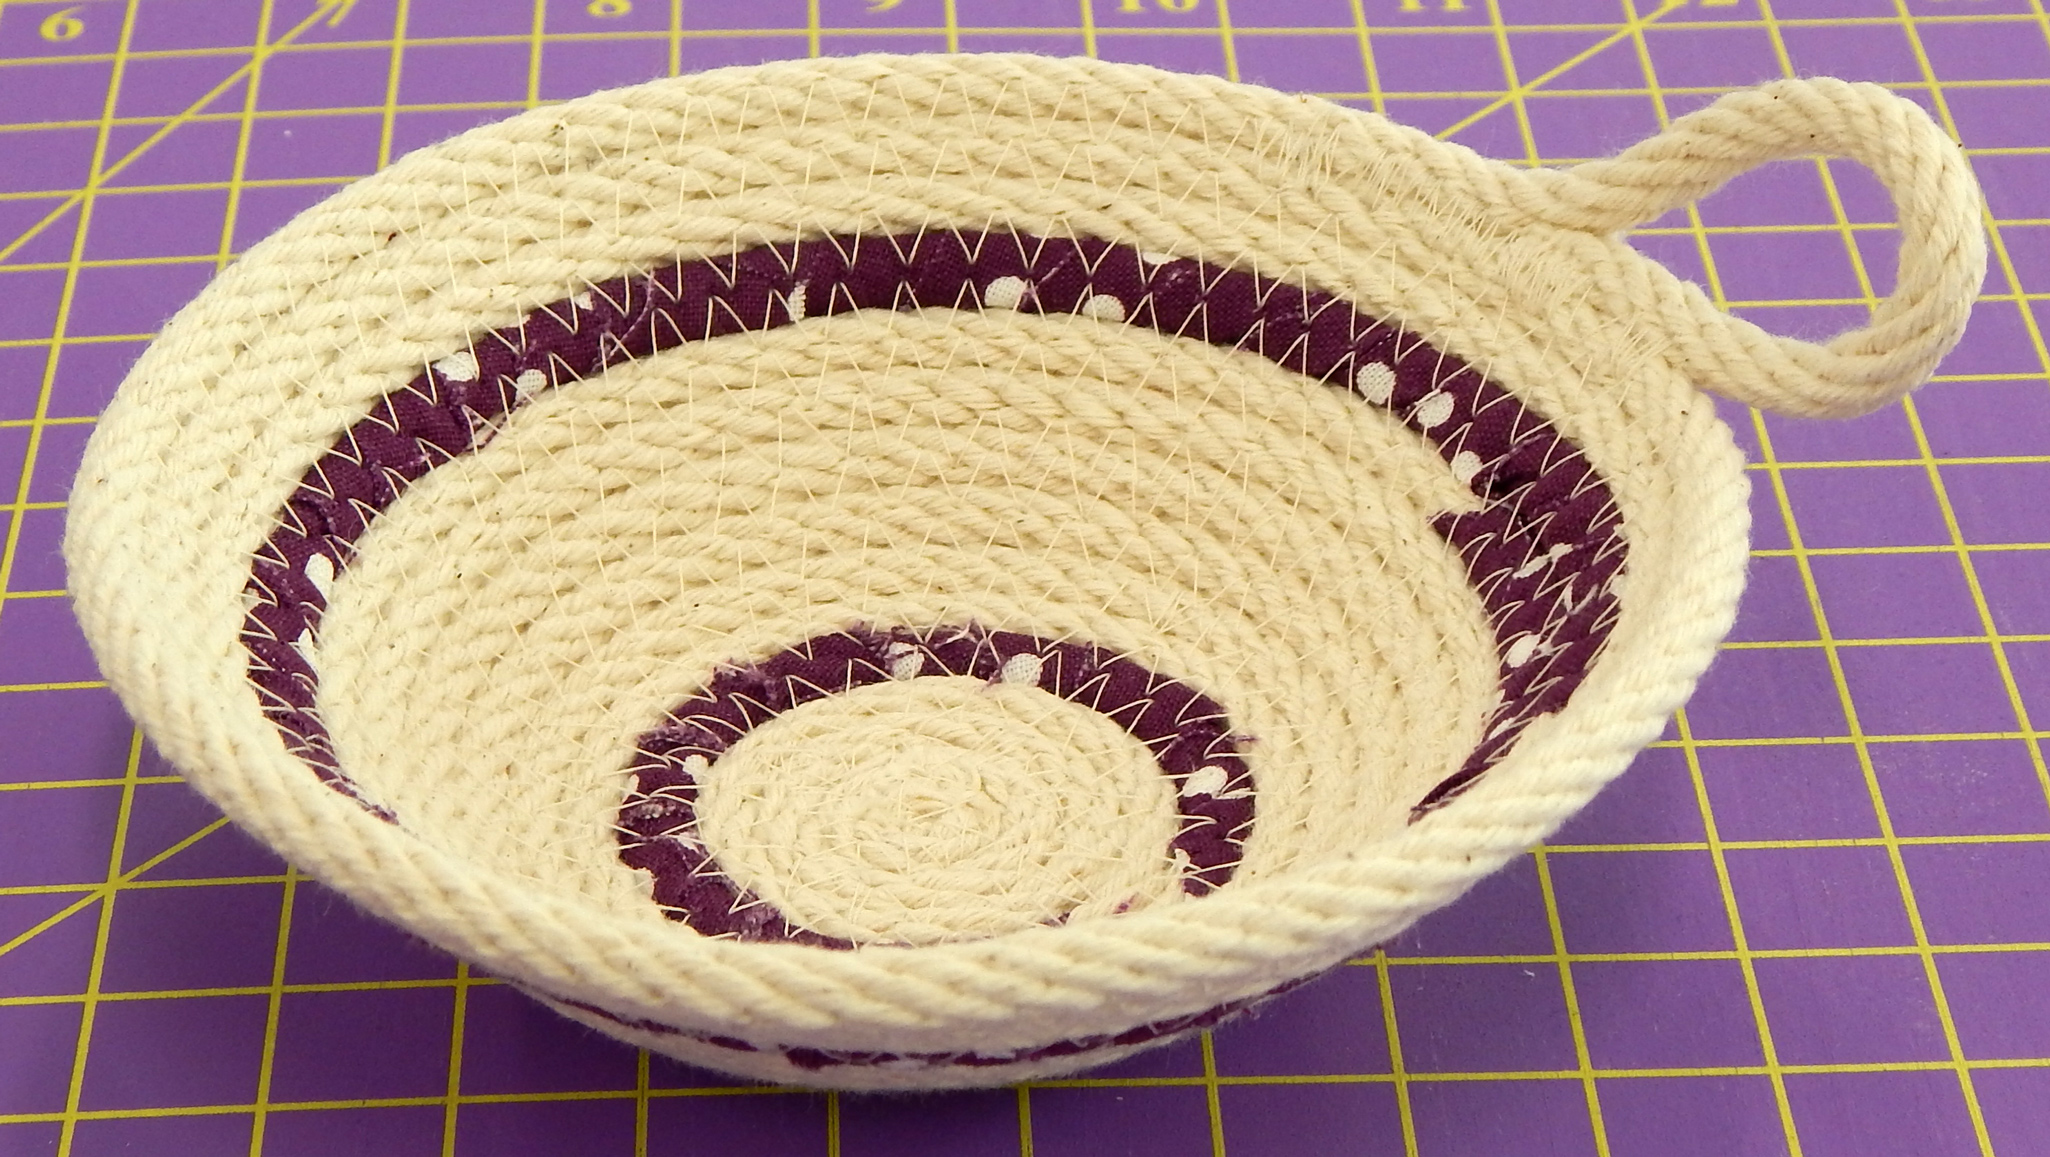
My first bowl made with The Mountain Thread Company cord

I found the cord very easy to work with. Because it is solid, it looks good unwrapped, so I followed Katherine’s example of intermittent wrapping for interest rather than wrapping the whole thing as I had done with previous projects. I also used her idea of making a cute little loop at the top of the bowl.

If you’re interested, you can visit The Mountain Thread Company here. If you’ve never made a rope basket, check out the video tutorials, which can be accessed from the main menu at the top of The Mountain Thread Company’s home page. I watched all of them before I made my little bowl and found them useful.

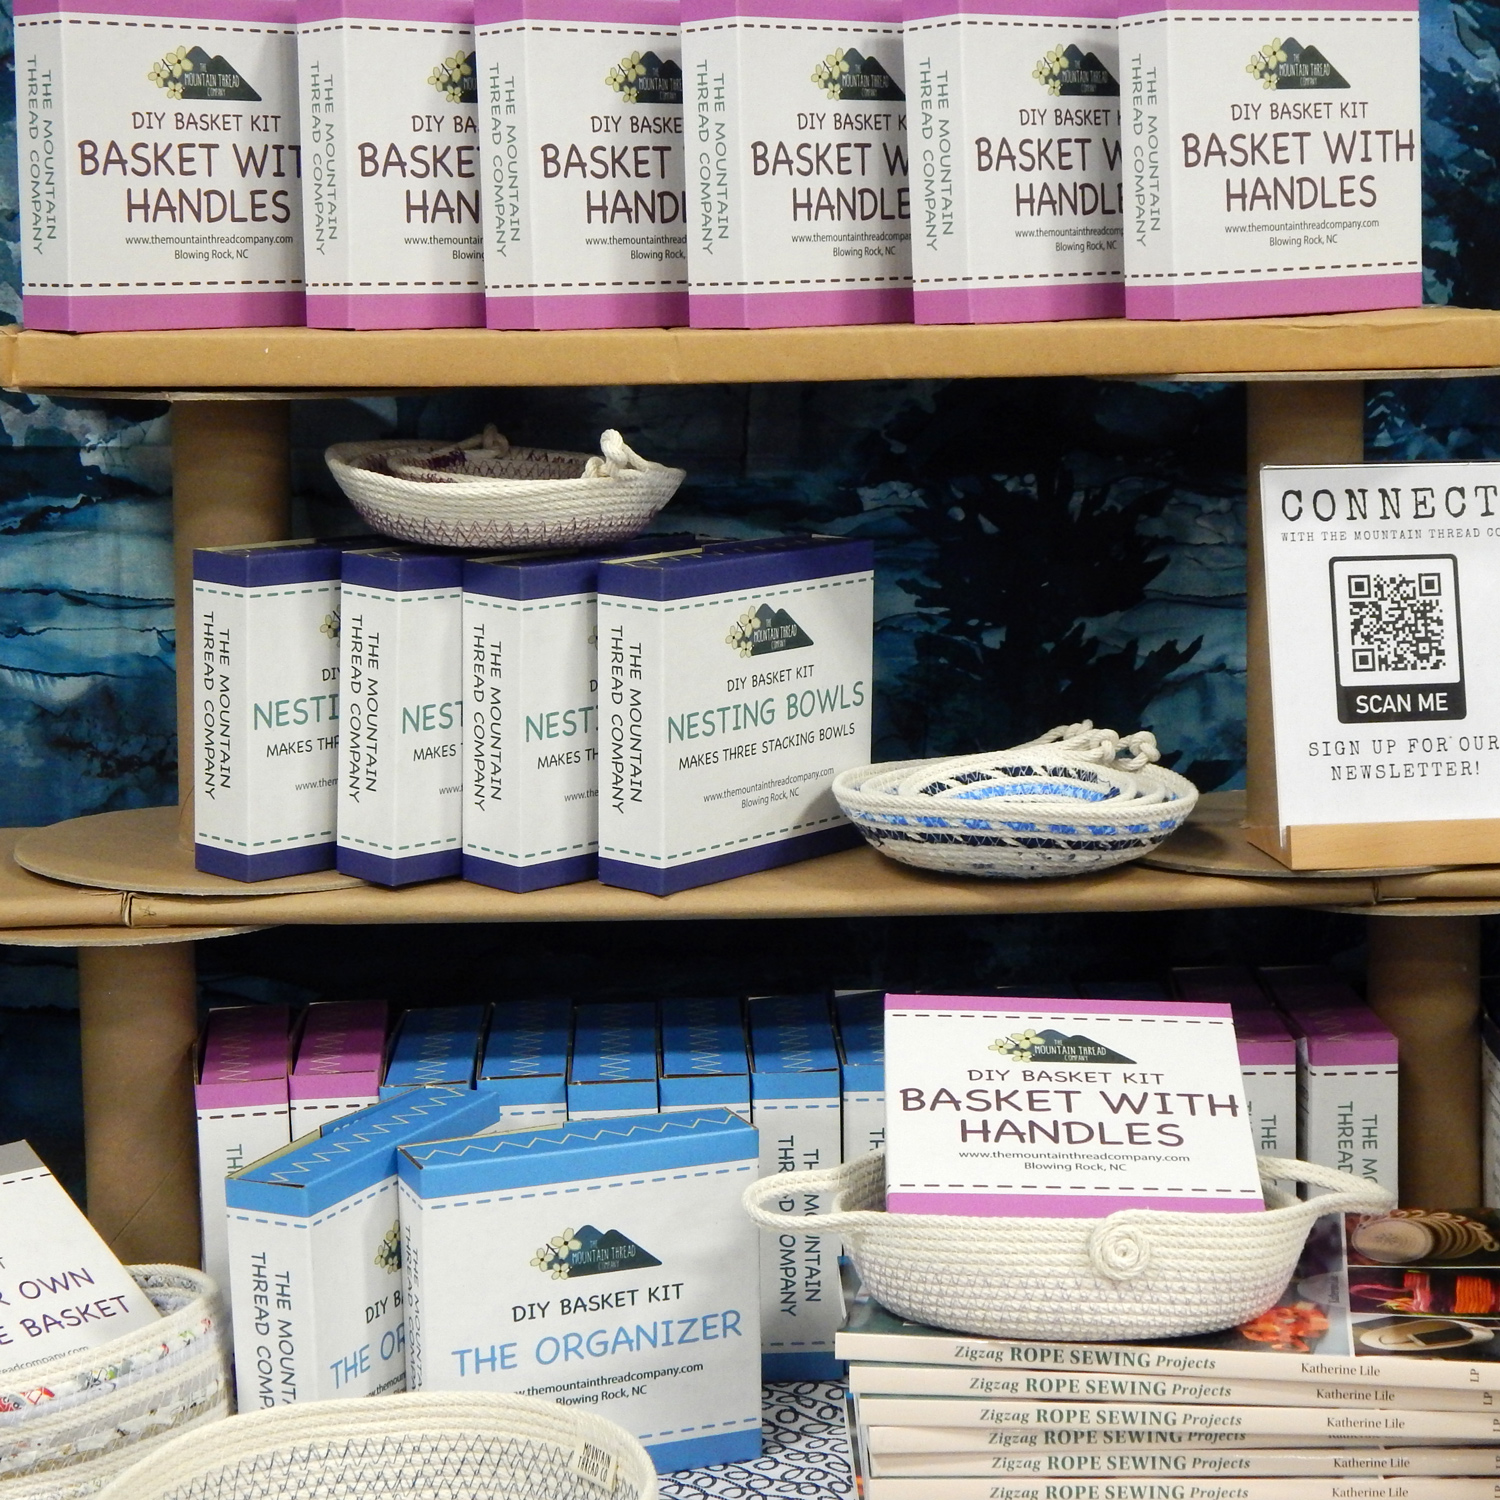
Here are some of the kits

And if you want a little extra help, they sell kits with everything you need (even a denim needle) so you don’t have to guess how much cord to buy or hunt for supplies.

The Mountain Thread Company link

Let me know what you think!

As always, these opinions are my own and I received no incentive or compensation for this review. However, I am always happy to write about products I use, especially if they are local, so let me know if you have something that might interest my readers and me.


A Quilt Show–In Person At Last!!!

I’ve thought for years that quilt shows should be held simultaneously with woodworking shows, and many of you know exactly why!

Happily, I found that the Catawba Valley Quilters’ Guild in Hickory, NC, holds their show concurrently with Klingspor’s woodworking show! My husband and I attended this past Friday and were so happy to be able to do so.

Here are just a few of the quilts that were on display.

This beautiful quilt was at the door. It had no label, and the nearby greeter knew only that it was “last year’s first place winner”. I loved it!

Here are pics of a few of the blocks (are they still blocks if they’re round?)

Some of the quilt labels had no information on the design source for the quilts, though I recognized some of the patterns. Where information was given about the design source, I’m listing it.

Made by Ann Becker in a class with Margaret Solomon Gunn

“Escher’s Christmas”, made by Teena McRary, based on designs by M. C. Escher

“Garden Jewels” made by Pat Carson and Pam Bowman. The label indicated the pattern is from the book Kaffe Quilts Again

Connected Places” by Dianne Johnston and Julie Wilson

“Fun With Pinwheels” by Libby Sigmon and Rebecca Mullins

Arizona Friends” by Cindy Konarski. Pattern is “Happy Together” by Sew Kind of Wonderful.

“Happy Trails” by Maryann McCormick and Rebecca Mullins. The smallest squares finish 1/2 inch!

“My Mountains” by Gigi Miller

Of course there were many more beautiful quilts, but this gives you some idea. I hope we can all go back to “in person” quilt shows soon!

Orphan Blocks–A New Use!

Most of us have a good pile of orphan blocks left over from various projects. Here’s the box with most of mine–there are a few in other locations 😀

Typically, I use mine for donation quilts. I’ve used the Circle of Nine idea.

Sometimes I  have just arranged them on the design wall then filled in around them with background fabric.

Splendid Stars, 51″ x 53″

Sometimes I’ve even cut them into circles to applique onto a quilted background.

Donation Quilts for Ronald McDonald House

But still, there’s a big box full of them.

Then my friend Jerri told me she had made some of her orphan blocks into a quilt back! Great idea!

The next time I had a quilt needing a back, I took the blocks from the top of the pile and sewed them together. Then I surrounded them with pieces of quilt backing left from other projects.

Quilt back with a center of orphan blocks

Voila! It may be more “interesting” than beautiful, but it used up a lot of orphans and scraps. And it’s done!

Tula Stack

A “stacked” quilt, with the blocks arranged so they look like they’re overlapped on top of each other, has been on my bucket list for years. So recently when I got a “stack” of Tula Pink10″ squares I decided it was time.

There were even a few blocks left for the back.

I love the lime green thread for the quilting! And just so you know, there are stacked bears on the back 😀

Quilt Stats

Name: Tula Stack

Design based on many similar quilts I’ve seen

Finished size: 52″ x 69″

Quilted by: Linda


A Great Little Shop!

I love to visit quilt shops when we travel. Different shops are a great source of ideas and, of course, fabric 😀

We recently travelled through Northern Maine, where we lived early in our careers, and were very pleasantly surprised to find the Majestic Touch Quilt Shop in St. Agatha. The owner, Sandra Bosse, agreed to let me her picture.

Sandra Bosse with one of her long-arm machines

Sandra told me she made her first quilt about 20 years ago. She was unhappy with the quilting done on it by someone else, so she bought a long-arm machine and learned to use it–just like that! I was amazed to hear this for reasons most of you probably understand. Clearly this lady is willing to take on a challenge!

Sandra’s business has changed over the years. She now does quilting for others and sells both long-arm machines and fabric. Her quilting is very much in demand and she is currently scheduling about 3 months out!

We talked about running a quilt shop 4 hours from the nearest “city” (Bangor, Maine, with a population of under 32,000). On the plus side, hers is the only quilt shop for miles around AND she is close to the Canadian border, so customers come a fair distance to shop and take classes. St. Agatha had a population of 730 in the 2020 census, but people in Northern Maine are accustomed to driving to little shops in little towns when they want something.

On the minus side, it’s expensive to get merchandise shipped to her and the fabric reps won’t come that far from the city! Sandra says they send her catalogs, and that’s the way she has to order.

In the photo above you can see just a bit of Sandra’s fabric shop. She has a lovely selection of batiks, and says they are especially popular with her Canadian customers. She also has so many beautiful printed fabrics from the major companies that I had a hard time sticking to my budget 🙂

Here are a couple of fabrics I was “forced” to buy. I haven’t seen them anywhere else, though maybe I just don’t visit enough shops 😉  She had both prints in many colors, with coordinating fabrics as well, and I had a difficult time choosing!

Sandra doesn’t have an online shop, but you can find her on Facebook here.  (The internet tells me that 6-8 yards of fabric can fit in a USPS flat rate envelope, and I expect Sandra would send you pictures if you want to shop with her.) BTW, her prices were lower than those in the bit city.

PS: Hurricane Ian came this far into North Carolina, so I am writing this with the generator powering the house and my computer. We had a neighbor’s tree come down in the yard. It took out our weather station, but that was the only real damage. Steve has left for the hardware store to get supplies for the chain saw, and I am getting geared up to use some beautiful fabric!

I hope all of you are safe and stitching along happily!


A Village

I made a lot of little improvised houses and related blocks during COVID and decided to combine them into a quilt for our builder, since we love our house!

Here are a few of my favorite blocks from the quilt.

First, this is a watermelon canning factory. I told the builder it really needs to be re-purposed to make garage doors, since those are in short supply and nobody eats canned watermelon.

Really it’s just my idea of whimsy.

Then there are several little houses that came pre-made from some fabric I’ve had on hand for a long time. I enjoyed placing them in various locations.

My husband especially likes the stars in the sky on this block, not to mention the car pulled up to the house 😀

I made a number of wonky houses of my own.

And even one modern house.


Quilt Stats

Name: It Takes a Village to Build a House (because it really did)

Finished size: 45″ x 53″

Designed and made by me

Quilted by Linda

I still have a number of quilts to be bound and blogged, but there is progress!


Sidetracked Again

Every once in a while I come to the surface after being inundated by quilts, scraps, binding, etc. Most recently I took a class at Studio Stitch to make this little clutch.

Of course I’ve made lots of bags, pouches, etc, etc, but I’d never used a frame closure, so I wanted somebody to show me how it’s done. Hint: It was a lot easier than it looks!

Also recently I dug up the pattern for the Celeste Dress, bought close to a year ago.

Celeste Dress, courtesy of Itch to Stitch

I figured the pattern had waited long enough so I made the dress. I studied the size charts carefully, and the fit is perfect (well on me, maybe not on the hanger)!

Pockets! That’s what sold me on this pattern!

I recommend the pattern for those who have some garment construction experience.  It’s a nice pattern and turned out well. I bought the pattern through PatternReview.com for two reasons: first, I could read about how it worked for other people before deciding, and second, I was able to order it already printed on full-size paper so I didn’t have to print at home and the tape the pattern together! (Been there, done that.)

Caveat: rayon probably wasn’t the easiest fabric to make it from.

Now back to the quilting…


Scrap HSTs

HSTs (half square triangles) are the basis of lots of dynamic quilt designs, so of course they’re even better if they’re scrappy. For those who may not know, here’s a half-square triangle block. Each half of the square is a triangle, and of course it helps that they contrast.

Block drawn in EQ8

So after I had made a whole bunch of scrappy squares, I decided to cut them in half diagonally to make scrappy HSTs. I had the perfect white fabric with metallic gold oriental writing to use as contrast.

Of course I tried numerous layouts for the blocks and consulted friends about which to use.

This arrangement was voted out

Eventually I chose the arrangement below because I like the “double twist” effect you get in the center if you look from a distance.

The finished quilt

Quilt Stats

Name: Ziggy Scraps

Designed and made by me

Finished size: 58″ x 78″

Quilted by: Linda

I’m developing a talk about making successful scrap quilts. If you have any ideas I should include, let me know!

A Visit to the Mint Museum Uptown

Several years ago my husband and I visited the Mint Museum of Craft + Design in downtown Charlotte (N.C.) and were very impressed. The museum has since constructed a new building (now called the “Uptown Charlotte” branch of the Mint Museum) so we were eager to visit.

The new facility is lovely, but the craft exhibits were disappointing. For example, the previous venue had a large Chihuly piece hanging from the ceiling in the entrance. I know I didn’t dream this, because I was able to find it on Pinterest as shown below.

This photo was found on Pinterest, where it is attributed to “rtencati on flickr”

There was no evidence of the chandelier in the new building, though the lobby is still impressive with a huge colored window, shown below. It is 3 stories high!

There were many fine crafts, especially in glass and ceramics, but if there were quilts I somehow missed them. Here are a few things I did enjoy.

Acrylic chair by Patrick Norguet

Marimekko fabric designed by Maija Isola, 1964. 

Wolf Crest Hat (in glass) by Preston Singletary.

Threshold, by Danny Lane is a huge piece made of stacked glass. The wall of glass is lighted from behind, and there are a variety of objects behind the glass, providing interesting shapes and colors. This was one of my favorite pieces.

Unfortunately, the two pieces below were the closest the museum came to having quilts. These are pieced by Anna Buckner and mounted on small stretchers, but are not quilted.

I miss the old Mint Craft + Design museum, but there was still plenty of inspiration in the new version. 

P.S.–I’ve added a dragonfly to the “summer rain” quilt over the stairs.

This came from my jewelry box. Someone crocheted the wings and assembled the whole by hand.

Turning 20 Again

I’m a long-time fan of the Turning 20 quilts, in part because they make such efficient use of fat quarters. (And who can resist fat quarters?) The original patterns came out many years ago, and there are a number of new ones since. If you don’t know about them, you can find them here, at Tricia Cribbs’ website.

Anyway, I recently made my upteenth version of her Turning 20 Again pattern, in part because I just had to use this gold fabric.

The quilt is straight; my picture is not!

The quilter did some wonderful swirls on it.

I’m blogging about this many weeks after finishing it–that’s the way it goes some days! It’s a donation quilt.

Quilt Stats

Name: Turning 20 Again

Pattern by: Tricia Cribbs (available here)

Made by: me

Finished size: 55″ x 55″

Quilted by: Linda