Orphan Block Table Runner

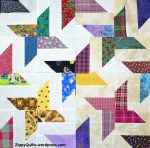
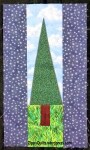
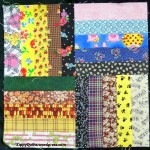
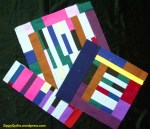
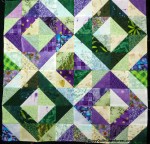
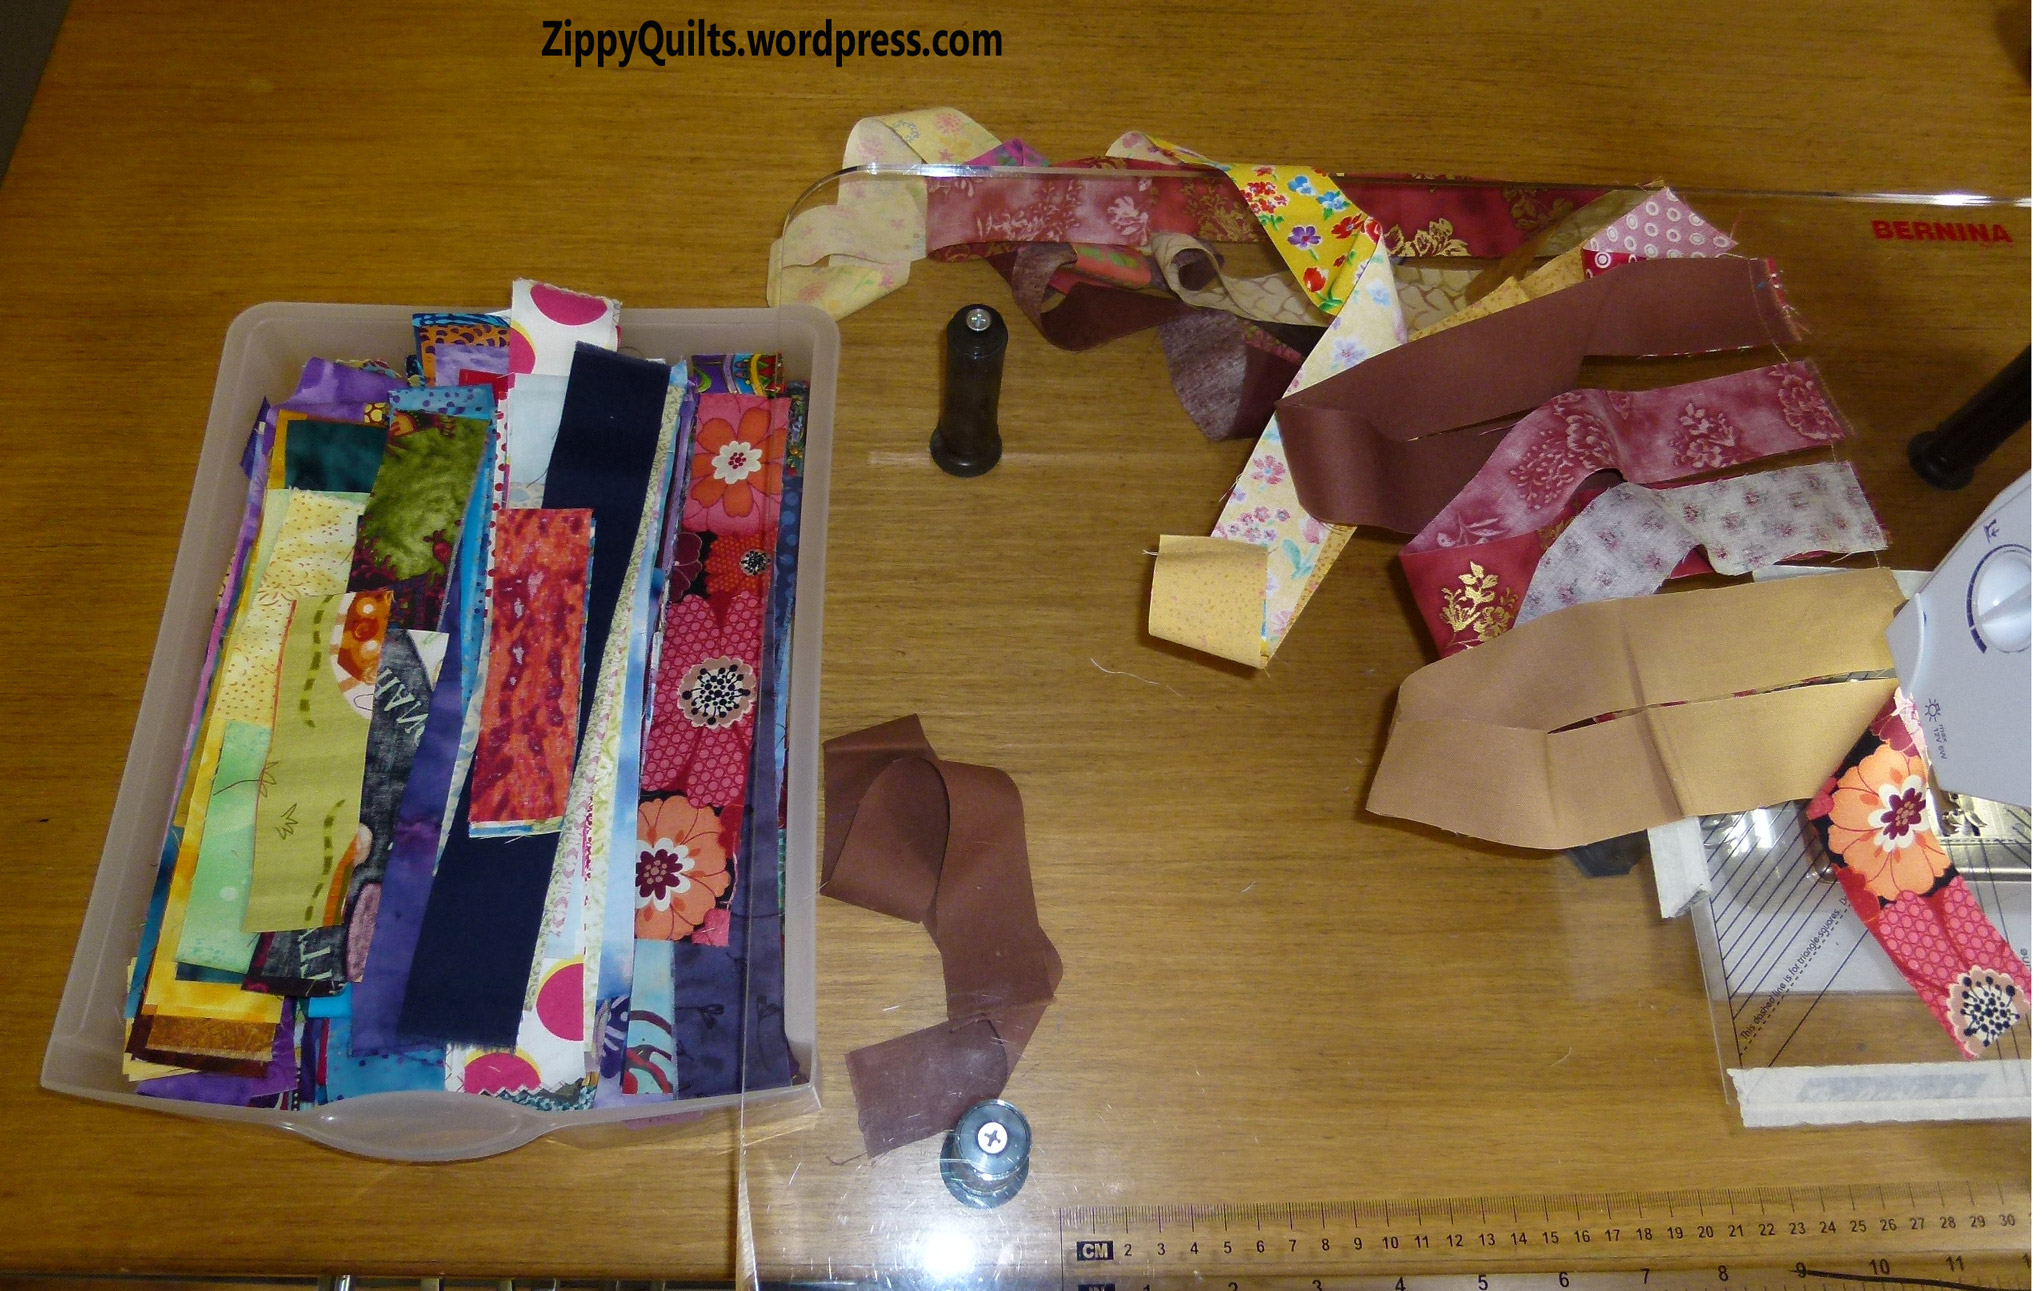
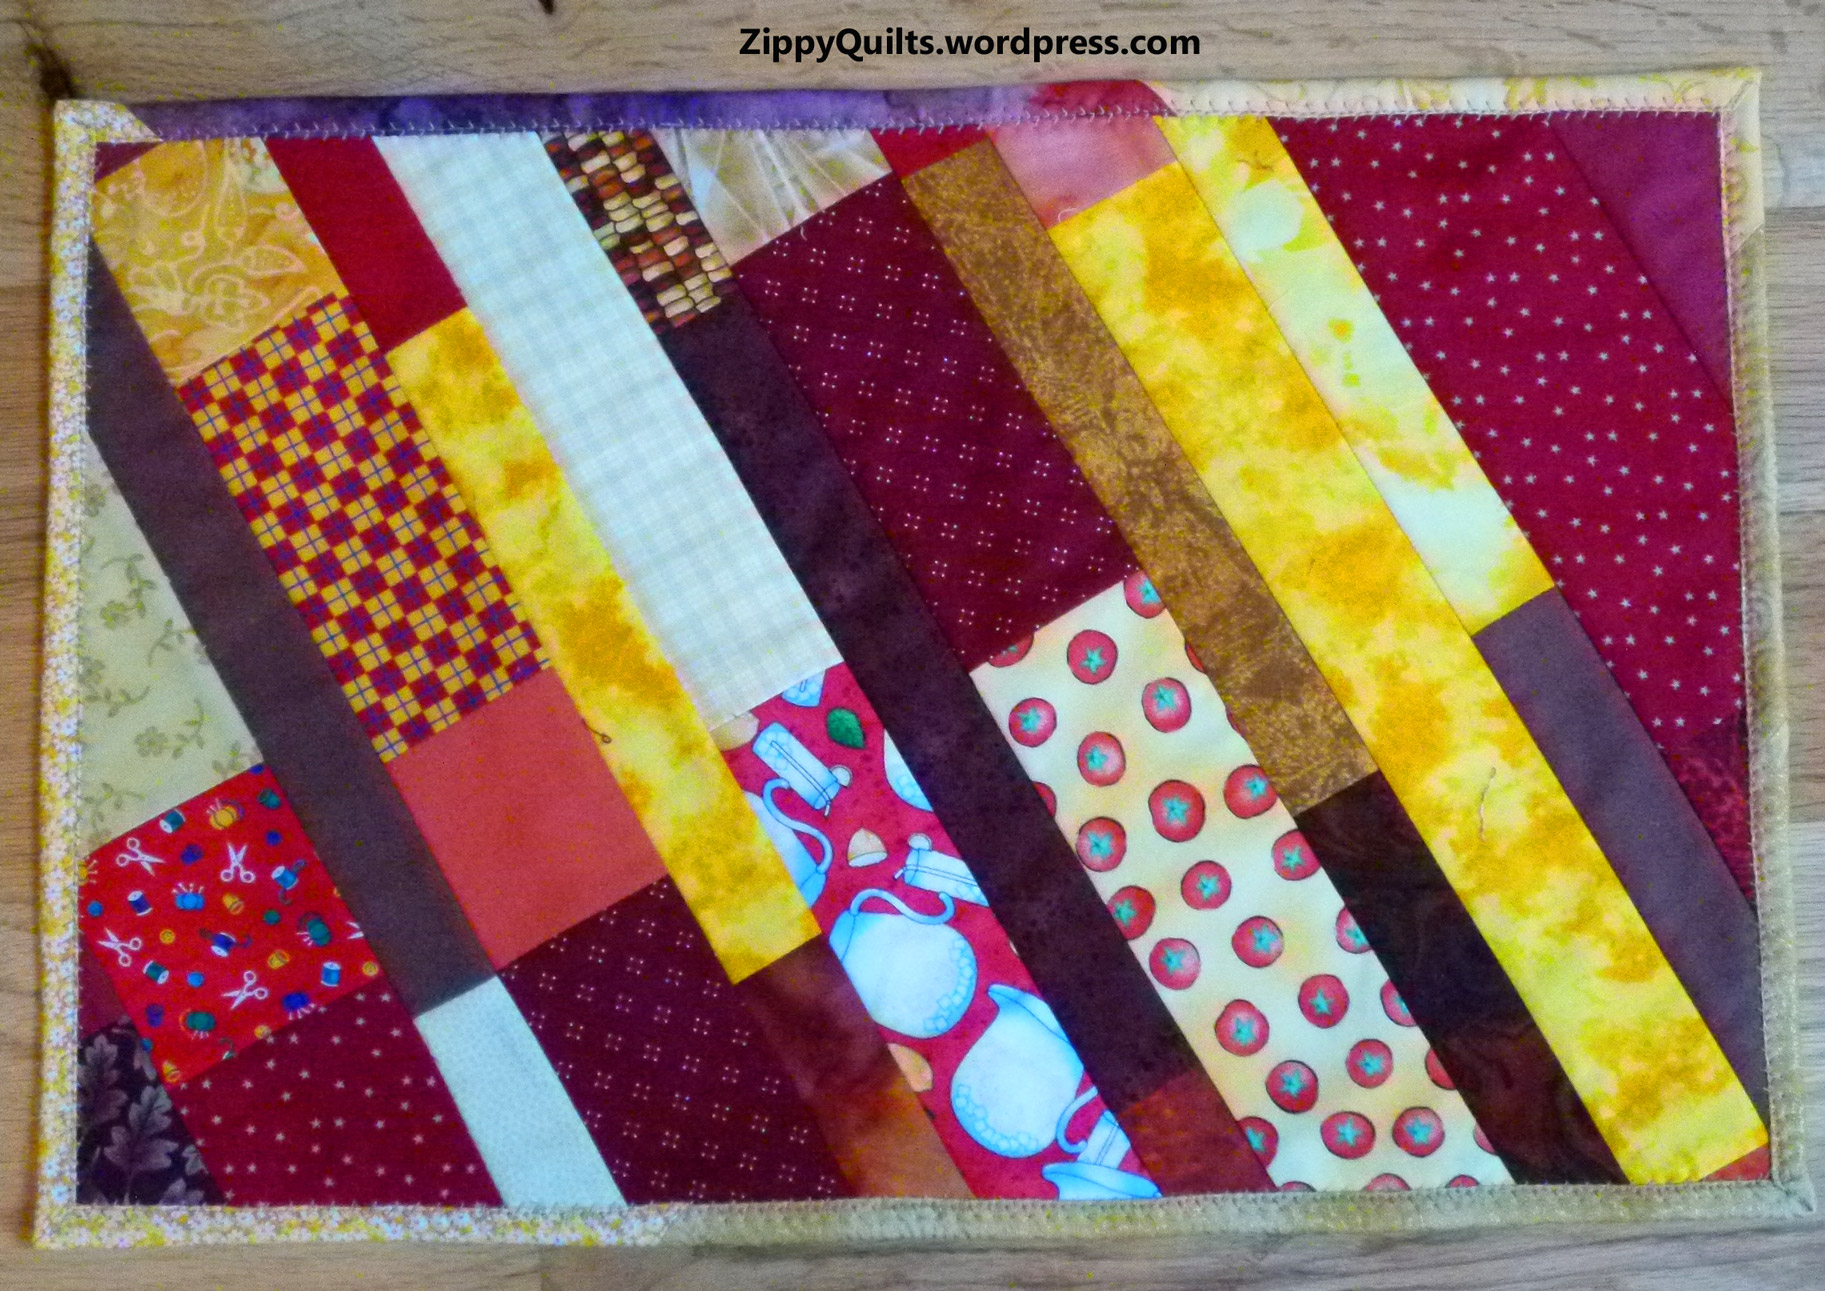
When I looked at my (er, large!) collection of orphan blocks, I found not only single blocks, but groups of blocks all from the same quilt, and several strips of blocks that looked like they had been almost included in a quilt.  The first such strip I came to was from an improvised batik quilt made with Bold Over Batiks and assorted others.  It was almost 24 inches long and 4 inches wide.

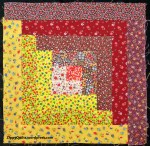
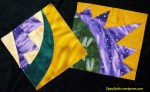
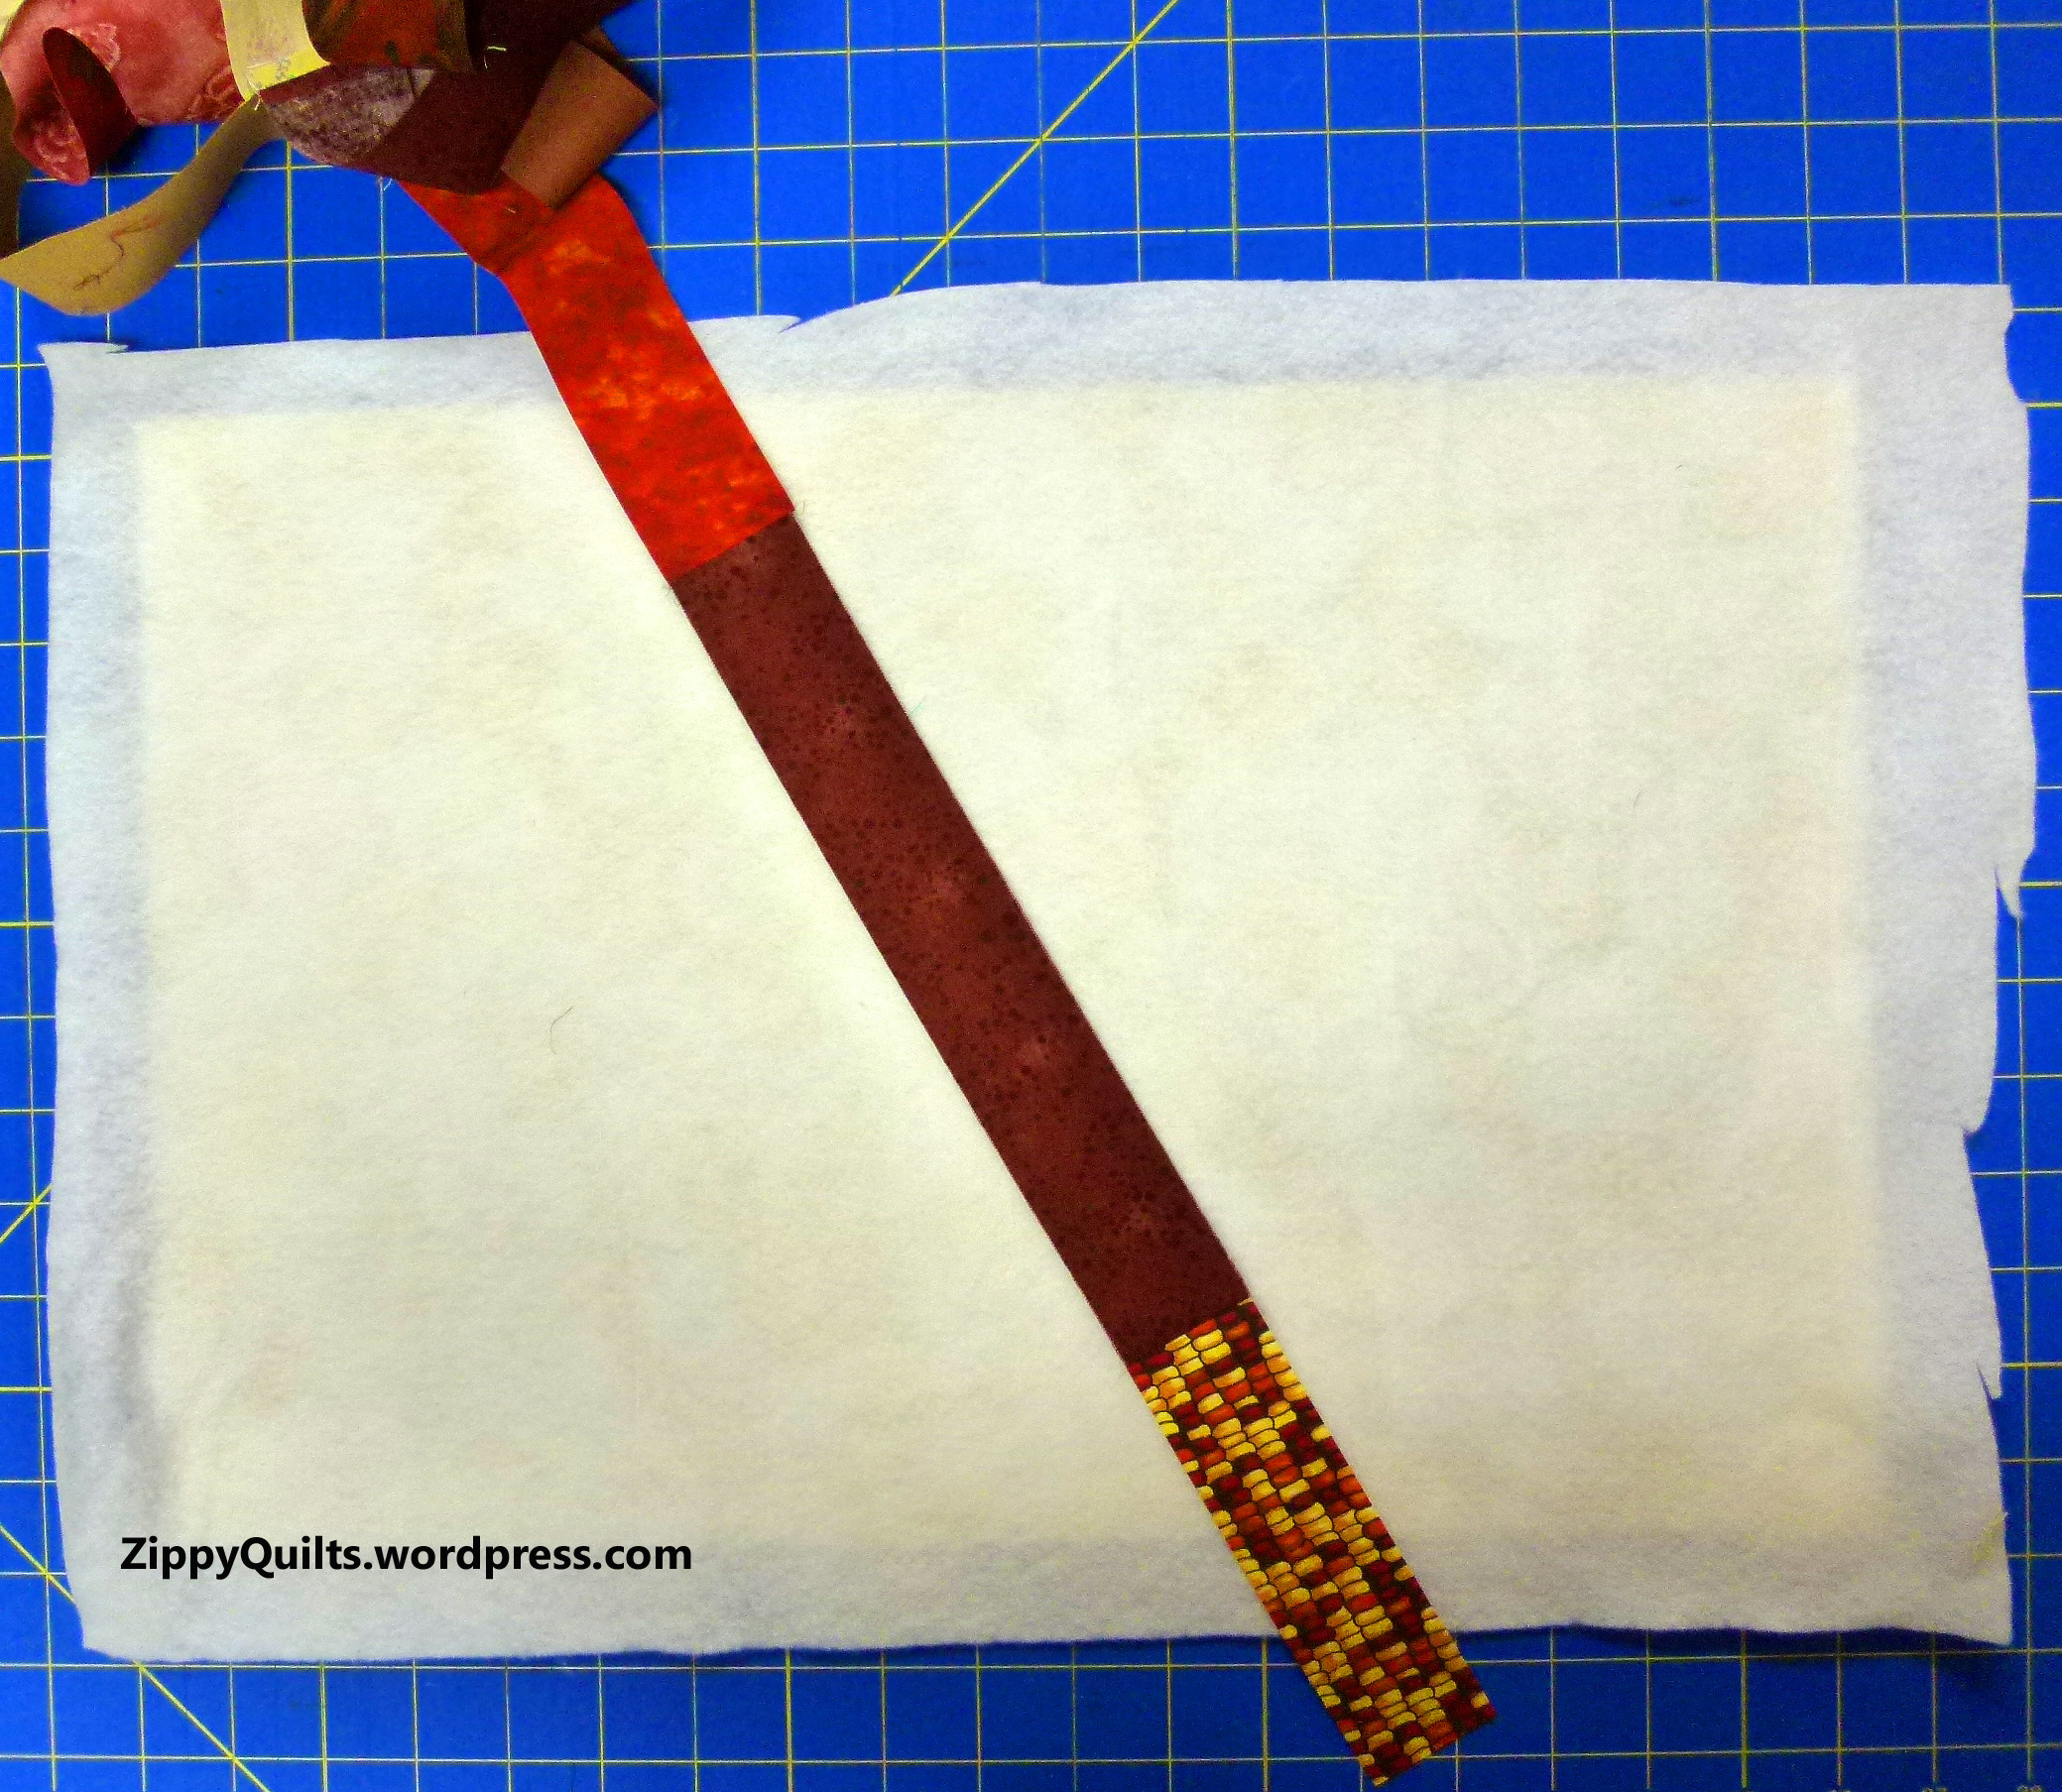
I cut the strip into a length of 12 inches and one of a few inches less, then added fabric to the shorter one so both were 12 inches.  I then joined them lengthwise with a black strip down the center:

table runner

Table runner made from a strip of leftovers

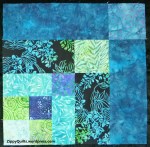
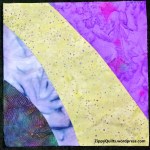
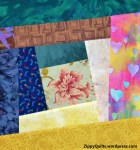
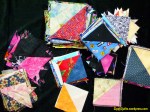
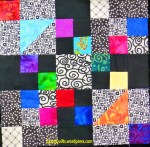
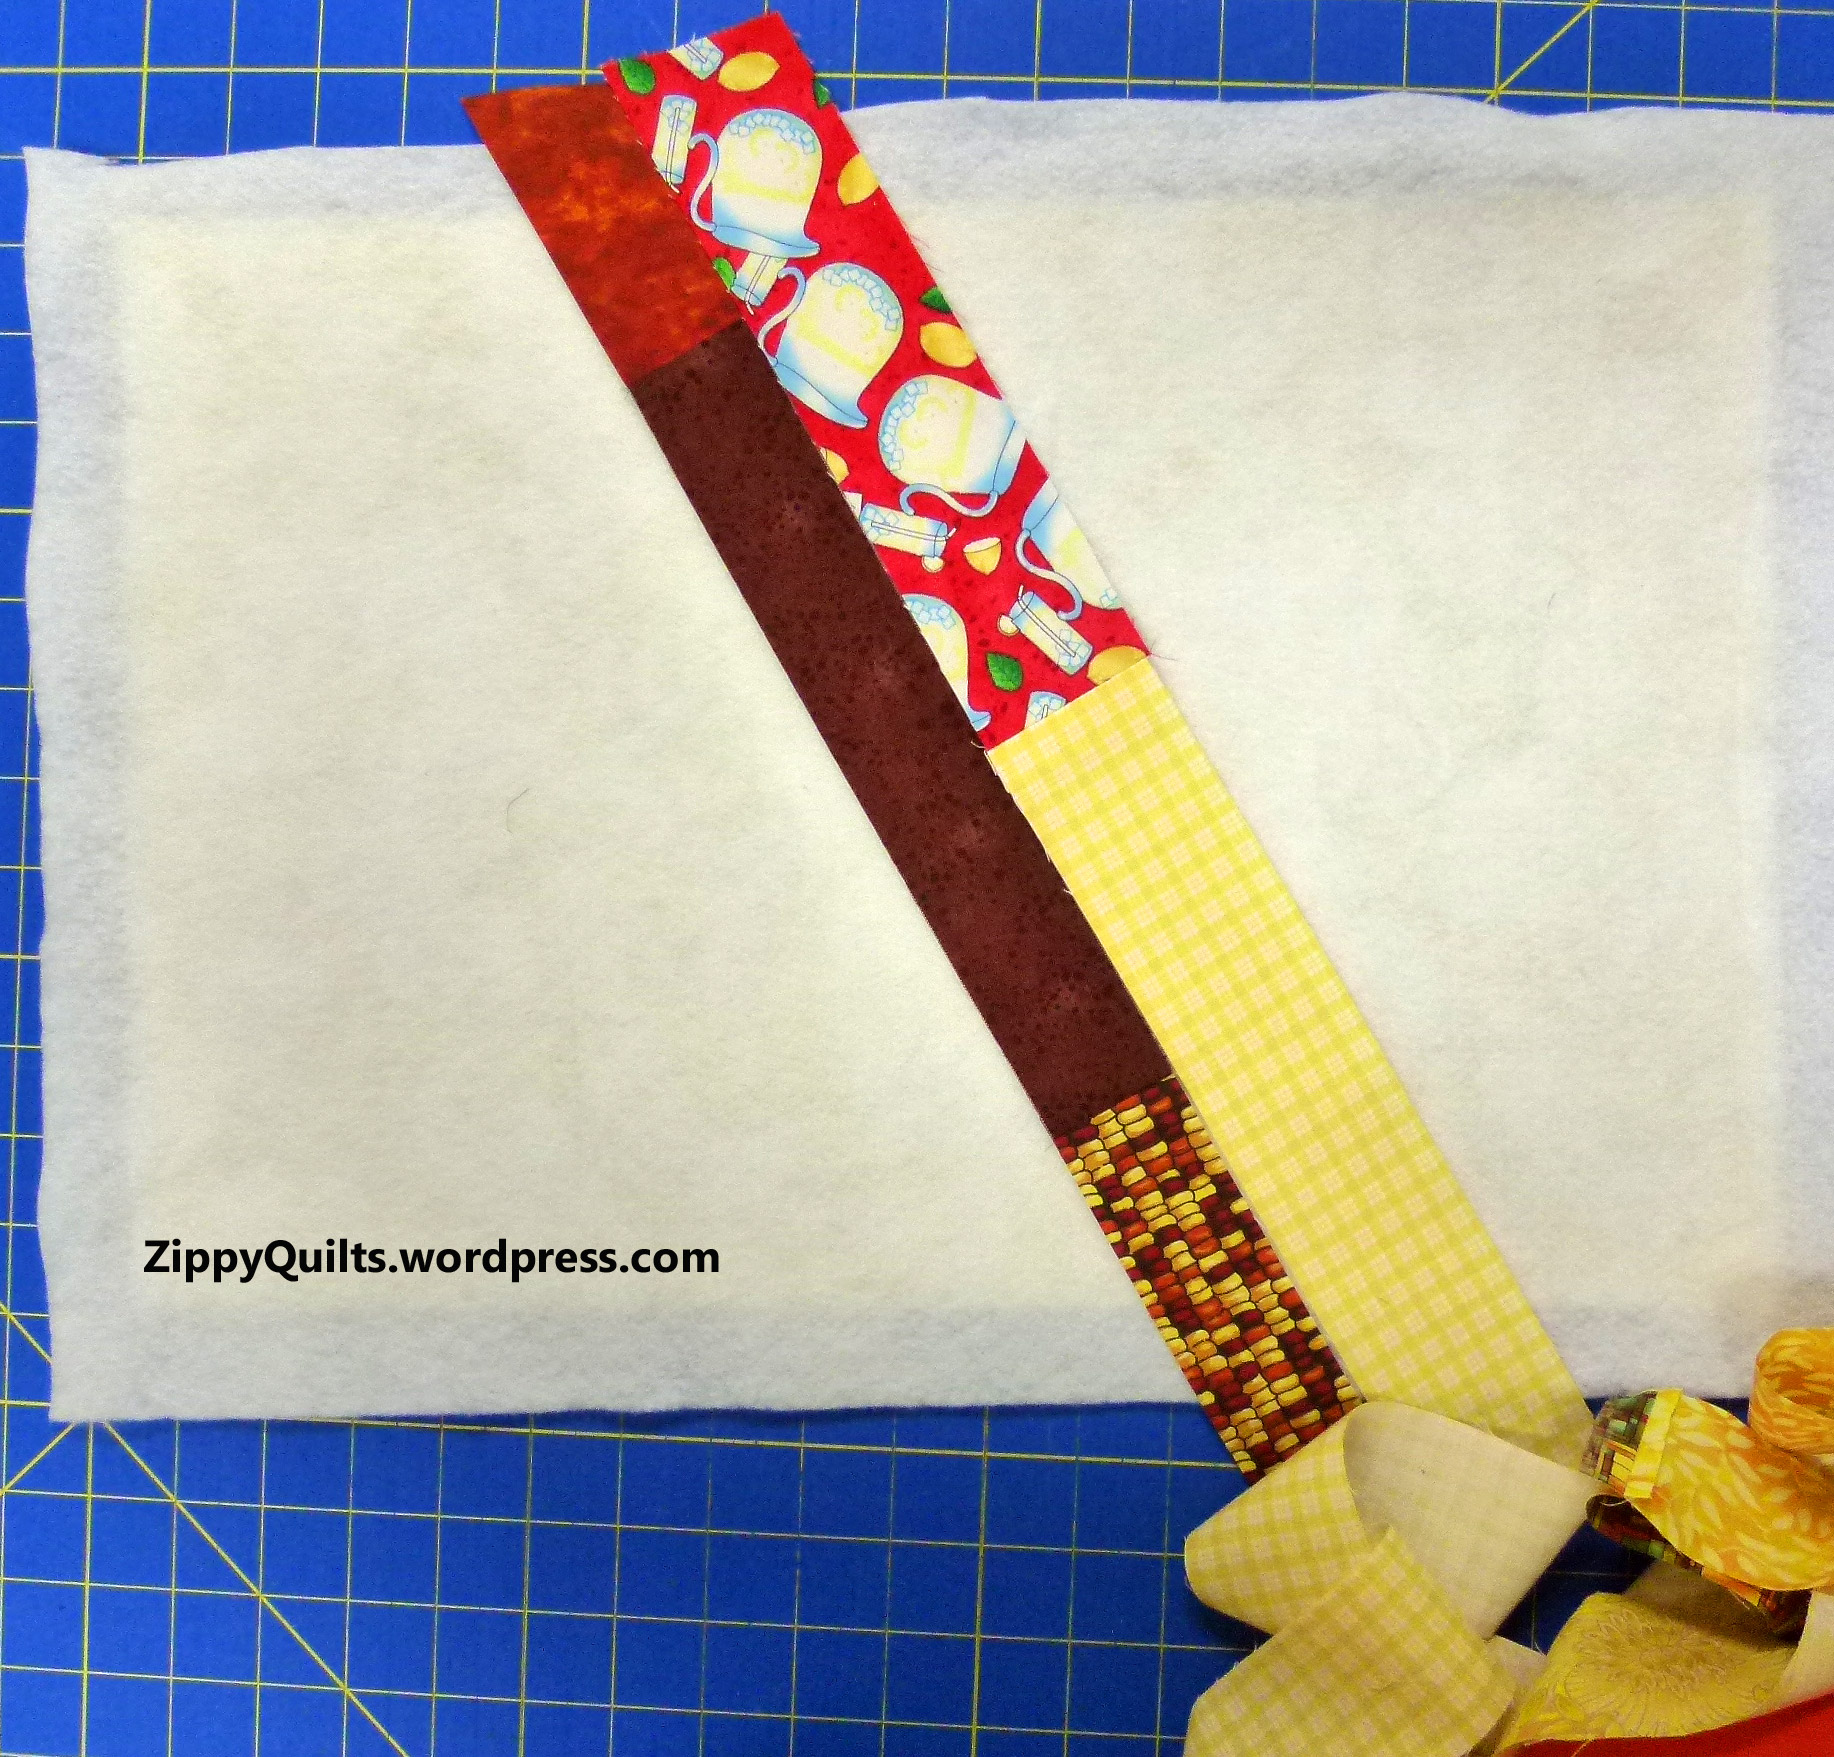
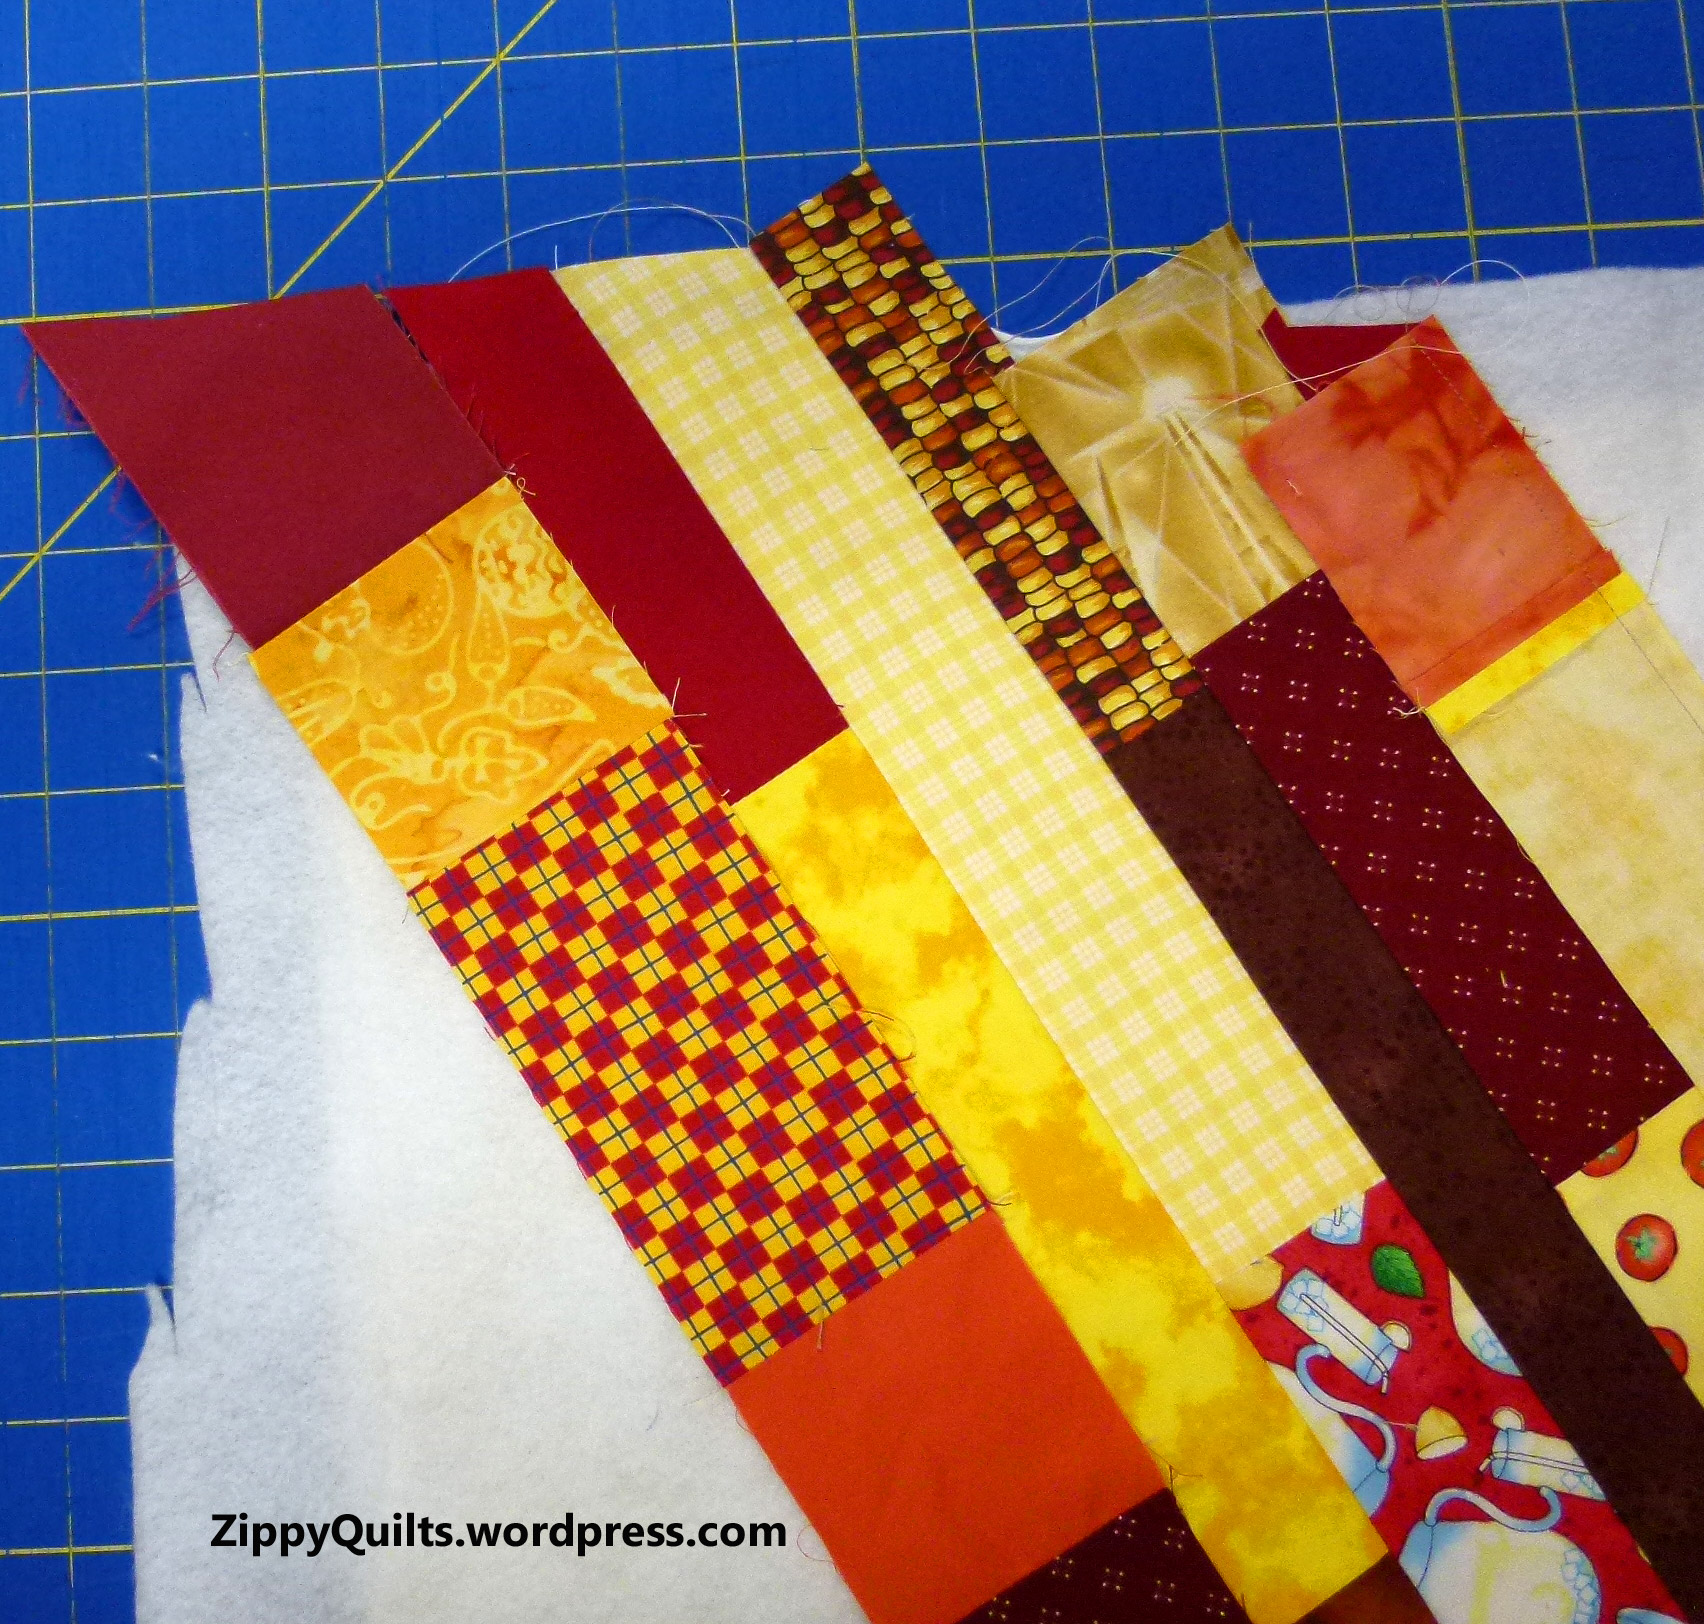
I made a backing by piecing together scraps from my current quilt, which happens to be batiks also.  I just put them together semi-randomly.  (You can see the current quilt at the end of this post.)

quilted table runner

The back was pieced from the scraps that happened to be on the top of the scrap bin!

I quilted the whole thing in the ditch and bound it in black.  I think I like the back almost as well as the front!

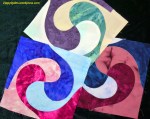
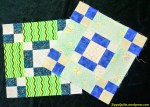
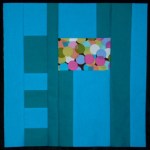
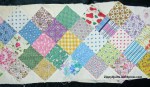
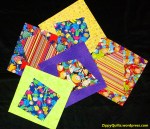
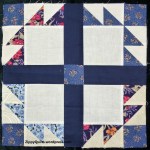
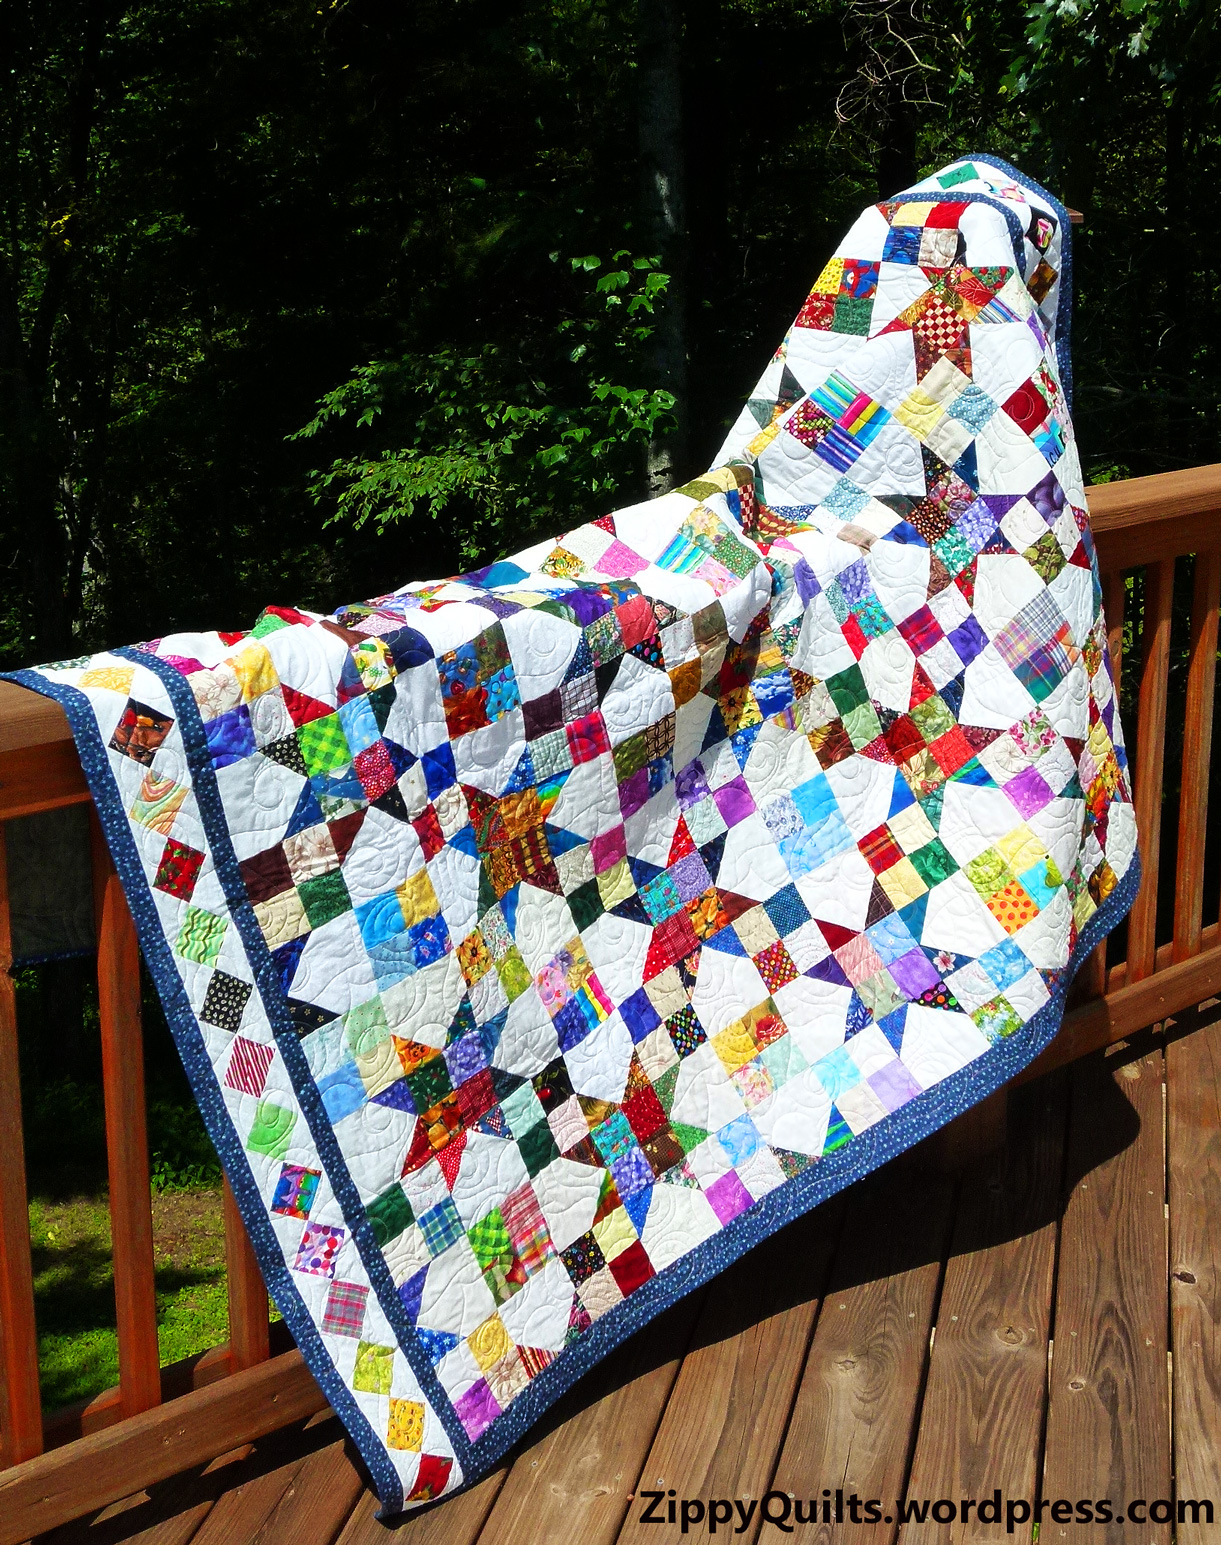
Of course, if you have individual orphan blocks instead of a strip, you can make a table runner by joining them, either with or without sashing.  I find that sashing is a good idea because it allows for the use of blocks of different sizes just by varying the size of the sashing.  (I made the mistake once of putting together a “group quilt” and it DEFINITELY required sashing individualized to each block, since apparently everybody in the group had a different idea of the size of a 9″ block.)  Sashing can save your bacon (or table runner) in a case like that.  So here’s a quilt design with blocks of 4 different sizes.  The blocks at the ends had extra sashing added.Table Runner

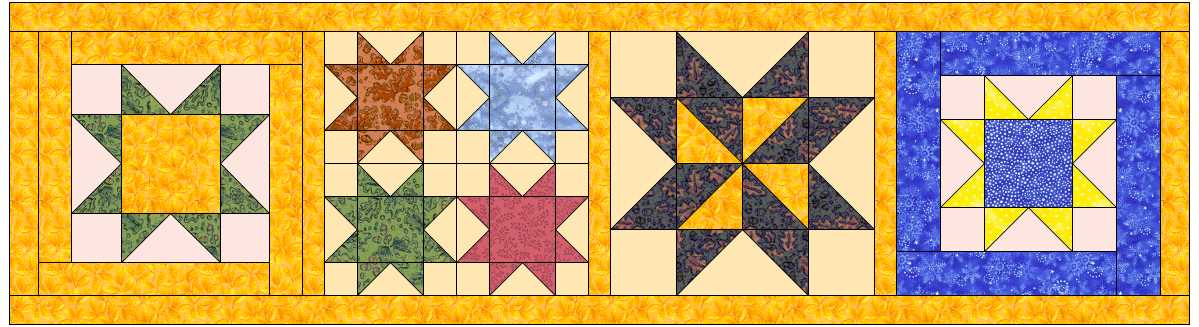
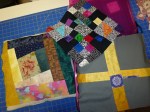
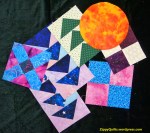
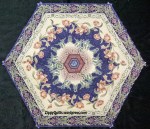
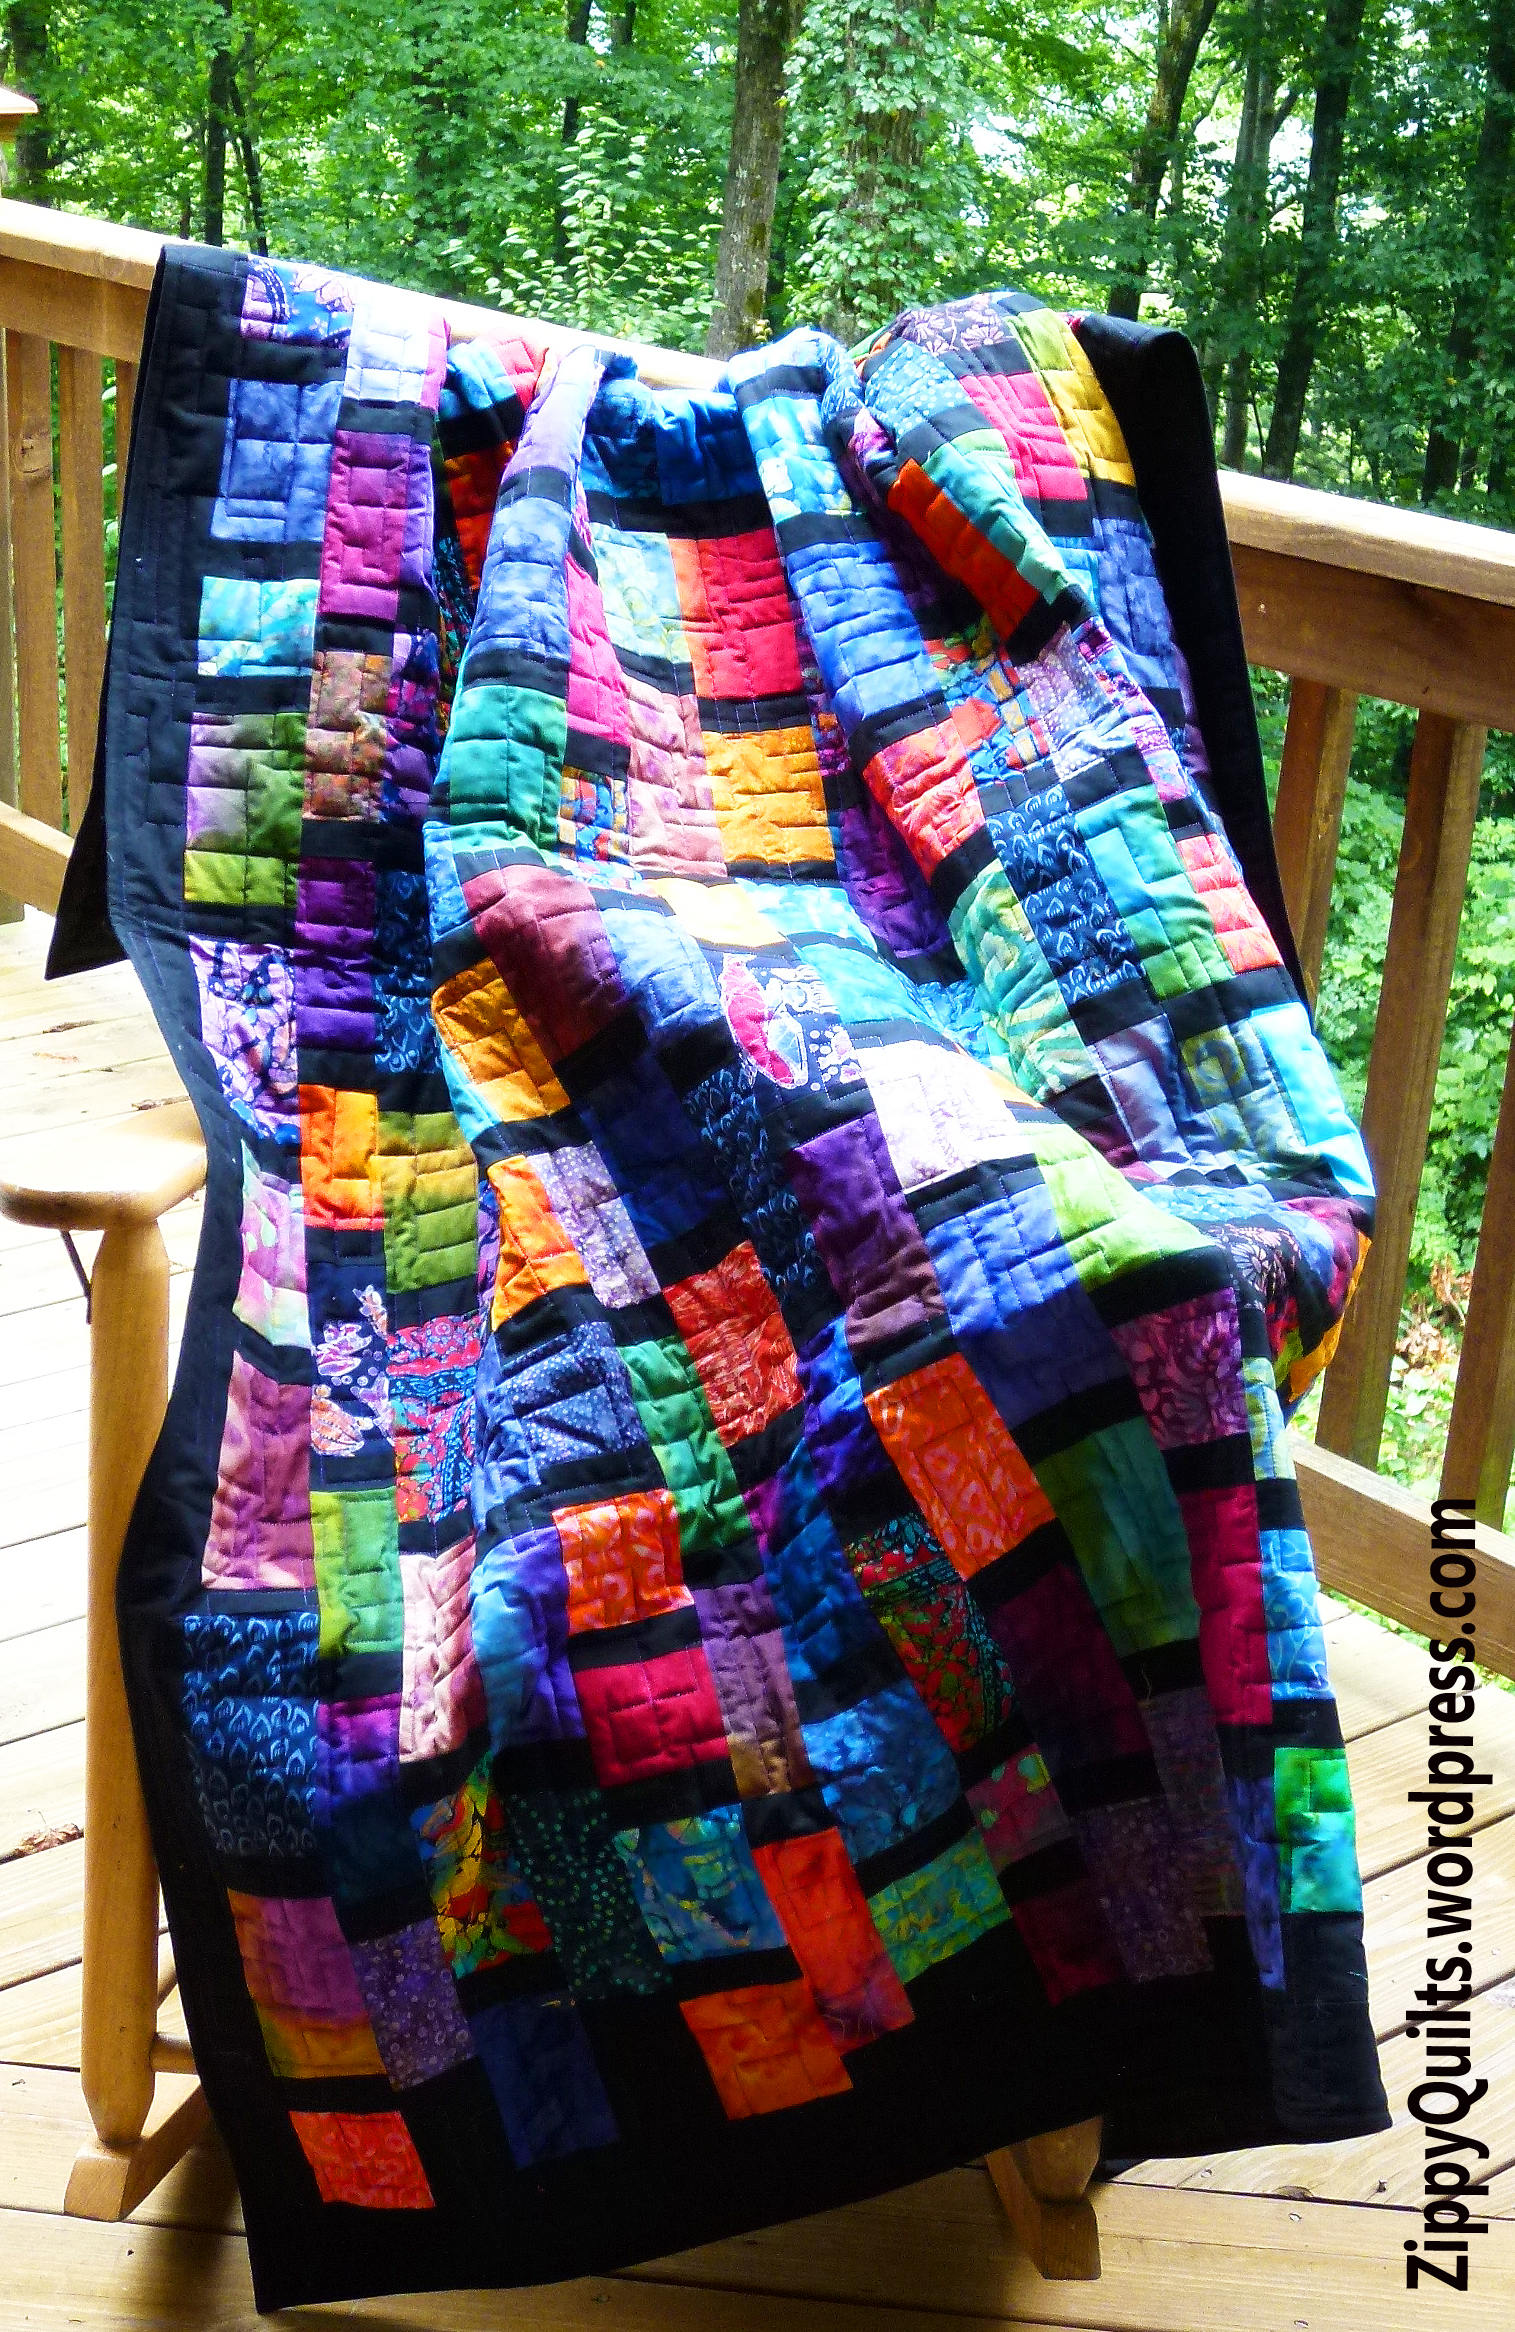
Finally, here’s a peek at the current quilt-in-progress.  It’s made from the FQs that jumped on me at Quiltfest in July and were shown at the end of an earlier post here. The quilt is up on my sticky wall with a label on each piece so I don’t get confused as I sew it together! Scraps from this were on top of the scrap pile, so I used them for the back of the table runner shown above.

Bermuda Sunrise quilt pattern

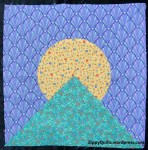
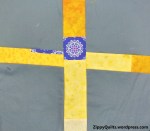
This pattern is Bermuda Sunrise

Hope everyone has a good week!

A Quilty Shirt

Orphan blocks make great decoration for denim or chambray shirts.  They might work on

quilt blocks on a work shirt

A decorated chambray work shirt

T shirts, too, but it’s easier to put them on a woven shirt than a knit one, so I vote for “workshirts”.

Here’s an example, modeled by my friend Anna.

These blocks had been around a while 😉  You know how that goes! Then I got a good deal on some chambray shirts and bought them in all the sizes my sisters-in-law wear.  They made good holiday gifts!

I suggest you turn under a 1/4″ hem on all sides of the block and then applique it to the shirt by hand or machine.  Very easy.  I don’t suggest quilting the block first, because even thin batting can feel uncomfortably lumpy attached to a shirt.

quilt block on a shirt

Here’s another orphan block on a shirt

Here’s another one attached to the back of a shirt.  I just sewed around these blocks with a straight stitch, but if you like hand applique, go for it!  If you don’t know sizes and don’t want to guess, you can buy L or XL for most people; if it’s too big just explain it’s meant to be worn as an overshirt 😉

Next week:  turn your orphan blocks into table runners!

Make An Orphan Block Pillow

Start by deciding what size and shape pillow you want; or start with the block you want to use and decide what size/shape pillow form to buy.

Once you have that pillow form home, measure from seam to seam to be sure it’s the size you think it is.  Add 1/2 inch to each dimension for seam allowances and you have the size to cut (or assemble) the front and back pieces.  For example:  Pillow form here is 16 x 16, so I’ll make the (unfinished) front and back pieces 16-1/2 x 16-1/2 inches.

I stated with an improvisationally pieced log cabin block and added logs to 2 sides to make it big enough.  While I was at it, I added pieces wider than I needed to allow for shrinkage during quilting and squaring up the final top.

I spray-basted and quilted the top with a thin batting and muslin backing.  However, a block will make a perfectly good pillow top without being quilted, like these:

To make the pillow cover easy to remove, I make an overlapping closure in the back.  It’s also fine to add a zipper to one of the edge seams IF you’ve got a zipper, and of course if you know how to put one in.  I do that sometimes, but there are lots of places on the web that show you how to put in a zipper, so I’m not doing it here.

To make the overlapping back:  Divide back width by 2 (16-1/2 divided by 2 = 8-1/4 in my case) and then add enough to each piece for overlap and hem.  “Enough” should be proportional to the size of the pillow, but in this case I added (8-1/4″ for back and one seam allowance + 1-1/4″ for hem + 2″ for overlap = 11-1/2″, which I rounded up to 12″).  So I cut two back pieces 12″ x 16-1/2″, then finished one of the long sides on each piece with a hem of 1/4″ first turn + 1″ second turn.

Next, I layed out the backing pieces with hemmed edges overlapping to make a square 16-1/2″ x 16-1/2″, and basted the overlapped edges together.  Put the front and back pieces right sides together, sew all around the edges with 1/4″ seam, turn right side out and insert the pillow.  Voila!

Orphan Block Tote Bag

There are a TON of bag patterns out there, and a lot of them are very good.  However, they aren’t really a FAST way to use up orphan blocks!


In contrast, there are several sources of good, sturdy, plain fabric bags that can be decorated with orphan blocks in very little time to make an attractive and useful bag.  If you haven’t run across them, try craft stores.  You can also Google “blank canvas totes” to find lots of options.  I like buying them in dark colors so they won’t show dirt with use!

NOTE:  Even if you didn’t prewash the fabrics for your orphan block, you should prewash the canvas tote.  Otherwise it may ruin your work by shrinking or bleeding color when it’s washed later.

Choose your block and, if you want, quilt it with your choice of batting and a thin backing.  It’s also fine to leave it unquilted.

orphan block

I quilted and bound my block, but it isn’t necessary

Once your block is ready to attach, either bind it or frame it with fabric.  Alternatively, it works fine to just turn under 1/4″ on each edge.  REALLY, you could just zig-zag stitch it to the bag without any edge finish.

The only trick is that you need to make full use of the free arm feature of your machine, and squnch the bag a bit, to sew around the block.  These bags aren’t very big, so it’s entirely do-able.

.

.

DONE!  This is a nice quick-and-easy project and a useful gift.  But don’t use up all your orphan blocks—there are more projects to come!

Final-bag

5 Great Uses for Orphan Blocks


Orphan blocks (i.e., those not intended for a particular quilt “home”) JUST INCREASE ON THEIR OWN in the dark places where you store your quilt bits…I learned that I have SEVERAL HUNDRED when I started taking pix for this post.

They come from lots of places:

*The sample blocks you made to try out a new pattern before cutting the fabric for the quilt

*The extra blocks you made so you’d have design choices in a quilt top

*The “found” blocks that just JUMPED ON YOU at a garage sale or thrift shop

*The single blocks you made at quilt classes but didn’t like well enough to duplicate for a whole quilt

*And the ones that JUST SHOWED UP and you have NO IDEA what they’re doing there

You get the idea—there are many sources of orphan blocks and many of us have quite a collection.

Therefore, I’m starting a little series of posts about what to do with them.  Here’s my list; I’ll write a separate “how-to” post on each use.  I know I’ll learn things along the way; hopefully my readers will, too!  So here we GO…

#5:  Decorate a tote bag.  You don’t even have to make the tote bag yourself!  These make great gifts.

#4:  Make a throw pillow.  Quilt it or not.  Use to spruce up your couch or as a housewarming gift.

#3:  Decorate a “work shirt”.  Great gift for quilty friends.

#2:  Make a table runner.  Keep on hand for hostess gifts, etc.  And a good build-up to my favorite:

#1:  Make a scrap quilt with an orphan-block focal point—MANY options with this one!

As you can see from the pix at the top and below, I have lots of orphan blocks to use!  I hope you’ll try out some of these ideas as I post instructions for them.

Scrappy Strippy Placemats

Here’s a QUICK, EASY way to use up scraps while making some gifts.  Could be gifts for you, of course 😉  I like to make them ahead of time to have as hostess gifts, housewarming surprises, etc.

A bin of scraps being made into a long strip

A bin of scraps being made into a long strip

Start by cutting scraps into strips of set widths.  (I cut and sort all my scraps, so I have bins of strips ready to go.) 1st-strip In this project, I used strips in widths of 1.5”, 2”, 2.5”, and 3”.  Sometimes I just use whatever color comes next, but for this project I selected yellow/gold, orange/red, and brown/tan scraps.  I joined the strips end-to-end to make long strips of a given width.  So, for example, a strip may be 1-1/2 inches wide and be made up of scraps of various lengths from 1-1/2 inches to about 8 inches.

add another strip, then fold them right sides together and sew the seam through all layers

add another strip, then fold them right sides together and sew the seam through all layers

After piecing my long strips, I started a placemat as follows.  I cut a piece of backing 14 x 20 inches, layered a piece of batting 13 x 19 inches on top (batting scraps, yes!), and placed a strip in the middle of the batting. [picture] I used the flip and sew method to add strips on each side, sewing through all layers as I went so that I was quilting while assembling the placemat top.

Strips can be oriented horizontally, vertically, or at any angle you choose!  You can mark your first line to be sure it’s straight if you want, but I just eyeballed it.consecutive-strips-web

I pressed after adding each strip, and every few strips I turned it over and ironed the back of the mat, too.

.

.

.

.

When the mat was finished, I trimmed it to 12 x 18 inches.  Note that it helps to make the last strip added a wide one so the mat can be trimmed to size without leaving a really skinny strip on one edge.

Last strips added are wide to allow for trimming to size

Last strips added are wide to allow for trimming to size

I bound the edges with scraps of bias binding left over from various quilts as well as scraps from my bins.  I got four mats done easily in a day, so this would work as a last minute gift—we all need those!finished-mat-web

Quilt Portraits–please comment

A straight-on picture of a quilt is great if you need to see the whole design, but I’m aiming for quilt photos with personality.  Here are a few first attempts.

#1  This is made with bright batiks and templates from Elisa's Backporch Design

#1 This is made with bright batiks and templates from Elisa’s Backporch Design

I live in a beautiful part of the country (I’ve said that about every place I’ve lived) so there should be lots of photo ops for my quilts.  I also live in the woods, which limits opportunities at my house.

Improvisational piecing using a bundle of Bold Over Batiks

#2: Improvisational piecing using a bundle of Bold Over Batiks

Luckily, some friendly neighbors let me borrow their setting for a few of these shots.  One thing I found out right away is that full sun washes out the colors in a photo.

#3: This is a traditional design taught by Augusta Cole; I added a border to make it a little longer

#3: This is a traditional design taught by Augusta Cole; I added a border to make it a little longer

I need your help!  Which of these quilt portraits sets the best mood for the quilt?  Which makes you say, “I MUST have that quilt!” so you would be tempted to make it, buy the pattern, buy the quilt, ask me to give you the quilt for your birthday (I KNOW who you are)?  And why?  Please comment!

Twinkle, a pattern by Swirly Girl Designs, was made because I had some fabulous leftover fabric

#4: Twinkle, a pattern by Swirly Girl Designs, was made because I had some fabulous leftover fabric

If you’ve never commented on a blog post, here’s how: Folks who get the post by e-mail need to click on the title of the post and that will take you to the blog online. Online, you’ll see a dialog bubble next to the title, like the bubble that appears over the head of a cartoon character. Click on that and you’ll be taken to a screen where you can type your comment. Thanks for your help!

#5: I love concentric squares!  This is similar to the Hip To Be Square pattern.

#5: I love concentric squares! This is similar to the Hip To Be Square pattern.

Improving My Quilt Pix

OLYMPUS DIGITAL CAMERA

Another version of “Turning Twenty Again”, this time with my improvisational border

So, this is what a typical picture of one of my quilts has looked like in the past:  Yes, that’s my husband’s head, and the edge of the rug in the TV room…well, you get the idea.  And in fairness, most of these pictures were taken years before I ever thought of having a blog and publishing them.  Let’s just say they’re less than perfect!

Since I started the blog, I’ve tried to improve the old pictures with editing software.  Most of the quilts are long gone to friends, customers, or both, so I don’t have the originals to make new photographs.  After photo editing, the quilts were a bit easier to see, but the photos still weren’t exactly professional looking!  See below.

This is a slight variation on Birthday Presents, by Atkinson Designs; it made a great baby quilt

This is a slight variation on Birthday Presents, by Atkinson Designs; it made a great baby quilt

I looked at a LOT of quilt pics on Flickr; most weren’t any better than mine.  I looked at books and catalogs.  The best quilt portraits I found were in the Keepsake Quilting catalog.  They showed the quilts in nice settings, not just a straight-on picture of the quilt.  I like this approach because it shows the mood of the quilt, not just the design.

Concentric Squares Batik

I love batiks and love making variations on concentric squares, so I enjoyed making this quilt

I started trying to make better “quilt portraits”, showing more than just a straight-on shot of the quilt.  I’ve found that a picture taken with the recipient is very nice.  This next picture was sent to me by a friend who bought one of my quilts as a gift.  Although it is clearly a snapshot rather than a professional photo, I think it does a nice job of being a portrait of the quilt (and the recipient).  It has personality, which is lacking in the straight-on shots even if they show the whole quilt better.

I’m off to make some quilt portraits of my own, having learned a thing or two that I hope will improve the shots for my blog.  Check back next week and see what you think of my “quilt portraits”.

Three Easy Chevron Quilts

My plan here is to make modern quilts to clear out ALL my stash, and yours!  With that in mind, here are some fun quilts to make if you have lots of charms (5 inch squares), or squares of any uniform size.

ONE: Make a chevron quilt

Just sort the squares into lights and darks and make half square triangle blocks using your favorite method (or here are half-square triangle instructions on another website).

Any single solid (or fabric that reads solid) can be used to contrast with scraps

Any single solid (or fabric that reads solid) can be used to contrast with scraps

Here’s the layout for option ONE:

.

.

.

.

.

.

chevron quilt

Scrappy zigzag quilt with alternate rows offset 1/2 block

TWO:  Just for fun, here’s an alternate layout that also makes a nice zigzag quilt.  This has fewer corners to match than option one 🙂

Just offset every other row a half block so that the points on the Row 2 blocks fall at the center of the Row 1 blocks–look at the picture on the left and you’ll get the idea!

.

.

THREE:  You can even arrange your blocks to make really big zigzags across the quilt:  This is the most challenging of the bunch in terms of making the corners match, but of course the design also has a big impact because of the big chevrons.2 better chevrons

 A bigger chevron would obviously be easier if you started with larger squares.  Got any layer cakes (i.e., packages of 10 inch squares) you’re wondering what to do with?  As you can see, this example shows two different ways to make BIG chevrons.

I’ve made a couple of zigzag quilts, one scrappy and one using all my purple charms.  It’s a fun way to make a quilt with a lot of graphic appeal while using stash.  Now, let’s go make some chevrons!

Modern Donation Quilt

Donation quilts are a great use for scraps, but they aren’t usually very exciting to make.  I make them more interesting by trying something new with each quilt.  

Most donation quilts are smaller than bed size, which makes them a good place to try new things.  Here’s an example where I “tweaked” the usual quilt design in several ways to make it more modern while still using older fabric from my stash.

First, this is a typical donation quilt. usual donation labelled It’s made 40″ x 40″ as requested by the charity, and it used up a fair number of those 5” charm squares that seem to reproduce themselves while the fabric closet door is closed. I used it to practice some of the quilting designs I’m learning in Leah Day’s Craftsy class, so I did learn something in making it.

And here’s what I decided to do on the next donation quilt for a children’s charity to make it more modern.  Ronald Labelled

I made these changes to made this design more modern:

  1. The blocks are rectangles rather than squares.  It didn’t use up any charm squares, but it did use come cute fabric I’ve had for a while.
  2. I found a nice coordinating almost-solid in my stash.  (Solids are commonly used in modern quilts.)
  3. The rows run vertically and are offset by a half block starting alternate rows.  This breaks up the usual march of blocks across the quilt, making a diagonal zigzag pattern.  It doesn’t hurt that the quilt also is easier to construct because there are no corners to match 😉
  4. The quilt was designed without a border.

If you’d like to make a quilt like this, I’ve made a separate page with instructions; click on this link.  If you make a quilt from this, send me a picture!