Elizabeth’s Lovely Quilts

I have long admired the pretty, colorful patterns developed by my friend Elizabeth Eastman. She agreed to an interview for this blog, so here is your introduction to her!

When did you start designing quilts? And when did you decide to sell patterns?

I designed my first pattern for Sherri McConnell–really a simple little giant block mini-quilt, which was in her booth at Quilt Market a few years ago.  Now I look at it and shudder, but our starts are always this way, aren’t they?  The next one wasn’t really an original design, but a recreation of an antique quilt, which I did in blue and white.  Riverside Sawtooth is still a favorite.  I think that was the first time I put a pattern up for sale, but then it was accepted by Simply Moderne magazine (one of the QuiltMania magazines) and I pulled it down for a while.

 Selling patterns really evolved from when I started teaching and lecturing at Guilds in my area: each guild likes to have a unique pattern they can draw from, so that’s when Home, Sweet Home was written.  From there, I would get ideas, try them out and then put them up online in my PayHip.com shop. And then Northern Lights was when I learned about creating medallion quilts.
 
The other factor in all this was the release of software from Affinity by Serif that enabled me to create a professional looking pattern.  I had wanted to upgrade from a word processing document, but didn’t want to spend the money for the Adobe software (recurring fee of 25 dollars per month).  Affinity’s Publisher was released in Beta during this time, and I became a beta tester — as I was so eager to get into the program.  (Side note: Affinity has three programs: Designer, Photo, and Publisher.  I use all three.  I think the last price I saw on them was $55 each.) Sorry to go on so long, but having the tools to create are just as important as the act of creation sometimes.  
 
The most recent pattern is Heart’s Garden.

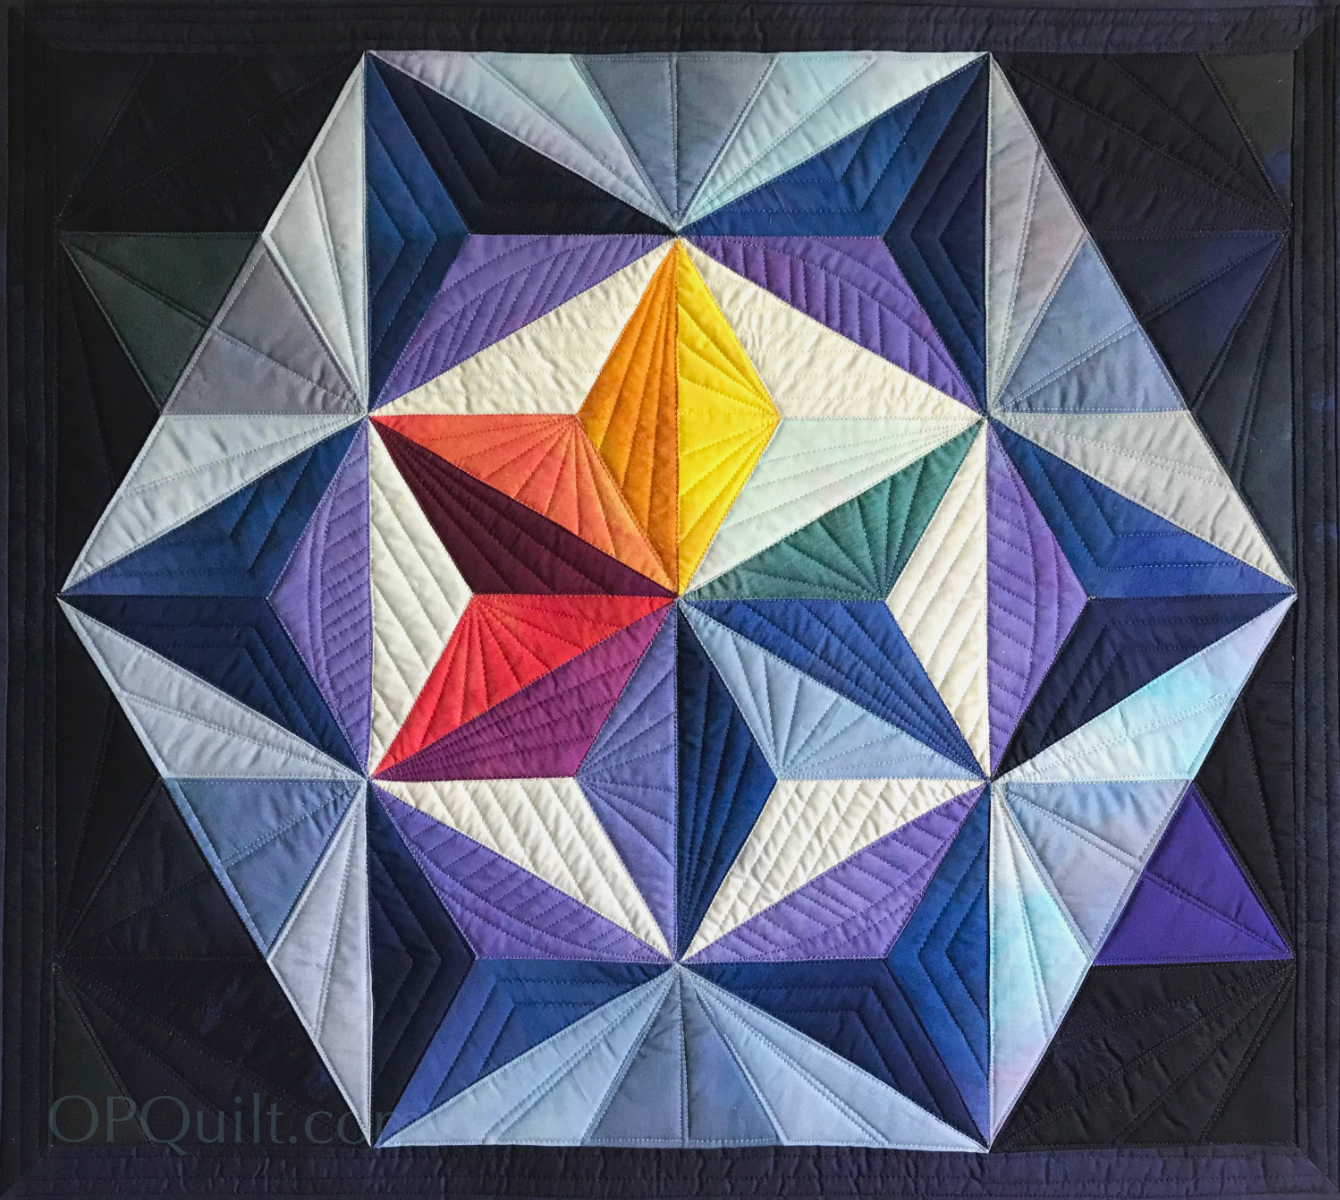
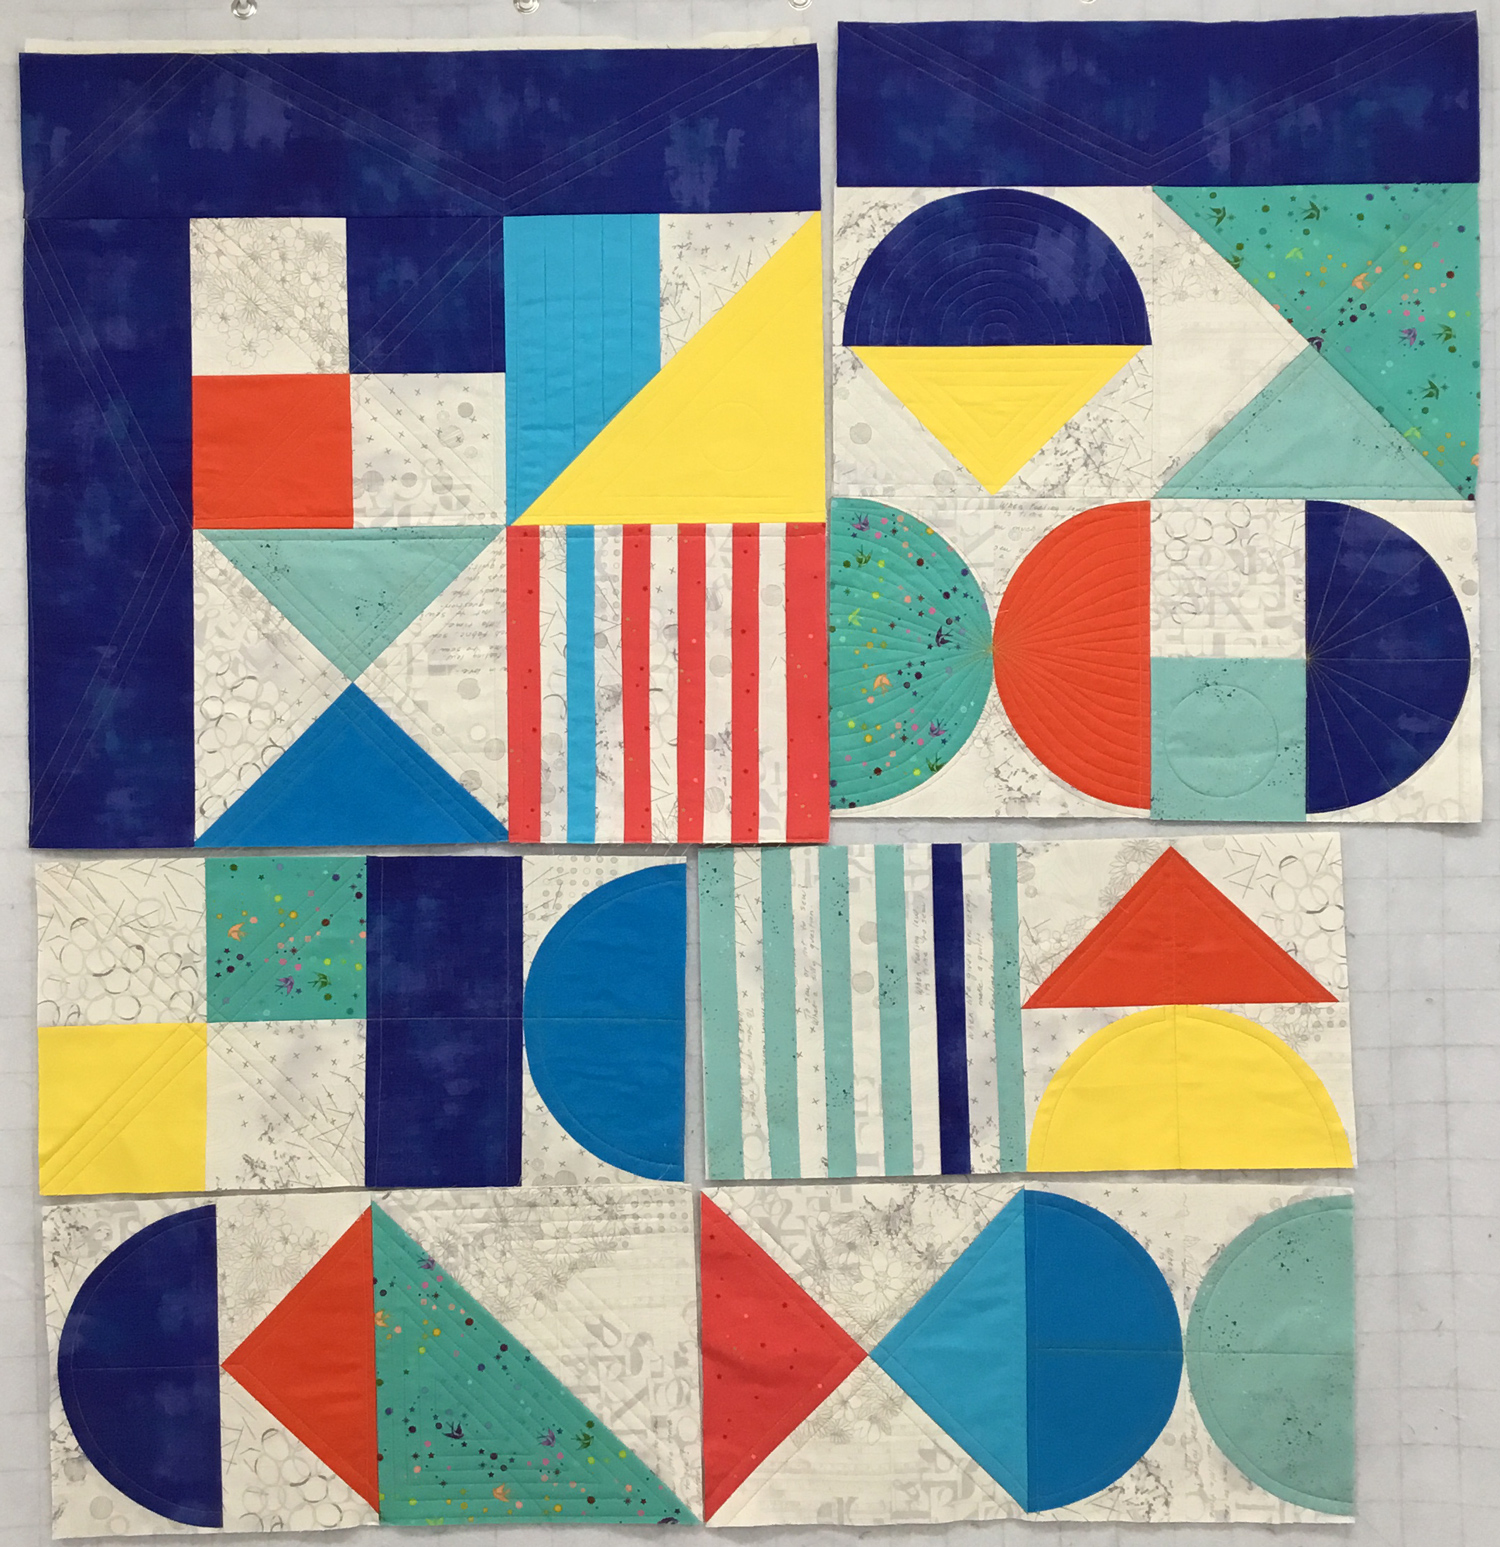
Elizabeth’s quilt “Triad Harmony”

Your quilts are so bright and cheerful looking! Do you have a method for how you choose your colors? Intuition? Trial and error? Color theory? Something else?
I live in an area with a distinct light–in Southern California, which has often been written about. I think that has influenced me in my color selection.  I could describe the color choices as high contrast, clear hues, but I love a good muted palette every once in a while.  While I majored in Creative Writing in College, I did a minor in Digital Art, which included photography, etc.  When you get in the color lab and have to decide if your colors are muddy or greyed or low contrast, you quickly learn to tell the difference.  A good way to teach yourselves this is to play around with some of the free photo apps on your phone (Snapseed is a good one), and experiment to find what you like.

And yes, I have lots of bits of cut pieces — sometimes I lay it out and I don’t like it, so I try something different.

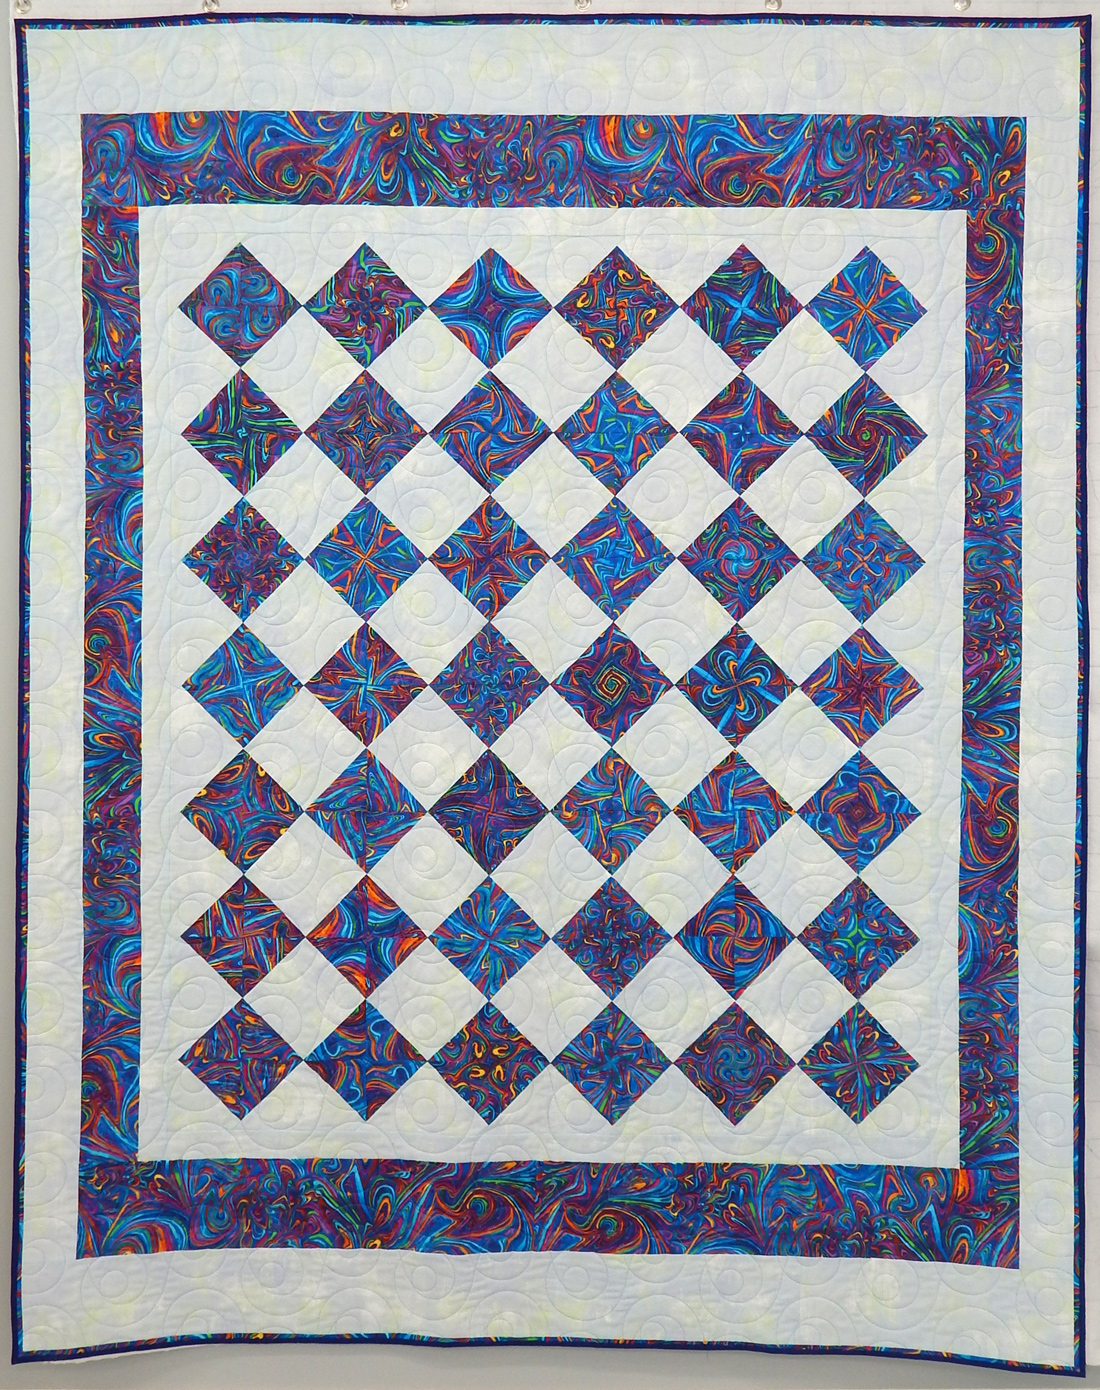
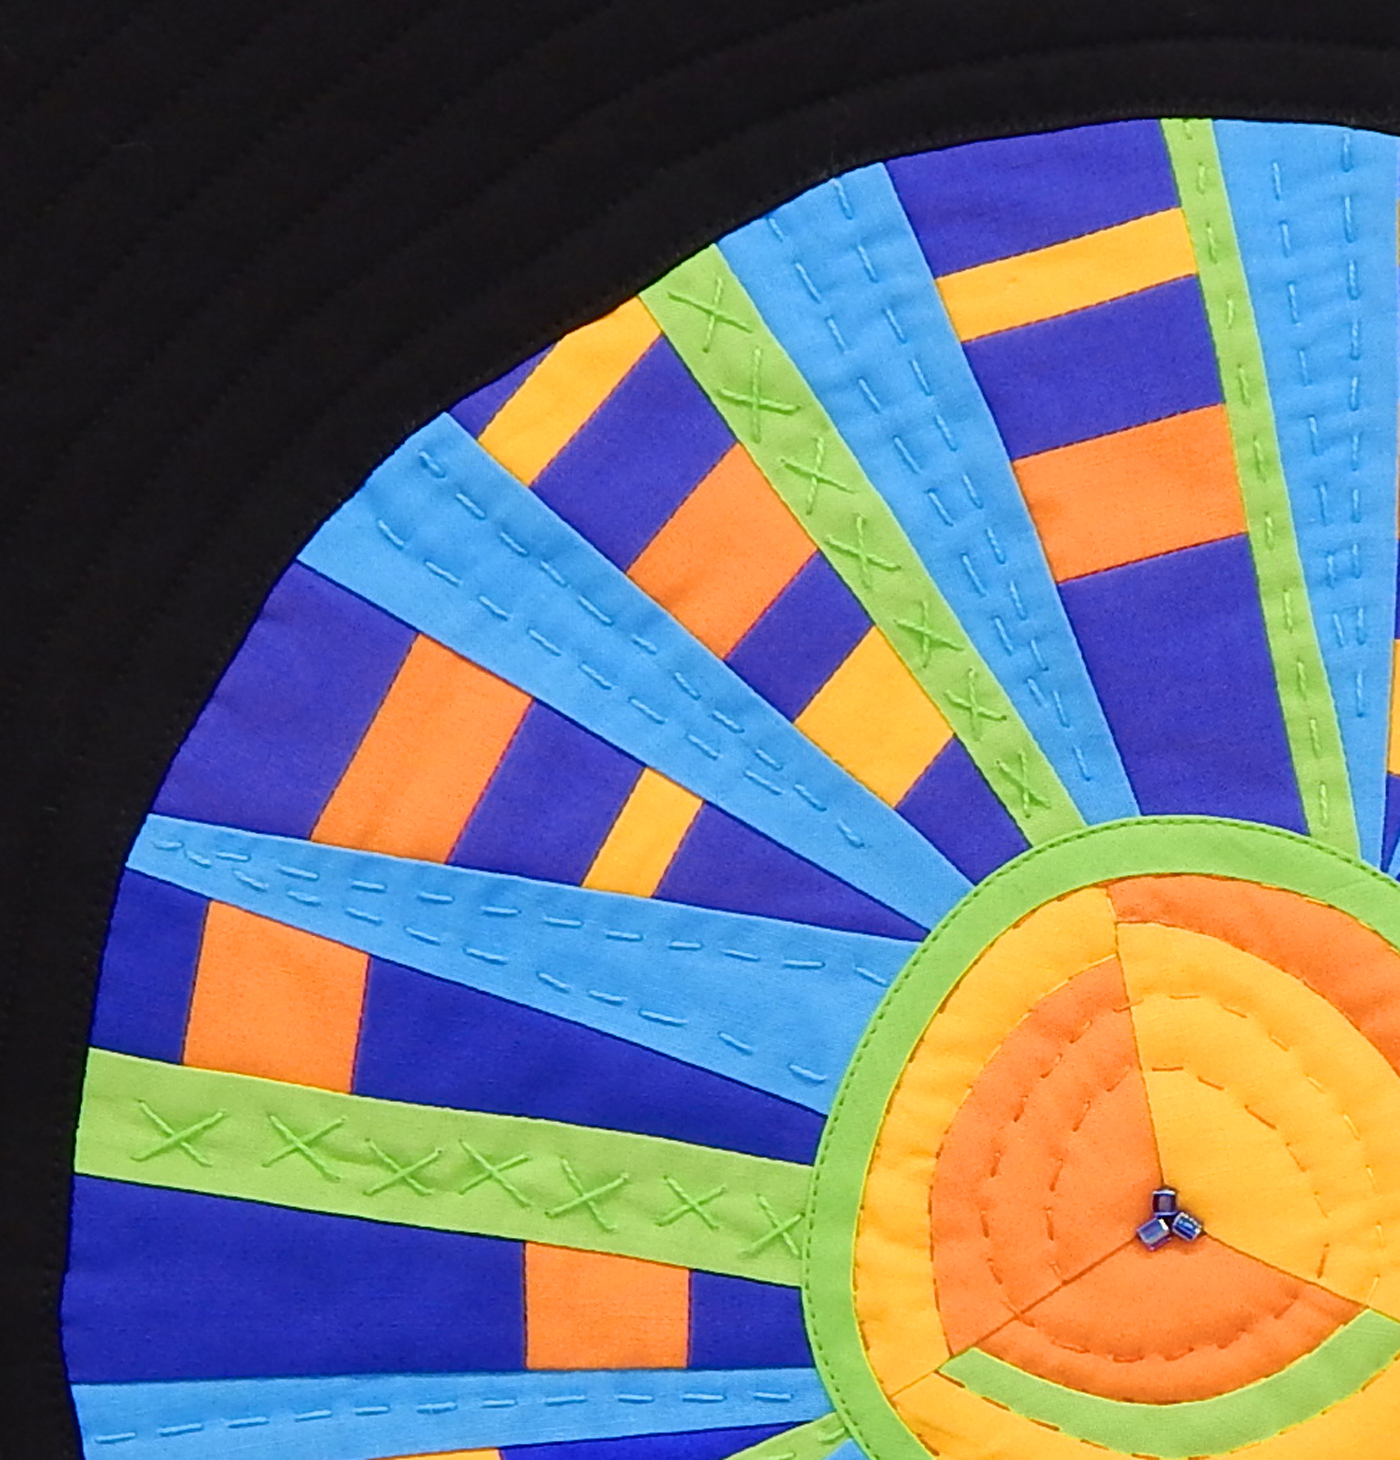
Elizabeth’s quilt “Annularity” shows her wonderful sense of color

What’s your current favorite among your patterns?

Always the most recent one.  Kidding.  I’m quite fond of Blossom, as it’s so versatile, but I also like Triad Harmony, especially done in ombré fabrics.  The most popular pattern overall is the Mini Double-Pocket Bag.

Elizabeth’s Mini-bag Pattern

And we are having a great time with the Mystery Quilt-A-Long of Heart’s Blossom.  The complete pattern will be ready Summer 2020.

I know you recently decided to quit teaching. Any plans for the time that will leave?

I decided to take a different approach to teaching, as I only want to teach Zoom classes and all the guilds are opening up for in-person.  So while the venue (guild visits) may change, teaching in some form will continue.

“Merrion Square” was the first quilt I made from Elizabeth’s patterns. It’s so cute I couldn’t resist!

You’re currently leading a quilt-along that will be a pattern eventually on your PayHip site. What made you decide to do this format?
Part of the Heart’s Garden project came about because I had time now to consider other ways of reaching out and teaching.  Many of us learn new things through what we read, and watch, and I wanted to explore that.

Also, because I’m crazy.  I had one design all mapped out, started the quilt-along, and realized I hated my original plan.  So I scrapped it, and had to re-design something I liked much better.  I can hardly wait to show it off!  Three other women have contacted me and shared their progress and I love seeing it in different fabrics and styles.  Such a treat to be a part of this!

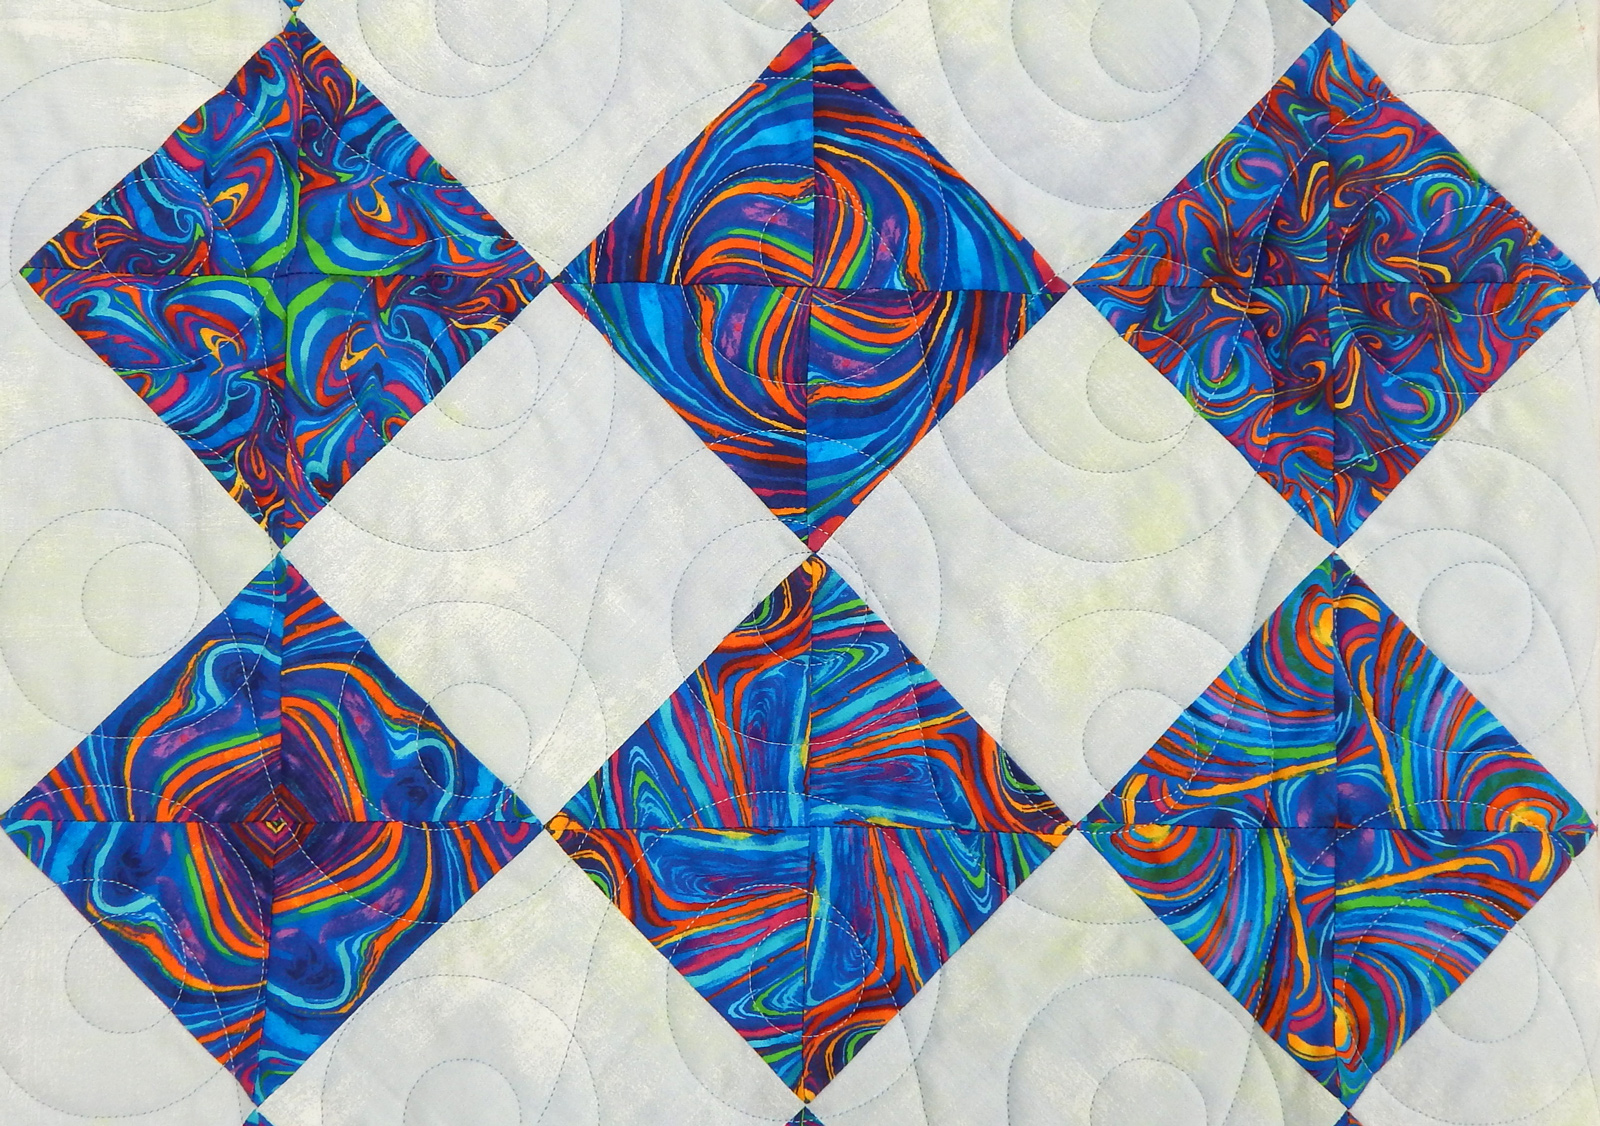
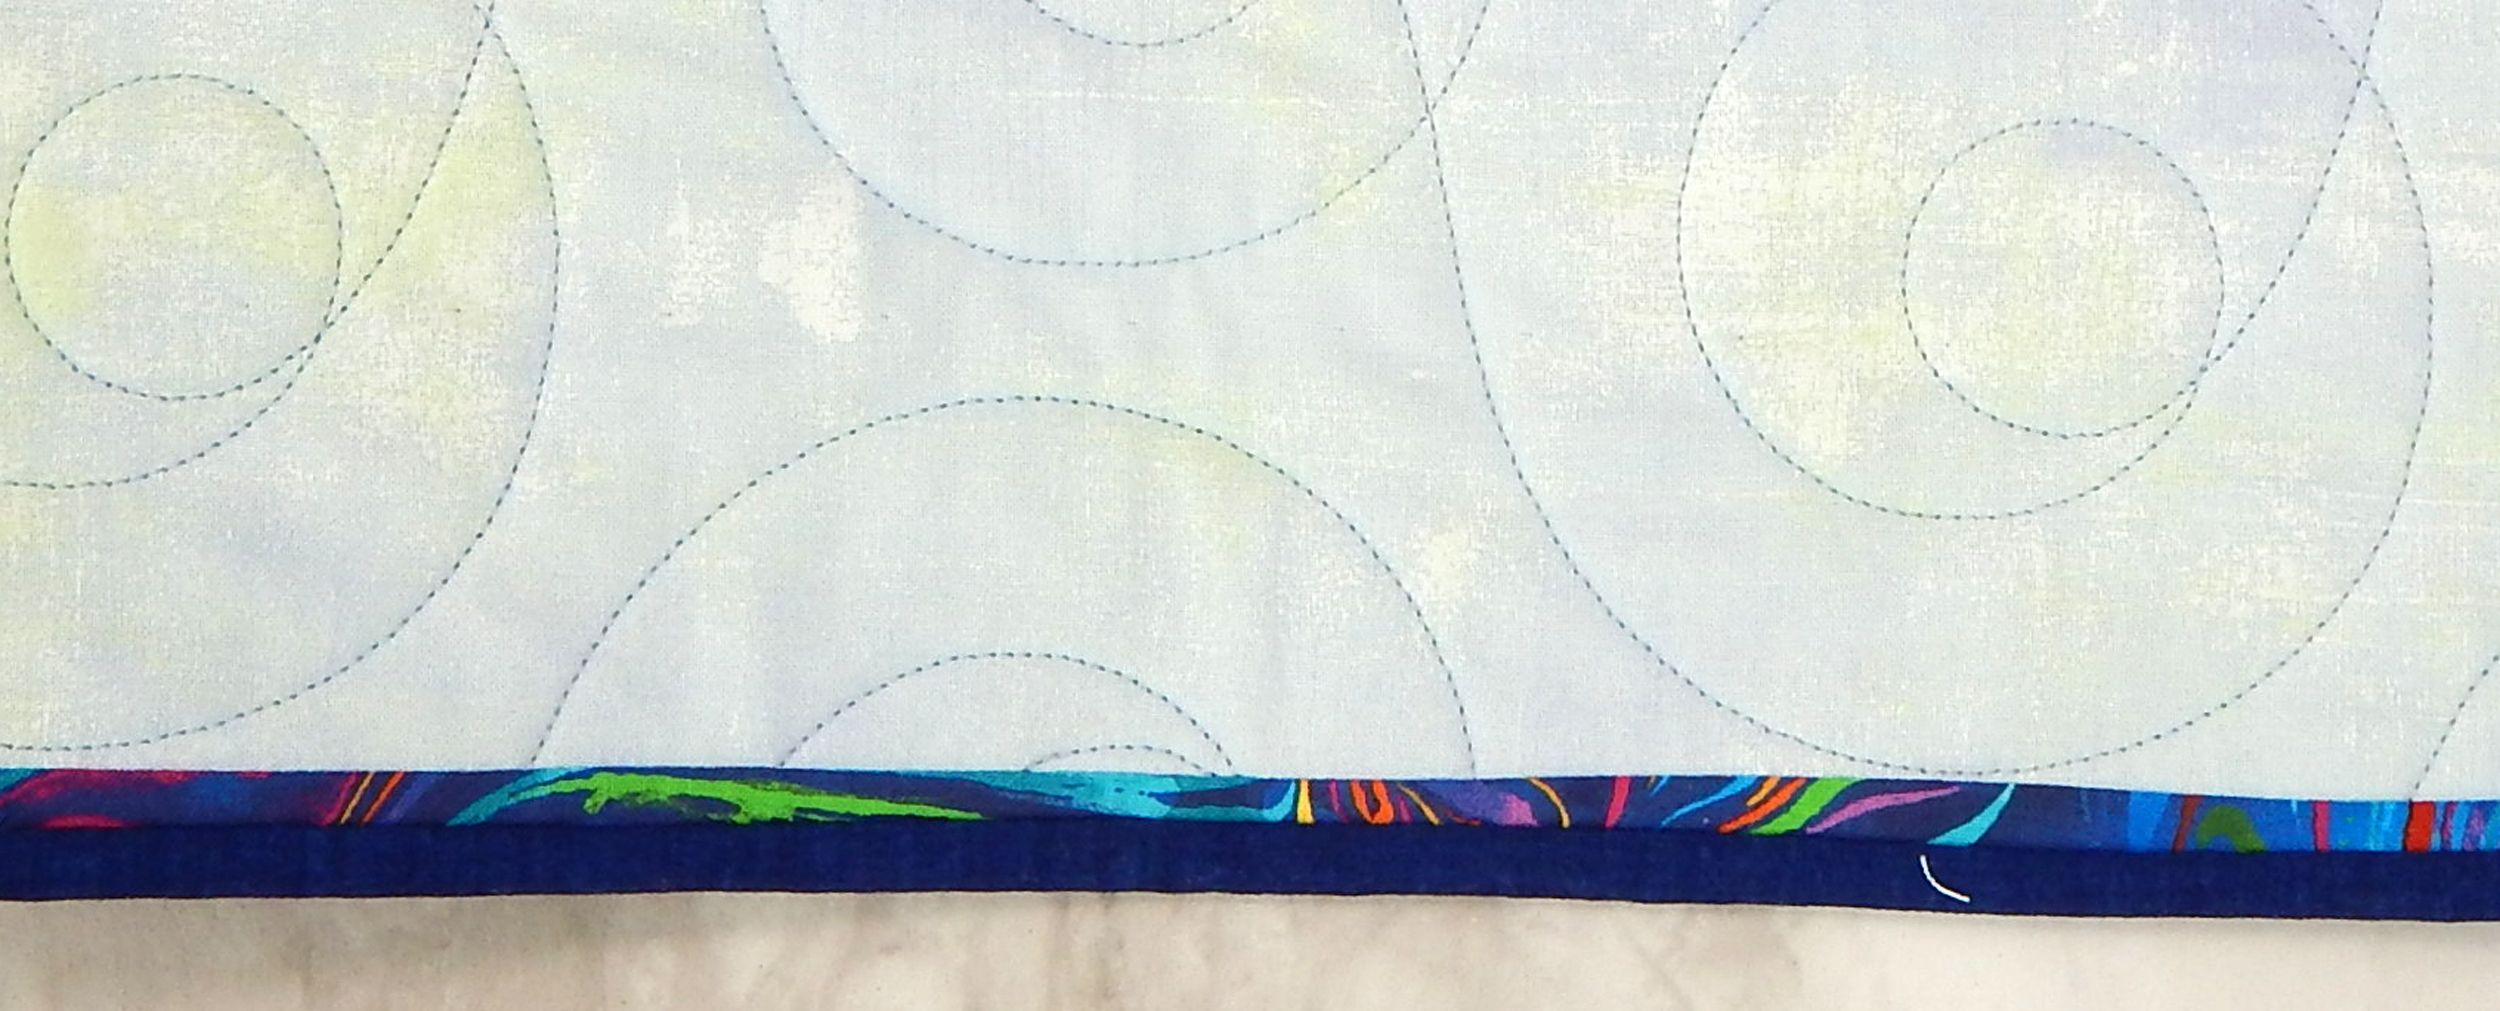
I love this quilt design of Elizabeth’s, too! It’s called “Criss Cross”

This is barely a sampling of Elizabeth’s wonderful designs. 
If you want to see more, here’s the link to her blog: opquilt.com
IG: occasionalpiecequilt
And her PayHip store: https://payhip.com/opquilt
Oh! And if you go to her PayHip store, the Heart’s Garden Sew-Along is currently FREE!

Whew! A Finish!

When I posted the latest mess, shown below, I got several helpful suggestions.

Nann suggested removing the borders and moving the blocks back to their original positions. I liked the idea of just removing the borders and sort of starting over, so that’s what I did.

The interesting thing is that this quilt was square without any effort. I hadn’t thought of quilt-as-you-go (QAYG) as a good way to get a square quilt, but apparently it was in this case, at least!

Quilt Stats

Name: Bauhaus II

Pattern: Bauhaus by Brigette Heitland

Made and quilted by me

Finished size: 44″ x 44″

Thanks to everyone for the suggestions!

Oh Boy, NOW What?

So, I loved the Bauhaus quilt pattern by Bridgette Heitland.  Here is my top finished, waiting to be quilted.

I changed a few blocks just for fun, and re-arranged them, but it’s basically still Brigitte’s design

It looked to me like a perfect quilt to do Quilt-As-You-Go (QAYG), so I pulled more fabric and got started.

I really didn’t like these fabrics as well as the brighter colors I used for the previous version, but it was fun to quilt the blocks individually.

After I got all the blocks quilted separately, I arranged them on the design wall.

But when I started joining blocks and adding borders, things went sideways!

Now what? I could remove the quilting and the borders, but I’m thinking I’ll just “redesign” the block arrangement! I know for sure those two striped blocks can’t be left next to each other like that!!!

A friend reported she had a shot of whiskey when she finally finished one of her projects. I’m pretty sure I’ll need one somewhere along in here!

Any ideas for this “slight error” (other than alcohol)?


Some Finishes–Not All Mine!

Two of the ladies who took the shirt making class earlier this year have finished their shirts and allowed me to have pictures.

I love both these shirts! They each did a great job!

In other news, I got this quilt back from the quilter and did the binding. It’s made with Charley Harper fabrics to go with the hand made Charley Harper tiles on my fireplace.

With regard to the Charley Harper fabric: It is very high quality. It’s the only fabric I’ve ever seen that was all printed exactly on grain! You can see from the designs why this is important, but it’s a rarity. Here’s a closeup of one of the blocks and the binding.

And here’s a closeup of the tiles in the fireplace surround so you can see why the quilt needs to go in the living room! These Charley Harper tiles are from Motawi Tile Works.

Quilt Stats:

Name: Charley Harper Love

Design: Modification of Elizabeth Hartman’s Rapid City

Finished size: 52″ x 66″

Made by: me 

Quilted by: Walker Quilt Co.

Magic Kaleidoscope Finish

I finished this quilt back in January but didn’t get around to blogging about it, so here goes…

I was on a magic kaleidoscope quilt kick, and this one was the last one. It was quilted by Walker Quilt Company, where they did an excellent job with an edge-to-edge design.

And here’s the whole quilt:

Here are a few of the blocks. There are no two alike!

Luckily there was enough fabric to put some on the back as well as in the border.

And here’s the binding.  I did a double binding so there is some of the original fabric as well as the solid binding.

Quilt stats:

Name: Magic Kaleidoscope 3

Designed and made by me

Finished size: 56″ x 70″

Quilted by: Walker Quilt Co., Franklin, NC

Classes Coming Right Up

Studio Stitch is moving down the street for a better location, so all these classes will be at 1616 Battleground Avenue, Suite D-3 (Greensboro, NC). There’s a bakery in the same shopping center, so I think everyone is looking forward to the move!

In March I’ll be teaching my Easy Kaleidoscope Quilt. It’s like stack-n-whack only easier. In addition to learning to make the quilt so no two blocks are alike, we’ll set the blocks on point. Here are a couple of samples:

And here’s a close-up of some of the blocks in the blue one:

In April I’ll be teaching Better Binding Painlessly, which is always popular. It’s mostly about binding a quilt entirely by machine, though the techniques can be used for a more traditional binding with the back hand sewn.

In May the class will be a cute bag made from a shirt. The larger the shirt, the larger the bag!

June’s class is another stash-busting scrap quilt, made much easier with the use of the right tools!

If you’re in the area, consider joining us! To obtain more information, go to the Studio Stitch website and subscribe to the newsletter. That way you’ll be the first to know when registration opens for each class.


Into the Quiltalong Vortex!

Yes, I’ve been pulled into the quiltalong vortex along with so many others!

It started when someone at MQG recommended the Urban Trek Quiltalong.

Photo of an Urban Trek quilt from Pinterest, no attribution available

There are a lot of good videos on techniques used in the Urban Trek quilt, so I signed up to watch the videos. However, I don’t intend to make the quilt.

Then one day when I was “between projects”, I got an email about a “Night Sky” Sew Along from Jaybird Quilts. What’s a quilter to do? The quilt is beautiful!  I checked with my quilty friends and one agreed to sign up with me. Yes! Here’s my progress so far:

Yes, just one block. And no, this isn’t the week to sew; I’m supposed to be just cutting everything.

However, I learned the hard way that it’s best to make one block before committing to the whole quilt. And with this one, even my buddy who loves lots of pieces is thinking her quilt will be made smaller than originally planned! Yes, it’s beautiful. Yes, it’s complicated. However, the videos are helpful and the pattern illustrations are excellent.

Then I found a list of quiltalongs. One of the offerings was a quilt called “Bauhaus“. It’s from Brigitte Heitland, whose Zen Chic designs are among my favorite fabrics.

The original quilt by Brigitte Heitland.  Image from https://www.brigitteheitland.de/bauhaus-qal

OF COURSE this appealed to me, so I signed up! Here’s my progress so far:

I changed a few blocks just for fun, and re-arranged them, but it’s basically still Brigitte’s design

No, I didn’t really follow all the directions.

And here’s why I don’t usually do Quiltalongs: I get impatient and want to do the whole quilt, not just this week’s segment. At this point I’m “supposed” to be selecting my fabrics 😀  I still need to add the outer border, but the blocks are done.

So, what quiltalongs have you been pulled into?

Interview: Sherry of Powered by Quilting

I recently ran across this quilt by Sherry Shish, of Powered By Quilting, and I’m very impressed with it. It’s a great mix of traditional and modern looks

Simply Cornered, as shown on Sherry’s website

I contacted Sherry and asked a few questions, which she graciously answered. Here’s The interview:

Q:  How did you get into quilting, how long have you been doing it, and when did you decide to make it professional?

A: I had been hand sewing and doing other crafts for many years before I learned how to sew on a machine.  I’ve been quilting for just over 5 years now and I fell in love with all the different aspects of quilting.  I started pretty early designing patterns since I really love seeing my ideas and my style of quilts.

Q: Where do you get your design ideas?

A: Everywhere… but I find it easier to put self constraints on what I’m designing to help narrow the focus.  I really love secondary designs (like really love them) so a ton of my patterns have a secondary design.  I create, iterate, rotate, recolor, and repeat several times before I land on a design that I love and want to make.

Q: You’ve got a lot going on with social media. How much time does it take?

A: Social media is hard… It’s necessary, but sometimes I’d rather just be me and pretty pictures are not reality.  I should spend more time on social media, but I find I give what I can and that has to be good enough.

Q: What are your goals for your quilting business? What are your goals for your quilting art?

A: I would love to make it my main source of income, but I have a good day job that makes it very difficult to balance time and commitments.  There are things that I would love to be able to do such as kit more of my patterns, teach, lecture, etc. but time is precious and there are things that I’m still prioritizing over adding to the business side to make sure I keep my sanity and don’t burnout in life in general.

Back to the quilt that impressed me: It certainly does have a great secondary design. I drew it in EQ8 and re-colored it because I think it would be striking if done all in one color.

My EQ8 drawing based on Sherry Shish’s pattern “Simply Cornered”

It appears Sherry has made the pattern available already to her Patreon subscribers, and she also sewed it on her Twitch channel in January. It will be available through her PayHip store in March, and you can pre-order here.

I will be making this pattern and following Sherry’s blog. Please join me in wishing her luck!


Atomic Sunflower

This started as an experiment with some leftover fabric, then sort of wandered off into an art quilt for the International Quilt Museum’s “Modern Meets Modern” challenge.

The fabrics are scraps of Michael Miller Cotton Couture left from another project. I saved them as a group because I particularly like the color combination. I started cutting the wedges freehand while working on a Cindy Grisdela-inspired project. When I decided to make them into a circle, I found a large platter in my kitchen and traced it because the rim was irregular. I then used reverse applique to set the circle in its background.

My friend Chela helped with input regarding the center design.

When I saw the Modern Meets Modern Challenge, I thought this piece would be a good fit, so I finished it up after Christmas, just in time to submit it. You can see the contest and the entries here.

Mine was not judged a winner, but here’s the good news: I agree the winners are better.

In looking at the entries, it’s clear that the better designs go all the way to the edge of the quilt, while mine is isolated in the middle. I’ve noticed this element of design several times over many years. In good modern designs, the design extends to the edge, often with the implication that it goes past the edge. But this time I got so wrapped up in what I was doing that I didn’t think “outside the circle”. 😀

As Nelson Mandela said, “I never lose. I either win or learn.” So, on to the next quilt!

A Girl’s Best Friend

Remember the song “Diamonds Are A Girl’s Best Friend”? (It’s from the Broadway show Gentlemen Prefer Blonds, later made into a movie with Marilyn Monroe.)

I’m not 100% sure diamonds are a quilter’s best friend, but one of our triangle swap group made her scrappy triangles into a beautiful diamond quilt, so I had to do the same.

I was especially happy to have backing printed with diamonds, and a blue striped binding fabric that worked.

I quilted with a metallic thread recommended at Studio Stitch, and it is the ONLY metallic I’ve ever used that gave me no trouble at all. It’s Fujix King Star metallic embroidery thread, and I was pleased with it! It’s thin, so it didn’t show up much, but I’ll be using it for other projects.

I don’t think you can see the silver thread on the white fabric at all, but look for the wavy lines on the dark blue areas.

Quilt Stats

Pattern: none

Finished block size: 6″ x 12″

Finished quilt size: 48″ x 51″

Made with swap blocks

Pieced and quilted by me