My husband and I recently went to Greenville, SC, for a few days including Mancuso Quiltfest. I didn’t take any classes, but here are a few of my favorite quilts from the show.
I was especially impressed with this cross section of a downed tree trunk:

Fallen Hero by Barbara Dahlberg
I was interested in this small crazy quilt shown above because I’m always wondering what to do with my vintage textiles, and a crazy quilt seems an appropriate use of them..

Crazy Patchwork by Denise Flynn.
I thought the following wall quilt was an especially effective use of color because it is so straightforward.

Hard Rain by Betty Colburn
And I enjoyed the way the quilting (scribbled lines) enhanced the appearance of this quilt, which I think most people would have quilted with the same old matchstick quilting:

Scribbled Lines by Sherri Lipman-McCauley
There was a special exhibit of “Fabulous Faces” by Jean Impey and Freddy Moran. I loved them ALL, but here are a couple:
And, lest you think I only admired the art quilts, here are some of my favorites among the quilts of a size to be used for warmth.
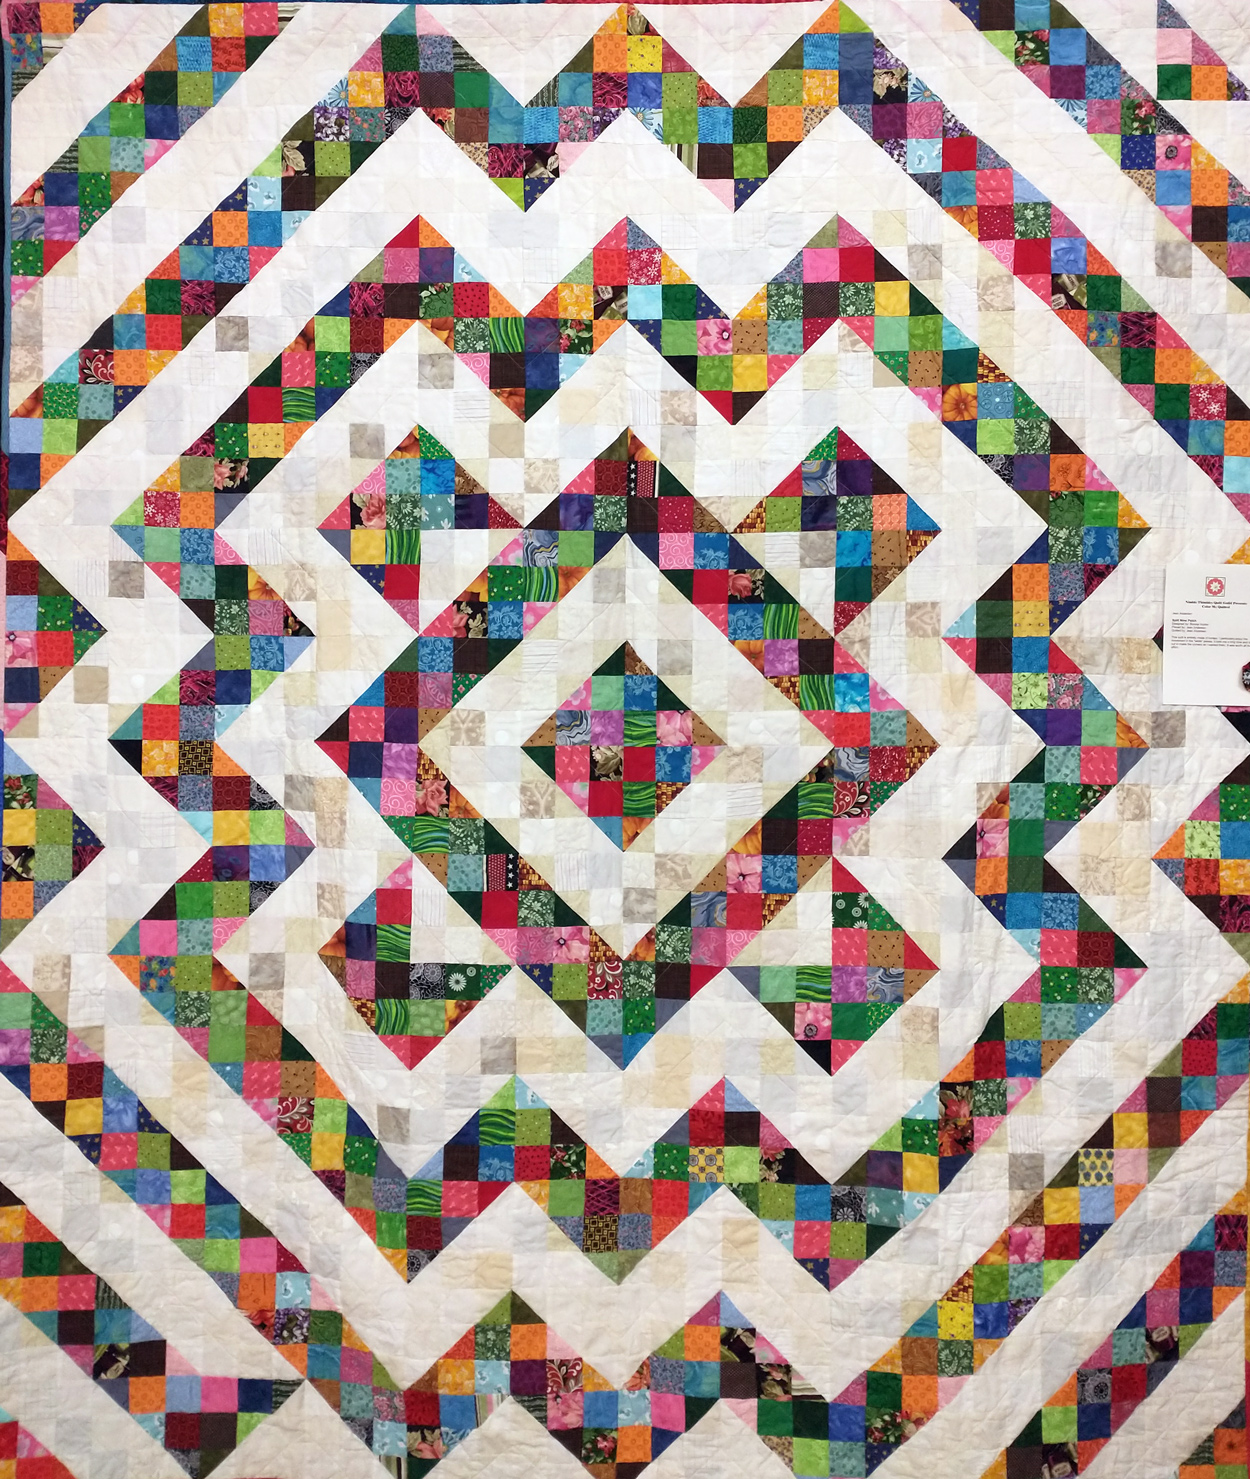
I enjoyed this scrappy variation on a design I know as Perkiomen Valley. The maker attributes this variation on the design to Bonnie Hunter, and it certainly has enough pieces to be one of hers!

Split Nine Patch, pieced and quilted by Jean Anderson
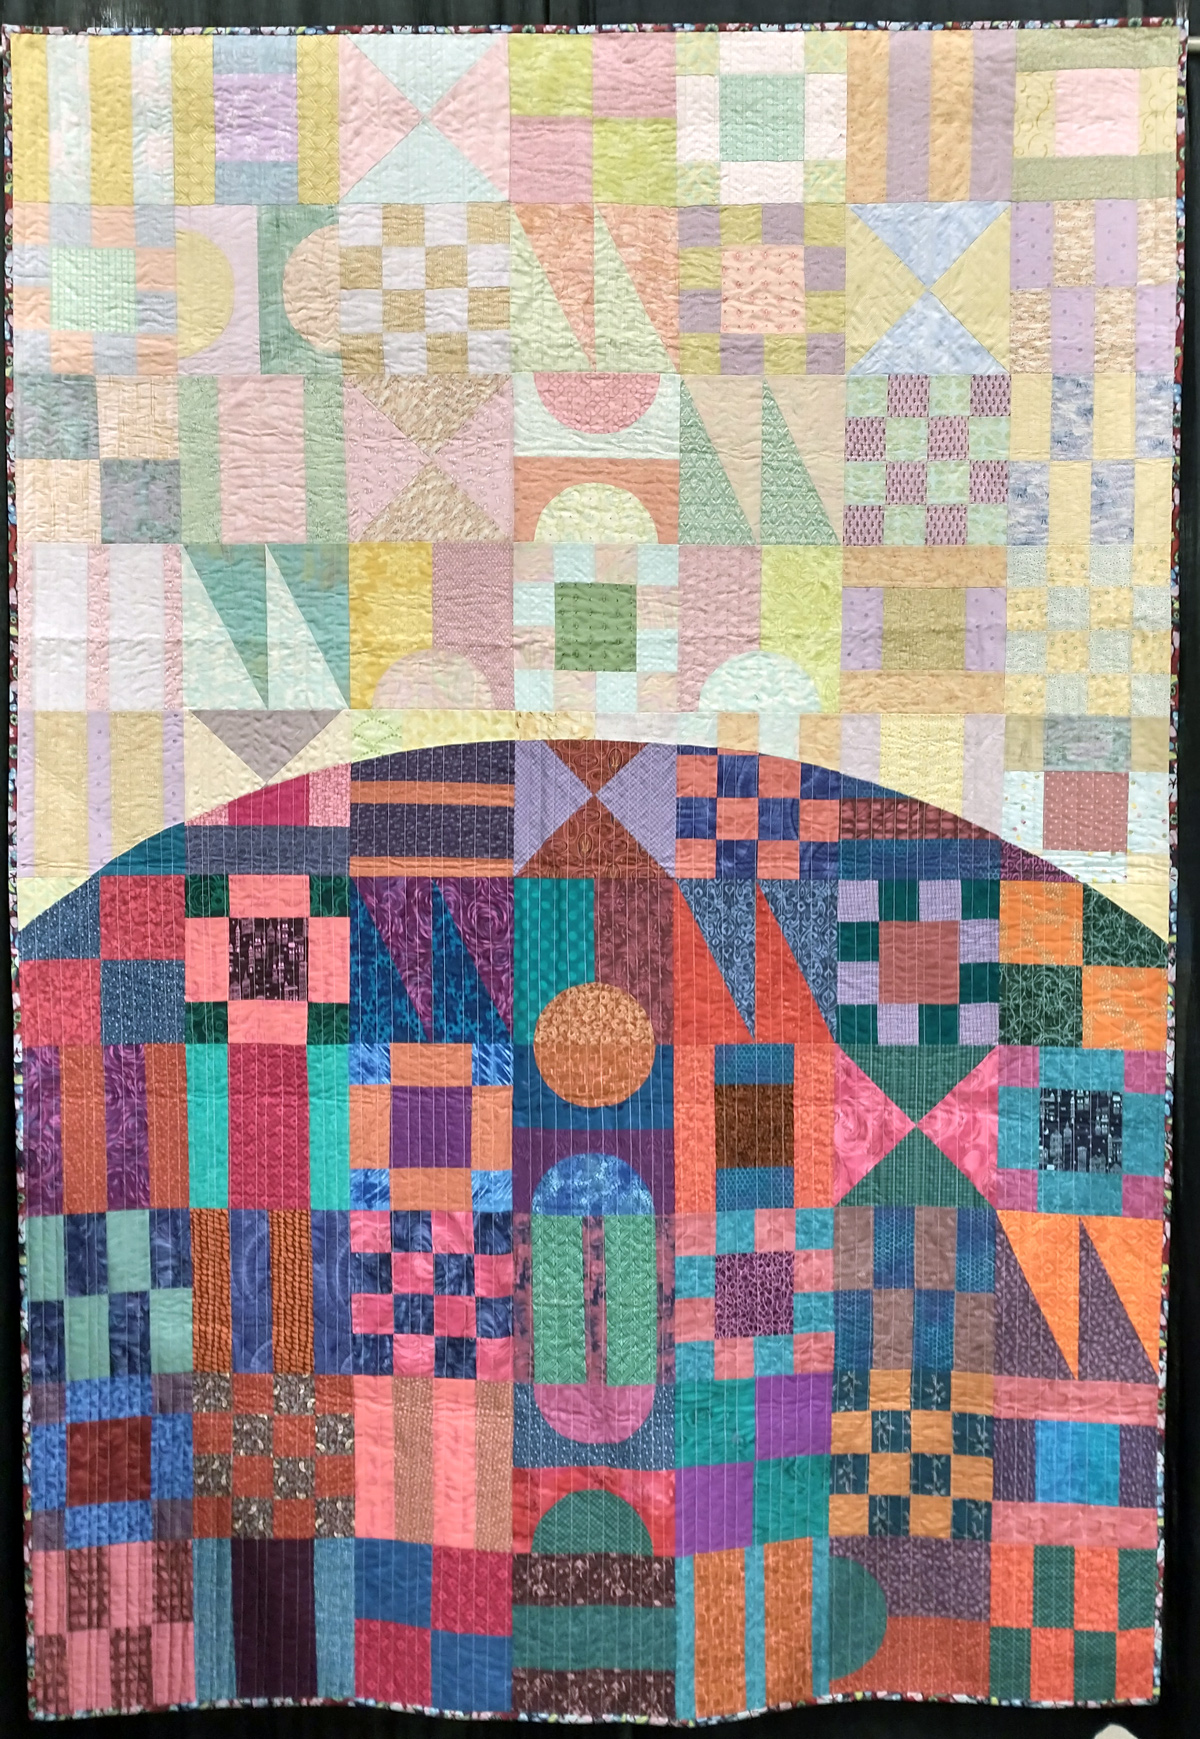
I love this unusual arrangement of colors, which the maker states is her variation on the Modern Mystery 2023 quilt hosted by Modern Quilt Studio:

New Day by Karen Foster
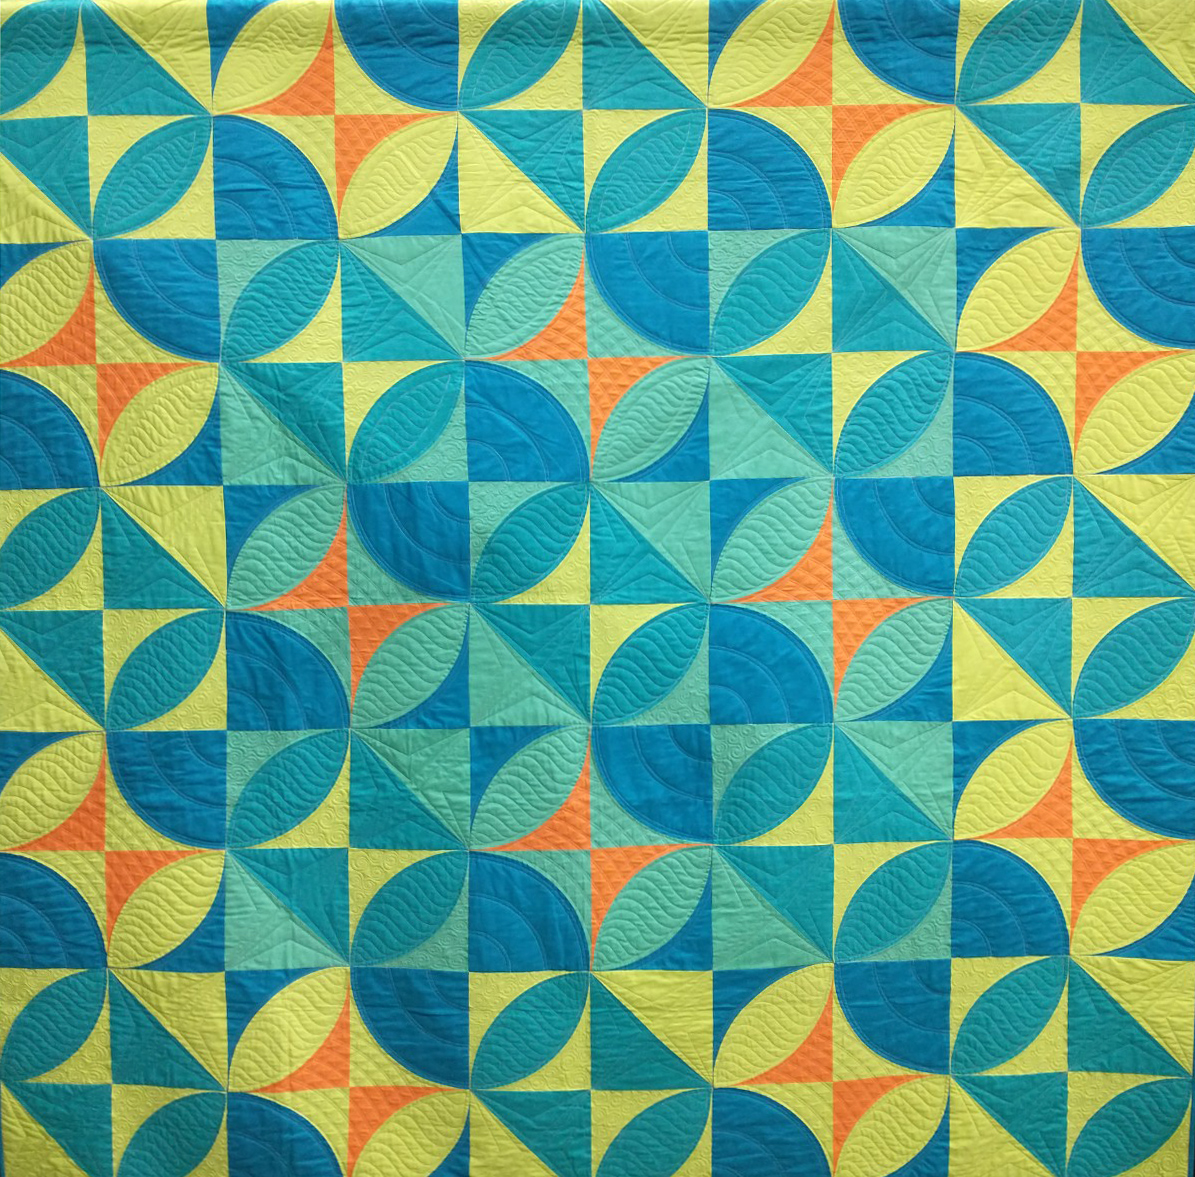
This one had wonderful colors, and I enjoyed the use of the “broken dishes” block for a quilt about (unbreakable) melamine:

Melted Melamine by Ben Millett
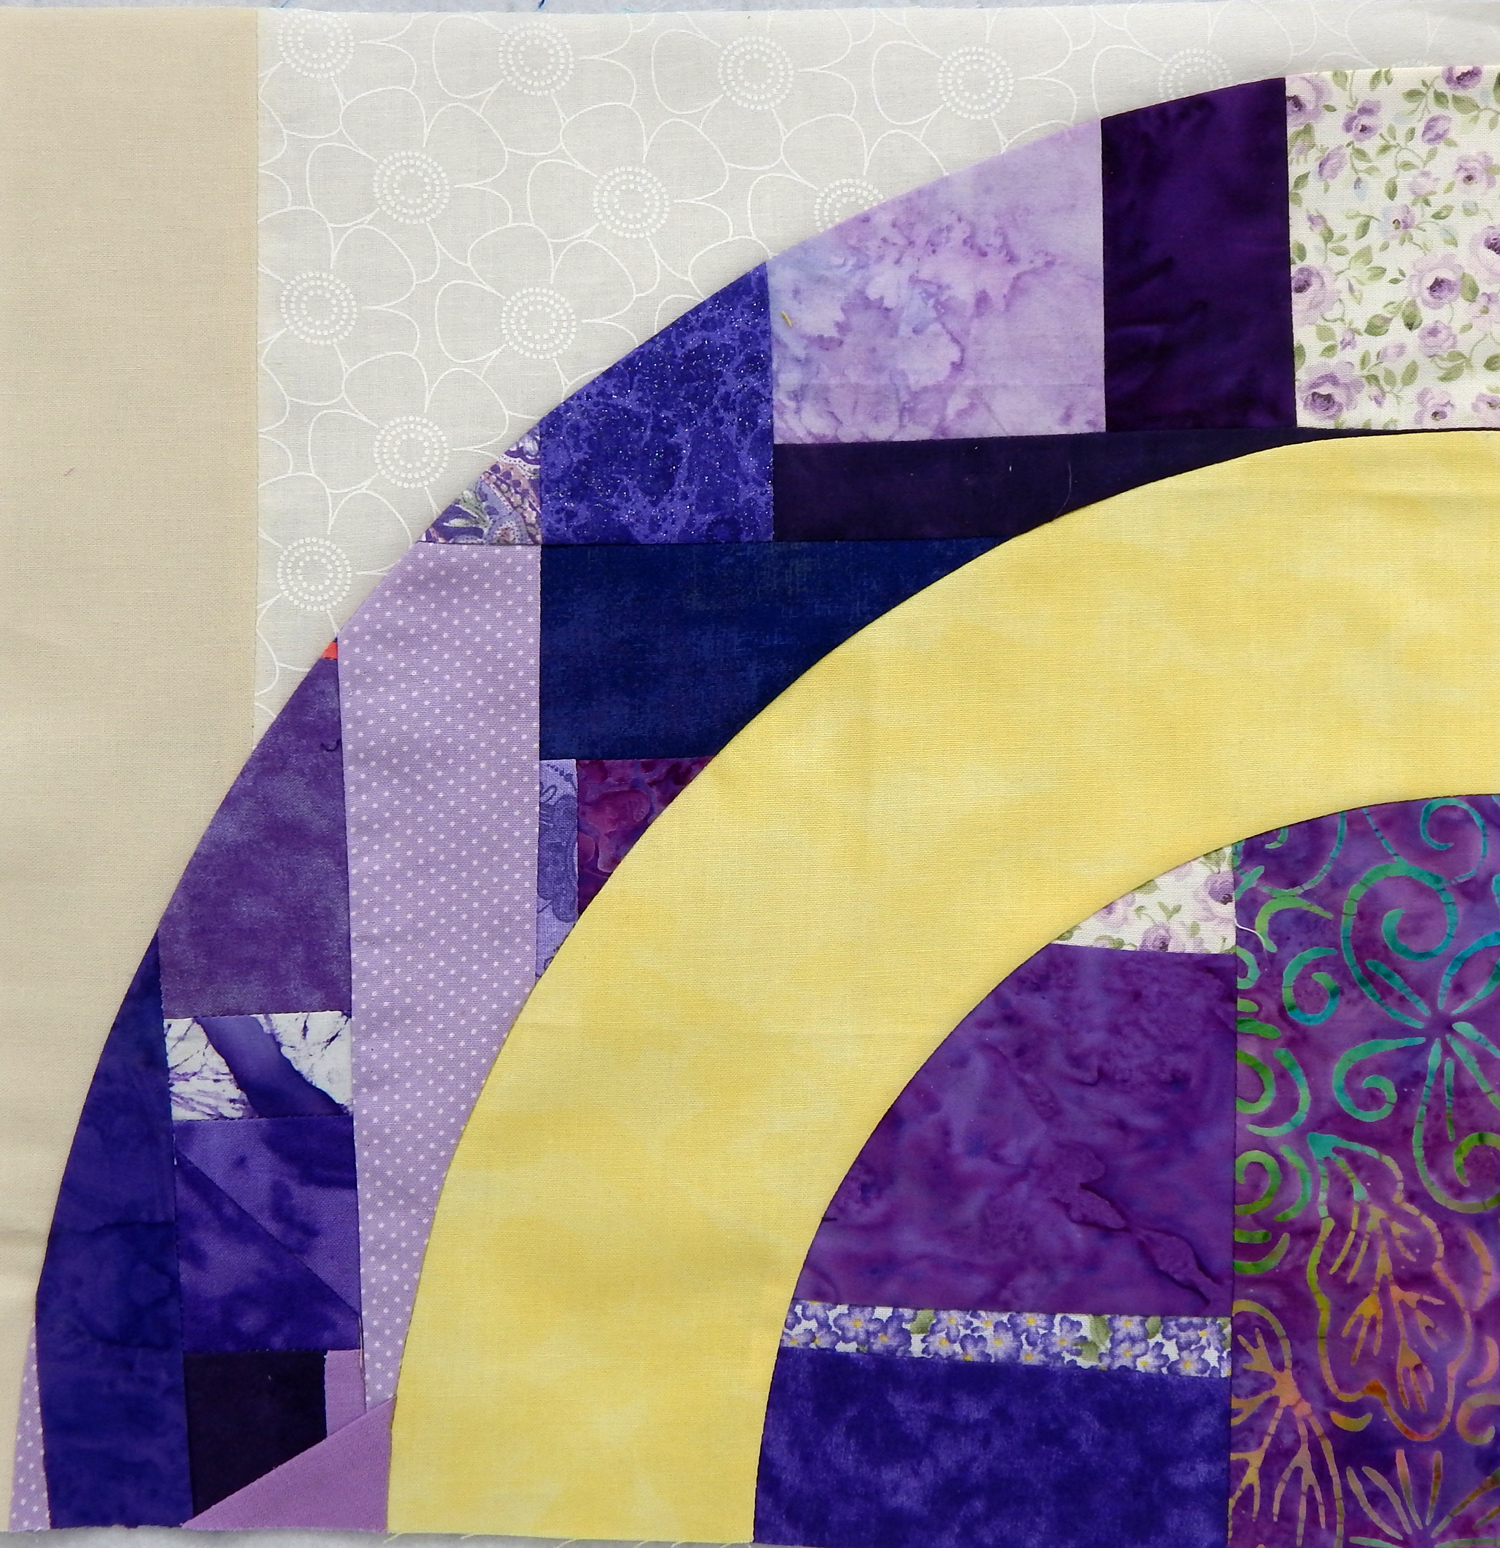
This gorgeous Celtic design quilt was large and I had trouble getting a good picture of it, but hopefully you can appreciate some of the work that went into it:

Celtic Dream by Elizabeth Ann Thackery
This quilt is made from a pattern, and I thought it was an especially effective design:

Starfield by Diane Poor. Pattern is Niagara Stars by Mara Quilt Designs.
Of course there were many more beautiful quilts! I would go to this show again, especially because there were other things we enjoyed in Greenville.