Snowmen On the Way!

Studio Stitch is having a Christmas in July event, and I asked to make something with a snowman for it. After searching through available patterns, we selected this cute wall hanging (or table runner, maybe) by Sandy Fitzpatrich of HissyFitz Designs.

I’ll be teaching this in July, but the patterns started selling as soon as the class sample went up, so the shop is re-ordering. If you’re comfortable with fusible applique there’s no need for a class, since this is pretty easy. However, that cute cardinal in the center block needs to be assembled separately, on a special applique sheet, and then fused to the block.

The pattern is available from Studio Stitch, either in person or by mail, and I’ll be teaching the class July 27. There are other fun holiday-related classes planned, as well; you can see them on the shop’s website.

For Special Little People

My latest quilts are for two special little people. The first is a “big boy” quilt for the boy who’s going to be a big brother. The second is for the baby, who isn’t here yet!

First, here’s the Big Boy quilt. His Mother says he likes Mickey Mouse, but when I looked at those fabrics it seemed like he’d outgrow them too fast. However, he’s playing with a ball whenever we see him, and his Dad coaches football, so his quilt has a team sports theme, with basketballs, footballs, and baseballs.

That blue baseball pennant may or may not be hiding a little boo-boo…

The baby’s room has a Sesame Street theme! I guess that’s coming back around, because I found the fabric with no difficulty.

Both quilts are backed with light-weight poly fleece so they feel yummy. There’s no batting, so they’re light enough to be dragged around and made into tents. And the designs of the tops are simple, allowing the fabrics to shine.

So, after 10 years of making children’s’ quilts for a number of young friends, here are my recommendations:

  1. Choose a fabric that is likely to interest the child for the next 5 years.
  2. Use a simple pattern. Nobody’s looking at your piecing; they’re looking at the cute fabric. Ask me how I know.
  3. Also, use a simple pattern because who EVER starts these things with time to spare?
  4. Back with poly fleece and don’t add batting. Feedback from my grandkids tells me this is the most practical, kid-friendly way to do it.

Anybody have anything to add?

I Took Another Class

I love taking classes, even though, after 40 years of quilting, I often know most of what’s being taught. Most teachers have a technique or perspective that adds something to my skills, and sometimes a class is an opportunity to make a quilt I wouldn’t make otherwise.

Therefore, I signed up for David Sirota‘s Zoom class on paper piecing, in which we made the storm at sea quilt. Or rather, I made some blocks and perhaps others made the whole quilt. Whatever.

That being said, I DID make a whole Storm at Sea quilt back in 2019. I used Deb Tucker’s tools and it came out just fine with no hassle.
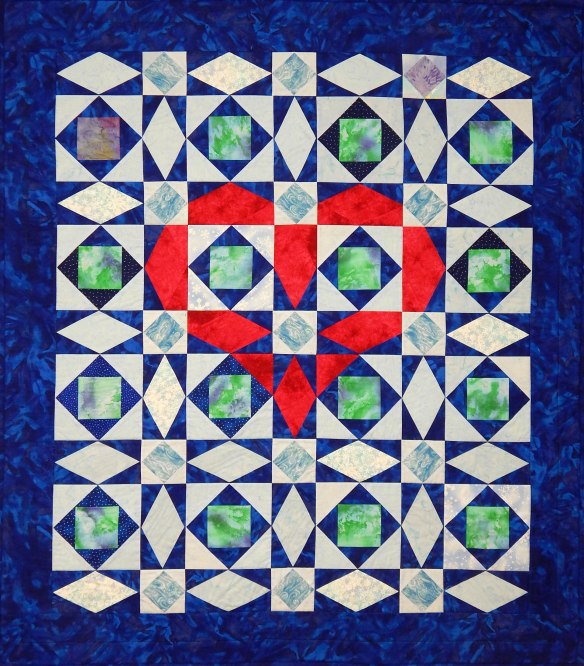
Love at Sea was made in 2019 using Deb Tucker’s tools.

The heart design in the quilt is a modification of Storm at Sea done by Marti Michel years and years ago; I just copied it. Eventually I gave the quilt to a friend for her new baby.

Anyway, David Sirota’s class. I took it because he’s a master paper piecer, and I’ve been doing a lot of New York Beauty blocks, which surely require paper piecing. I thought I might learn something, and I did!

David has some excellent advice on “the paper” for paper piecing and some nice techniques for accomplishing the piecing as well. Much of it is available as videos through his website. (Are they even called videos these days, or are they now called YouTubes?)

The class was well run and David is an interesting teacher. His techniques worked quite well.

So why did I make only one block? I simply lost interest in the project after I’d learned what I could from it. The block joins a number of other “orphan blocks” set aside for future projects.

The good news is that one of my guilds recently set out a call for orphan blocks. I’m going to look that up and see how many I have that meet their requirements!

Class With Cindy Grisdela

When attending the Mid-Atlantic Quilt Festival this spring I took a class with Cindy Grisdela and attended her lecture about color. Both were worthwhile.

Cindy’s class was based on her Full Wild quilt, which she entered in QuiltCon. Here’s a picture of her with the quilt, taken from her blog:

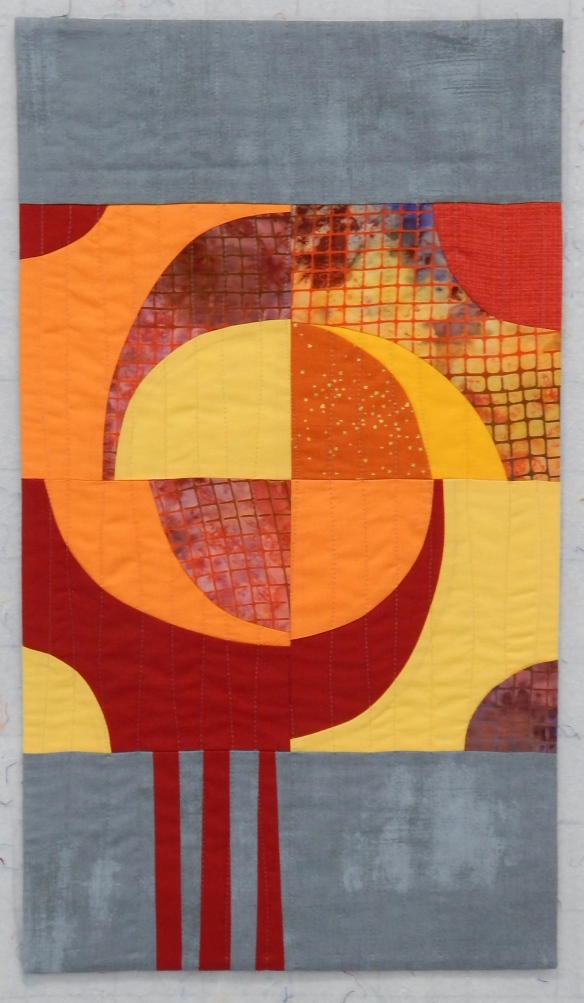
When I got home I wanted to let most of the blocks I made in class rest for a while, but I did make a small wall hanging with one of them. It’s called Drip, and I’m not crazy about it but I just had to do something with one of those blocks!

The rest of the blocks I put away because I want to consider what other colors to add. My usual problem is using TOO MANY colors, so I tried to restrain myself. Now I want to add more colors. Here’s a picture of some of the blocks just before the blocks were put away–they aren’t joined yet.

To be continued.

In her color lecture, Cindy suggested making a color wheel, saying it would be interesting to see what you had in your stash. Here’s my snapshot of her color wheel.

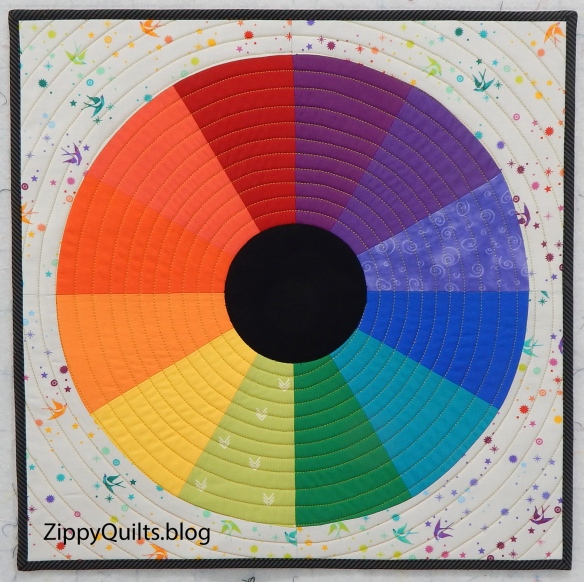
When I recovered from the recent quilt show (Heart of the Triad, blog is here), I decided to make a more elaborate color wheel. I drew it in EQ8 and printed templates from my drawing.

This was a fun project, AND I had all of those fabrics right here in my stash! I couldn’t resist using the light grey Tula Pink fabric with all the fun colors as background. The color wheel finished about 18″ square.

Anyway, I enjoyed Cindy’s lecture and her class, and I recommend both if you have the opportunity to attend.


Some Scrappy Fun

When you’ve been quilting as long as I have, you own an endless supply of scraps (and sometimes not much yardage). Therefore, here are a few more recent scrap quilts, all for donation to various places.

This first one was made from blocks I used as leaders and enders. I took a bag of single-color scraps and joined them randomly, sometimes inserting a spark of another color just for fun. The background is a navy fabric with fun gold swirls that I’ve had for some time and needed to use!

Happy Scrappy, 61″ x 69″; this one will go to Flying Horse Farm

This next quilt was made from a free pattern called Wickedly Easy Quilts, available at byannie.com. However, be aware that the format on the site has changed since I got the pattern. It used to be just a free pattern; now it’s part of a free course. Whatever.

As I’ve mentioned before, I cut my scraps into standard widths and store them that way. This quilt was made by pulling blues, greens, and orange accent strips from those storage drawers.

Wickedly Easy quilt, 49″ x 49″; this is a lap quilt for the senior center

Finally, here is another Circle of Nine quilt using improvisational blocks made from a combination of orphan blocks and scraps.

Circle of 9 quilt, 54″ x 54″, a lap quilt for the senior center

Do you have a favorite scrap quilt pattern or method?