Personal labels 3 ways

quilt back and binding

The first quilt to have my new label on the back!

I’ve been thinking for some time that I’d like a “standard” Zippy Quilts label to sew into the binding of my quilts in addition to the usual label I put on with the name of the quilt and the date.  I’ve seen several such labels and think they look cool.  They make me think the creator takes herself and her work seriously enough to have a professional label.

I collected a bunch of ideas for making labels on my Pinterest page, here, if you want to look.  Pinterest is great for gathering idea from around the web and organizing them all in one place.  I also got some of those ideas by doing a search within Pinterest for “fabric labels”, which lead me to things other people had discovered.

It boiled down to just a few good options in 3 categories:

1.  Print your own labels, sort of like I do my labels with the quilt name/date/etc.  This would be fairly economical despite the cost of printable fabric, because the labels are small.  However, the washability of some of the printable fabrics was in question, and there would be the need to finish the edges in some way to avoid fraying.  Nevertheless, there’s a very nice tutorial on how to do it here, on the Emmaline blog.

2.  Get commercially-made labels, either woven or printed, from specialty companies that make them.  There are lots of companies that offer lots of different labels, from laundry tags like you sew into your kids’ clothes before they go to camp to really professional woven labels.  The cost varies a lot, too.  The main drawback was that, for the better looking ones, you have to order an awful lot.  What if I had 1000 labels I didn’t much care for?

3.  Design your own at Spoonflower and have them printed up on fabric for you to cut apart into labels.  There’s a tutorial on how to do it here, on a nice blog called “While They Snooze”.  This is what I ultimately decided to do.  They’ll print either a sample or a fat quarter (FQ) for you, so I ordered FQs of 2 different layouts to see if I liked them.

Spoonflower labels

Spoonflower labels–first layout

I cut them apart with pinking shears to avoid a hard edge and sewed a little hem around each one to prevent fraying.  I think another time I’d make them a little smaller, but this is a good start.  The Spoonflower site is easy enough to use that I never even had to contact them for help.

Spoonflower label

The second layout

My second layout left space below my name on each label so that I could cut out the label, hem the sides only, and then fold it in half, inserting the remaining raw edges in the binding.  This avoids the need to sew it down separately on 4 sides.  I may like this better, but I haven’t had time to try them much yet.  The first one is going on my Quilt Alliance donation quilt, which I’m still binding.  I think I’ll go back and put them on all this year’s projects.

If you get some labels made for your projects, write and let me know what you did and how it worked out.

Spoonflower label

Label on Quilt Alliance quilt back

Wrapping Fun!

Ruby Star Wrapping BookI recently found this book and thought it was perfect for using up stash.  It’s about how to make recyclable wrapping for gifts, whether holiday, birthday, or whatever. So I bought it, and I love it!

Of course, the first thing you need to know is that the cute wrap on the front is very dependent on a cute printed fabric (or paper, I’m not sure)–nothing in the book is as complicated as painting a little face on a package.

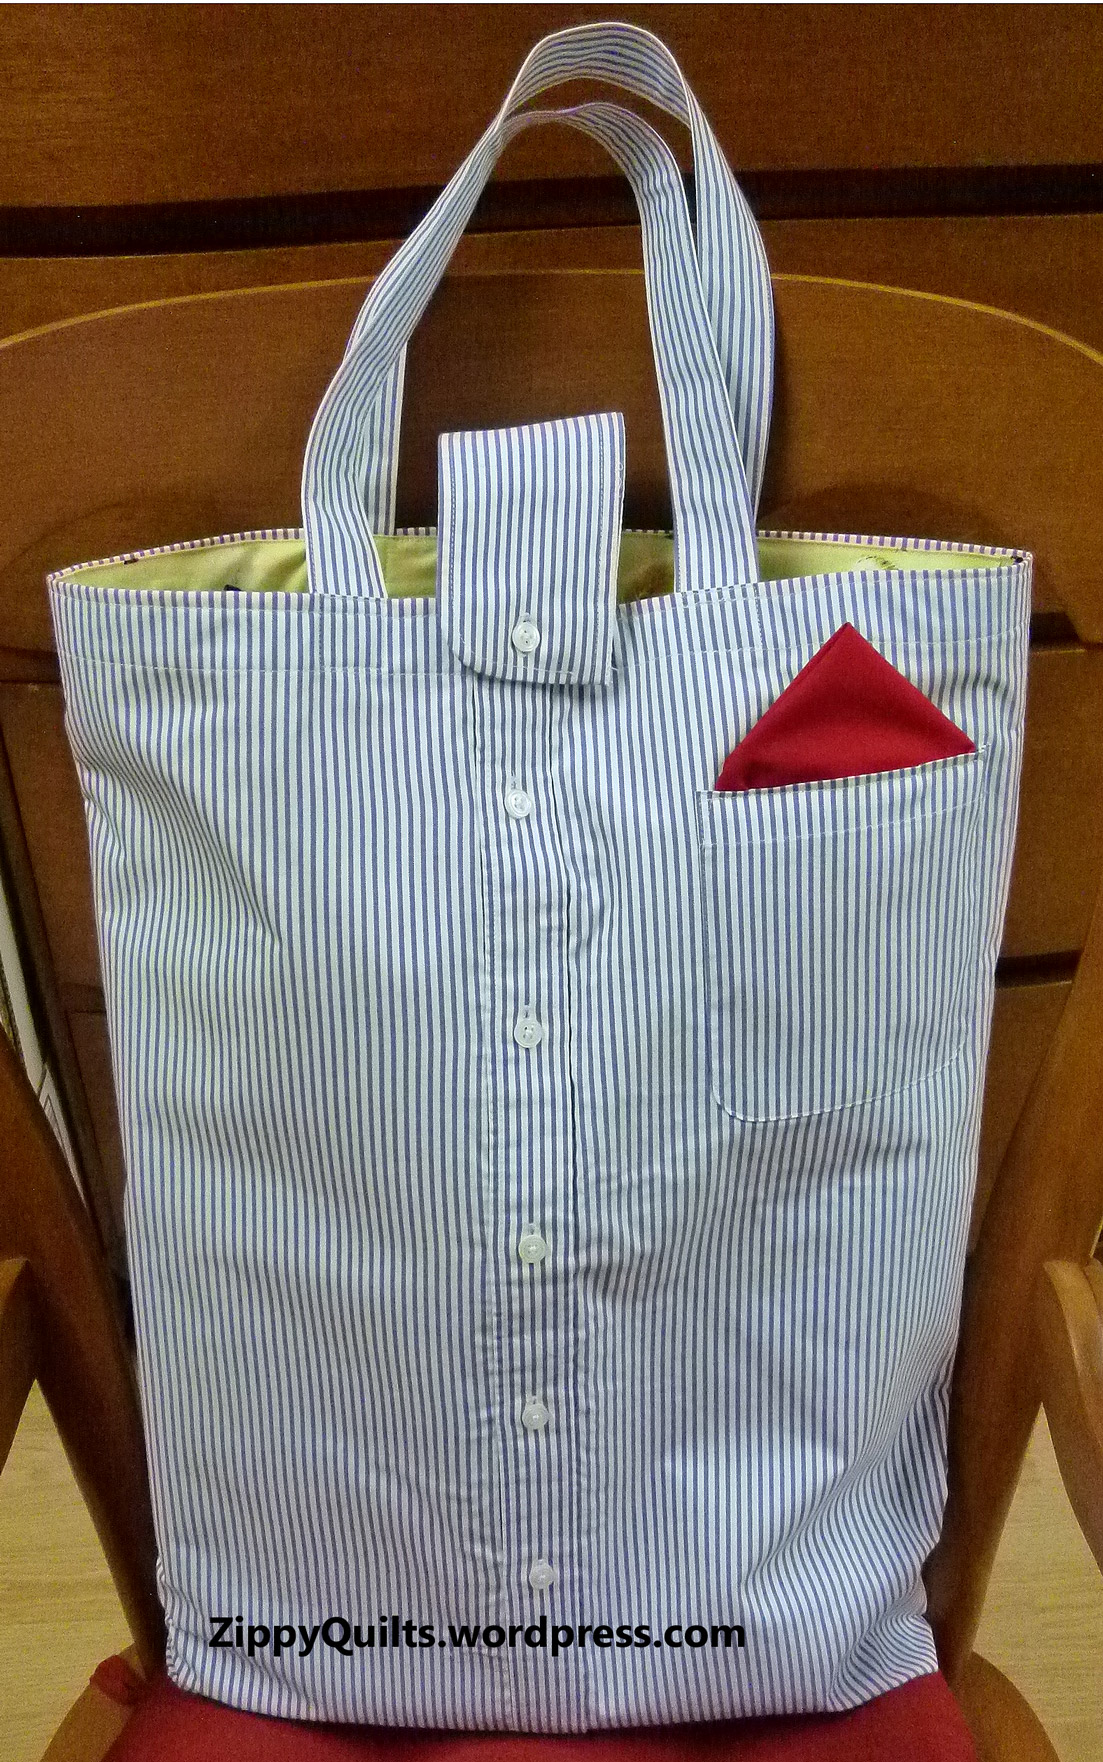
My favorite project so far is a gift bag made from a discarded man’s shirt.  This idea was very welcome to me because my stash includes a

large box of discarded clothing to be made into quilts “some day”. Shirt-bag The book has instructions for a simple envelope bag.  I made it with a flat bottom so a wider gift would fit in more smoothly, added a red “hanky” in the pocket, and used the cuff of the shirt to fix the bag so it buttons closed.  My husband swears he wore this shirt last Tuesday and I stole it, but scout’s honor, I didn’t!

The book has lots of ideas about using materials you already have around the house to Paper-flowermake unique wrapping for presents.  I “wrapped” a box for a baby shower by gluing on pages from a baby catalog that came in the mail and making a cute paper flower for the top, following instructions from the book.  I took her suggestion to wrap (or cover with glued pictures in this case) just the top of the box.  That way it can be used over again, since opening it doesn’t require any tearing of the wrap–just lift off the lid, like on TV.

plaid-bagAnother project in the book is for a drawstring bag with a round bottom.  I made this one to use up a couple of yards of fabric from my stash, since I got “a few” yards of fabric for Christmas!  This is big enough to use to give someone a quilt, so I’ll probably make more of them.

I recommend this book!  It has tons of inspiring ideas for wrapping all sorts of things.  I figure if I get started now, I may never have to use wrapping paper again!  And, of course, it uses up lots of stash 🙂

Book page

Here’s another page from the book for you to preview

Update on the Auction

Now that it is Monday night the group of Quilt Alliance donations that includes mine is up for auction on eBay.  Check it out with this link!  When you get to the eBay site, you’ll need to click on “Items for Sale”, near the top right, to get the full listing.  (Currently mine is listed twice; I assume that will be fixed soon.)  And thanks for looking!

Rising Star for Web

Three Easy Chevron Quilts

My plan here is to make modern quilts to clear out ALL my stash, and yours!  With that in mind, here are some fun quilts to make if you have lots of charms (5 inch squares), or squares of any uniform size.

ONE: Make a chevron quilt

Just sort the squares into lights and darks and make half square triangle blocks using your favorite method (or here are half-square triangle instructions on another website).

Any single solid (or fabric that reads solid) can be used to contrast with scraps

Any single solid (or fabric that reads solid) can be used to contrast with scraps

Here’s the layout for option ONE:

.

.

.

.

.

.

chevron quilt

Scrappy zigzag quilt with alternate rows offset 1/2 block

TWO:  Just for fun, here’s an alternate layout that also makes a nice zigzag quilt.  This has fewer corners to match than option one 🙂

Just offset every other row a half block so that the points on the Row 2 blocks fall at the center of the Row 1 blocks–look at the picture on the left and you’ll get the idea!

.

.

THREE:  You can even arrange your blocks to make really big zigzags across the quilt:  This is the most challenging of the bunch in terms of making the corners match, but of course the design also has a big impact because of the big chevrons.2 better chevrons

 A bigger chevron would obviously be easier if you started with larger squares.  Got any layer cakes (i.e., packages of 10 inch squares) you’re wondering what to do with?  As you can see, this example shows two different ways to make BIG chevrons.

I’ve made a couple of zigzag quilts, one scrappy and one using all my purple charms.  It’s a fun way to make a quilt with a lot of graphic appeal while using stash.  Now, let’s go make some chevrons!