When I showed this quilt last week, I promised a tutorial on how to make the blocks. So here goes!
The first (most important?) step is to choose a block size for which you have a square-up ruler in your collection. This makes the whole process easier, as you’ll see.

No my ruler isn’t a trapezoid, but I had to take the picture at an angle to avoid reflections!
Then choose a couple of strips that are about 2″ longer than the square-up ruler. My ruler trims to 9.5″ (for a finished 9″ block), so I chose strips about 11.5″ long. You can either cut wedges for your strips, or join the strips and then trim the edges to make them wedge-shaped. I had a bunch of 1.5″ strips, so I did the sew-and-trim way. 
Continue to add strips to each side, alternating sides. Alternating sides makes it easier to keep the block symmetrical. It isn’t necessary to use 1.5″ strips–you can use any width from about 1″ on up.

Press all seams open to decrease bulk. And when you trim seams to make a wedge, leave at least 1/2″ of width at the narrow end to avoid extra bulk when adding the next strip.

The seam that is circled at the bottom just meets because the strip was narrowed to 1/2″ at that end
The piece will, of course, tend to curve. To counteract that tendency, I sometimes add longer strips to correct for the way the edges want to angle down at both ends.

Here’s a longer strip I added to be sure the edges weren’t curving too much.
Keep checking to be sure the block is outside the edges of the ruler at both the top and bottom of each strip.
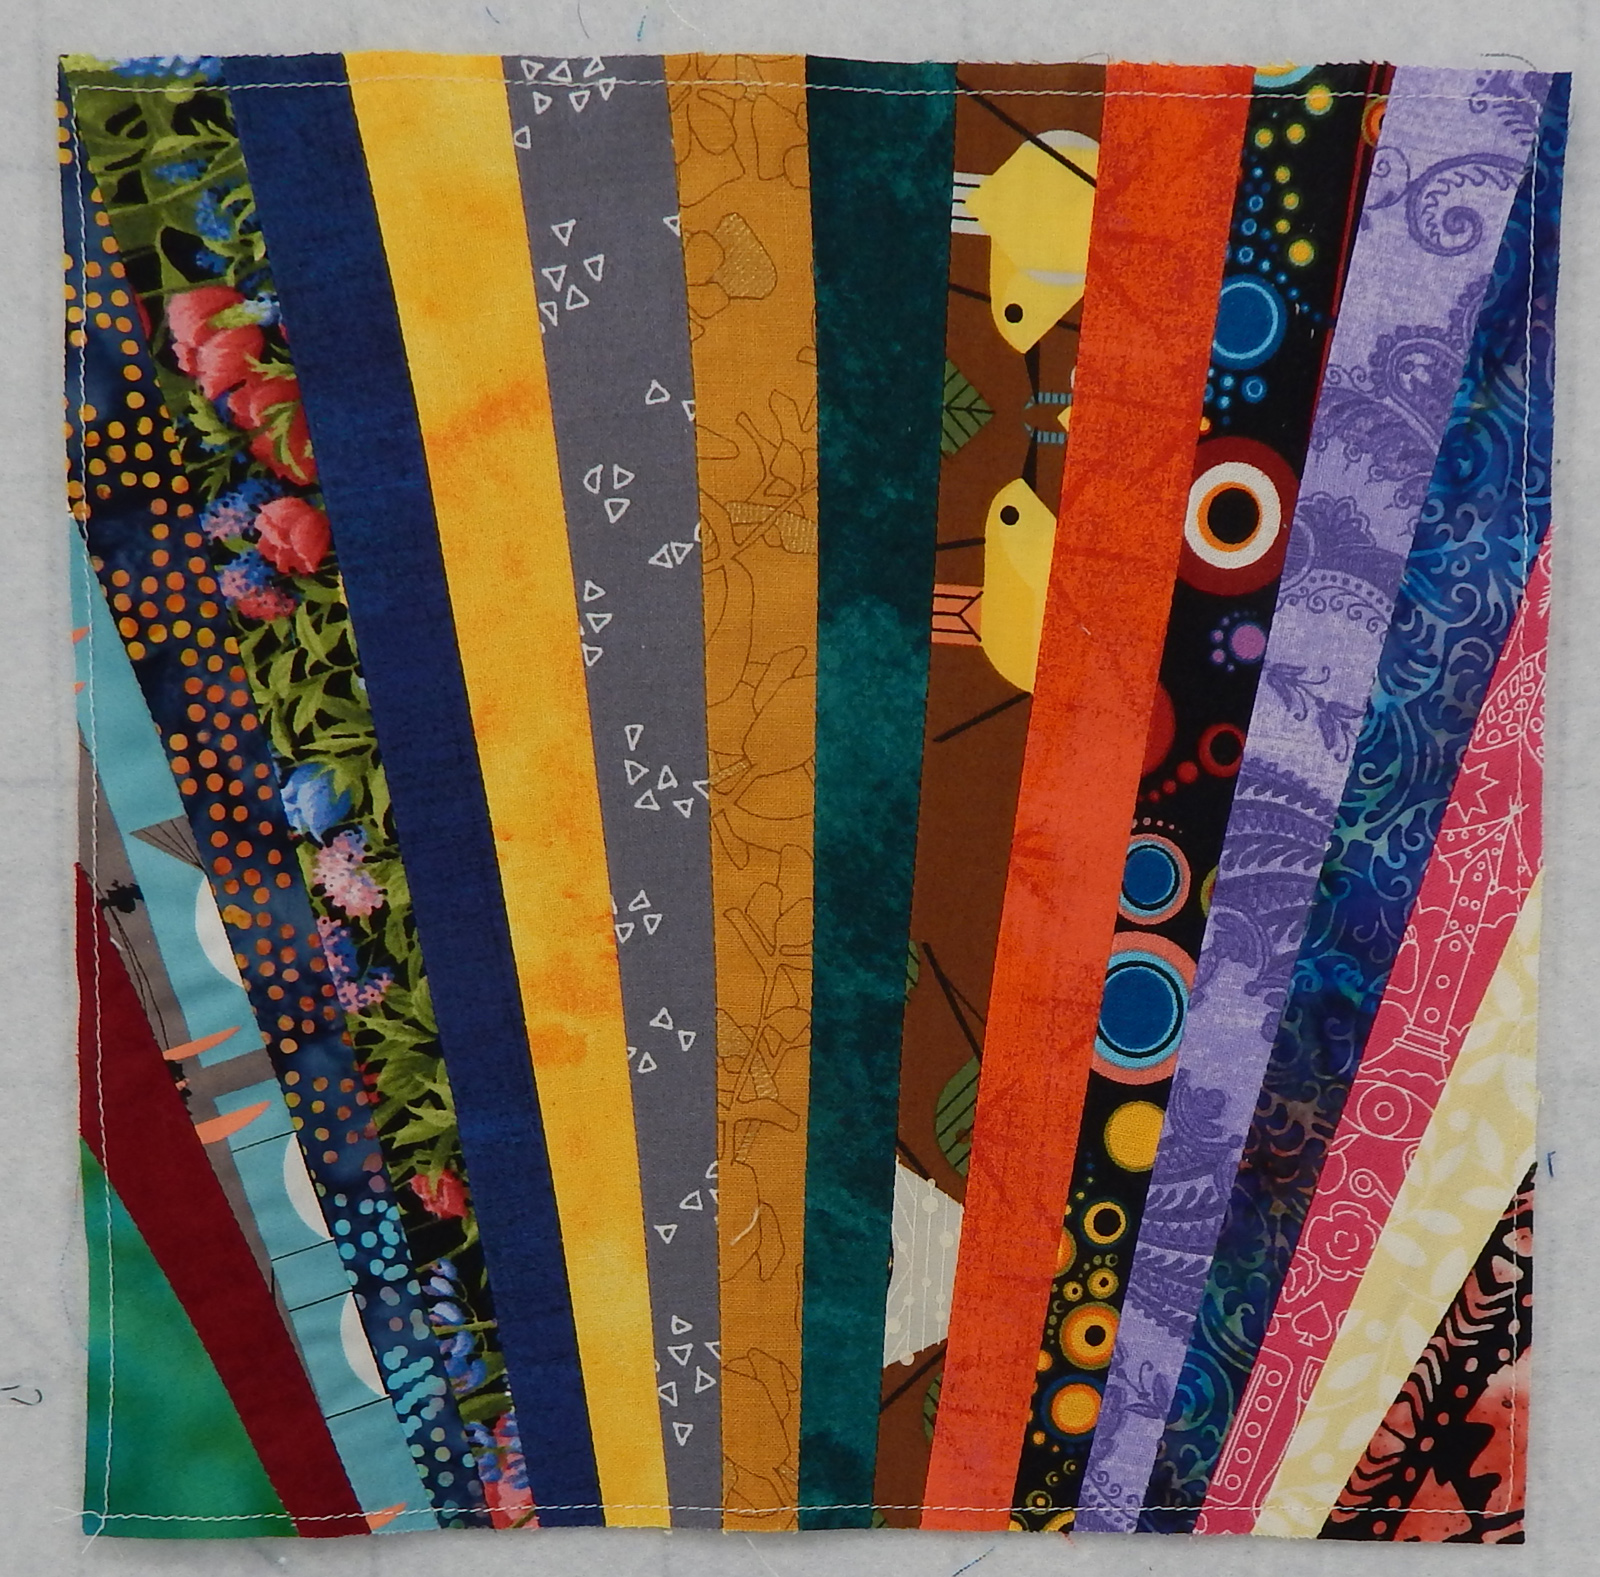
And finally comes the happy day when the block is as wide as it needs to be at the top!
From here on you can add shorter strips. Align them at the bottom of the block to start sewing. Keep checking, and when the piece is wide enough, trim all edges with your square-up ruler.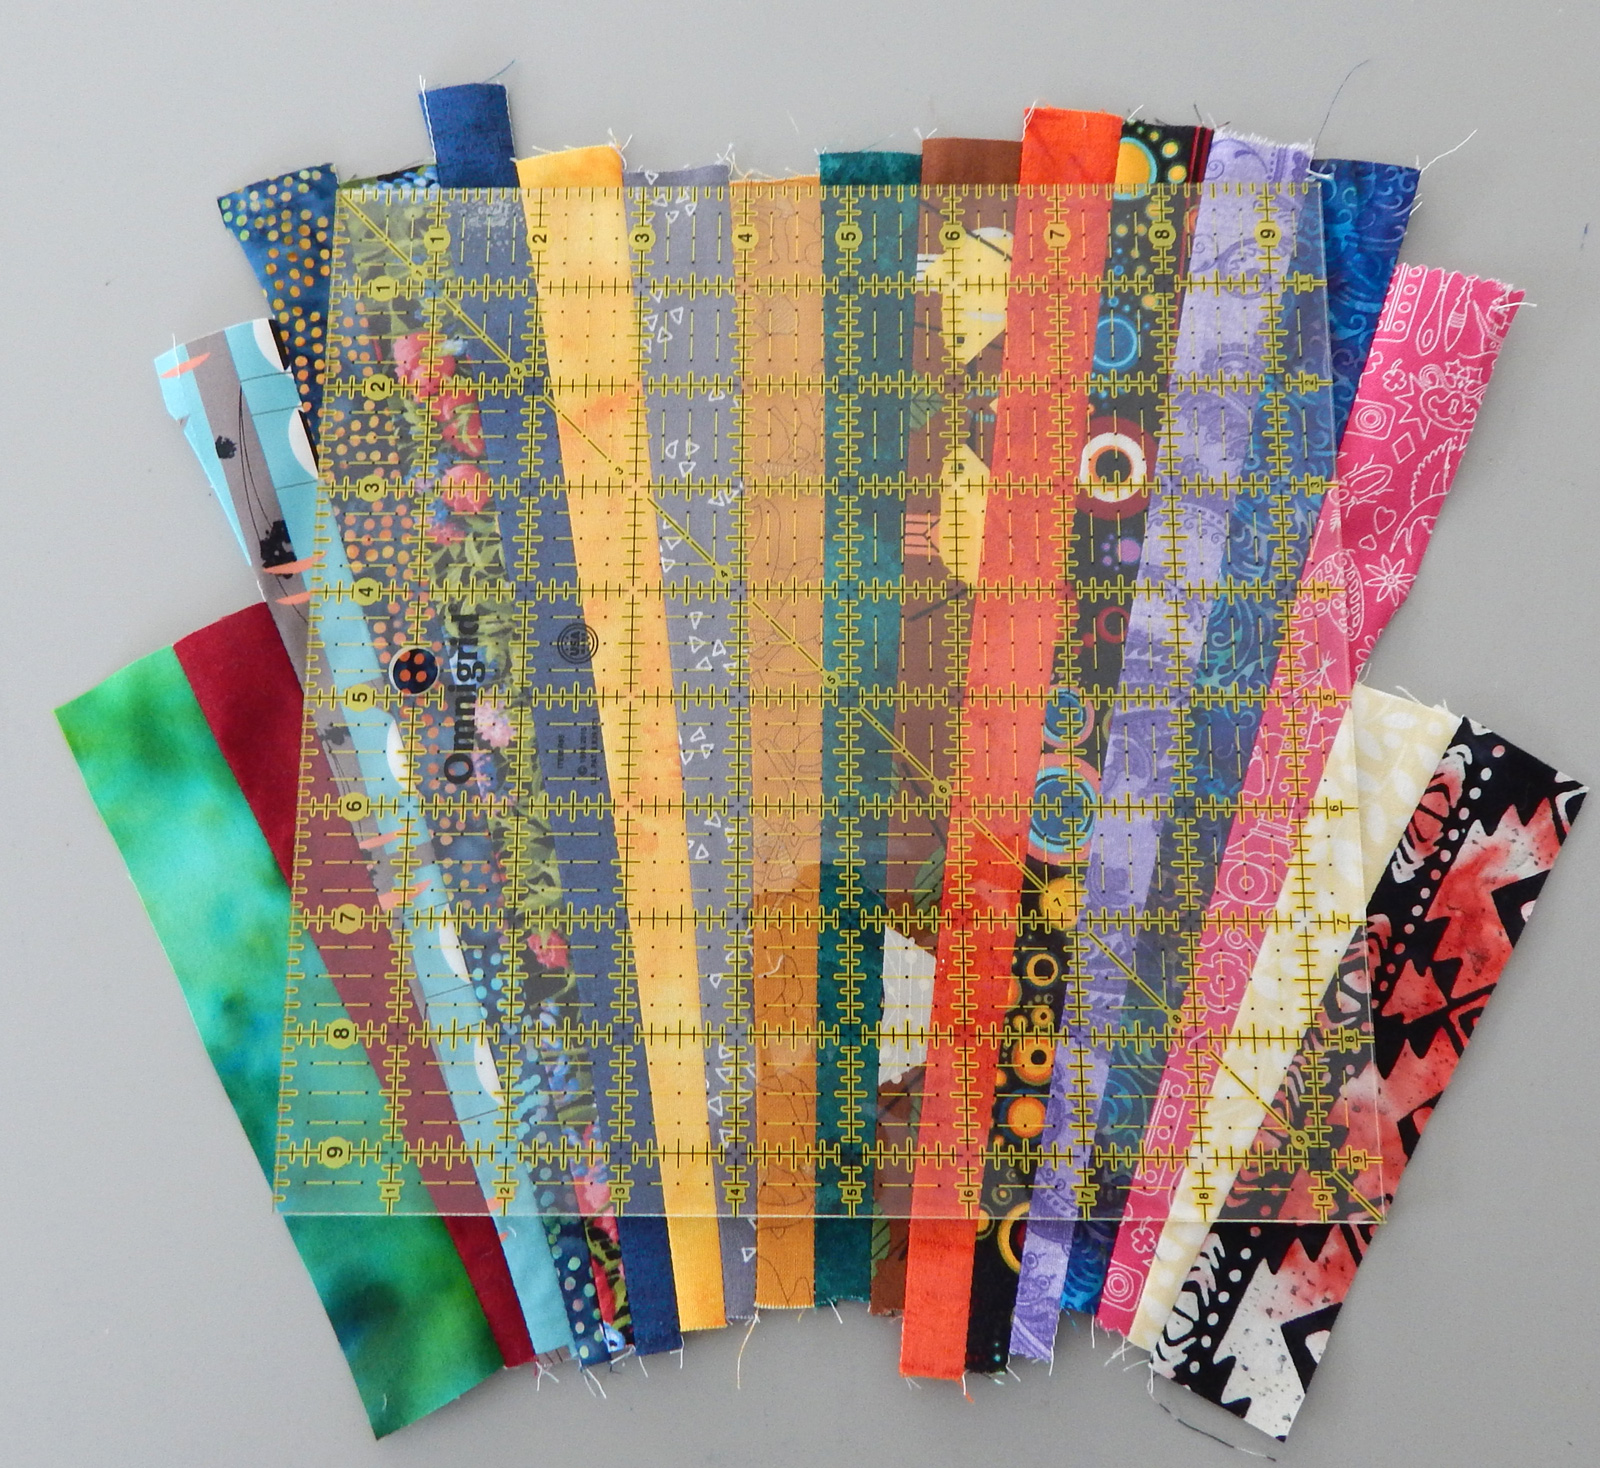
When trimming, I pick a line near the middle of the ruler and lay it along a seam near the center of the block to get everything as even as possible.

I stitched about 1/8″ from the edges
Stay stitch all edges! This is important because you really, really don’t want those seams to start coming undone, and because there are many bias edges.
DONE!
You may notice that the last strips (bottom corners) are a bit wider than the others. That is done to avoid the possibility of having a seam in the block come at a corner when joining to other blocks.
Quilt Stats
Name: Super Fans
Designed and made by me, with inspiration from Pinterest
Finished size: 47″ x 65″ (5 x 9 blocks, 9″ each, with 1″ border on all sides)
Quilted by: Linda
There are 18 pieces in the sample block above. That means the finished quilt has approximately 810 strips. Thank goodness I didn’t calculate that until now!!!


This is such a cool idea. It would be great as a stash bee block for sure. Thanks for sharing.
Thanks, Velda! I’m glad to hear from you. Somehow I haven’t seen a post from you in a long time and this reminds me to see if I can figure out why.
Love it! And thank you
Hi Gail! Glad you like it 😀
Thanks for the clear instructions, Mary — I’m going to try this!
This is a nice tutorial. I’ve made a quilt similar to this from only greens and blues in my scrap bins, and a 6-1/2″ square ruler. I assembled blocks to make a baby quilt for my nephew’s little boy. It’s a great pattern for using up fabric scraps on hand!
Thanks!
Thank you for this tutorial!
Send me a picture when you finish 😁
How did you know I was going to try this?😁I’m getting my strips ready now! My friends and I are headed for a 5 day retreat in two weeks, so I am taking plenty of stuff to work on while I’m there.
Just want to let you know that the illusion in this quilt really sings to me!! Great way to use scraps.
This is Jean Larson. Shoulda put my whole name on my comment.
WordPress now gives me the email address (but doesn’t make it public, of course)
Hey, Jean! Thanks! It’s great to hear from you 😁
Aha – so the dippy curve on the untrimmed edge (photo #4) is normal! I always figured I was doing something wrong (when I improv pieced strips together) and then I’d go with the flow! It’s nice to know your little trick about adding a longer strip to aid in curve-prevention. Wow. A great tidbit take away for me, thanks Zippy! I’m wondering if all your 1.5 strips were leftover from your Fiddlesticks quilt?
😉
I like this so much, thanks again for teaching it in this post, teacher!
Oh, boy, there are always lots of 1.5” strips because I cut up my scraps when I’ve finished a quilt. Glad you like it.
HA! Good to have on hand, eh?
Love this
Thanks 😊
Thank you so much! I would never have figured this one out on my own! I hope to try it soon.
Terrific! Send me a picture when you do!
A big thank you for this very clear tutorial.
Glad you enjoyed it 🙂
Looking at the pieced quilt it looks complicated but your instructions show it is totally “do-able”! Nice!
Let me know when you make one 🙂
Thanks for the pattern. Just need to create template but with your instructions it won’t be hard. Or is making a template too anal 🤔?
I’ll try it your way first. Thanks again from your crazy follower.
Haha. I didn’t have a template but I did have strips of different widths, so I just invented as I went along. However, it’s fair enough if you want to do it differently!